If a typical WordPress site is like a single storefront, a WordPress multisite network is an entire shopping complex: each site operates as an independent entity yet benefits from centralized management and shared resources. WordPress multisite network management can be a headache unless you have a solid hosting infrastructure as the foundation.
This article explores how to maximize your WordPress multisite network management using Kinsta. And we connect this to practical, real-world scenarios that demonstrate when and how to implement various solutions. There’s a lot to cover, so let’s begin by understanding why multisite might make sense for your projects.
Getting started with WordPress multisite
The transition from standard WordPress to a multisite network can transform how you manage your web presence. While a regular WordPress installation will focus on the maintenance of a single site, multisite lets you manage an entire ecosystem of interconnected websites.
This fundamental difference impacts your development workflow, resource management approach, and much more. Understanding these differences becomes crucial when you plan your network’s architecture.
Each standard WordPress site maintains its own database tables, plugin configurations, and user base. In contrast, multisite shares these resources across the network — although you can still maintain individual site independence where it matters most.
Understanding Kinsta’s multisite architecture
Multisite installations at Kinsta benefit from infrastructure optimized for WordPress and built on a powerful cloud infrastructure.
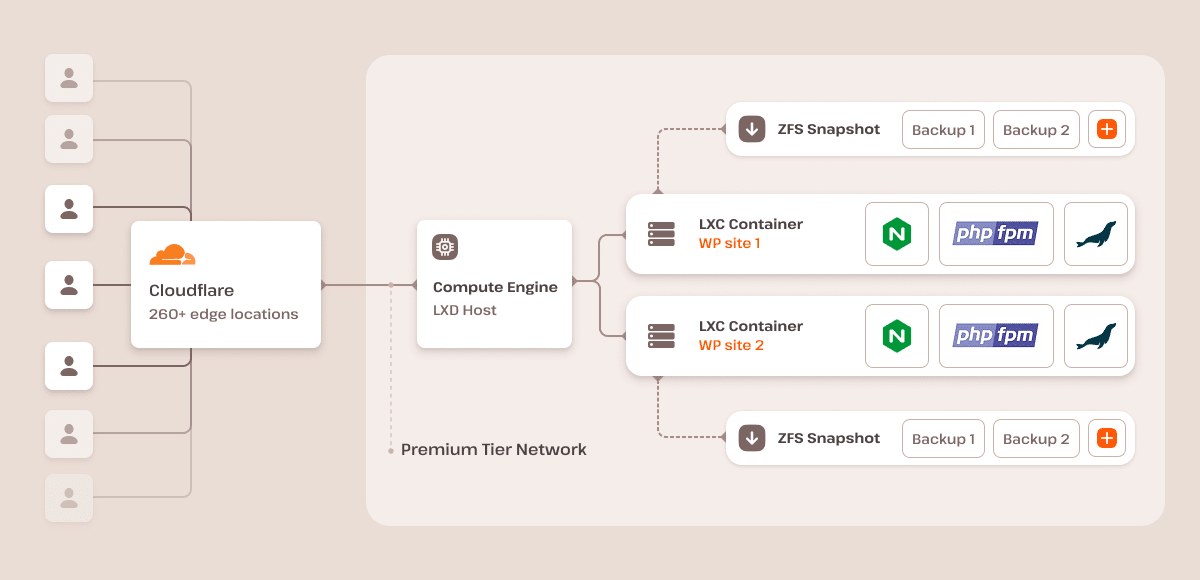
Kinsta’s isolated container technology means your network of sites operates within its own environment rather than sharing resources with the websites of other customers. In addition, Kinsta’s platform has Cloudflare on hand for optional CDN and edge-caching support.
When multisite makes sense (and when it doesn’t)
On the surface, choosing between a standard WordPress installation and multisite can be simple.
For example, if your agency manages multiple client sites that share similar configurations and requirements, WordPress multisite will help streamline your workflow. Educational institutions often benefit from this setup as it lets them maintain consistent branding across campuses and departments while providing autonomy. Franchise businesses can see similar benefits.
However, multisite isn’t always going to be an optimal solution. If your sites require different PHP versions or have conflicting plugin requirements, managing them separately makes more sense. Similarly, if each site has independent scaling needs or requires complex configuration customizations, individual installations will serve you better.
The key lies in looking at your specific use case with care and assessing your needs. Consider factors such as resource sharing, maintenance requirements, and scaling needs.
Setting up WordPress multisite network on Kinsta
You need to do more than toggle settings when it comes to setting up a WordPress multisite network, although the process doesn’t have to be complex and lengthy. It does require some thought and consideration of your network’s structure.
The process begins in the MyKinsta dashboard when you add a new site:
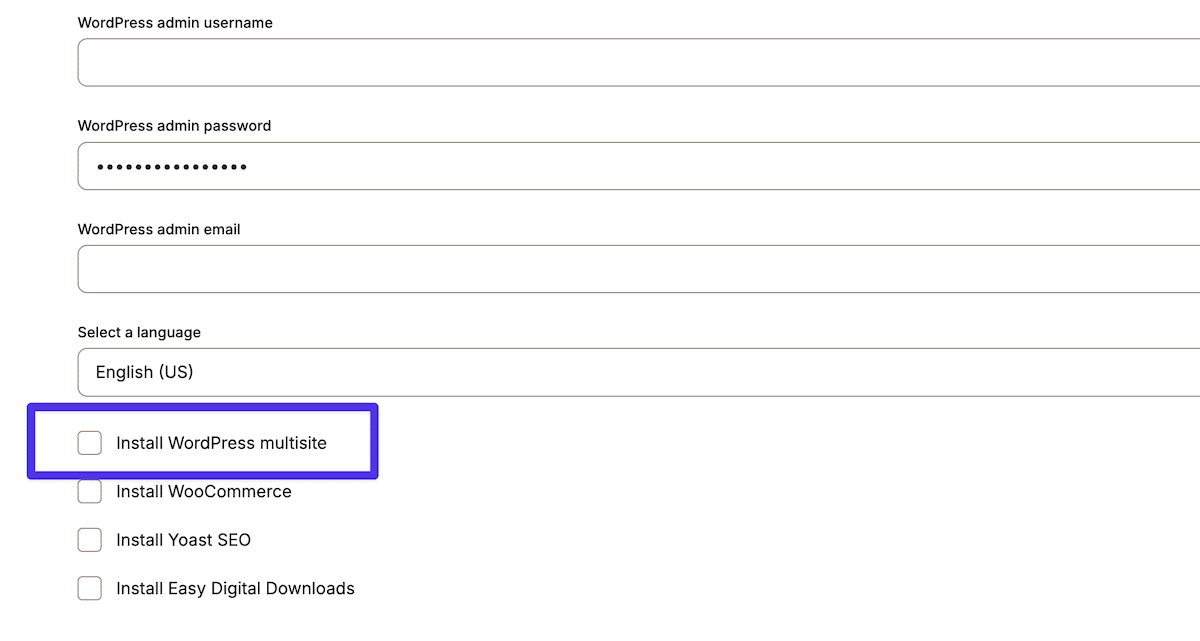
Once you toggle the checkbox to enable multisite, you will need to choose your network’s structure. Kinsta supports both subdomain and subfolder configurations, each with distinct advantages:
- Subdomain setups (such as
site1.example.com) work better for larger networks where each site needs its own distinct identity. - Subfolder configurations (such as
example.com/site1) offer simpler management and suit smaller networks better.
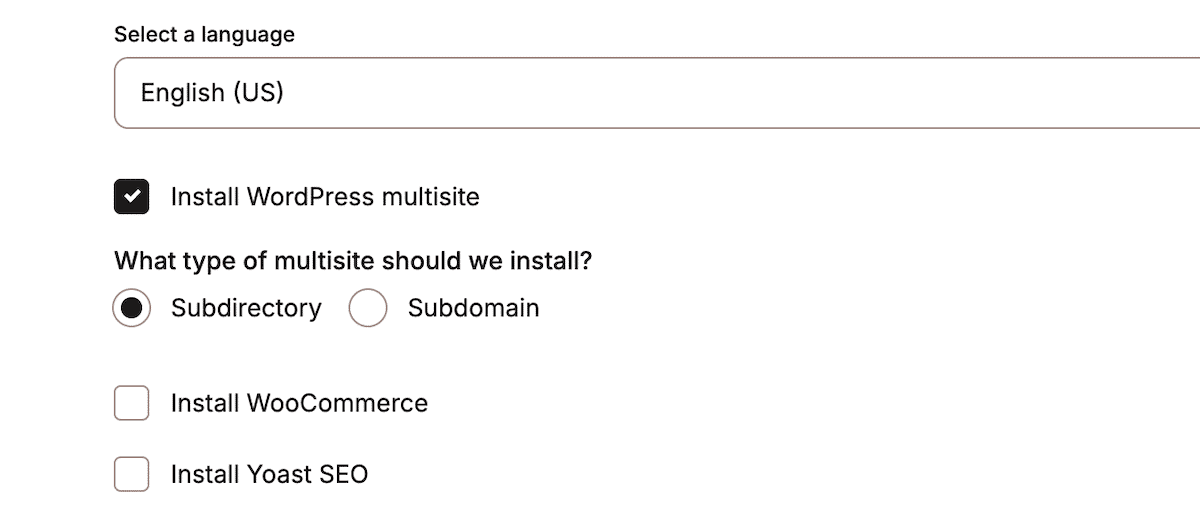
After you click Continue and Kinsta completes the installation, you can start work on domain management.
Domain configuration and management
Domain management in a multisite network can require careful attention, but the MyKinsta dashboard simplifies the process.
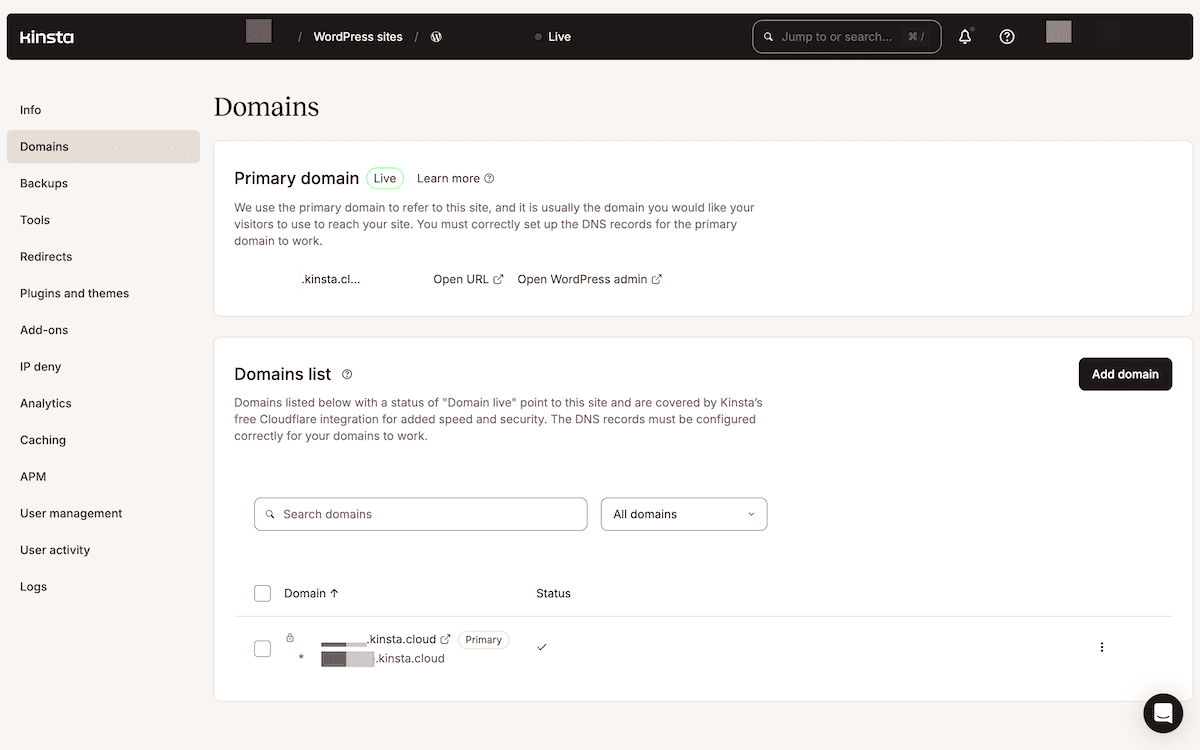
External domain mapping deserves special attention because it lets you use different (and custom) domain names for each site in your network. This is something an agency would find valuable, given the need to manage multiple client sites. It might also be suitable for a company that maintains distinct brand identities across various products or services.
Kinsta handles the technical aspects of external domain mapping under the hood, and all you need to do is implement the custom domain name for each site. You also don’t need to worry about SSL certificate management or the intricacies of domain verification, which makes this step straightforward.
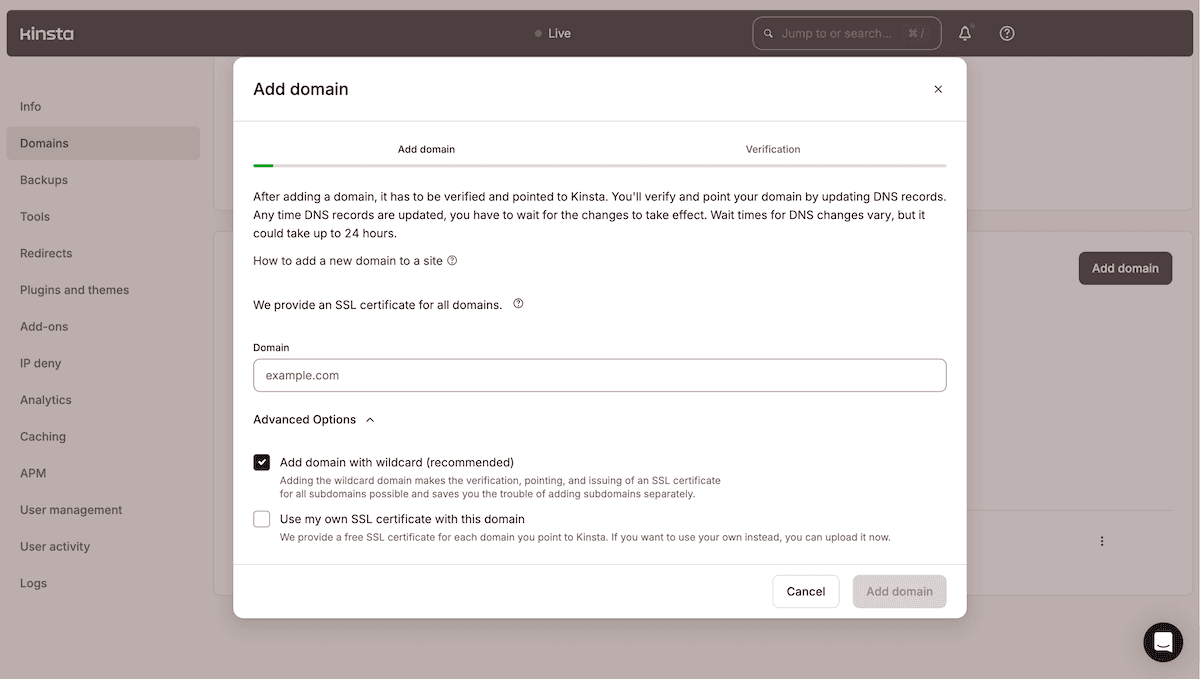
This part of the job has two steps:
- First, map domains within your WordPress multisite dashboard through the Sites > Edit link. Change the Site Address (URL) field to that of your custom domain.
- Within the MyKinsta dashboard, head to the Domains screen for your main multisite installation. Here, click the Add domain button, fill in the fields, and confirm the changes.
You will also update your DNS records to verify your domain. The last step is to head to the Tools tab within MyKinsta and open the Force HTTPS dialog. You don’t want to force all traffic to your primary domain, as you won’t have access to your network of sites. Instead, choose Force HTTPS on all your live domains and click the Force HTTPS button.
Implementing an NGINX reverse proxy
Kinsta’s NGINX reverse proxy capabilities add another layer of flexibility to your WordPress multisite setup. This feature becomes particularly valuable when you need custom routing rules or want to implement advanced load-balancing strategies. The reverse proxy lets you achieve a few tasks:
- Directing traffic efficiently between different parts of your network.
- Supporting custom caching rules for specific sections.
- Handling SSL termination “at the edge.”
- Managing complex routing scenarios.
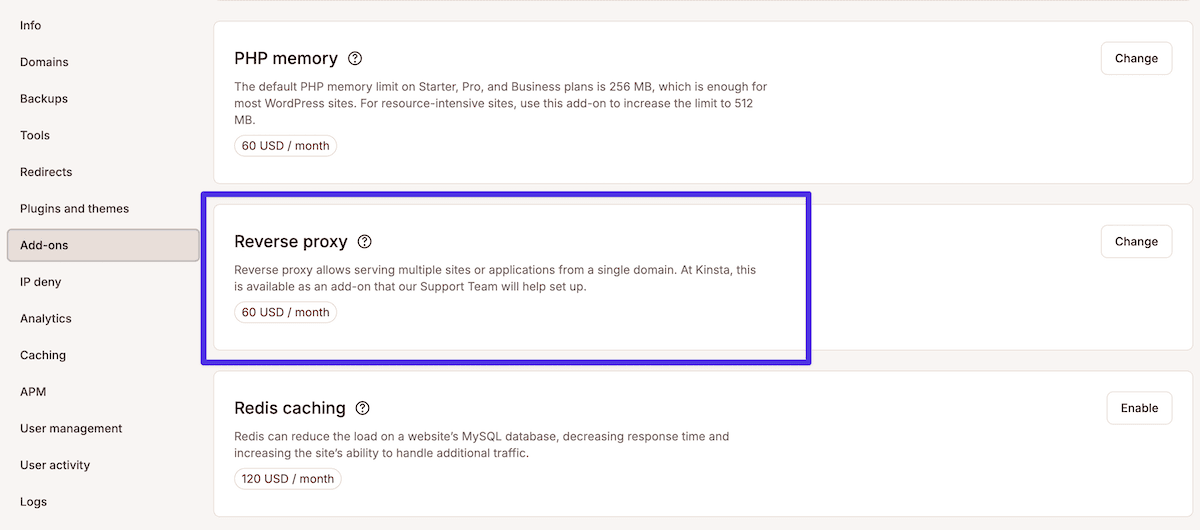
For WordPress multisite networks, a reverse proxy is how you will serve multiple sites from a single domain. Consider a subsite that uses an example.kinsta.cloud subdomain. You can implement the reverse proxy to map this URL to mysite.com/example (or other variations).
A reverse proxy is not a core feature of Kinsta. Instead, you can purchase a dedicated Add-on to support it.
Once you complete the whole setup and domain mapping process, you can begin to optimize and refine the performance of your WordPress multisite network.
Optimizing your multisite performance
Performance optimization is an aspect that is even more crucial for WordPress multisite network management. Issues can affect multiple sites simultaneously, which can impact engagement for other sites within the network that don’t stand in the direct line of fire.
Fortunately, Kinsta provides comprehensive tools to maintain this optimal performance across your entire network.
The power of Kinsta’s caching stack
Kinsta implements a sophisticated caching system that both WordPress multisite and single sites can access. There are four main ways to cache a site:
- Server (or local) page caching
- Edge caching
- Redis caching
- A cache for the built-in content delivery network (CDN)
You can access each of these caches through the MyKinsta dashboard. The system operates at multiple levels, with individual configurations available for each subsite within the network. It also means you don’t need additional third-party plugins to cache your site.
This holistic caching begins at the server with a typical implementation and an option within the dashboard to clear the cache. WordPress websites can leverage dedicated caching for the platform that includes bytecode caching using the native OPcache extension for PHP.
Edge caching takes this a step further with global distribution. Once a visitor requests a page, edge caching serves it from the nearest server location thanks to Cloudflare. Within the MyKinsta dashboard, you have options to clear the mobile cache, the entire cached dataset across every location, and the same for an individual URL you enter.
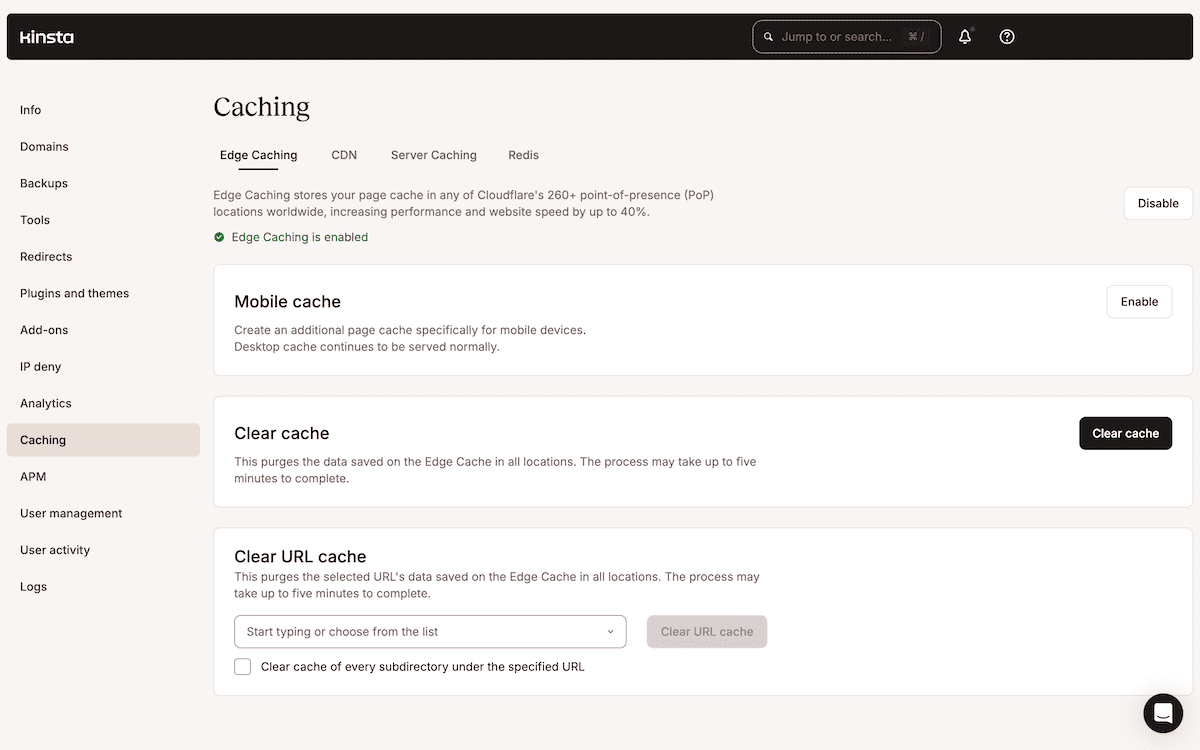
This system is particularly valuable for multisite networks serving visitors from different geographical regions. Edge caching combines well with Kinsta’s typical CDN cache to handle static assets such as images, CSS, and JavaScript files. With 300+ Cloudflare PoPs worldwide, you can ensure fast loading times regardless of visitor location.
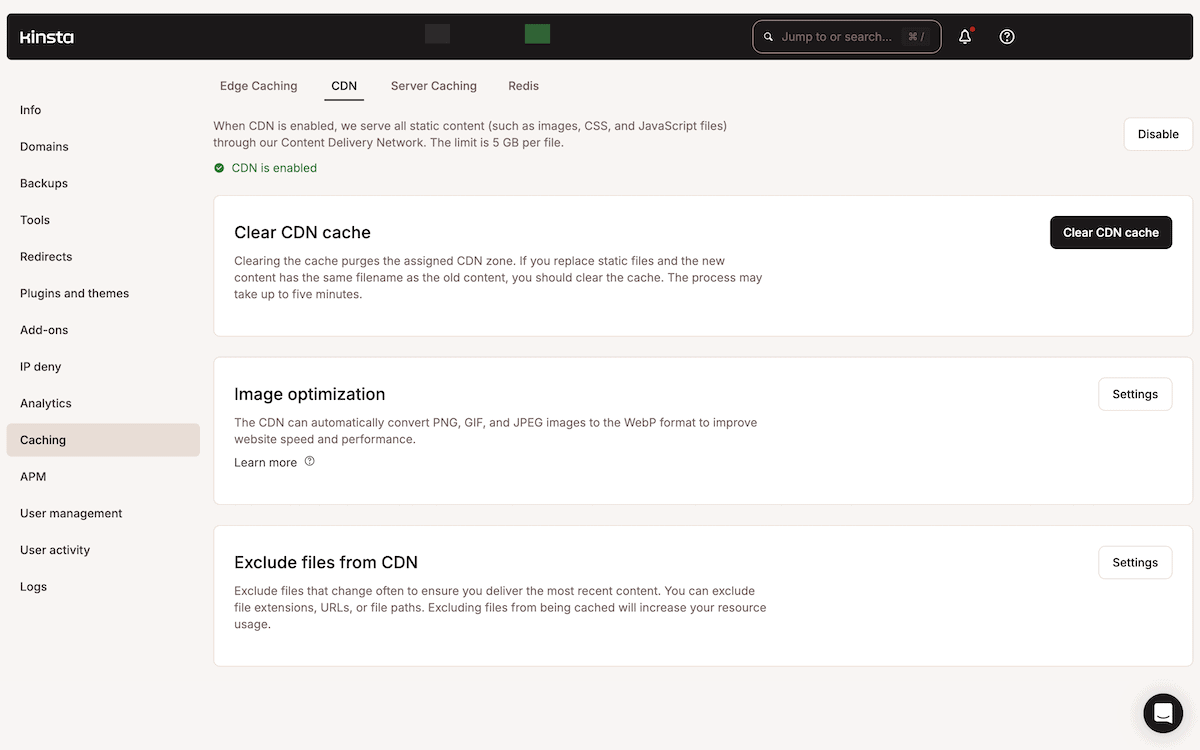
Within MyKinsta, you can clear the cache, tweak image optimization, and set up exclusion rules.
While Kinsta provides database object caching functionality as standard, Redis caching enables you to store the values the object cache generates. This is also an option found in MyKinsta’s Add-ons section.
Leveraging the Application Performance Monitoring tool
Performance testing will be a pivotal part of your WordPress multisite network management. Given that you have potentially hundreds of sites to manage, it’s important to have a quick and accurate way to assess your network’s and individual sites’ performance.
Kinsta’s Application Performance Monitoring (APM) Tool monitors PHP processes, database queries, and AJAX calls to help you identify and resolve bottlenecks before they impact your users.
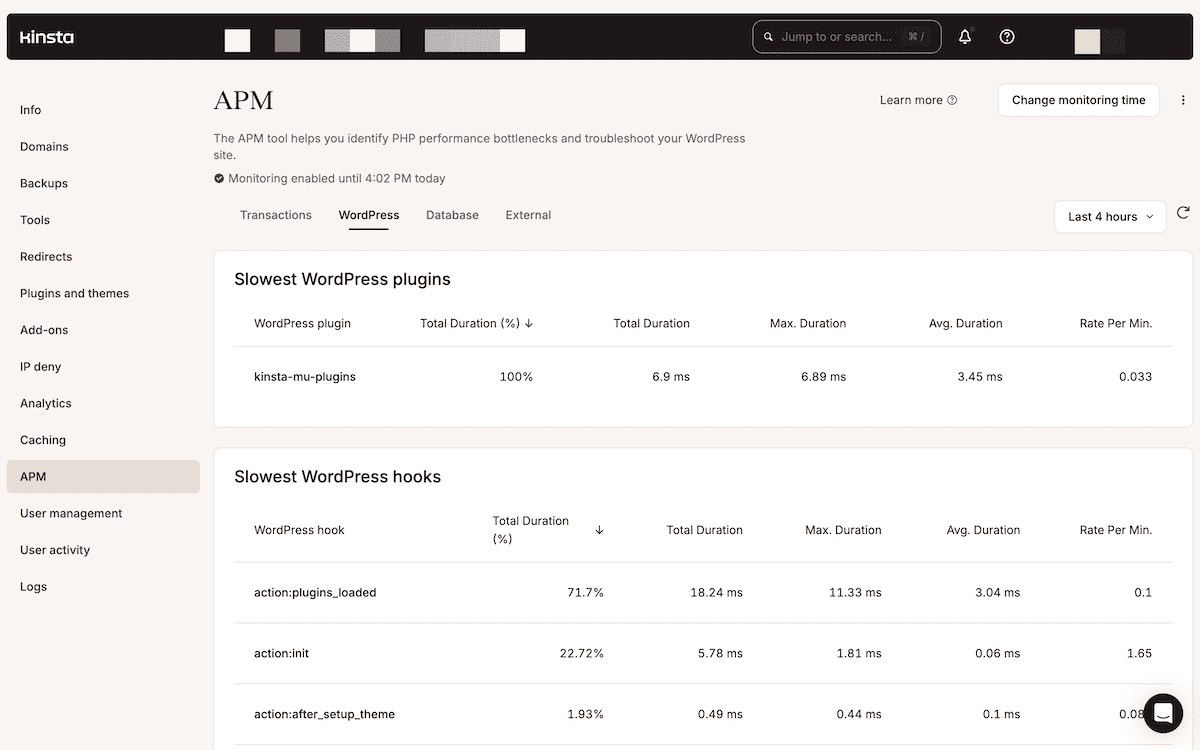
While there are plenty of performance tools on the market, you can access key metrics of the APM tool directly within the MyKinsta dashboard. You can monitor various aspects of your sites, such as database queries, slow WordPress hooks and plugins, and receive breakdowns of transactional requests — key for speeding up your site.

The APM Tool excels at identifying slow database queries. This is important for WordPress multisite networks, where many sites will share database resources. It helps you optimize these queries and improve overall network performance.
Every site can benefit from the APM Tool. For instance, WooCommerce stores could monitor checkout speed through the impact of API requests. The APM Tool is also great for identifying sluggish site speed at certain times of the day.
Photography tutorial website PHLEARN has big traffic numbers and uses Kinsta’s monitoring to ensure its site loads well for all of its site’s members. Of course, potential new signups will benefit from the improvement of the user experience (UX), too.
How Kinsta helps secure your WordPress multisite network
Security takes on added importance when it comes to WordPress multisite network management. A security breach could potentially affect many sites within the network.
Kinsta employs industry-leading and state-of-the-art security technology to keep your sites safe at the server level.
Leveraging Kinsta’s security infrastructure
Kinsta’s approach to security is SOC 2 compliant and ISO 27001 certified. Adherence to these industry-standards demonstrates Kinsta’s commitment to maintaining rigorous security protocols:
- SOC 2 compliance. This proves that Kinsta adheres to several trust services criteria, and is a marker for user safety.
- ISO 27001 certification. This is the “gold-standard” for confidentiality, integrity, and availability of information and data on Kinsta’s servers.
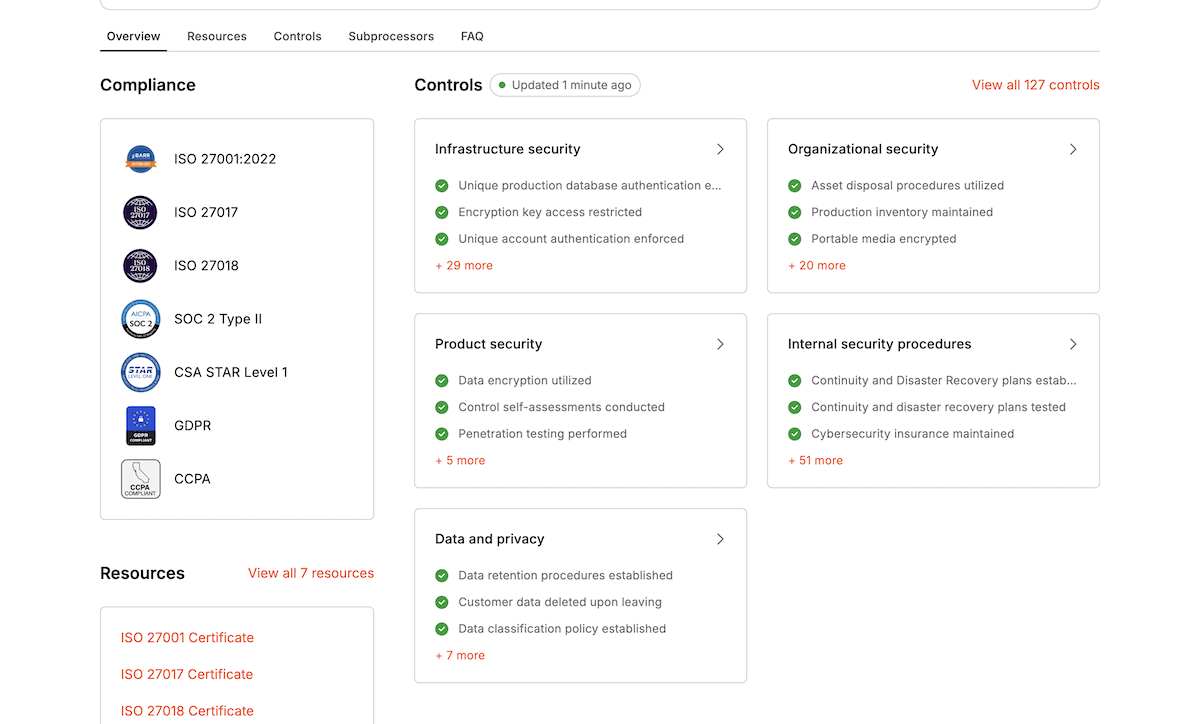
Your sites also benefit from Cloudflare’s security functionality to combat malicious intent. This includes enterprise-grade distributed denial of service (DDoS) protection, a web application firewall (WAF), bot protection, and more.
Between the baked-in protections from a powerful cloud infrastructure, Kinsta’s trust markers, and Cloudflare’s top-class provision, you have almost all of the answers to questions relating to your network’s security.
Monitoring and maintenance
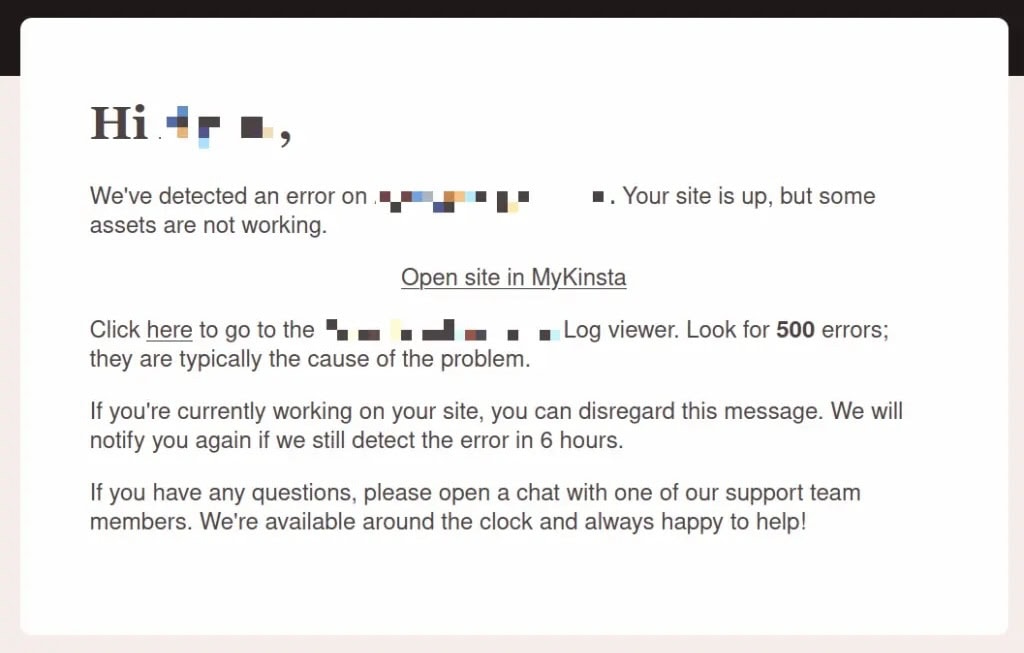
Alongside the APM Tool, you have other ways to make sure no sites on your WordPress multisite network fail. For instance, Kinsta monitors the uptime of your network every three minutes. If there’s a drop in uptime, you receive an email notification:
You may find your network analytics within the MyKinsta dashboard can help you spot potential issues alongside the built-in logging functionality:
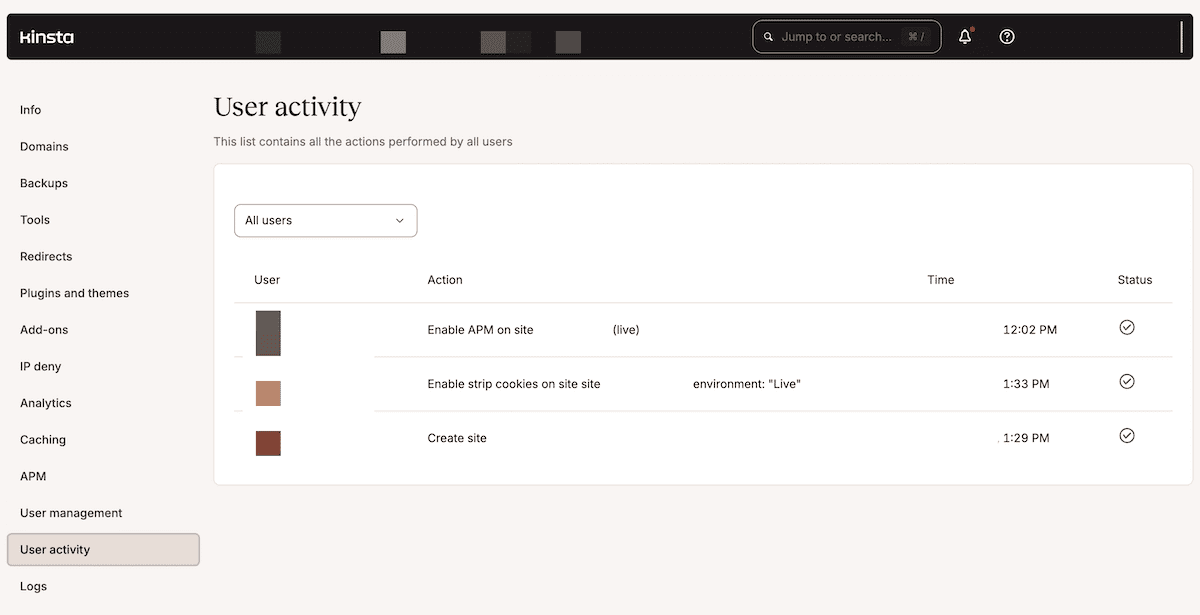
What’s more, there are dedicated tools to log user activity within MyKinsta:
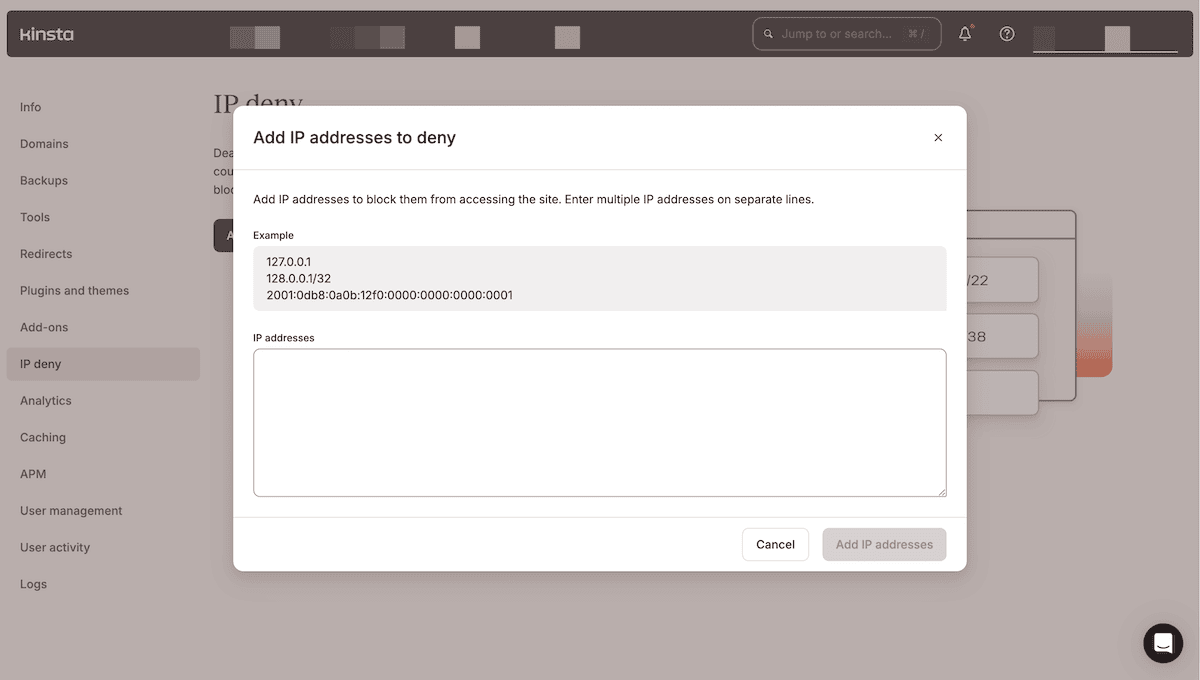
Other tools available within MyKinsta to protect your multisite network include IP Deny, which works at the network level to block traffic from malicious IP addresses:
Finally, through a network-wide plugin such as Wordfence, you can also implement routine malware scans (and removals), which is a benefit of being able to use WordPress plugins across your entire multisite network.
WordPress multisite network management: development and deployment
An efficient development and deployment workflow will be essential for WordPress multisite network management. Kinsta provides a “local-to-live” workflow that begins with DevKinsta as your local development environment:

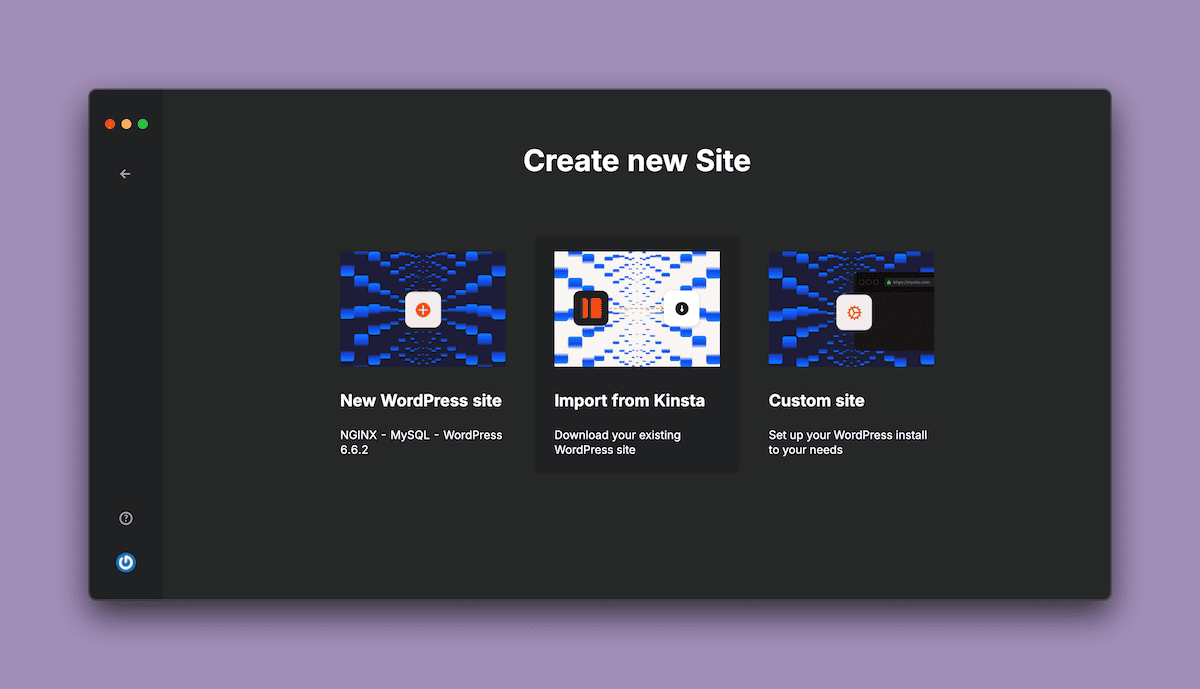
Using DevKinsta, you can mirror your production setup on your local machine, make the changes you need, and then push them back to your online servers. For multisite, DevKinsta can pull a network instance from your server through its import dialog:
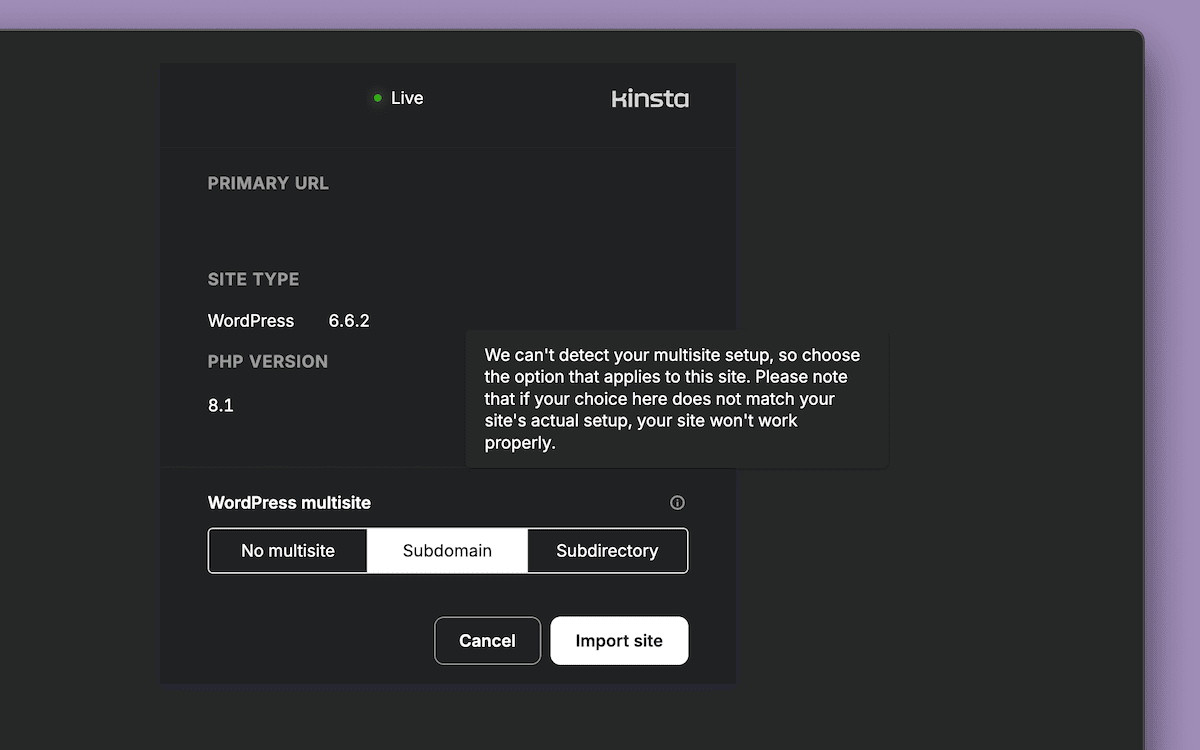
This will let you set your multisite directory structure before the import takes place:
DevKinsta’s syncing functionality lets you push and pull to and from your server using a minimal number of clicks:

The important aspect of a multisite local-to-live pipeline is the My Sites dashboard within WordPress:
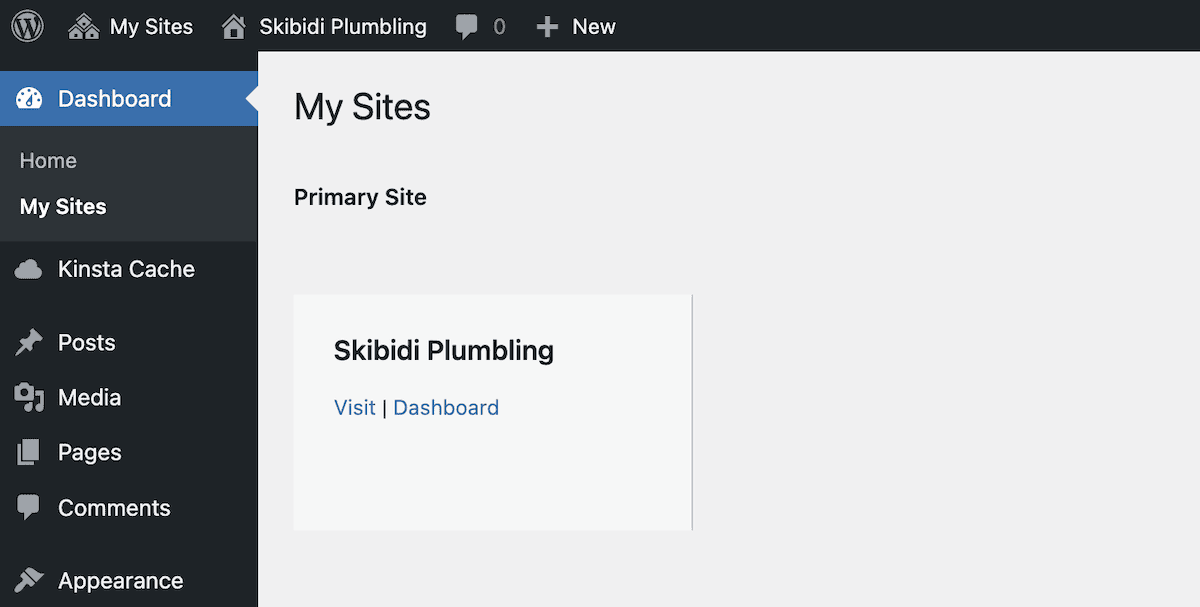
Another crucial part of your local-to-live workflow is staging and testing your network’s changes.
Staging and testing strategies
Using a staging environment is a critical decision when working with WordPress multisite. There are a few approaches to building a staging site for your network, but Kinsta provides one-click staging within the MyKinsta dashboard:
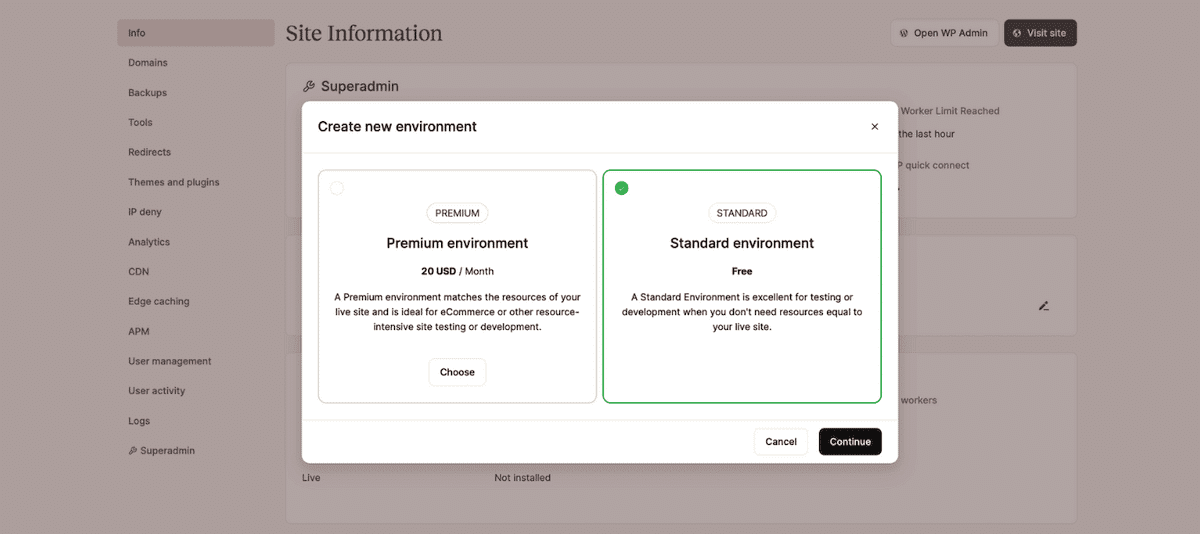
With premium staging, you could create many different copies of your setup, test your changes, and push the correct ones live. There are plenty of advanced ways to utilize staging for your WordPress multisite network management, including incorporating version control.
A common approach to deployment is to push changes to a GitHub, GitLab, or Bitbucket repo, with some server-side scripts fetching changes and updating the site. Multisite networks can benefit from both monorepo and multirepo setups, and a version control approach works for staging and live deployment.
Testing your network and changes will depend on your development goals. Individual site testing could be simple functionality checks or advanced unit testing.
Putting your workflow together: a summary
You will work with your local and staging environments for almost all of your development and deployment. Here’s a quick rundown of the steps we recommend:
- If your network hub is already live, use DevKinsta to pull that instance to your local machine. Otherwise, you can create a new site either within MyKinsta and pull it to local, or directly within DevKinsta.
- Within this local environment, make the changes you need. Version controlling those changes to a “feature” or “testing” branch is sound.
- Part of this local process could involve some usability testing or other visual checks, although this will happen throughout your workflow.
- It’s a subjective decision to push to staging through DevKinsta or your Git repo.
Once you have your network hub on a live server, you may want to set up an automated testing strategy and monitoring pipeline. This is also the right time to look at how your network will respond to scaling decisions.
How an agency can benefit from Kinsta’s WordPress multisite network management
WordPress agencies typically need custom and specific solutions for multisite network management. This is due to the custom workflows and cultures in each agency. For example, agencies might adopt different approaches to team collaboration.
User management
User management in MyKinsta includes the ability to invite other team members to the project:
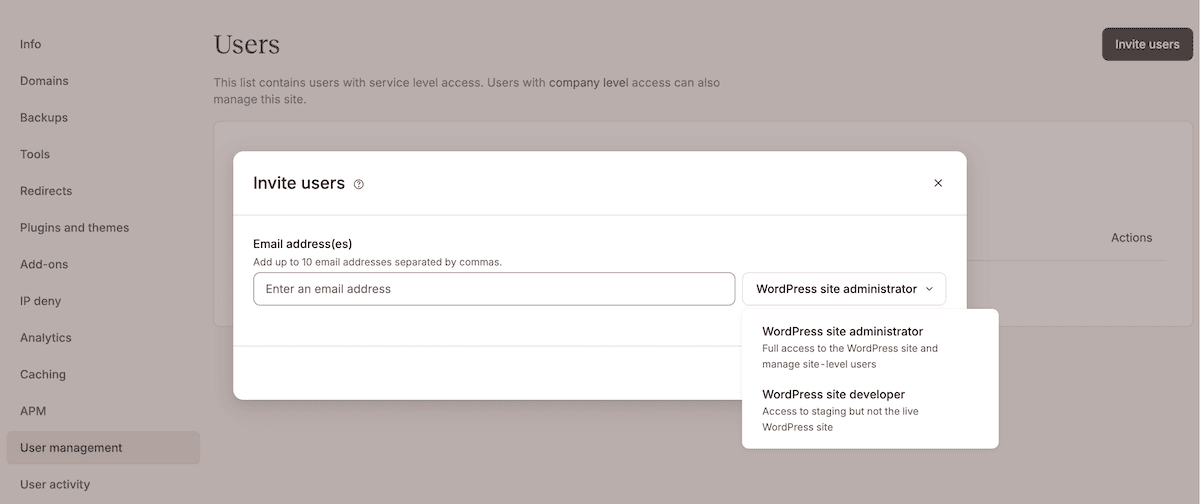
With many users working on your projects, it’s important to organize your access hierarchy and structure. You can set up various roles that offer access to the company as a whole or a particular service (such as database administration). Some of the lower-privilege options will be great for client access to the network or a specific site.
Analytics and reporting
Kinsta’s analytics are good for more than spotting traffic anomalies: it can also help you understand how that traffic hits your network and (by extension) your clients’ sites. Even a quick look at the Visits graph can tell you how much traffic in on the network throughout the day:
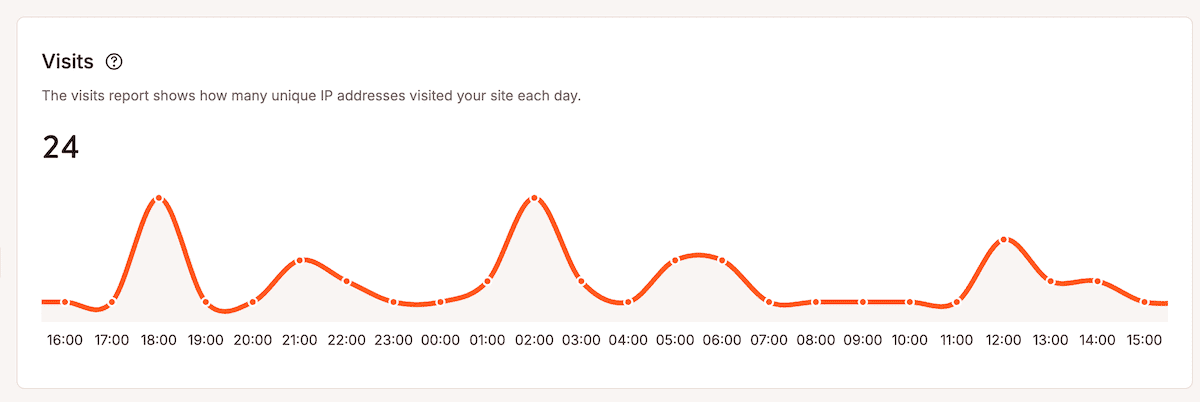
You can view basic resource usage for your network: disk space and bandwidth. Other tabs can give you an insight into PHP response times, memory limits, AJAX usage, error code breakdowns, and many more advanced metrics.
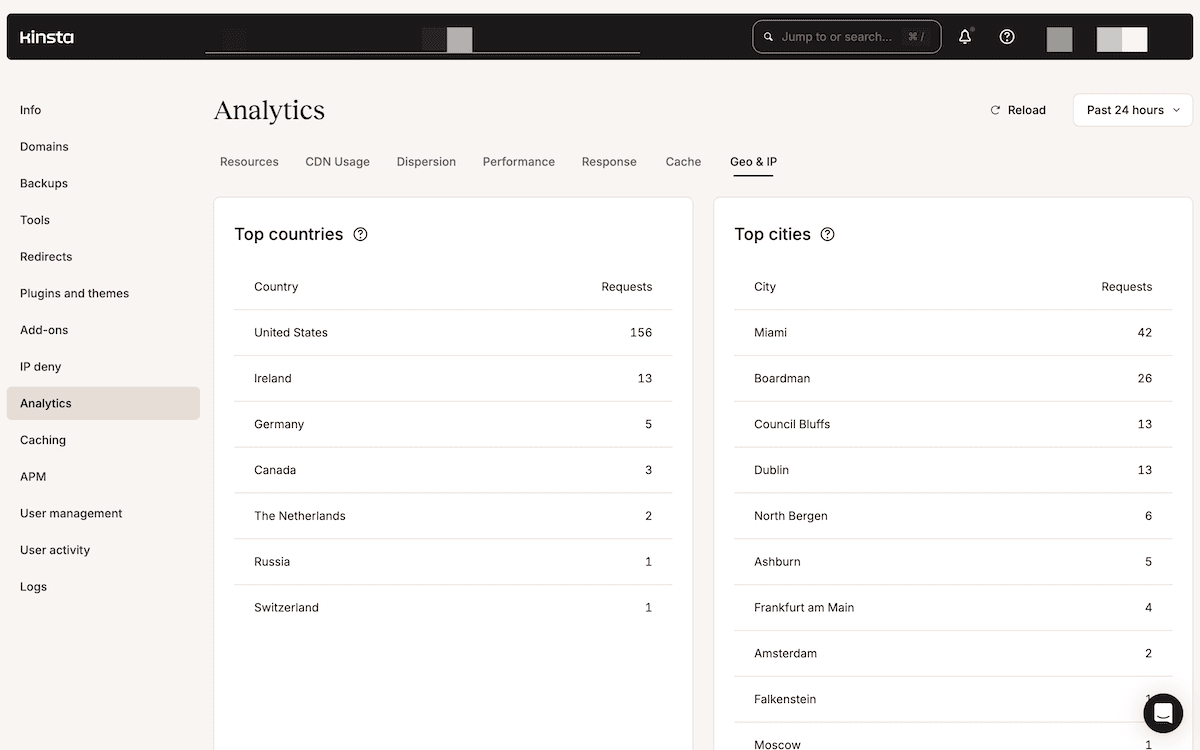
Analyzing your geographic data can have value in a number of ways. International clients or those who run multilingual sites will want to know where in the world its traffic comes from. MyKinsta can tell you this through the Geo and IP screen:
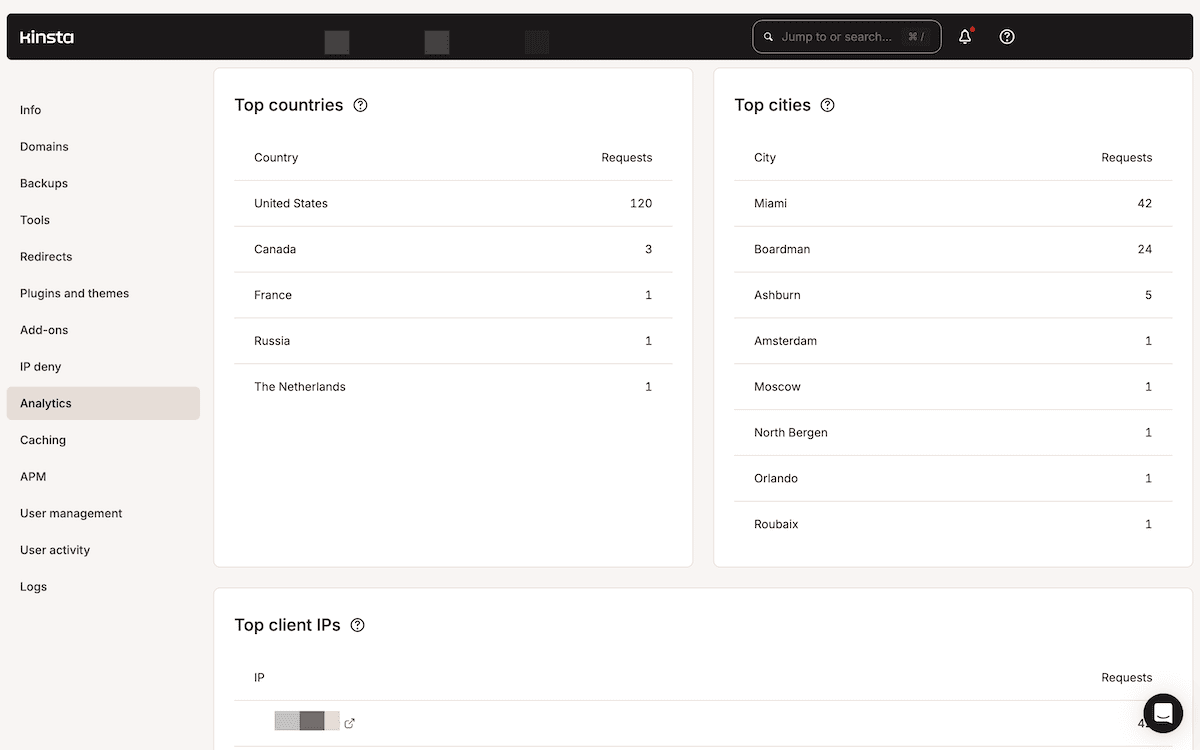
For instance, if you notice significant traffic from a particular region, you might adjust your CDN configuration or consider using a closer data center. The information your site’s analytics gives you helps you to improve your service and your clients to better optimize their content delivery and server locations.
Site management
Kinsta provides a number of robust tools to help you manage the technical aspects of your WordPress multisite network. For example, it’s straightforward to change the PHP engine version your network uses:
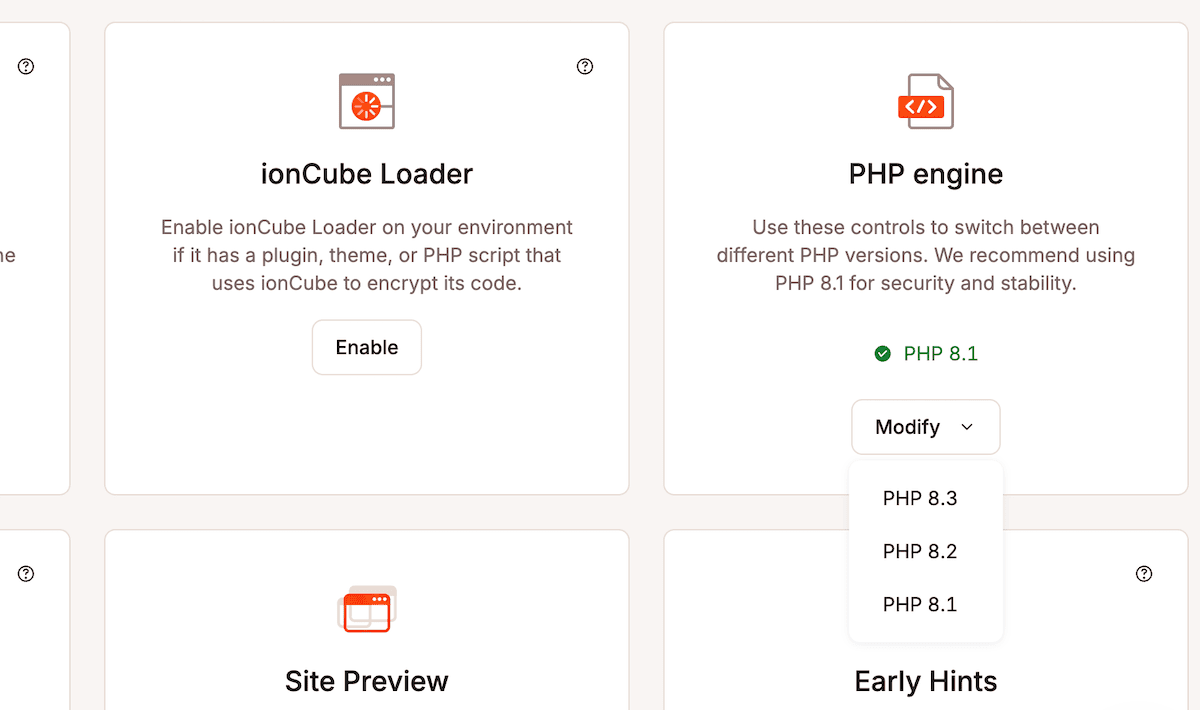
You can use this in a few ways, such as testing the compatibility of different PHP versions during staging, monitoring those performance impacts, and processing (or rolling back) changes.
For performance monitoring, the APM Tool records your slowest database queries:
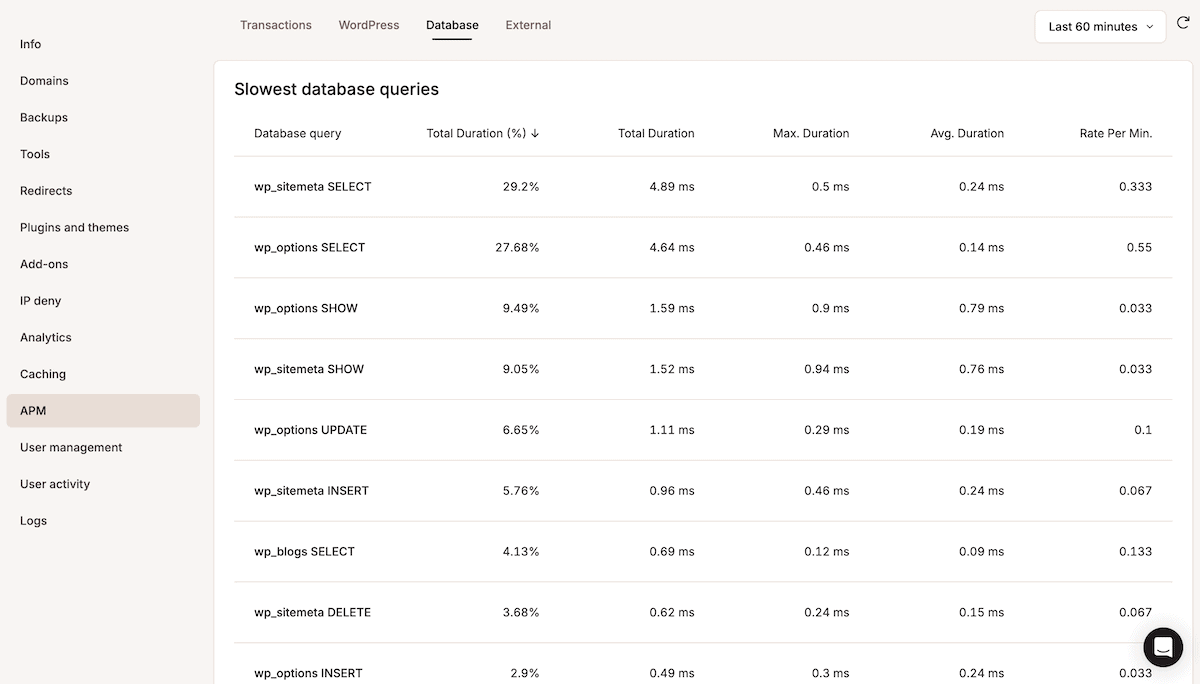
With any tools that change the fundamental settings of your WordPress multisite network, you should backup your site. Kinsta’s backups include a full snapshot of your multisite installation, including the database.
Migrating a database can be tricky to complete, especially with potential extra tables relating to networked sites. The Tools menu in the MyKinsta dashboard gives you a way to conduct a search-and-replace on your database:
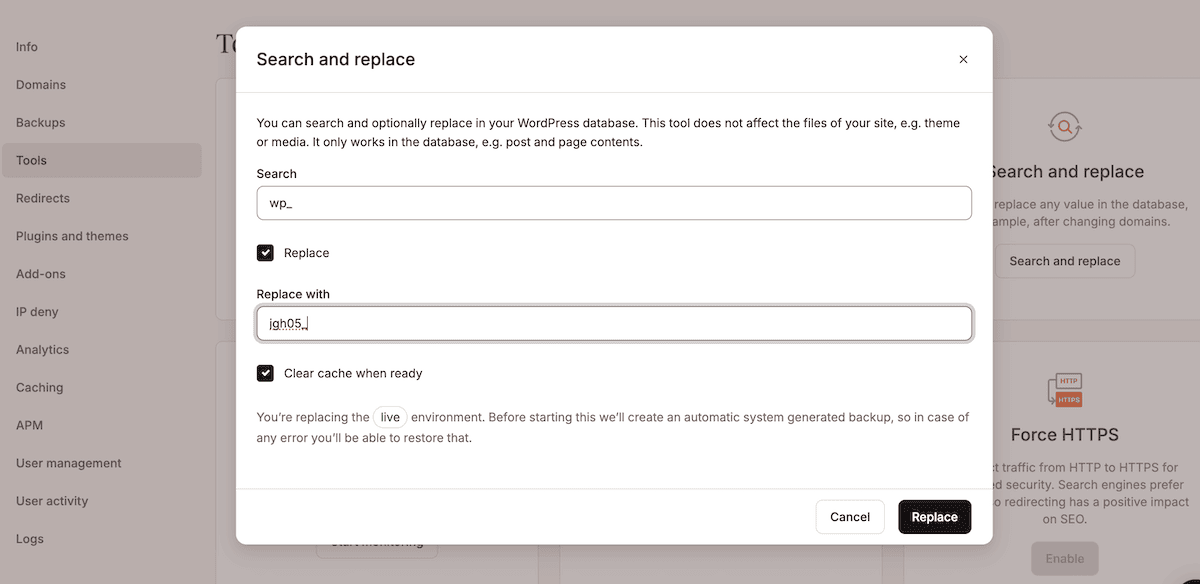
You often have to change entries relating to domain names, table prefixes, and other elements that WordPress hard codes into the database.
Finally, your domain name system (DNS) management will need the best support possible — understandable given that you might run multiple sites with different domain names.
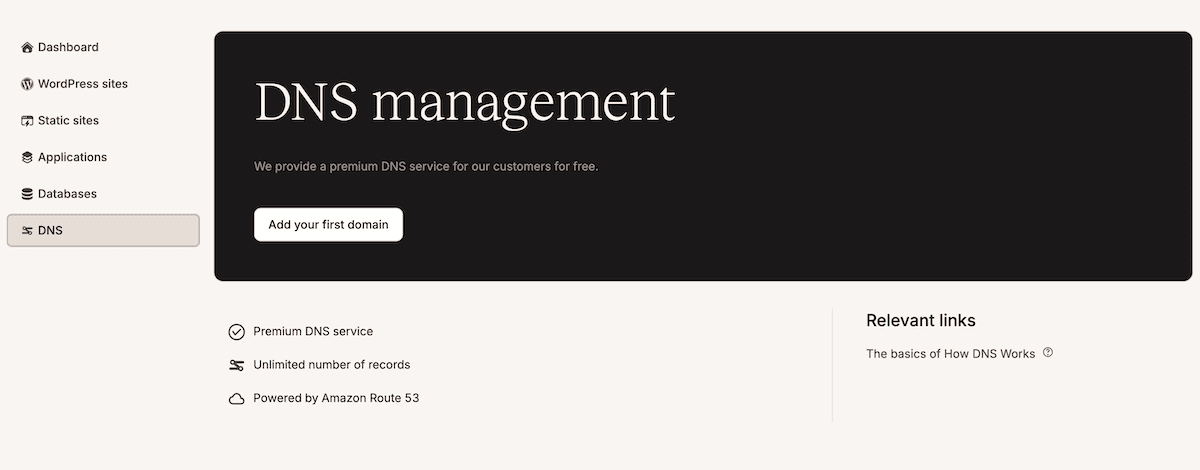
Kinsta offers robust DNS management, but premium DNS is not optional either in our opinion. We integrate with Amazon Route 53 to offer enterprise-grade reliability, global DNS propagation, advanced routing options, and more.
Summary
WordPress multisite network management requires careful planning and the right tools, but Kinsta can ease the burden through its rich architecture and infrastructure. For instance, you can build your development and deployment pipeline around DevKinsta and the built-in staging functionality. In addition, you have a wealth of monitoring and security options within the MyKinsta dashboard, including analytics and the APM tool.
What challenges are you facing with WordPress multisite network management? Share your experiences in the comments section below!


