
Many WordPress users struggle when it comes to connecting Google Analytics to their WordPress site and they miss out on collecting data about their users.
Fortunately, there are several methods available for adding Google Analytics to WordPress. Once you know what you’re doing, these techniques are fairly simple and can prove useful in a variety of situations.
In this post, we’ll discuss what Google Analytics does and why it matters to your site. Then we’ll share four ways you can connect it with WordPress to start tracking activity.
Let’s get right to it!
Prefer the video version?
A Quick Introduction to Google Analytics
Before you go about connecting Google Analytics to your WordPress site, it’s best to understand what it is and how it works. In short, this platform monitors your website’s activity and provides you with key data to help you improve it:

By using a code snippet inserted into the header of each of your site’s pages, Google Analytics gathers a wide variety of information, which can be divided into five categories:
- Realtime: Displays what’s happening on your site at the specific moment you’re viewing the report.
- Audience: Includes information about who is visiting your site, including demographics.
- Acquisition: Explains how your site acquires traffic.
- Behavior: Shows what visitors do on your site, including buttons clicks and which of your pages are the most popular.
- Conversions: An advanced report to be used in conjunction with Google Analytics Goals, to track activity such as email list subscriptions or e-commerce sales.
Some examples of specific information you might find in your Google Analytics reports include:
- The number of active users on your site at any given moment.
- How many people visit your site over time.
- Your visitors’ ages, genders, and locations.
- Where your visitors come from (e.g., organic search, social media, etc.).
- Which pages visitors view and for how long.
- Bounce, click-through, and conversion rates.
There’s a lot to see and learn in your Google Analytics dashboard. This can help you improve your site in many ways.
To find out about Google’s latest version of Google Analytics, check out our guide to GA4.
Why Analytics Matter to Your WordPress Site
If you know how to put them to good use, analytics can be valuable to many different aspects of your website. Four key areas that are relevant to any type of site include:
- Content marketing strategy. By considering your most popular posts, pages, products, or other content, you can determine what your visitors like most. Increasing pageviews and traffic is a matter of creating more of the type of content that resonates best with your audience (here’s how to get started with keyword research and how to optimize for SEO).
- Inbound marketing. Knowing where your traffic is coming from tells you which marketing strategies are working and which ones are falling flat. You can then focus the bulk of your efforts and budget on the methods that produce the most results.
- Audience segmentation. Understanding your audience is key to effectively communicating with them to encourage conversions. With analytics, you can create subgroups for targeted marketing.
- User Experience (UX) auditing. User behavior flows can reveal problems with your navigation or site design. Pinpointing poorly-performing content and pages with high bounce rates may help you improve problem areas.
If you’re running an ecommerce site, the Conversions report is also helpful for tracking sales and revenue.
As you can see, it’s not always the numbers themselves that are important. How you apply the knowledge you gain from Google Analytics is where the value is. Fixing problem spots and applying the best marketing techniques for your site can lead to increases in traffic, conversions, and revenue.
How to Add Google Analytics to WordPress (4 Possible Methods)
If you’re trying to gather data about your users, here are different ways you can connect Google Analytics to your WordPress site.
In each case, we’ll assume you already have a Google Analytics account set up. If you don’t, head over and create one first, then come back for your next steps.
1. Use a Google Analytics WordPress Plugin
The simplest way for most WordPress users to add Google Analytics to their sites is with a Google Analytics WordPress plugin. This method saves you from having to edit your website’s code.
To do this, we recommend three plugins:
Site Kit by Google
If you’d like to add Google Analytics to your WordPress site, Google has got you covered with a simple yet powerful plugin: Site Kit by Google.
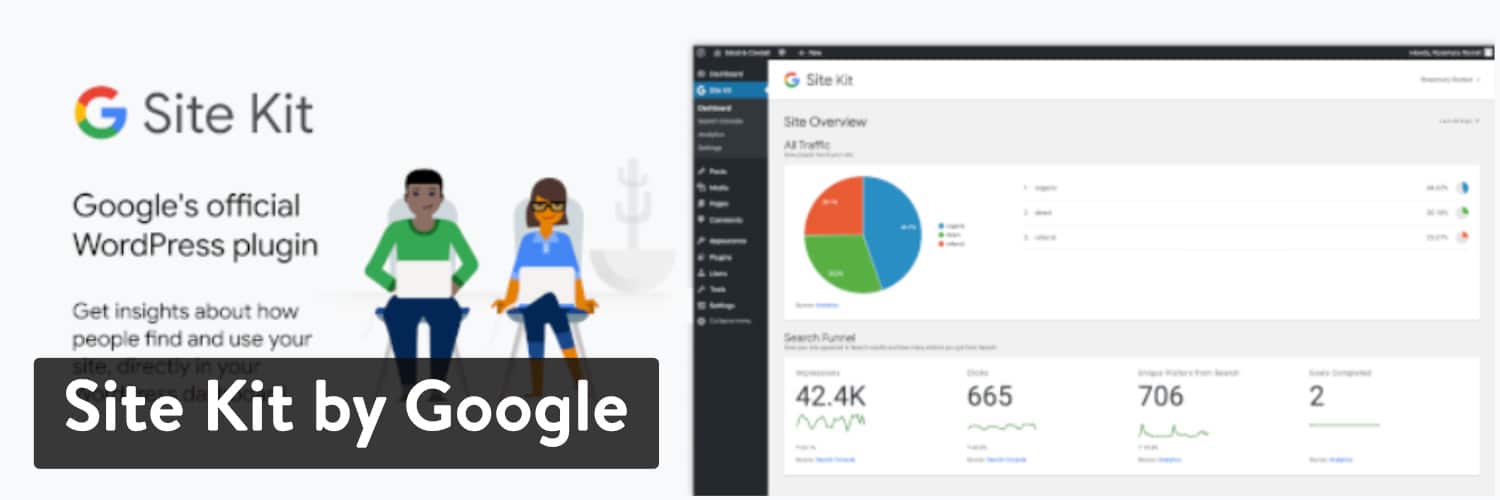
This free plugin connects Google Analytics to your WordPress site in just a few clicks but that’s not all. On top of analytics, this plugin pulls data from other services provided by Google, like Google Search Console, Google AdSense, and PageSpeed Insights allowing you to build a nice dashboard based on Google as your data source.
Here’s how to get started:
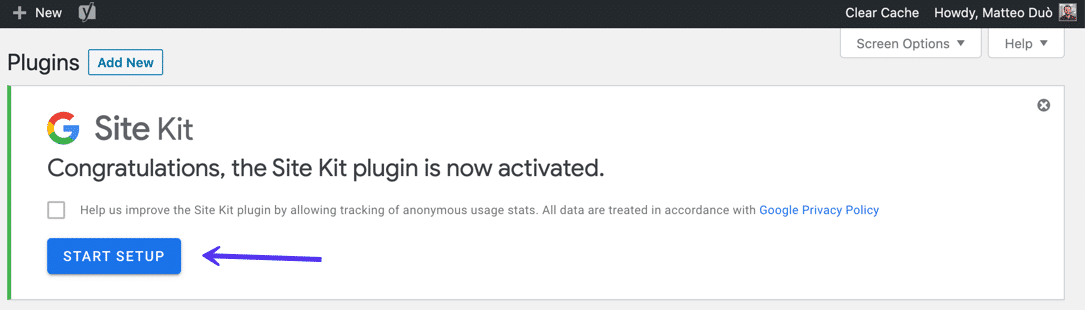
Install and activate the Site Kit by Google plugin, then click on the Start Setup button.
When done, you’ll be required to connect your WordPress site to your Analytics account.
As you might expect, you’ll need to go through a few steps to verify you’re the owner of the domain, grant access to Google to its data, and set up each service you’d like to add to WordPress.

When successfully connected with your Google account, you’ll be then able to see data from Google Analytics along with all other services activated directly in your WordPress dashboard. Here’s how it looks:
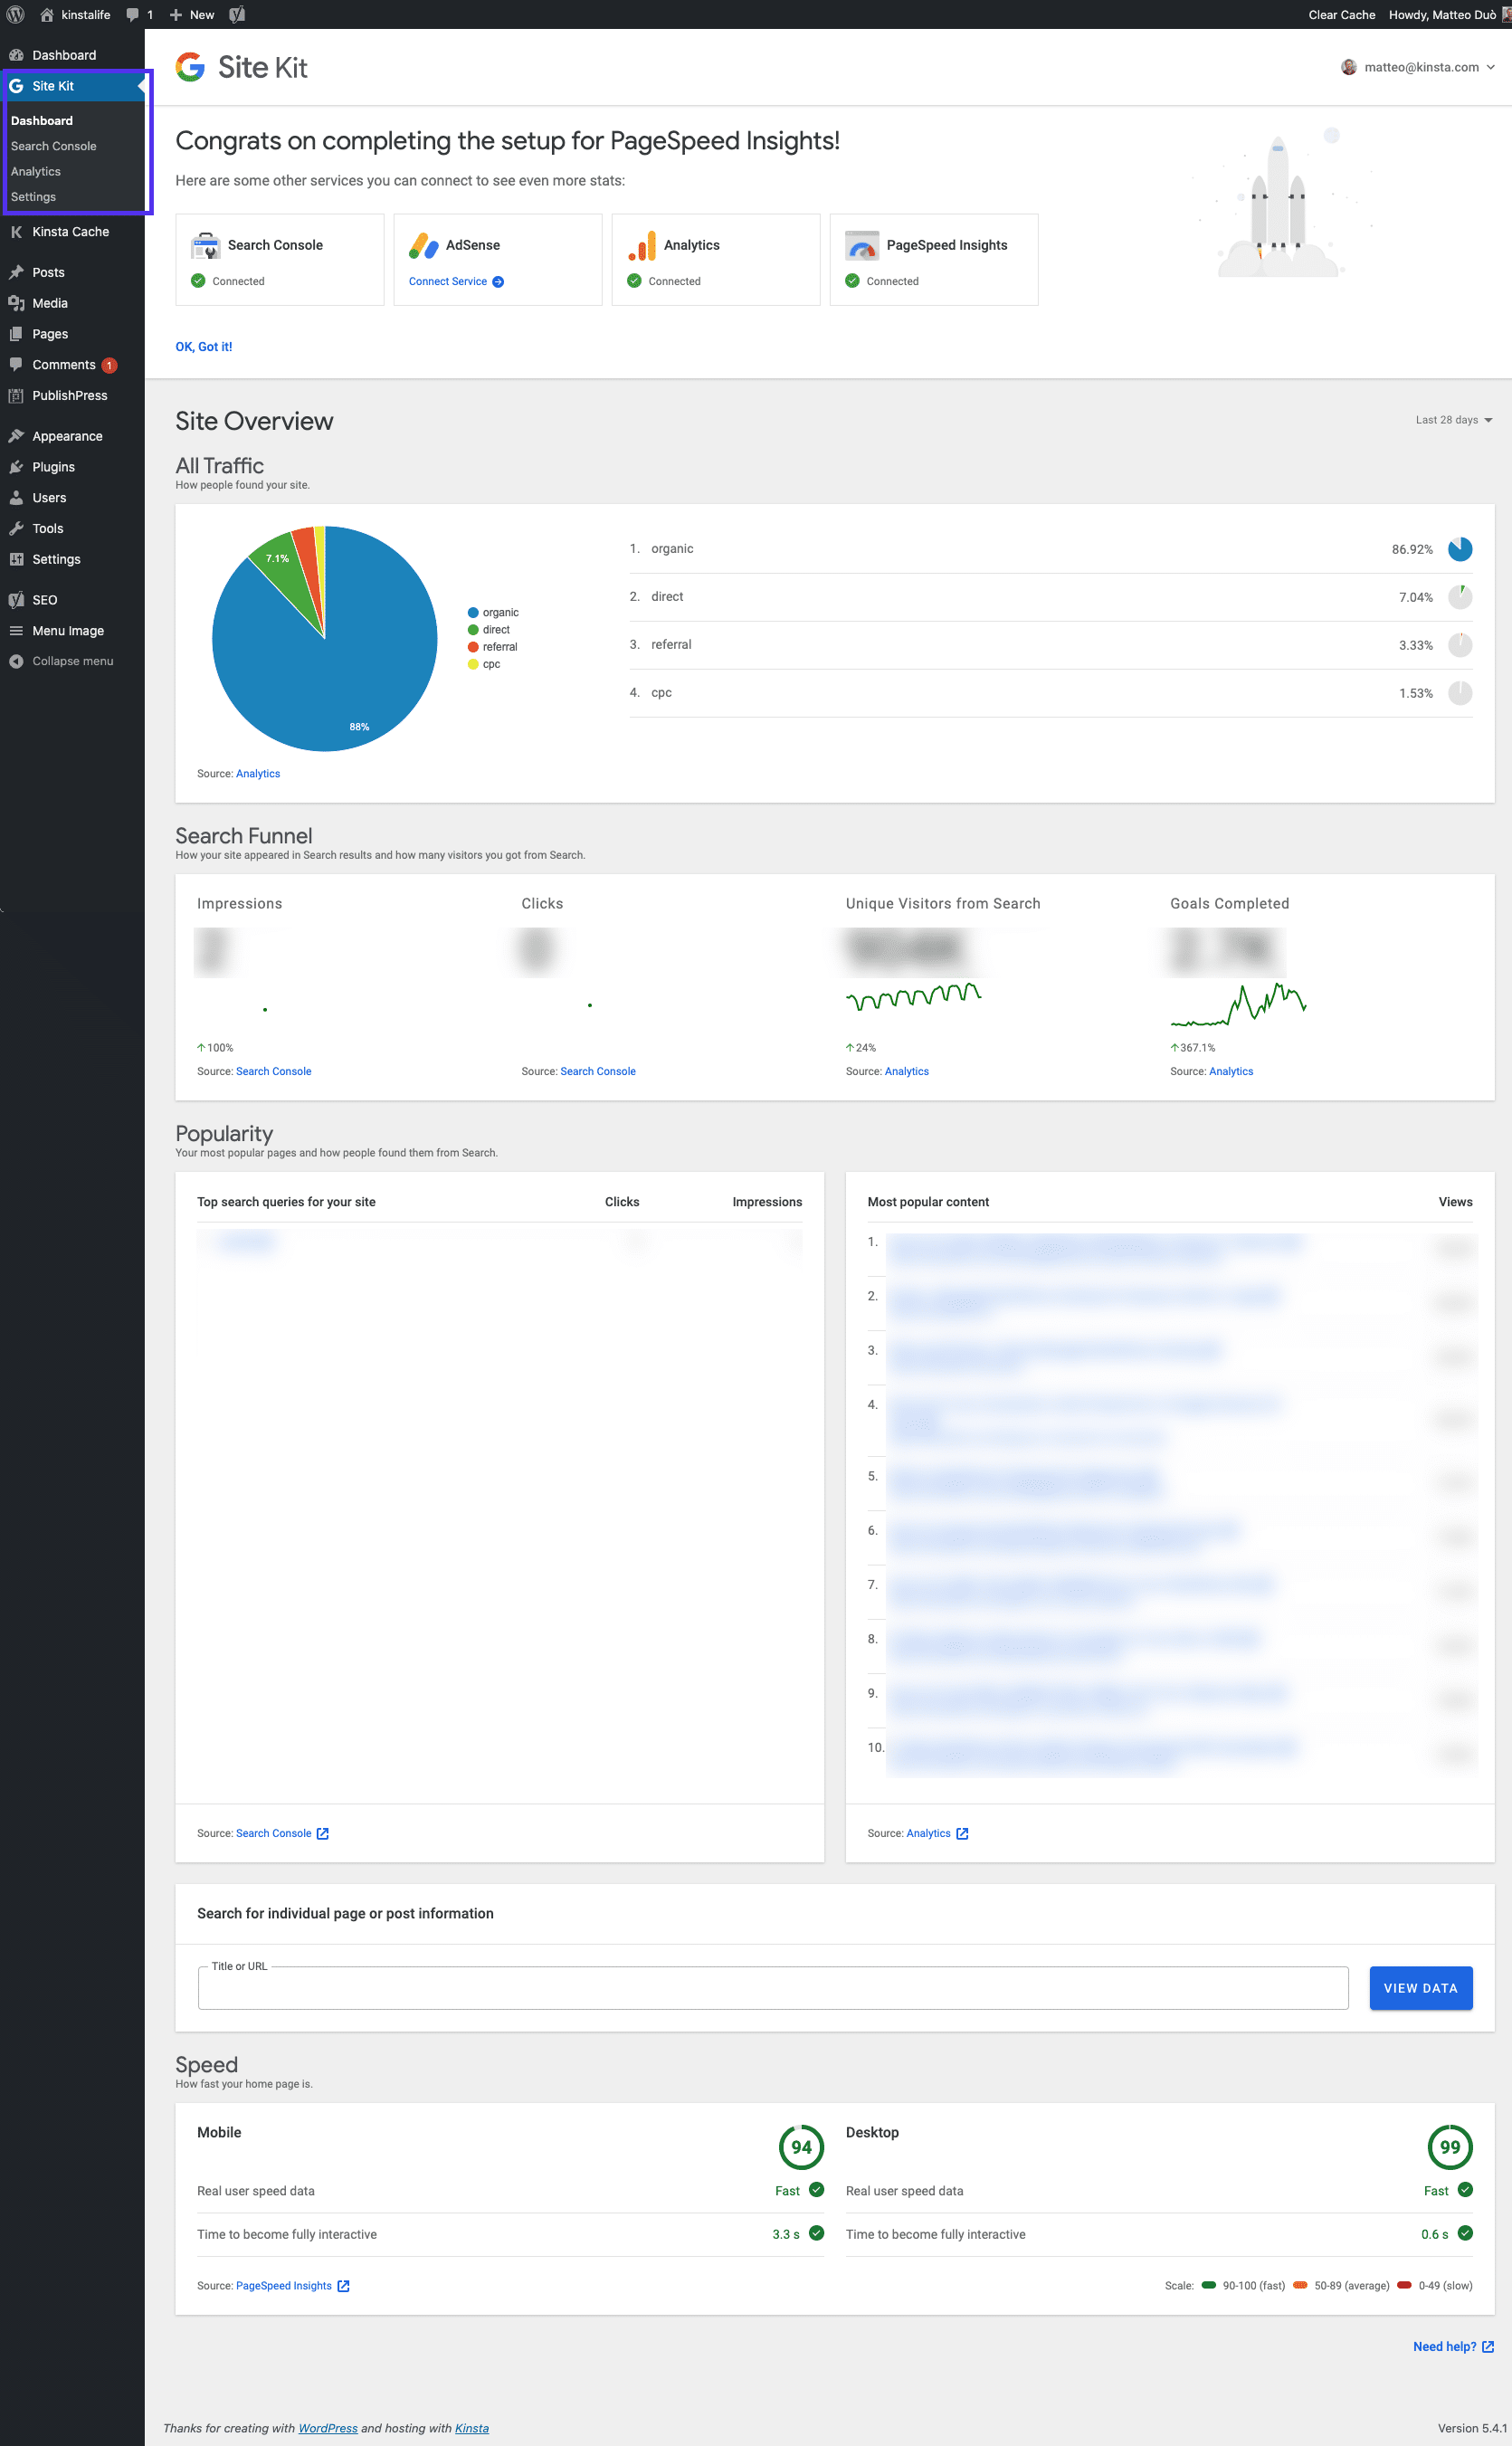
All this data will always be reachable directly within WordPress in your left-hand sidebar.
If this plugin is too much for you and want to keep things focus primarily on Google Analytics, you could use the next plugin.
GA Google Analytics
The free GA Google Analytics plugin by Jeff Starr has over 400,000 active installs and a five-star rating:

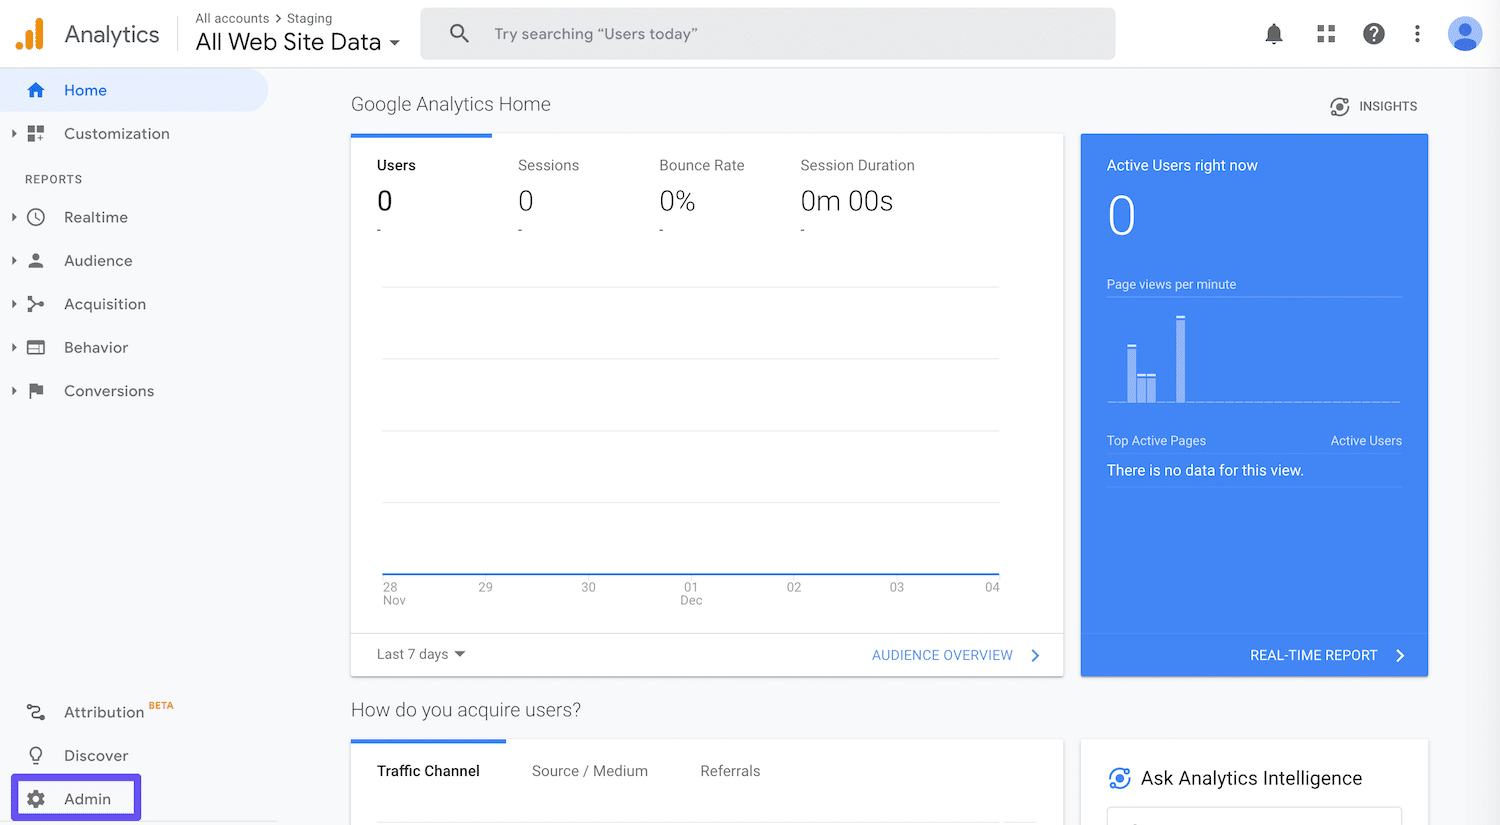
After you install and activate the Google Analytics WordPress plugin, all you have to do is add your Google Analytics tracking ID in its settings. To retrieve your tracking ID, go to your Google Analytics account and click on Admin in the sidebar:
Under Property, select Tracking Info, then click on Tracking Code:
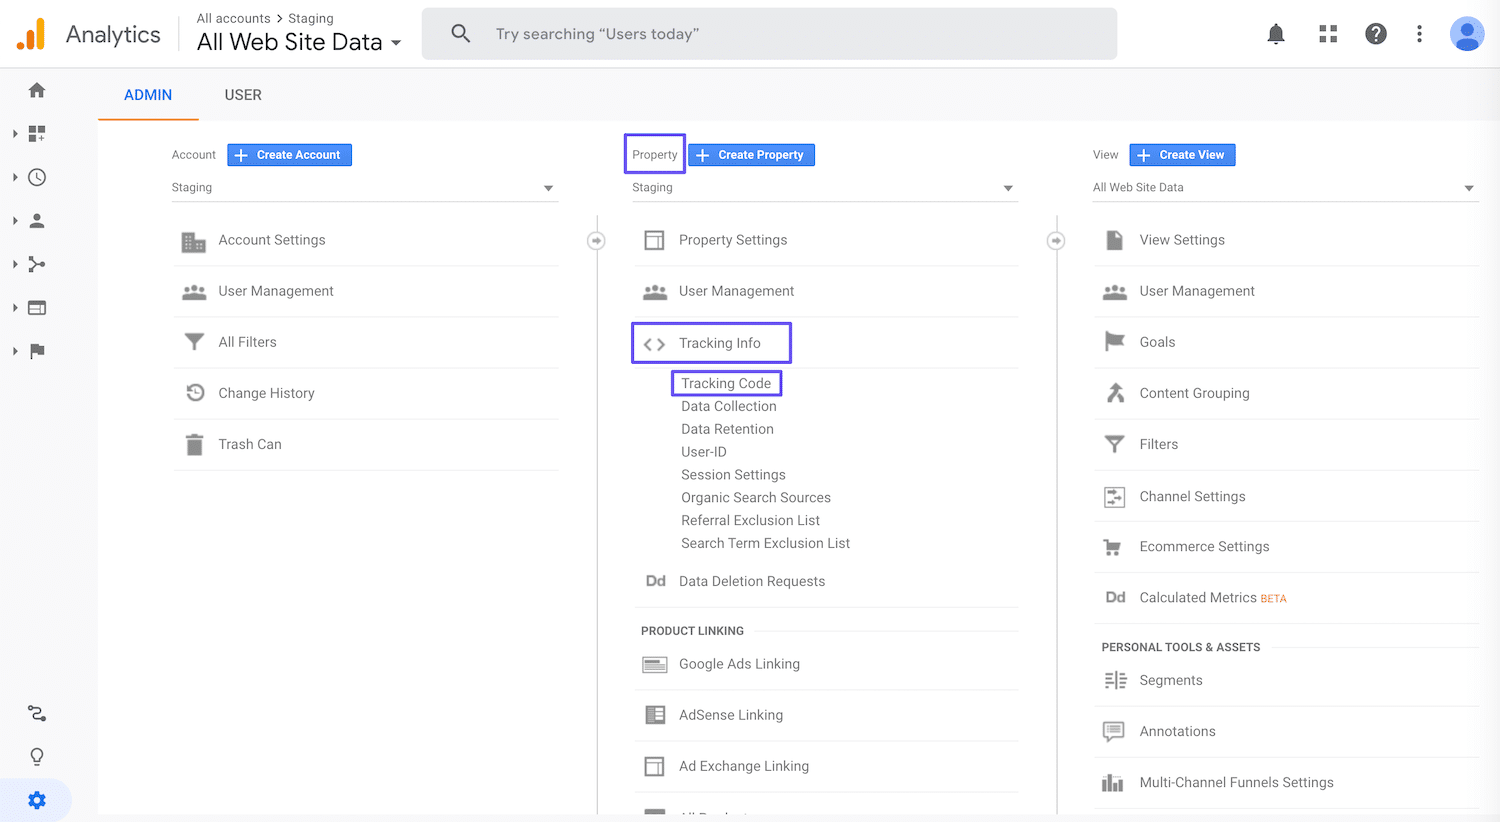
Your tracking ID will start with UA and be at the top of this section:
In your WordPress dashboard, navigate to Settings > Google Analytics. Scroll down to Plugin Settings and add your tracking code in the relevant field:
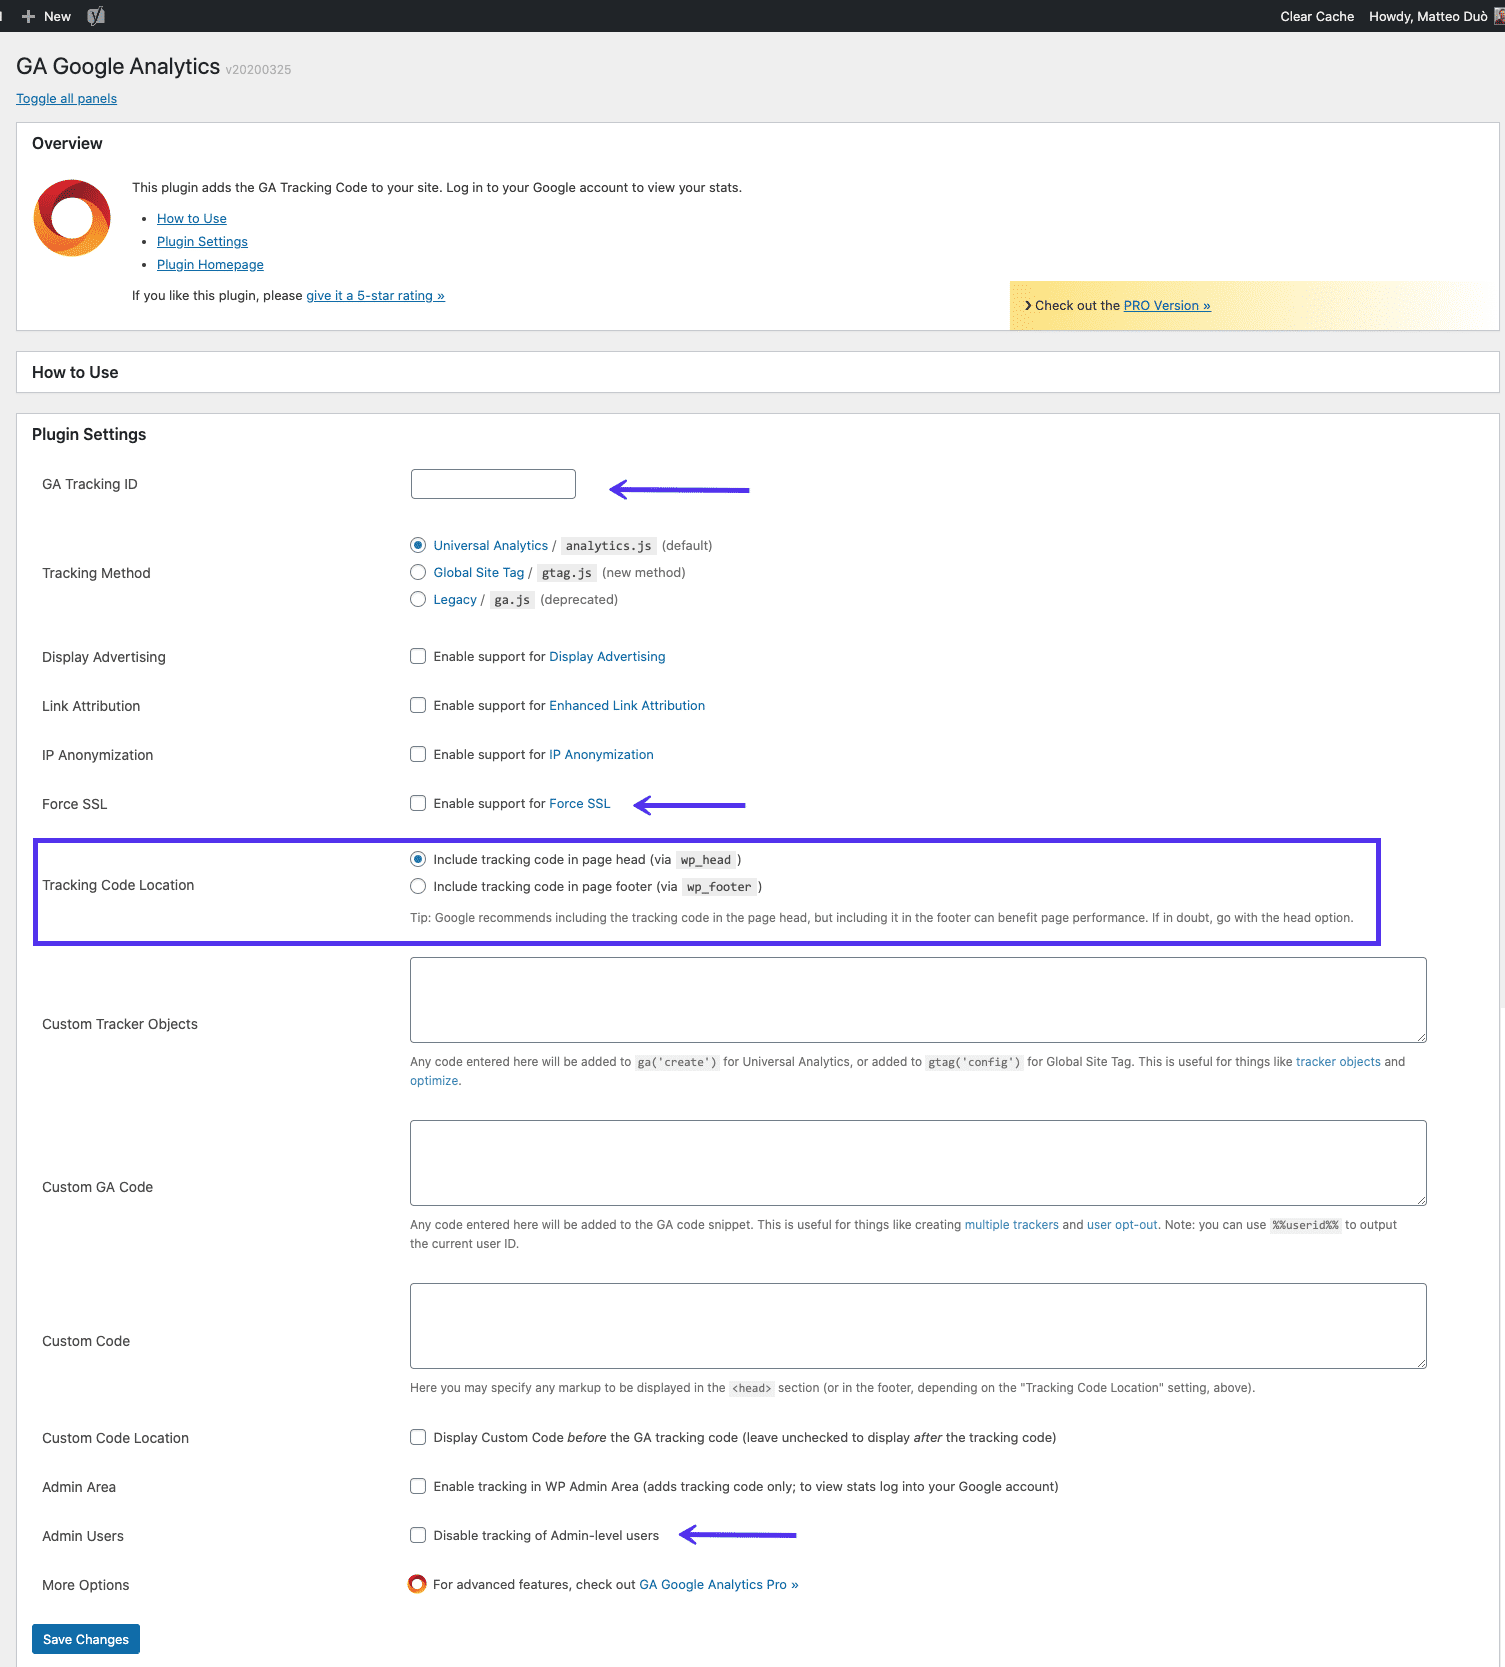
This plugin allows you to also choose whether you’d like the tracking code to be placed in your header vs footer, add custom tracking code, force SSL, disable tracking for your admin users, and a few other useful options.
Once tweaked to your needs, scroll down and click on the Save Changes button. Google Analytics should now be active on your WordPress site.
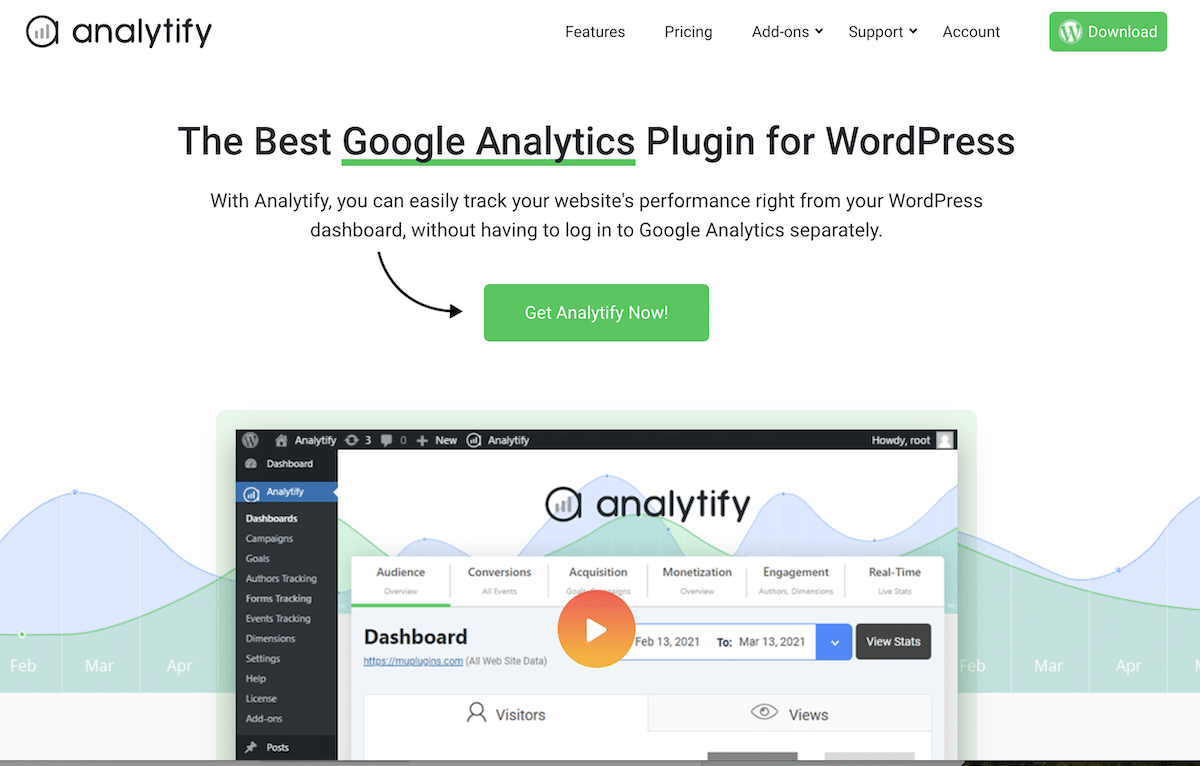
Analytify
Analytify is the best Google Analytics 4 plugin for WordPress. It’s a user-friendly WordPress plugin designed to streamline the integration of Google Analytics into your website. It eliminates the need for complex code modifications or manual tracking implementations, making it ideal for WordPress users of all technical levels.
Analytify offers real-time statistics, in-depth reports, and customizable dashboards, giving you valuable insights into your website’s performance and visitor behavior.
Steps to Add Google Analytics Using Analytify
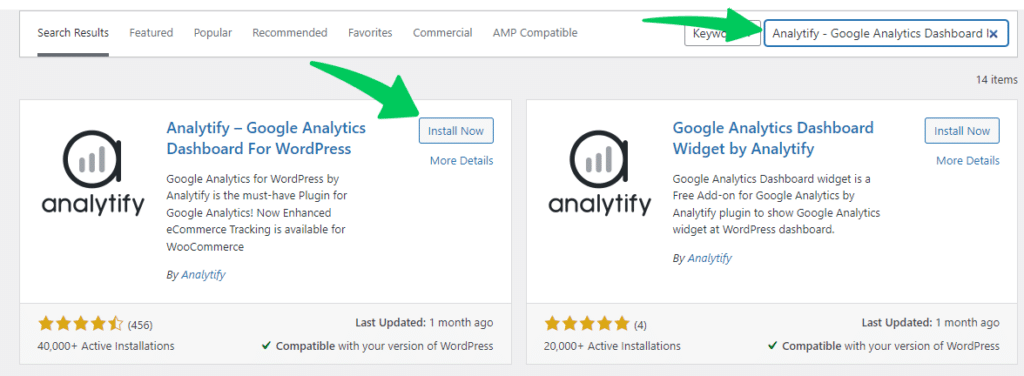
Step 1: Install and Activate Analytify
- Navigate to your WordPress dashboard’s Plugins section.
- Click Add New and search for “Analytify.”
- Once found, click Install Now, followed by Activate.
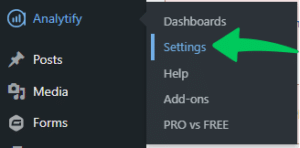
Within your WordPress dashboard, go to Analytify >> Settings.
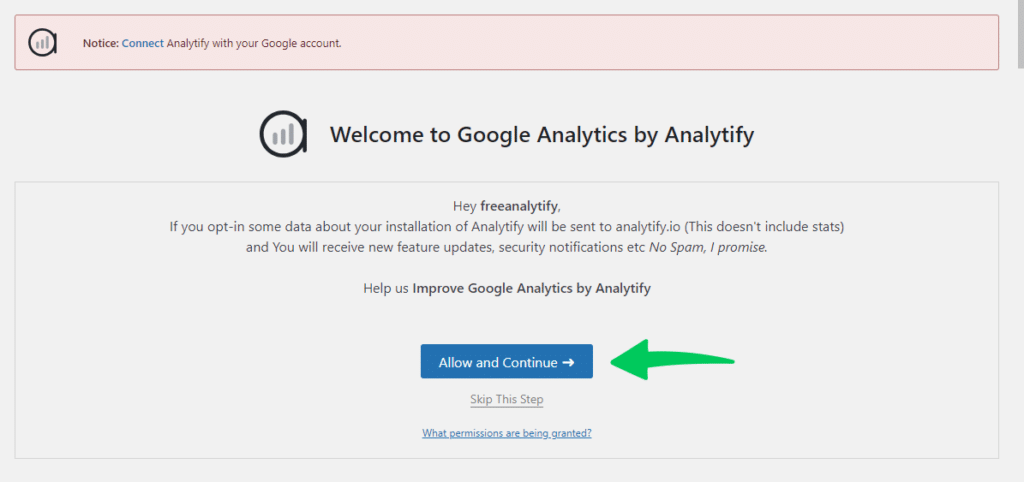
Click on Allow and Continue.
Note: Analytify Pro offers advanced features like enhanced eCommerce tracking, custom event tracking, and file download tracking, giving you even deeper insights into user interactions. For a more comprehensive analytics experience and access to premium features, consider upgrading to Analytify Pro today.
Step 2: Connect Google Analytics with Analytify
It’s time to link your Google Analytics account with Analytify.
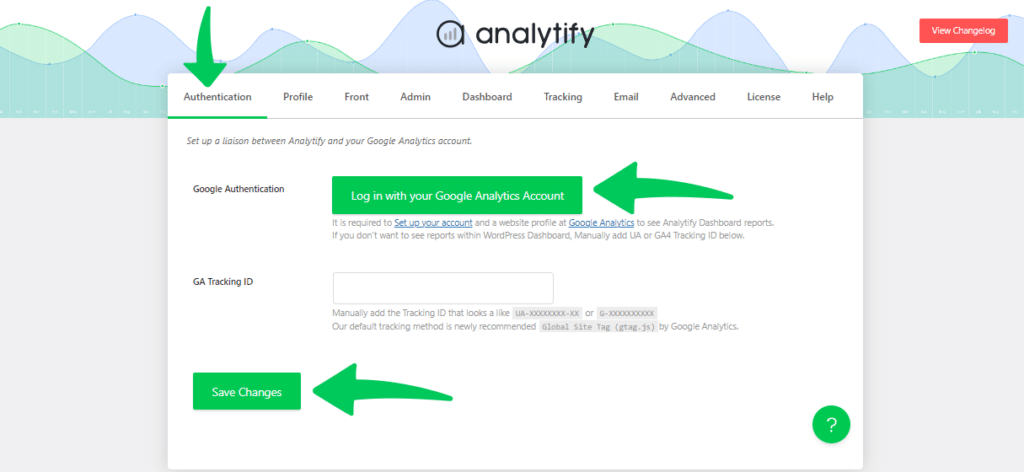
- In your WordPress dashboard, go to the Analytify section and click on Settings.
- Navigate to the Authentication tab.
- Click on the button that says “Log in with your Google Analytics Account.”
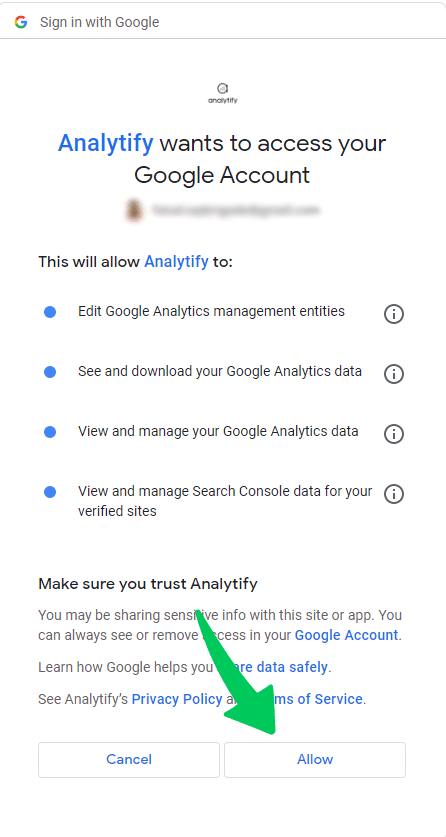
You’ll be taken to the Google Accounts Authentication page. Select the Google Account linked to your Google Analytics.
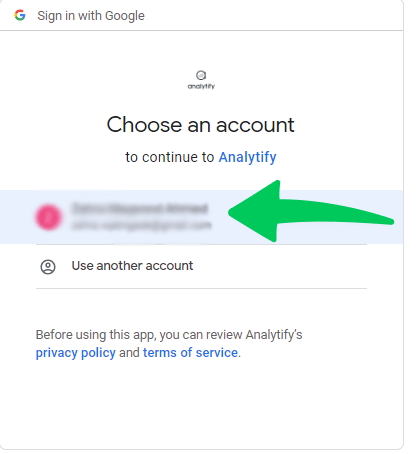
Grant Analytify the necessary permissions. Click Allow.
You’ll be redirected back to your WordPress dashboard.
Step 3: Choose Your Preferred Analytics Profile
By default, Analytify automatically installs the Google Analytics tracking code.
You’ll be back in Analytify >> Profiles. Select your “Profiles for posts” and “Profile for the dashboard.”
- “Profiles for posts” tracks user activity on your site.
- “Profile for dashboard” displays stats within Analytify.
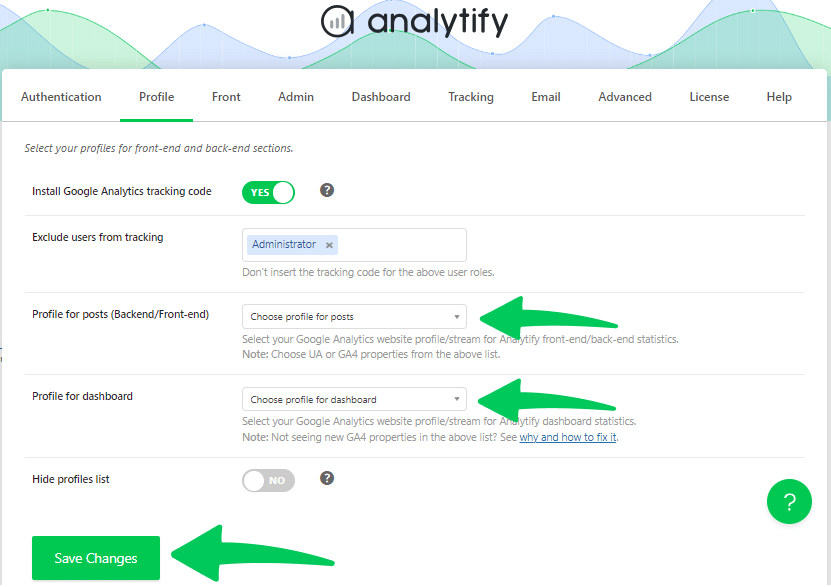
Once you’ve made your selections, click Save Changes. In most cases, these two profiles will be the same.
Congratulations! You’ve successfully installed and activated the free version of Analytify on your WordPress website.
Start Tracking:
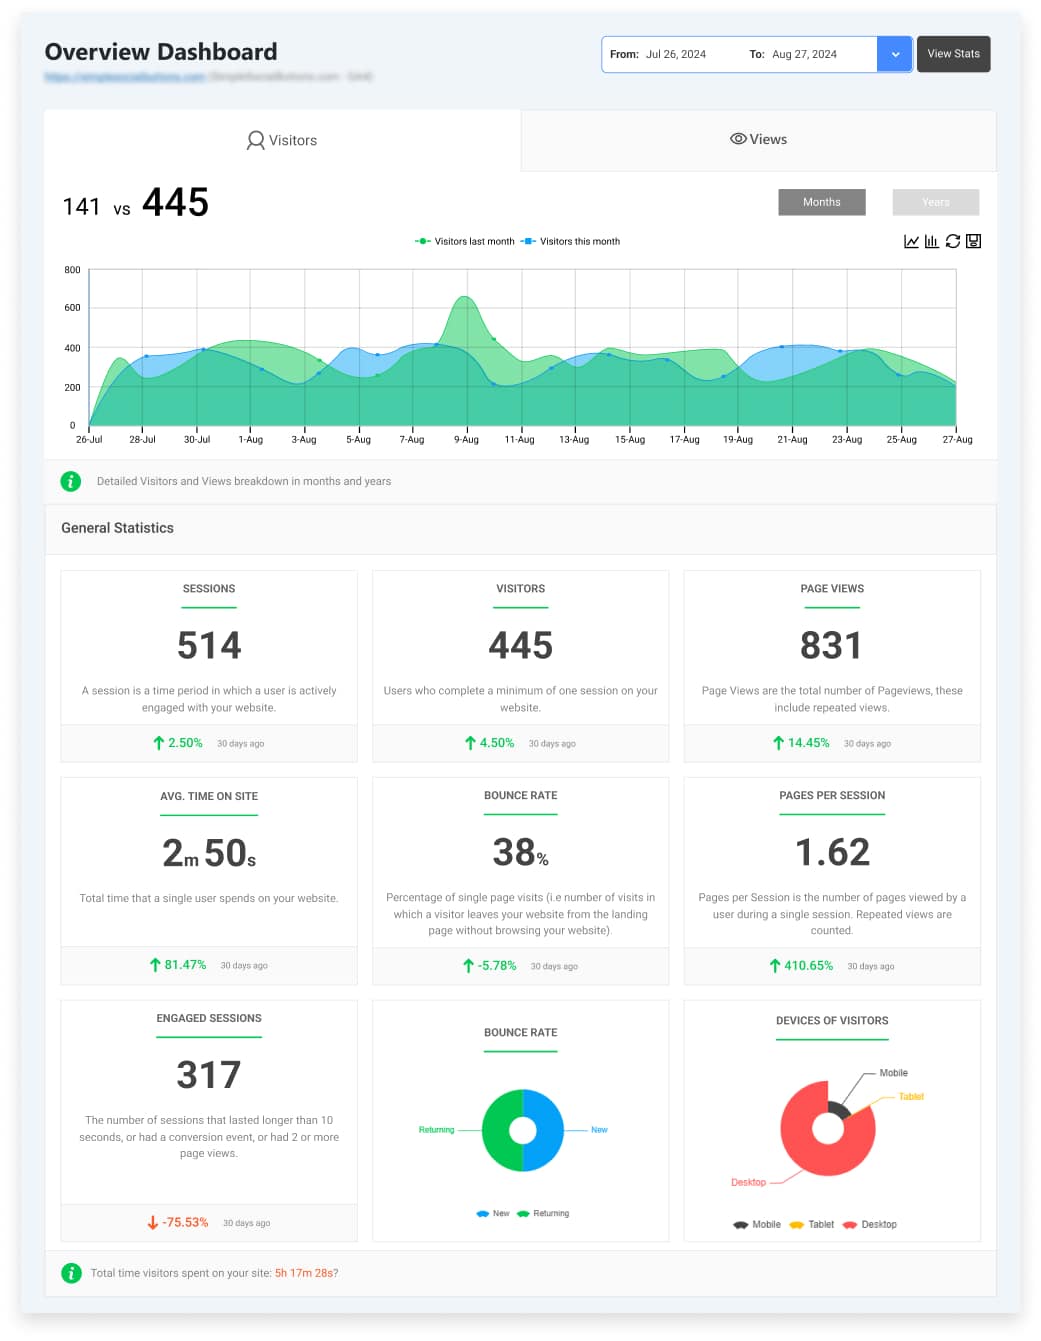
Once connected and configured, Analytify will automatically start tracking visitor data on your WordPress site. You can access real-time statistics and detailed reports within your WordPress dashboard or through the Analytify front-end interface.
Benefits of Using Analytify:
- Simplified Setup: No coding or technical expertise is required.
- Real-time Insights: Monitor visitor activity as it happens.
- Comprehensive Reports: Access detailed statistics on traffic sources, user behavior, and conversions.
- Customizable Dashboards: Tailor your analytics view to focus on key metrics.
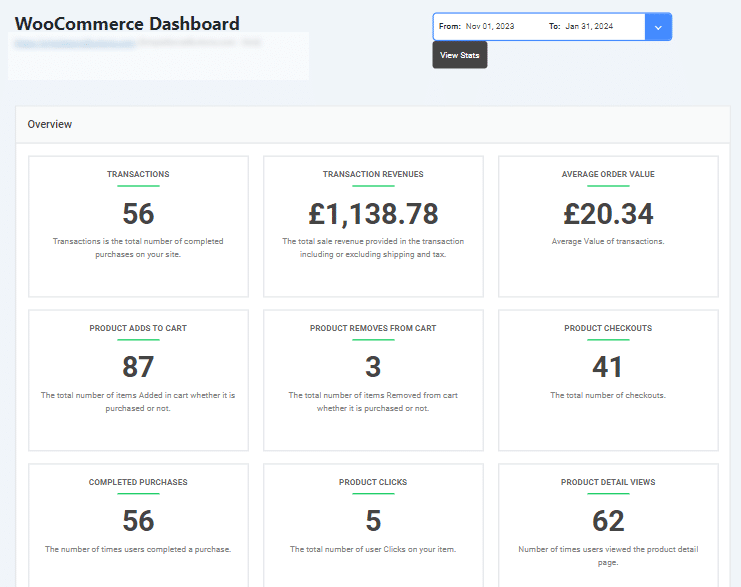
- eCommerce Tracking: Track product views, add-to-carts, and purchases (with compatible plugins).
Analytify provides a straightforward way to integrate Google Analytics into your WordPress site, empowering you to make informed decisions based on data-driven insights.
Conversion Bridge
Conversion Bridge simplifies the process of setting up conversion tracking, regardless of which plugins or analytics platform you are using.

With 1-click conversion tracking setup for 50+ WordPress plugins, from forms to e-commerce, you can be sending data into Google Analytics or any of the 15+ analytics or ad platforms is supports. No matter what your unique WordPress website project is using, you can have analytics and conversion tracking setup in less than 1 minute without any extra coding.
Key Features
- Adds main tracking tags for Google Analytics and other platforms like Plausible, Fathom, and many more.
- Set up conversion tracking easily with one click for 50+ plugins and other core WordPress features.
- Detailed conversion data sent to ad platforms like Google Ads, Meta, Pinterest, and TikTok.
- Accurately tracks complete product and revenue data to all connected platforms.
- Custom tracking events for any website element, such as clicks, scrolls, or time spent on a page.
- Conversion Journeys allow you to see the page-by-page interactions for every conversion to better understand your website visitors.
2. Manually Connect Google Analytics and WordPress with Code
If you’d prefer not to use a plugin, it’s also fairly simple to add the Google Analytics tracking code directly to your WordPress theme via your functions.php file.
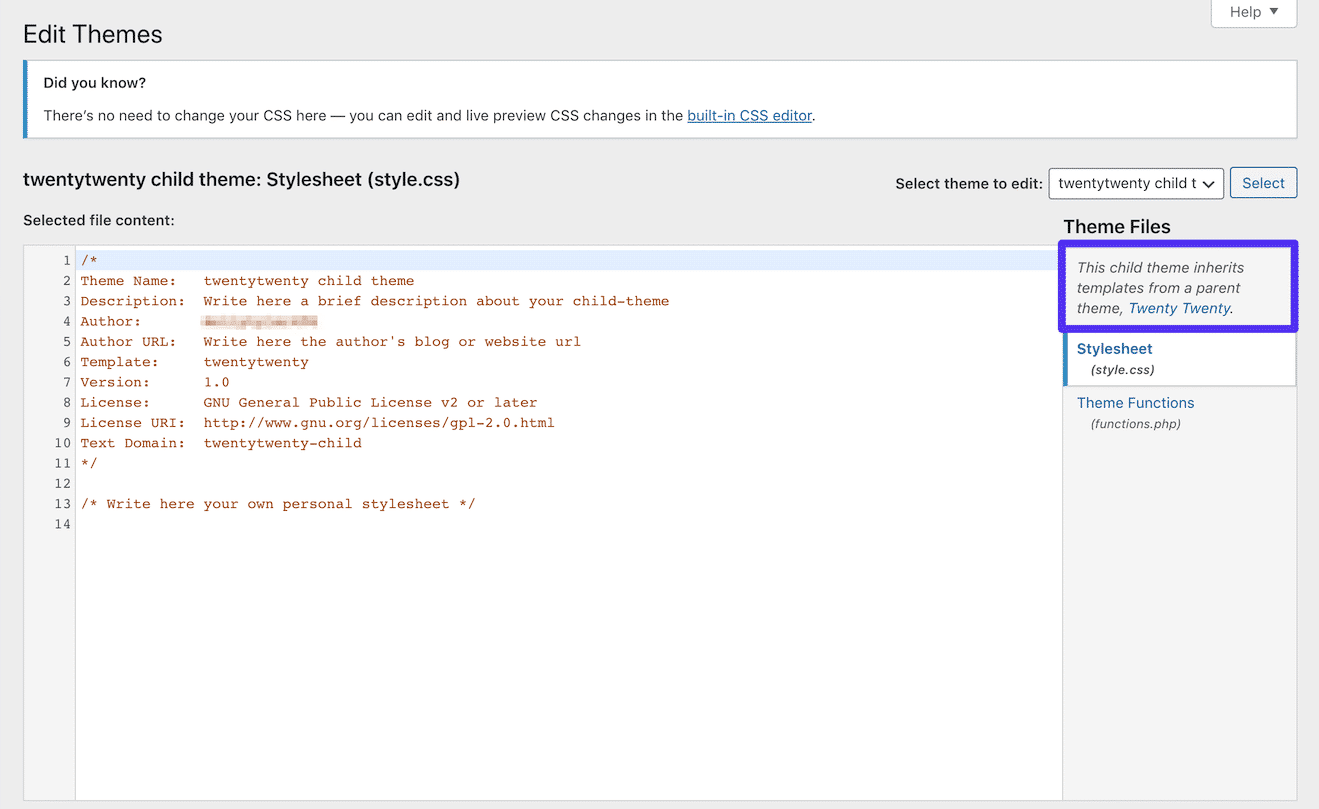
If you go the manual route, it’s essential that you use a child theme so that your tracking code won’t be overwritten every time you update your WordPress theme. Before you make any changes, though, it’s always good practice to make a backup.
Once your child theme is active, you’ll need to paste your Google Analytics Tracking Code right before the closing </head> tag in your header.php file.
To find your Google Analytics tracking code, go to your account and access your tracking info as we described in the previous method. You can then copy the script from the box under Google Site Tag:
To add it to your WordPress site, go to Appearance > Theme Editor. If your child theme is inheriting template files from its parent, you won’t see header.php here. You can click on the name of your parent theme in the file list to access it:
Once you’ve located and selected header.php, paste the Google Analytics Tracking Code right before the </head> tag in the Editor:
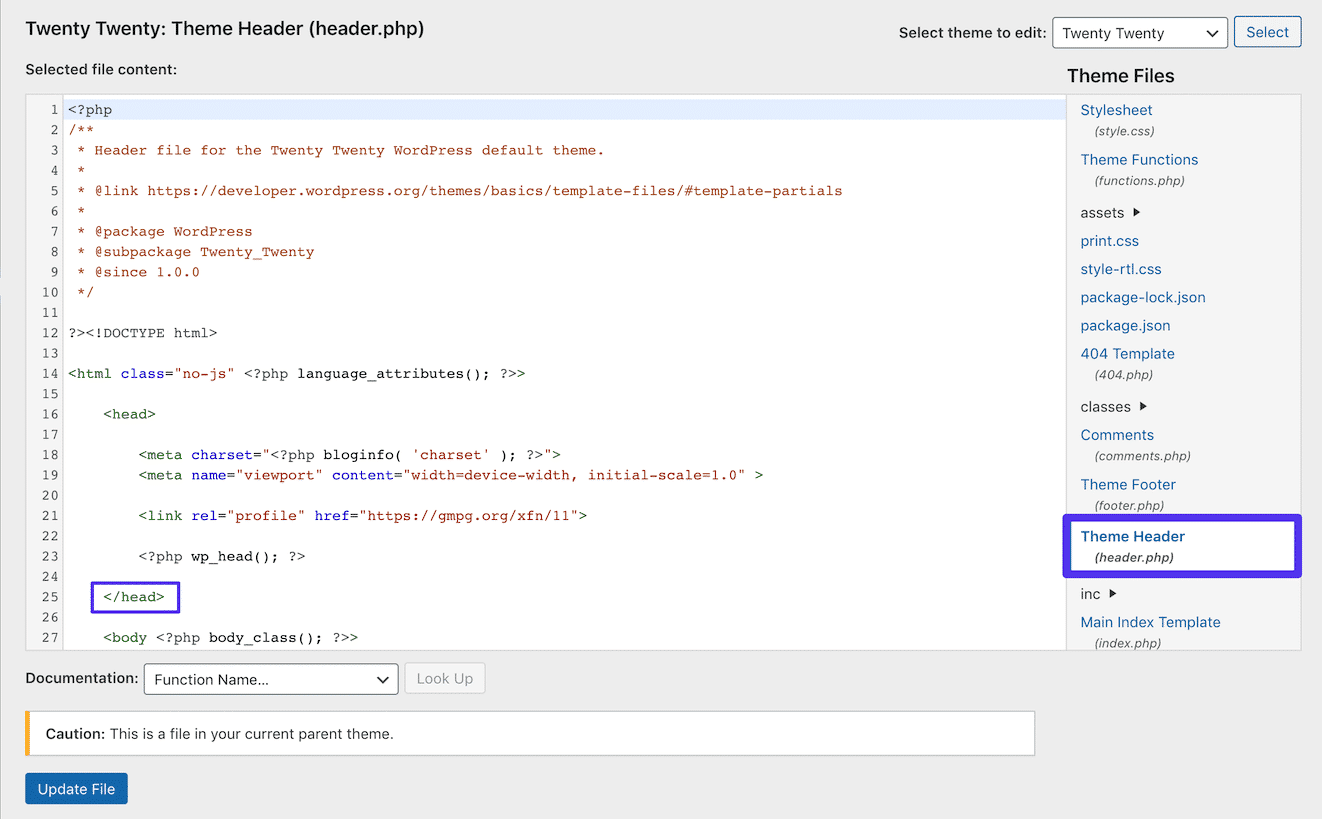
Then, make sure to click on the Update File button. Google Analytics tracking code is now being added to WordPress.
3. Integrate Google Analytics and WordPress with Google Tag Manager
Another method you can use to add Google Analytics to WordPress is using Google Tag Manager. This is really meant for sites that incorporate scripts for a variety of purposes, not solely analytics.
Google Tag Manager is a tag management system. It allows you to quickly and easily update tags and code snippets on your website or mobile app, such as those intended for traffic analysis and marketing optimization.
You can add and update scripts from the Tag Manager user interface, instead of editing site code in WordPress. This reduces errors and frees you from having to involve a developer when configuring tags.
The easiest way to do this is to use the free Google Tag Manager WordPress plugin. It currently has over 300,000 active installs and a five-star rating:

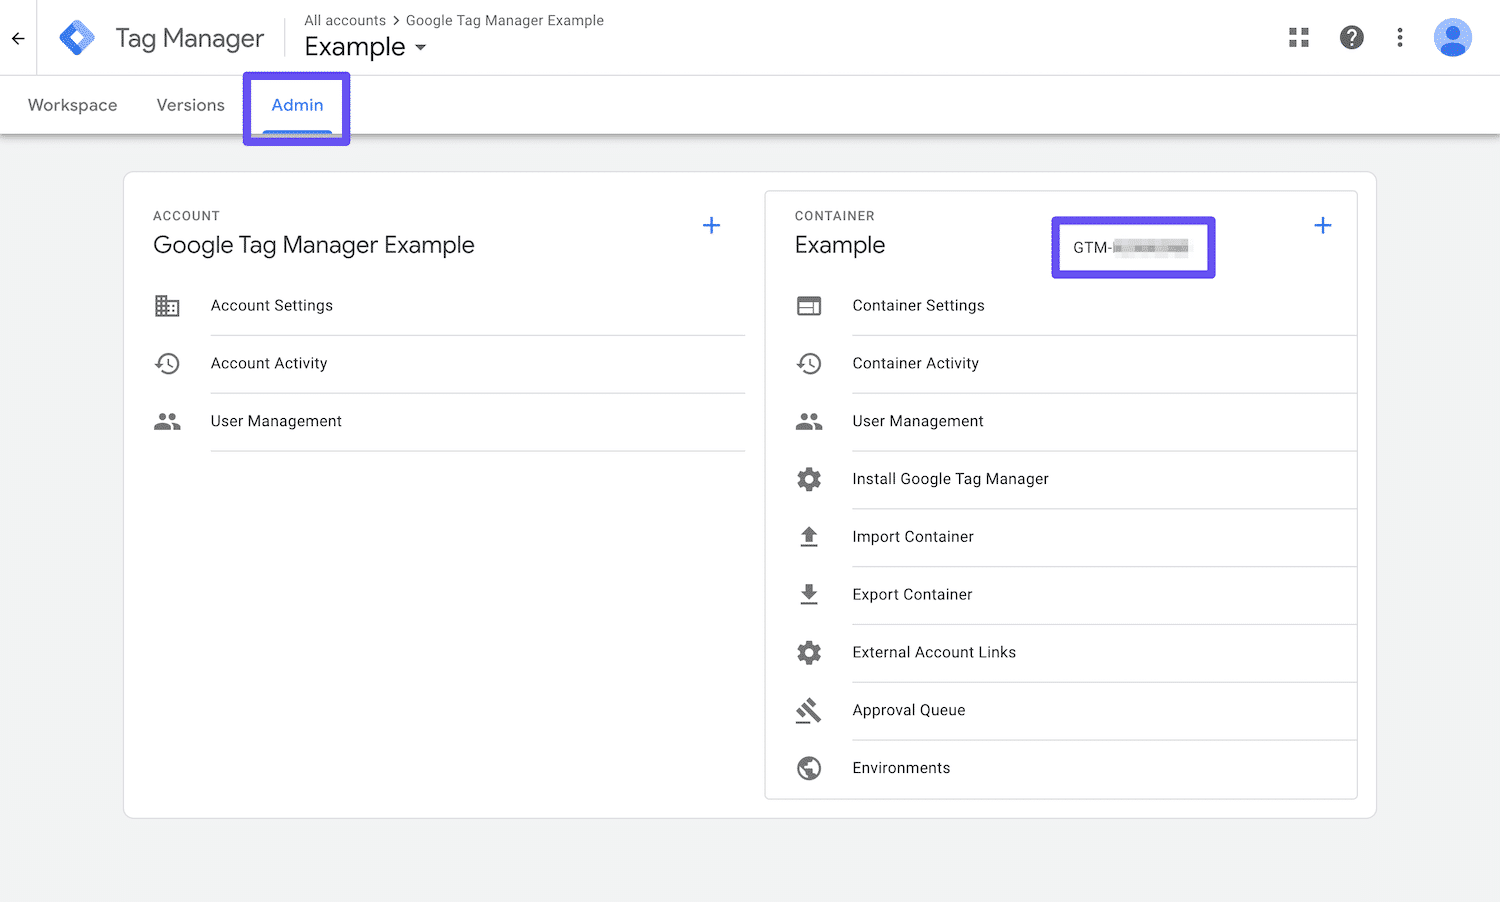
You can download the Google Tag Manager plugin from the WordPress repository or by searching for it under Plugins > Add New in your WordPress dashboard. You will then need to sign up for a Google Tag Manager account and create your first container.
Once you have completed the above steps, you can copy your container ID from the Google Tag Manager dashboard by navigating to the Admin tab and looking for a series of characters starting with GTM:
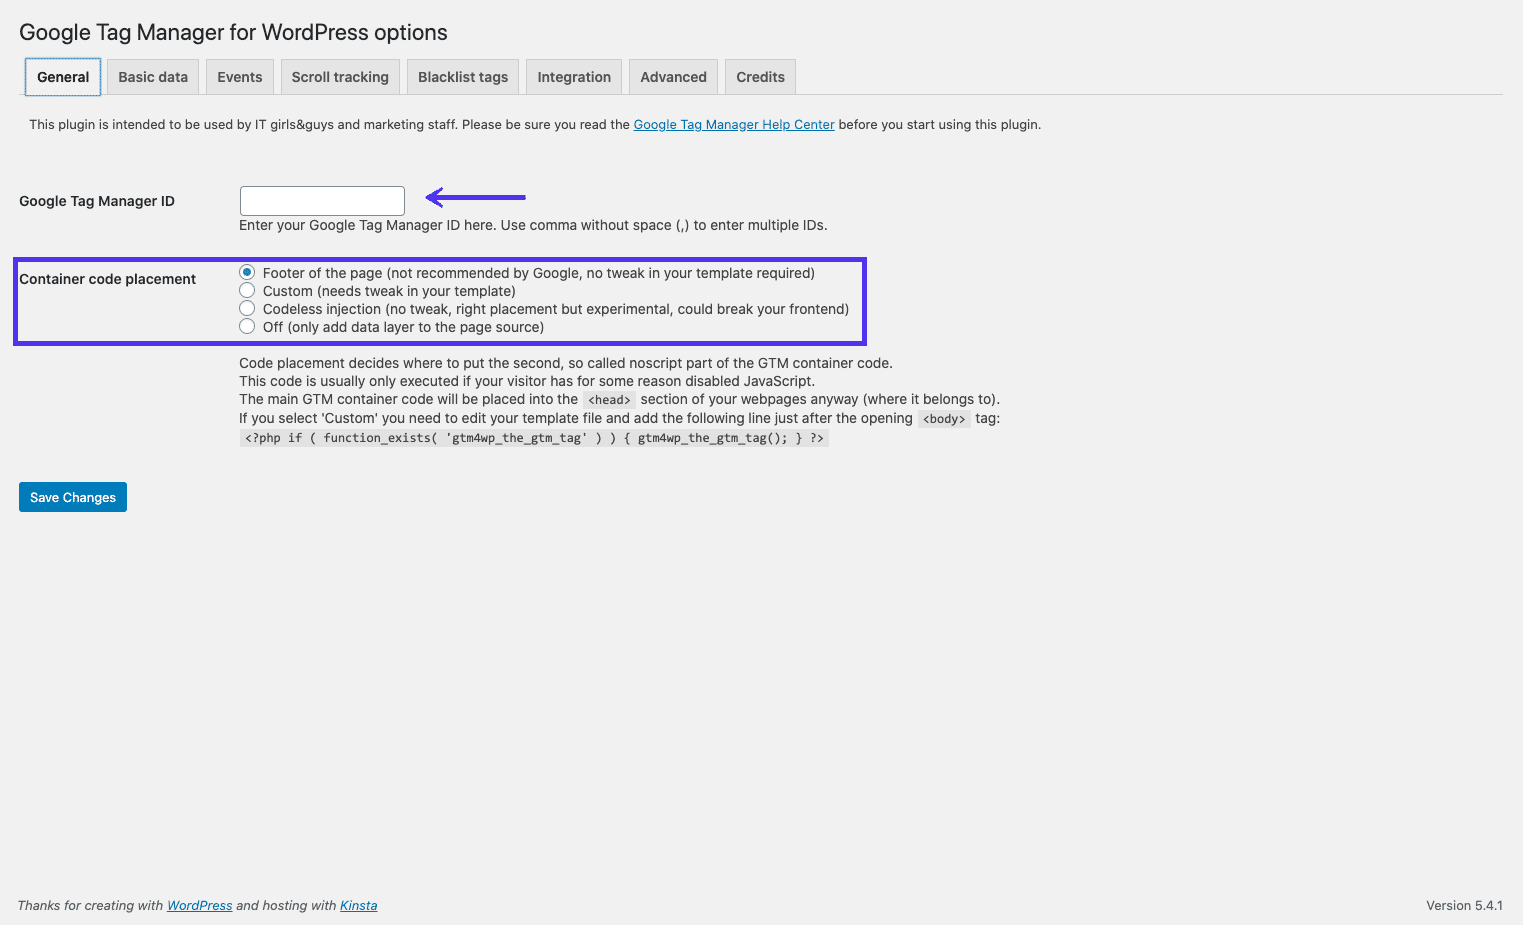
Then return to your WordPress site and paste your Google Tag Manager ID into the relevant field on the plugin’s settings page. You can get there by navigating to Settings > Google Tag Manager:
Any tag you set up in Google Tag Manager (including the one for Google Analytics) will now work on your WordPress site via the plugin.
Adding Google Consent Mode for Compliance (Optional)
If your site serves visitors in regions with strict privacy laws (such as the EU’s GDPR or California’s CCPA), you may also want to enable Google Consent Mode alongside your Tag Manager setup.
Consent Mode allows Google services like Analytics and Ads to adjust how they track users depending on whether someone accepts or rejects cookies. This ensures you stay compliant while still collecting useful aggregated data.
- Basic Consent Mode: Google tags remain blocked until a visitor interacts with your cookie banner. Tracking only starts if they give consent.
- Advanced Consent Mode: Google tags always load, but if consent is denied, only “cookieless pings” are sent. These signals let Google model conversions without storing personal data.
Since Consent Mode doesn’t provide its own banner, you’ll need a cookie consent plugin to collect user choices and pass them to Google. Popular options include:
- Complianz – GDPR/CCPA Cookie Consent (full-featured, integrates directly with Google Tag Manager)
- CookieYes | GDPR Cookie Consent (lightweight and widely adopted)
Once activated, these plugins automatically connect your consent banner with Google Tag Manager or Analytics so that user preferences are respected.
4. Sync Google Analytics Locally for Performance Reasons
The final method you can use is to sync the Google Analytics script locally on your own server. Please be aware that this method isn’t supported by Google.
However, there are a couple of reasons you might want to do this. First, syncing Google Analytics locally can reduce your external HTTP requests. Additionally, you’ll have full control over the caching of the file so you can use your own server’s cache headers.
This is important for improving website performance. If you use Google PageSpeed Insights, you may have seen a “Serve static assets with an efficient cache policy” warning for your Google Analytics script:
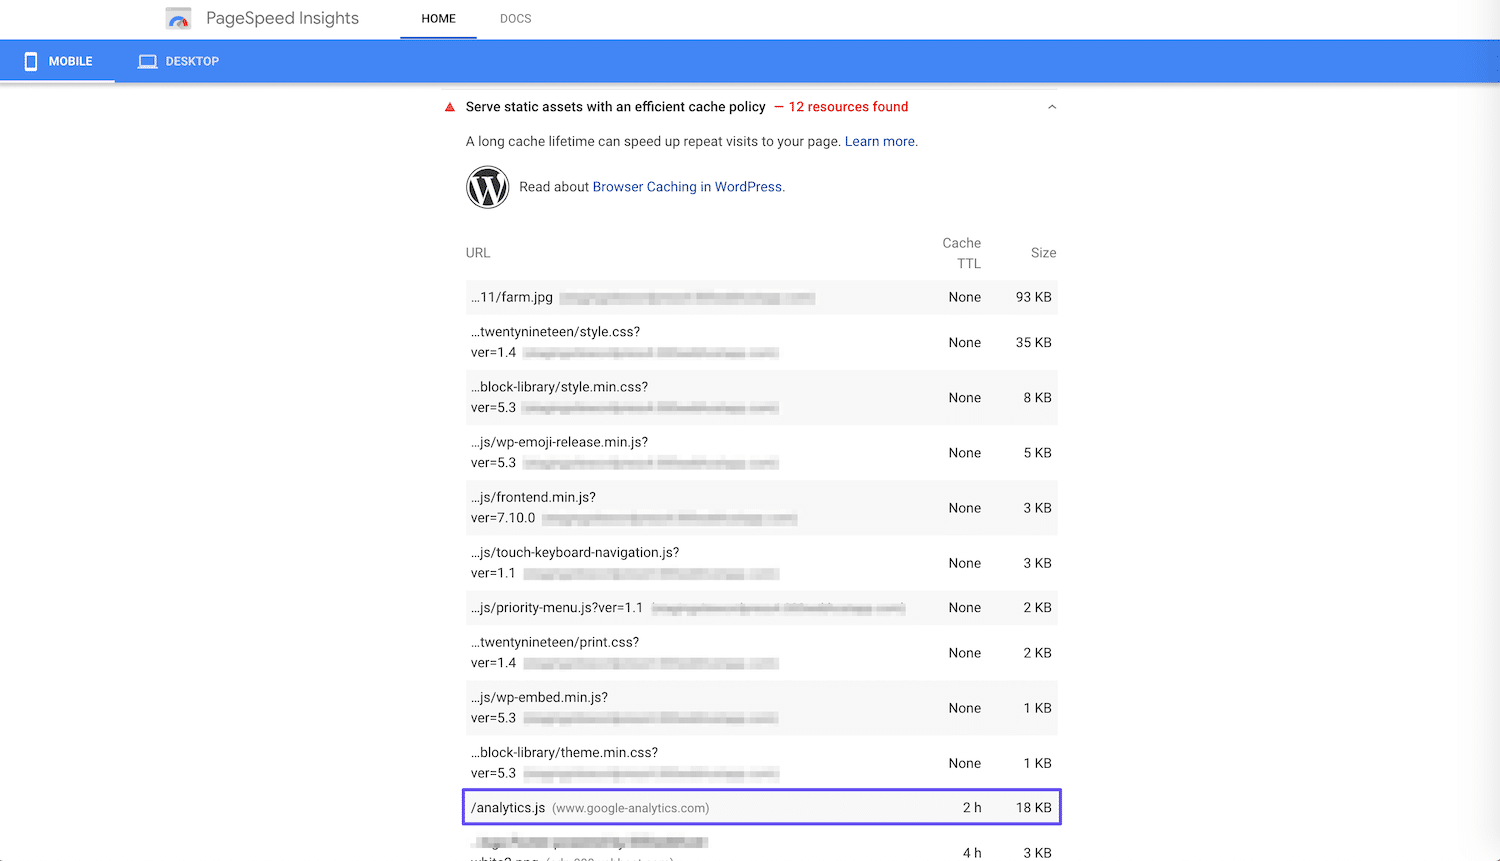
The problem is that by default, Google Analytics has a two-hour cache time, as you can see in the warning above. This is likely because if Google needs to modify something on its end, it wants all users to have access to the changes as fast as possible.
By hosting the Google Analytics script on your own server, you can change the cache time to improve performance.
Syncing Google Analytics Locally with the Complete Analytics Optimization Suite
To get started, we recommend using the Complete Analytics Optimization Suite (CAOS), a free plugin created and developed by Daan van den Bergh. It currently has over 20,000 active installs with a five-star rating:

You can download it from the WordPress repository, or by searching for it under Plugins > Add New in your WordPress dashboard.
The CAOS allows you to host your Google Analytics JavaScript file (analytics.js) locally and keep it updated using wp_cron(). Other features enable you to:
- Anonymize the IP address of your visitors.
- Set an adjusted bounce rate.
- Change the placement of the Google Analytics script (header or footer).
You’ll need to deactivate any analytics plugin you already have installed before using it.
When you install CAOS and enter your Google Analytics Tracking ID, the plugin adds the necessary code for Google Analytics to your WordPress website. It then downloads and saves the analytics.js file to your server, and keeps it updated using a scheduled script in wp_cron().
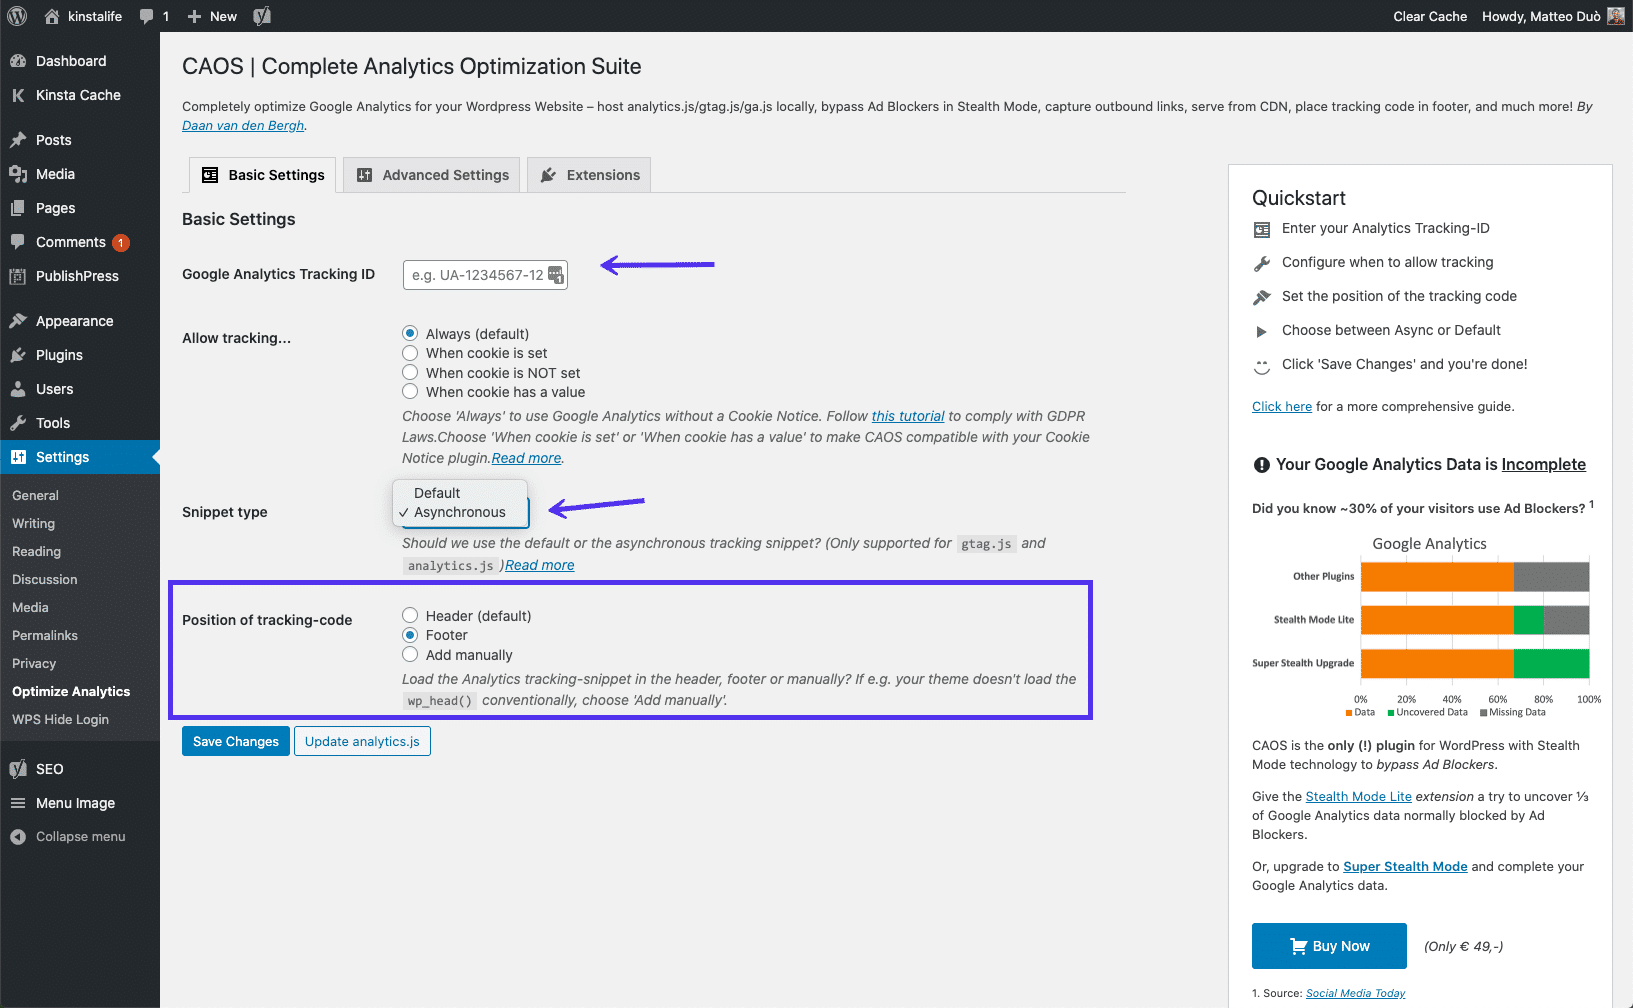
We recommend setting the script to load in the footer by going to Settings > Optimize Analytics and selecting the Footer option under Position of tracking code:
It’s important to note that CAOS doesn’t work with other Google Analytics plugins.
Syncing Google Analytics Locally With Perfmatters
Another plugin you can use for local analytics is Perfmatters. This is a premium website performance optimization plugin created by Brian Jackson and his brother Brett:
Among its many features, there’s also an option to sync Google Analytics locally by entering your tracking ID. Like CAOS, you can also set the script to load in your footer instead of your header.
Summary
Google Analytics is a vital tool for website owners and managers, although not the only analytics tool available you could use.
Tracking your site’s user activity, referral sources, and other data is key to growing your audience and your brand. To connect Google Analytics to your WordPress site, you can use one of the following ways:
- Add Google Analytics to WordPress with a plugin (Site Kit or GA Google Analytics).
- Manually connect Google Analytics and WordPress by adding code directly to your theme.
- Integrate Google Analytics and WordPress using Google Tag Manager (easy with a plugin such as Google Tag Manager WordPress).
- Sync Google Analytics locally for performance reasons (using the CAOS or Perfmatters plugins).
Have any thoughts or different methods you use to add Google Analytics to WordPress? If so, we would love to hear them!

Head of Content at Kinsta and Content Marketing Consultant for WordPress plugin developers. Connect with Matteo on Twitter.

