Logging In
When you sign up or log in to MyKinsta, you can choose to:
- Use a MyKinsta account to log in, or
- Use Single Sign-On (SSO) via your company’s Identity Provider (IdP), or
- Use Single Sign-On (SSO) via your Git provider.
When creating a MyKinsta account, you must use a permanent email address. To complete the signup process, you’ll need to verify your email by entering the authentication code we send you. Disposable email addresses are not supported and cannot be used to create or access an account. If you have any issues receiving the authentication code, please contact our Support Team.
If you choose to log in with your MyKinsta account, two-factor authentication is required as part of the login process.
If you need to reset your MyKinsta password on your user account, you can start the process on the MyKinsta login page.
Two-Factor Authentication (2FA)
Kinsta utilizes Two-Factor Authentication (2FA) to safeguard your MyKinsta account against unauthorized access, providing you with enhanced security and greater peace of mind. 2FA requires an additional verification code sent to your email or available through an authentication or password manager app. This extra step ensures that even if someone gets your password, they won’t be able to log in without the code from your trusted device or account.
Every time you log in to MyKinsta, you’ll be prompted to enter a six-digit verification code, which can be received either by email or through an authenticator app. If you’re using an authenticator app, open it, find the 2FA code, enter it into the 6-digit verification code field, and click Login. If you’re using a password manager like 1Password, the code should be automatically copied to your clipboard, allowing you to paste it in after the first login page.
If you trust the device you’re using and select Don’t ask for a code on this device, you won’t need to enter an authentication code for 30 days, as long as you continue logging in with the same browser and IP address. After 30 days, we’ll prompt you for a code again to help keep your account secure.
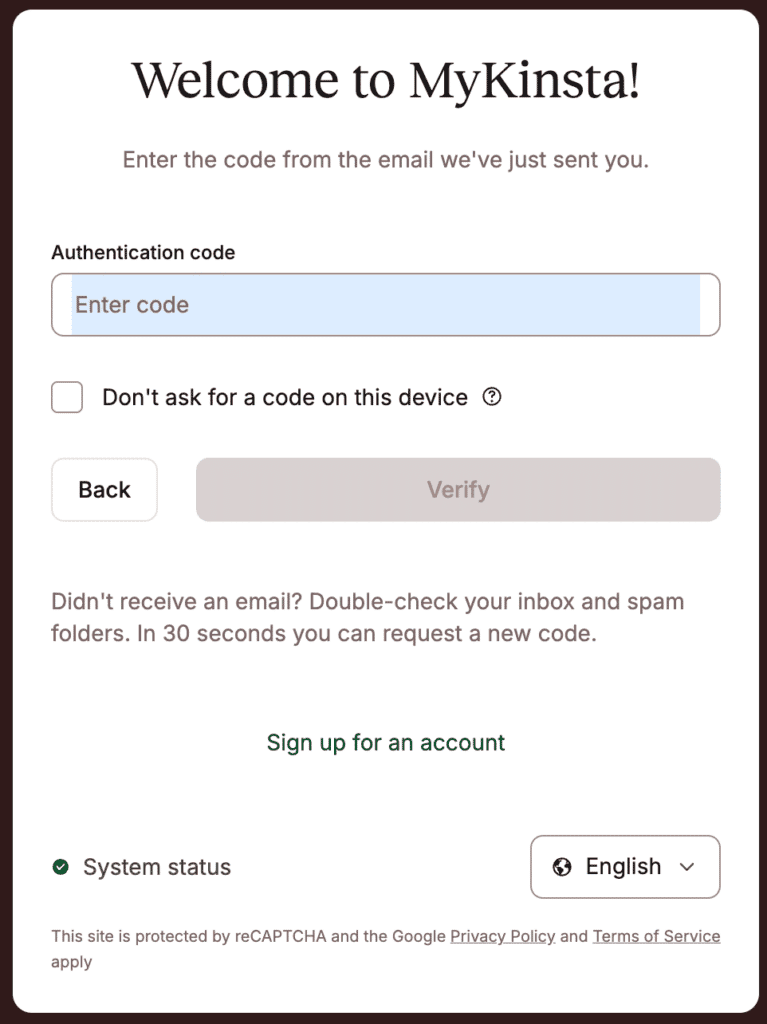
Email authentication
When you create your MyKinsta account and log in for the first time, your email is used as the default authentication method. A one-time verification code will be sent to your email address; simply enter this code in MyKinsta and click Verify to continue. Each code can only be used once and is valid for 30 minutes. If a code is entered incorrectly ten times in a row, it will be reset.
If you don’t receive the email, check your spam or junk folder. After 30 seconds, you’ll have the option to click Request a new code to receive another one. If you’re still having issues after requesting a new code, contact our Support Team.
If you prefer to use an app for authentication, you can enable App authentication.
App authentication
If you want to authenticate your MyKinsta login with an app instead of an email, click your username in the top right corner, then select User settings.

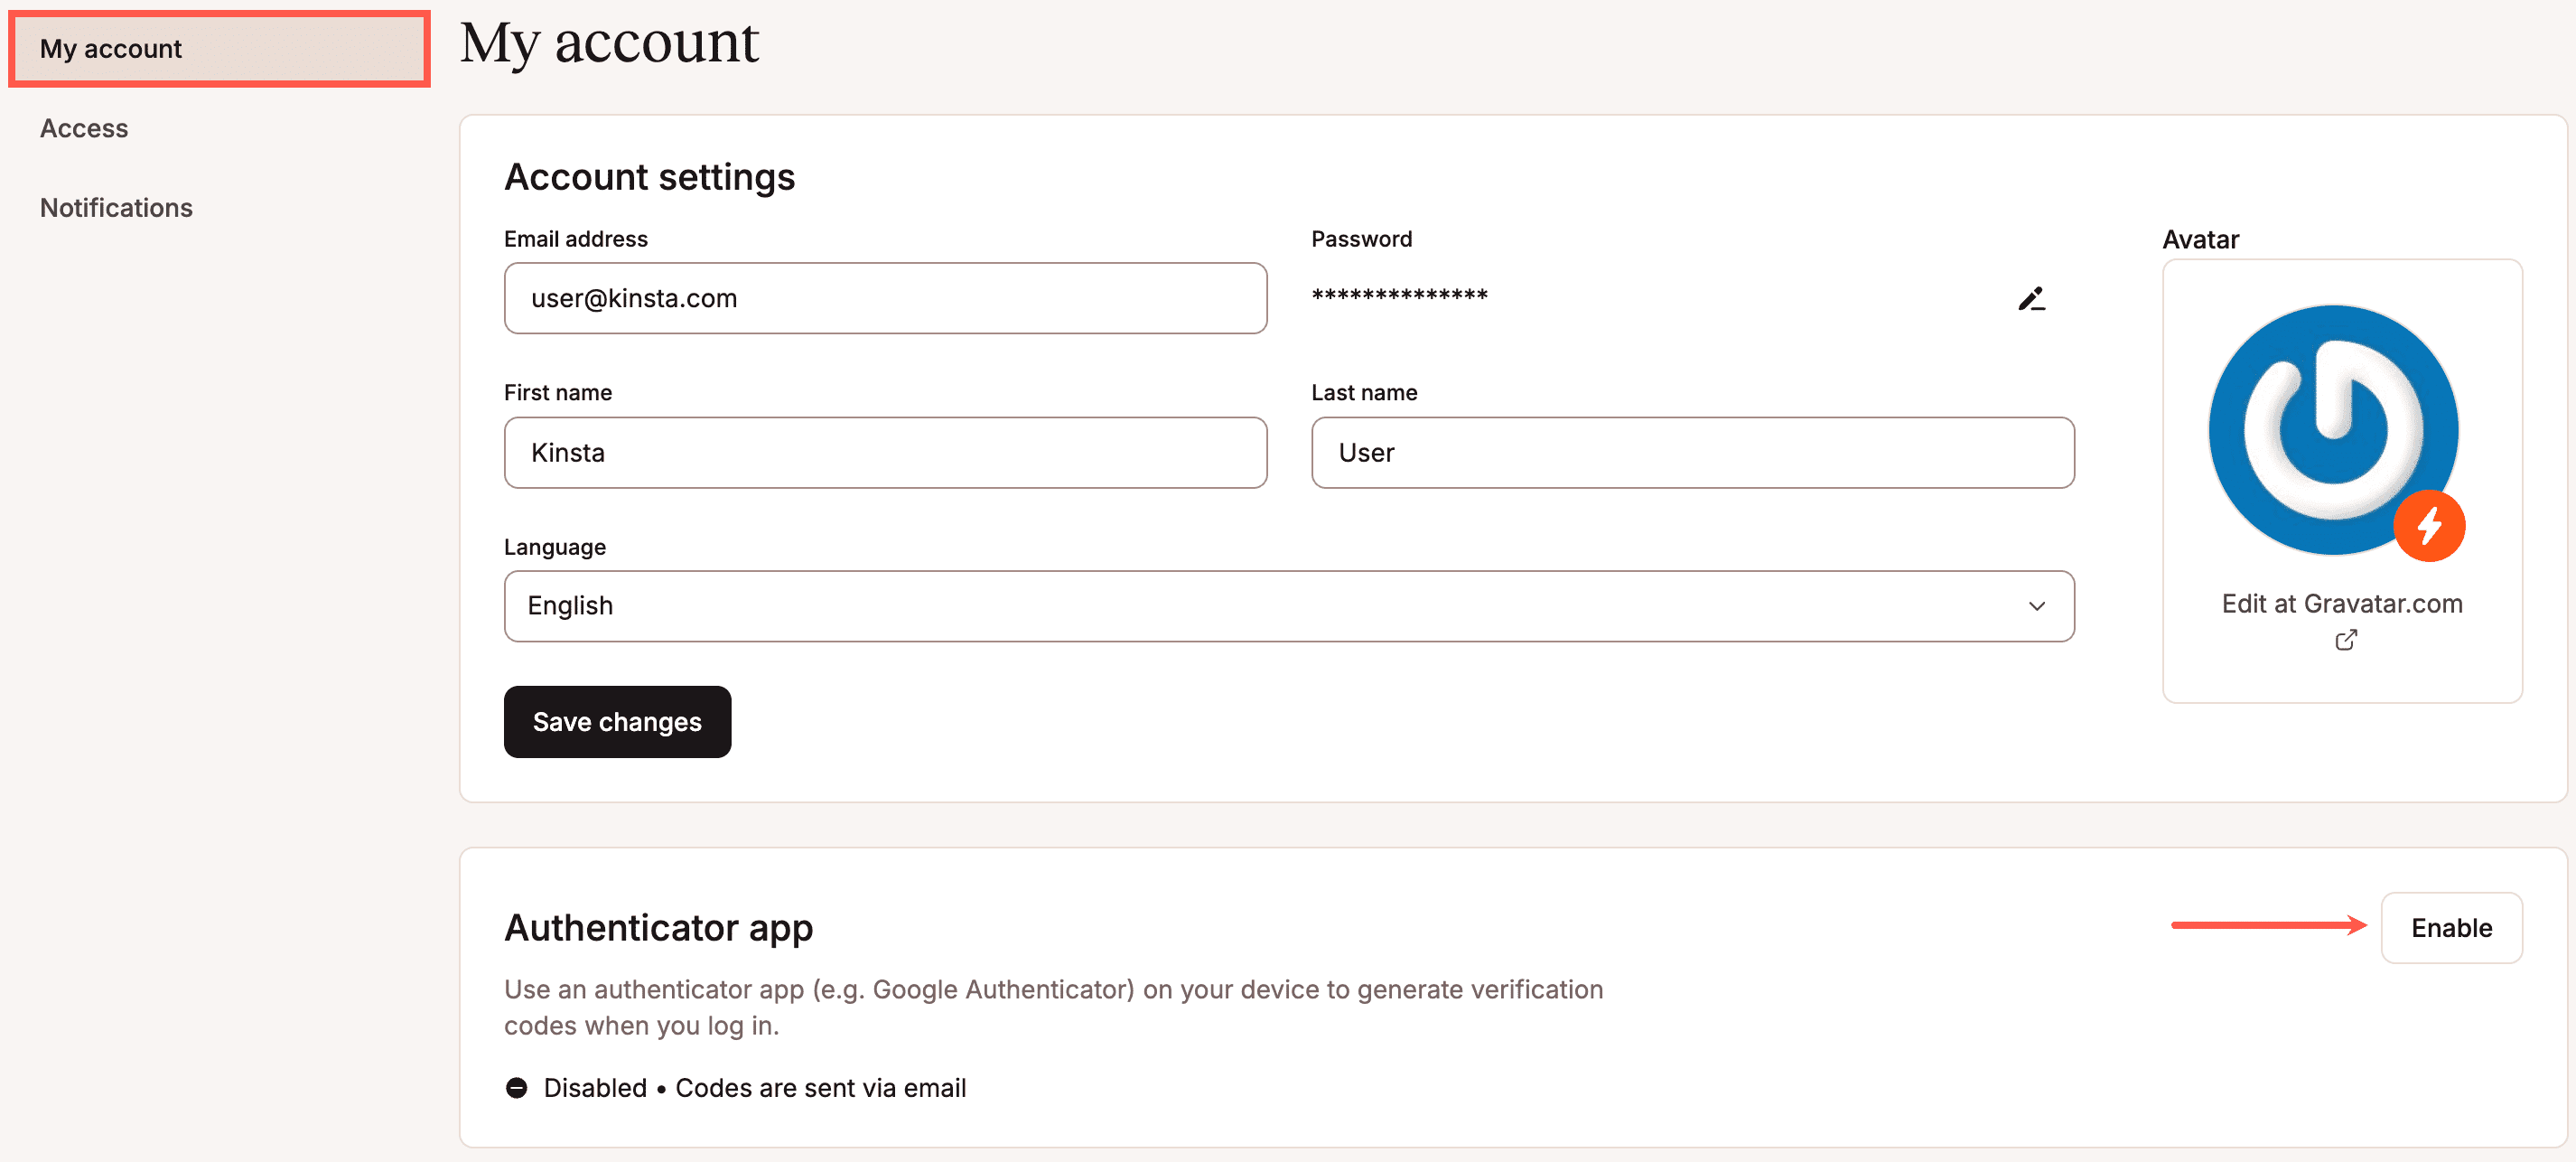
On the My account page, within Authenticator app, click Enable.
You will then be prompted to scan a QR code with an authenticator app. If you’re using a password manager like 1Password or LastPass, we recommend using the built-in 2FA feature in those apps. Otherwise, you can use an app on your mobile device, such as Google Authenticator. If you encounter any issues scanning the QR code, you can enter the 16-digit code displayed below the QR code.
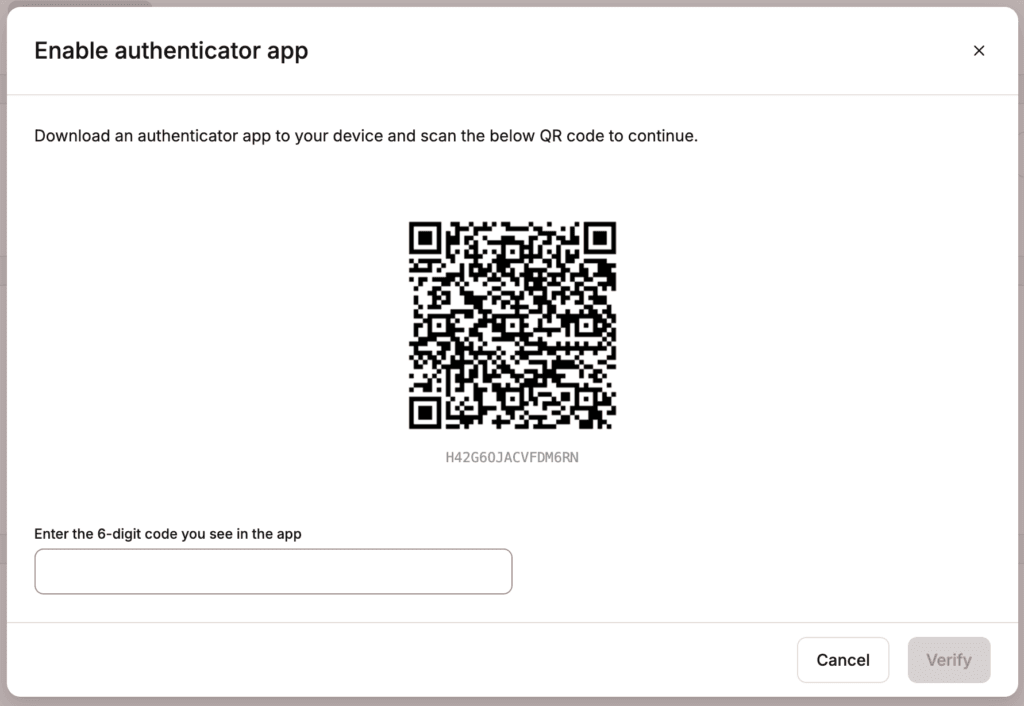
Once you scan the QR code, you app should provide you with the 6-digit code to enter in MyKinsta, when you enter the code, click Verify.
How to add MyKinsta 2FA to 1Password
If you’re already using 1Password to manage passwords, we recommend using the built-in 2FA feature.
In the 1Password app, navigate to the login profile for your MyKinsta account and click Edit.
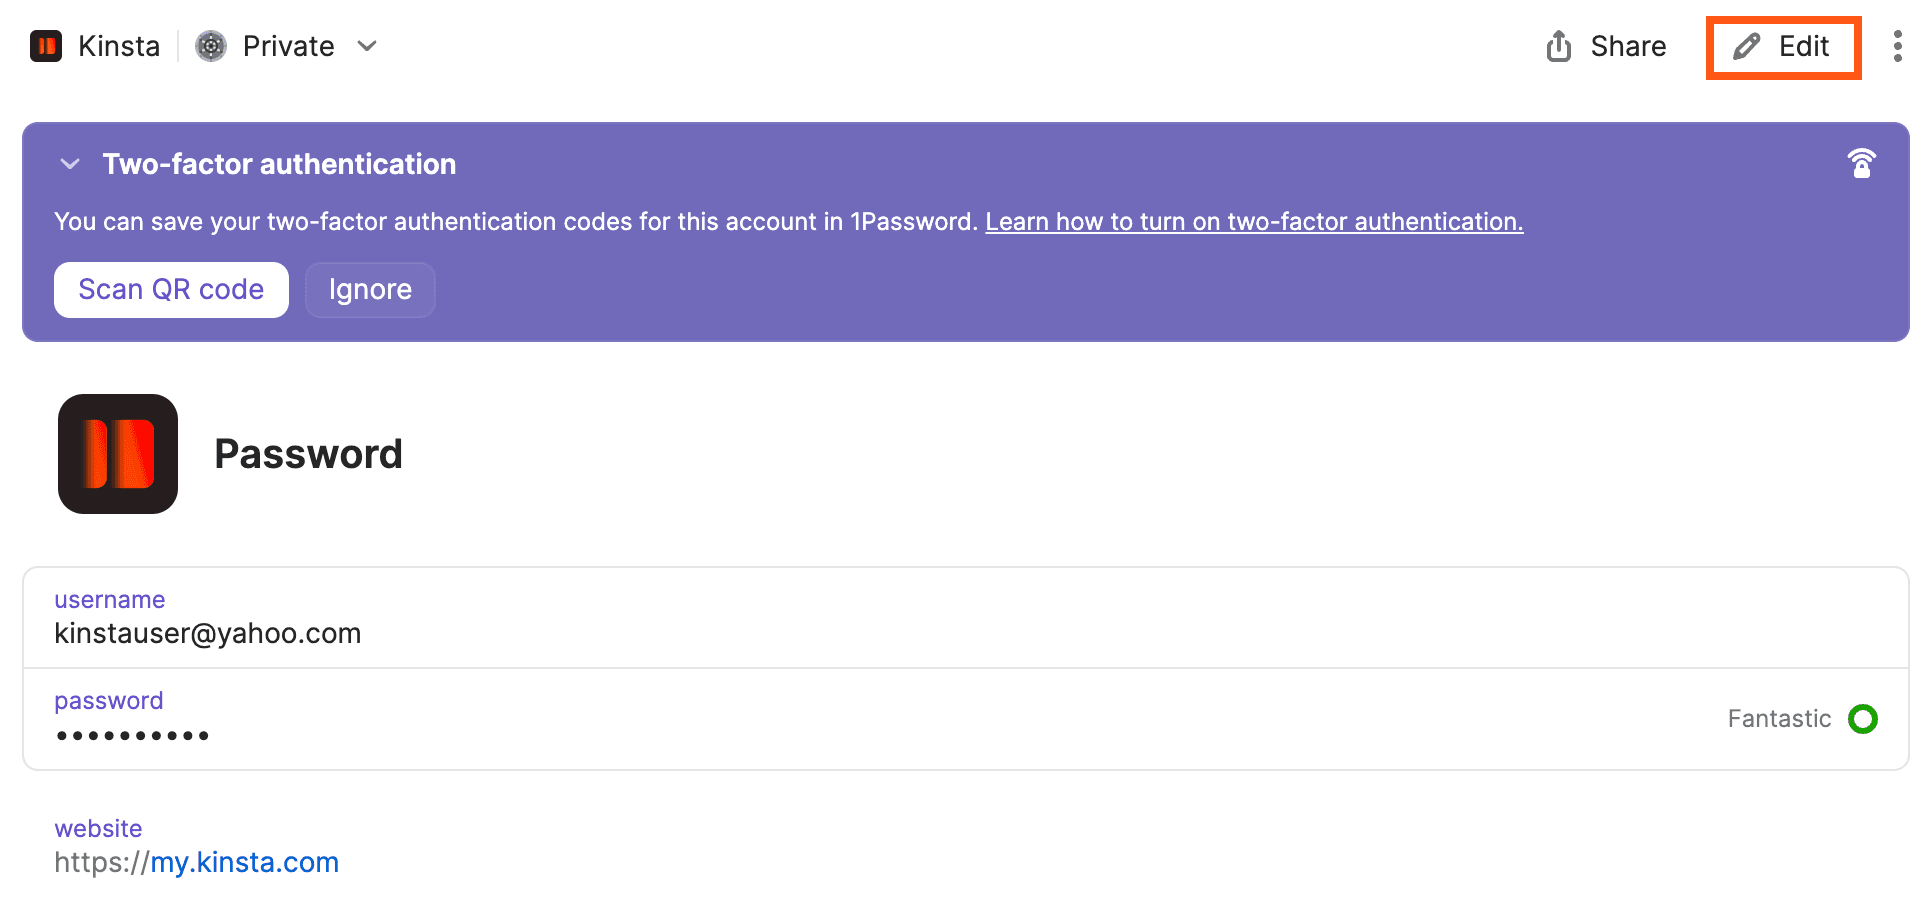
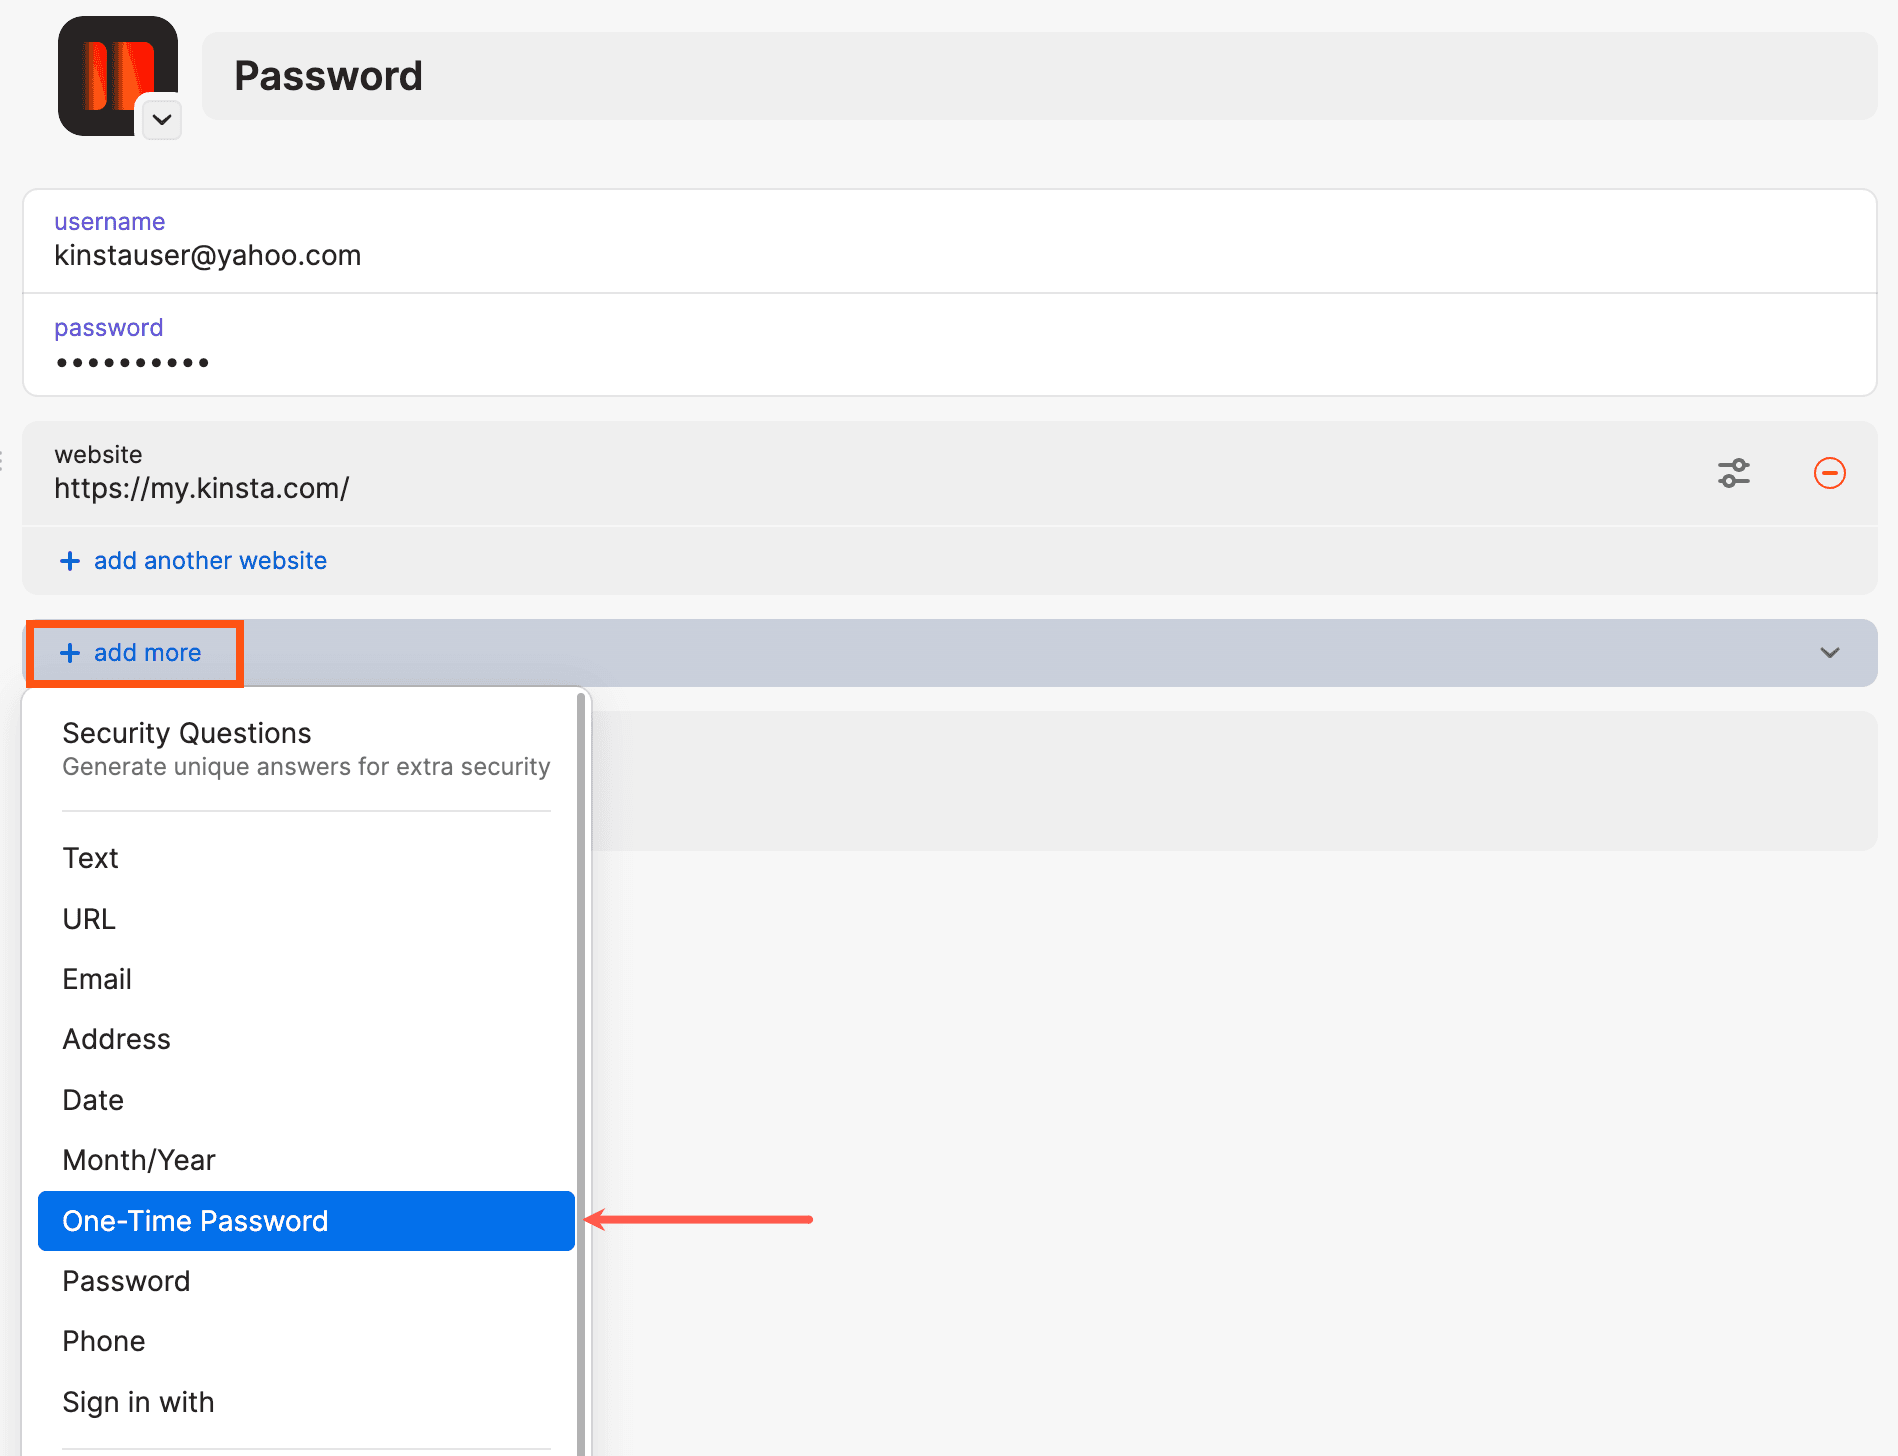
Next, click on the New Field dropdown and select the One-Time Password option.
Next, click on the QR code icon in the newly created One-Time Password field to activate 1Password’s QR code scanner.
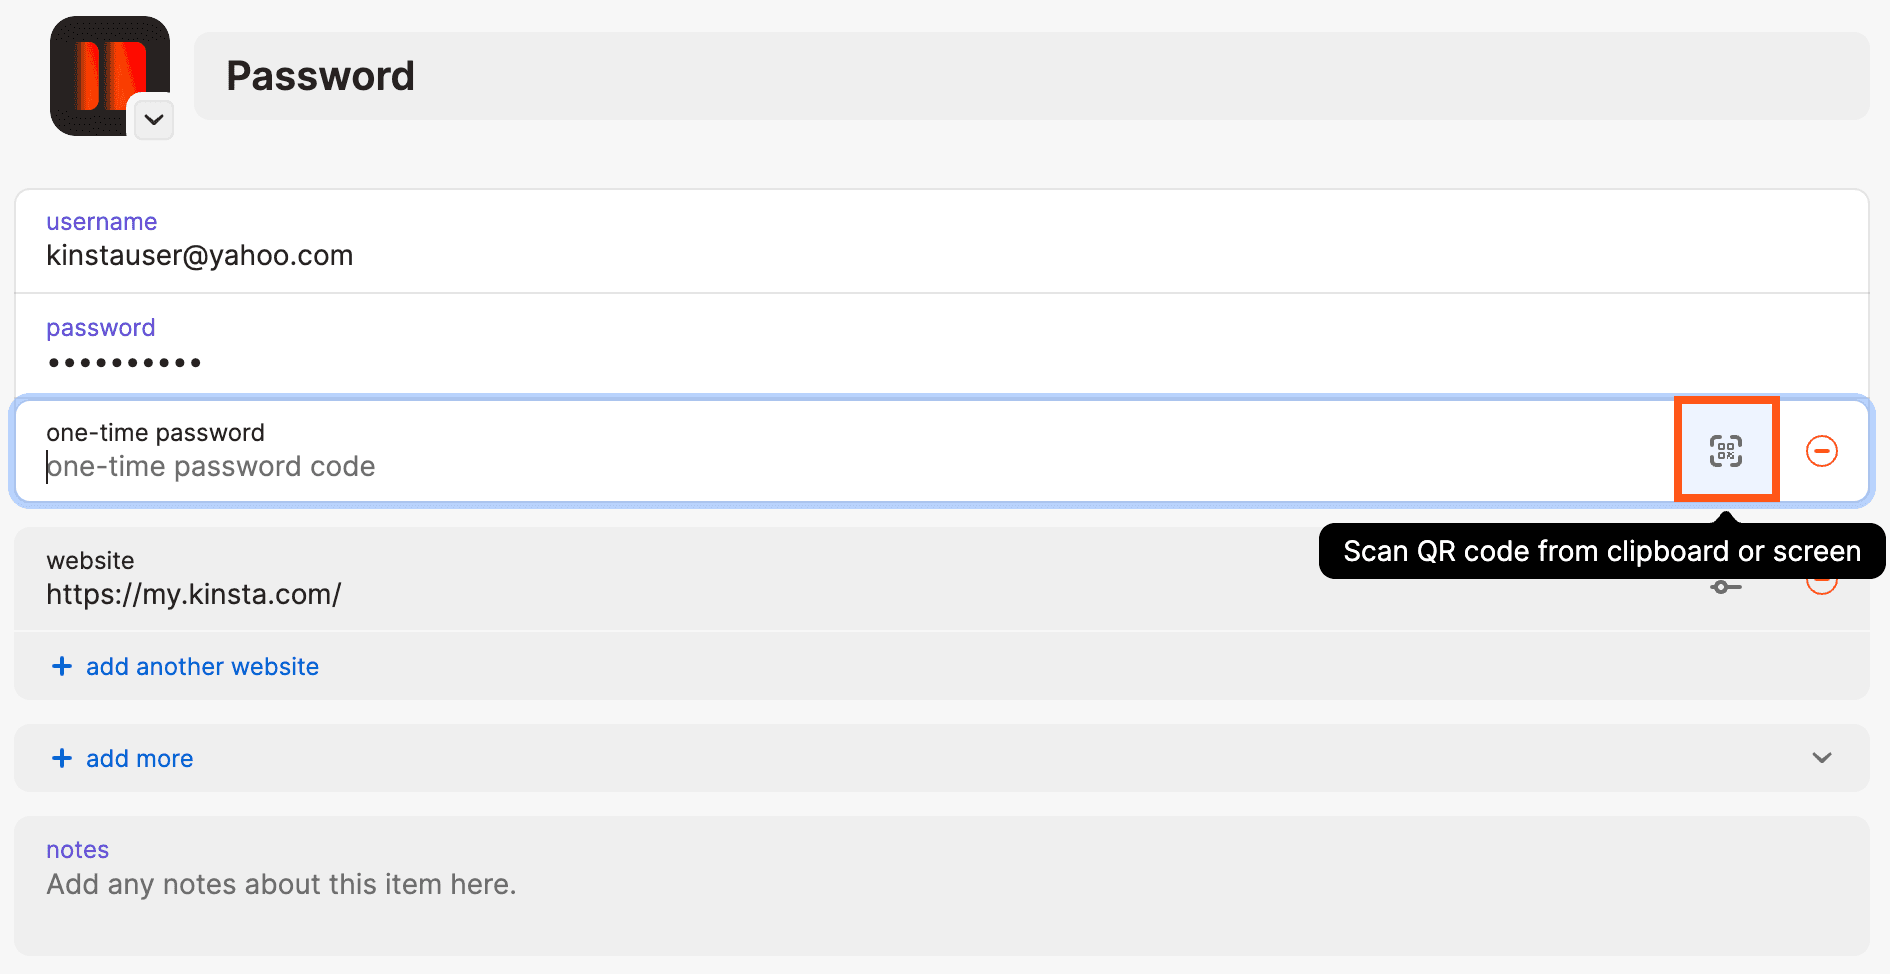
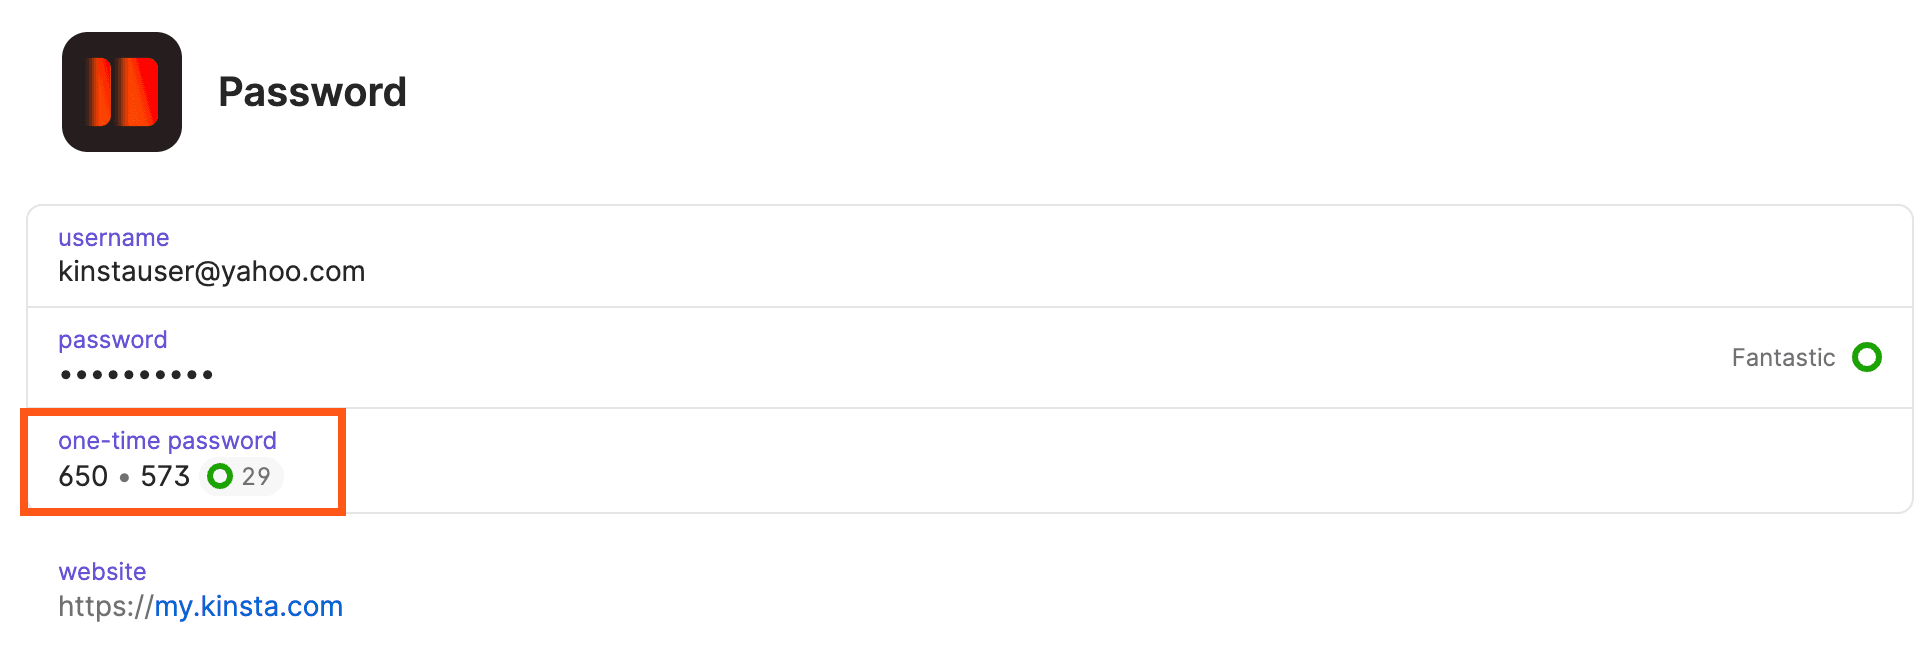
1Password should identify any QR codes on your screen and display the message One-time password detected on screen. Click Save. You should now see a one-time password field in the 1Password login profile for your MyKinsta account. To complete the 2FA setup process in MyKinsta, copy the one-time password into the Enter the 6-digit code you see in the app field in MyKinsta, and press Verify.
How to add MyKinsta 2FA to Google Authenticator
Google Authenticator is a 2FA app that’s available for both iOS and Android devices. To add MyKinsta 2FA to Google Authenticator, press the + button in the upper right corner of the Google Authenticator app and press Scan Barcode.
Next, use the camera on your mobile device to scan the QR code in MyKinsta. After scanning the QR code, enter the six-digit code from Google Authenticator into the Enter the 6-digit code you see in the app field in MyKinsta, and press Verify.
How to recover your 2FA-protected MyKinsta account
If you have lost access to your authenticator app and cannot log in to MyKinsta, follow the steps below, and our Support team can help you regain access to your account:
- Send an email to [email protected] from the email address on file in your MyKinsta account. If you use [email protected] to log in to MyKinsta, send us an email from [email protected]. In the email, let us know you’ve been locked out and need to regain access to your account.
- Our Support team will verify your email address to make sure it matches the one we have on file.
- Our Support team will ask you to provide the last 4 digits and the expiration date of the credit card we have on file for the account.
- After successfully verifying your email address and credit card details, our Support team will remove the authenticator app protection from your account. You can then log in to MyKinsta and use email authentication to access your account.
Single Sign-On (SSO) via Identity Provider
If your company uses Kinsta’s Single Sign-On (SSO), you can sign in using your existing company credentials. You do not need to complete Kinsta’s 2FA, as authentication is handled directly by your company’s Identity Provider (IdP), such as Okta, OneLogin, or Google Workspace.
If your company has enabled Just-In-Time (JIT) provisioning for SSO, you can access your company in MyKinsta without an invitation. If JIT is not enabled, you’ll still need to be invited before you can sign in.
When mandatory SSO is enabled, you’ll automatically be directed to log in through your IdP. If it’s not enabled, and you prefer to sign in via SSO, click Sign in with SAML SSO on the MyKinsta login page.

Single Sign-On (SSO) via Git
Single Sign-On (SSO) saves you time by allowing you to log in with your Git service provider login without signing up separately for a Kinsta account.
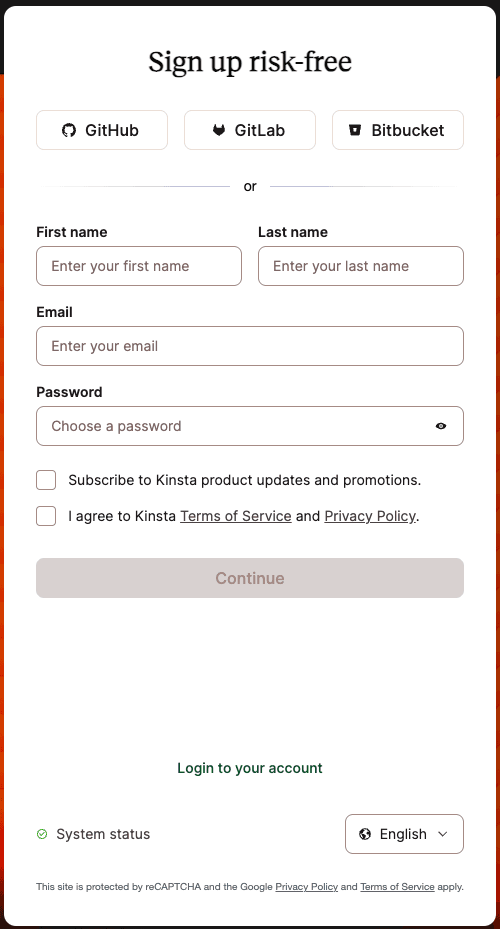
Access MyKinsta with your Git provider login
- To get started, head over to the Kinsta Signup page.
- Select your Git provider (GitHub, GitLab, or Bitbucket).
- When prompted, log in to your Git provider and connect Kinsta to your account.
- Depending on your provider, when you are returned to the signup page, you may need to enter your email address and name to continue logging in to MyKinsta.
Link your Git service to your MyKinsta account
- Log in to MyKinsta, click your username, then click User settings.
- On the My Account page, scroll down to the Connect with Git service section and click on the Git service provider you want to connect to and use for SSO with your MyKinsta account.

Connect your Git service to MyKinsta. - When prompted, log in to your Git provider and connect Kinsta to your Git service account.
- Now you can log in to MyKinsta using SSO or your MyKinsta email address and password.
Disconnect your MyKinsta user from a Git provider
- Log in to MyKinsta, click your username, then click User settings.
- In My Account scroll down to the Connect with Git service section and click Revoke access for the Git service you want to disconnect from MyKinsta.

Remove access to your Git service.
Reset your MyKinsta password
If you need to reset your MyKinsta password, you can start the process on the MyKinsta login page.
- Click the Forgot password link on the MyKinsta login page.
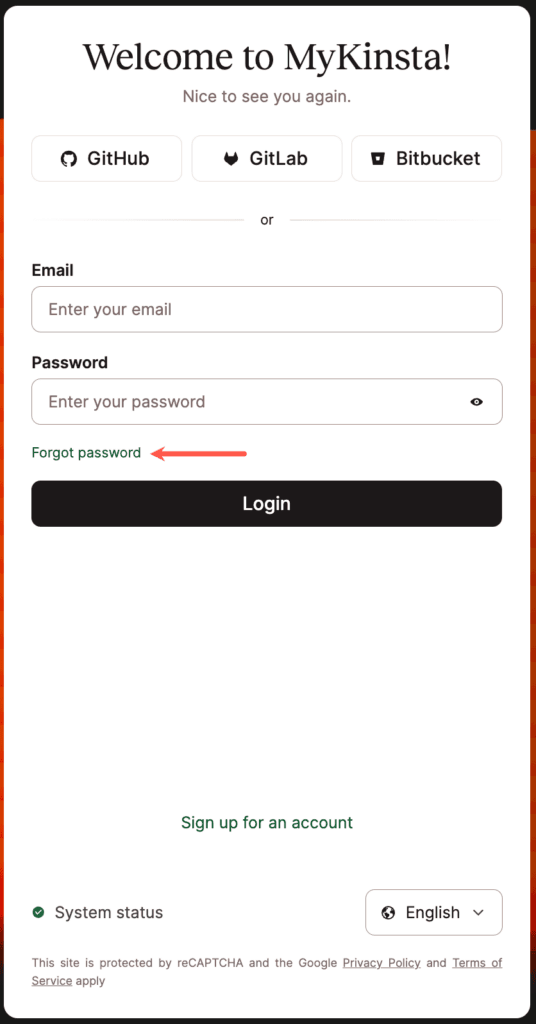
Click the forgot password link on the MyKinsta login page. - Enter your email address, and click the Reset password button.
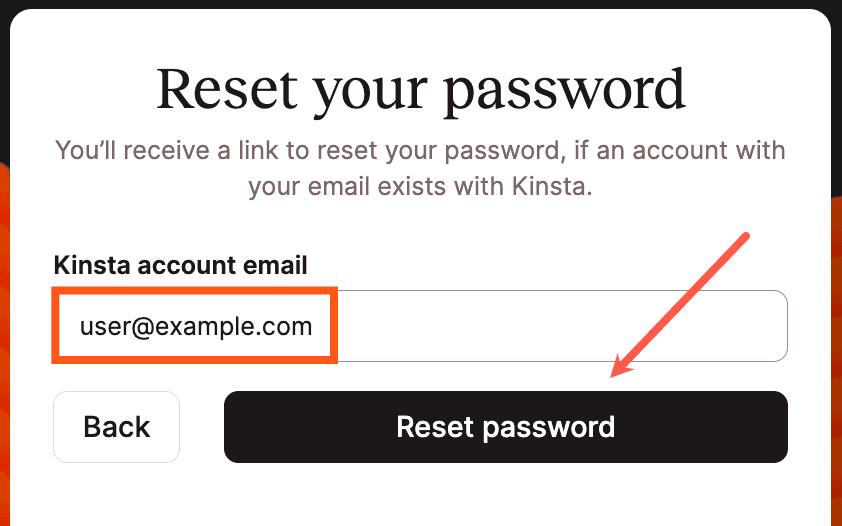
Enter your email address in the password reset modal/pop-up. - Check your email for the reset password message from
[email protected]with the subject “Password reset in MyKinsta” (should arrive within 15 minutes or less) and follow the instructions provided.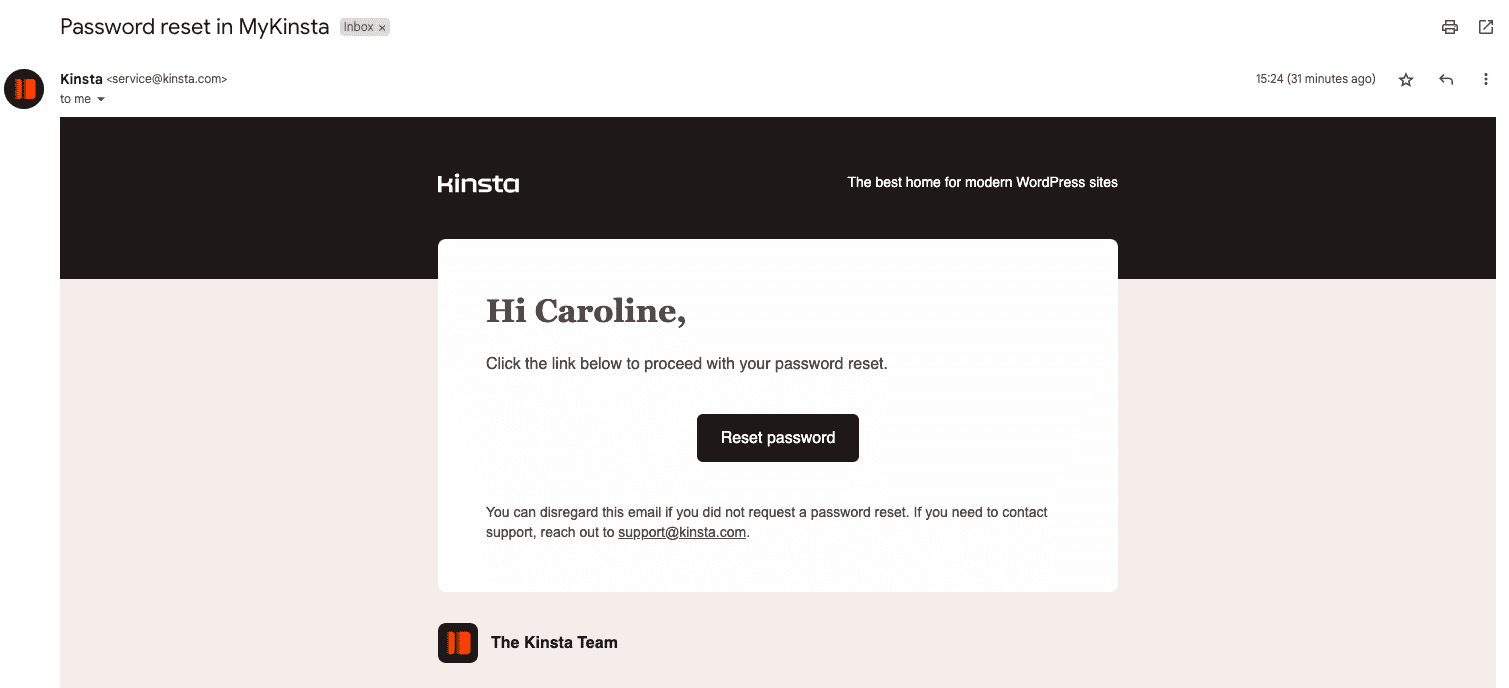
Password reset email from [email protected]
Locked account
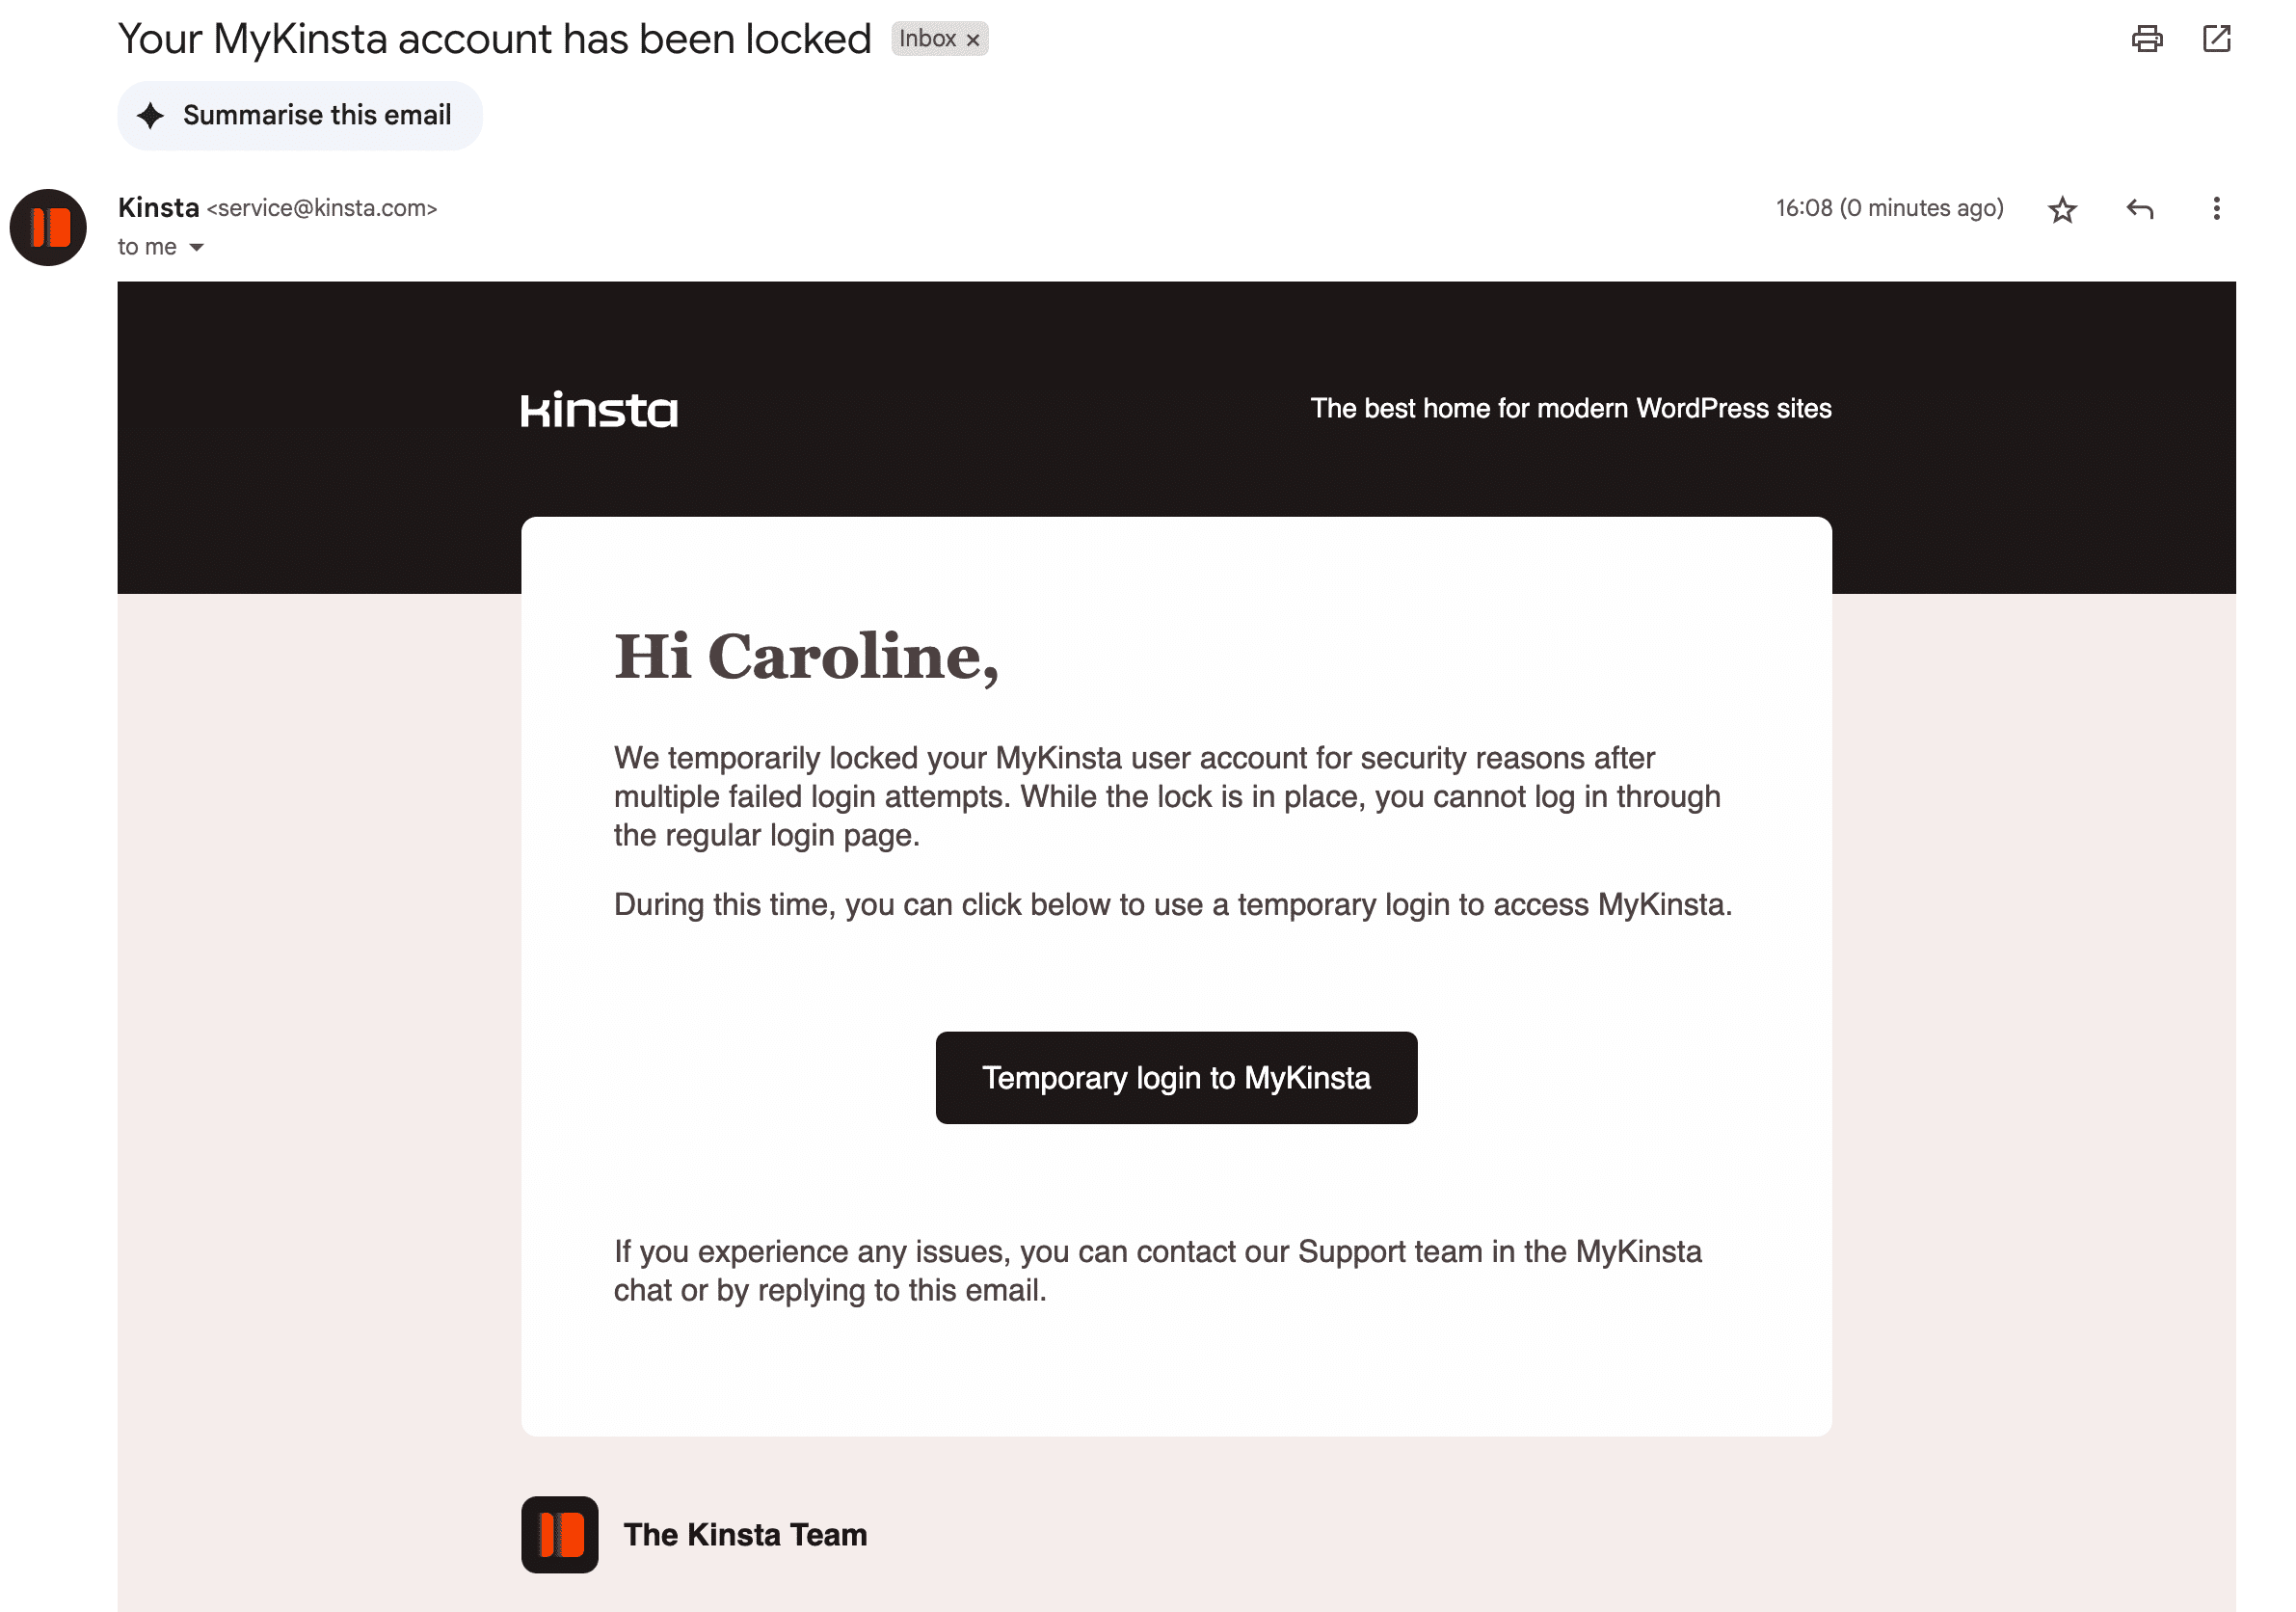
To enhance security and protect your MyKinsta account from unauthorized access, we lock your account after multiple failed login attempts have been made. When this occurs, the following error appears:
“This account has been locked after multiple failed login attempts. We sent you an email about how you can access your account.”
When your account is locked, we’ll send you an email notification. This email includes a Temporary Login to MyKinsta link. By using this link, you can bypass the lockout period and log in immediately with your email address, password, and two-factor authentication (2FA). If you attempt to log in through any other link or method, the account will remain locked until the lock duration expires.
Can’t find user with this email/password
When you try to log in with an incorrect email address or password, you may receive the following error message:
“Can’t find user with this email/password”
This could be either an incorrect email address or password. If you’ve forgotten your password, click the Forgot password link to reset your password. If you enter the incorrect details too many times, your account will be locked.
Too many attempts
When you try to log in, you may receive the following error message:
“Too many attempts. Please retry it later.”
This error usually occurs when too many requests are made in a short period, or if Google detects unusual activity. To workaround this error, try the following:
- Wait a few minutes and try logging in again.
- Use a different browser.
- Log in to your Google account first before you log in to MyKinsta.
- Ensure you’re not using any automation or browser extensions that could affect your request.
Authentication code expired
When you log in to MyKinsta, you may receive the following error message:
“The last authentication code we sent has expired. Request a new code.”
If your authentication code has not expired and this message continues to appear, your computer’s system time may be set incorrectly (ahead of the current time). Check your system time based on your operating system and ensure it is set correctly to prevent this issue from occurring.
Can’t access email account
All email addresses must be verified, even if you’re using an app for two-factor authentication (2FA). If you no longer have access to the email address associated with your MyKinsta account, please contact our Support Team.