Migrate Guru
Migrate Guru is a free plugin available from WordPress.org. It is relatively easy to use, works well even with larger WordPress sites and is compatible with Kinsta.
These are the steps you’ll need to take to migrate your WordPress website to Kinsta using Migrate Guru.
This guide is provided to help you perform your own migration. However, please note that Migrate Guru may not be fully compatible with some WordPress sites. Our Support team is always happy to help with basic migration questions, but cannot assist with failed migrations, as this falls outside of the scope of our support.
Kinsta migrations are free, if you’re at all worried about the integrity of your data, we highly recommend using our professional Migrations team.
Add a site in MyKinsta
Once you’ve signed up for a Kinsta hosting plan, to use Migrate Guru, you’ll need to add a site in MyKinsta.
When creating the site, be sure to select the Install WordPress option.
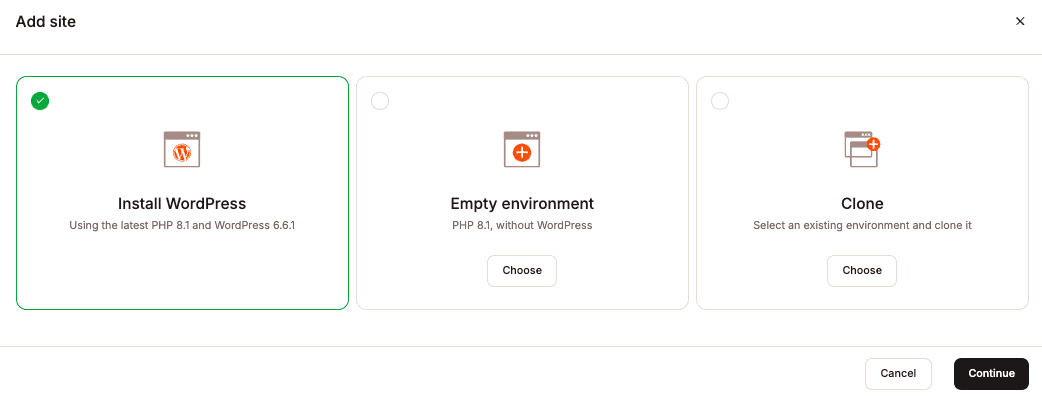
While your new site is being created, you can move on to the next steps.
Install Migrate Guru
While the site is being created in MyKinsta, log into your existing website (the one you want to migrate). Once you’ve logged in to the WordPress Admin area, navigate to Plugins > Add New and then search for Migrate Guru.
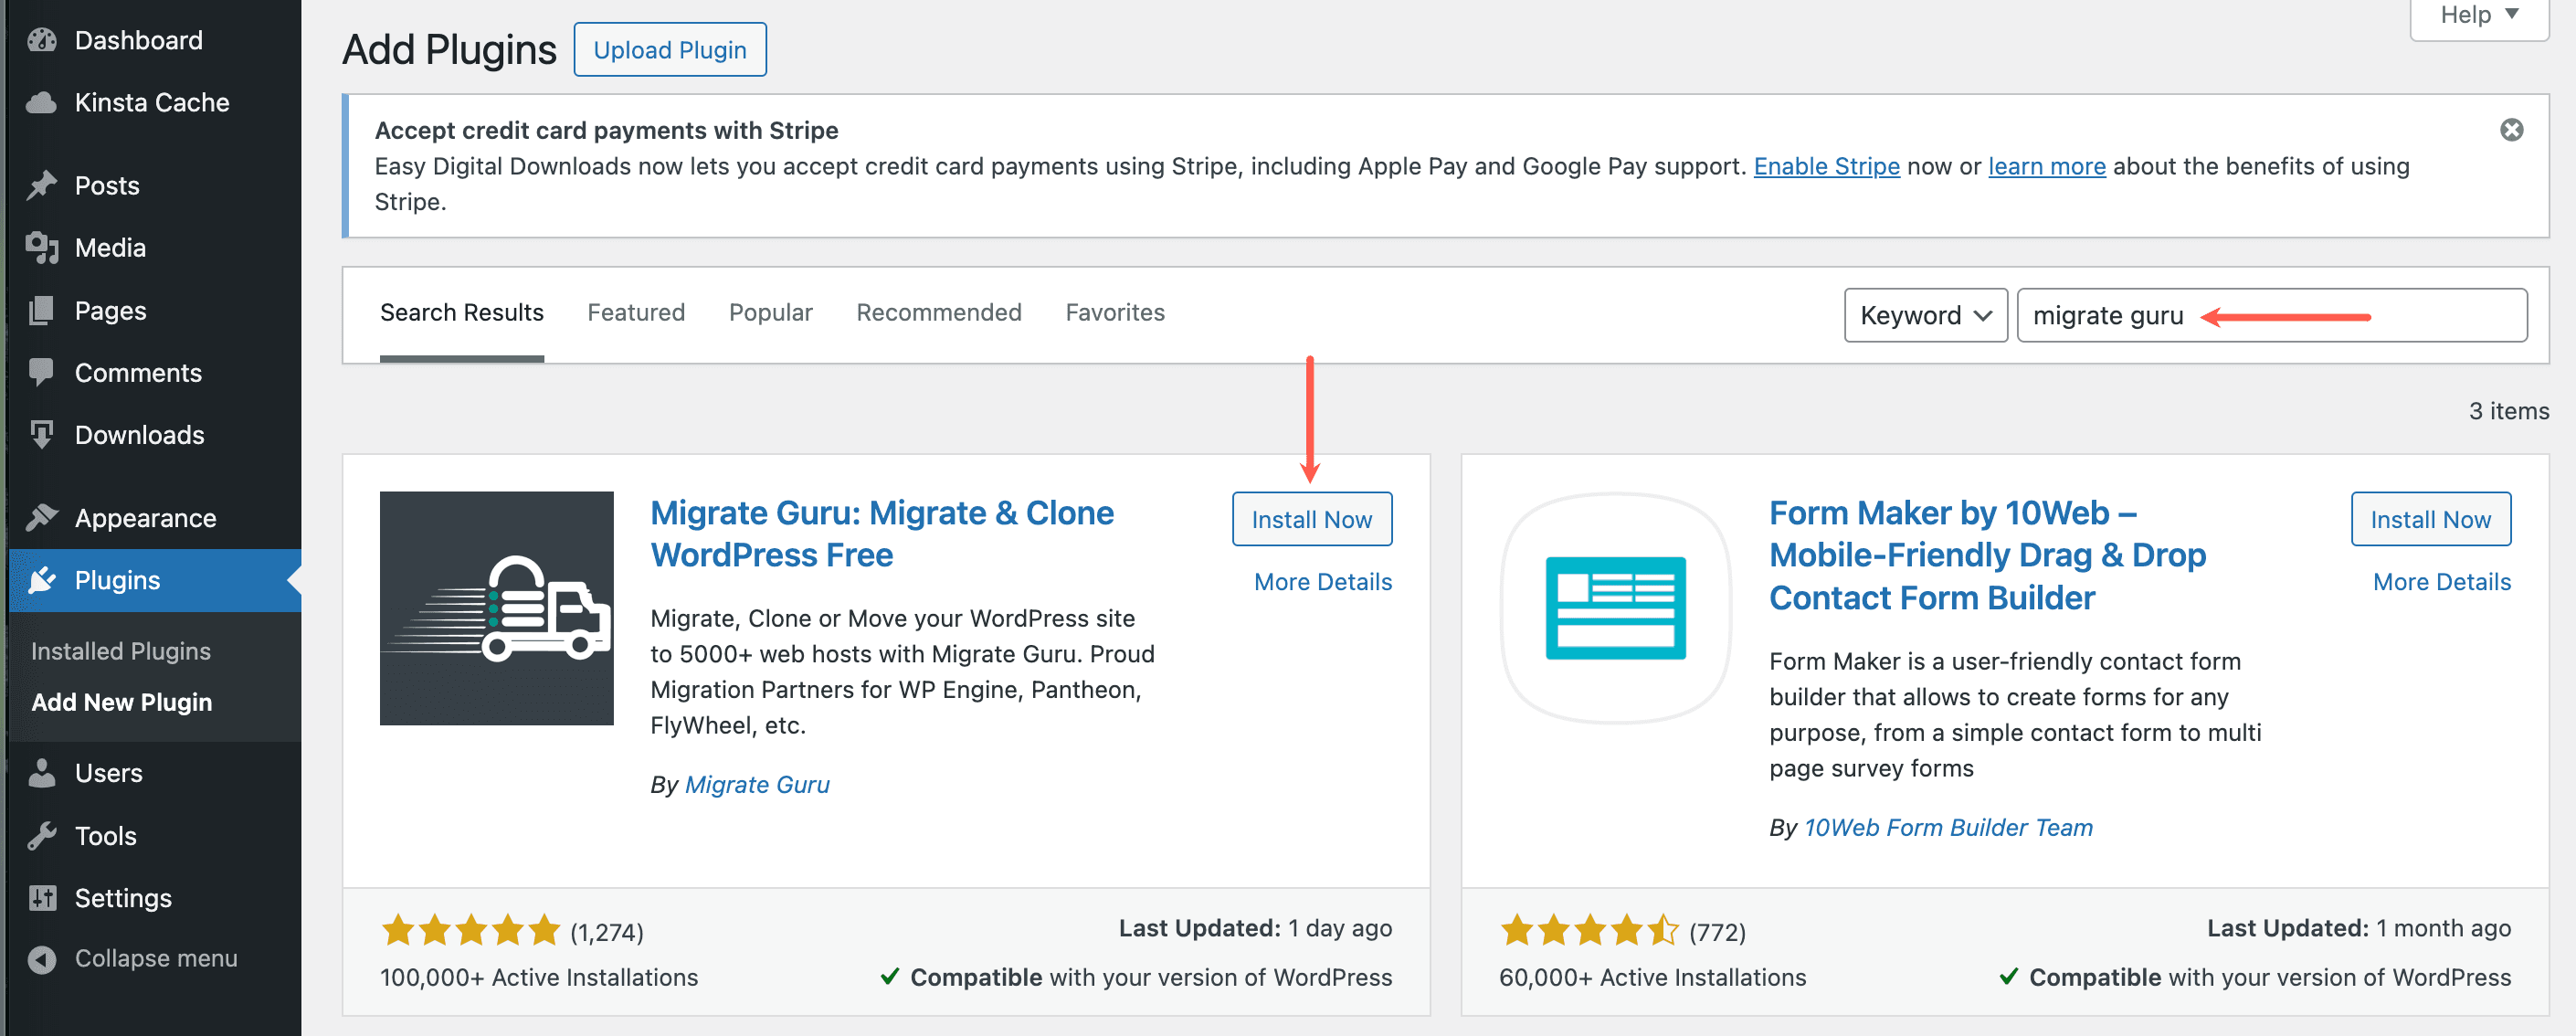
Once you locate the plugin, click the Install Now button to install it.
Initiate the migration
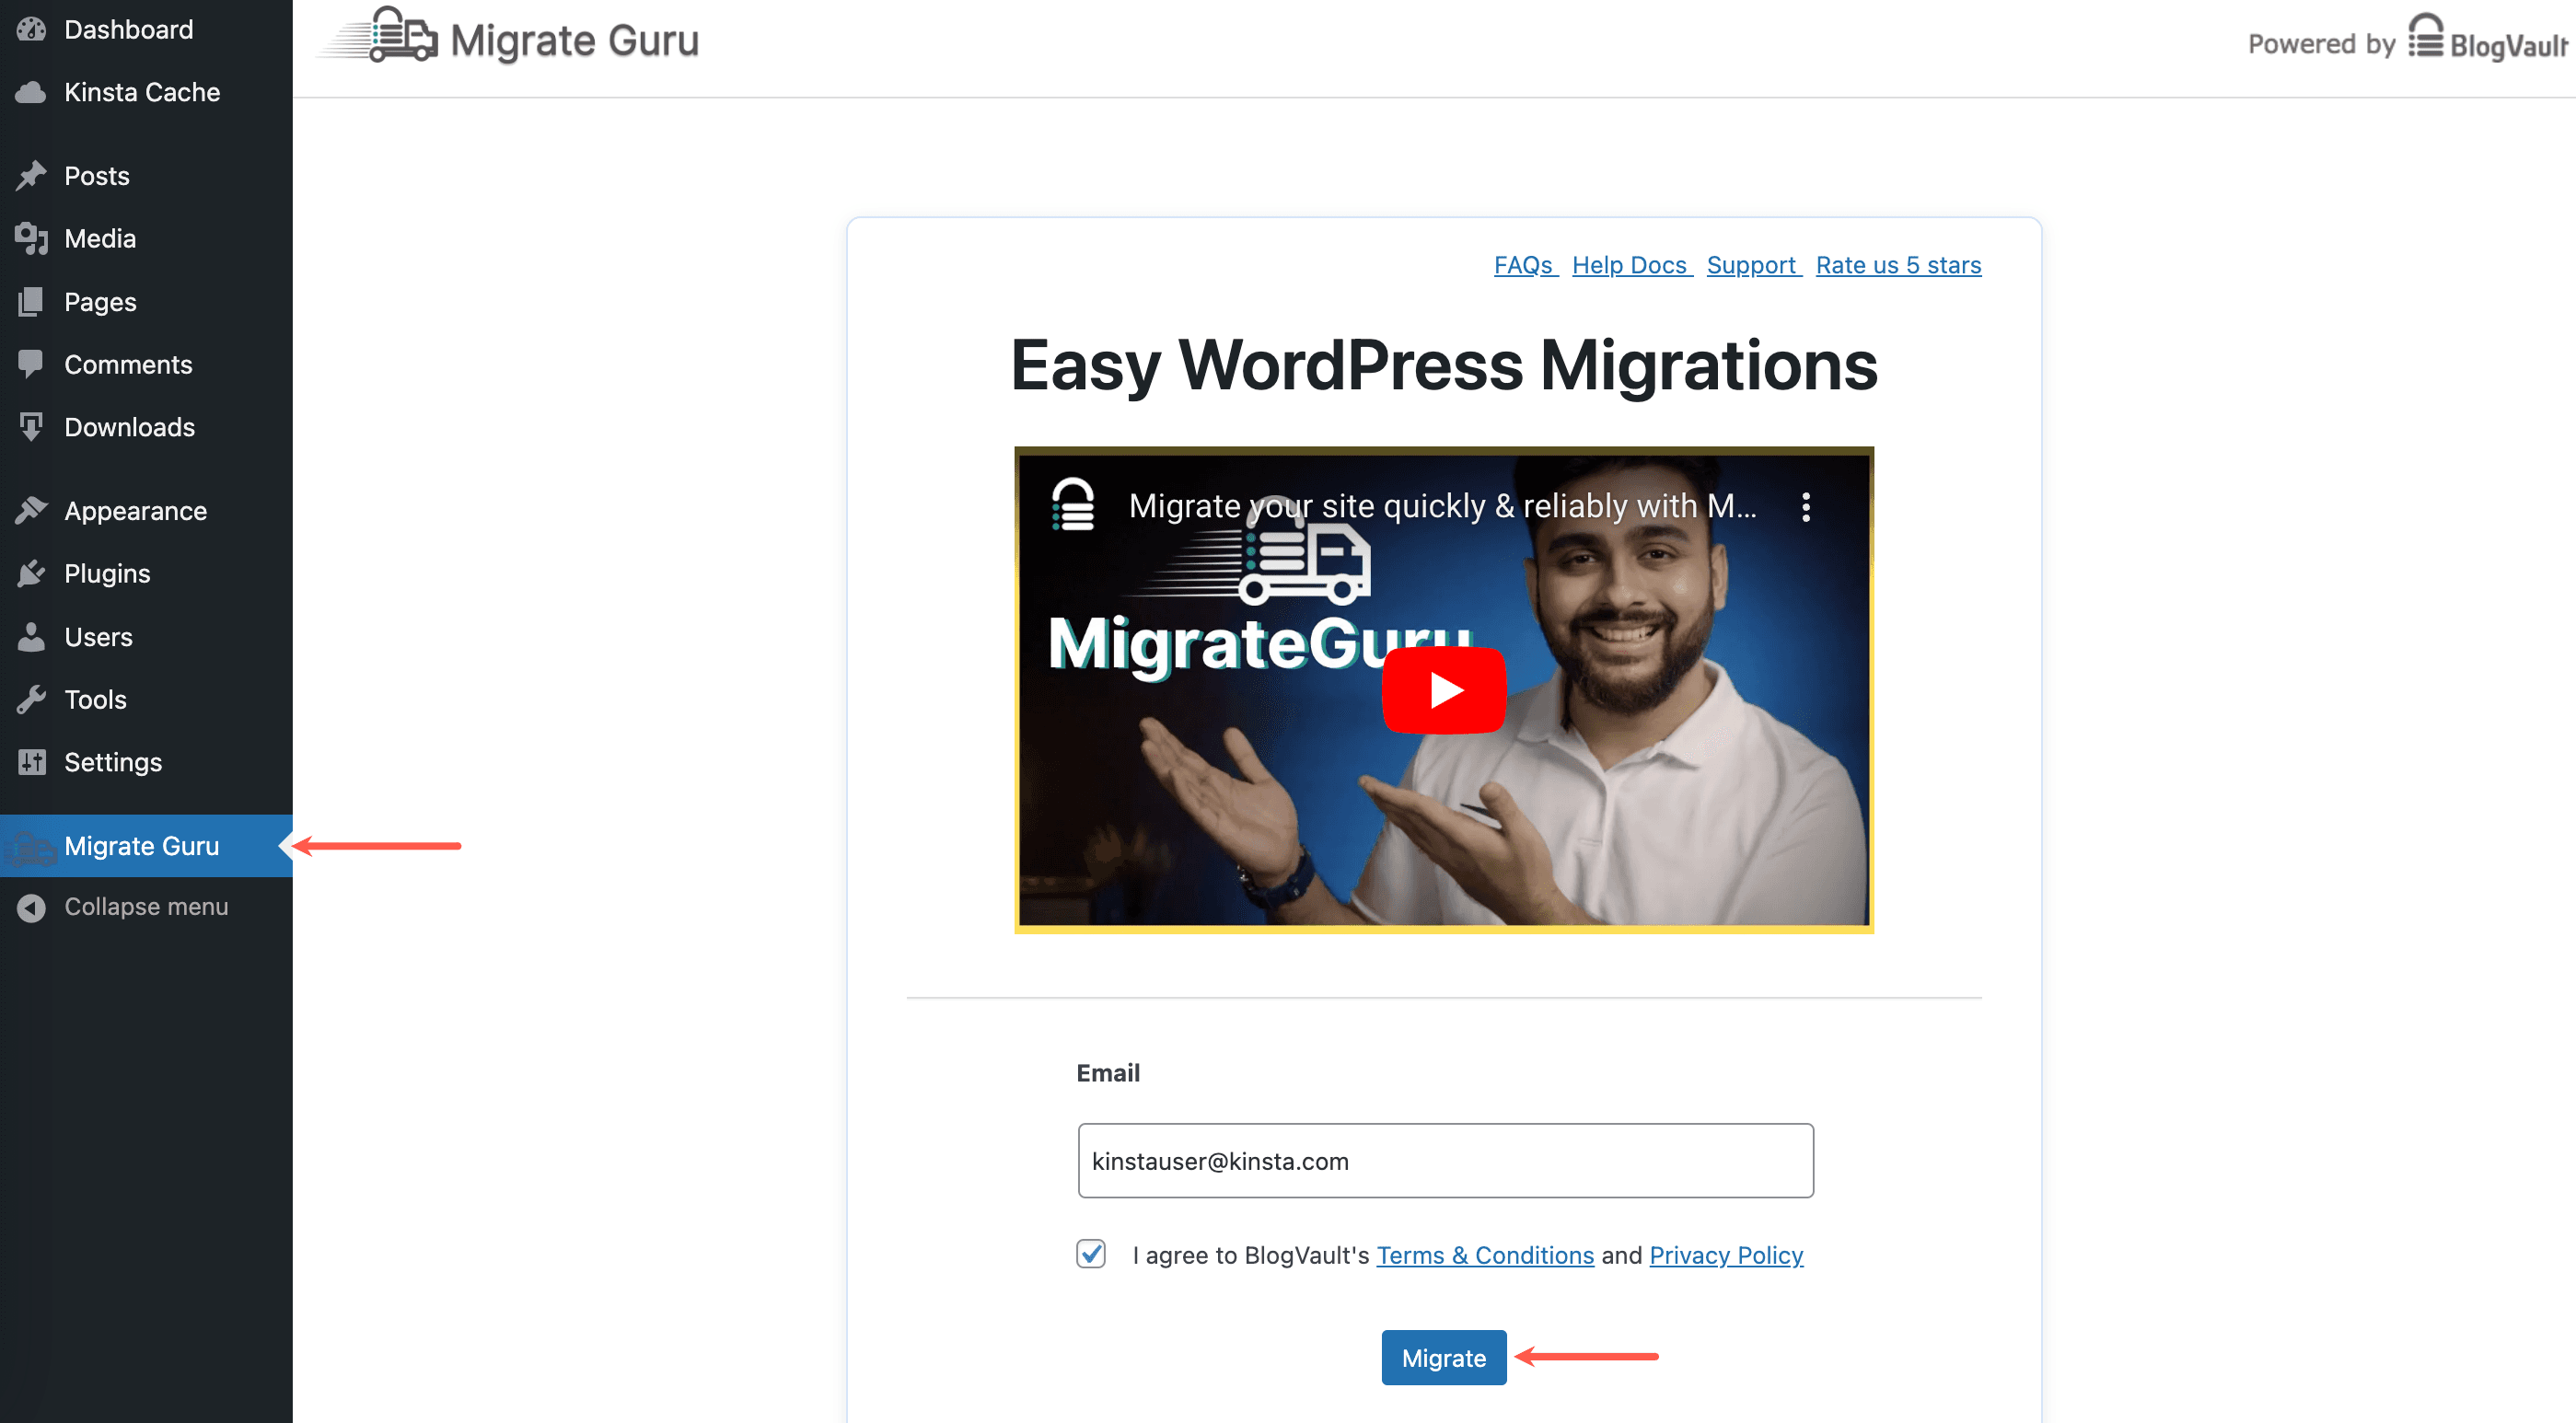
After installing Migrate Guru, activate the plugin. Once activated, you’ll be redirected to the Migrate Guru admin menu. If you happen to click away and need to find your way back, you can find this screen by clicking on Migrate Guru in the WordPress sidebar menu.
On the Migrate Guru page, enter your email address, check the box to agree to the Blogvault Terms and Conditions and Privacy Policy, and then click the Migrate Site button.
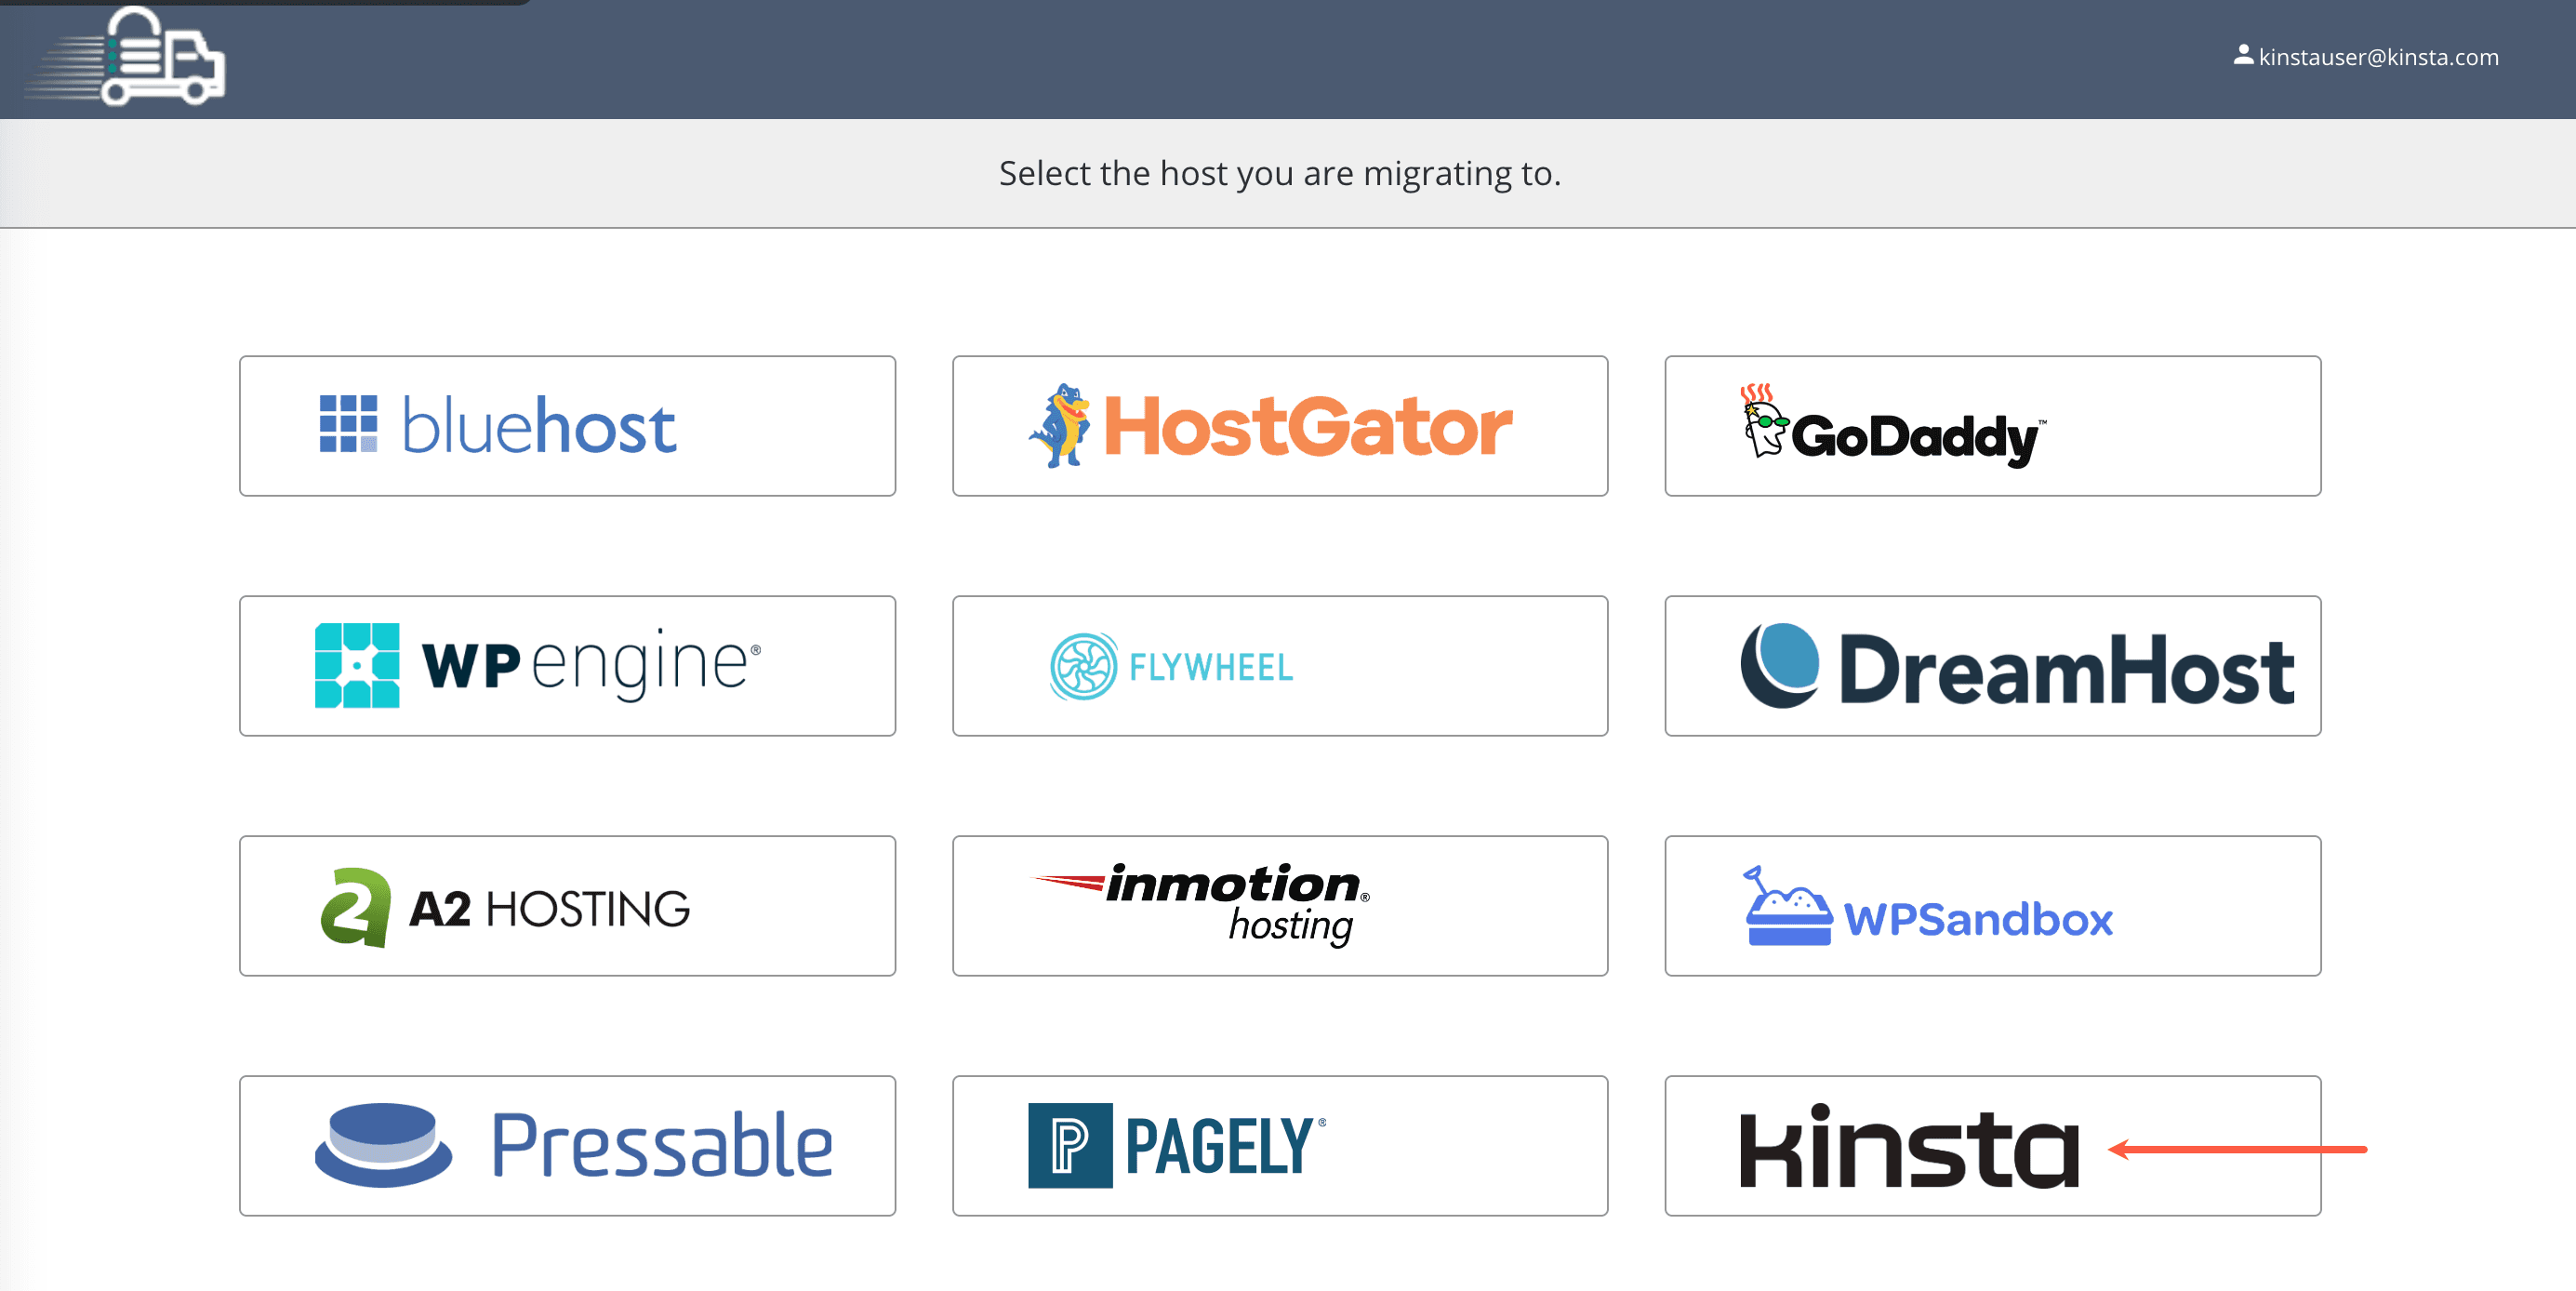
On the next page, select Kinsta as the host you are migrating to.
On the next screen, click Manually Input Host Details.
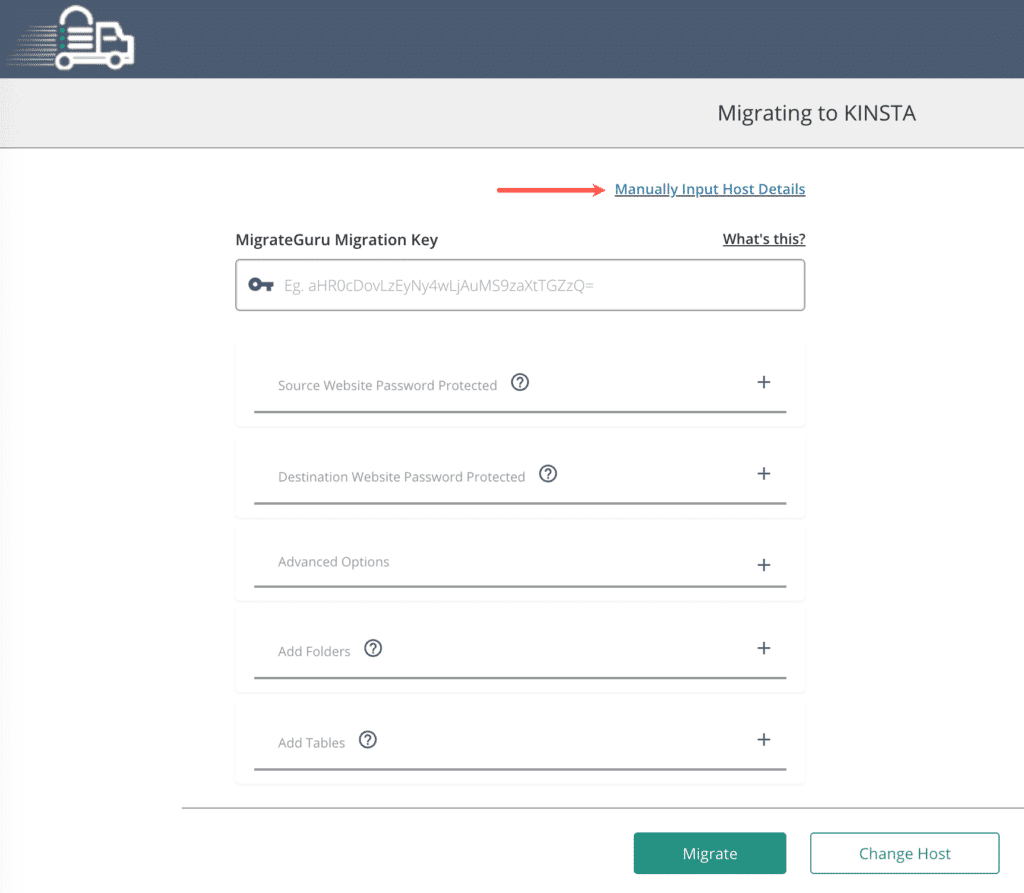
Domain and SFTP details
Next, go back to MyKinsta and gather the URL and SFTP details for the site you just created.
Domain details
Go to WordPress Sites > sitename > Domains. Every site created at Kinsta comes with a WordPress temporary URL that uses this format:
https://sitename.kinsta.cloud
You’ll use this temporary URL for the Destination Site URL in Migrate Guru.

SFTP details and directory path
Find your SFTP details and directory path in WordPress Sites > sitename > Info.

If you need more information about finding your SFTP details, our article on How to Use SFTP can help you locate them. Once you have the necessary details, enter the information into the Migrate Guru form.
Start the migration
Below are the very important migration settings you must configure properly. Otherwise, you won’t be able to get to the next screen in Migrate Guru.
- Destination Site URL: Your new site’s temporary URL, including the protocol (e.g. https://kinstahelptesting.kinsta.cloud)
- sFTP Host/Server Address: The IP address from the Host field in MyKinsta under WordPress Sites > sitename > Info
- Port: Varies from site to site, found in MyKinsta under WordPress Sites > sitename > Info
- sFTP Username: Found in MyKinsta under WordPress Sites > sitename > Info
- sFTP Password: Found in MyKinsta under WordPress Sites > sitename > Info
- Directory Path: The new site’s path found in MyKinsta under WordPress Sites > sitename > Info (e.g. /www/sitename_123/public)
After you have verified the details are correct, scroll down and click the Migrate button to start the migration.
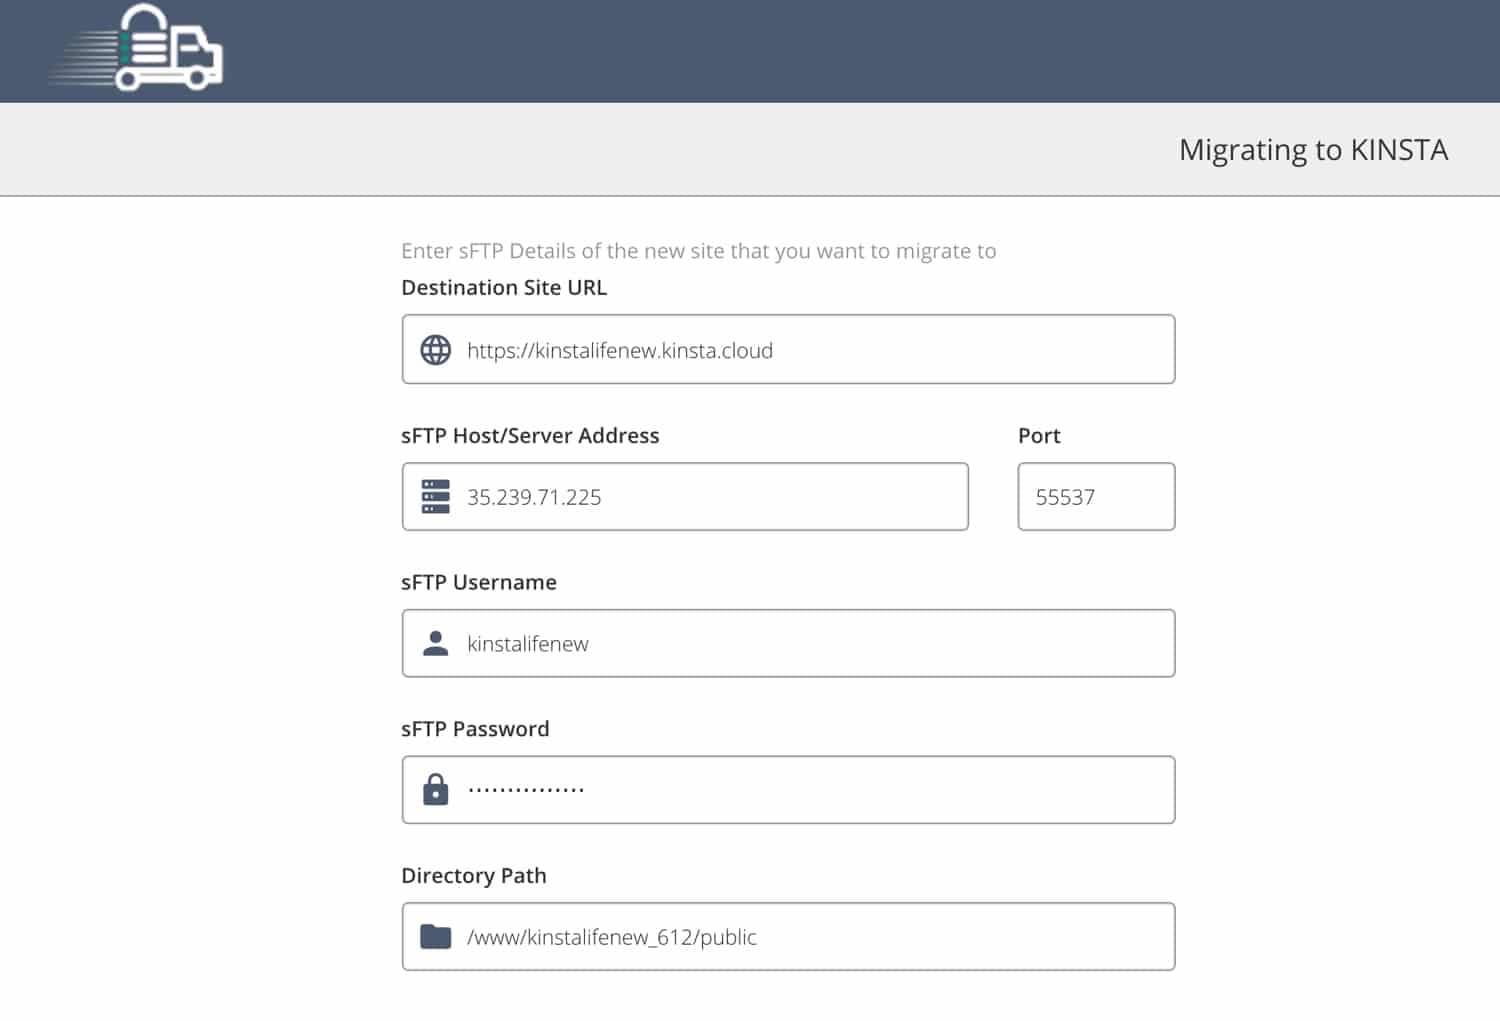
Migrate Guru will now test the SFTP credentials you provided. If any problems are encountered, Migrate Guru will return to the SFTP details screen and highlight the fields that need to be reviewed. Check the details, correct any mistakes, and click Migrate again.
If you don’t enter the correct directory path or destination address, you’ll receive the following error:
Unable to access wpconfig file. Please check if WordPress is installed on the destination address. Also, check if you have permission to access the folder.
If Migrate Guru repeatedly reports issues with the SFTP details, please contact our Support team for assistance. Multiple failed SFTP connection attempts can trigger an IP address ban.
Once the connection is made successfully, Migrate Guru will begin migrating the site and display a page that you can use to monitor the progress of the migration. Depending on the size of your WordPress site, the migration can take a while.

When the migration is finished, you’ll see a page that says Migration completed successfully.

Test the migrated site
After the migration is finished, you can test with your site’s temporary URL. In the screenshot below, our migrated site’s temporary URL is https://kinstalifenew.kinsta.cloud, and looks exactly like the site we’re migrating from.
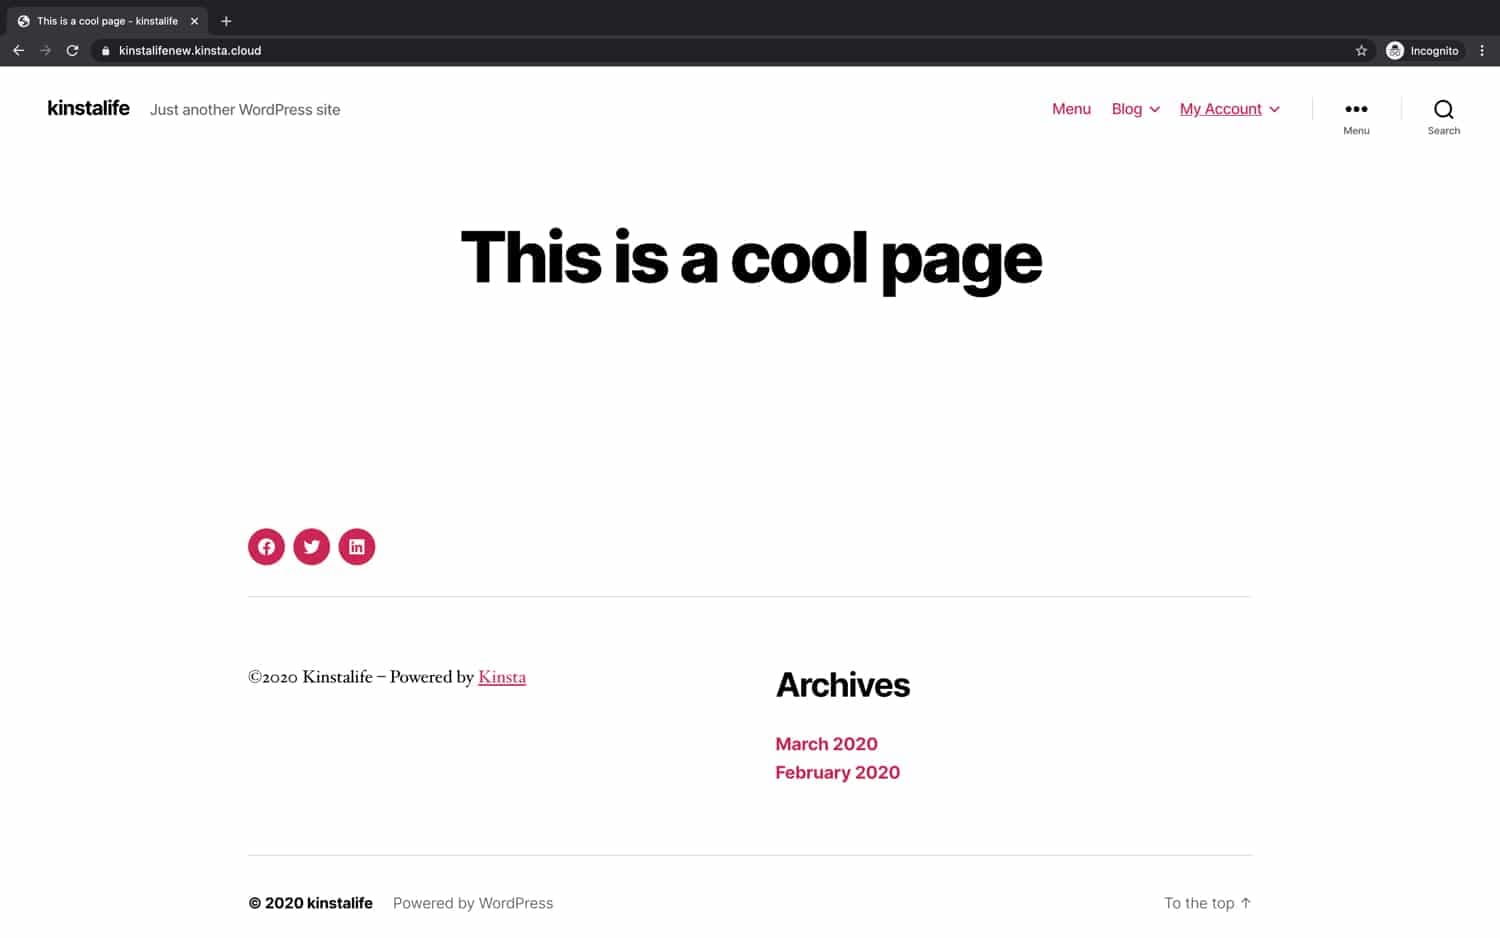
If there are references to the live domain in the database or files that give you trouble when viewing the site on the temporary URL, check out our article on how to preview your site with our Site Preview tool before updating DNS.
Go live
When you’ve finished testing, and you’re ready to go live with your migrated site, follow the steps in our Go Live Checklist. This includes important steps like installing the Kinsta MU plugin and setting up SSL.