GitLab CI/CD
For more advanced users, GitLab CI/CD (continuous integration/continuous delivery or continuous deployment) can automatically deploy code changes to your Kinsta site whenever a new commit is pushed to the relevant branch. This method allows you to continuously push code to your live environment on Kinsta without overwriting the WordPress MySQL database.
This setup allows you to push code from your local environment or Kinsta staging environment and have a version control system. In the example below, we’ll set up a staging environment and push changes to that environment to our live environment via GitLab (bypassing Kinsta’s Push to Live feature).
If you don’t already have a GitLab account, visit their signup page to get started.
Create a Kinsta site
For this tutorial, we’ll start by creating a new empty site on Kinsta, and we’ll install WordPress later on. If you already have a Kinsta WordPress site, you can still follow the steps in this tutorial to connect your site to GitLab.
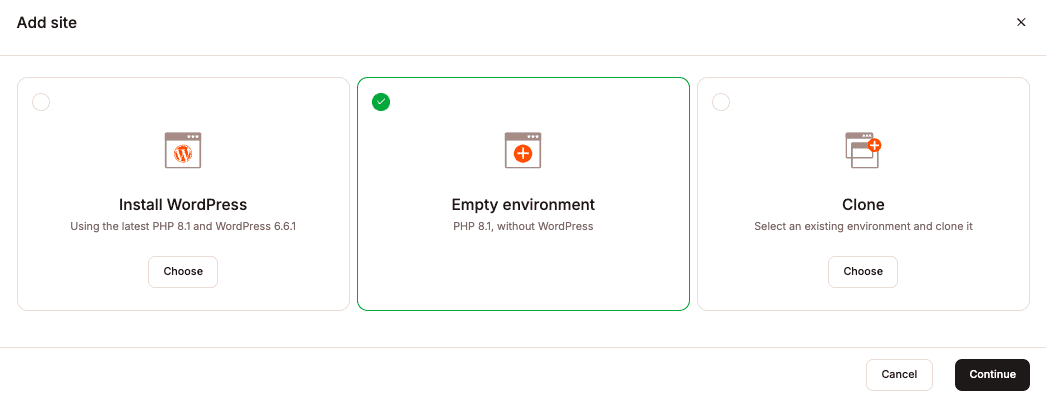
In MyKinsta, go to Sites > Add site > Create new site. Select the Empty environment (Without WordPress) option in the modal/pop-up window, and click the Continue button.
Complete the fields requested, click the Continue button to progress to each window, and finish the site creation process.
Create a GitLab project
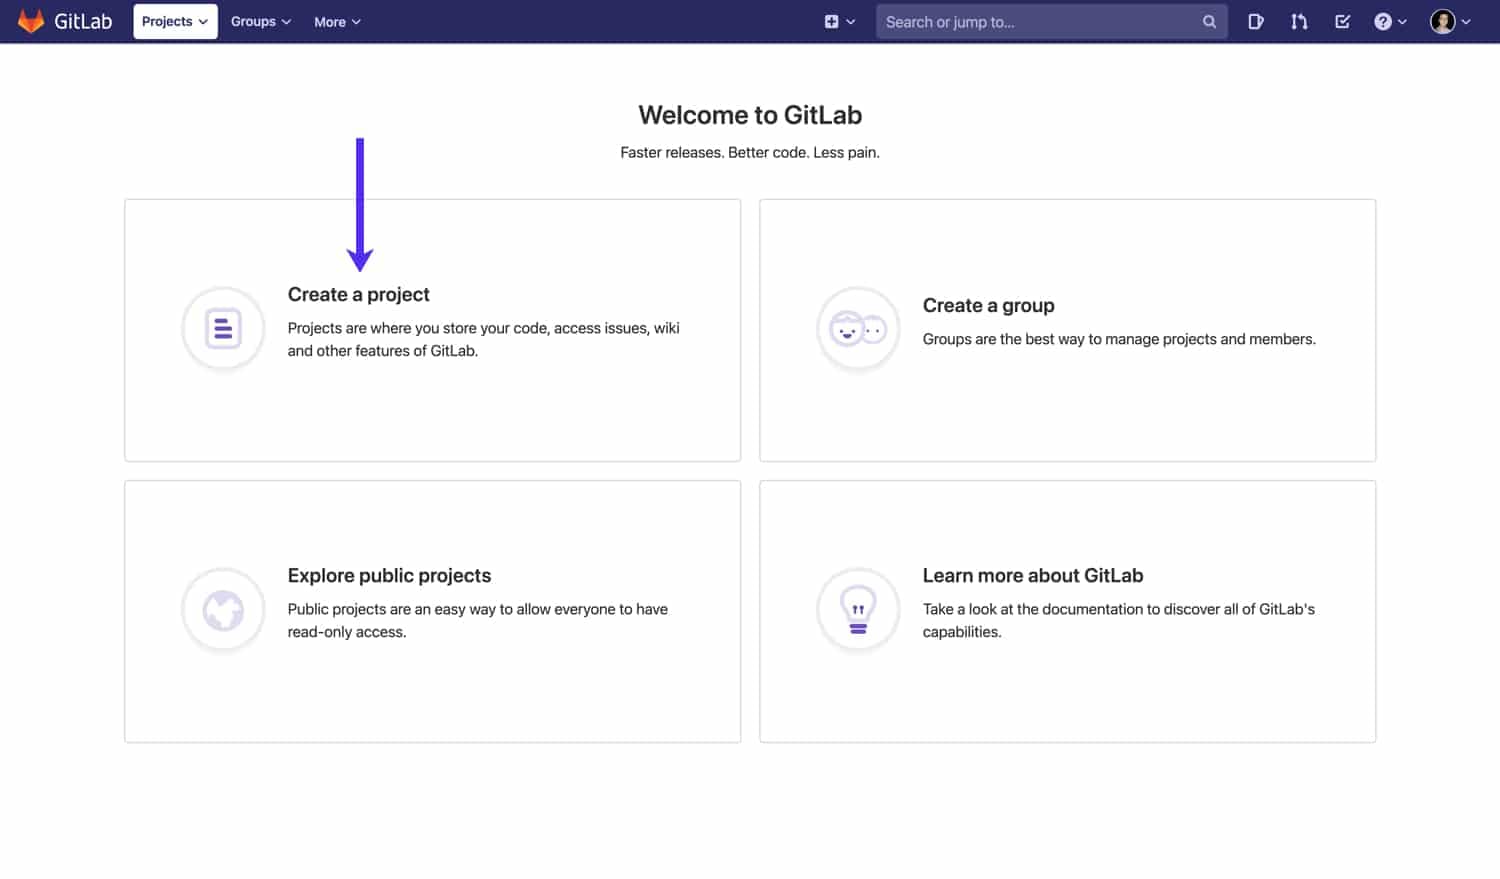
To get started, head over to GitLab and click Create a project to create a new repository for your Kinsta site.
Select the Blank Project option, and fill in the Project name and Project slug fields.
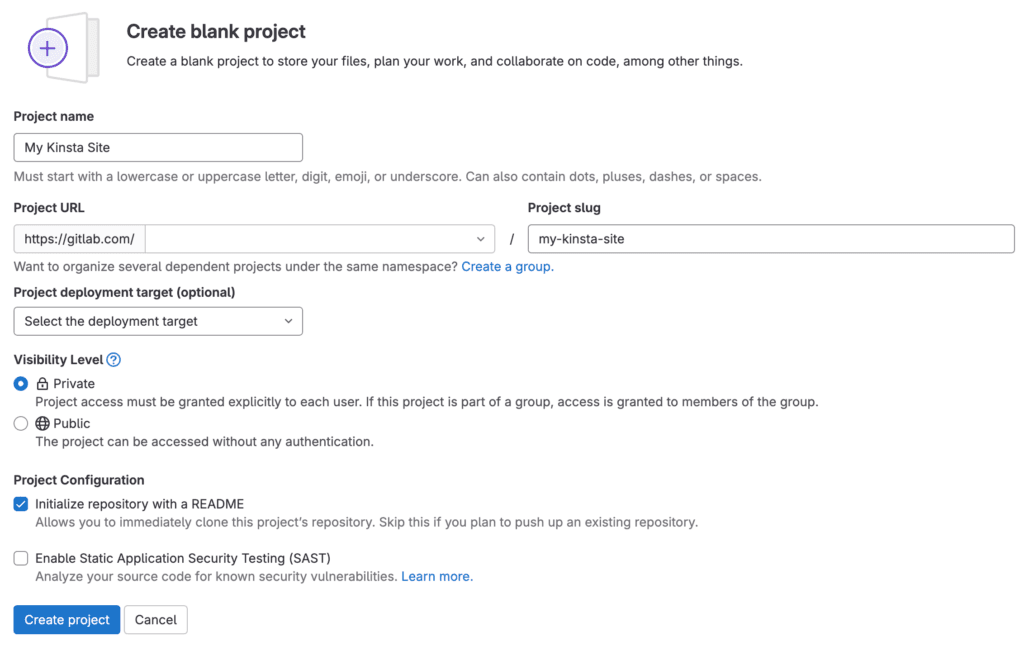
For the Visibility Level option, we recommend making the repository private. Since this repository may contain premium plugin and theme code, leaving it accessible over the public Internet would allow anyone to download the products you paid for.
Once you’re finished configuring the new project, click Create project to continue.
Configure SSH keys
Next, you’ll need to add SSH keys to GitLab and MyKinsta to allow the two platforms to communicate.
Add SSH public key to GitLab
First, SSH into your Kinsta site’s live environment and run the cat command below to display your SSH public key.
cat ~/.ssh/id_rsa.pubYour public key should look similar to the one below. Keep your command line window open for the now, and go back to GitLab in your web browser.
ssh-rsa AAAAB3NzaC1yc2EAAAADAQABAAABgQC7zdjwd6UIUJ5t4YnXNi6yhdHgrvIV2xgjvJ3592wd1Hzmnta4dau7yOIxQDU7/oNIr6DIskuIUii5ruGi4YZpIwB/AWGrn/uWb+FXJFiQHMZq9rCFcqtZXT0fyzKiSNkblV4F1RaPQJRvxfSUsSQ3jJU3FX8CF1c4R40CiBKkSHM8uavVIIESzgIHRiWVxkL9F6SKzg8GeTctJaAa3W+q1F1T60OKYmzH3OLdA37ZNmkm1CYWa8SF0JjOszxOnPwhfQ49P5r+rftXRFLz/7hGJ8CnUyzErSiUdUKNknUAB+w4KEZshQSNuiken0+GKqIw83dWWSyjiJJigcyDez2s+3AqDLHPG45NoBEXuBXjPQ9C08hokVyKlbzd/P2qvcnzUT5S6zTuaYOW+50+fiXeYkJlEoYYxoGRVx6FFdFqWyJx5UyaDv7QY3iQH0qct1iq9XGXMhBxIecIAEPUwF8nOp15in8L+5UIFMiNnihztTAXysc+8xvVwbuRlQIeR/E= ansible-generated on fvj-kinstagitClick on the user icon dropdown in the upper right corner of GitLab, and click Preferences.
On the Preferences page, click on SSH Keys in the sidebar.
Click Add new key and paste your SSH public key into the Key field. The Title field should auto-populate with a name, but feel free to change it if you’d like. GitLab also allows you to set an expiration date for the SSH key. This option is useful if you invalidate and rotate SSH keys as part of your infrastructure security protocol. If you don’t, feel free to leave the Expires at field blank.

After double-checking your configuration, click Add key to finalize the process.
Add SSH public key to MyKinsta
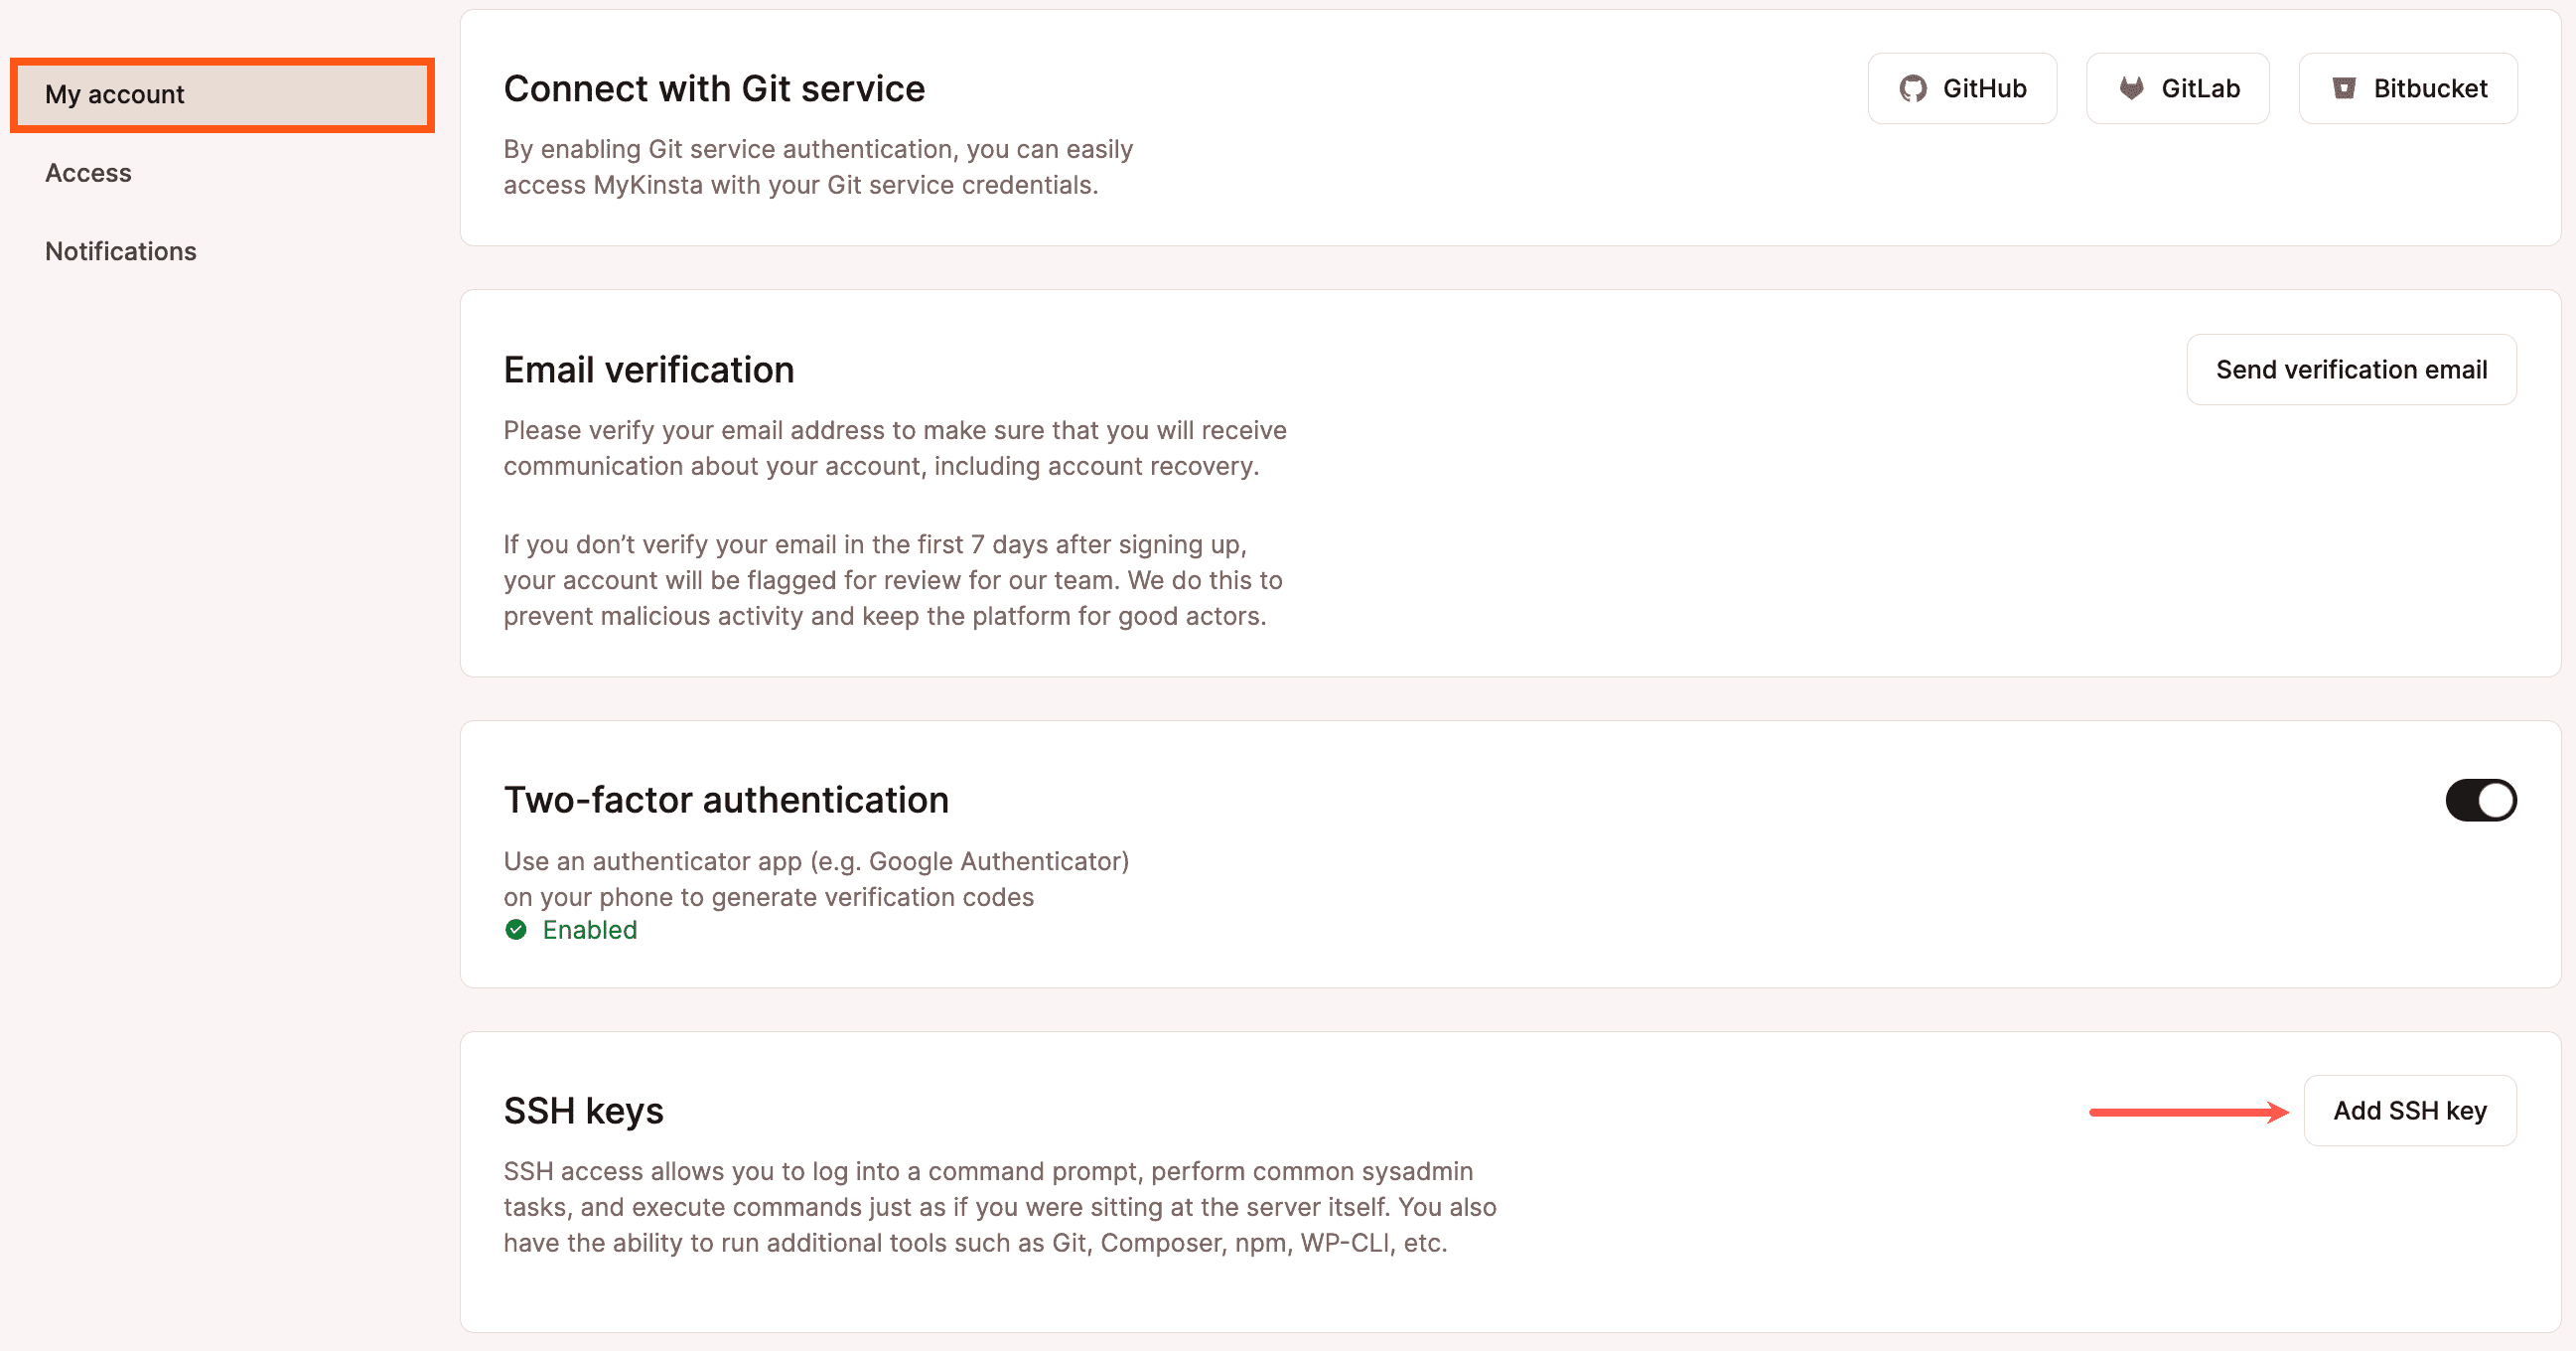
Now that your SSH public key has been added to GitLab, you’ll need to add the same key to MyKinsta. This step adds your SSH public key to your site’s authorized_keys file (only writable by root and MyKinsta) and will allow GitLab to SSH into your site to deploy code changes. In MyKinsta, click your name in the upper-right corner and select User Settings from the dropdown menu.

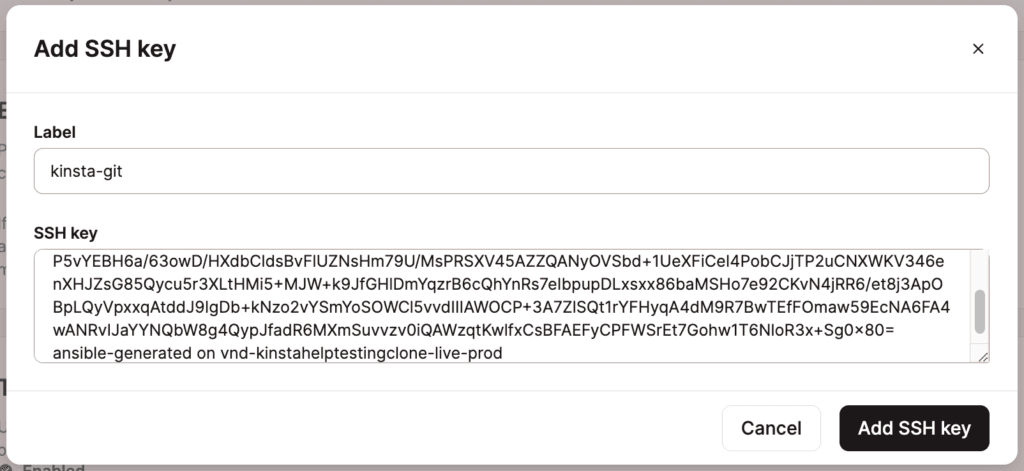
Scroll down and click the Add SSH key button.
In the modal/pop-up window, specify a Label (name) for the SSH key, paste your public key in the SSH key field, and click Add SSH key to finalize the process.
Add SSH private key to GitLab
Next, you’ll need to add the SSH private key from your site’s live environment as an environment variable in GitLab.
To find your private key, switch back to your command line window, and run the command below. Be sure not to share your SSH private key anywhere outside of GitLab.
cat ~/.ssh/id_rsaIn GitLab, click on the project you created earlier. In the sidebar, hover over Settings and click CI/CD in the menu that appears.

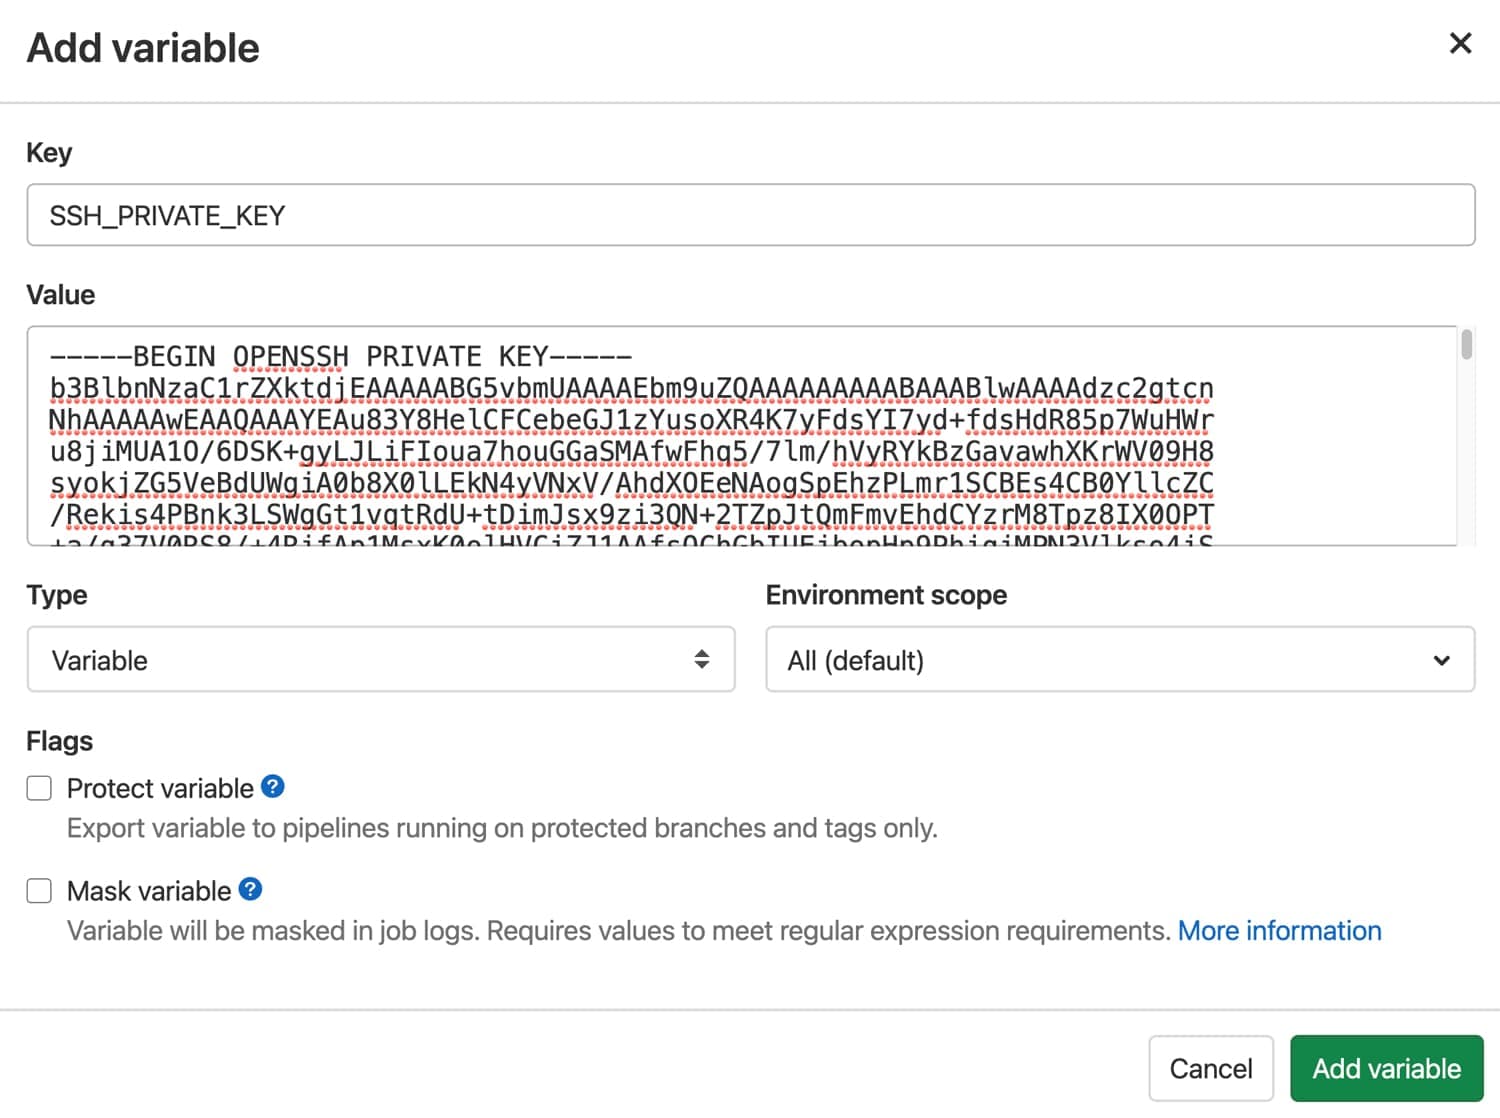
Scroll down to the Variables section, click the Expand button, and click Add variable. Use SSH_PRIVATE_KEY for the Key name, paste your private key into the Value field, and click the Add variable button to continue.
After the variable has been added, you’ll be able to see it in your repository settings.
Clone GitLab repo to MyKinsta
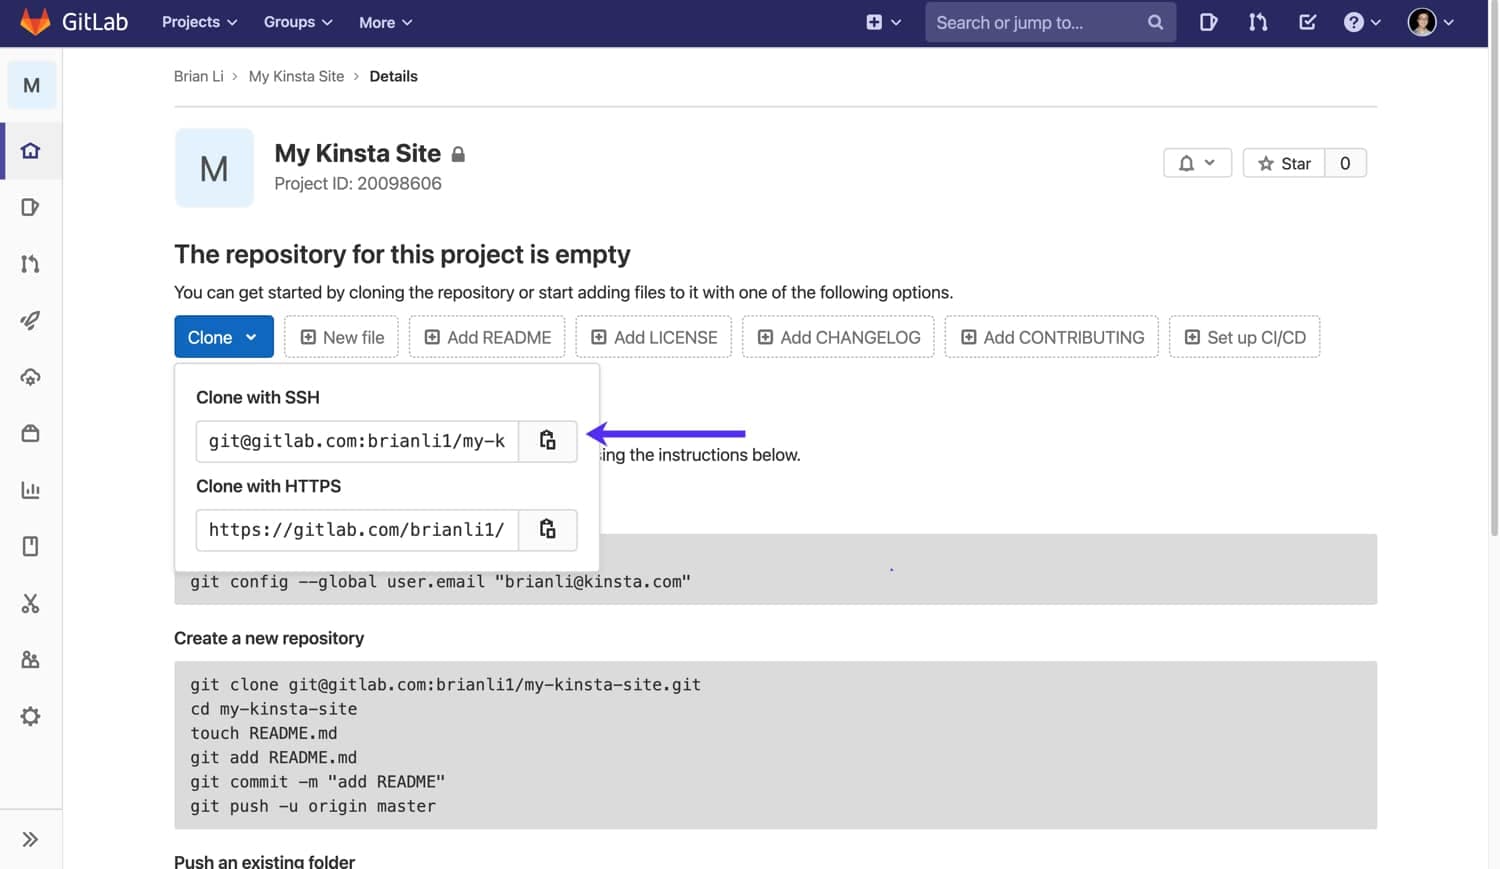
Now that the necessary SSH keys have been added, you can clone your GitLab repository to your Kinsta live environment. In GitLab, navigate to your repository, click on the blue Clone button, and click on the copy/clipboard icon to copy the repository address under Clone with SSH.
Switch back to your command line window and navigate to your live environment’s home directory. If you are unsure how to get to your home directory, use the command below.
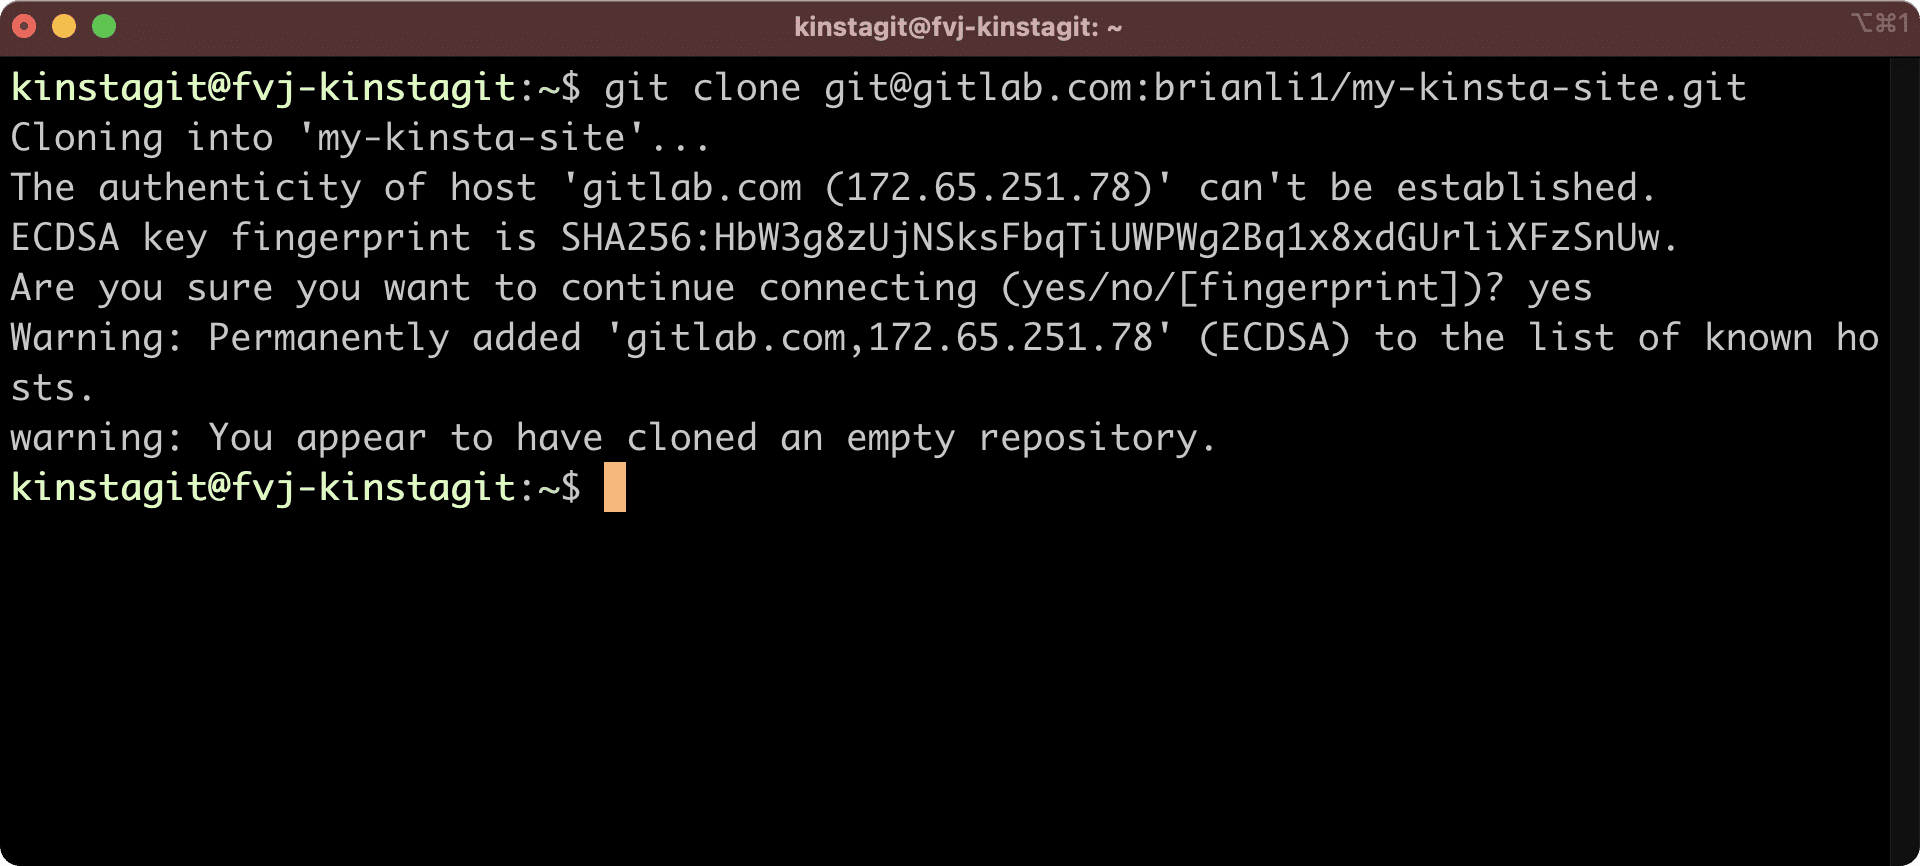
cd ~/Once you’re in the home directory, run the git clone command with the repository address you copied from GitLab.
git clone [your-repository-url-here]After cloning the repository, you’ll see a warning that says “you appear to have cloned an empty repository.” This is to be expected because the repo is empty at the moment.
At Kinsta, our Nginx configuration serves content from the ~/public folder. Thus, you need to delete the current ~/public folder and rename your cloned repo folder to ~/public. To do this, run the two commands below.
rm -rf ~/public
mv ~/your-repo-folder-name ~/public
Configure GitLab repo
Next, use the command below to navigate to the ~/public folder.
cd ~/publicRun the two commands below to configure your GitLab repo. Be sure to specify your valid email address and a username associated with your GitLab account.
git config --global user.email "[email protected]"
git config --global user.name "brian"
Install WordPress with WP-CLI
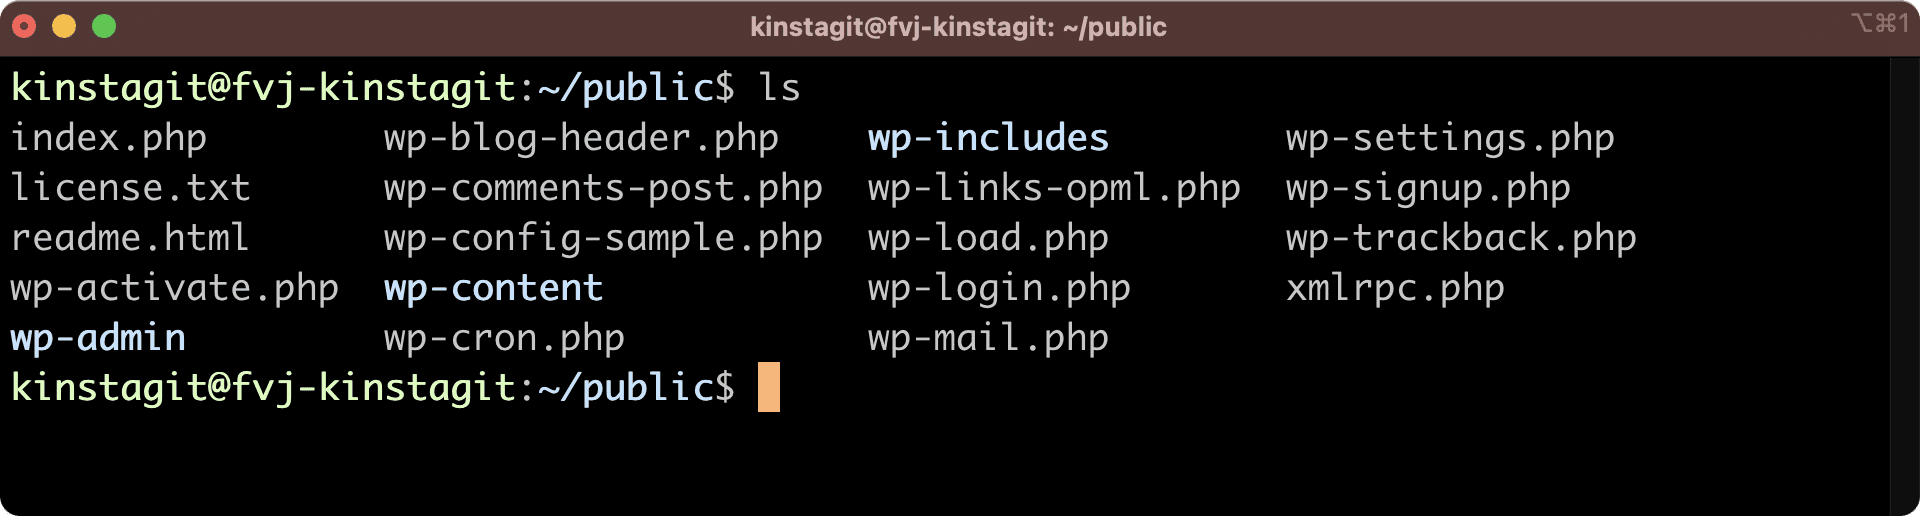
Now that the GitLab repo has been cloned to your Kinsta live environment and configured, let’s install WordPress. You can install WordPress manually by downloading it from wordpress.org, or you can install it with WP-CLI. For this example, we’ll use WP-CLI to install WordPress with the command below in the ~/public folder.
wp core downloadAfter installing WordPress, your ~/public folder should look like this:
Next, go to your site’s Domains page in MyKinsta and click the Open URL link to visit your Primary domain.
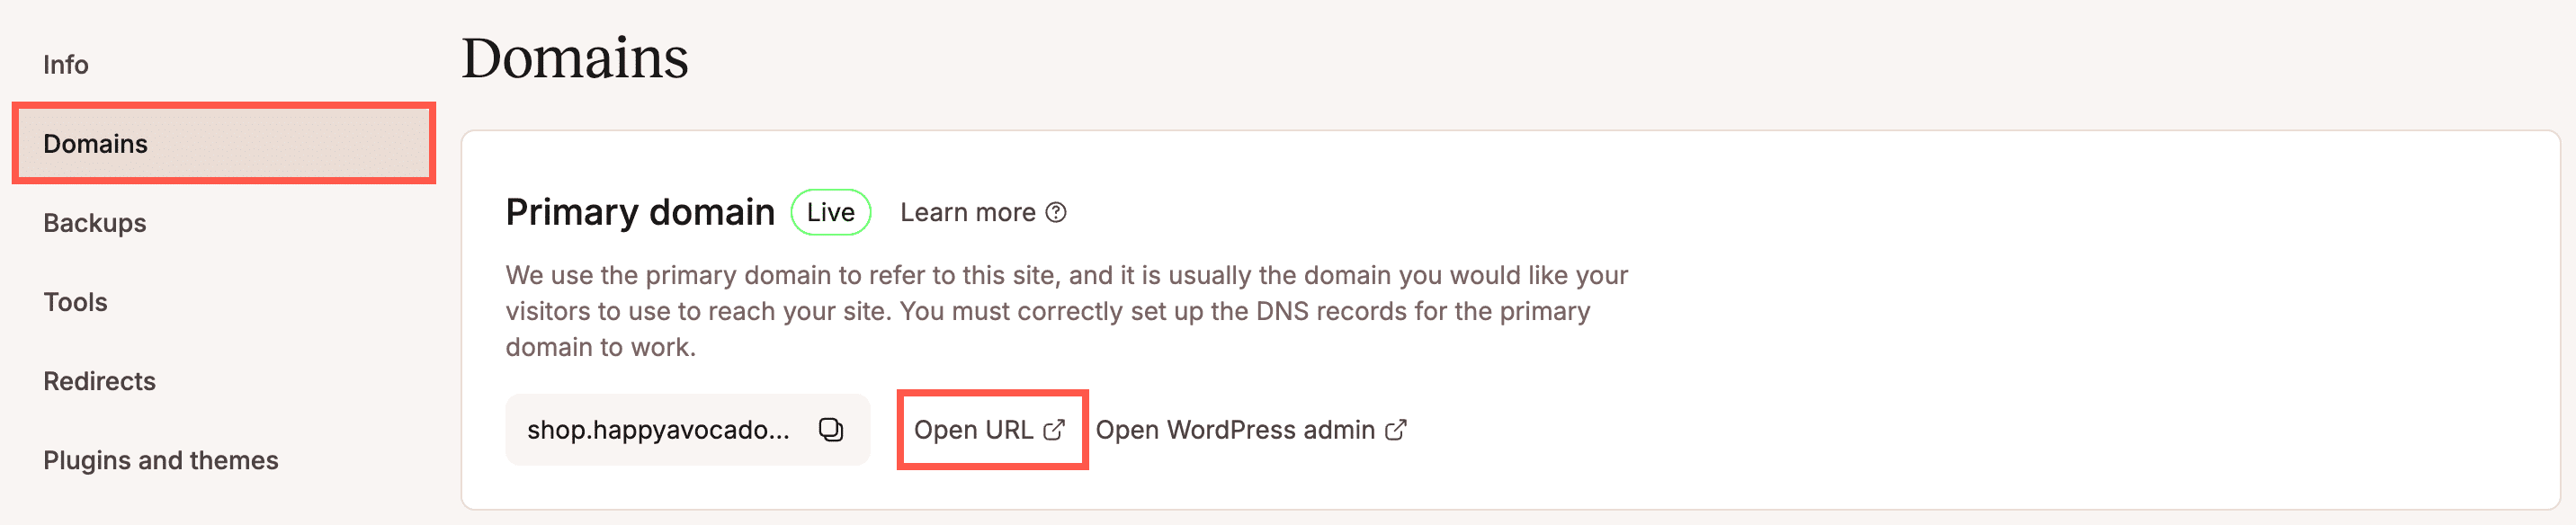
You’ll be greeted with the WordPress five-minute installation process. If you’re unsure about setting up WordPress, we have an in-depth guide here.
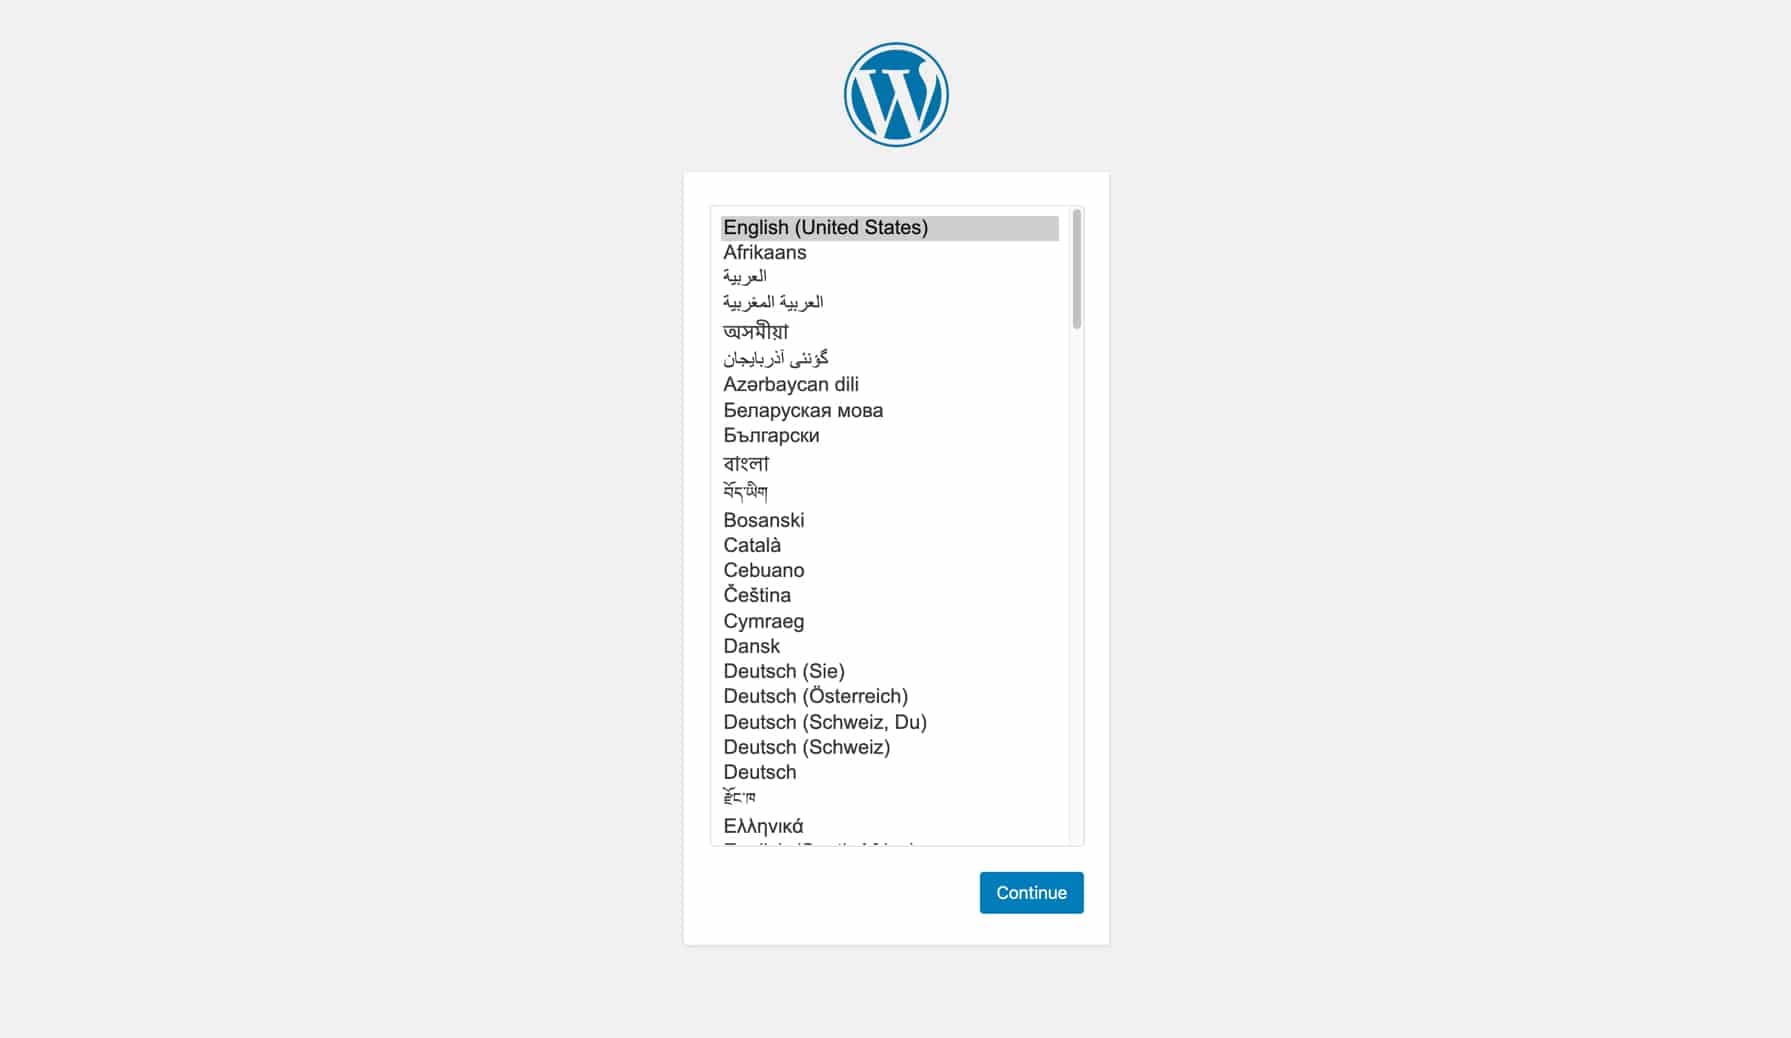
After WordPress has been installed, you should be able to see your new WordPress site by visiting your primary domain.

Configure the GitLab CI/CD pipeline
Next, you’ll need to set up a configuration file to instruct GitLab to initiate automatic deployments after the repo’s main branch has been updated. To do this, make sure you’re in the ~/public folder in your Kinsta live environment (run cd ~/public to navigate there if needed) and create a new file called .gitlab-ci.yml with the command below.
touch .gitlab-ci.ymlAfter the file has been created, add the following text to the file. You can either edit the file with nano or vim in the command line or with SFTP and a text or code editor. If you use an SFTP client, be sure to enable hidden files in order to see the .gitlab-ci.yml file.
before_script:
    - apt-get update -qq
    - apt-get install -qq git
    # Setup SSH deploy keys
    - 'which ssh-agent || ( apt-get install -qq openssh-client )'
    - eval $(ssh-agent -s)
    - ssh-add <(echo "$SSH_PRIVATE_KEY")
    - mkdir -p ~/.ssh- '[[ -f /.dockerenv ]] && echo -e "Host *\n\tStrictHostKeyChecking none" > ~/.ssh/config'
    - ssh-keyscan gitlab.com >> ~/.ssh/known_hosts
    - chmod 644 ~/.ssh/known_hosts
deploy_live:
    environment:
        name: Live
        url: your-primary-domain script:
        - ssh user@ip-address -p port-number "cd public-root && git checkout main && git pull origin main && exit"
    only:
        - main
Change the url and script parameters in the deploy_live block; replacing the bold values with your site’s details from MyKinsta.
- Replace your-primary-domain with your site’s primary domain.
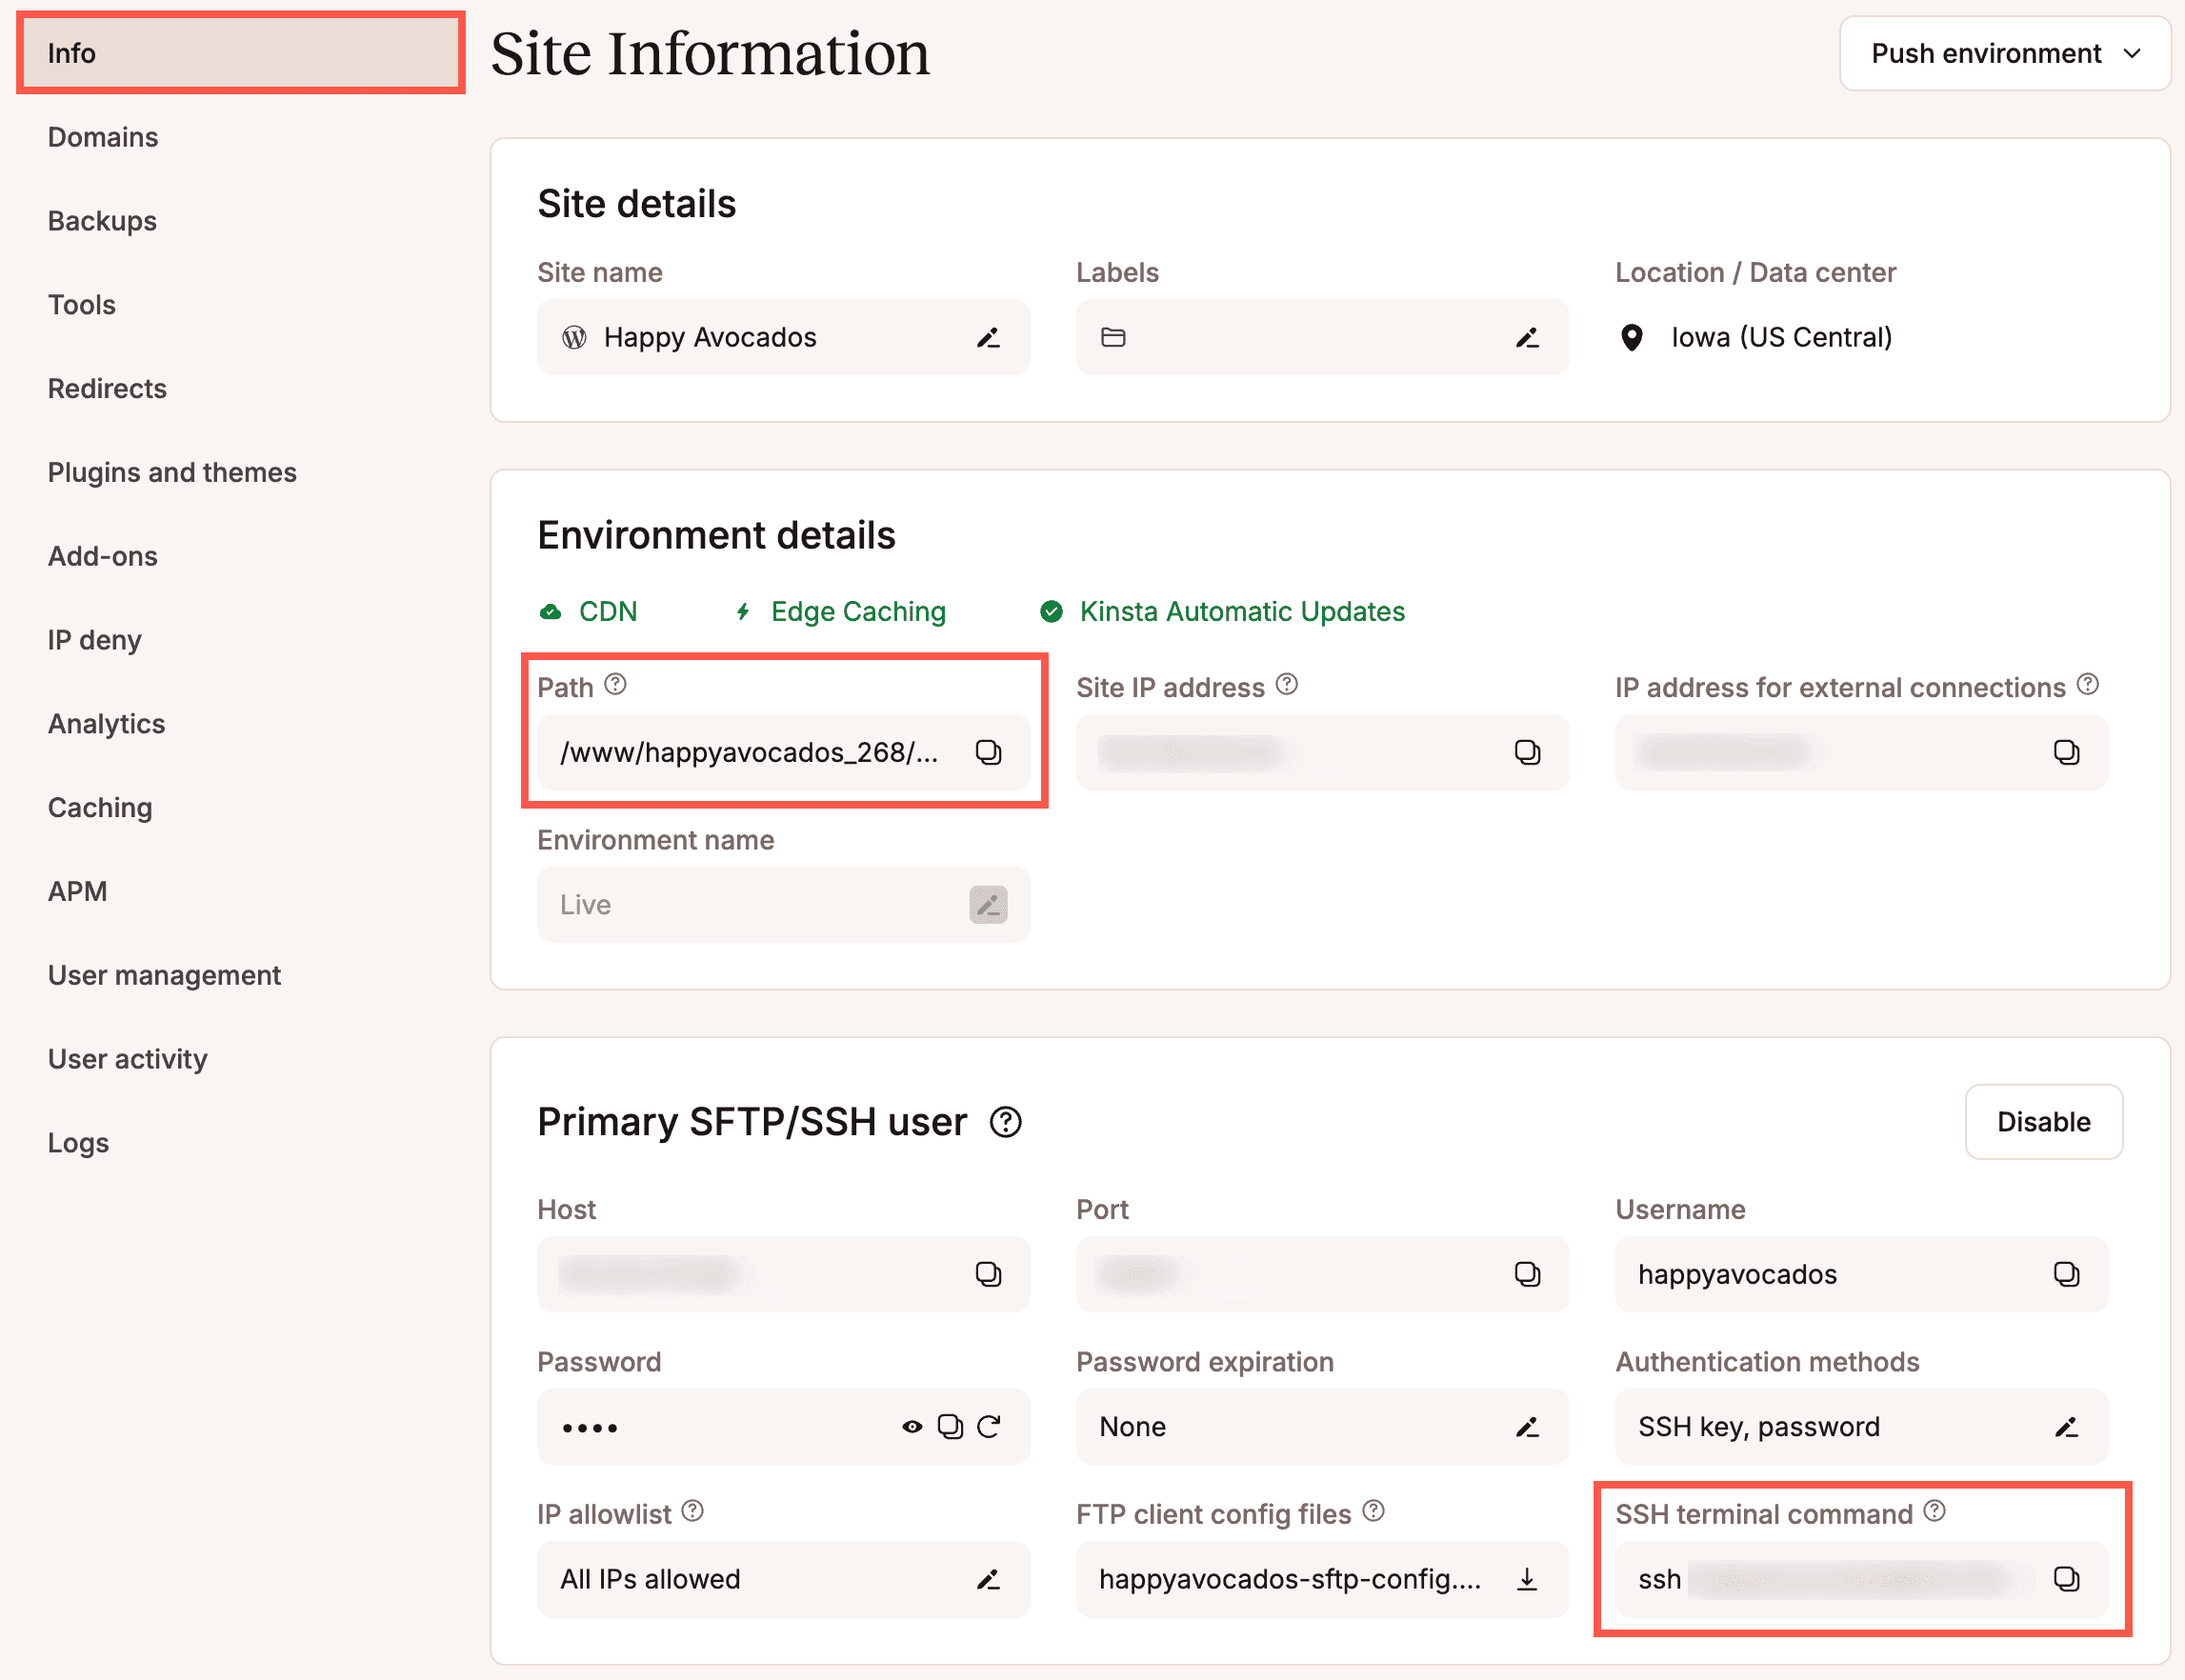
- Replace ssh user@ip-address -p port-number with the SSH terminal command in MyKinsta (Sites > sitename > Info > SFTP/SSH).
- Replace public-root with the Path in MyKinsta (Sites > sitename > Info > Environment details).
The only: - main section of the file refers to the repository branch that will trigger GitLab’s CI/CD process. With this configuration, pushes to the main branch will initiate a deployment to your Kinsta live environment. If you would like to specify another branch to trigger deployment, feel free to change the configuration.
If you’d like to implement additional granularity to the configuration to account for a staging environment, you can add an additional deploy_staging block with the URL and SSH details for your Kinsta staging environment. Update the branch to match your Git repository’s staging branch; the example below uses git checkout staging.
deploy_staging:
    environment:
        name: Staging
        url: your-staging-domain script:
        - ssh user@ip-address -p port-number "cd public-root && git checkout staging && git pull origin staging && exit"
    only:
        - staging
Notice the only: - staging section as well – this means pushing to the staging branch will initiate GitLab’s CI/CD process. You can adjust this as needed to deploy from the branch of your choosing.
Initial commit to GitLab
Now that WordPress and the GitLab configuration file are set up, let’s make an initial commit to GitLab. We’ll create a new branch called v0.1, start tracking the files in the repo, commit the changes, and push the changes to GitLab on the v0.1 branch. Run the commands below from ~/public to trigger the initial commit.
git checkout -b v0.1
git add .
git commit -a -m 'Initial Commit'
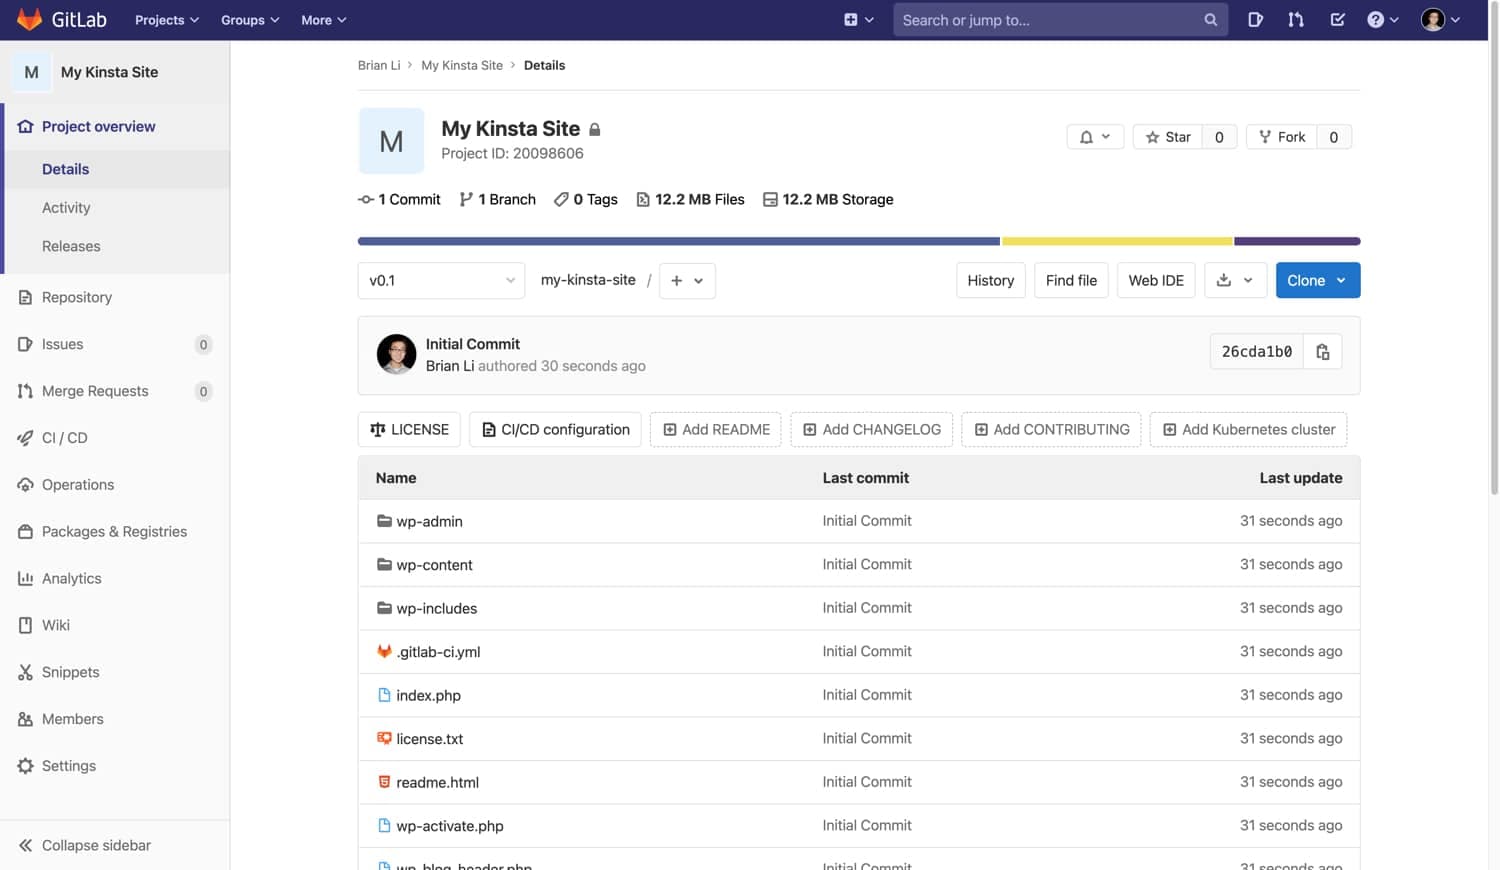
git push origin v0.1If you check your repository in GitLab, you’ll now see the files from your initial commit.
Configure Kinsta staging environment
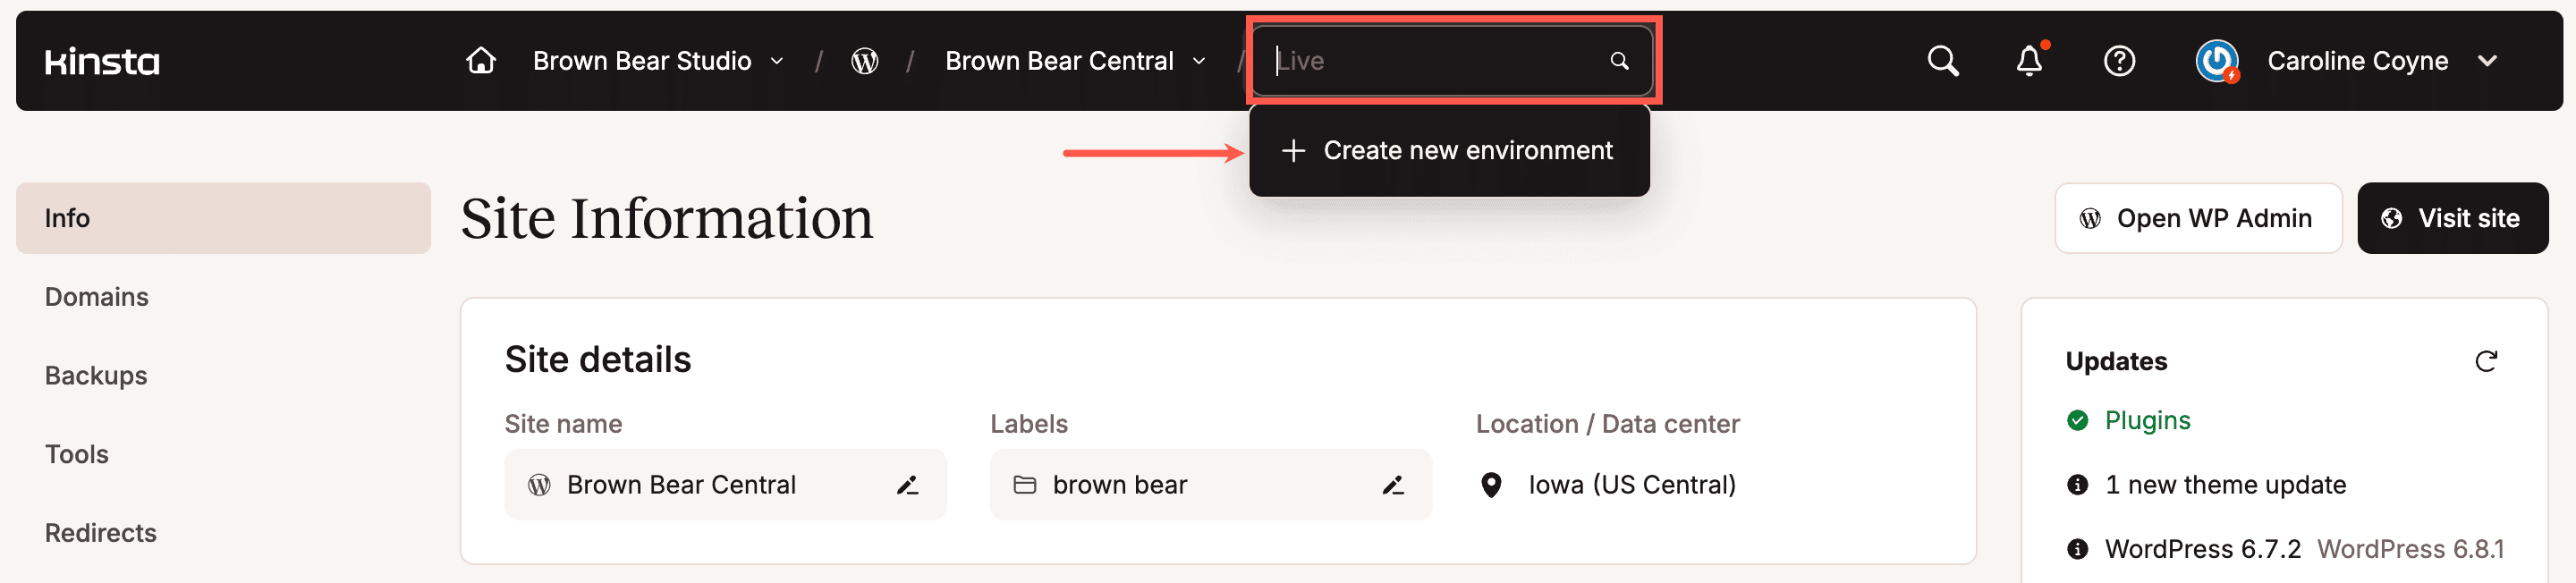
The next step is to create and configure a staging environment in MyKinsta, so you have a safe place to test out new plugins, themes, and code without impacting your live/production environment.
After creating your site’s staging environment, SSH into the staging environment in a new command line window (keep the separate window for your live environment open) and run the command below to check for any code changes.
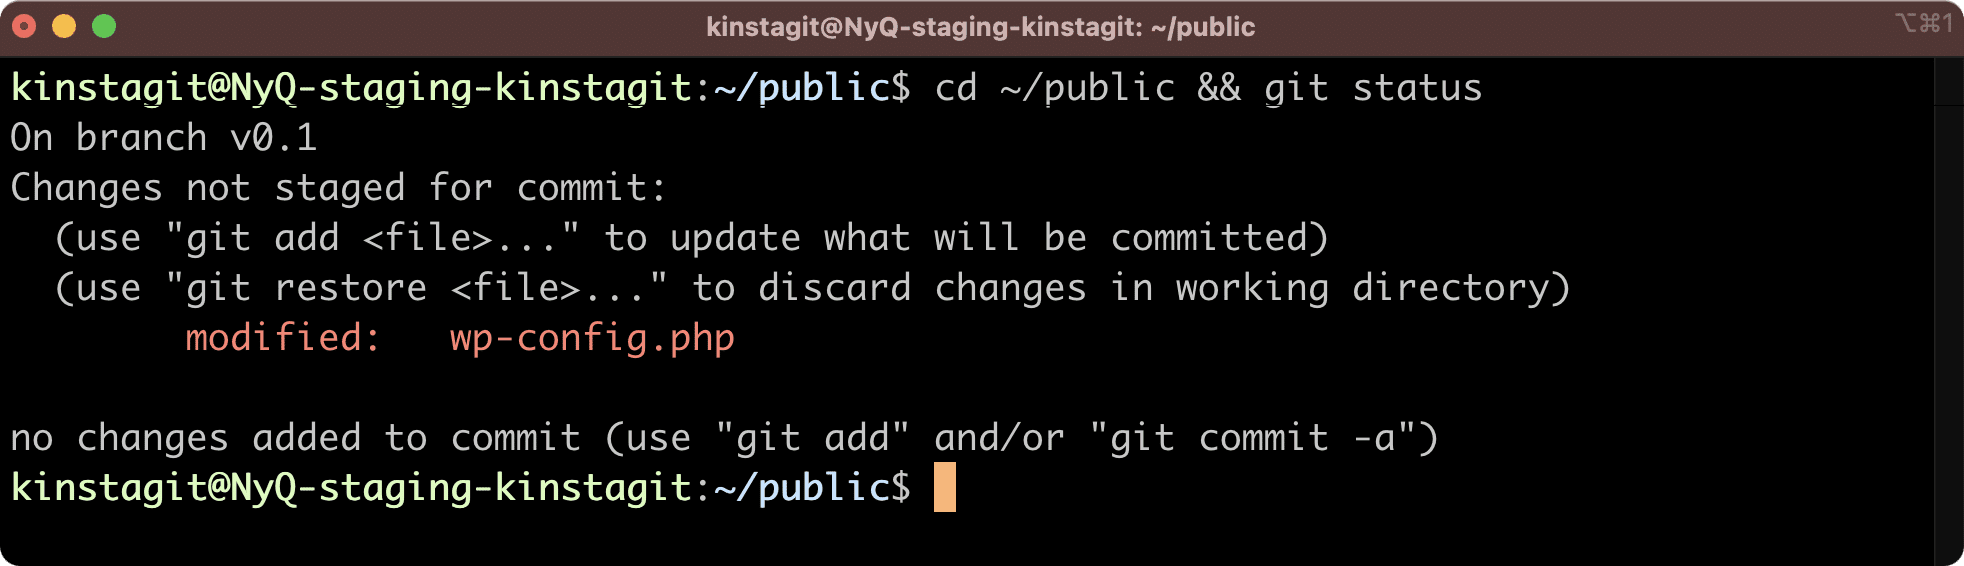
cd ~/public && git statusYou should see a message like the one below. As you can see, the branch is the v0.1 one created earlier. In addition, the wp-config.php file has changed. This happens because Kinsta adds a few additional lines to wp-config.php when creating the staging environment.
Commit and deploy changes to live
Finally, let’s make some changes to the staging environment and push a new commit to the Kinsta live environment using GitLab. Keep in mind that this method will bypass Kinsta’s Push to Live feature.
For this example, let’s install the Yoast SEO plugin using WP-CLI with the command below.
wp plugin install wordpress-seoAfter the Yoast SEO plugin has been installed, run the commands below to make a commit and push the changes to the v0.1 branch.
git add .
git commit -a -m ‘Installed Yoast SEO plugin.’
git push origin v0.1
Finally, let’s switch to the main branch, merge v0.1 to main, and push main to GitLab with the commands below. This will cause GitLab to initiate a deployment process to your Kinsta live environment because of the only: - main setting in the GitLab configuration file.
git checkout main
git merge v0.1
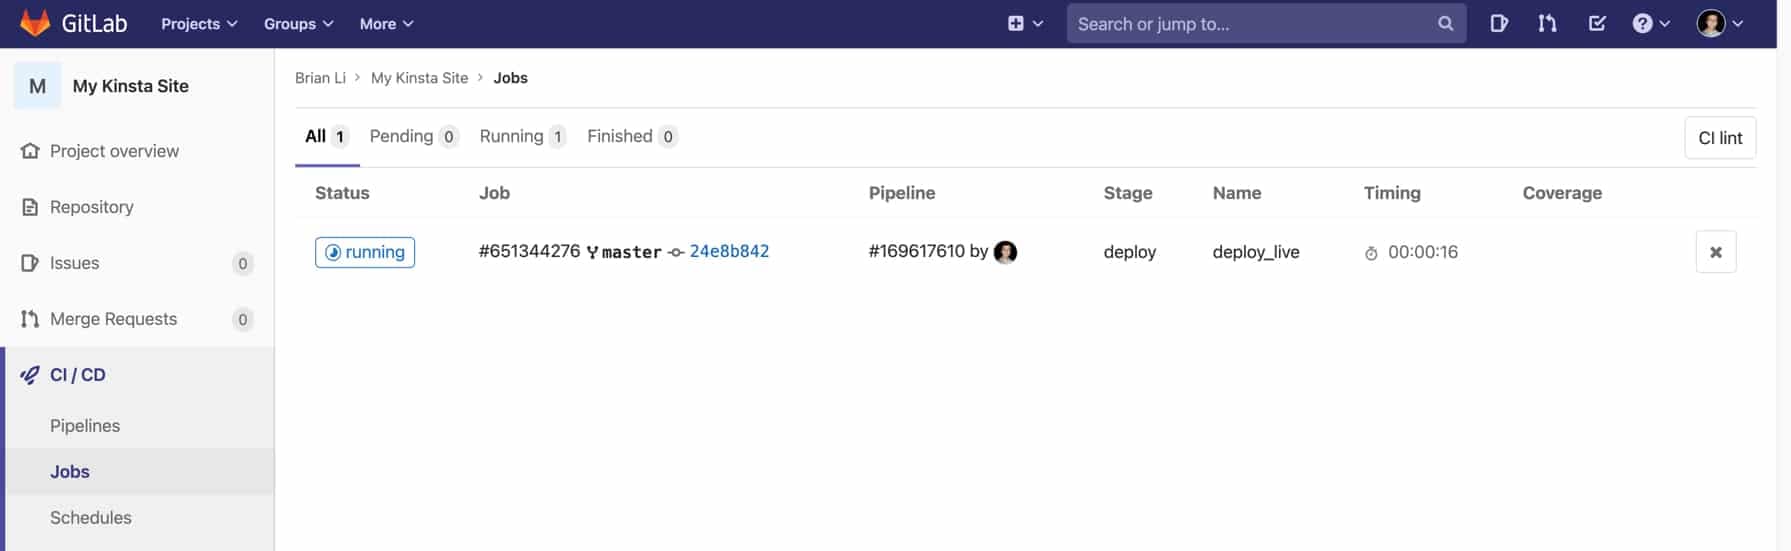
git push origin mainIn GitLab, go to CI/CD > Jobs in your repo’s sidebar, and you’ll see the job running. This job is GitLab deploying the Yoast SEO plugin to your Kinsta live environment.
After the job is finished, switch back to the command line window for your live environment and run wp plugin list in that window. You should see wordpress-seo in the list. This is the Yoast SEO plugin that was installed on the staging environment earlier.

If you’re a theme or plugin developer who works with Kinsta sites, setting up auto deploys via GitLab CI/CD can help speed up your workflow while providing version control.