Site Preview
With Site Preview, when you migrate your WordPress site to Kinsta, you can preview your site over your WordPress temporary URL (e.g. https://sitename.kinsta.cloud) before you make it live, even if the database or hard-coded files still use your live domain or another domain. Site Preview allows you to view your site at Kinsta without having to make any changes to your site’s database, files, or your domain’s DNS records. This tool lets WordPress think the URL it should use is the temp URL, without the hassle of running a search and replace in your site’s database.
Enable Site Preview
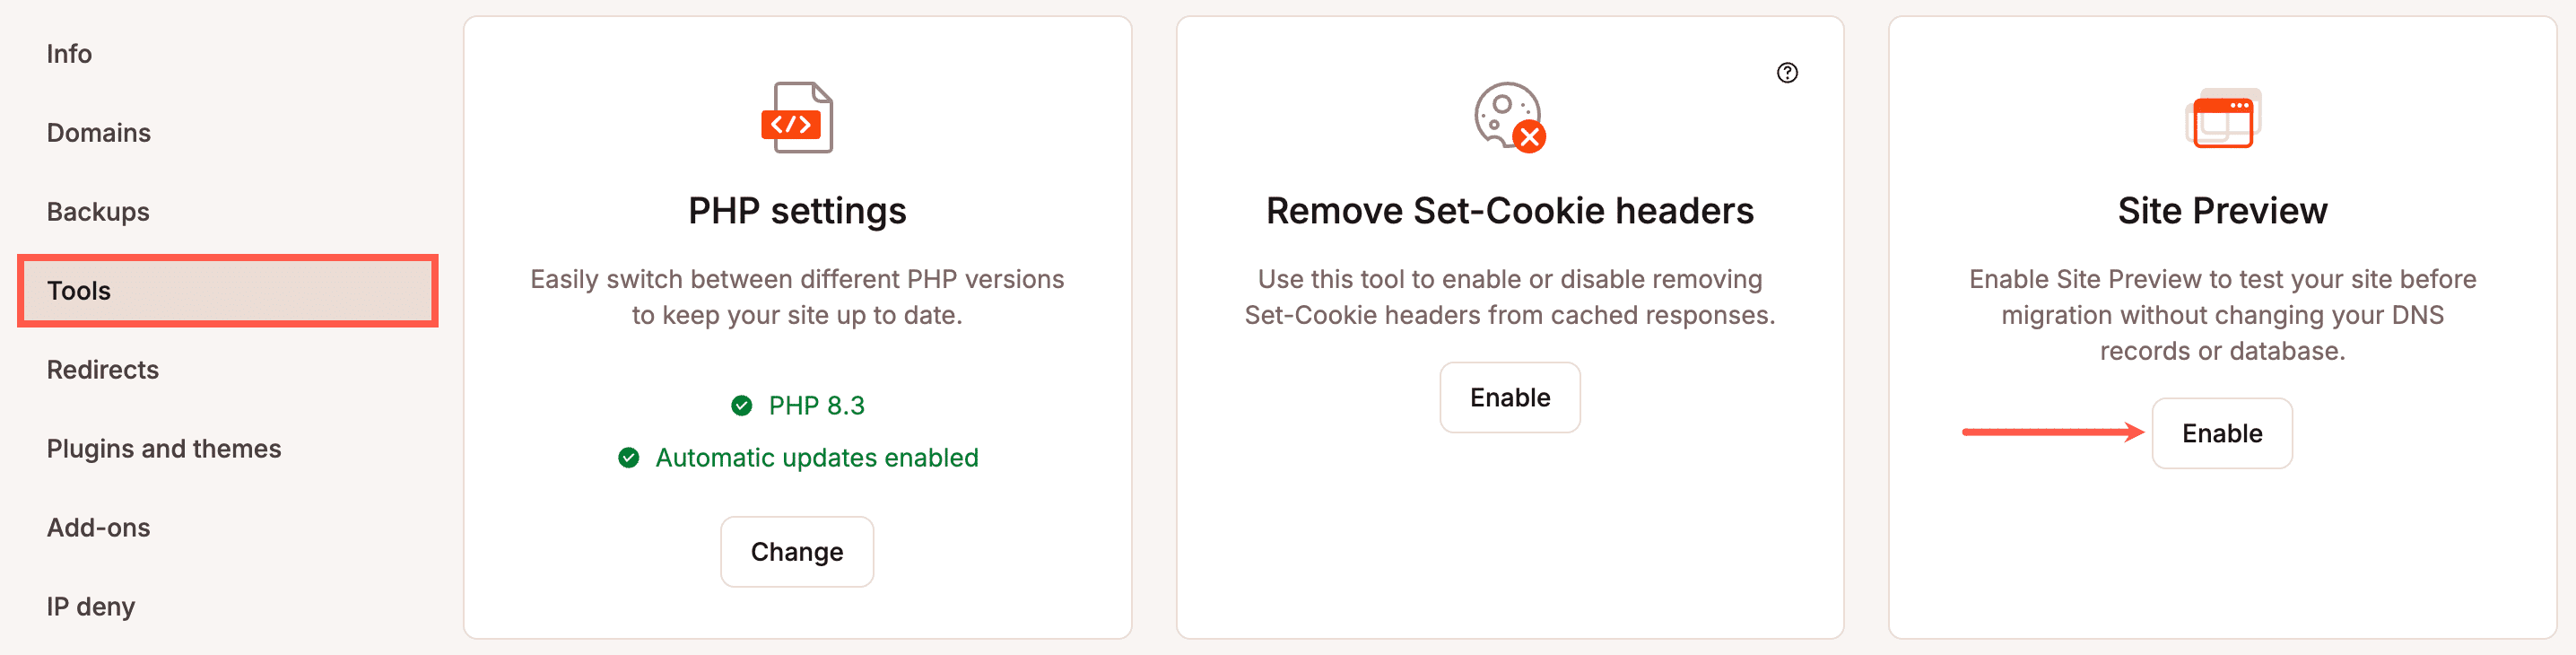
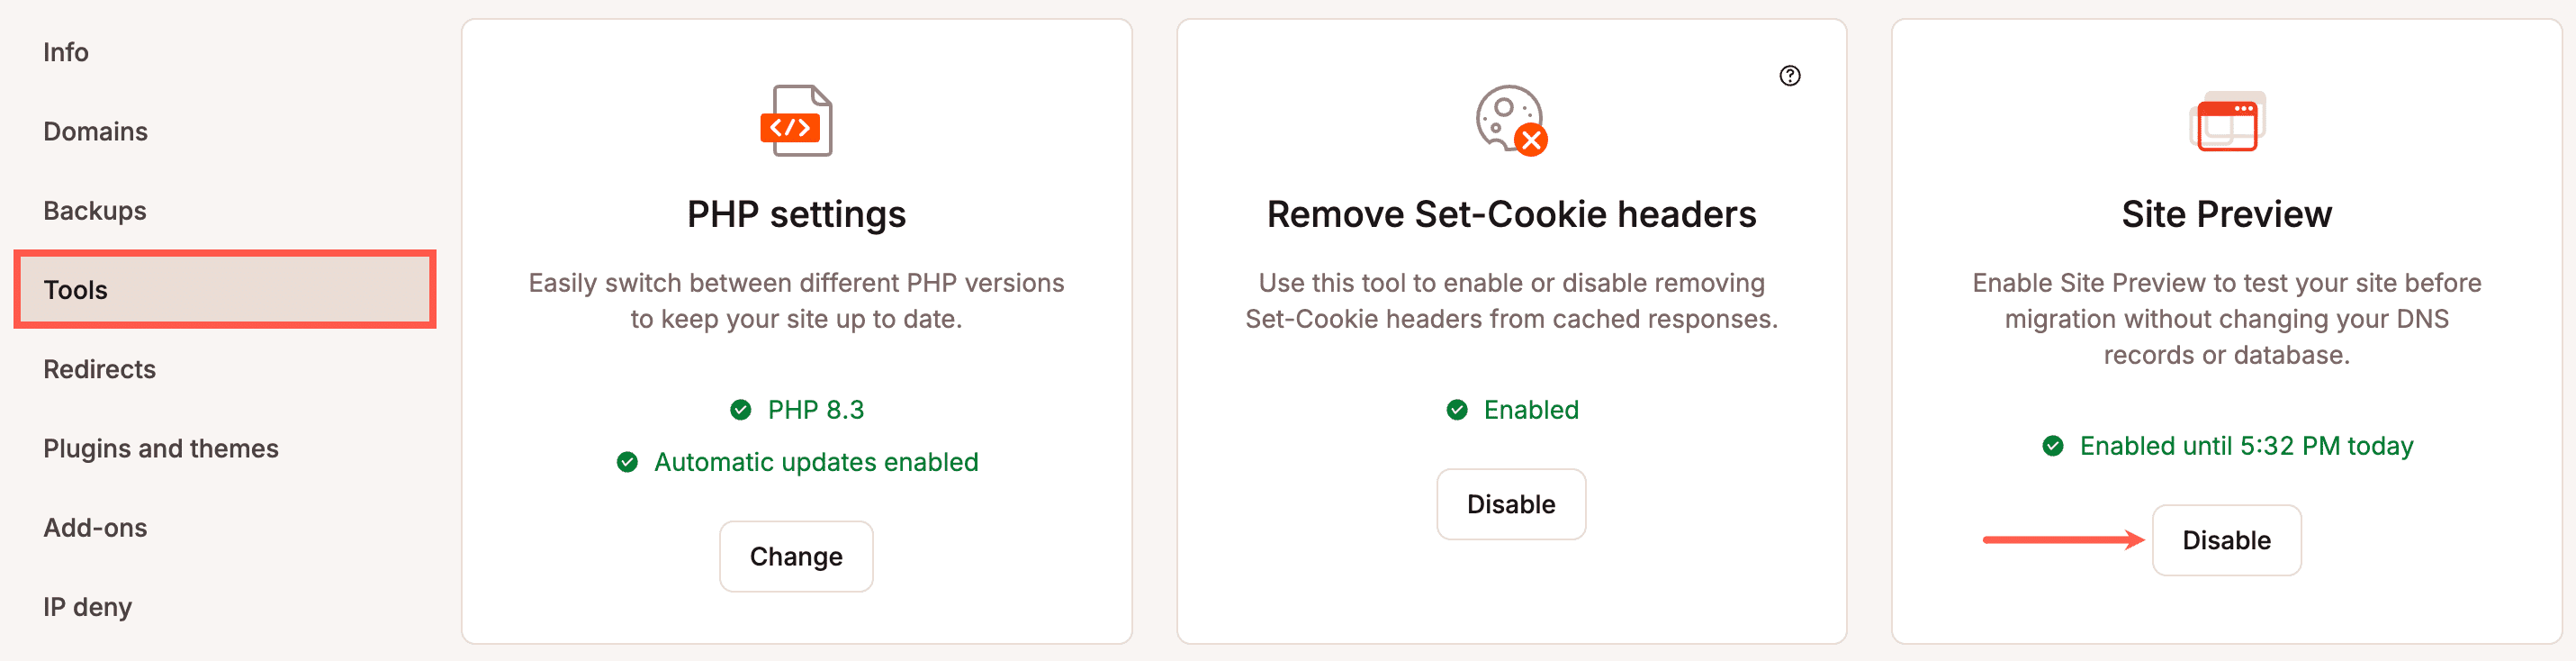
To activate Site Preview in MyKinsta, head over to your site’s Tools tab and click on the Enable button under Site Preview.
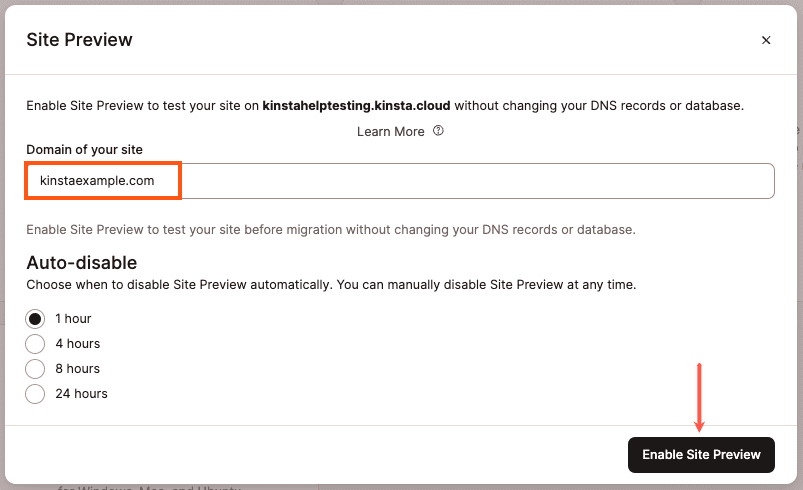
In the Site Preview modal/pop-up that appears, enter your live site’s domain. This needs to be the domain that is currently configured within your WordPress install and is typically the live domain but could be a different domain, depending on where you migrated the site from.
Choose how long you want Site Preview to be enabled under Auto-disable and click the Enable Site Preview button.
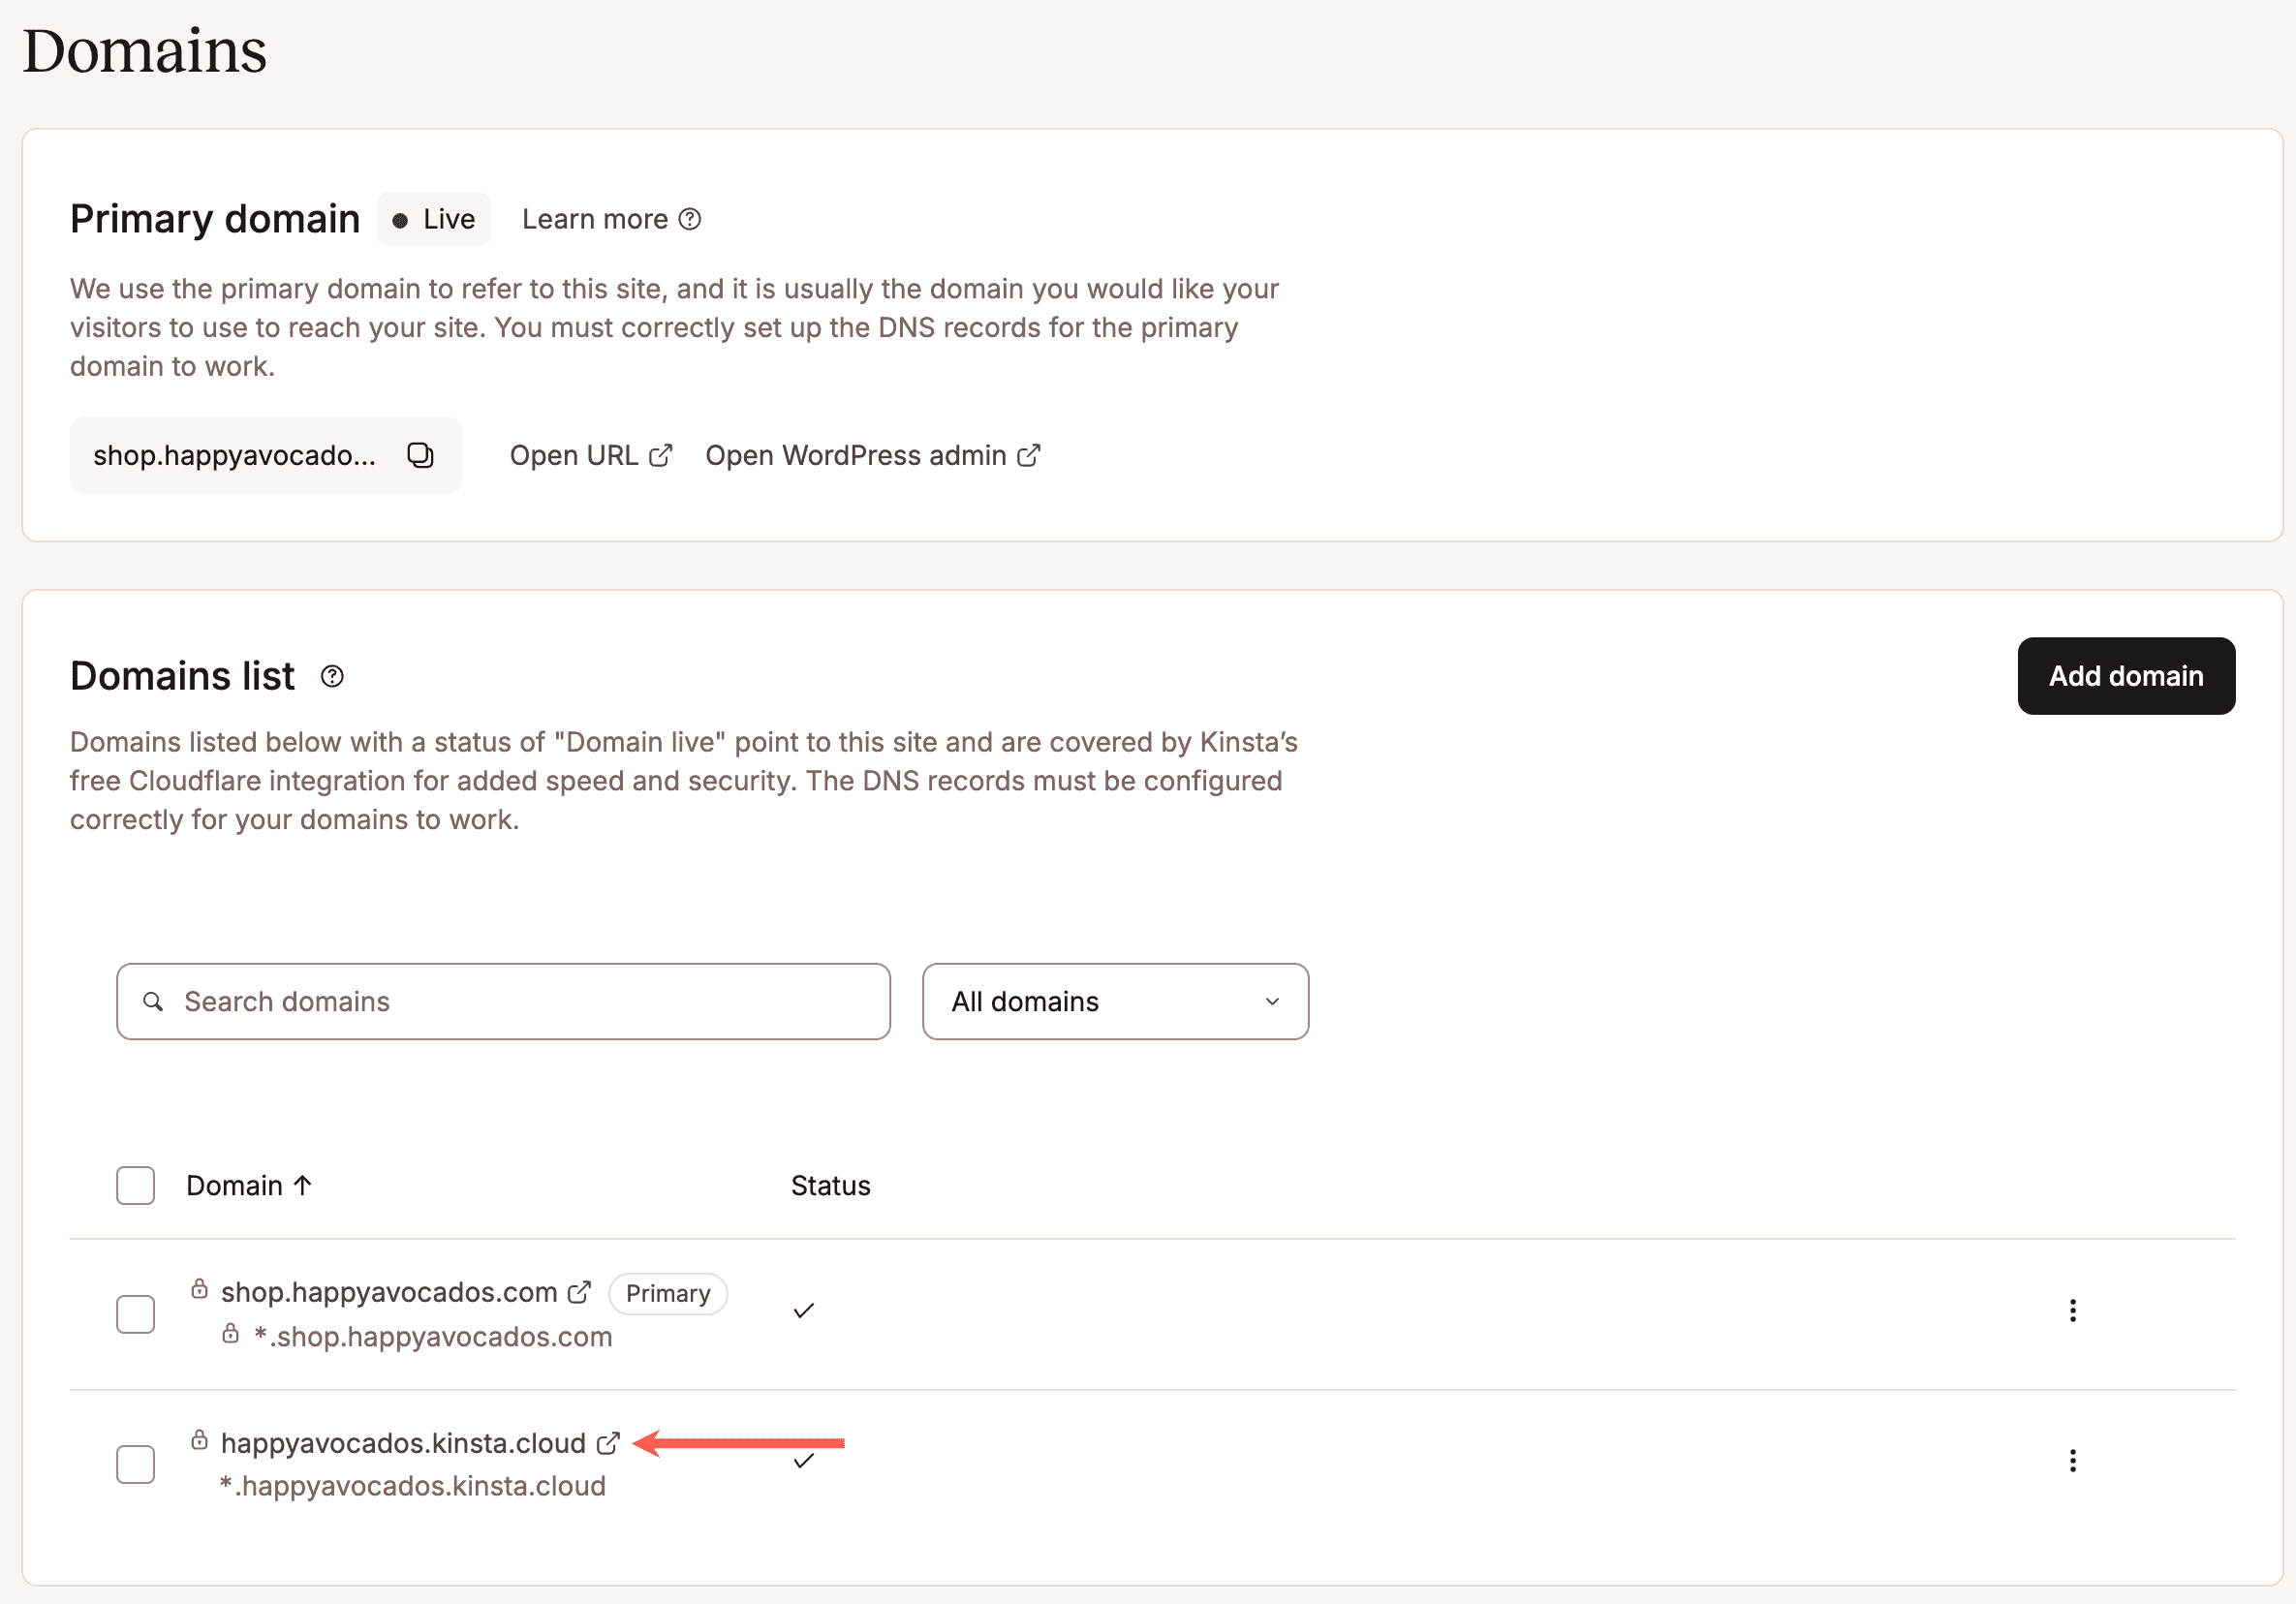
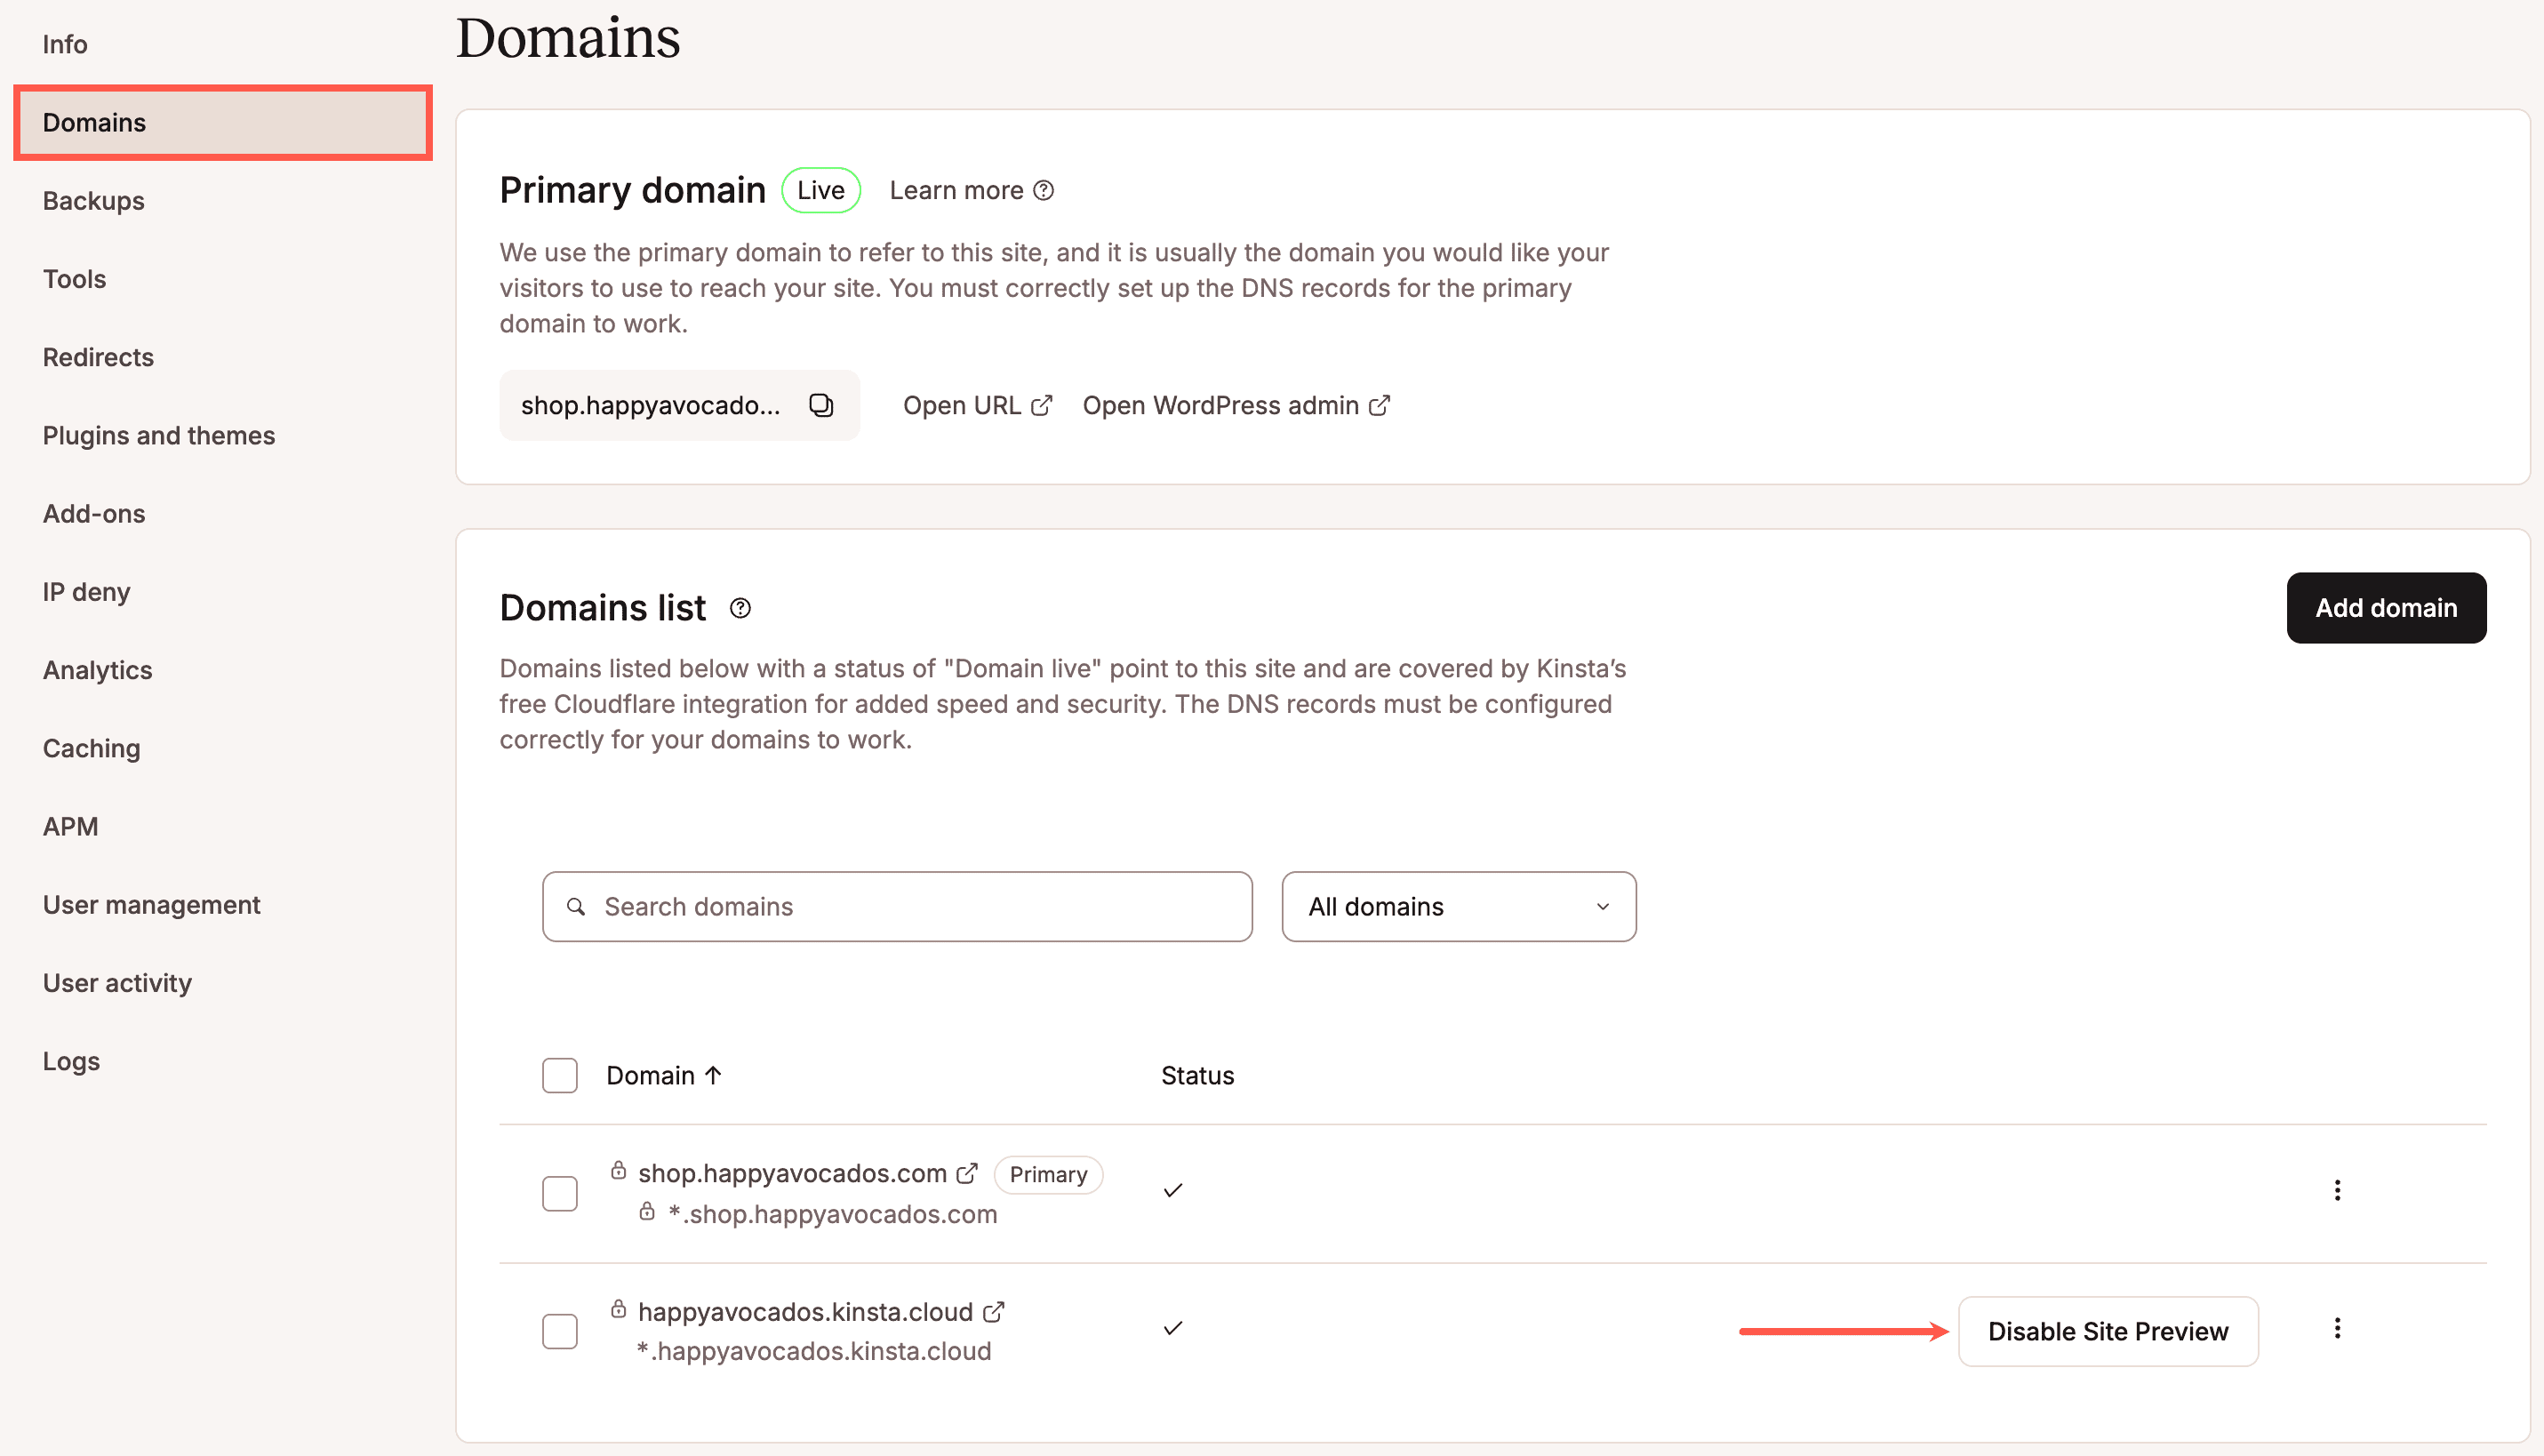
Once Site Preview is enabled, click Domains and open your site’s temporary URL in your browser. This is the URL that ends in .kinsta.cloud, for example website.kinsta.cloud, and may be different from your Primary domain.
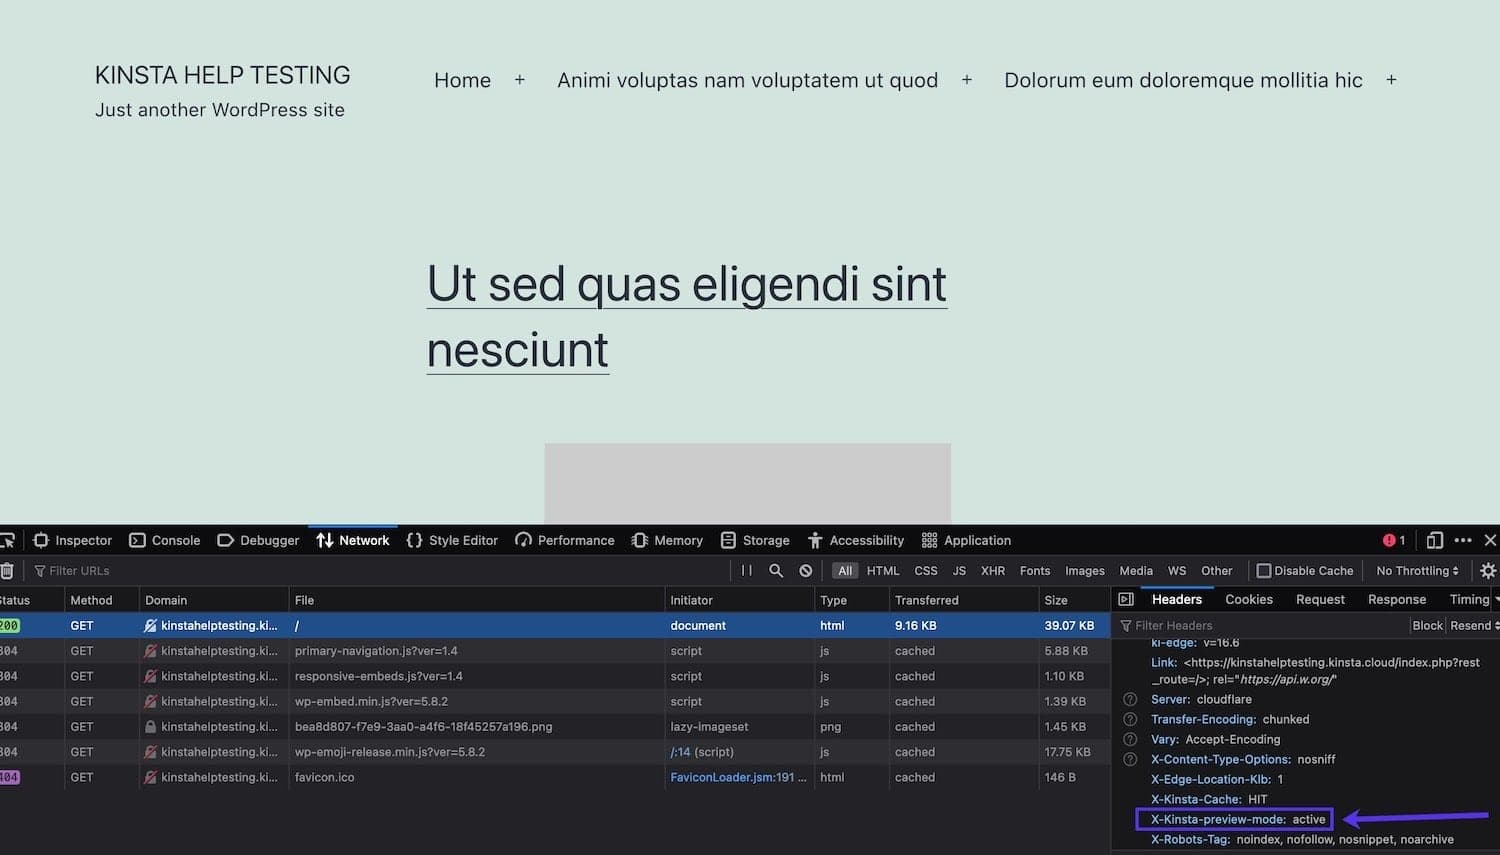
You’ll be able to view the site just like you normally would on the live domain. You can also confirm that Site Preview is working by inspecting your site with your browser’s developer tools and looking for the X-Kinsta-preview-mode: active header on the Network tab.
If you’re happy with the migrated content and you want to make the site live, you can disable the site preview. To see what steps are required to make the site live, check out our Go Live Checklist.
Disable Site Preview
Once you’re finished previewing your site, you can disable Site Preview. To do this, you have two options:
Option 1: On your site’s Domains page, click the Disable Site Preview button next to the temporary domain.
Option 2: Head back over to your site’s Tools tab in MyKinsta and click the Disable button under Site Preview.
Previewing a multisite
To preview a WordPress multisite, you’ll need to disable and re-enable Site Preview for each domain or subdomain you want to preview. The steps to preview a multisite are:
- Enable Site Preview for the domain you want to test first (example.com) by entering the domain in the Domain of your site field in the Enable Site Preview modal/pop-up.
- Open your site’s Kinsta temporary URL in your browser and test the site thoroughly.
- Disable Site Preview and re-enable it for the subdomain you want to test next (site1.example.com) by entering the subdomain in the Domain of your site field in the Enable Site Preview modal/pop-up.
- Open your site’s Kinsta temporary URL in your browser again and test the subsite thoroughly. You’ll use the same Kinsta temporary URL to preview each site. Note: If you do not see the correct subsite, try clearing your browser cache or loading the URL in an incognito/private window.
- Repeat until any subdomains you want to preview are tested. Turn Site Preview off for the last time.
Notifications
We send email notifications to the Company Owner, Company Administrator, and Company Developer users when:
- Site Preview is enabled by a user.
- Site Preview is disabled by a user.
- Site Preview is automatically disabled after the time selected in Auto-disable.
Note: If our Support team enables or disables Site Preview, we do not send any email notifications.