Adding and configuring your domain correctly and pointing the necessary DNS records to Kinsta is a crucial part of going live with your WordPress site. Your Domains list shows which domains can be used to access your site. The primary domain is the main domain you want your visitors to arrive through. When adding a new domain, first determine whether it uses Cloudflare or non-Cloudflare DNS, then follow the appropriate setup steps.
Every custom domain you add automatically includes a free SSL certificate. Your site’s temporary domain (e.g. sitename.kinsta.cloud) is automatically covered by the wildcard certificate for the kinsta.cloud domain. You can also add a custom SSL certificate.
If you haven’t already, we also recommend reviewing our go-live checklist to make sure you have everything ready to make your site live.
Within your site’s Info page, you can view the Domains your site is using and if the SSL certificate is valid.
Domain information on your site’s Info page.
Determine if a domain is Cloudflare or non-Cloudflare
Users with active Cloudflare accounts of their own will need to follow a special set of instructions to maintain compatibility between the two Cloudflare zones (their Cloudflare account and our free Cloudflare integration).
If you know your domain is already connected to Cloudflare through your own active Cloudflare account, then it is considered a “Cloudflare domain.” To add your domain, refer to Add a Cloudflare domain.
If you know your domain has no connection to Cloudflare (proxy or DNS), then it is considered a “non-Cloudflare domain.” To add your domain, refer to Add a non-Cloudflare domain.
When you add your domain in MyKinsta, our system will help guide you through the process and will identify whether or not your domain is a Cloudflare or non-Cloudflare domain.
If you want to check the domain yourself, you can use a tool like Whois.com or whatsmydns.net to view the name servers. Or, you can use the command line interface (CLI) with the following command (replacing example.com with your domain name):
dig +nssearch example.com
If the name servers end with cloudflare.com (e.g. sasha.ns.cloudflare.com), your domain is a Cloudflare domain. If the name servers end with anything else, your domain is a non-Cloudflare domain.
Note: There is one exception to the above, though it isn’t common. If you have a Cloudflare account and you set up custom name servers, they can end with something other than cloudflare.com.
Add a Cloudflare domain
1. Add domain
In MyKinsta, go to Sites > sitename > Domains, and click Add domain.
Add a new domain in MyKinsta.
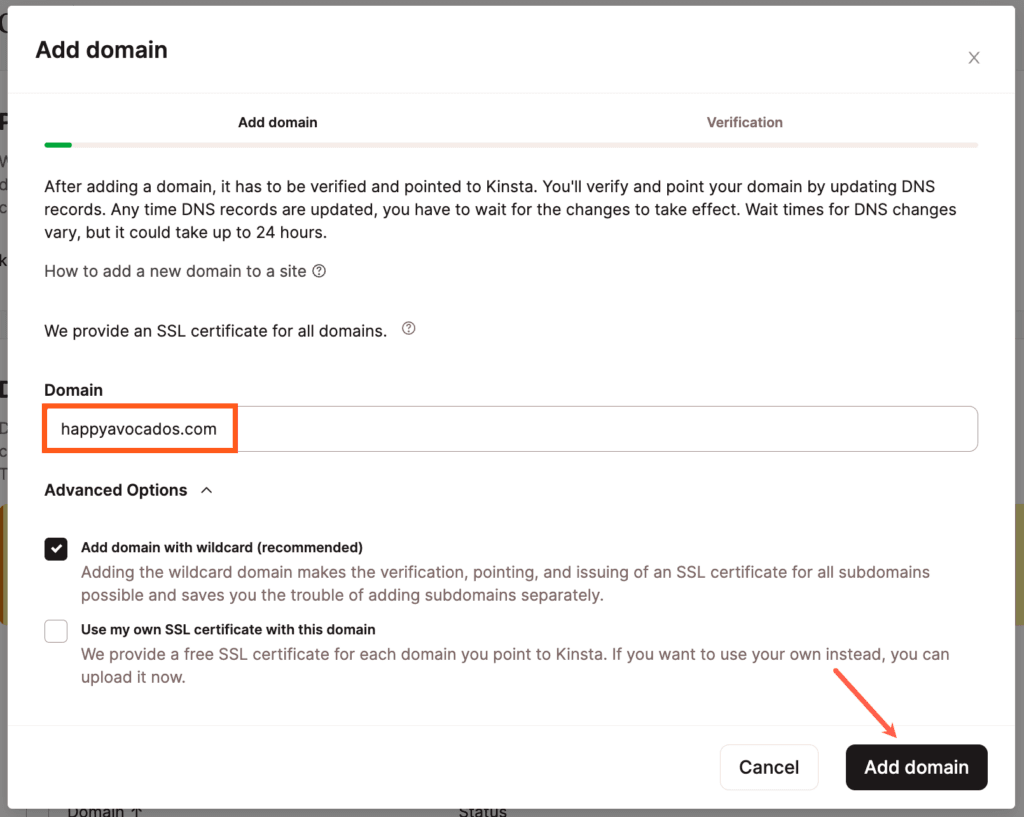
In the Add domain modal/pop-up, enter your domain name in the Domain field. If you want to add your domain without the wildcard subdomain (*.example.com) or if you want to add a custom SSL certificate, click on the Advanced Options link to see those options and make your selections.
Add your custom domain in MyKinsta.
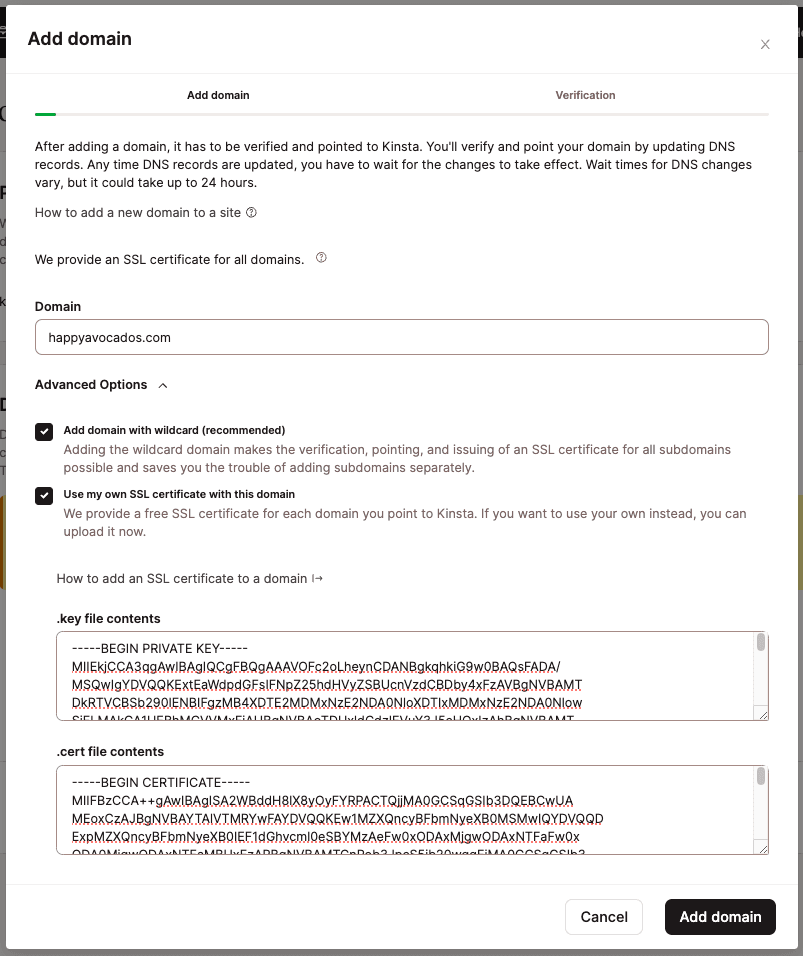
If you want to add a custom SSL certificate while adding the domain, select Use my own SSL certificate with this domain and enter your SSL certificate and key in the corresponding fields.
Add your custom domain and custom SSL certificate in MyKinsta.
When you’ve entered the details for your domain and made your selections under Advanced Options (if applicable), click the Add domain button.
2. Verify domain
Verifying your Cloudflare domain is a two-phase process. You’ll need to add a TXT record for the initial domain verification, wait for DNS propagation, then add 1 or 2 more DNS records to complete the verification. If you have already verified the domain with MyKinsta and you’re adding a company DNS-managed domain or subdomain, Kinsta checks user access to the verified domain and skips this verification step.
In the Add domain window, you’ll see a single TXT record that you need to add at Cloudflare to begin verifying your domain. Copy the Name/host and the Value fields.
If you have CAA records in place, you may also need to update or remove those records. The Add domain window will also show any CAA records that require updating.
First TXT record in MyKinsta to verify Cloudflare domain.
Phase one TXT record
This TXT record verifies the domain’s ownership. Once the domain is fully validated, you can remove this record from your DNS if necessary.
Name:k-verification-xxxxxx
Value: Unique UUID value from MyKinsta (xxxxxxxx-xxxx-xxxx-xxxx-xxxxxxxxxxxx)
Go to your Cloudflare dashboard (log in if you haven’t already), select your domain, and click on the DNS tab. Click the Add record button and create a new TXT record with the details you copied from MyKinsta.
Add domain verification TXT record in Cloudflare.
After you’ve added the TXT record at Cloudflare, click Verify to confirm that the record exists in your DNS and matches the value provided by Kinsta. Alternatively, click OK, I’ve done it to close the verification window and allow the checks to run in the background.
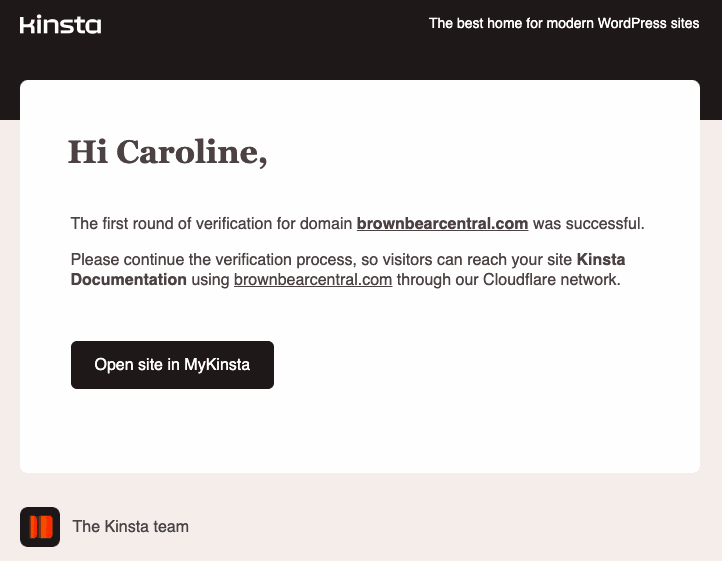
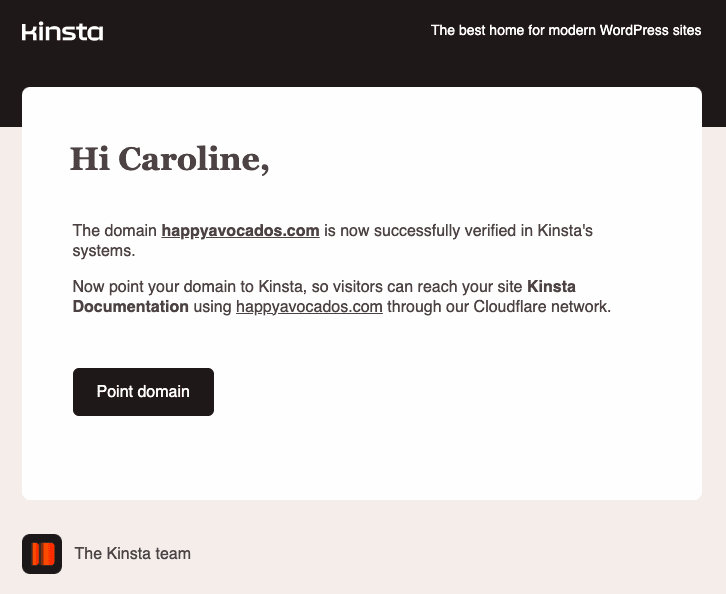
Once DNS propagates (usually within a few minutes from Cloudflare, but it may depend on the TTL set when adding the record), you’ll receive a notification email like this to let you know you can continue with the next phase of verification:
Initial domain verification email for Cloudflare domain.
Next, you’ll be prompted to add 1 or more DNS records. If you have closed the verification window, click Verify domain to view the records. Copy the Name/host and Value/Domain name fields for the DNS record(s).
Second set of DNS records in MyKinsta to verify Cloudflare domain.
Phase two DNS records
TXT record
This TXT record allows Cloudflare to verify that you own the domain and are authorized to use their services for that domain. Once the domain is fully validated, you can remove this record from your DNS if necessary.
Name: _cf-custom-hostname
Value: Unique UUID value from MyKinsta (xxxxxxxx-xxxx-xxxx-xxxx-xxxxxxxxxxxx)
CNAME record
Kinsta uses this DNS entry to update the domain with the necessary tokens for your SSL certificate. As long as this record exists in your DNS, you won’t need to manually renew your SSL certificate; Kinsta manages it for you. We don’t recommend removing this DNS entry, as you will need to re-add it each time the SSL certificate requires renewal.
Name: _acme-challenge
Domain name: example.com.kinstavalidation.app
Go to your Cloudflare dashboard once again, select your domain, and click on the DNS tab. Click the Add record button and create the new DNS records with the details you copied from MyKinsta.
After you’ve added the DNS record(s) at Cloudflare, click Verify to confirm that the record exists in your DNS and matches the value provided by Kinsta, and then click Ok, I’ve done it. Alternatively, click OK, I’ve done it to close the verification window and allow the checks to run in the background.
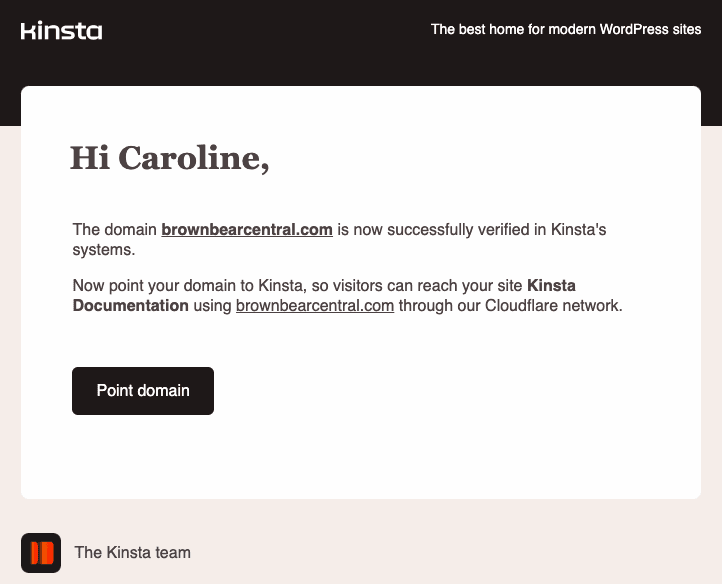
Once DNS propagates (usually within a few minutes from Cloudflare, but may depend on the TTL set when adding the record), you’ll receive another notification email to let you know your domain is fully verified and can be pointed to Kinsta:
Domain verification email from Kinsta
3. Point domain to Kinsta
After your domain has been successfully verified, you’ll see a Point domain button next to your custom domain in MyKinsta. Click this button to start the domain pointing process.
Point your domain to Kinsta.
Point your root domain to Kinsta
To point your root domain to Kinsta, add the first CNAME record (Name/host @) shown in the Point your domain to Kinsta modal/pop-up to your Cloudflare DNS settings.
CNAME record to point your domain to Kinsta.
Go to your Cloudflare dashboard and click on the DNS tab.
Delete conflicting A record at Cloudflare.
After deleting the A record, click the Add record button and create a new CNAME record with the details below:
Type: CNAME
Name: @
Target: Your site’s “hosting.kinsta.cloud” domain (as shown in the Point your domain to Kinsta modal/pop-up)
TTL: Auto
Add a CNAME for your root domain in Cloudflare.
After adding the CNAME record, you’ll see a checkmark next to your root domain in MyKinsta. This indicates that the root domain has been pointed to Kinsta correctly. You must not remove this CNAME record from your DNS.
A checkmark next to your root domain in MyKinsta indicates it’s pointed correctly.
Point your WWW domain to Kinsta
In addition to configuring a CNAME record for your root domain, we recommend pointing the www version of your domain to Kinsta. This means users can access your site from both the www and non-www versions. For example, if your site is mysite.com, users can also enter www.mysite.com.
To do this, add the second CNAME record (Name/host www) shown in the Point your domain to Kinsta modal/pop-up to your Cloudflare DNS settings.
CNAME record to point your www domain to Kinsta.
After deleting the conflicting CNAME record, click Add Record to create a new CNAME record with the settings below:
Type: CNAME
Name: www
Target: Your site’s “hosting.kinsta.cloud” domain (as shown in the Point your domain to Kinsta modal/pop-up)
TTL: Auto
Create a CNAME record for your www domain at Cloudflare.
Point your wildcard domain to Kinsta (optional)
We also support wildcard subdomains. A wildcard subdomain is a “catch-all” subdomain. For example, if you have three DNS records set up like this:
A record for sub.domain.com pointing to 192.0.2.1
A record for sub2.domain.com pointing to 192.0.2.2
A record for *.domain.com pointing to 192.0.2.3
Any request to a subdomain that is not sub.domain.com or sub2.domain.com will be automatically handled by the *.domain.com A record and routed to 192.0.2.3.
If you would like to use the wildcard domain functionality on Kinsta, first check the following:
Make sure you added your wildcard domain in the steps above. If not, you’ll need to remove the domain, add it again, and make sure Add domain with wildcard is selected.
If you added a custom SSL, make sure it supports your wildcard subdomain (*.example.com).
Then, you can create an additional DNS record with the settings below:
Type: CNAME
Name: *
Target: Your site’s “hosting.kinsta.cloud” domain (as shown in the Point your domain to Kinsta modal/pop-up)
TTL: Auto
Add a wildcard CNAME for your Cloudflare domain.
If you’re using a free Cloudflare plan, you may see a message that reads, “Some of your DNS only records are exposing IPs that are proxied through Cloudflare. Make sure to proxy all A, AAAA, and CNAME records pointing to proxied records to avoid exposing your origin IP.”
This notification message is normal and not an issue, in this case, because the target kinsta.cloud domain is proxied behind Cloudflare as well.
Once the wildcard CNAME record has propagated, accessing any subdomain that isn’t pointed elsewhere will result in the request being routed to Kinsta.
Once you’ve added your custom domain, you must ensure it is set up correctly as your site’s primary domain. We also recommend forcing your site to load over HTTPS for added security.
Add a non-Cloudflare domain
1. Add domain
In MyKinsta, go to Sites > sitename > Domains, and click Add domain.
Add a new domain in MyKinsta.
In the Add domain modal/pop-up, enter your domain name in the Domain field. If you want to add your domain without the wildcard subdomain (*.example.com) or if you want to add a custom SSL certificate, click on the Advanced Options link to see those options and make your selections.
Add your custom domain in MyKinsta.
If you want to add a custom SSL certificate while adding the domain, select Use my own SSL certificate with this domain and enter your SSL certificate and key in the corresponding fields.
Add your custom domain and custom SSL certificate in MyKinsta.
When you’ve entered the details for your domain and made your selections under Advanced Options (if applicable), click the Add domain button.
2. Verify domain
Next, you’ll need to verify ownership of your domain in order to use Kinsta’s free Cloudflare integration. To verify a new domain, you’ll need to add a TXT record and a CNAME record to your domain’s DNS. Your DNS provider is where your domain’s name servers are pointed to. This may be your domain’s registrar, but it could be another DNS provider.
If you have CAA records in place, you may also need to update or remove those records. The Add domain window will also show any CAA records that require updating.
If you’re using Kinsta’s DNS, the DNS records for domain verification will be automatically added for you, so you can skip to Step 3 — Point Domain.
If you’re using a different DNS provider, log in to its management panel and add the new DNS records.
DNS records in MyKinsta to verify your domain.
TXT record
This TXT record allows Cloudflare to verify that you own the domain and are authorized to use their services for that domain. Once the domain is fully validated, you can remove this record from your DNS if necessary.
Name: _cf-custom-hostname
Value: Unique UUID value from MyKinsta (xxxxxxxx-xxxx-xxxx-xxxx-xxxxxxxxxxxx)
CNAME record
Kinsta uses this DNS entry to update the domain with the necessary tokens for your SSL certificate. As long as this record exists in your DNS, you won’t need to manually renew your SSL certificate; Kinsta manages it for you. We don’t recommend removing this DNS entry, as you will need to re-add it each time the SSL certificate requires renewal.
Name: _acme-challenge
Domain name: example.com.kinstavalidation.app
Log in to your DNS provider’s management panel and add a new TXT record.
For the TXT record, use _cf-custom-hostname for the Hostname field and your unique UUID value for the Content/Text field. After you’ve added the TXT record details, save your new TXT record.
For the CNAME record, use _acme-challenge for the Hostname field and your unique Domain name value in the Points to/Target hostname field. After you’ve added the CNAME record details, save your new CNAME record.
After you’ve added the DNS record(s), click Verify to confirm that the record exists in your DNS and matches the value provided by Kinsta, and then click Ok, I’ve done it. Alternatively, click OK, I’ve done it to close the verification window and allow the checks to run in the background.
Depending on your DNS provider, the DNS records may take up to 24 hours to propagate. After a successful domain verification, you’ll receive a notification email like this:
Domain verification email from Kinsta.
3. Point domain
After your domain has been successfully verified, click the Point domain button in the email or the Point domain button next to your custom domain in MyKinsta.
Point your domain to Kinsta.
Point your root domain to Kinsta
In the Point Your Domain to Kinsta modal/pop-up, you’ll see your Site IP Address. This is the IP address for your domain’s A record.
A record to point your domain to Kinsta.
Next, go to your DNS provider and update your A record to point to your Site IP Address. For more detailed information on updating DNS at some popular registrars and DNS managers, check out these articles:
If you’re using Kinsta’s DNS, here’s how you can update your A record:
Open MyKinsta in a new tab, navigate to DNS management and click on your domain.
If you already have an A, AAAA, or CNAME record with the given Name/host, you should remove that before adding the new A record by clicking the Delete (trash can) icon under the Actions column. Note: You must not remove the _acme-challenge CNAME record, as this is used for the SSL renewal on non-wildcard domains.
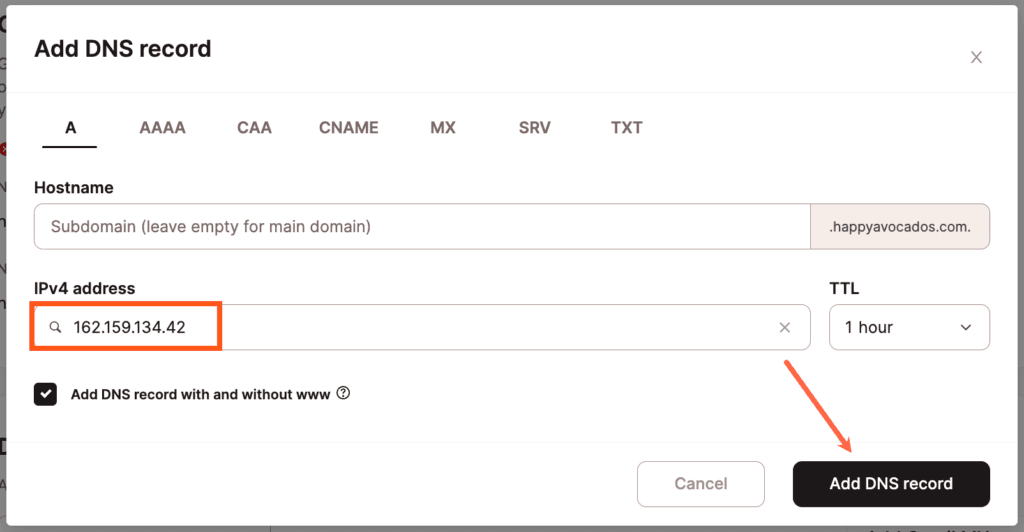
Click Add a DNS Record button, and select the A option.
If you’re pointing your root domain, leave the Hostname field blank. If you’re pointing a subdomain, specify your subdomain in the Hostname field.
Input your Site IP Address in the IPV4 Address field.
Click Add DNS Record.
Create an A record in Kinsta’s DNS.
After adding the DNS record, go back to the Point Your Domain to Kinsta modal, and click OK, I’ve Done It.
Point your WWW domain to Kinsta
In addition to configuring an A record for your root domain, we also recommend pointing the www version of your domain to Kinsta (if you haven’t already). This means users can access your site from both the www and non-www versions. For example, if your site is mysite.com, users can also enter www.mysite.com.
CNAME record to point your www domain to Kinsta.
Note: If you’re using Kinsta’s DNS and selected the option to Add DNS record with and without www, your www CNAME is already pointed.
To do this, add or edit a CNAME record for your www domain and point it to your root domain.
Create a CNAME record for your www domain.
If you’re using Kinsta’s DNS, click on Add a DNS Record, and select the CNAME option. Use the settings below for the CNAME record:
Type: CNAME
Hostname: www
Points To: Your root domain (e.g. example.com or @)
TTL:1 hour
Point your wildcard domain to Kinsta (optional)
We also support wildcard subdomains. A wildcard subdomain is a “catch-all” subdomain. For example, if you have three DNS records set up like this:
A record for sub.domain.com pointing to 192.0.2.1
A record for sub2.domain.com pointing to 192.0.2.2
A record for *.domain.com pointing to 192.0.2.3
Any request to a subdomain that is not sub.domain.com or sub2.domain.com will be automatically handled by the *.domain.com A record and routed to 192.0.2.3.
If you would like to use the wildcard domain functionality on Kinsta first check the following:
Make sure you added your wildcard domain in the steps above. If not, you’ll need to remove the domain, add it again, and make sure Add domain with wildcard is selected.
If you added a custom SSL, make sure it supports your wildcard subdomain (*.example.com).
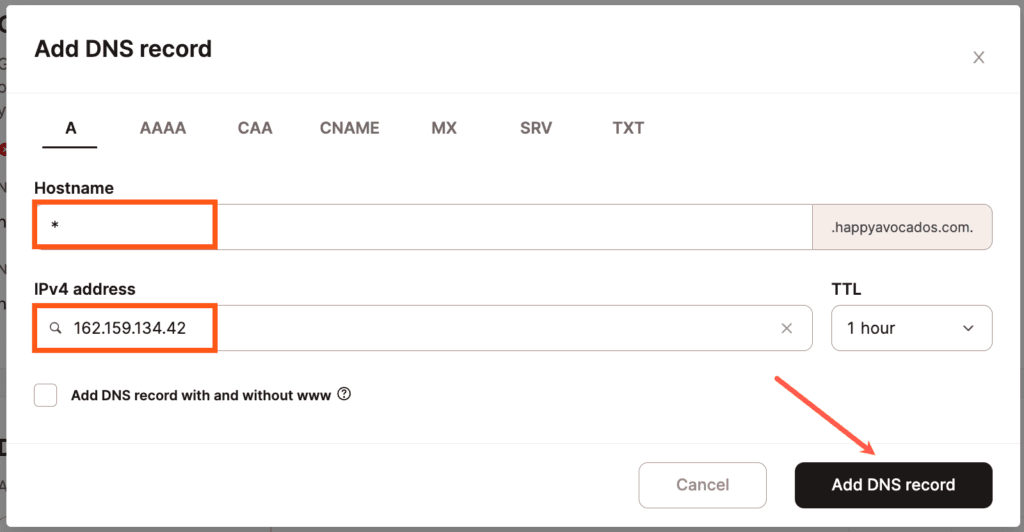
Then, you can create an additional A record with the settings below:
Type: A
Hostname: *
Points To: Your Site IP Address from MyKinsta
TTL:1 hour
Add a wildcard A record for your domain.
After adding a wildcard A record, accessing any subdomain that isn’t pointed elsewhere will result in the request being routed to Kinsta.
Once you’ve added your custom domain, you must ensure it is set up correctly as your site’s primary domain. We also recommend forcing your site to load over HTTPS for added security.
Change your primary domain
Every site hosted on Kinsta is assigned a primary domain. The primary domain is the “main domain” of the site and is automatically assigned when a site is created. If you don’t add a custom domain during site creation, your site’s primary domain will be set to a kinsta.cloud domain.
If you’ve added a custom domain and you’re ready to make your site live, you’ll want to ensure it’s set up correctly as your site’s primary domain.
To view your site’s primary domain, navigate to Sites > sitename > Domains. In the screenshot below, our Kinsta Help Testing site is configured with kinstahelptesting.kinsta.cloud as the primary domain.
Kinsta temporary URL.
To update your primary domain, scroll down to the Domains list section, click on the dropdown menu next to a domain, and select Make primary domain.
Make a domain the primary domain in MyKinsta.
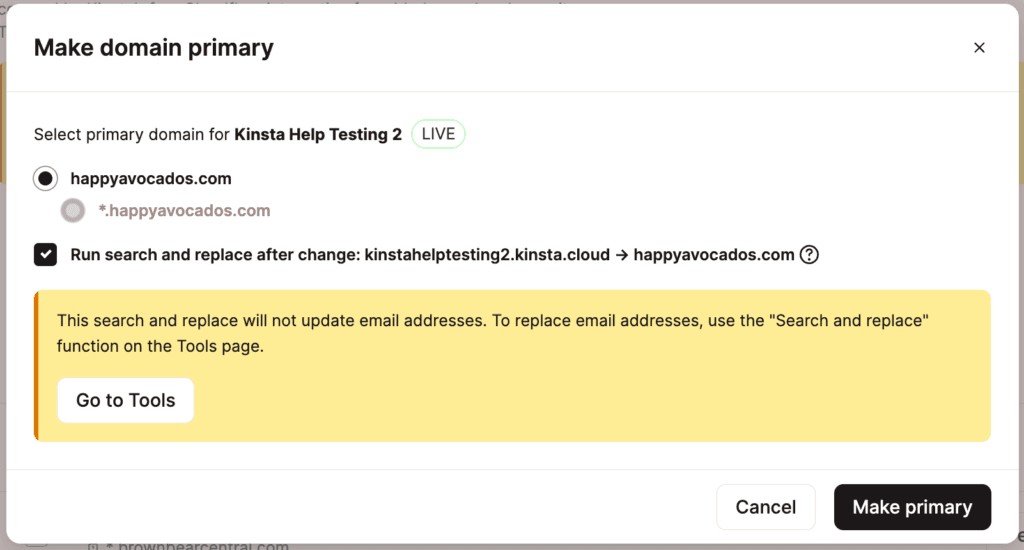
On the Make domain primary modal/pop-up, you have the option of choosing to run a search and replace. This search and replace will automatically update instances of your old domain to your new domain in your WordPress database. We recommend checking this option to prevent unexpected redirects caused by old URLs in your database. If you don’t perform the search and replace here, you can always do it manually with our search and replace tool later on.
Search and replace primary domain.
After clicking the Make primary button, it’ll take a few minutes to update the primary domain. Once it’s finished, you should see your new domain listed under Primary domain.
New primary domain in MyKinsta.
Force HTTPS (optional)
While technically optional, forcing your site to load over HTTPS is recommended. With our Cloudflare integration, once your domain is verified, a free SSL certificate (with wildcard support) is automatically added to your site. The only thing you’ll need to do is head over to your site in MyKinsta, then go to Tools and click on the Enable button under Force HTTPS.
Enable Force HTTPS in MyKinsta.
Linked DNS zone
If you’re using Kinsta’s DNS and you have linked a DNS zone to a site, the zone is shown here. You can click on the DNS zone to open the DNS records page. This does not add the required DNS records; it gives Site Administrators access to manage the DNS records for the site.
DNS zones that are linked to this site.
Add a subdomain pointing to multiple IP addresses
If you’re adding a subdomain that’s part of a wildcard DNS setup that has A records pointed to multiple IP addresses, you’ll need to take a few extra steps to point that subdomain to Kinsta. This isn’t a common setup, and the steps below are only applicable when a wildcard (catch-all) subdomain is pointed to multiple A records.
If your domain does not use wildcard A records pointed to multiple IP addresses, you don’t have to go through these additional steps when adding a domain to your site.
To set up a wildcard subdomain that’s pointed to Kinsta, an additional wildcard subdomain (*.example.com) is automatically added when you add a root/apex domain (domain.com) to a site in MyKinsta (unless you deselect the wildcard option under Advanced Options).
What is a multiple IP wildcard subdomain?
First, let’s define what it means for a wildcard subdomain to be pointed to multiple IP addresses. In most cases, a wildcard subdomain will have a single A record pointing to an IP address:
A record for *.example.com pointing to 192.0.2.1.
However, in some cases, a wildcard subdomain may point to multiple IP addresses. This kind of configuration is commonly used for DNS failover protection, round-robin setups, and more:
A record for *.example.com pointing to 192.0.2.1.
A record for *.example.com pointing to 192.0.2.2.
A record for *.example.com pointing to 192.0.2.3.
A record for *.example.com pointing to 192.0.2.4.
If you’re unsure whether your wildcard subdomain is pointing to multiple IP addresses, you can use a tool like WhatsMyDNS to check the A record(s) for the subdomain you want to point to Kinsta. In the screenshot below, you can see that the subdomain sub.happyavocados.com is pointing to multiple IP addresses.
Subdomain pointing to multiple IP addresses.
Next, you’ll need to check whether the DNS records pointing to multiple IP addresses are set up as static (e.g. sub.kinstaexample.com) or wildcard (*.kinstaexample.com) A records. If your DNS configuration looks similar to the one below (wildcard A records), you’ll need to proceed with the rest of this tutorial.
Wildcard subdomain pointing to multiple IP addresses.
Adding a multiple IP subdomain in MyKinsta
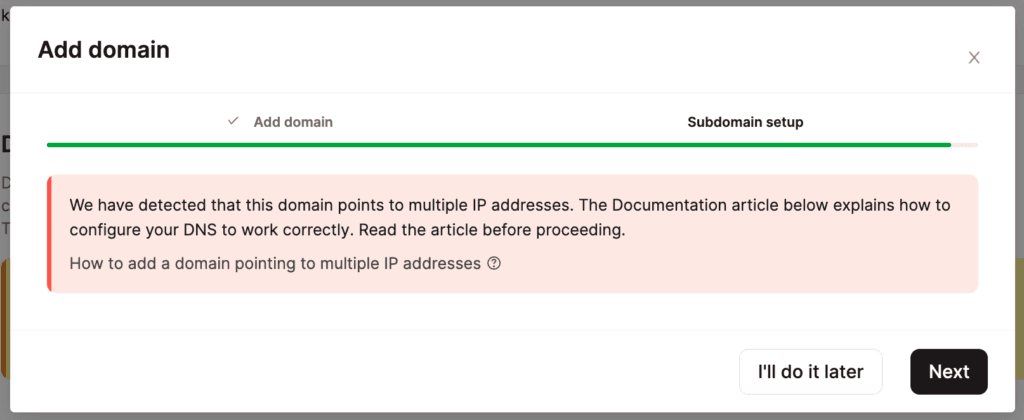
If we detect that your subdomain is configured with multiple A records, you’ll see a message like the one below after adding the subdomain in MyKinsta:
Warning in MyKinsta for subdomain pointing to multiple IP addresses.
1. Point subdomain to existing wildcard IPs
If the subdomain you’re adding to MyKinsta is already hosted elsewhere, you’ll need to create A records for that specific subdomain. These A records should point to the same IP addresses as your wildcard A records. If this is a new subdomain that isn’t currently hosted anywhere else, you can skip this step.
This step is only needed to keep the subdomain working and resolving properly at another host until it’s verified and can be pointed to Kinsta.
For example, if you’re trying to configure sub.kinstaexample.com and have the wildcard A records below:
A record for *.kinstaexample.com pointing to 192.0.2.1.
A record for *.kinstaexample.com pointing to 192.0.2.2.
A record for *.kinstaexample.com pointing to 192.0.2.3.
A record for *.kinstaexample.com pointing to 192.0.2.4.
You should add the four A records below to sub.kinstaexample.com at your DNS provider.
A record for sub.kinstaexample.com pointing to 192.0.2.1.
A record for sub.kinstaexample.com pointing to 192.0.2.2.
A record for sub.kinstaexample.com pointing to 192.0.2.3.
A record for sub.kinstaexample.com pointing to 192.0.2.4.
2. Verify subdomain
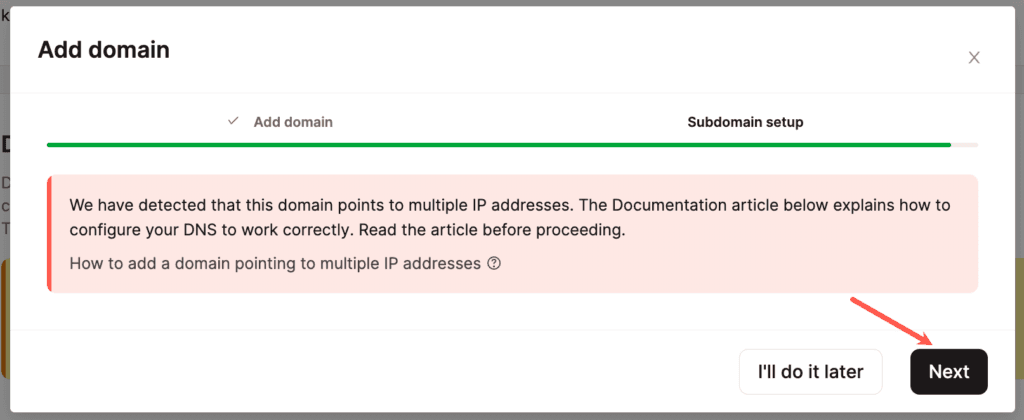
After you’ve added the A records, go to MyKinsta and click the Next button in the Verify Domain modal/pop-up.
Click Next in the Verify domain modal/pop-up in MyKinsta.
You’ll be prompted to add one or more TXT records to verify ownership of your subdomain. The TXT record is formatted like the following:
Type: TXT
Hostname: _cf-custom-hostname.your-subdomain
Value: Unique UUID string.
TXT records to verify your subdomain.
Next, add this TXT record to your subdomain at your DNS provider.
Add TXT verification record.
After you’ve added the DNS record(s), click Verify to confirm that the record exists in your DNS and matches the value provided by Kinsta, and then click Ok, I’ve done it. Alternatively, click OK, I’ve done it to close the verification window and allow the checks to run in the background.
3. Point subdomain to Kinsta
MyKinsta will start the verification process for your subdomain. Depending on your DNS provider, this process may take a while due to DNS propagation. Once the verification has finished, you’ll see a Point domain button in MyKinsta.
Point domain button in MyKinsta.
Click the Point domain button, and you’ll see your Site IP address. This is the IP address for your subdomain’s A record.
Site IP address to point your subdomain to in MyKinsta.
Next, go to your DNS provider and remove the A records for your subdomain that you added earlier.
Remove the A records for your subdomain that were added earlier.
Finally, add an A record for your subdomain pointing to your Kinsta Site IP address.
Add an A record for your subdomain pointing to Kinsta.
After setting up this A record and after DNS has propagated, you’ll see a check mark next to your subdomain in MyKinsta. This means the subdomain has been set up successfully.
Troubleshooting
Verification suspended
If your domain has been verifying for 7 days or more, the verification process is automatically suspended. We recommend checking that the correct DNS records are in place, then clicking Restart verification to try again.
Fix domain error
During the domain verification process, if a Fix domain error button appears next to the domain, this means a CAA record conflict is occurring.
A CAA record is an optional DNS record that lets you specify which certificate authorities (CAs) are allowed to issue SSL certificates for your domain. If a domain has no CAA records, any CA can generate an SSL certificate for it if requested. If a domain has a CAA record, only the CA(s) specified in the CA record can generate an SSL certificate for the domain.
To resolve this error, click the Fix domain error button, then visit your domain’s DNS provider to either add missing CAA records (marked as Pending) or, if you do not need a CAA record on your domain, remove existing records that are causing conflicts (marked as Detected).
Fix domain error showing conflicting CAA DNS records.
Troubleshoot Cloudflare domain pointing
If you have pointed your domain (allowing up to 24 hours for DNS to propagate) but you’re still seeing either of the following, there are a couple of places to check in your Cloudflare account:
a banner or warning that your site isn’t pointed to Kinsta and is subject to service interruption.
a status of “Confirming that you have pointed your domain to Kinsta.”
First, check the Page Rules in your Cloudflare account. If the root domain is redirected to the WWW domain or vice versa, the domain that is being redirected cannot be verified in MyKinsta. To resolve this issue, you’ll need to remove the redirect in Cloudflare Page Rules. This will allow the domain to be verified in MyKinsta. The redirect to the primary domain will now be handled at Kinsta.
Next, in your Security – Firewall rules, allow the user agent kinsta-bot and the IP address 35.194.36.163 so the firewall doesn’t block the bot that confirms your domain is verified and pointed to Kinsta.
Existing DNS zone record at Cloudflare
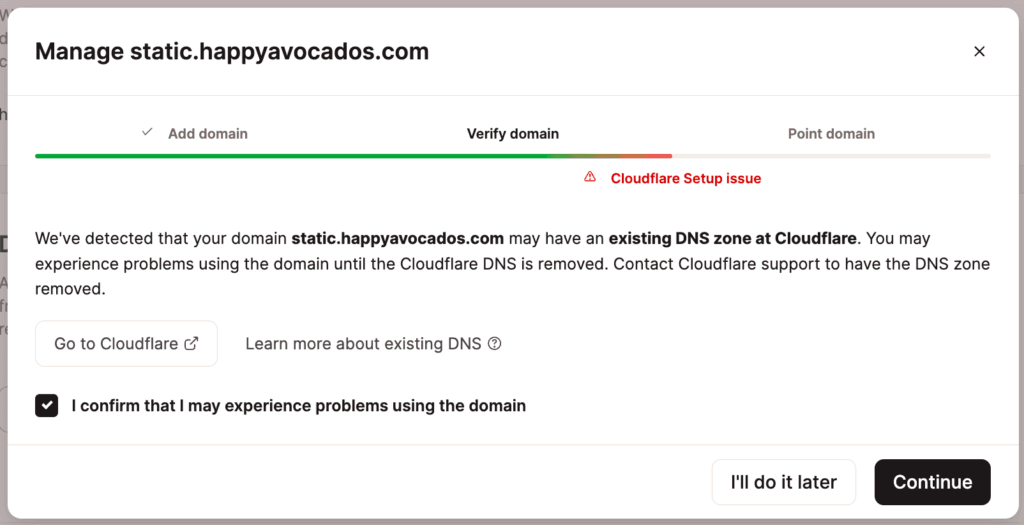
When adding and pointing a domain to your site in MyKinsta, under certain circumstances, you may see a warning that the domain has an existing zone record at Cloudflare, and continuing may cause your site to go offline.
Warning about existing DNS record at Cloudflare.
If you’re sure that you do not need to remove the existing zone record at Cloudflare, you can choose to continue without removing it. Select I confirm that I may experience problems using the domain, and click Continue.
If you do need to remove the existing zone record at Cloudflare, this is the message you can send to them, replacing YOURDOMAIN.com with your actual domain name.
Hi,
I am writing to you about the domain YOURDOMAIN.com.
My host, Kinsta, has detected an old, unused Cloudflare DNS zone for my domain. Would you please remove it from your system?
I confirm that I have access to DNS for the domain and am willing to add a TXT record to prove domain ownership. Please send the TXT record you would like me to use.
Thanks!
If you’re not sure whether or not you need to remove the existing zone record, contact our Support Team, and we will review your setup and let you know how to proceed.
We care about your privacy
We use cookies for analytics and improved functionality to improve your website experience.