Manual Migration
When migrating your site to Kinsta, you can request a free migration from Kinsta or choose to handle the migration yourself.
If you prefer to migrate the site on your own, you can use a plugin, such as Duplicator or Migrate Guru, or perform a manual migration using SFTP and MySQL. This guide covers how to complete a manual migration for both a single-site and a multisite WordPress installation.
Migrate a single site
Create a new WordPress site
In MyKinsta, select Sites, click Add site, and then Create new site.

When you migrate your site, this will include the WordPress files; therefore, the new site must be created without installing WordPress, select Empty environment, and click Continue.

Enter a site name and choose a data center, then click Continue to create the site.

Export the files from your old site using SFTP
You need to migrate your WordPress files from your old site to your new one at Kinsta. This includes:
- Files
- Plugins
- Uploads
- Any other files you may have in your
wp-contentdirectory.
Log in to your old site via SFTP and download all of your WordPress files. If your site is in the root domain, download all files. If you installed WordPress in a subdirectory, download the contents of that directory.
Export the database from your old site
In addition to your site files, you’ll also need to transfer the database from your old site to your new site in MyKinsta. This is typically done using a MySQL management tool such as phpMyAdmin.
From your current hosting provider’s dashboard, open phpMyAdmin. You’ll be prompted to enter your database username and password. These are separate from your hosting account credentials and can usually be found in your hosting control panel or account details.
Once logged in, click the Databases tab to view a list of all databases associated with your hosting account.

Click on the name of the database associated with your site. This shows a list of all the tables within the database. Click Check all, and in the With selected: dropdown, click Export.

In Exporting tables from, click Export.

phpMyAdmin will export the database as an SQL file and download it to your computer. Save the file in a location where you can easily find it for the next step.
Import your files to your new site in MyKinsta
Connect to your new site in MyKinsta using SFTP and the credentials within Sites > sitename > Info > Primary SFTP/SSH user.
Kinsta only supports SFTP connections; therefore, you should ensure the connection type is always SFTP. The Host may be described as the Address, URL, or Hostname within the SFTP client.
Upload the files from your old site to the same directory structure on your new site, typically the /public/ directory.

Import the database tables to your new site in MyKinsta
In MyKinsta, go to Sites > sitename > Info and within Database access, click Open phpMyAdmin.

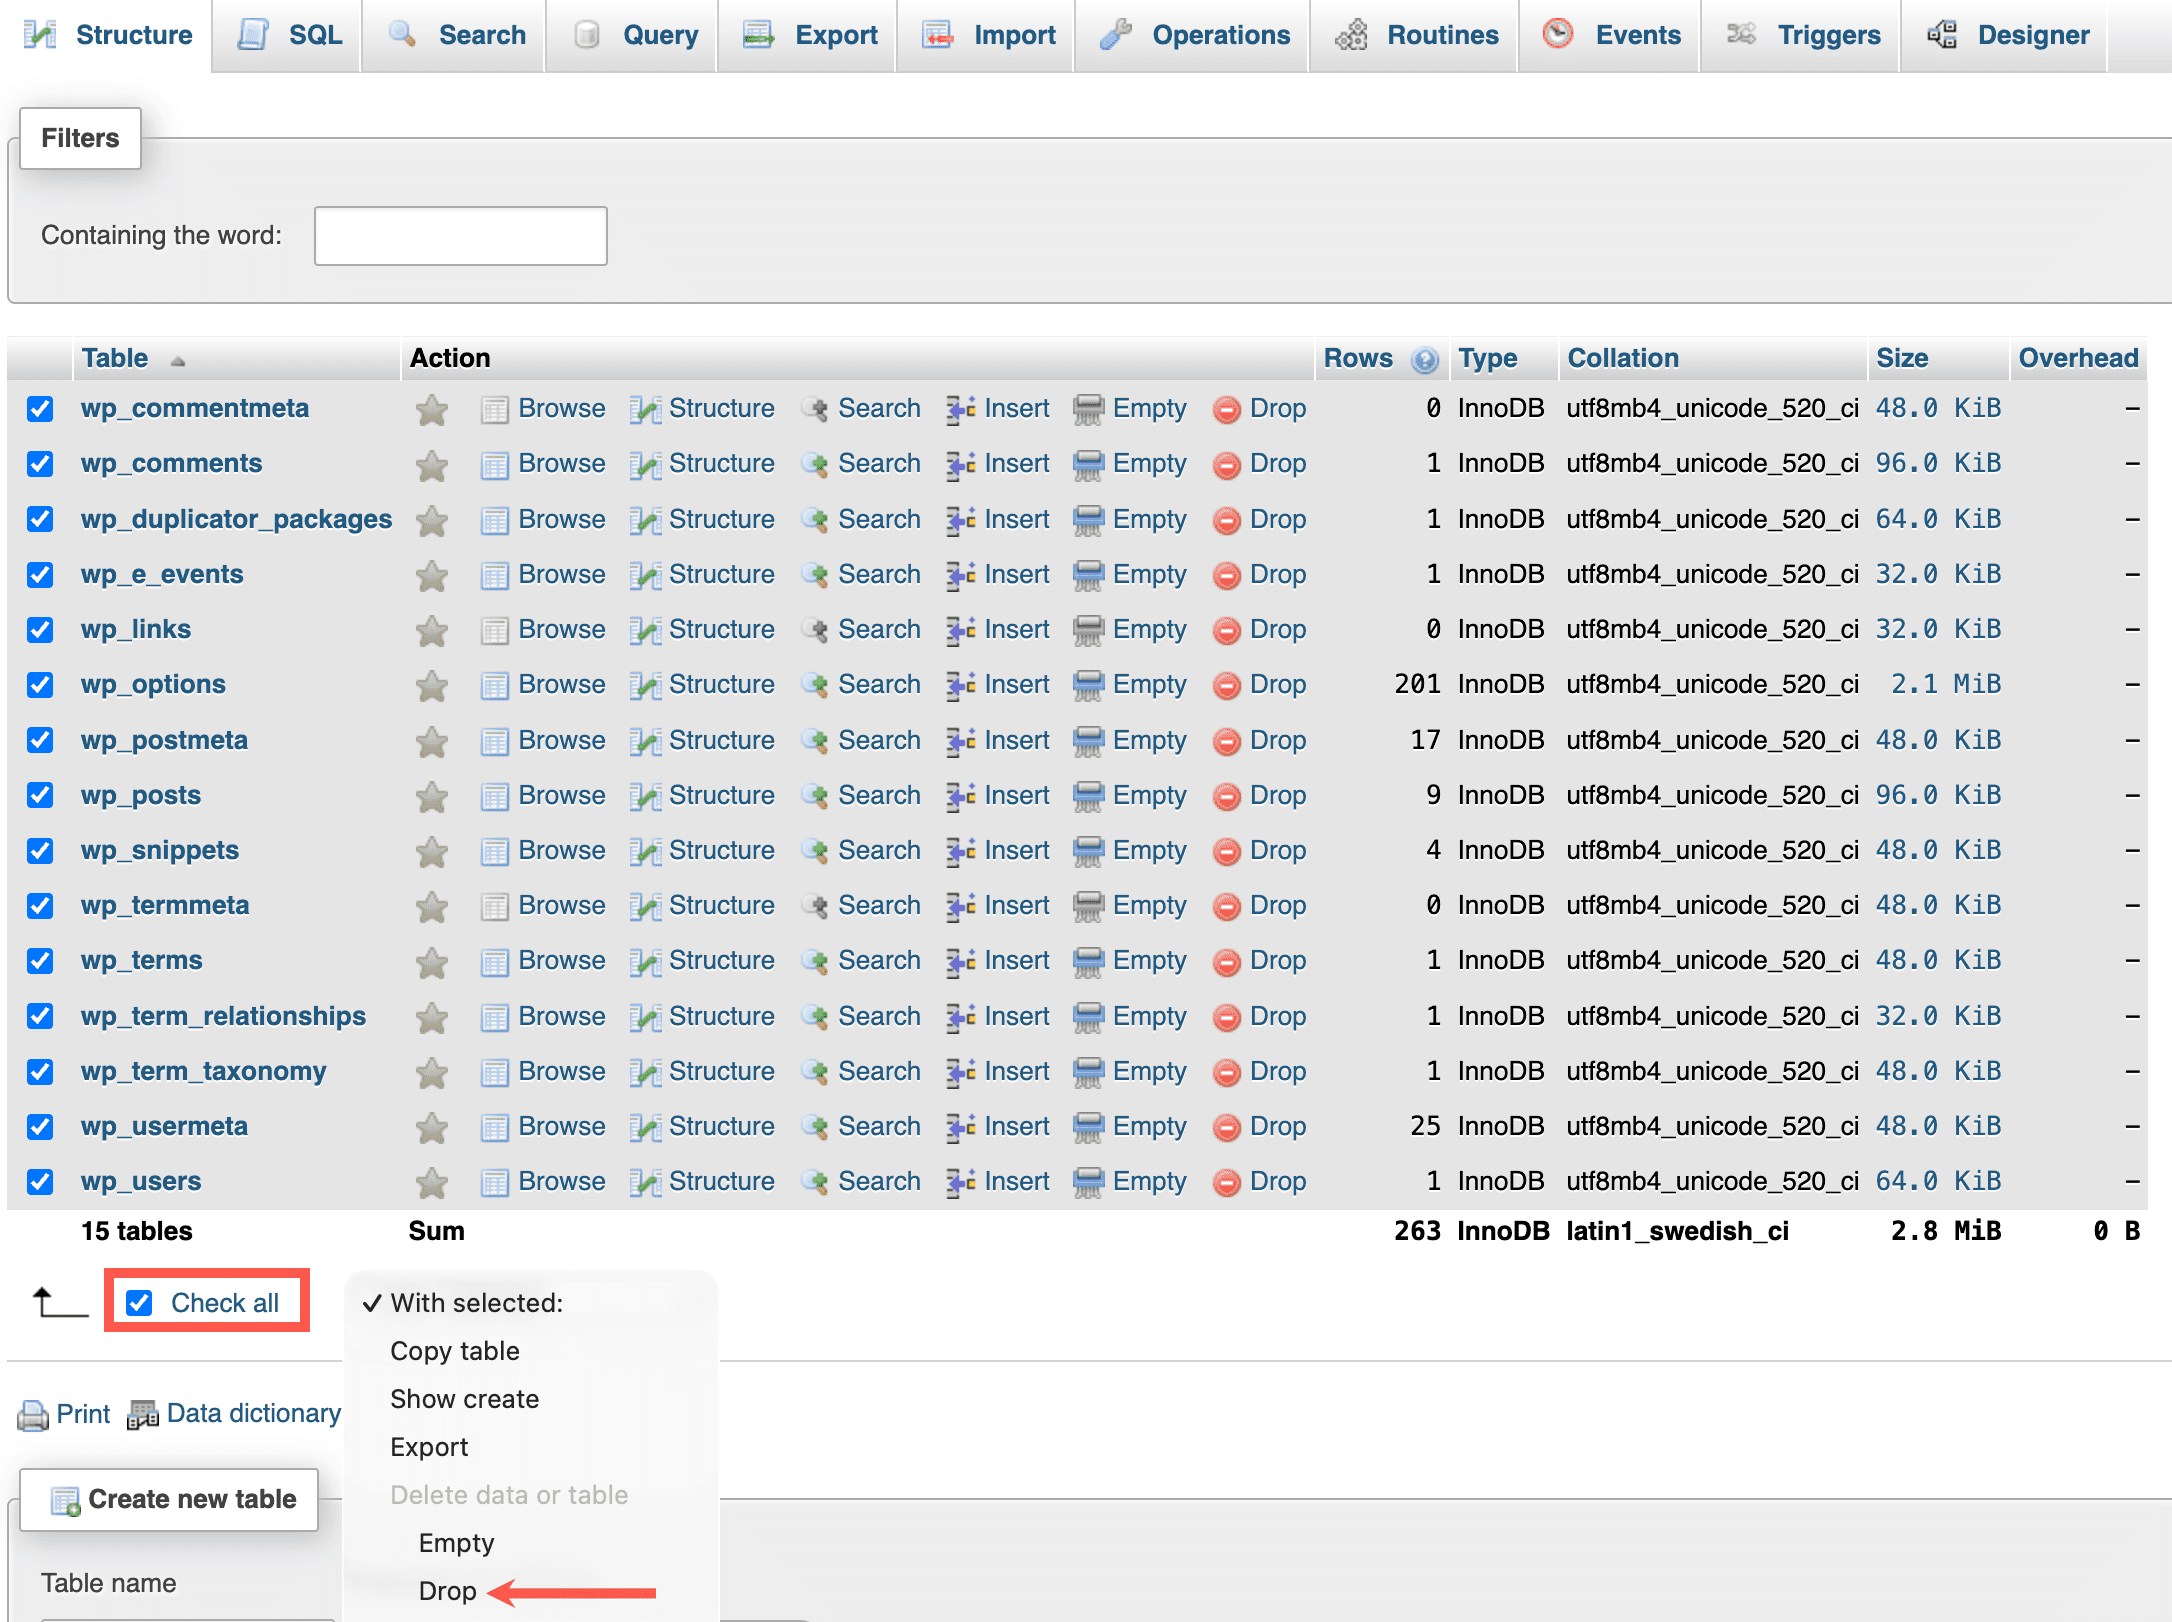
Before you import the files from your old site, you must remove any existing database files. Click Databases, select your site’s name, click Check all, and in the With selected: dropdown, click Drop.
Click the Import tab, in the File to import section, click Choose file, and select the SQL file you downloaded from your old site, then click Import.

Edit your wp-config.php file
After uploading your database, you need to edit the wp-config.php file in the new site to ensure it reflects the database you’ve just created.
Connect to your new site using SFTP, and locate the wp-config.php file. Make a copy of it so you have a backup. Right-click on the file and click Edit to open it. Locate the section that includes details of the database:

Update these lines with the credentials for your database from Sites > sitename > Info > Database access in MyKinsta.
Test your site
Now that your new WordPress site is set up, take some time to test that everything is working as expected. We recommend using Site Preview to perform the testing, as this allows you to view your site at Kinsta without having to make any changes to your site’s database, files, or your domain’s DNS records. While testing, make sure you only follow links that point to the new site, not the old one, as some URLs in the database may still reference the original domain. This is expected and will be updated later when you switch the domain.
Compare the old and new sites carefully to ensure they match and that everything has been migrated correctly.
Switch the domain to your new site
Once you’ve tested your new site and confirmed everything is working correctly, you can add your domain in MyKinsta and follow the steps to verify and point it to your new site.
If you’re changing domains or moving hosting providers, you’ll need to update your domain’s DNS settings so it points to your new environment. Depending on your setup, this may involve updating your nameservers, A record, or CNAME record with your domain registrar. If your domain is also used for services like email, avoid changing the nameservers, as this can affect all DNS records. In this case, update only the relevant DNS records (such as A or CNAME).
Once your DNS changes have been made, allow time for propagation. This can take up to 48 hours, though it’s often much faster.
After the domain is pointing to your new site, update the URLs in WordPress:
- In WP Admin, go to Settings > General.
- Update the following fields:
- WordPress Address (URL): The primary domain for your site.
- Site Address (URL): The address visitors see (usually the same as above).
- Click Save Changes.
Your site is now live at its new location. If you no longer need the old site, you can safely remove it and close your previous hosting account if applicable.
Migrate a multisite installation
When you migrate a multisite installation, you need to create your multisite WordPress installation in MyKinsta, along with your subsites, and then migrate each site individually.
Create a new WordPress multisite
Follow the Install WordPress Multisite instructions to create a new WordPress multisite installation, including adding the subsites. Be sure to note the site IDs for each subsite, as you’ll need to match these IDs when exporting your old sites and importing them into MyKinsta.
Export the files from your old sites using SFTP
You need to download the files for each subsite separately.
Connect to your old site via SFTP. Since this is a multisite network, you only need to download files specific to each subsite, not the entire installation.
Themes and plugins
Download only the themes and plugins used by the sites you want to migrate. These are located in:
wp-content/themeswp-content/plugins
You can identify which are in use from the site’s admin dashboard.
Uploads (media files)
Each subsite has its own uploads directory.
- In Network Admin > Sites, find the site ID.
- Navigate to
wp-content/uploads/sites/via SFTP. - Download the folder matching that site ID.
This folder contains all media for that subsite.
You need to download the files for each site within your multisite network separately.
Export the databases from your old sites
You’ll also need to export the database tables for each subsite.
Open phpMyAdmin from your current hosting provider and select your database.
Each subsite has its own set of tables with a unique prefix in the format wp_ID_ (e.g. wp_3_posts, wp_3_options).
Select all tables for the subsite and click Export.
Import your files to your new sites in MyKinsta
Connect to your new site in MyKinsta using SFTP and the credentials within Sites > sitename > Info > Primary SFTP/SSH user.
Kinsta only supports SFTP connections; therefore, you should ensure the connection type is always SFTP. The Host may be described as the Address, URL, or Hostname within the SFTP client.
Since you’re importing into a multisite network, upload your files to the correct location:
- Uploads: Upload to
wp-content/uploads/sites/{site-id}(matching the new subsite ID). If the subsite was created during multisite setup, this folder should already exist. - Themes and plugins: Upload these to
wp-content/themesandwp-content/plugins.
Ensure all files are placed in the correct directories so the site functions properly within the multisite network.
Import the database tables to your new sites in MyKinsta
Before importing, update the table prefixes to match the new subsite ID.
- Make a backup of your SQL file.
- Open the original file in a text editor.
- Replace the old prefix (e.g.
wp_2_) with the new one (e.g.wp_3_). - Save the file.
In MyKinsta:
- Go to Sites > sitename > Info and within Database access, click Open phpMyAdmin.
- Locate the tables created for the new subsite.
- Select them and in the With selected: dropdown, click Drop.
- Go to the Import tab and upload your edited SQL file.
Import your users
In a WordPress multisite network, users are stored at the network level, not per individual site. Because of this, there’s no built-in way to manually export or import users for a single site.
To move users between sites, you can use a plugin such as Import Export WordPress Users.
Keep in mind that users imported this way won’t be automatically linked to existing content. As a result, posts and pages may not retain their original authors, and you’ll need to manually reassign content to the correct users after the import.
Test your sites
Once your files and database tables are imported, test each subsite to ensure everything works correctly. We recommend using Site Preview to perform the testing, as this allows you to view your site at Kinsta without having to make any changes to your site’s database, files, or your domain’s DNS records. Only follow links pointing to the new environment, as some URLs may still reference the old domain; this is expected.
Compare each subsite with the original to confirm everything has been migrated correctly.
Update domains and domain mapping
After confirming everything is working:
- Add your primary domain in MyKinsta.
- Configure multisite domain mapping.
Once DNS has propagated, update your WordPress URLs if needed. Your site is now live at its new location. If you no longer need the old site, you can safely remove it and close your previous hosting account if applicable.