Storage
In Kinsta, you can add persistent storage to a web process or background worker to create a stateful application.
Persistent storage adds a storage volume that retains data even if the application is restarted or redeployed. When you deploy an application at Kinsta with persistent storage, your application’s pod is connected to the persistent storage volume. If you redeploy the application, the application pod is rebuilt, but the storage volume remains untouched and is reconnected to the application pod once the deployment is complete.
With persistent storage, processes are limited to one instance. You cannot add persistent storage to a cron job or job. There is no horizontal scaling for processes with persistent storage, but you can vertically scale them by increasing the pod size for the process.
Add persistent storage
You can also add persistent storage to your web process or a background worker after you’ve created the application, within Applications > app name > Disks, click Create disk.
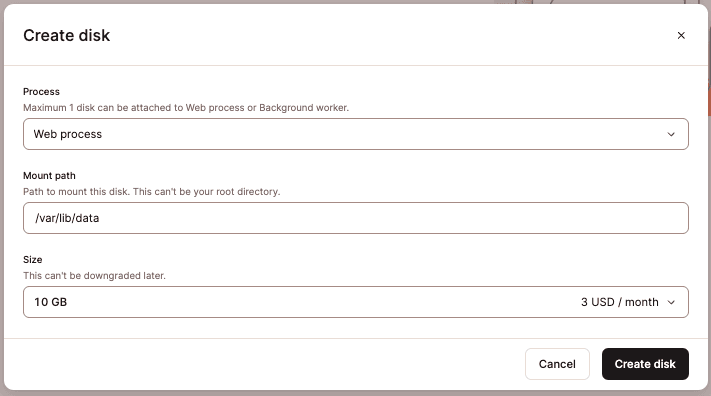
Complete the fields as follows:
- Process: Select the web process or a background worker to add the persistent storage to.
- Mount path: Specify the location of the files to be added to persistent storage (e.g.
/var/lib/data). If you use Buildpacks or Nixpacks to set up your container image, you must prefix the location of the files with/app. For example, if your files are stored inwp-content/uploads, the mount path should be/app/wp-content/uploads. Note: This cannot be the root directory or the directory of any configuration files; a full list of invalid mount paths is shown below. - Size: Choose the disk size for your persistent storage volume. You can increase the disk size at any time (on the application’s Disks page), but you cannot downgrade the disk size once it has been created.
Click Create disk. The persistent storage costs are added to your monthly invoice and are prorated for the first month. For example, if you add a 10 GB persistent storage disk on the 20th of January, you’ll be charged for 11 days in January: $3 / 31 * 11 = $1.06.
Invalid mount paths
The following mount paths are invalid because mounting data in these paths may cause issues in an application:
- ‘/’
- ‘/app’
- ‘/etc/’
- ‘/layers’
- ‘/lib/’
- ‘/mnt/’
- ‘/root/’
- ‘/usr/local/’
- ‘/var/’
- ‘/workspace’
Note: You can start a mount path with the paths above; for example, /app/wp-content/uploads is a valid path.
Update persistent storage
To view disk usage and update persistent storage settings, go to Applications > appname > Disks. If your disk usage is below 1 MB, the usage will be shown as 0.
To change the mount path or increase the disk size, on the disk you want to change, click the ellipsis and Update disk.
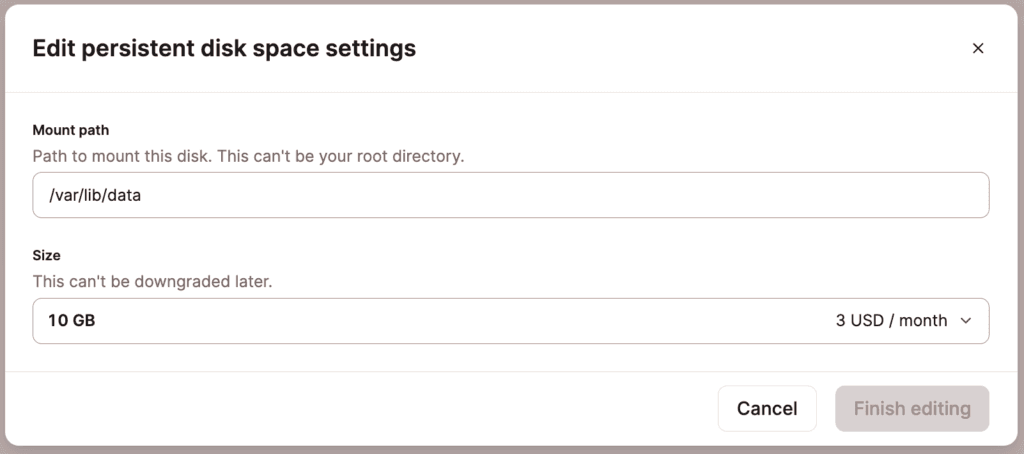
You can increase the disk size, but you cannot downgrade it. If you need less disk space for persistent storage, you’ll need to create a new application with the desired disk size.
Delete persistent storage
To delete persistent storage, go to Applications > appname > Disks; on the disk you want to remove, click the ellipsis and Delete disk.
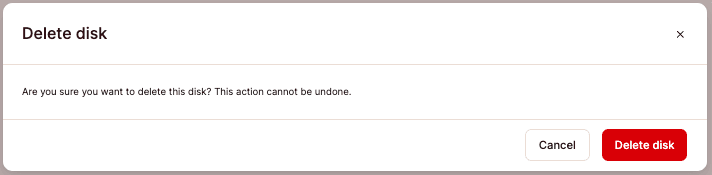
Click Delete disk to confirm the deletion.
Accessing persistent storage
To access and view files in persistent storage outside of your application, you can use the Application Web Terminal.
You can also use the Application Web Terminal if you need to add files directly to the persistent storage disk outside of your application. For example, when moving from third-party storage or manually adding files that aren’t included in your application’s repo.
Currently, you cannot push data to the container. Instead, you’ll need to initiate a transfer from the container to pull the files to the disk with something like wget. First, ensure the method you want to use is available in the storage container. For example, to see a help message with options for wget:
wget -hWith wget, you can pull the files to the persistent storage disk with something like the following:
wget -O filename.tgz https://user:password@hostname/filename.tgzNote: user:password@ is needed if the file is protected with basic HTTP authentication (htpasswd). Replace user and password with the actual user and password used for authentication.
This can also be run in a script, but the authentication details should be stored in environment variables rather than hard-coded in the script file.
Backups
We provide daily backups for persistent storage that are stored for 7 days and can be restored by request. When a backup is restored, all data in persistent storage will be rolled back to the time the backup was created.
To request a backup restoration, open a new chat with our Support team and ask for your persistent storage to be restored. Be sure to include your application’s name and persistent storage mount path in your request.
Only users with access to create an application can request a persistent storage backup to be restored. This means that you need to be the owner or company administrator in order to request a backup restoration.
Available disk sizes and pricing
Persistent storage is available for an additional monthly fee, computed at $0.363/GB per month. You can choose from the following disk sizes:
| Size | Price |
| 10 GB | $3/month |
| 20 GB | $6/month |
| 50 GB | $15/month |
| 100 GB | $30/month |
| 150 GB | $45/month |
| 200 GB | $60/month |
| 300 GB | $90/month |
| 400 GB | $120/month |
| 500 GB | $150/month |
| 750 GB | $225/month |
| 1 TB | $300/month |