Kinsta Integration
This article explains how you can integrate your WordPress sites hosted on MyKinsta into DevKinsta, including how to pull your WordPress site from Kinsta, how to push your changes from DevKinsta to MyKinsta, and how to create a site from a WordPress backup.
Pull a site from Kinsta
If you have a Kinsta account, you can pull your sites into DevKinsta. To import a new site in DevKinsta, see the Import from MyKinsta section of our Creating a Site With DevKinsta guide.
- Select the site you want to pull to in DevKinsta.
- Click the Sync button and select Pull from Kinsta in the dropdown menu.
- If you are not already logged in to your MyKinsta account in your DevKinsta settings, you’ll be prompted to log in (and provide 2FA if it’s enabled).
- Select the environment (Live, Standard Staging, or Premium Staging) you want to pull from.
- You can choose what to pull from your hosted site to your DevKinsta site:
- only the selected files,
- only the database,
- or both.
- Click Update local site to begin the pull process.
As an alternative backup method, when you pull a site into DevKinsta, you can make a local backup of the site using the following command:
docker exec -it devkinsta_fpm bash -c "cd /www/kinsta/public/SITENAME && wp db export --allow-root"Push changes to staging
When pushing changes from DevKinsta to MyKinsta, you can only push to a Standard or Premium Staging Environment; you can’t push to a live site directly from DevKinsta. Once you’ve pushed your changes from DevKinsta to a staging environment, you can then push from staging to live in MyKinsta.
- Select the site you want to push from in DevKinsta.
- Click the Sync button and select Push to Kinsta in the dropdown menu.
- If you are not currently logged in to your MyKinsta account in your DevKinsta settings, you’ll be prompted to log in (and provide 2FA if it’s enabled).
- Select the environment you want to push your changes to.
- You can choose what to pull from your hosted site to your DevKinsta site:
- only the selected files,
- only the database,
- or both.
- Click Push site to begin pushing your changes.
Pushing your changes to staging will:
- Overwrite all files, if selected.
- Overwrite the database, if selected.
- Change the Site URL from local to the primary domain of the staging environment you’re pushing to.
- Push every existing WordPress user from the DevKinsta site if database is selected.
Won’t change:
Create a site from a backup
If you have a backup of a WordPress site you’d like to bring into DevKinsta, you can now create a site from a backup file right from within DevKinsta.
Make sure the backup file contains all of your site’s WordPress files and your database (.sql) file. If your backup doesn’t contain a complete WordPress site, follow the steps in our Manually Import a Backup guide instead.
Creating a backup
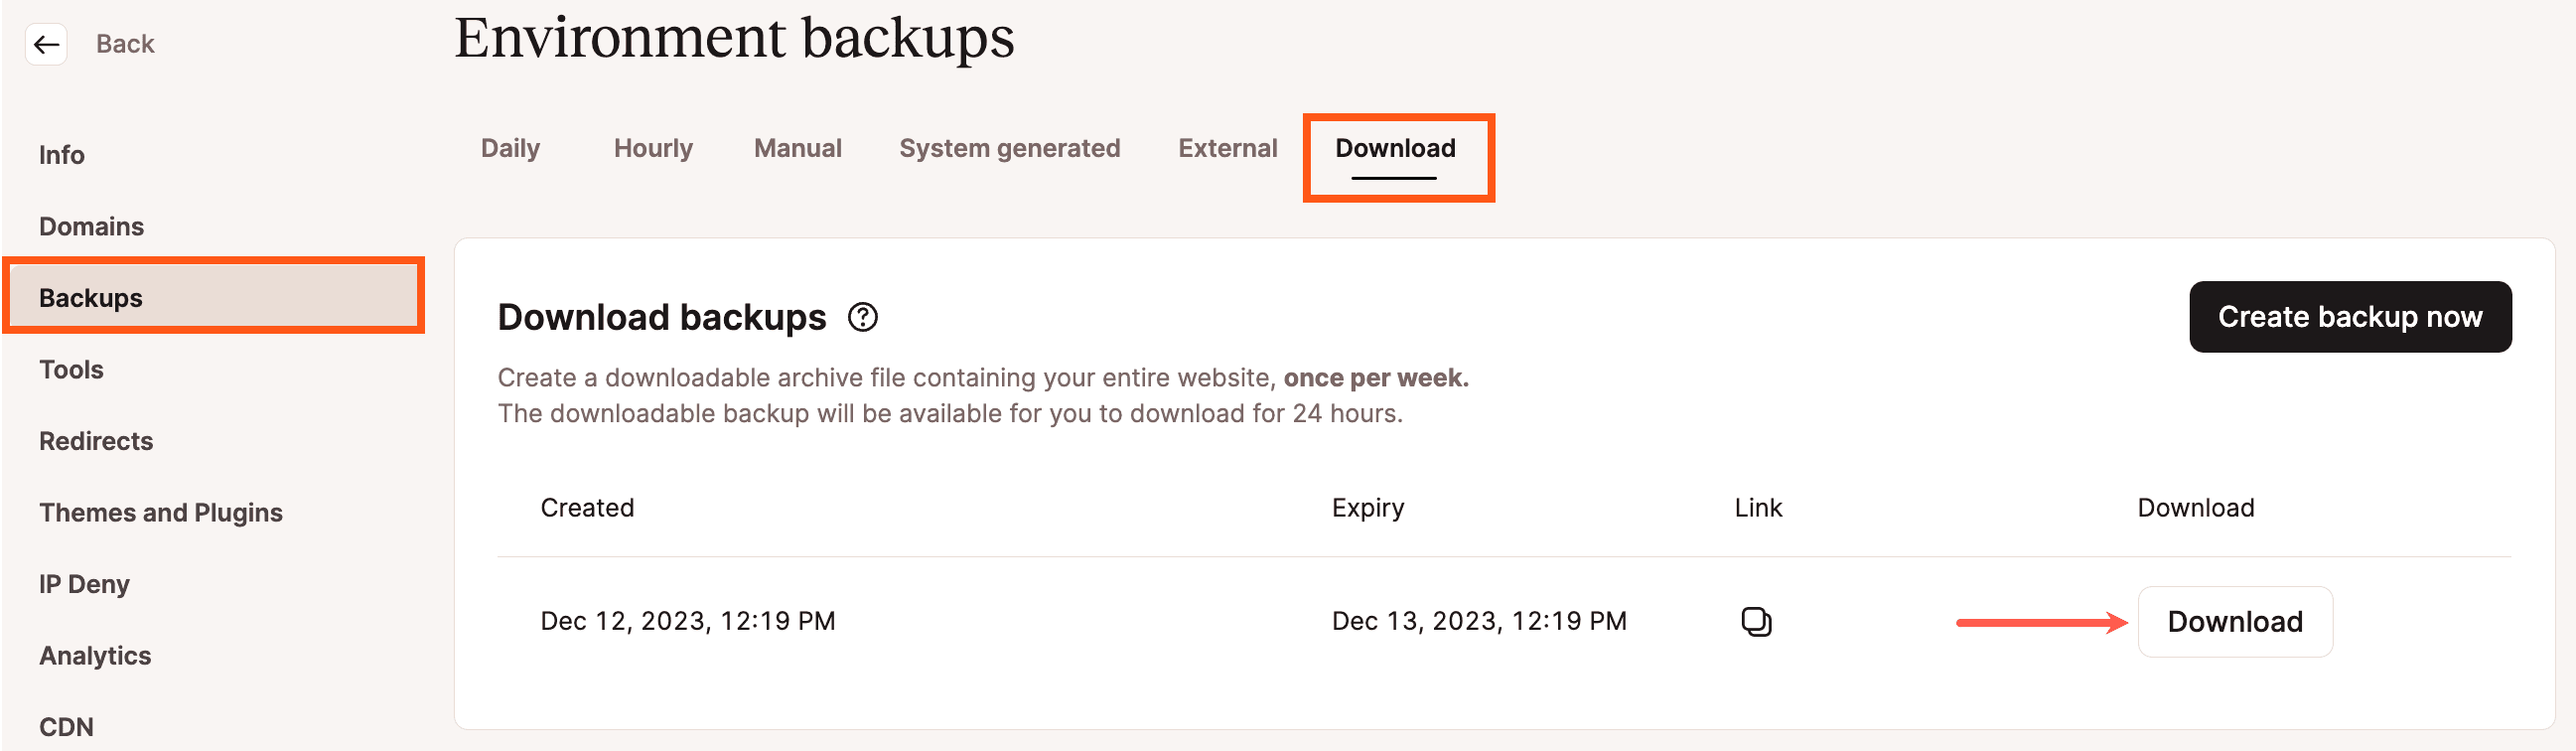
The first thing you’ll need is a backup of the site you want to add in DevKinsta. If the site is hosted at Kinsta, log in to MyKinsta and go to Sites > sitename > Backups > Download to create and download a backup of the site.
Creating a site from a backup in DevKinsta
Once you have your backup file, create a custom site in DevKinsta and select the Import backup tab.
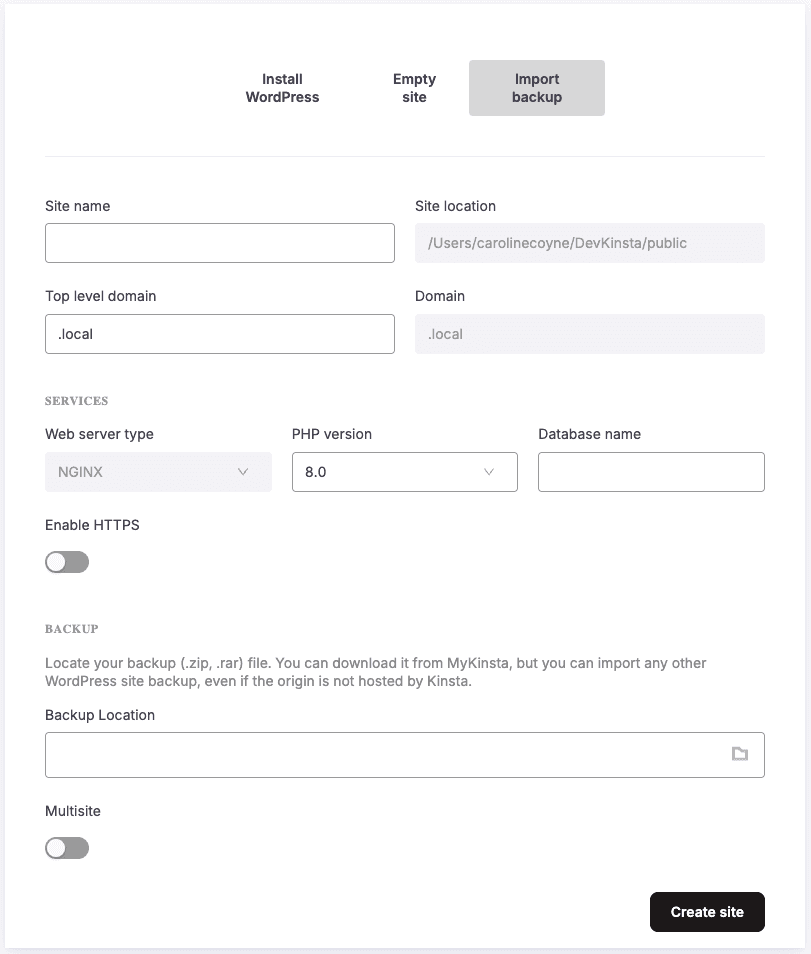
Enter your site details and click the Create site button. If you do not know the database name, there are a couple of ways you can find that information:
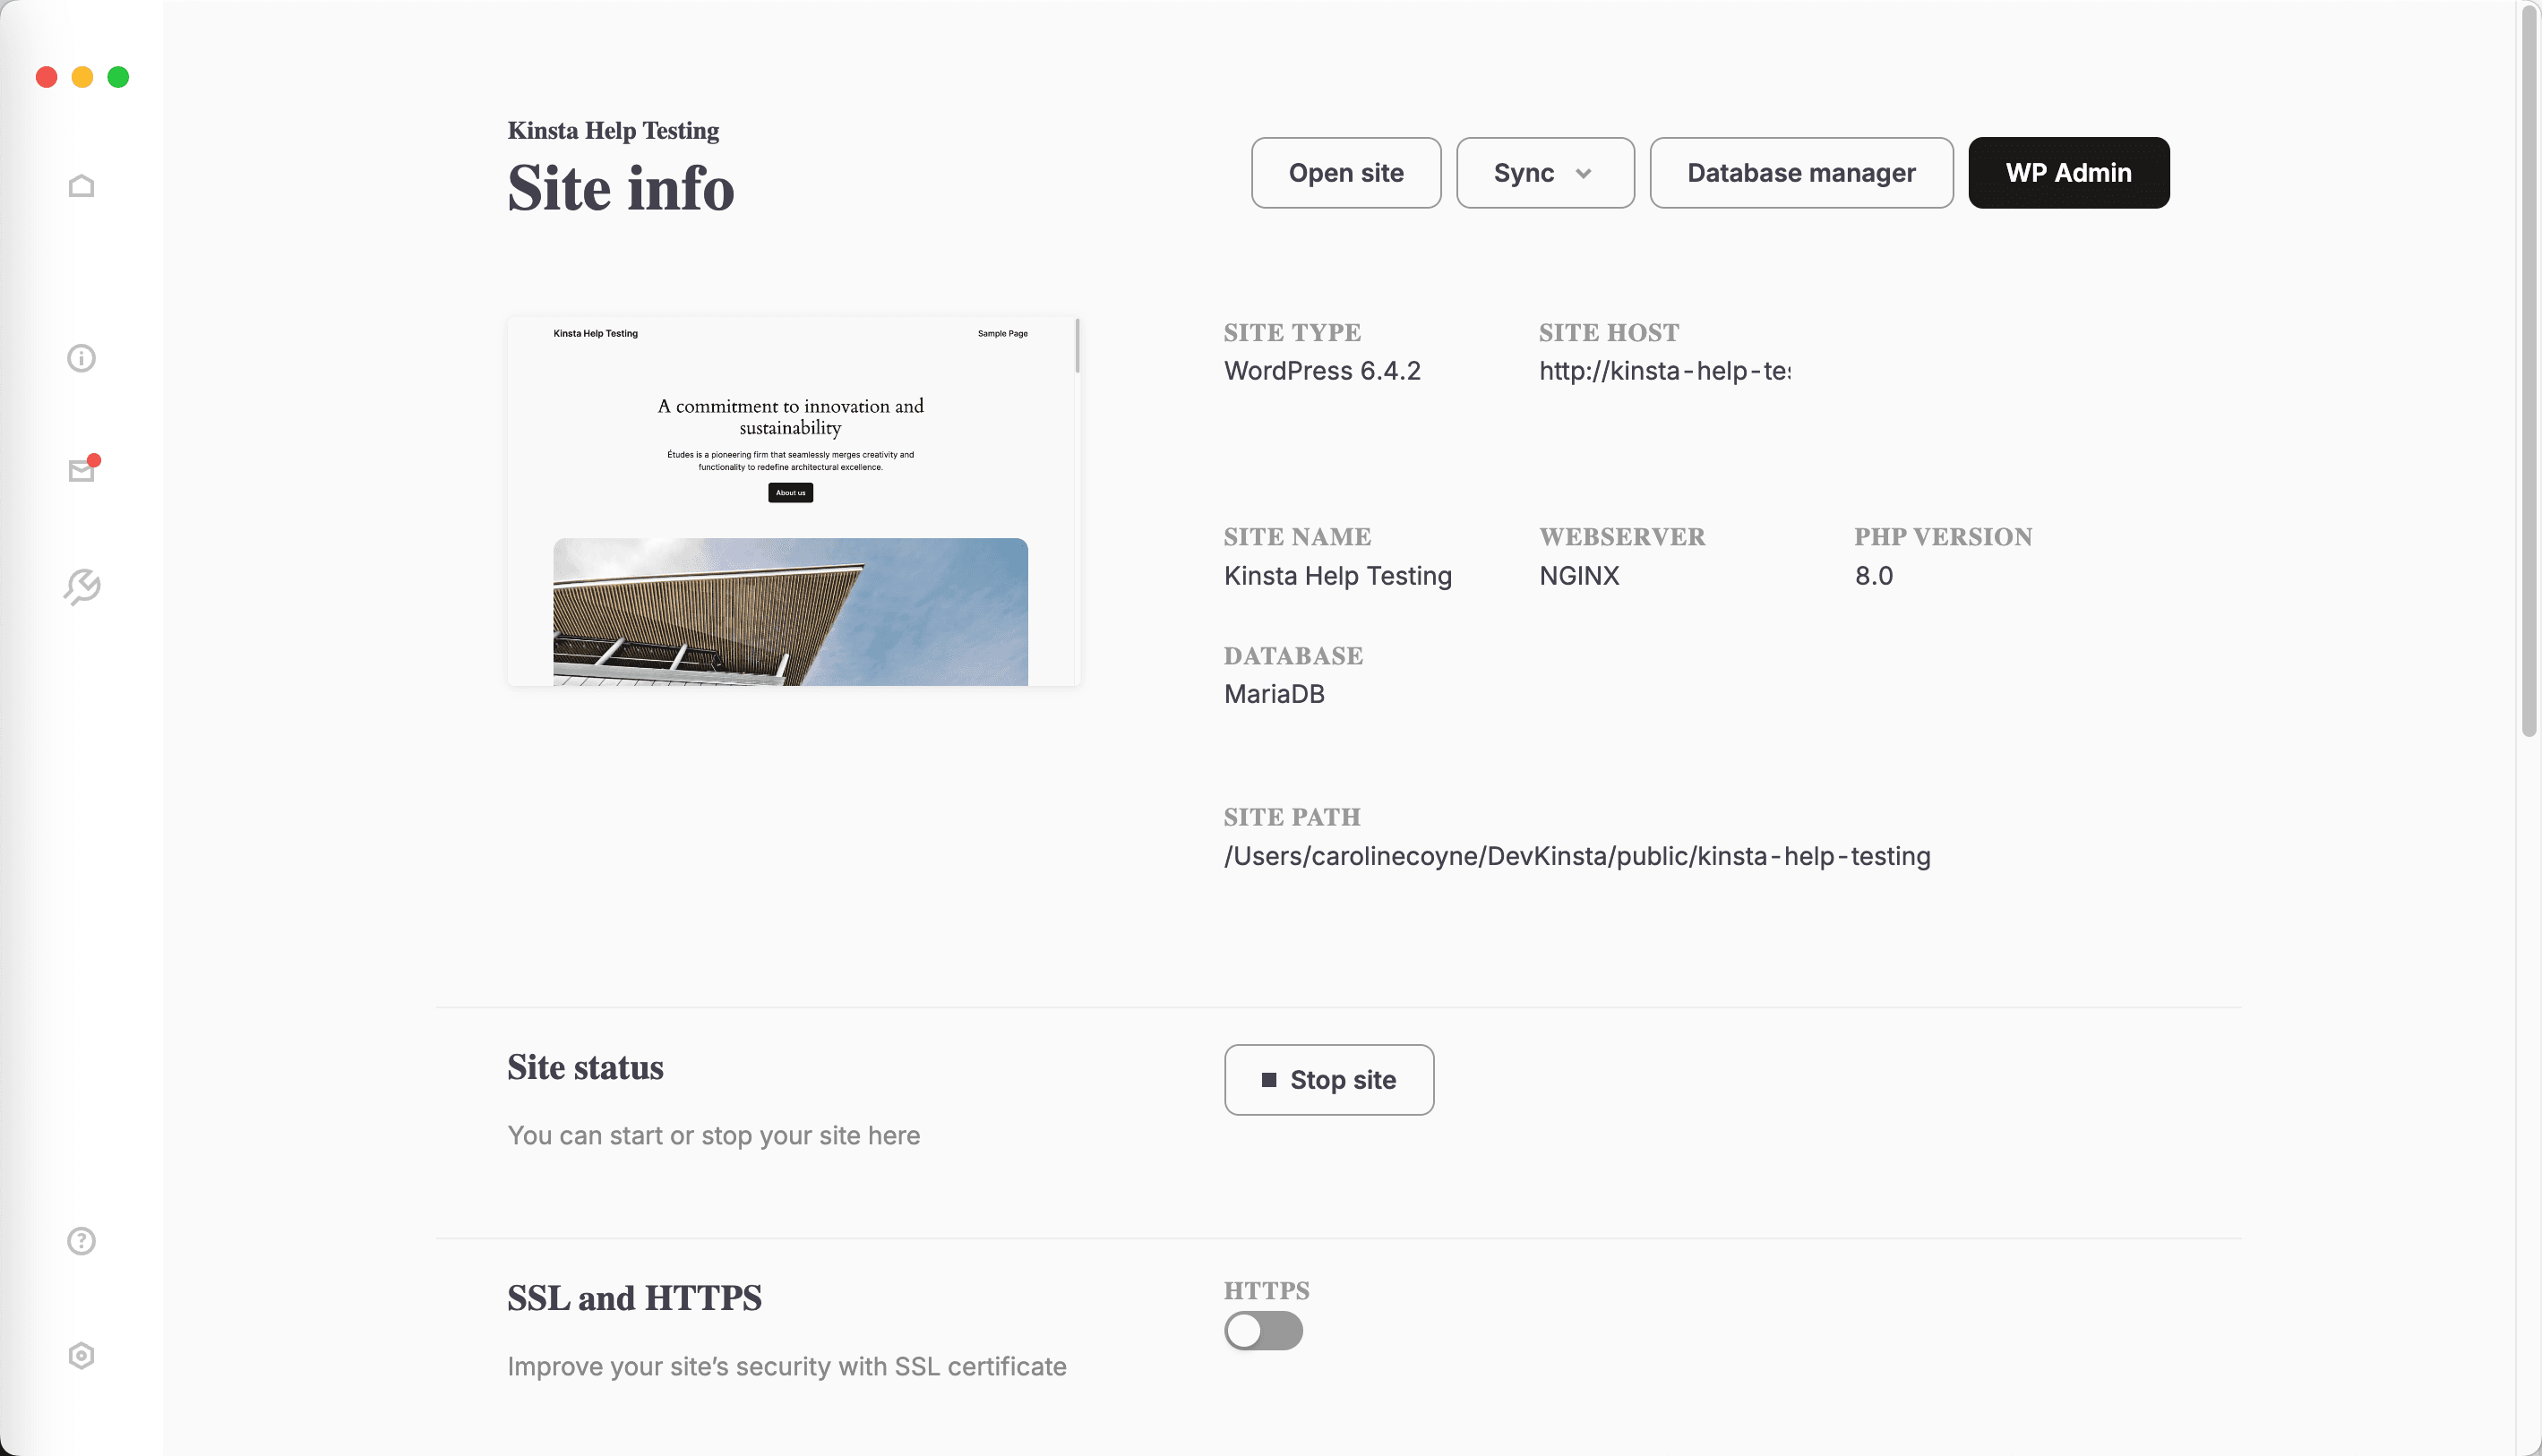
- If your site is hosted at Kinsta, log in to MyKinsta, go to Sites > sitename > Info and look for the database name under Database access.
- Unpack the backup file and look for the name of the database (.sql) file or look for the database name in the wp-config.php file.
A search and replace to update the URLs in the database to your local site’s URL is automatically performed during the site creation. Once the site is created, you’re ready to begin using your local site.
Manually import a backup
If you have an incomplete backup or have any trouble creating a site from a backup, you can use the manual process described below.
Creating a backup
One of the easiest ways to import a site is to create a downloadable backup. If the site you want to import is hosted with Kinsta, visit the Backups page of your chosen site (Sites > sitename > Backups) and head over to the Download tab to create a downloadable backup. This may take a while if you have a large site, but once the download is ready, you’ll get a message in MyKinsta and an email with a download link.
Once the backup is downloaded, extract it on your local computer.
Creating a site in DevKinsta
Create a site in DevKinsta (see our site creation guide) as usual. Once created, you’ll see the site path, which you can click to open.
Importing your content
Once you open the site path, you’ll see a standard WordPress directory structure. Delete the wp-content folder and then move the wp-content folder from your extracted backup in its place. This will ensure that the themes, plugins, and media from the imported site are in place.
Importing your database
In DevKinsta, click the Database manager button to open your local database. Make sure the correct database is selected in the top left in Adminer (the database manager). In the main screen that shows the table list, click the checkbox on the left in the top row of the table list. This will select all tables.
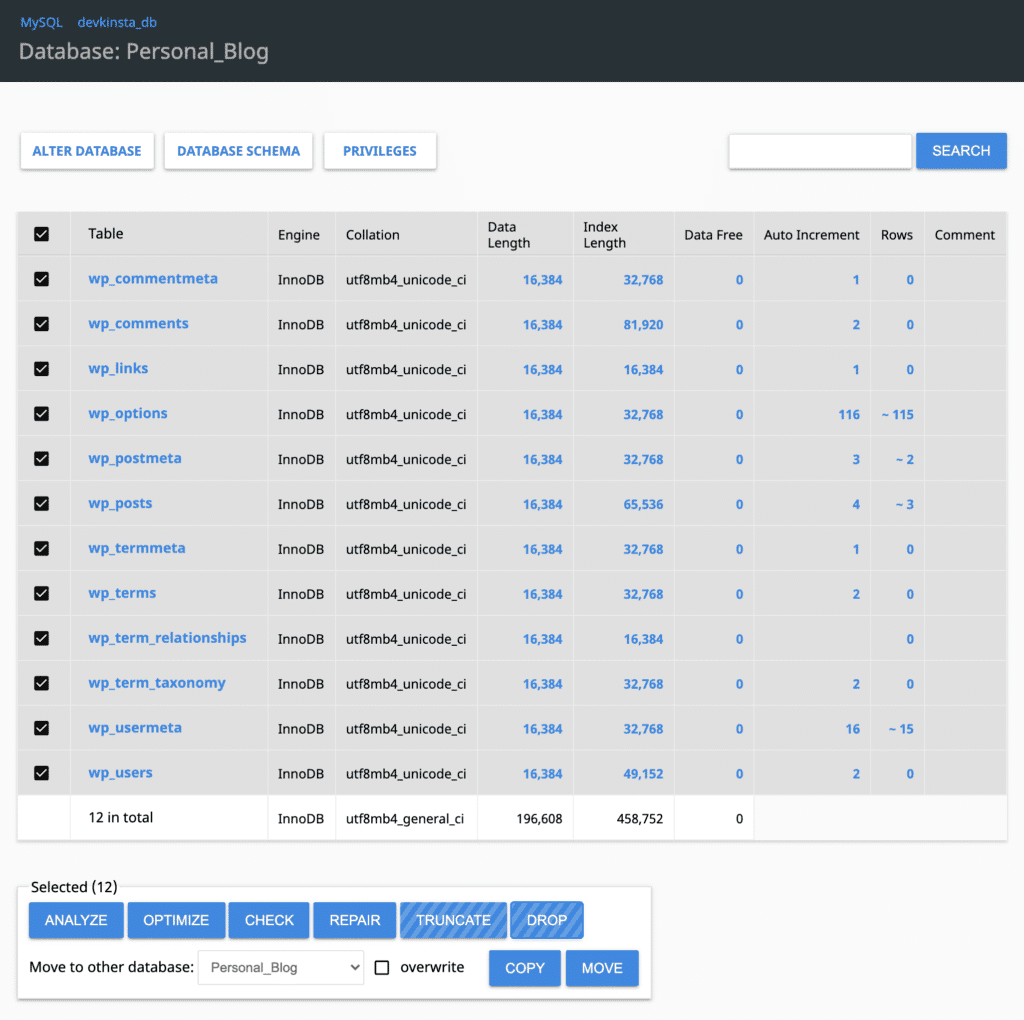
Click the Drop button and confirm to delete all database tables from your local site’s database. Next, click the Import button in the sidebar, and in the File upload section, select the mysql-database-backup.sql (or similar) file from your downloaded backup and click Execute. This will import your database.
Search and replace
Since the database is from a hosted site, there will be a lot of references to your site’s URL within the database. To ensure this doesn’t cause any issues, you’ll need to run a search and replace to update those URLs in your database.
You can do so with any of the following tools:
For more info about using WP-CLI and how to search and replace URLs, check out these guides: