SSL Certificates
All verified domains are automatically protected by our Cloudflare integration, which includes free SSL certificates. This means that unless you have a specific reason to add a custom SSL, you won’t have to worry about manually configuring an SSL on Kinsta. All SSL certificates provided by Kinsta have TLS 1.2 and TLS 1.3 enabled, both of which are secure and supported by all major browsers.
However, there may be circumstances where you need or want to add a custom SSL certificate to your application. To install your custom SSL certificate, you must first obtain your custom SSL certificate from your certificate provider or transfer the SSL certificate from a previous server (have access to the certificate and key).
Obtain a Custom SSL Certificate
All verified domains are automatically protected by our Cloudflare integration, which includes free SSL certificates. For users who prefer to go the custom SSL route, MyKinsta also supports custom SSL certificates.
Step 1 — Purchase SSL Certificate
Purchase your SSL certificate from any vendor you like, such as Comodo, DigiCert, GeoTrust, Thawte, or Trustwave. Kinsta supports all types of SSL certificates.
Step 2 — Server Type
You are asked to provide the server type when purchasing a new SSL certificate. Our web server type is Nginx. If that option is not available, then “Apache” or “Other” will also work.
Step 3 — Generate CSR and Private Key
The SSL provider will need a CSR (Certificate Signing Request) to create/sign the certificate file. For generating a CSR and RSA key (together known as a key pair), please complete this form: Online CSR and Key Generator.
We recommend filling out every field, but at a minimum, you should fill in the following, as seen in the example below:
- Common name (domain name)
- Email Address
- Organization
- City / Locality
- State / County / Region
- Country
Note: For the common name field, if you’re generating a wildcard certificate, you’ll need to input your domain name like *.domain.com.
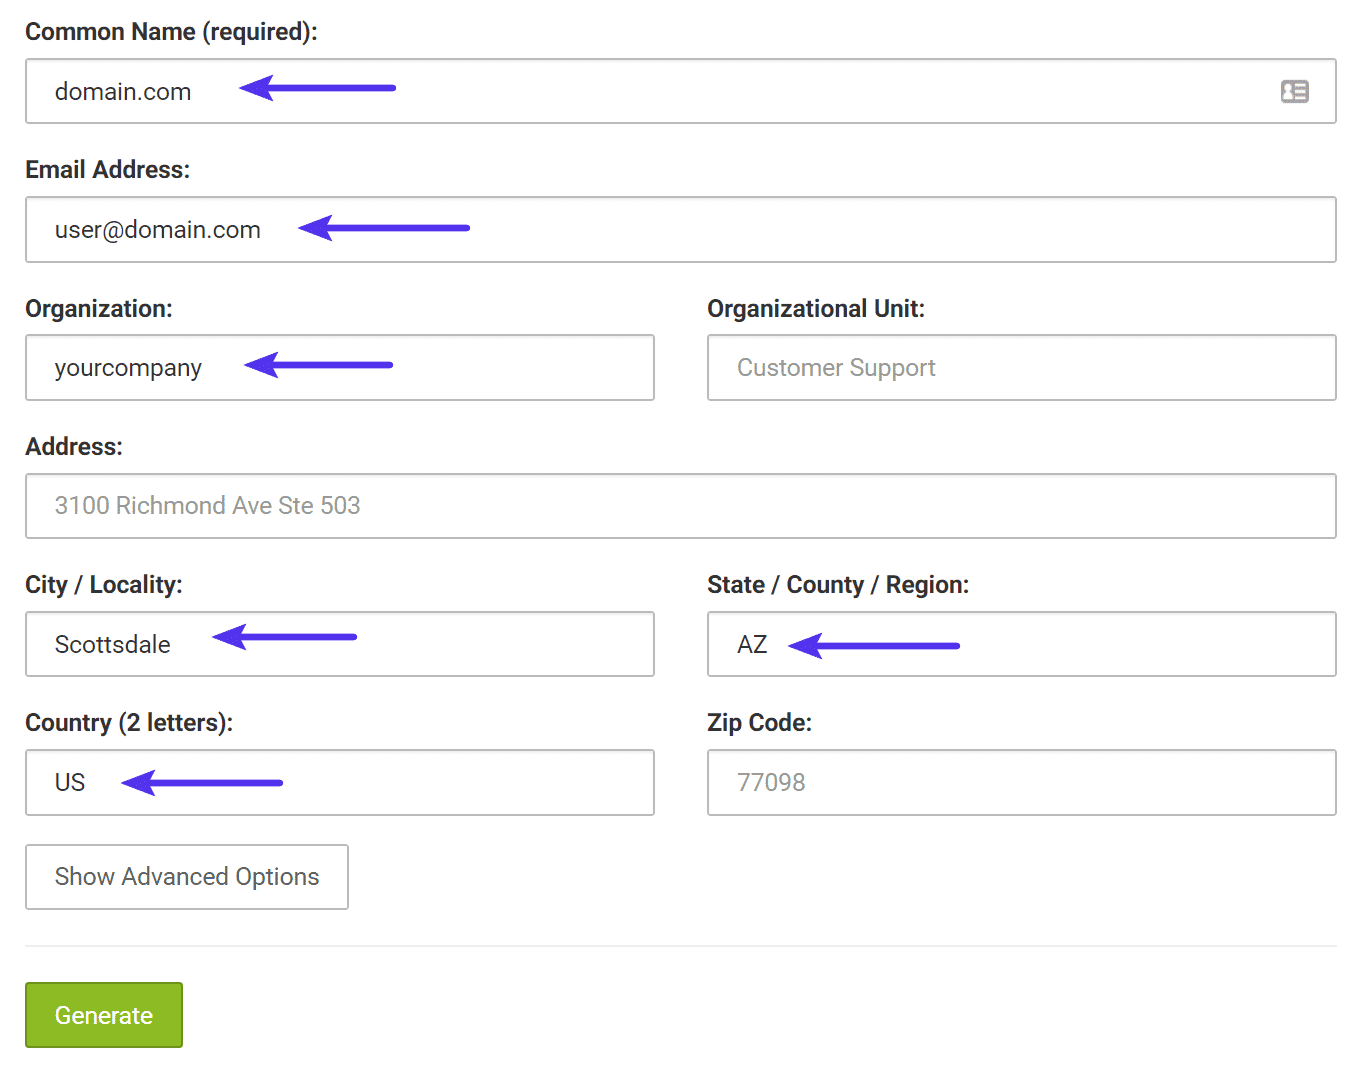
The form will generate the Private Key file and the CSR. Save both of those, as the certificate will be unusable without them.

Step 4 — Upload CSR and Generate SSL Certificate
Upload only your CSR with your SSL provider to generate your SSL certificate (.cert file). Once you receive your SSL certificate from your provider, you can install it in MyKinsta.
Transfer an SSL Certificate From Another Server
You can transfer an SSL certificate you installed on another server. You’ll need to get a copy of your SSL certificate and the certificate’s private key. This private key is created when you generate your CSR and is installed on the server.
If your site is coming from a host that uses cPanel, these can typically be extracted from cPanel directly or from the file manager. If your previous host doesn’t use cPanel, their support team may be able to assist you with getting a copy of your SSL certificate.
Alternatively, you can regenerate your SSL certificate from where you purchased it, whether it’s with your domain registrar or a third-party SSL reseller. To do that, you will need to obtain a copy of the private key or create a new one by generating a new CSR.
Don’t forget we do have free SSL certificates at Kinsta. So unless you have a specific reason for using your existing one, you can take advantage of our easy one-click solution. Otherwise, follow the steps below to transfer your SSL certificate.
Once you have your SSL certificate and key, you can install it in MyKinsta.
Install a Custom SSL Certificate
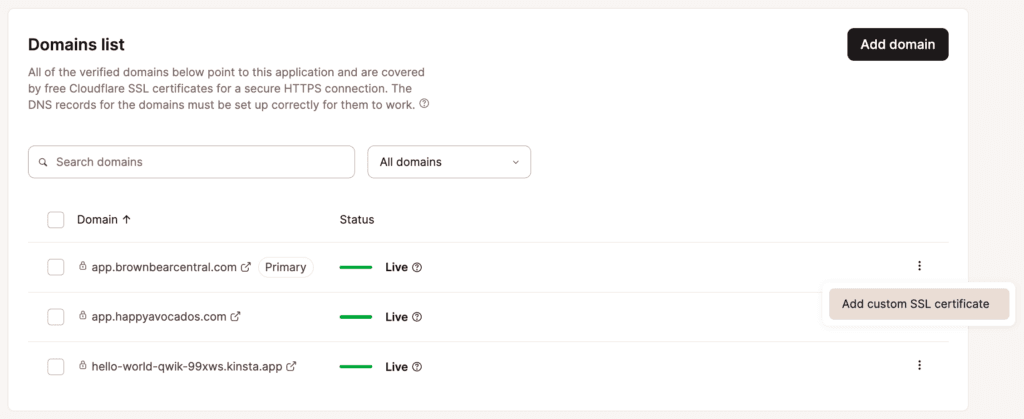
Step 1 — Add Custom SSL Certificate
In MyKinsta, go to Applications > appname > Domains.
Click the kebab (three-dot) menu for the domain you want to add a custom SSL certificate to and select Add custom SSL certificate from the dropdown menu.
Step 2 — Confirm Domains Covered by the SSL
Next, you’ll see a confirmation modal showing the domains that the custom SSL will cover. Click Next to proceed.
Step 3 — Add SSL and Private Key
You will then be able to add your private key (.key) and certificate (.cert, .cer., or .crt file).
Most SSL providers will email you a .crt or .cer file and a .ca-bundle file. You can use a text editor like Notepad++ or TextMate to open the certificate and bundle files, and copy the content of each file.
Paste the contents of your .crt file in the .cert file contents field first and then the contents of the .ca-bundle file below that, in the same field.
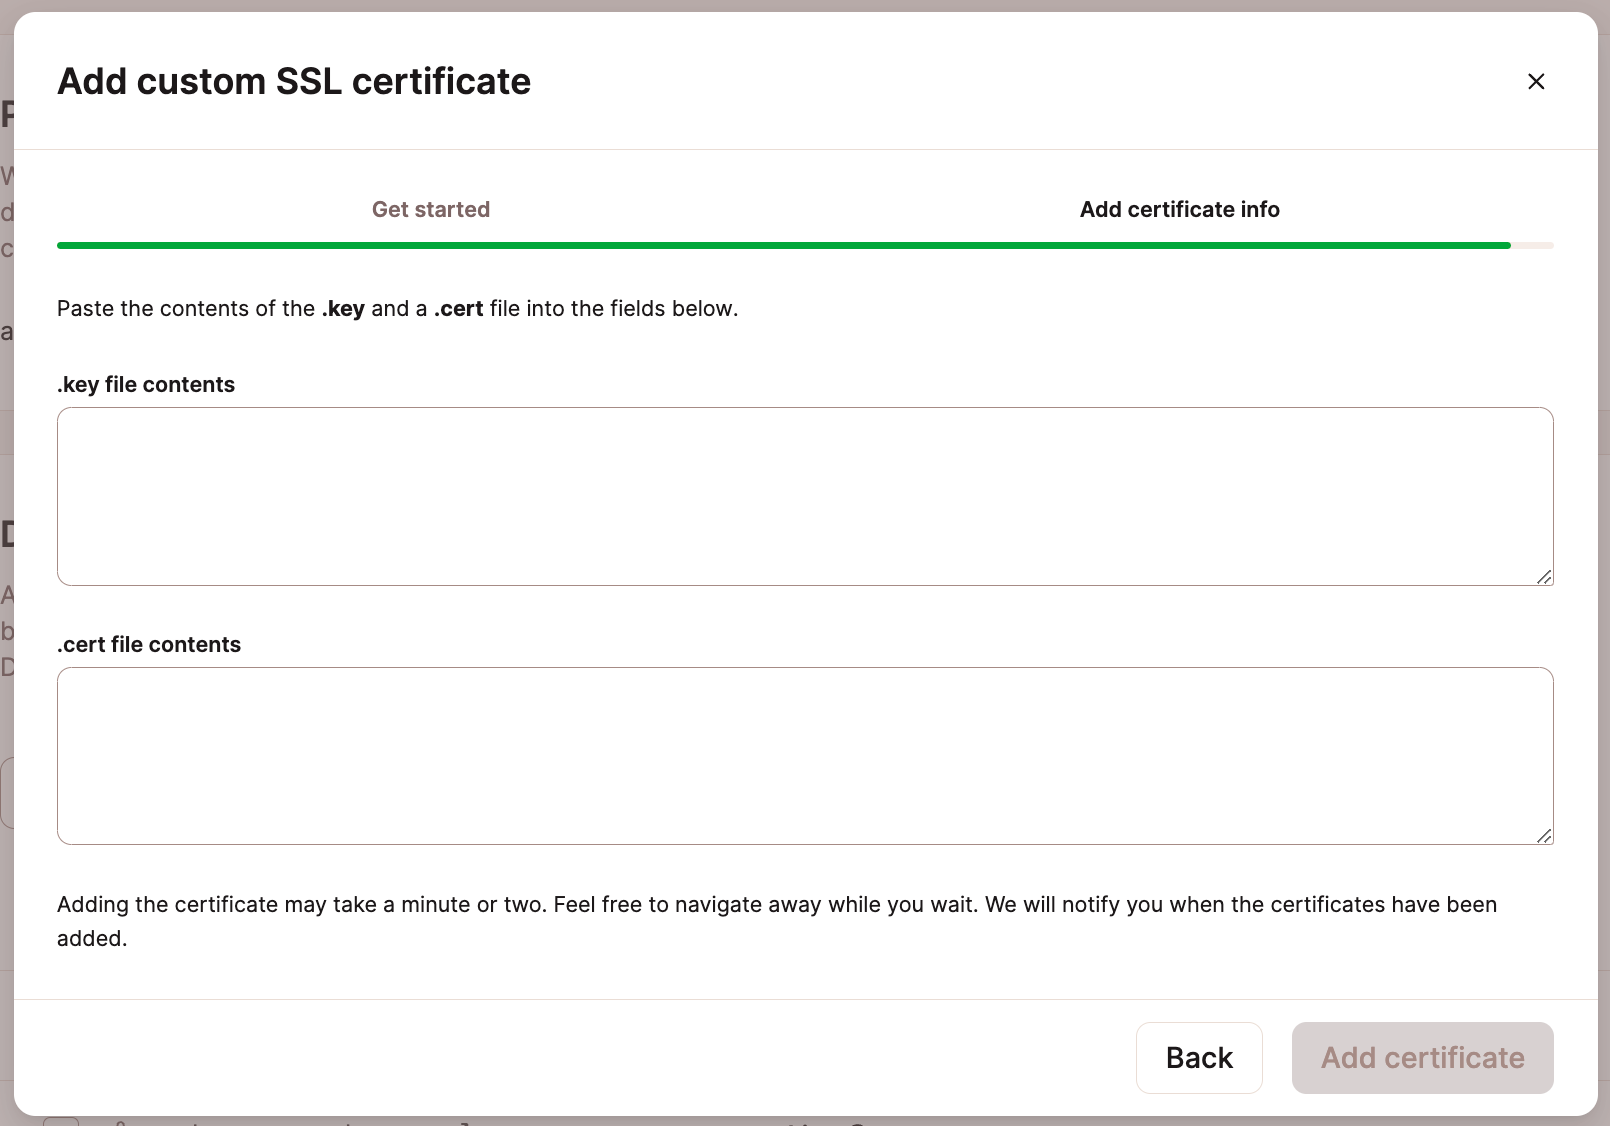
Click Add certificate to finalize the configuration process.
Step 4 — Check Your SSL Certificate
After you have installed your SSL certificate, we recommend running an SSL check to verify that everything is set up correctly. An invalid SSL certificate can cause your visitors to be faced with the “your connection is not private” error.
Summary
At Kinsta, we support both free Cloudflare SSL certificates and custom SSLs. For most users, our Cloudflare SSL integration provides HTTPS support at no additional cost. However, if you have a specific use case that requires a custom SSL, we support that as well.
If you have any questions about how to add an SSL certificate to your site, support chat for customers with a paid plan or service is available 24/7. If you only have a Static Site Hosting account, you can connect with developers and knowledgeable community members in the Kinsta Community forum.