Database Access
We offer direct database access, as well as the ability to manipulate databases using various tools, including the database manager in MyKinsta, phpMyAdmin, HeidiSQL, Sequel Pro, and MySQL Workbench. To configure direct database access, you’ll need to set up an SSH tunnel to your Kinsta site. Explore the various ways to connect below.
While it may be common at some hosting providers to add a remote IP address to allow external database connections, that isn’t necessary here at Kinsta. When an SSH tunnel is used to access a database (as described in this article), the connection is secured through the SSH authentication process.
When you add your site to MyKinsta, the database name, username, and SSH/SFTP username are generated using your site name. If your site name contains non-Latin characters, such as Chinese Hanzi, Japanese Kana, Arabic, or Thai, these are converted to Latin characters for our systems to function correctly.
Database manager
You can use the database manager in MyKinsta to access your WordPress database directly. From there, you can view and edit data, create or modify tables, run SQL queries, and perform other database management tasks.

phpMyAdmin
Kinsta provides one-click access to phpMyAdmin on all hosting plans. phpMyAdmin is a popular free application for managing MySQL databases.
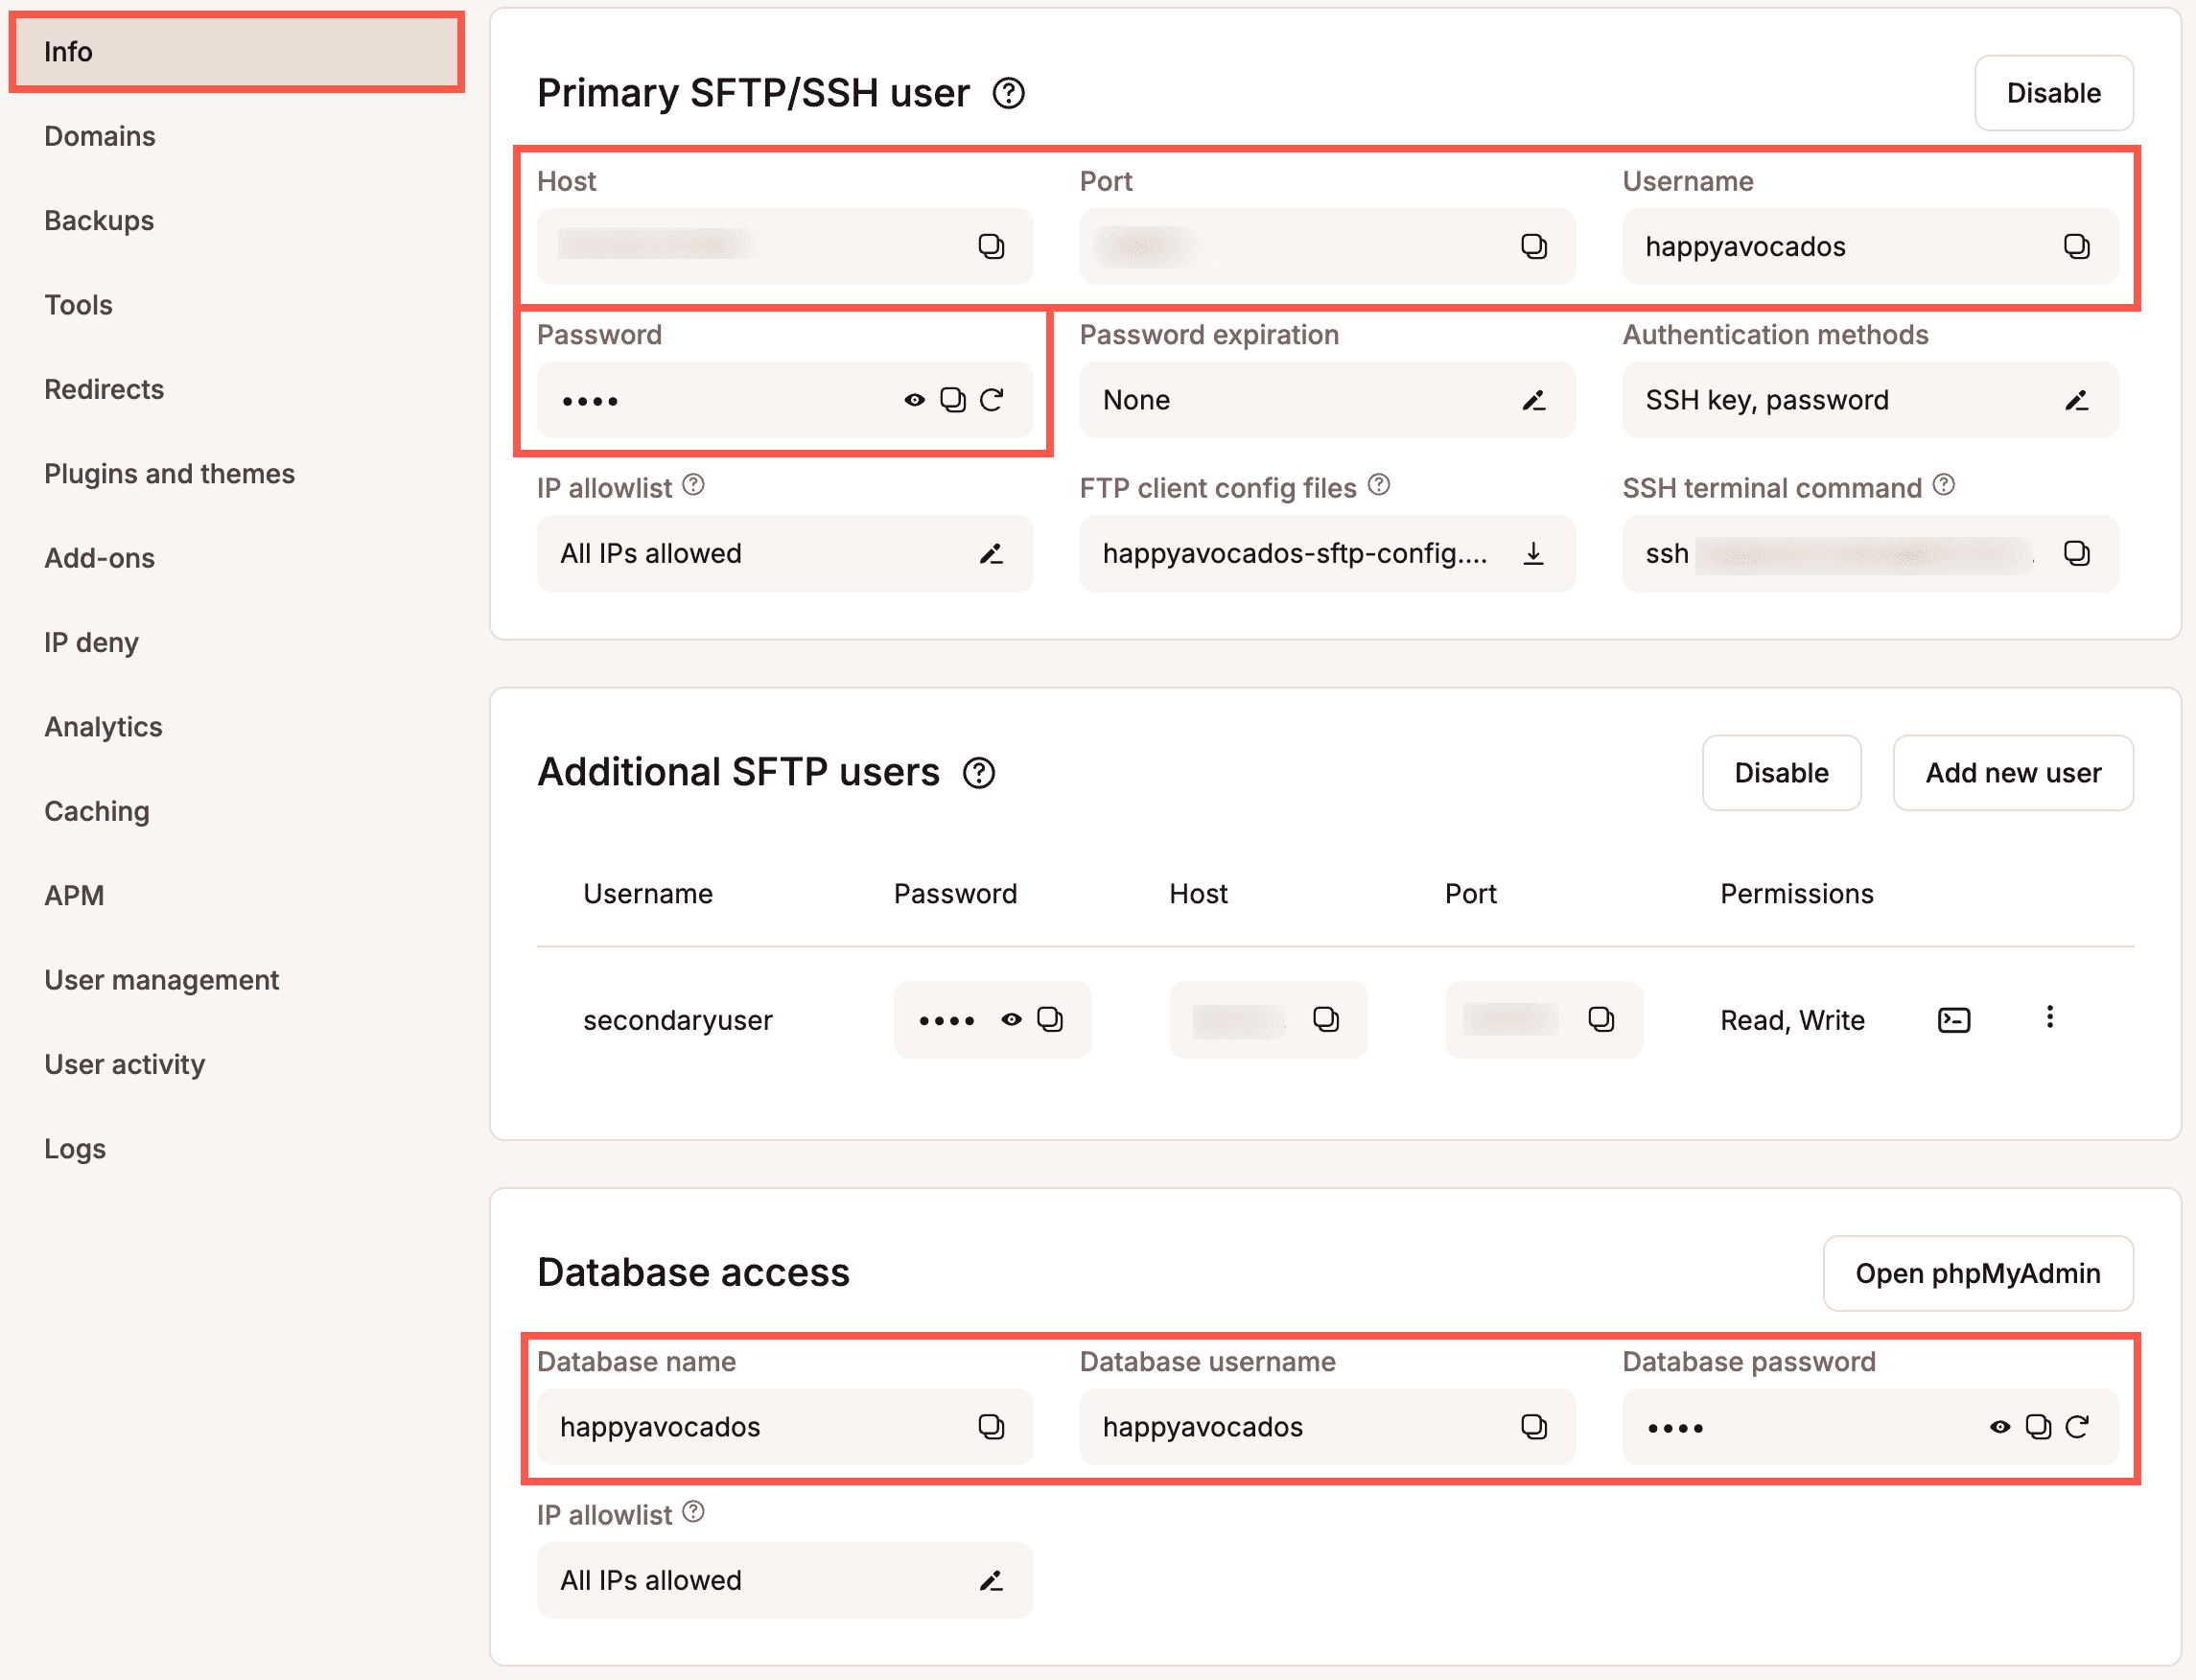
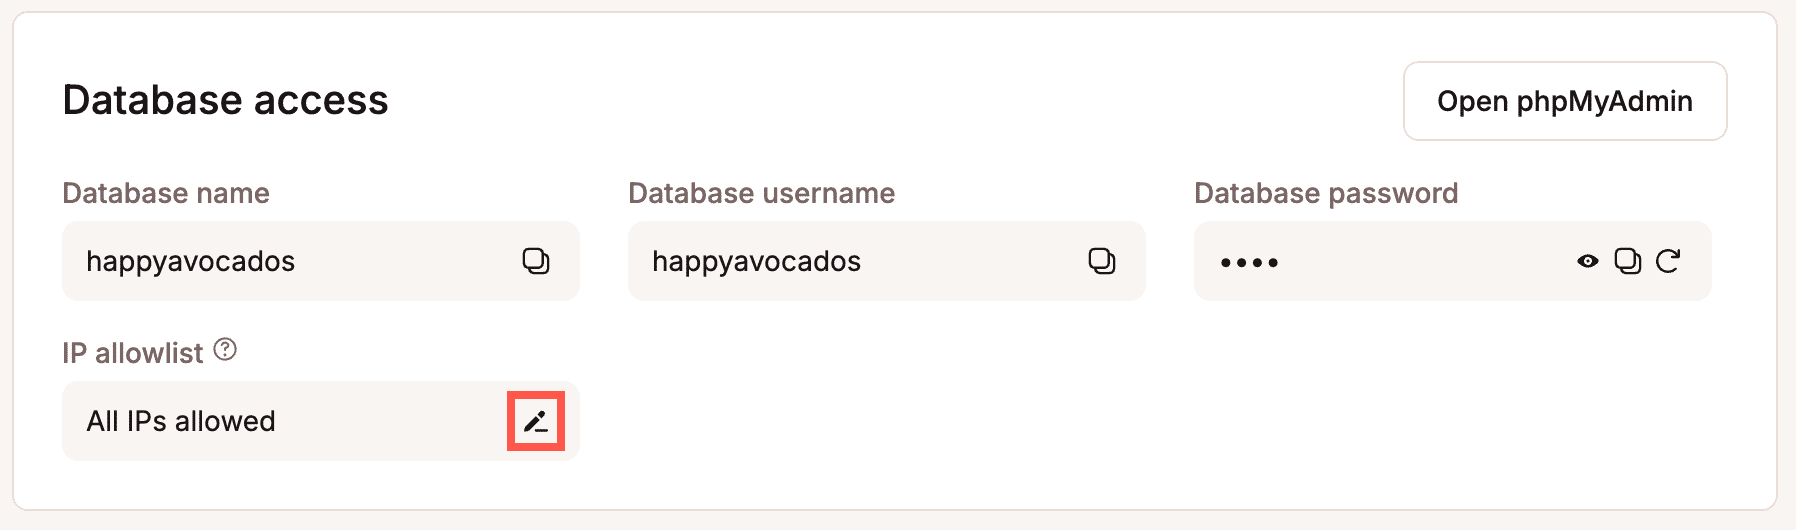
To access phpMyAdmin and manage your WordPress database, log in to MyKinsta and navigate to Sites > sitename > Info. Scroll down to the Database access section and click Open phpMyAdmin. This opens in a new tab and automatically logs you in using your database credentials.
If you’re taken to a login screen instead, simply enter the Database username and Database password displayed in the Database access section on the Info tab.

Within phpMyAdmin, you can view your database tables, run queries, drop tables, import data, export your WordPress database, and more.

For more information about using phpMyAdmin, refer to the official phpMyAdmin documentation.
SSH and database information
In the connection methods shown below, you’ll need to gather SSH and database information for your site from MyKinsta. This information can be found in MyKinsta under Sites > sitename > Info.
- SFTP/SSH Host
- SFTP/SSH Username
- SFTP/SSH Password
- SFTP/SSH Port
- Database name
- Database username
- Database password
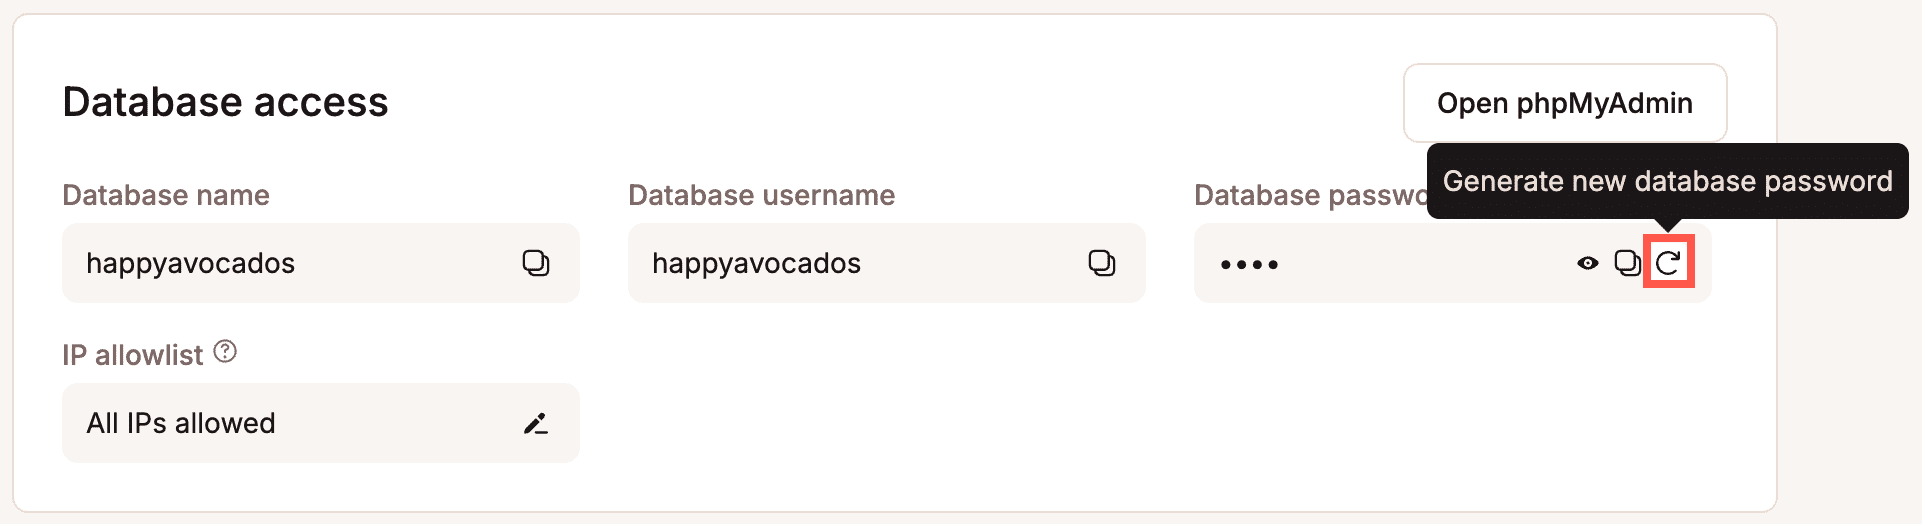
Change the database password
If you want to update the database password, hover over the password and click Generate new database password.
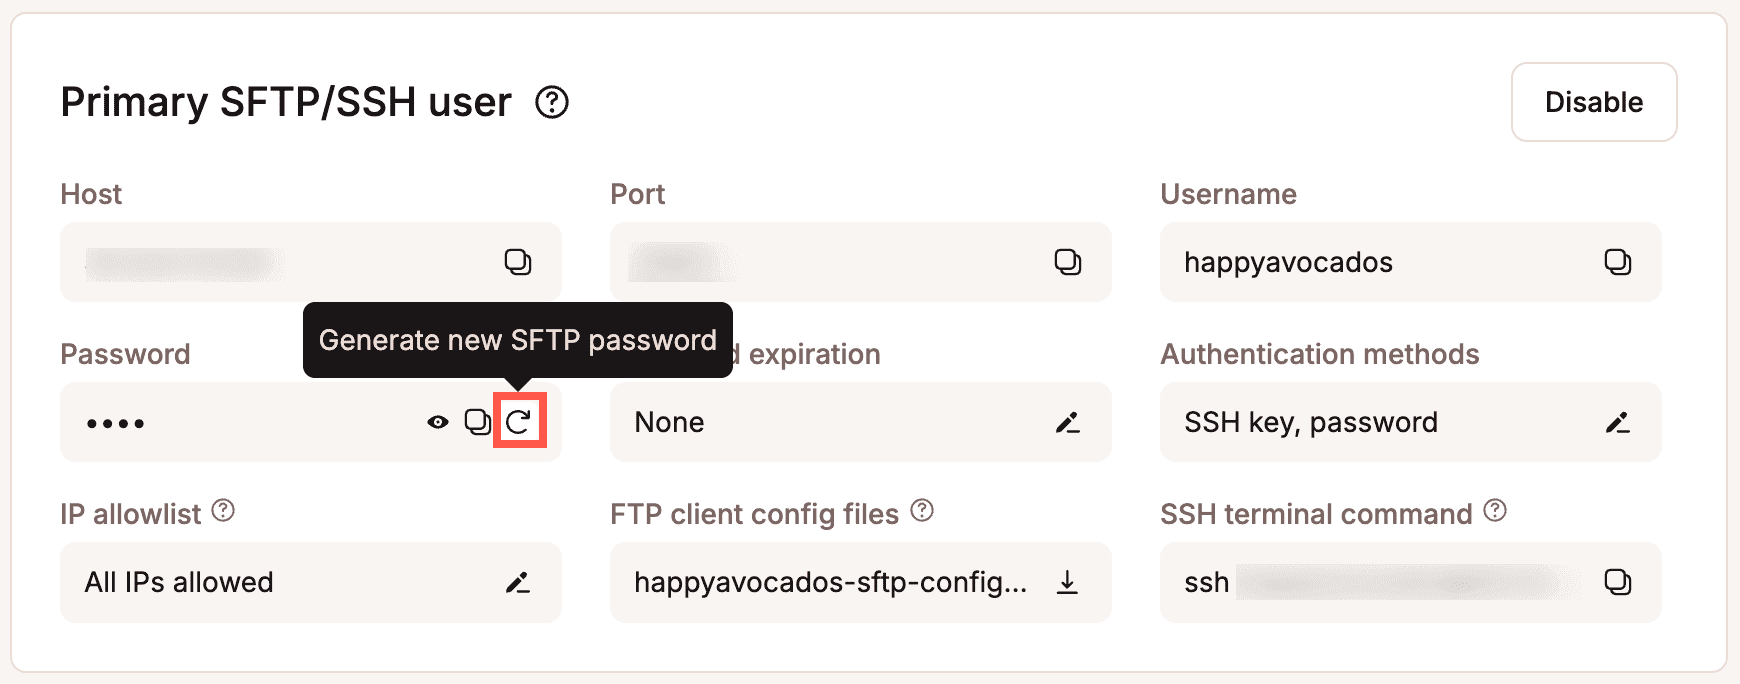
Change the SFTP/SSH password
If you want to update the SFTP/SSH password for the current environment, hover over the password and click Generate new SFTP password.
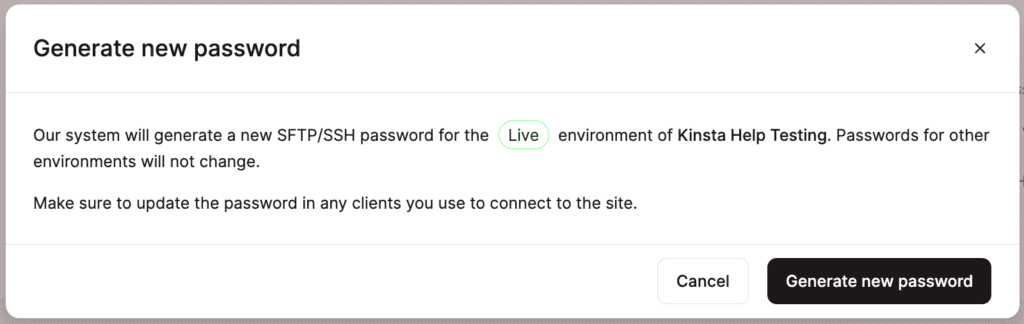
To confirm the password change, click Generate new password.
IP allowlist
To specify a list of IP addresses that are allowed to access your database, click the edit icon under IP allowlist.
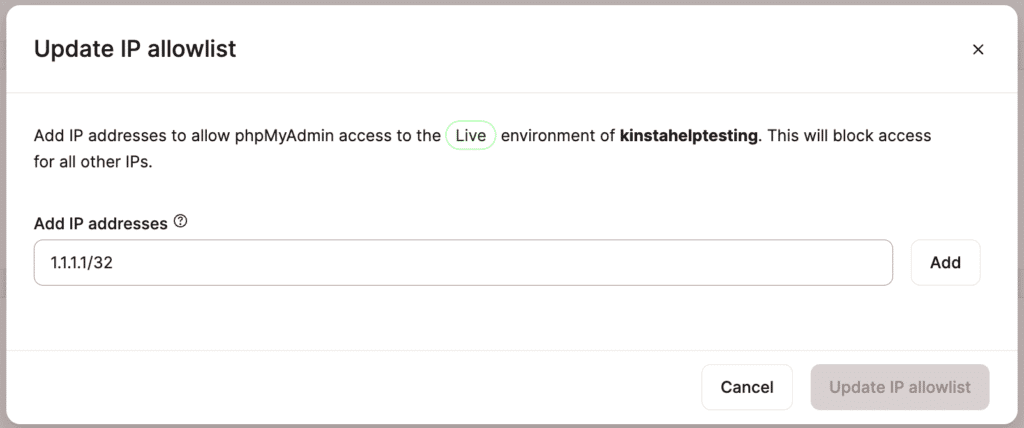
Enter the IP addresses you want to allow access to your database and click Add. You can specify multiple addresses separated by a comma, e.g., 1.1.1.1, 2.2.2.2. You can also specify a range of IP addresses using a slash, e.g., 1.1.1.1/32.
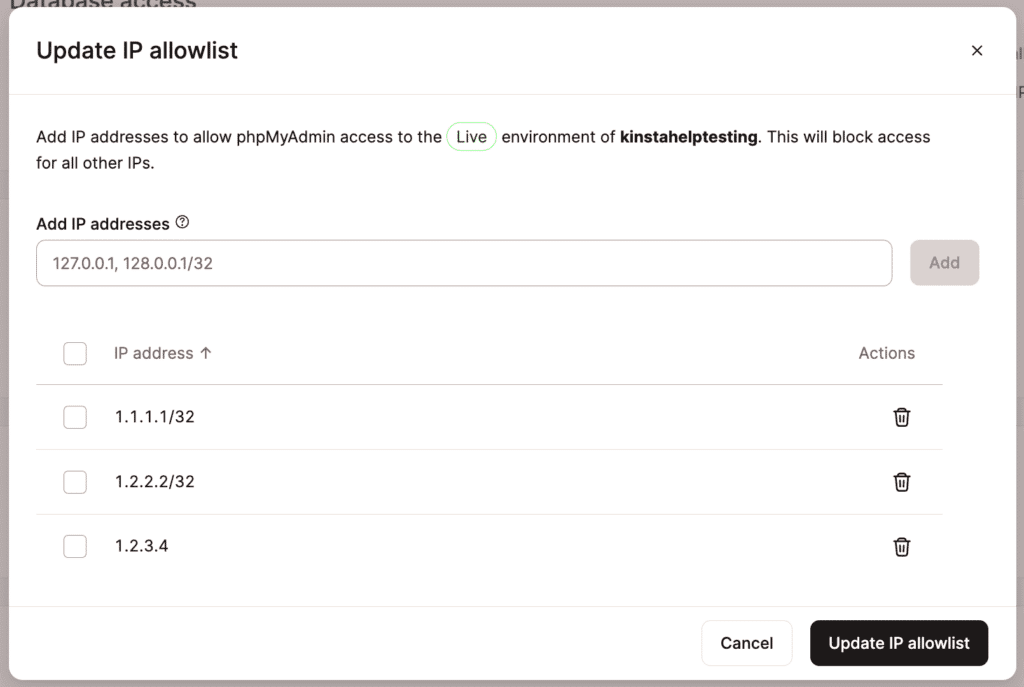
Once you have entered all of the required IP addresses, click Update IP allowlist.
Connect to a database with the command line
If you prefer to work exclusively in the command line, you can connect to your Kinsta database directly via an SSH tunnel. This allows you to use local database administration tools like MariaDB Server to make changes to a MySQL database in a secure fashion.
To connect to your database via SSH tunnel, you’ll need a few key pieces of information from your site’s Info tab in MyKinsta.
- SSH username
- SSH password
- SSH host
- SSH port
- Database username
- Database password
macOS
In macOS, launch Terminal and run the command below. Be sure to replace “ssh_username”, “ssh_host”, and “ssh_port” with your site’s settings. This command binds your local port 3307 to port 3306 on the remote server containing your database and performs the necessary port forwarding.
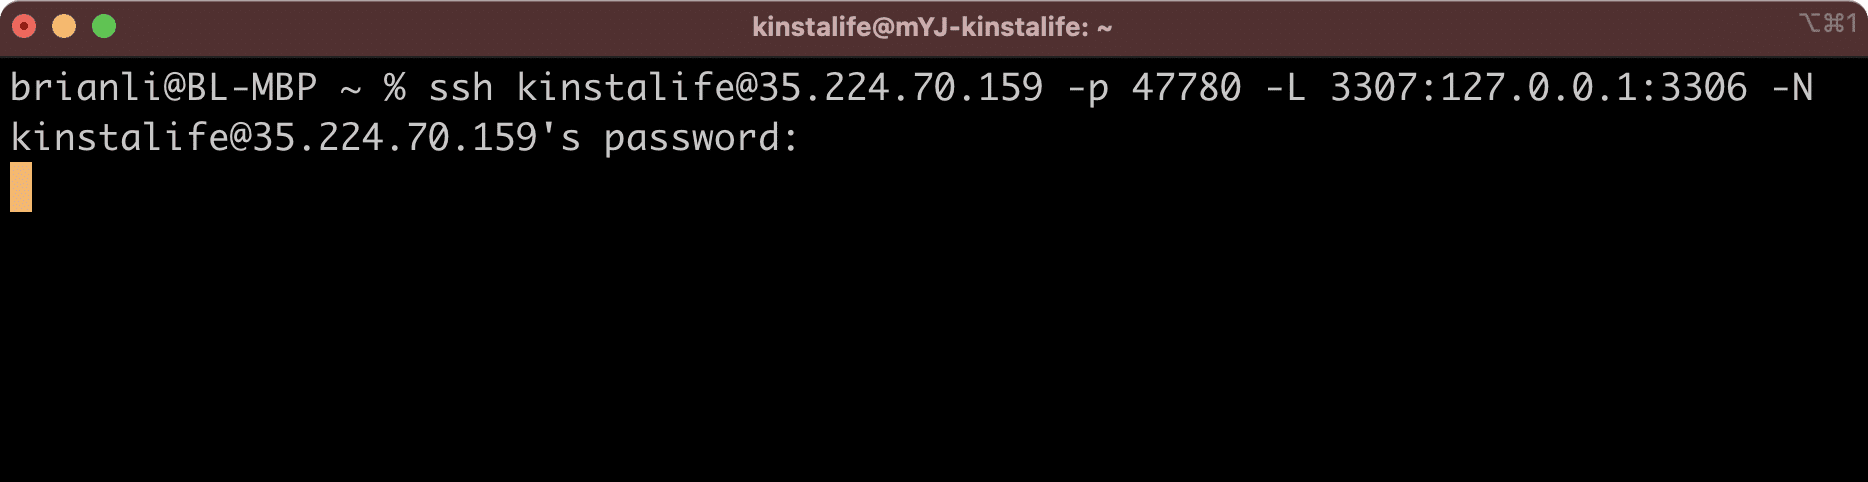
ssh -fN ssh_username@ssh_host -p ssh_port -L 3307:127.0.0.1:3306For the kinstalife site in the screenshot above, the command below can be used to start the SSH session.
ssh -fN [email protected] -p 47780 -L 3307:127.0.0.1:3306Input your SFTP/SSH password when prompted, and press “Enter”. If you do not see an “incorrect password” message, that means you’re good to go!
At this point, your Mac is set up to connect to your remote database via 127.0.0.1:3307. If you haven’t already, you’ll need to install MariaDB Server locally. This includes the MySQL command-line tool required to connect to the database. Note that while MariaDB Server must be installed, you don’t need to run it locally.
Use the command below to connect to your database.
mysql --host=127.0.0.1 --port=3307 -u database_username -p --skip_sslFor our kinstalife site, we would use the command below.
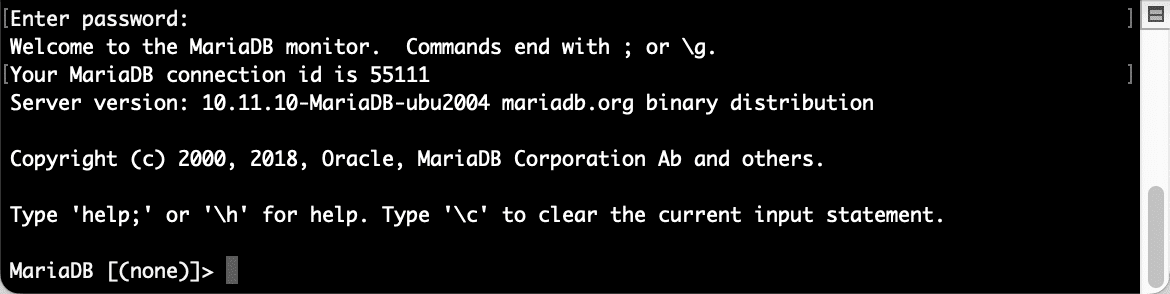
mysql --host=127.0.0.1 --port=3307 -u kinstalife -p --skip_sslYou’ll be prompted for your database password, so be sure to have that handy. After successfully connecting, you’ll see the interface below, which lets you query your remote database directly.
Connect to the database with HeidiSQL – Windows only
- Download HeidiSQL and install it. When you first launch it you will need to create a new session file using the following information:
- Network Type: MySQL (SSH Tunnel)
- Hostname / IP: localhost (or 127.0.0.1)
- User: Database username from MyKinsta
- Password: Database password from MyKinsta
- Port: 3306
- Database: Database name from MyKinsta
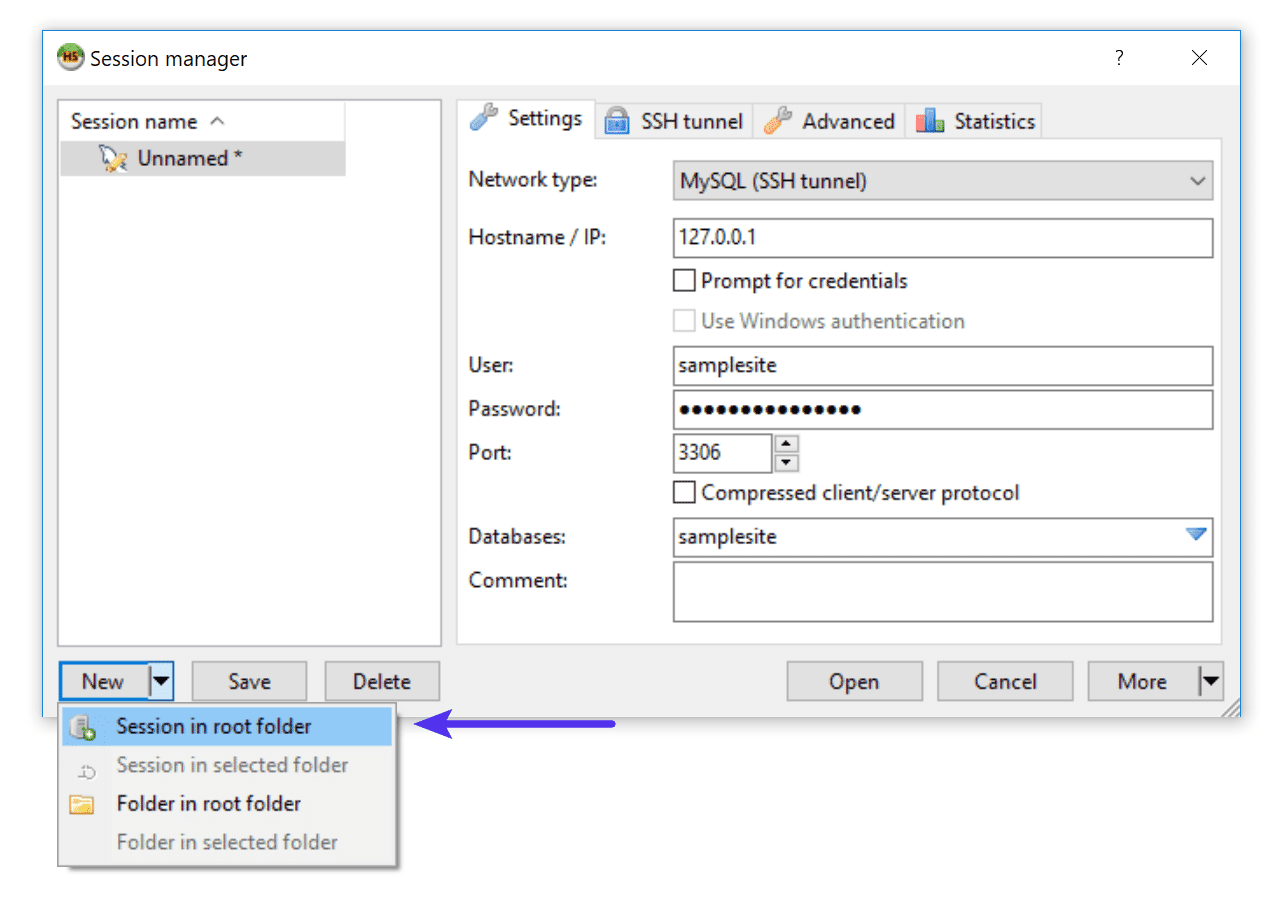
New session file HeidiSQL - You will then need to download Plink.exe (PuTTY Link, a command-line connection tool) and specify the location under the Advanced tab in HeidiSQL. Use the following information on the SSH tunnel tab.
- SSH Host: SFTP/SSH Host IP Address from MyKinsta
- SSH Port: SFTP/SSH Port from MyKinsta
- Username: SFTP/SSH username from MyKinsta
- Password: SFTP/SSH password from MyKinsta
- Local port: 3306
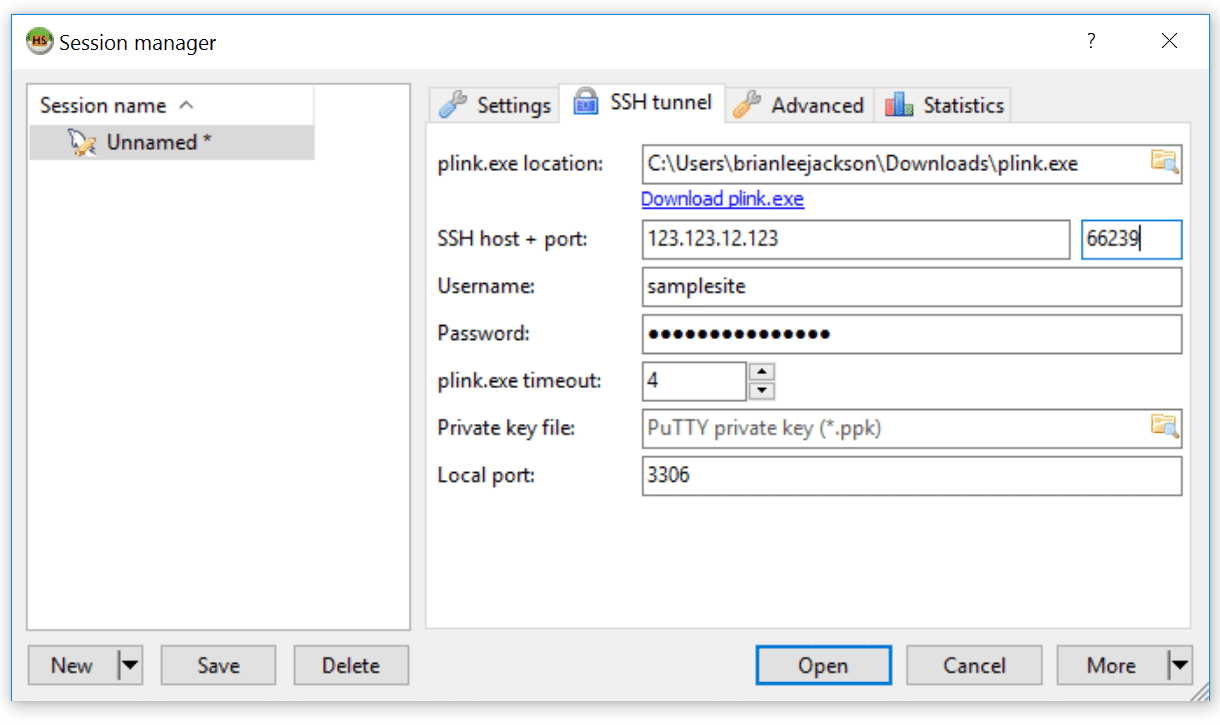
SSH tunnel settings in HeidiSQL. - Click Open and it should prompt you to trust the host and add the key to your registry.
Connect to the database with Sequel Ace
- Download Sequel Ace and install it.
- To create a new connection, click SSH and complete the following connection parameters:
- MySQL Host: 127.0.0.1
- Username: Database username from MyKinsta
- Password: Database password from MyKinsta
- Database: Database name from MyKinsta
- Port: 3306
- SSH Host: SFTP/SSH Host IP Address from MyKinsta
- SSH User: SFTP/SSH Username from MyKinsta
- SSH Password: SFTP/SSH Password from MyKinsta
- SSH Port: SFTP/SSH Port from MyKinsta

Sequel Ace - Click Connect.
Connect to the database with MySQL Workbench
- Download MySQL Workbench and install it. When you first launch it, you will need to create a new session file.
- Open Workbench, click Database > Manage Connections > New, and give your connection a name, and within Connection Method choose Standard TCP/IP over SSH.

MySQL Workbench connection. - Complete the connection parameters as follows:
- SSH Hostname: SFTP/SSH Host IP Address followed by a colon (:) and port from MyKinsta (e.g. 123.123.12.123:53229)
- SSH Username: SFTP/SSH Username from MyKinsta
- SSH Password: SFTP/SSH Password from MyKinsta
- MySQL Hostname: localhost
- MySQL Server Port: 3306
- Username: Database username from MyKinsta
- Password: Database password from MyKinsta
- Click Close.
- Windows Users Only – If you’re running Windows, you will need to update the system type under the System Profile tab. However, by default, these options are greyed out. To enable them, click on the Remote Management tab and enable Native Windows Remote Management temporarily. This will enable you to change configuration options in the System Profile tab. Update the following:
- System Type: Linux
- Installation Type: Ubuntu Linux (MySQL Package)
Then, under the Remote Management tab, switch it back to Do not use remote management.
- Open the connection from the list. You will probably see two pop-up windows: Could not connect the SSH tunnel and Connection Warning. Click Continue on both windows.

Could not connect the SSH tunnel. 
MySQL Workbench connection warning You should then be able to access and manage the database.
If you get the following error: “Incompatible SSH peer (no acceptable kex algorithm)” it’s letting you know your Workbench software is out of date. However, we’ve had reports from clients about a possible bug with the “check for updates” option, reporting they were already running the latest version when, in fact, they weren’t. The solution is to go to the download page and grab the latest version.