Server Caching
At Kinsta, we implement and manage server caching (aka full-page caching) for all sites server-side. This means there is no need for typical caching plugins.
Server caching stores the generated HTML content of a webpage, speeding up delivery by avoiding repeated processing. However, it does not cache dynamic pages that are ineligible for caching, such as HTML content generated for an e-commerce checkout page, which requires real-time data.
By default, the cache expires every 24 hours; you can change the expiration time, and you can manually clear the cache. If you manually clear the cache either in MyKinsta, through the WordPress dashboard, or using WP-CLI, it is limited to 1 request every 10 seconds.
For more details, please take a look at our detailed post on the topic: Kinsta Handles WordPress Caching So You Don’t Have To.
Server cache expiration
The cache is set to expire every 24 hours by default, but you can adjust this to be longer if needed. To change the cache expiration:
- Go to MyKinsta > WordPress Sites > sitename > Caching > Server Caching.

Change the server cache expiration time in the Caching tab. - Select Change cache expiration, in the modal/pop-up that appears, select your desired cache expiration, and click Change expiration.

Choose the cache expiration time for your environment.
This changes the server cache and edge cache expiration. For sites that don’t often change, having a longer cache expiration can be beneficial for performance.
Clear cache in MyKinsta
When you update posts or pages on your site, the cache should clear automatically. If it doesn’t, you can clear the cache manually; however, if the issue continues and the cache doesn’t clear after making changes, please contact our Support Team so we can investigate this for you.
In MyKinsta, you can clear the server, CDN, and Edge Cache for one or multiple sites, including staging sites, simultaneously from the Sites page. This also clears the Redis object cache if you’ve added the Redis addon to your site.
Select the checkboxes next to the site(s) you want to clear the cache for, click Actions, and choose Clear cache.

Select the types of cache you want to clear and click Clear cache.
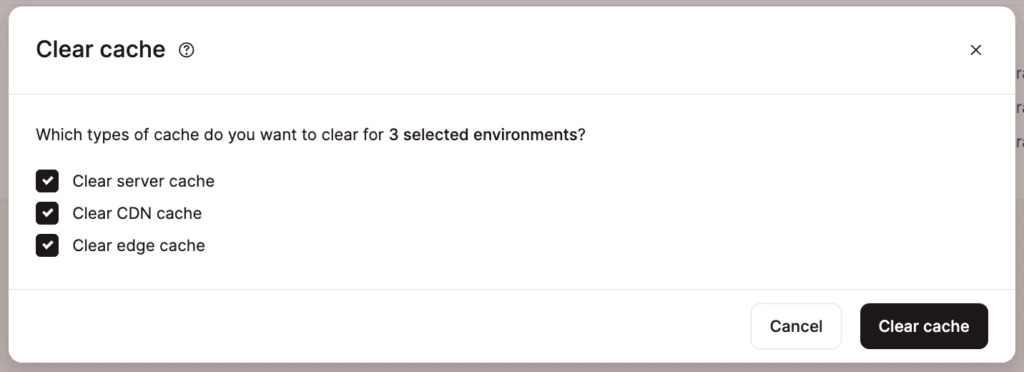
Once the process is complete, a success message will appear.
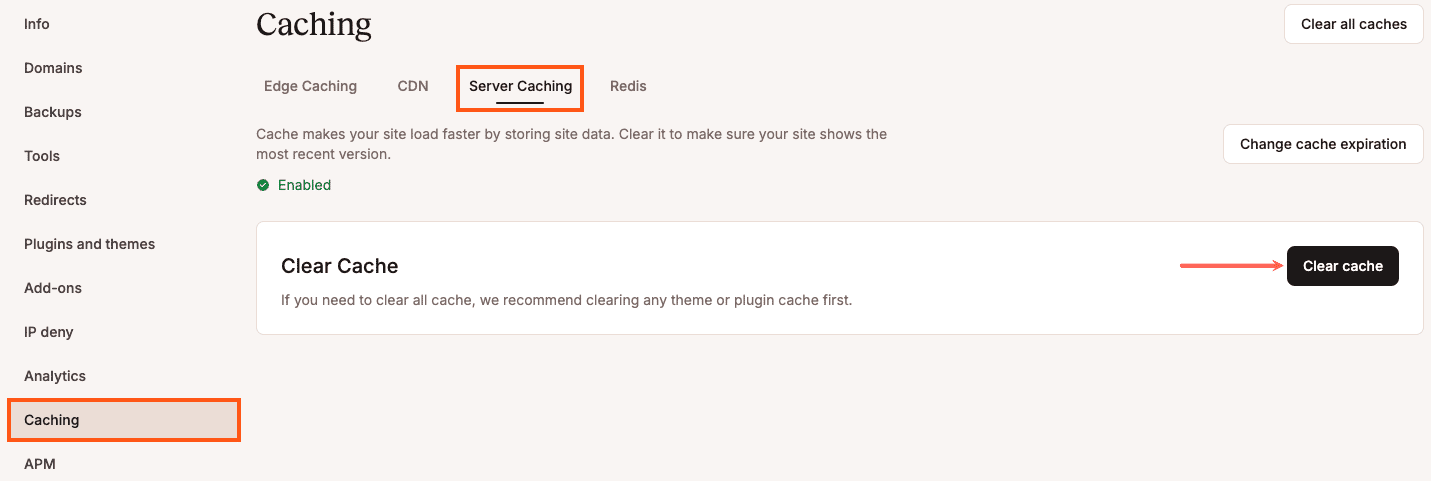
You can also clear the server cache for a single site within Sites > sitename > Caching > Server Caching > Clear cache. This also clears the Edge Cache if Edge Caching is enabled and the Redis object cache if you’ve added the Redis addon to your site. However, it does not clear the CDN cache, which provides an additional layer of caching for static assets (e.g. images, CSS files, JavaScript files); this needs to be cleared separately within Sites > sitename > Caching > CDN > Clear CDN cache.
Clear cache in your WordPress Dashboard
The Kinsta Must Use (MU) plugin is installed by default on all Kinsta-hosted sites. This is not your typical caching plugin, as it works on a server level. It allows you to purge the cache right from the admin bar, including:
- All cache.
- Server cache (aka full-page cache).
- Object cache.
- CDN cache.
You can also control automatic purge settings when posts and comments are published or updated.
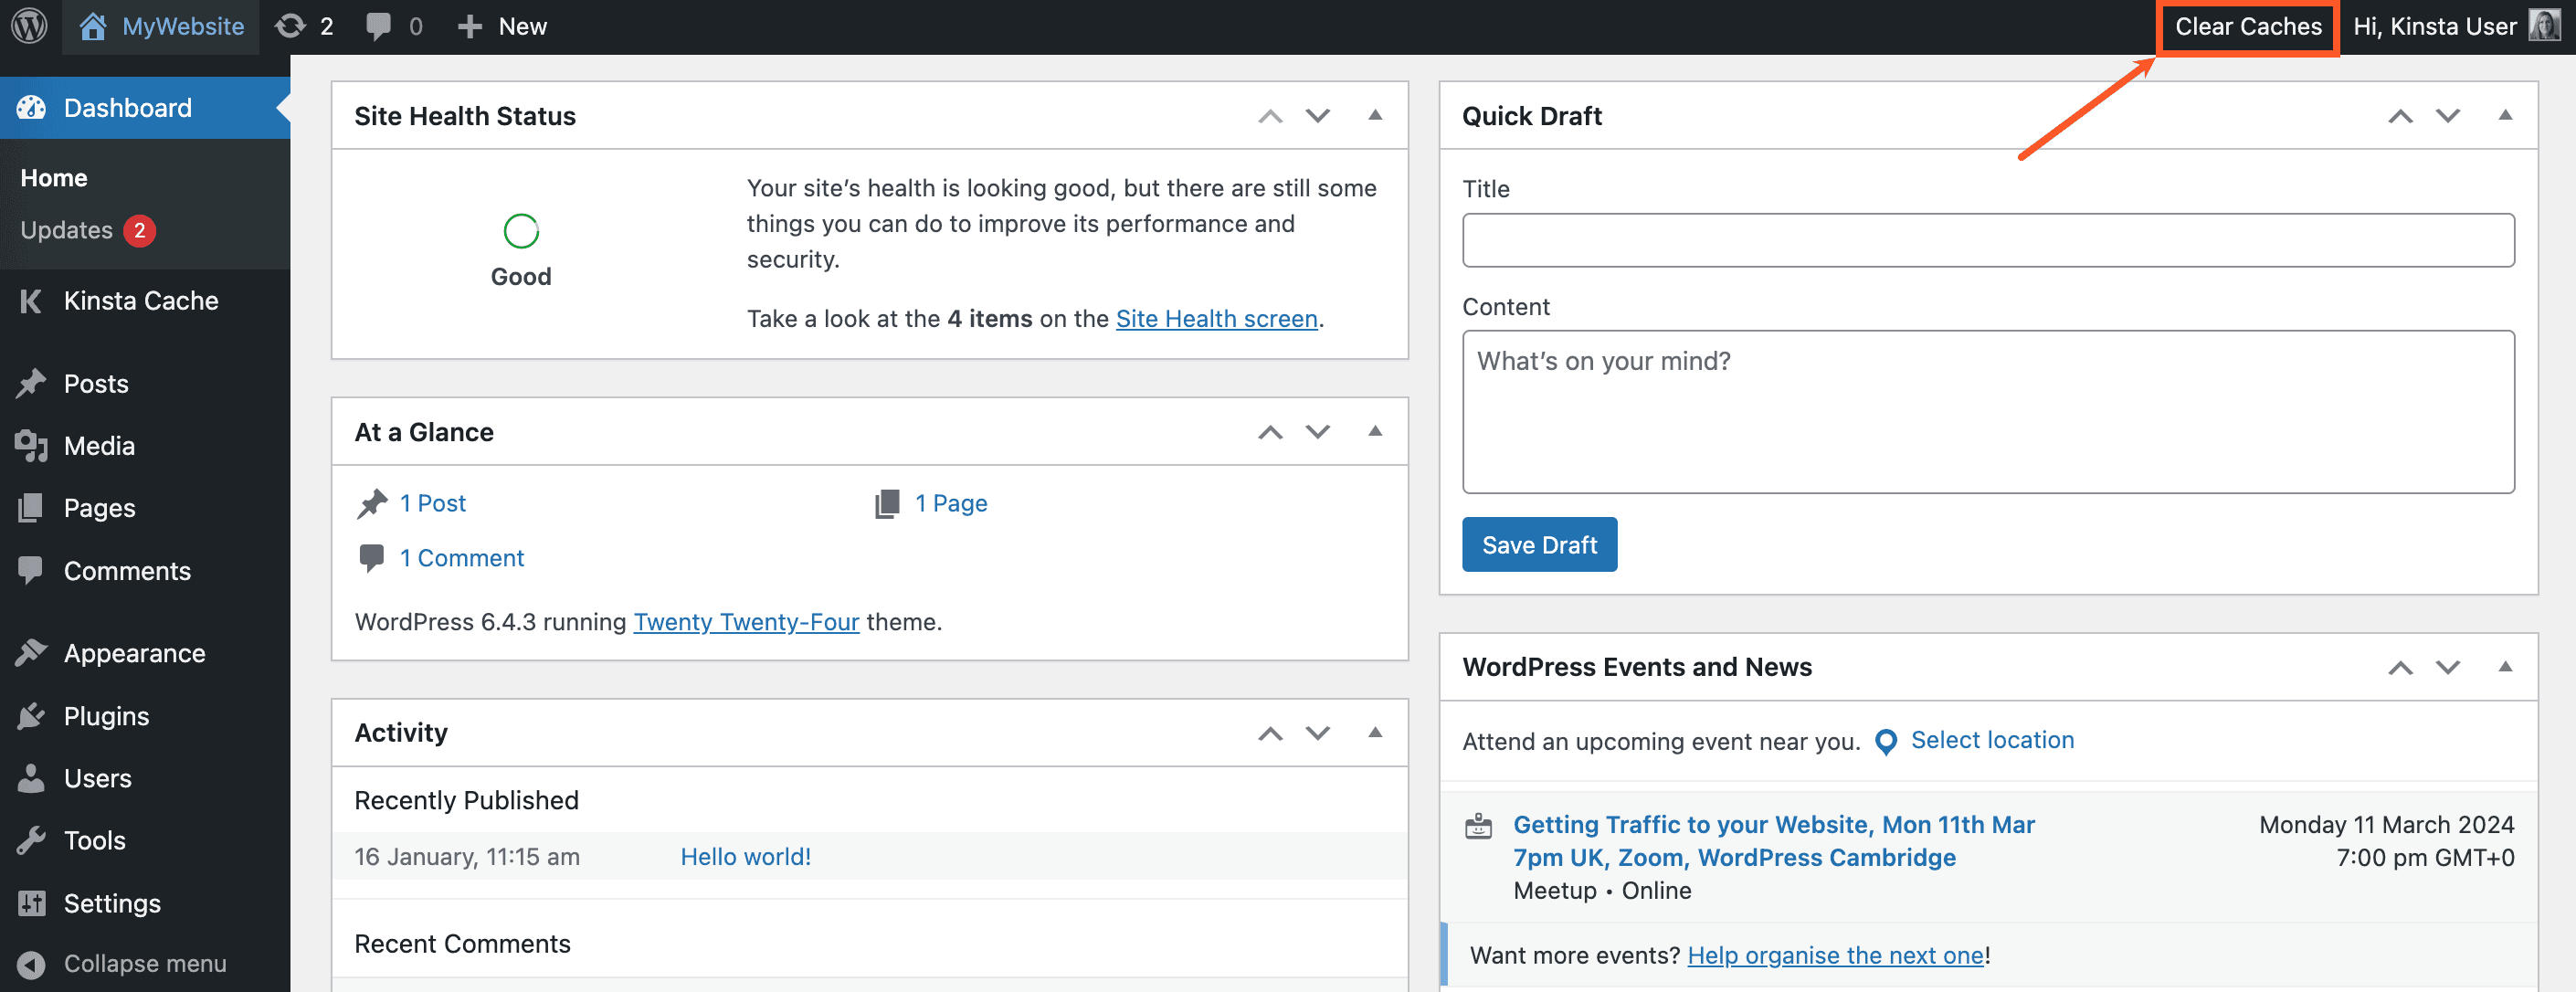
To manage or clear your server cache, login to your WordPress dashboard.
If you need to clear the cache for the entire site, click the Clear Cache link in the admin toolbar near the upper right corner of the page.
To configure automatic purge settings (automatically clear the cache for specific URLs or paths when you make changes to your site), you can configure those URLs in the Kinsta MU Plugin Settings.
Click Kinsta Cache in the left sidebar and add the URLs you want to purge when updates are made. For more information, check out our guide on Adding Custom Caching URLs in the Kinsta MU plugin.
- When Edge Caching is enabled on your site, clearing the cache with the Kinsta MU plugin also clears the Edge Cache.
- When Kinsta’s CDN is enabled, clearing the cache with the Kinsta MU plugin also clears the CDN cache.
Clear cache with WP-CLI
Connect to your server with SSH and navigate to your site’s document root:
cd publicIf the Kinsta Must Use (MU) Plugin is installed on the site, you can clear the site cache and the edge cache (when Edge Caching is enabled) with this command:
wp kinsta cache purgeIf you want to clear the CDN cache, you can use the following command:
wp kinsta cache purge --cdnIf you only want to clear the site cache without clearing the edge cache, add the --site flag:
wp kinsta cache purge --siteTo clear all cache, add the --all flag:
wp kinsta cache purge --allExit SSH with the following command:
quitDisable or bypass server caching
If you disable server caching, PHP and MySQL must generate each page on demand, which significantly increases the load on the host machine. To prevent this from impacting other sites on the same server, you will need to either use a dedicated server or run your site with limited resources (1 CPU and 1 GB RAM).
Alternatively, the Kinsta Support team can configure rules to bypass the cache for specific pages on your site. This is useful for pages where content is dynamic or personalized, and therefore should not be served from the cache.
For example, if you use a plugin for logging in that requires dynamic content, we can set rules so that caching is bypassed on pages like /login, /account, /register, and similar. This ensures that login forms, account details, and registration flows always load fresh, dynamic content instead of cached versions, preventing errors and improving the user experience.
If you need to disable server caching or bypass the cache for specific pages on your site, please contact our Support team.
Tracking parameters cached by Kinsta
Tracking parameters are added to the end of a URL to help website owners understand where visitors come from and how they interact with marketing campaigns. They are commonly used by analytics platforms such as Google Analytics and other reporting tools.
Kinsta caches the following tracking parameters to help improve cache efficiency while preserving marketing attribution data:
- utm_source: Identifies the source of the traffic (for example, Google, Facebook, or a newsletter).
- utm_medium: Identifies the marketing channel (for example, email, social, or CPC).
- utm_campaign: Identifies the specific campaign or promotion.
- utm_content: Differentiates between variations of the same campaign, such as different ads or links.
For example, in the following URL, the tracking parameters indicate that the visitor arrived from a Google paid advertising campaign called “spring-sale”:
https://example.com/?utm_source=google&utm_medium=cpc&utm_campaign=spring-sale