Add a Domain
Adding and configuring your domain correctly is a key step in going live with your WordPress site. To make your site accessible, you need to point your domain to Kinsta by adding DNS records. Kinsta gives you the exact records to add once you start the process.
There are three steps:
Most users only need the steps below. If you use Cloudflare, need wildcard subdomains, or want to use your own SSL certificate, see Special setups further down; otherwise, you can skip that section entirely.
1. Add your domain
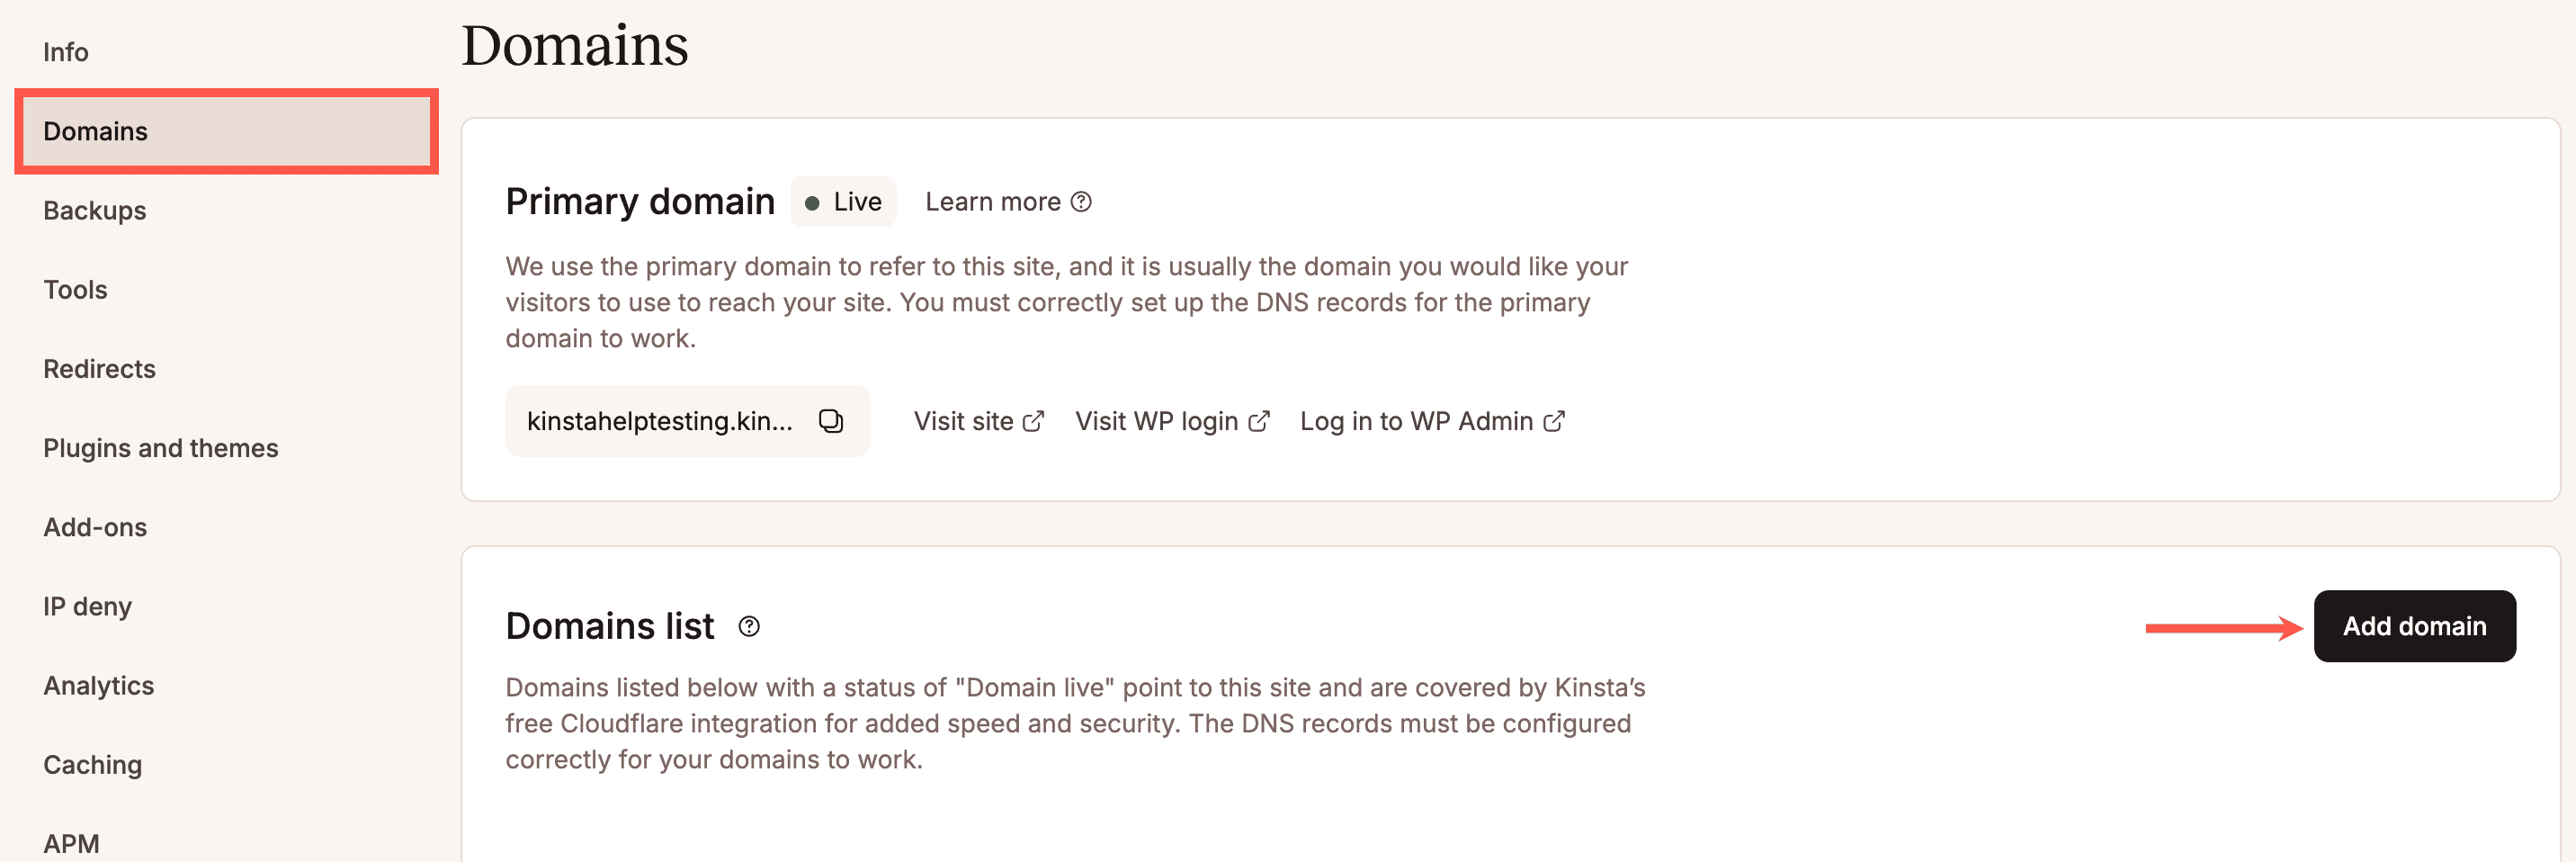
In MyKinsta, go to Sites > sitename > Domains, and click Add domain.
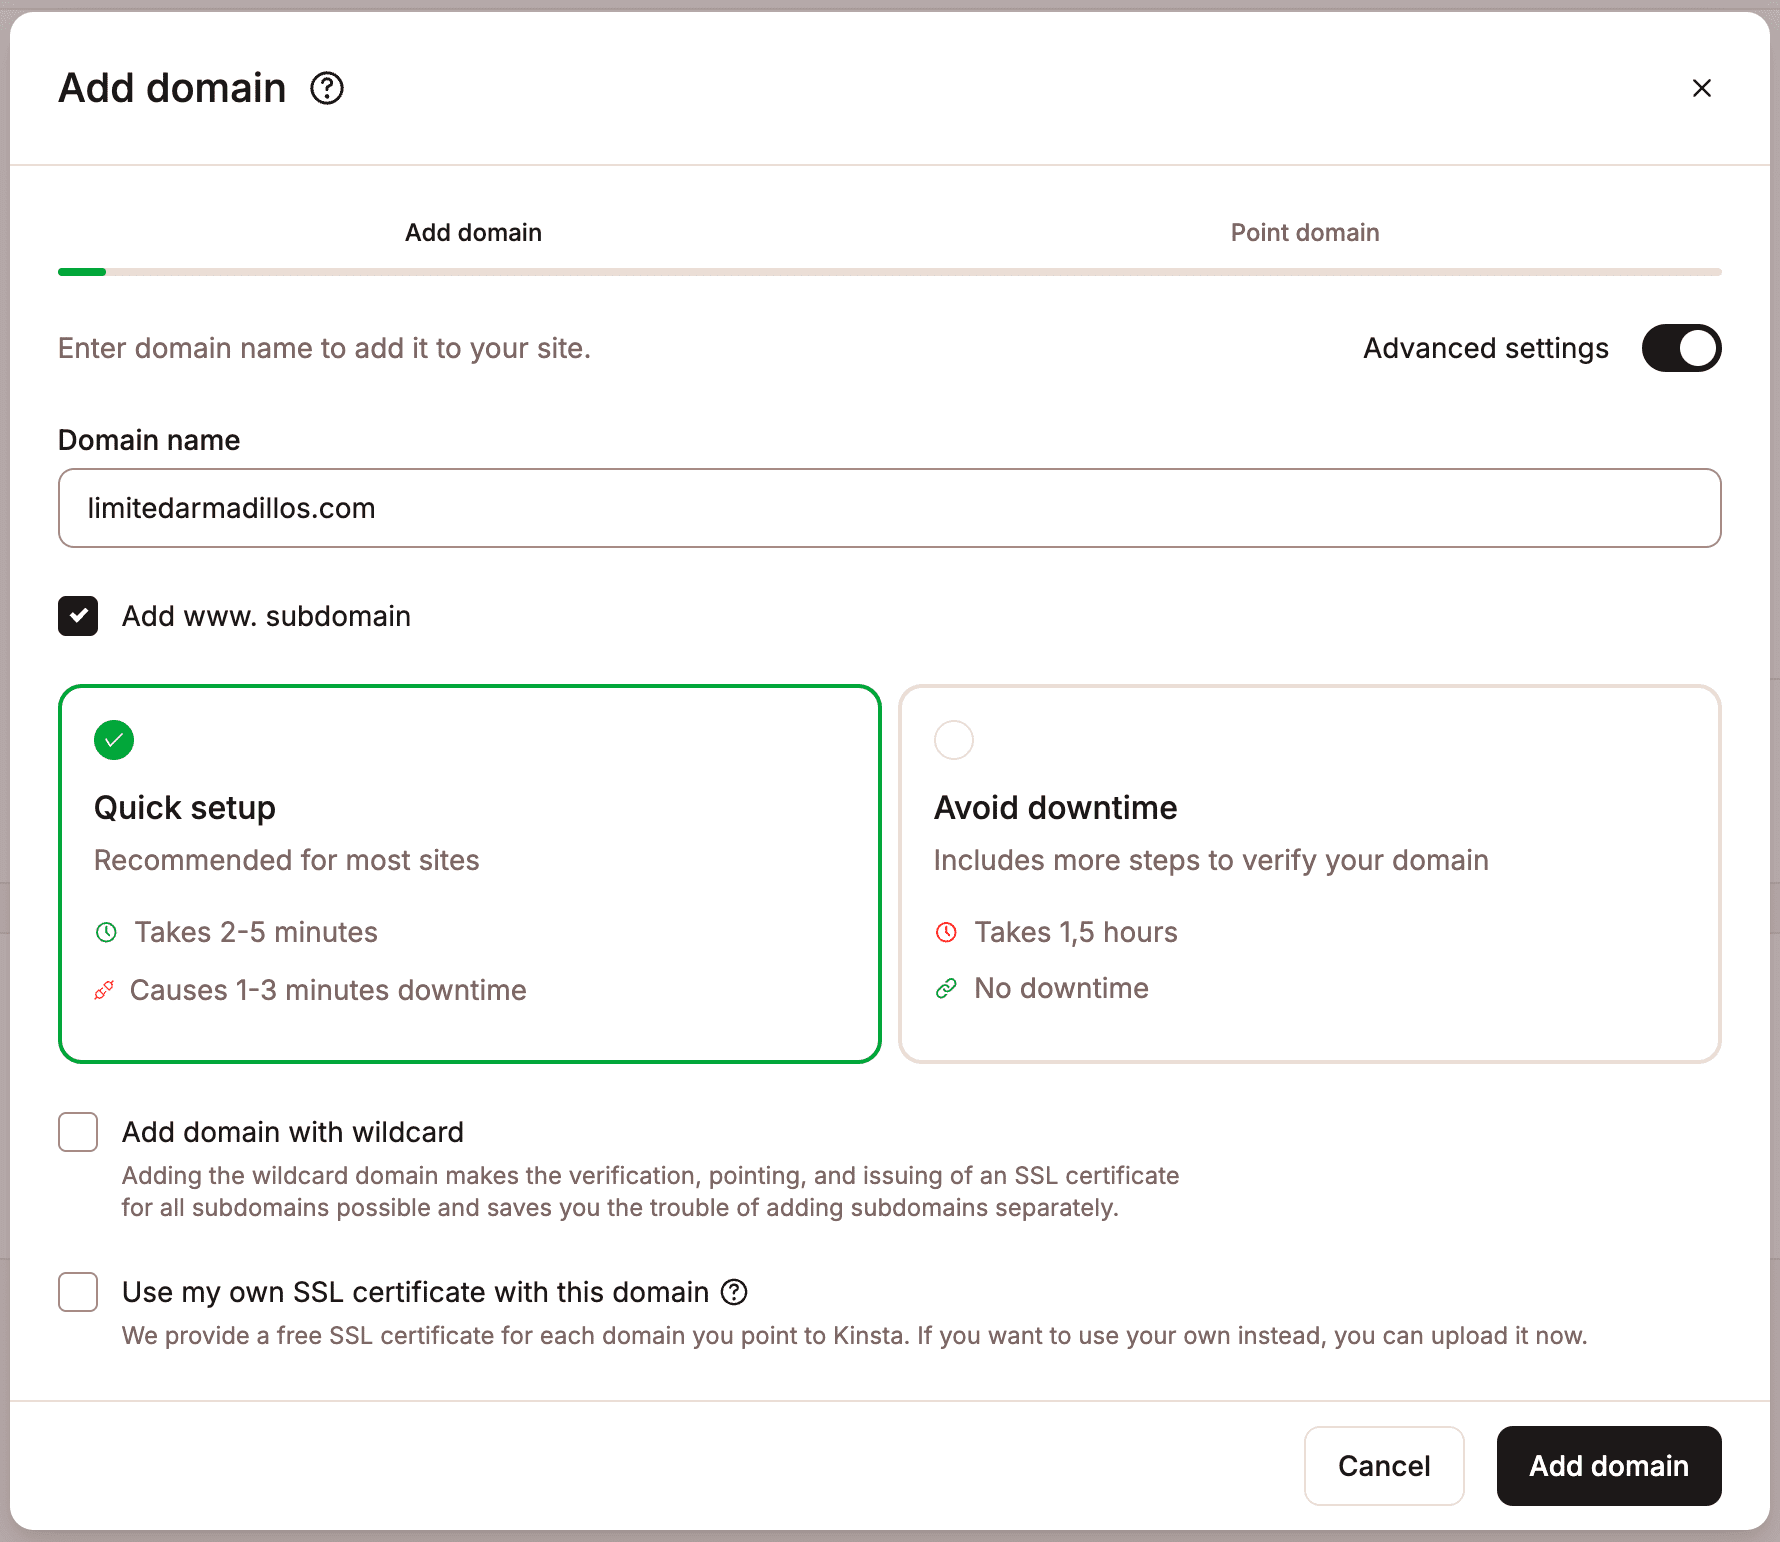
Complete Add domain as follows:
- Domain name: Enter your domain name (e.g.,
example.com). - Add www. subdomain: Enabled by default, so both
example.comandwww.example.comare configured with Kinsta’s Cloudflare integration. We recommend leaving this on; some browsers, systems, or integrations default to one version over the other, and configuring both prevents unexpected issues. You’ll be able to choose your preferred version and redirect the other to it.
Click Add domain to continue.
2. Set your domain as primary
The primary domain is the main domain visitors use to reach your site. When you first add your site to Kinsta, this defaults to a kinsta.cloud address.
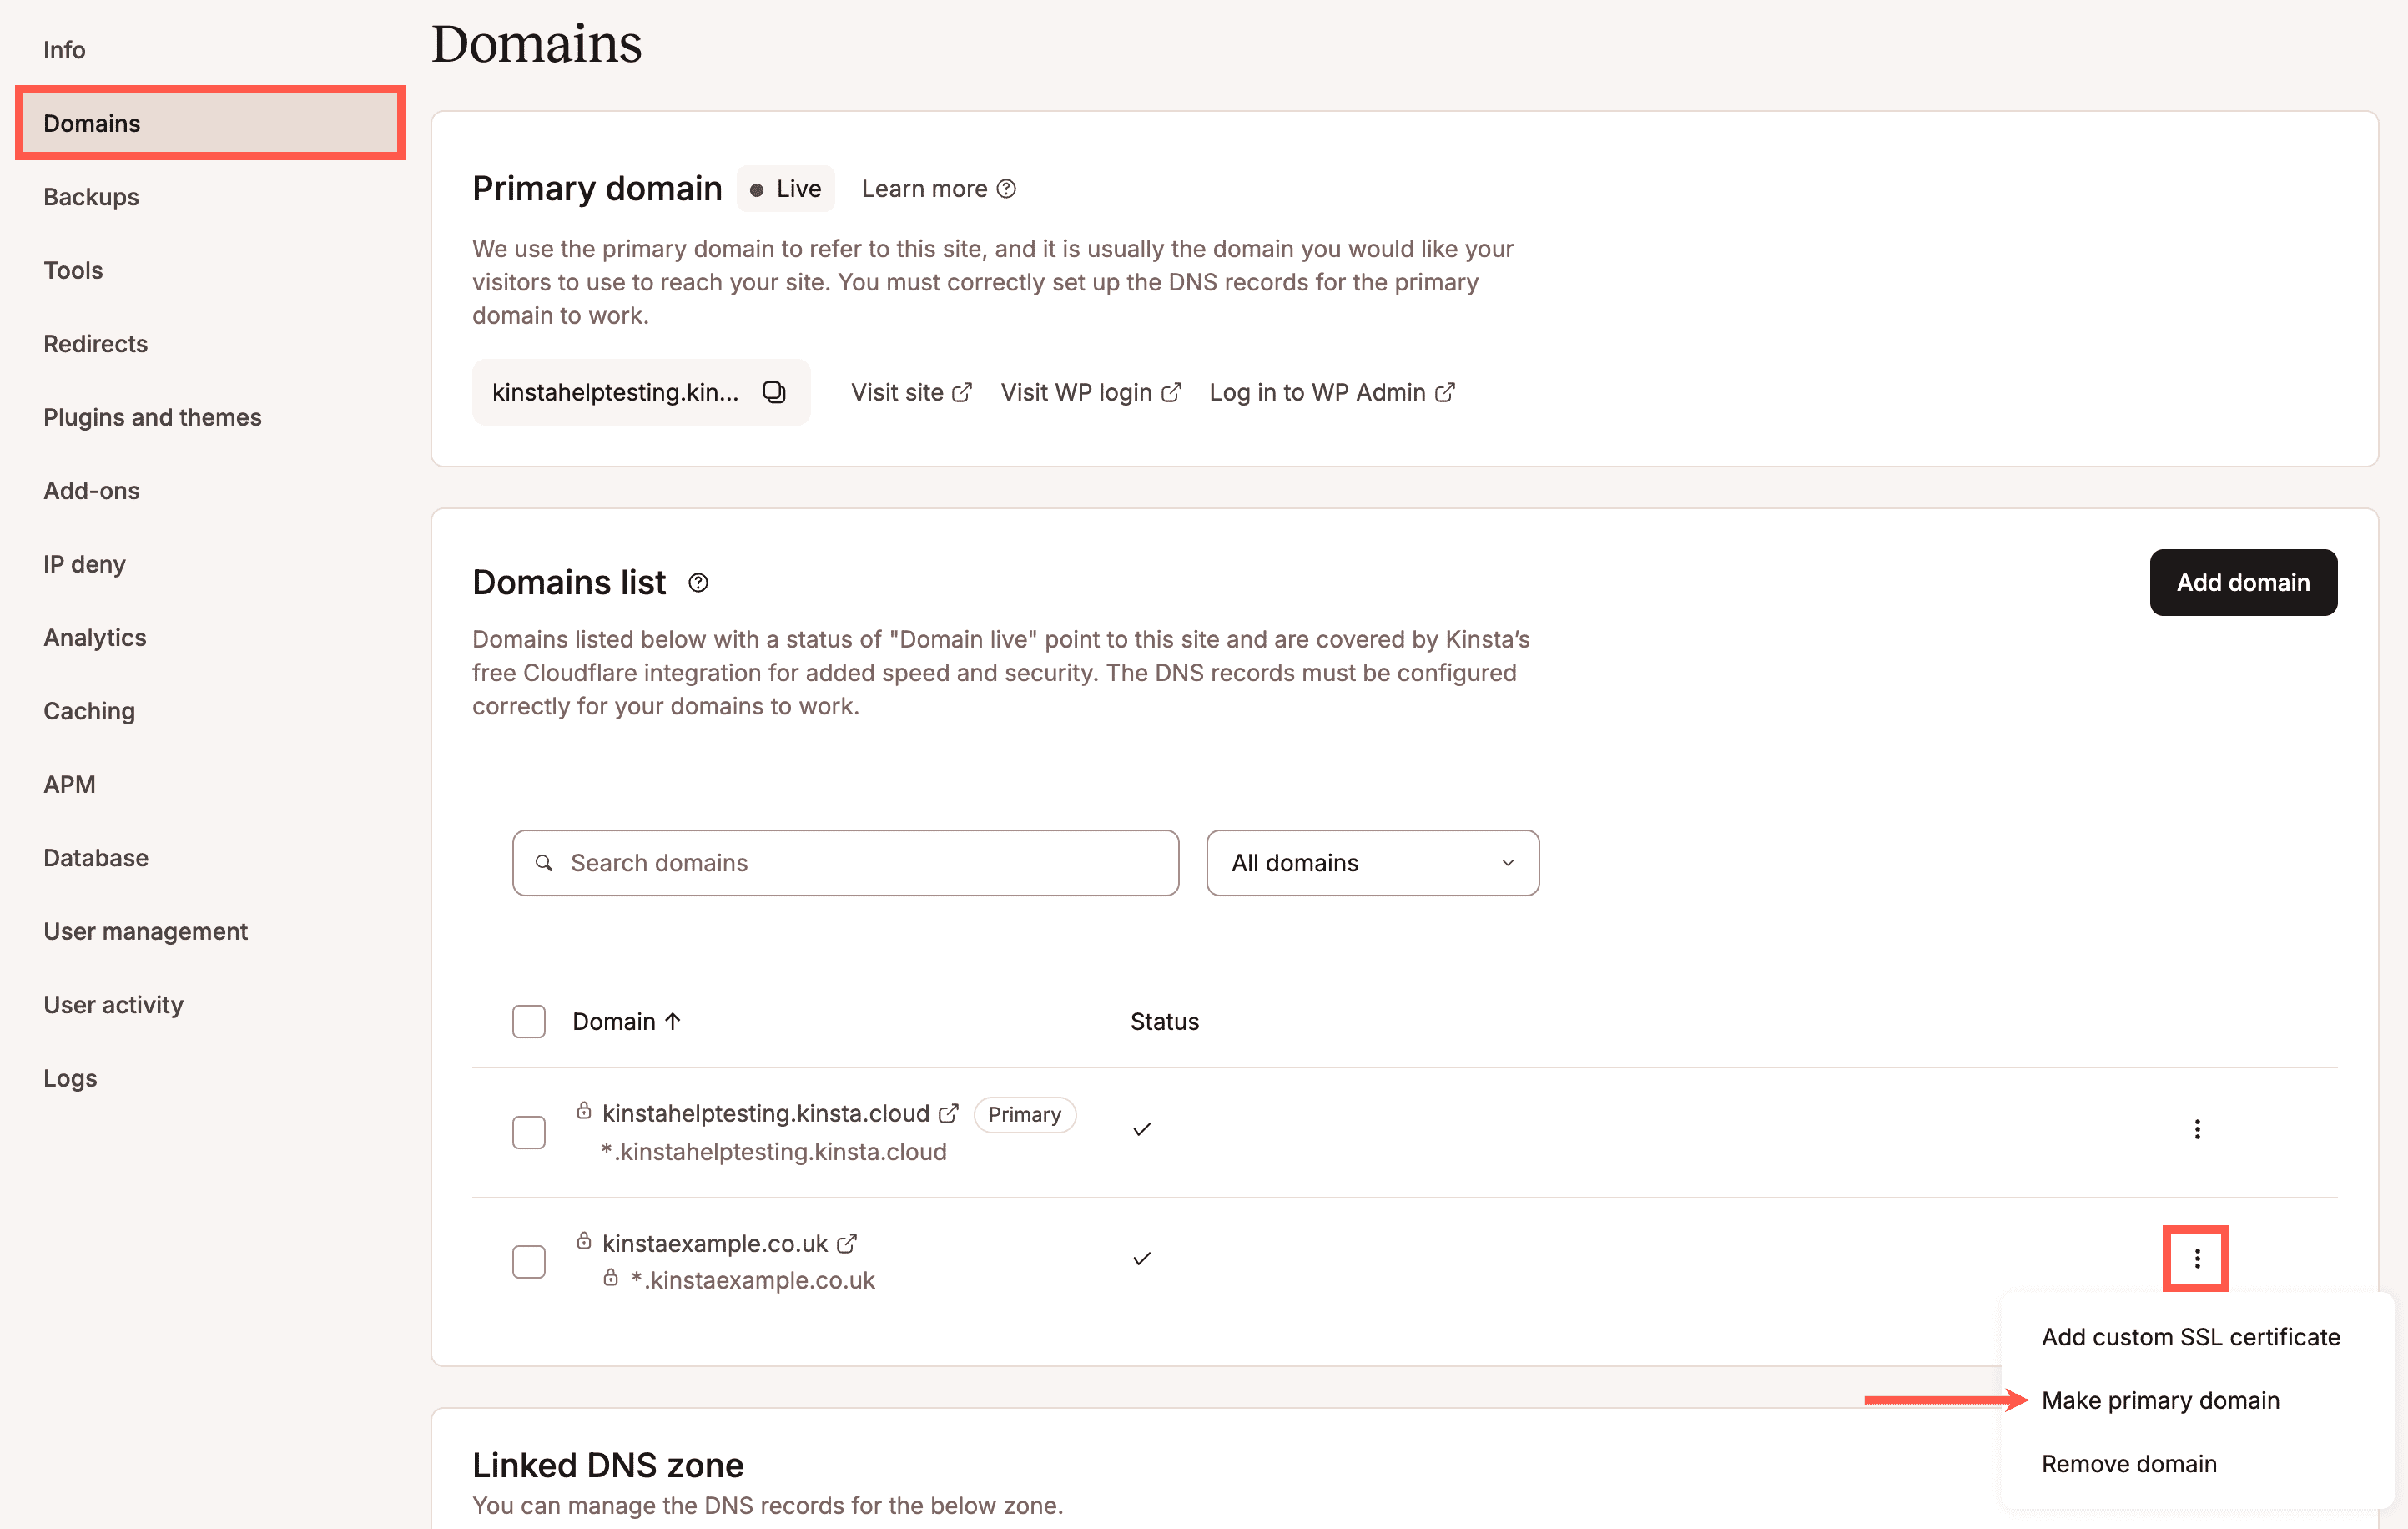
To set your custom domain as your primary domain, go to Sites > sitename > Domains, scroll to the Domainslist, click the kebab (three dots) next to your domain, and select Make primary domain. Setting a domain as primary in MyKinsta doesn’t change where it currently resolves. If your site is hosted elsewhere, visitors will keep reaching that host until you also point the domain to Kinsta by updating your DNS records.
If you have multiple domains or both the www and non-www versions of your domain, setting one as your primary domain doesn’t automatically redirect traffic from the other; you’ll still need to add a 301 redirect yourself, under Sites > sitename > Redirects. For more information on setting this up, refer to one of the following:
- Add a 301 redirect to redirect all www traffic to non-www
- Add a 301 redirect to redirect all non-www traffic to www
- Add a 301 redirect to redirect all traffic from one domain to another, preserving paths
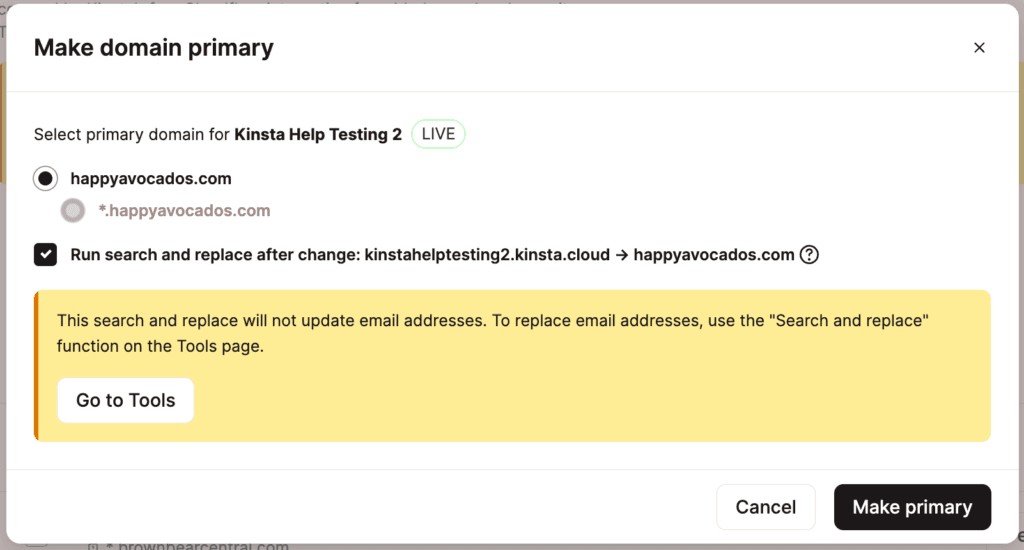
You’ll be asked whether to run a search and replace, which updates old domain references in your WordPress database. We recommend enabling this to prevent unexpected redirects, or you can run it manually later using the Search and replace tool.
It takes a few minutes to update. Once complete, your new domain appears under Primary domain.

3. Point your domain to Kinsta
Pointing your domain means adding DNS records at your DNS provider so traffic reaches Kinsta. This is usually your domain registrar (e.g. GoDaddy), but may be a separate provider (e.g. Cloudflare).
Choose one of the two setup methods:
- Quick setup: Recommended if your domain is new and not yet receiving traffic. Faster, but may cause 1–3 minutes of downtime.
- Avoid downtime: Recommended if you’re migrating a live site that already receives traffic. Prevents downtime, but takes longer (up to 1.5 hours) to go live.
If you’re using Kinsta’s DNS to manage your records, refer to that guide. Otherwise, here’s how to manage DNS records at some popular providers:
- Cloudflare – Manage DNS records
- GoDaddy – Manage DNS records
- Bluehost – How to manage DNS records in cPanel
- Namecheap – How do I set up host records for a domain
Once DNS has propagated, you’ll receive a confirmation email and see a checkmark next to your domain in MyKinsta. If this doesn’t happen, or you see an error, see Domain and DNS Troubleshooting.
Quick setup
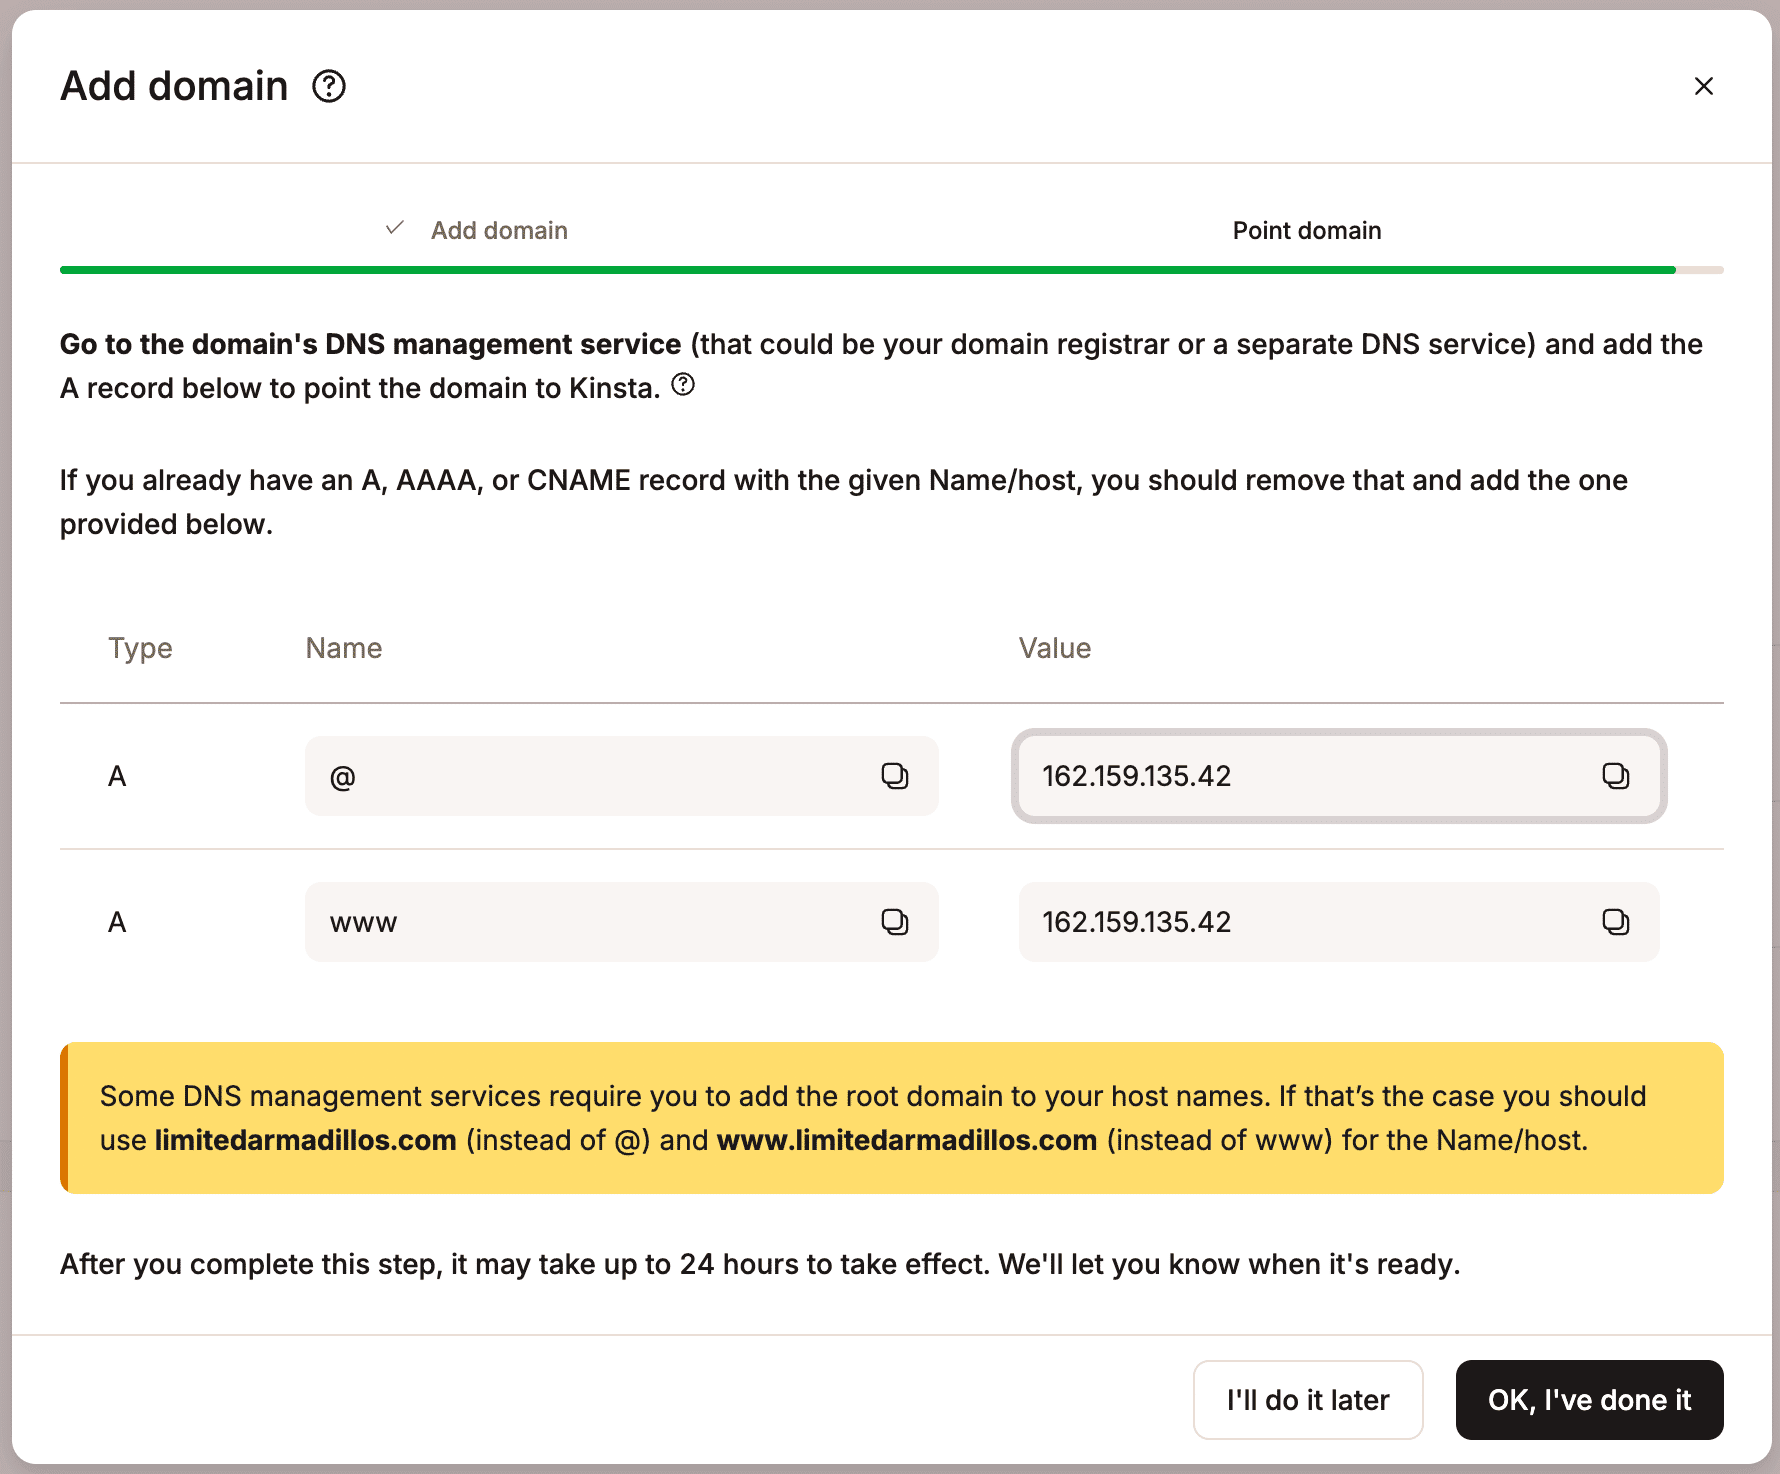
Kinsta shows you the exact DNS records to add:
- If you selected Add www. subdomain, you’ll see two records. CNAME records if you’re using a Cloudflare account, or A records if not.
- Values are unique to your site and generated when you add the domain; copy them exactly as shown in MyKinsta.
Add these records at your DNS provider, then click OK, I’ve done it.
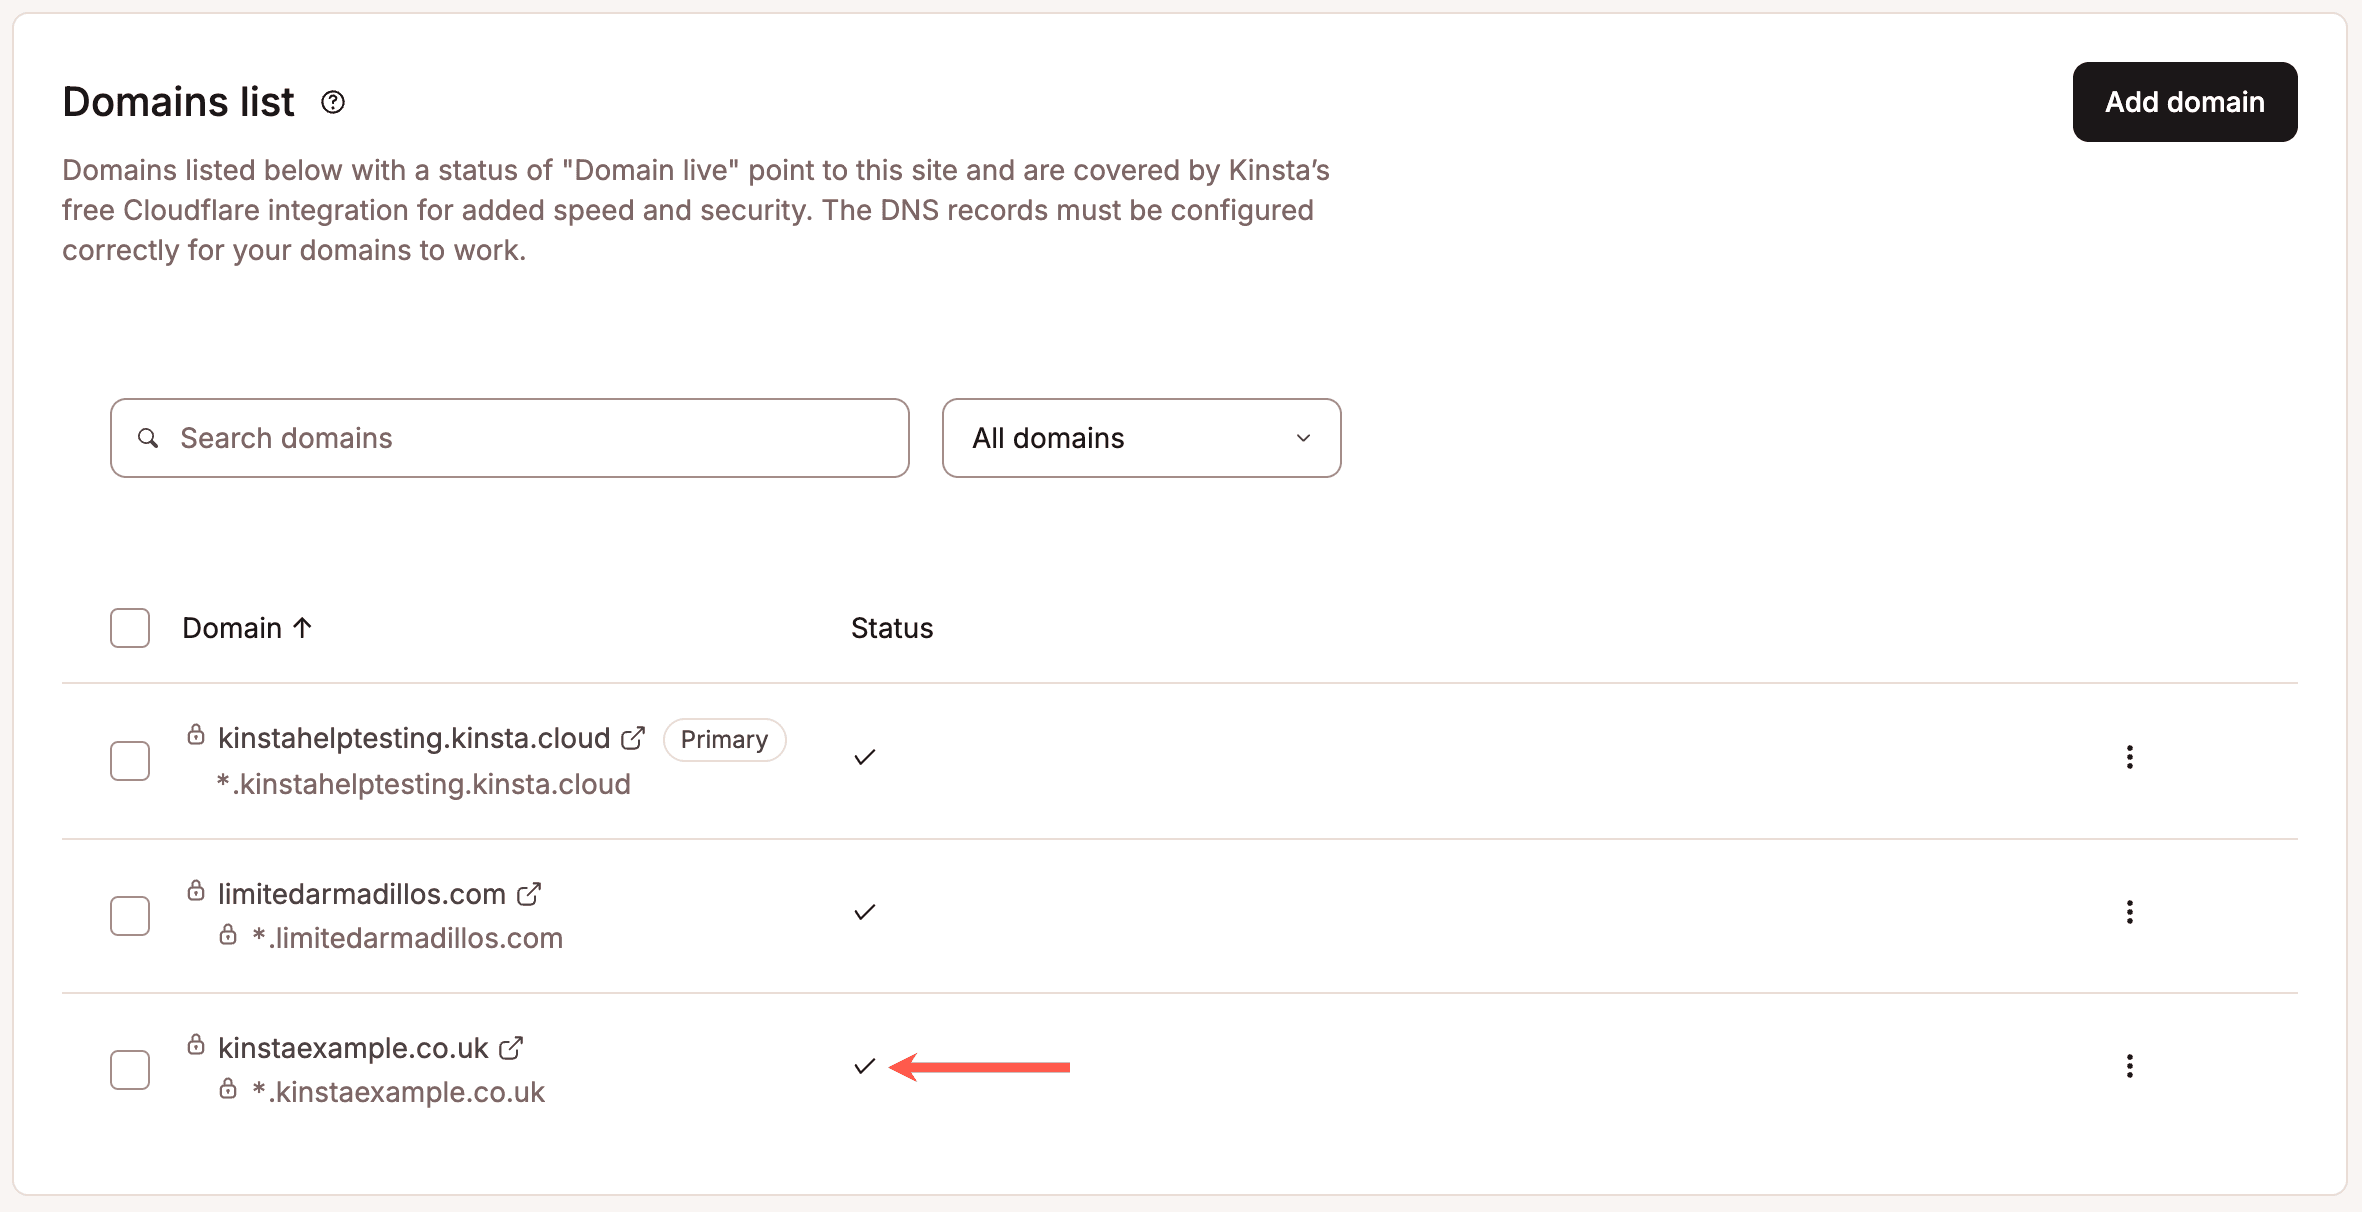
Once DNS has propagated:
- You’ll receive a confirmation email.
- A checkmark appears next to your domain in MyKinsta to confirm it’s pointed correctly.
Avoid downtime
This method verifies domain ownership first, then points your domain, avoiding downtime, but taking longer overall.
Step A: Verify your domain
Kinsta provides a TXT and CNAME record (two of each if you selected Add www. subdomain):
| Record | Name | Value |
|---|---|---|
| TXT | _cf-custom-hostname | Unique UUID from MyKinsta (xxxxxxxx-xxxx-xxxx-xxxx-xxxxxxxxxxxx) |
| CNAME | _acme-challenge | example.com.validatedomain.cloud |
The TXT record confirms you own the domain; once fully verified, you can remove it if you no longer need it. The CNAME record lets Kinsta manage your SSL certificate renewal automatically; we recommend leaving this in place, as removing it means you’ll need to re-add it at each renewal.
Add the records at your DNS provider, then click OK, I’ve done it.
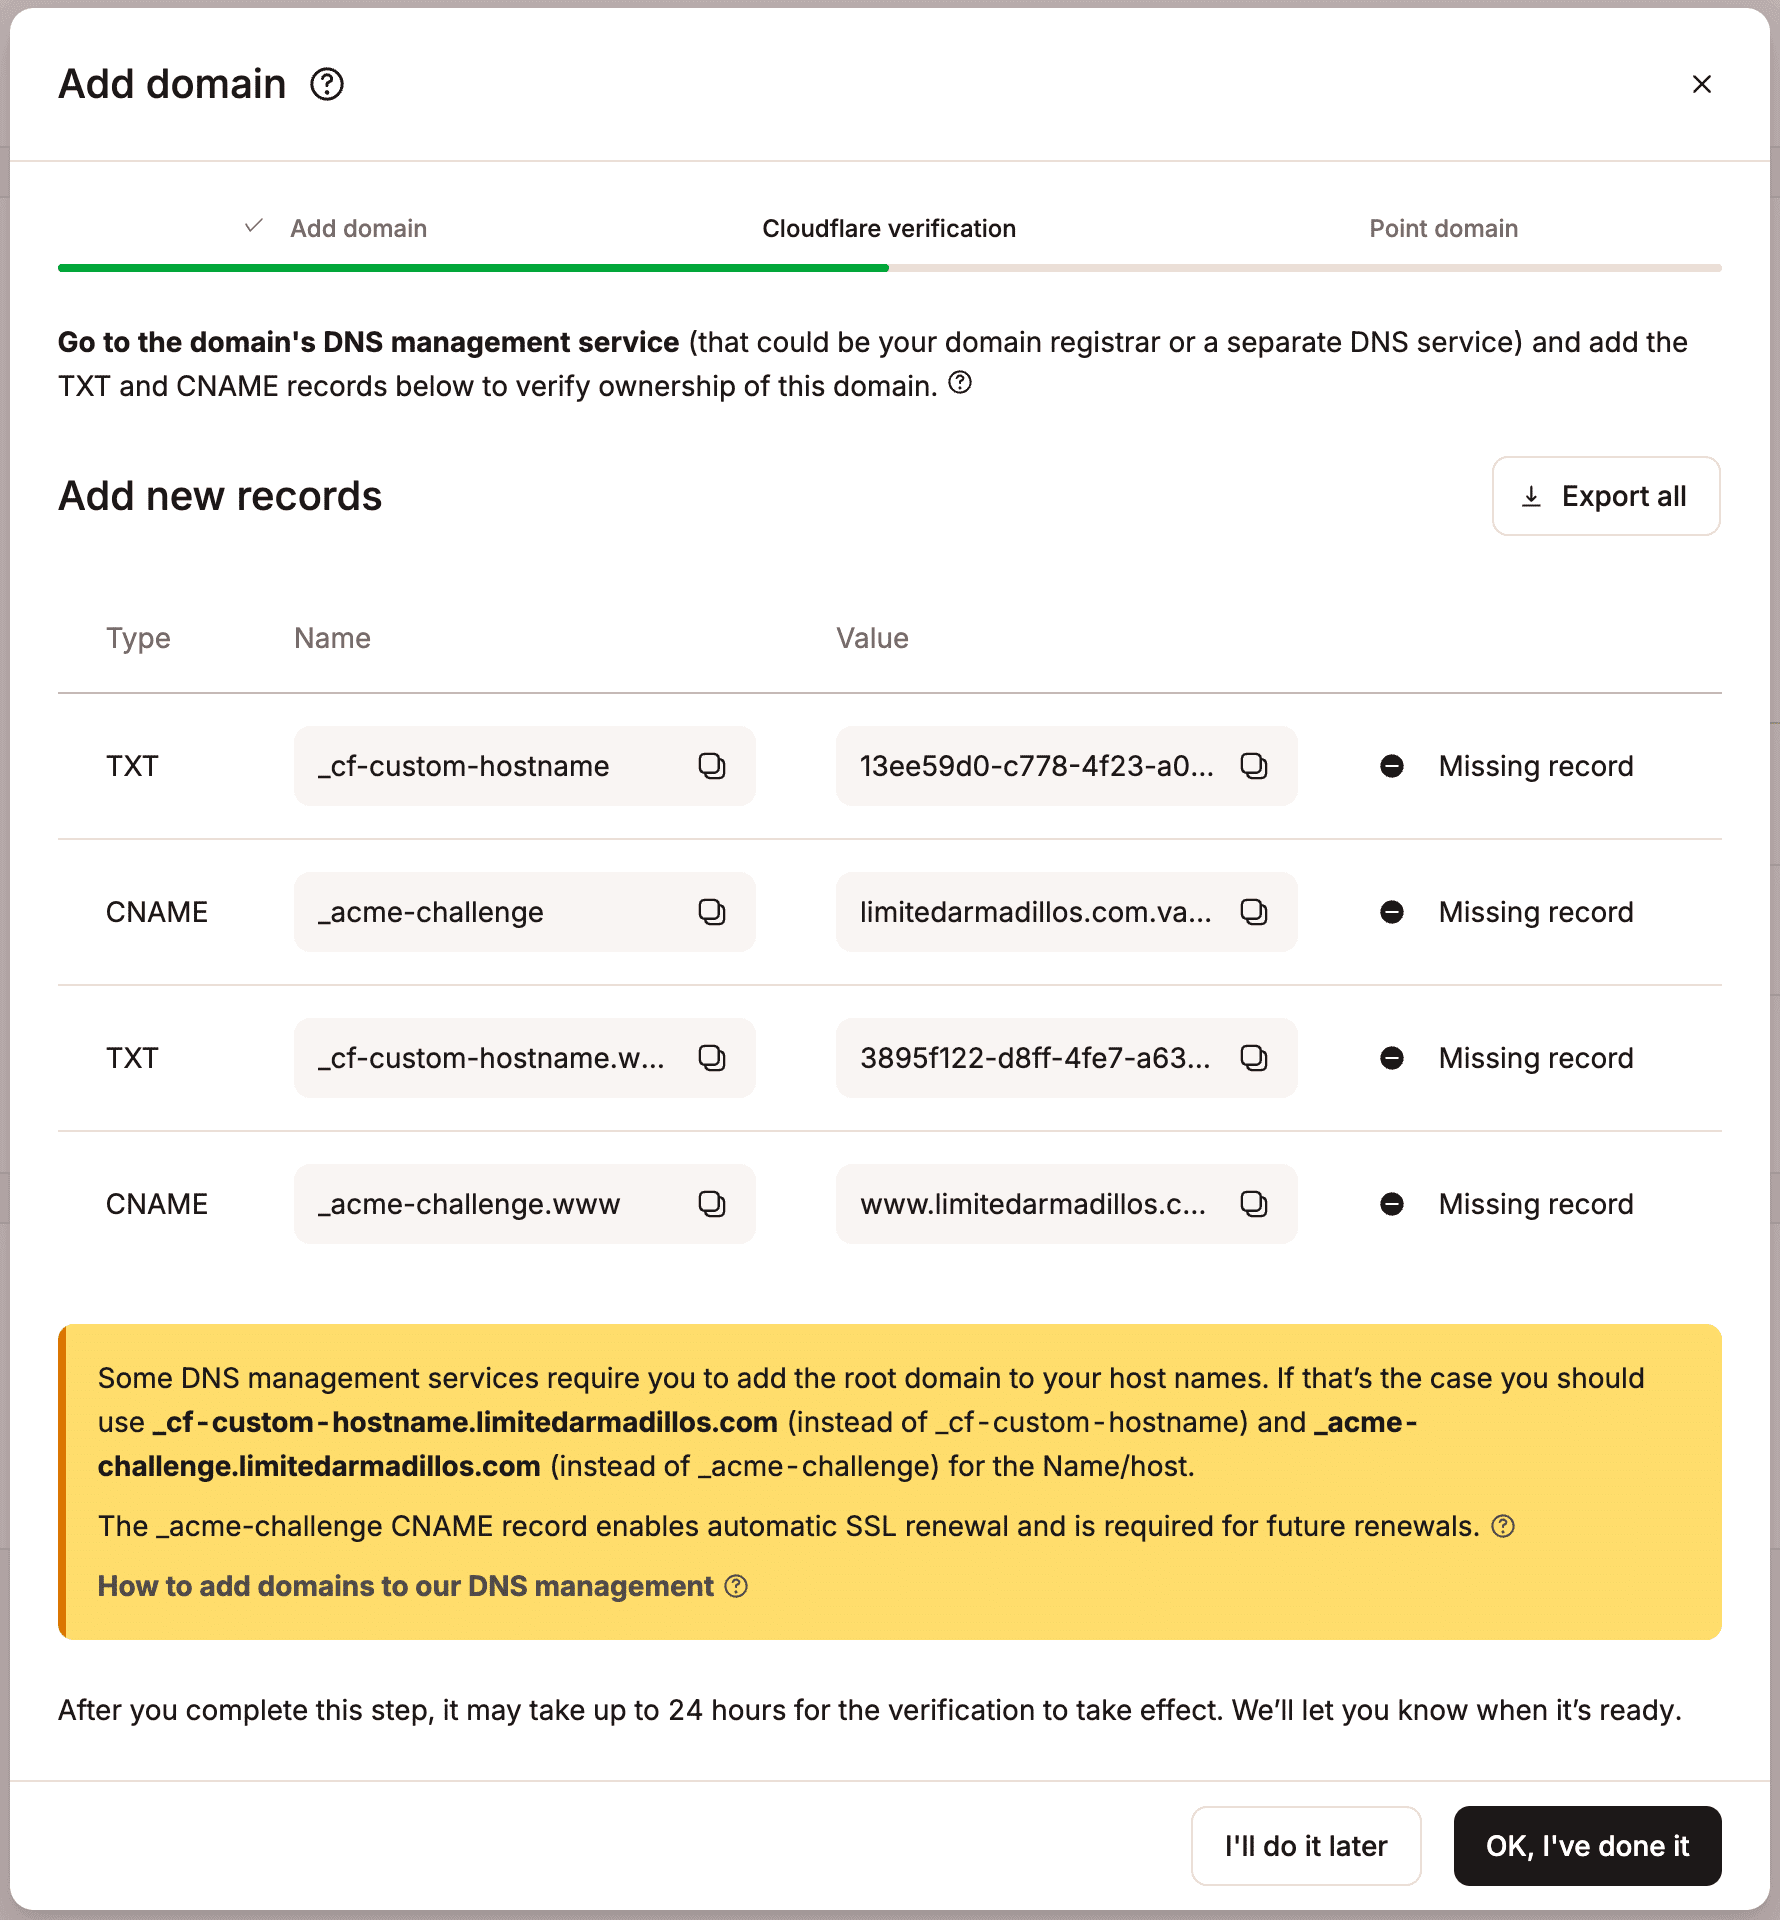
Once a record is added and verified, it shows as Detected. If a record has an incorrect value, it shows as Incorrect value; check that you added the correct value to your DNS record.
If you close the verification window, once all records have been verified (usually within a few minutes, depending on your TTL), you’ll get a confirmation email. Click Point domain to continue.
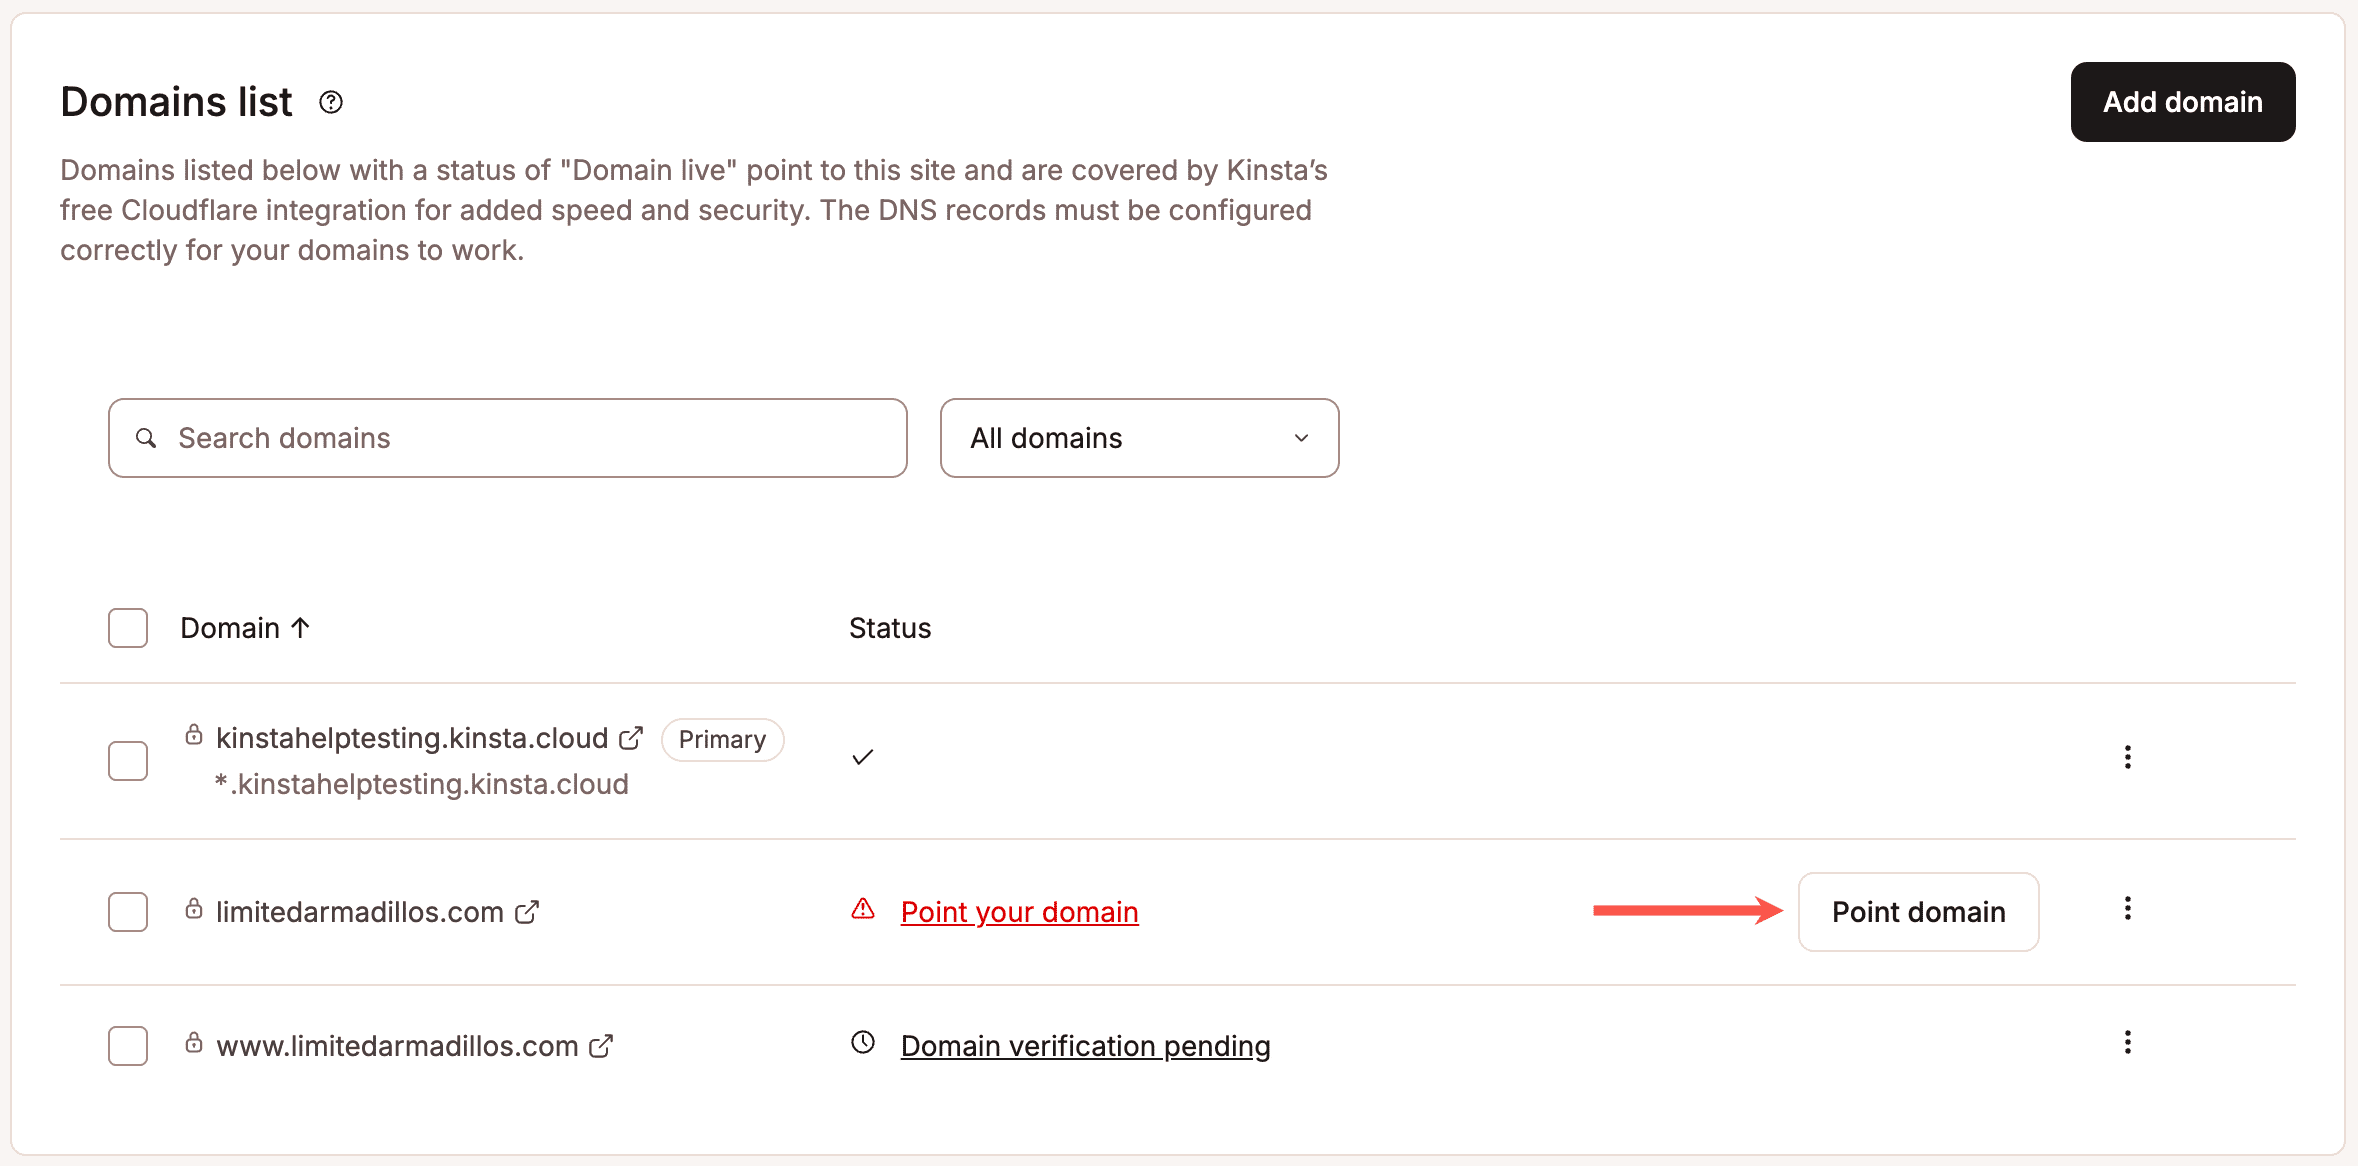
Step B: Point your domain
Kinsta shows you the records needed to point your domain. CNAME records for Cloudflare domains; A records otherwise. Values are unique to your site; add them exactly as shown, then click OK, I’ve done it.
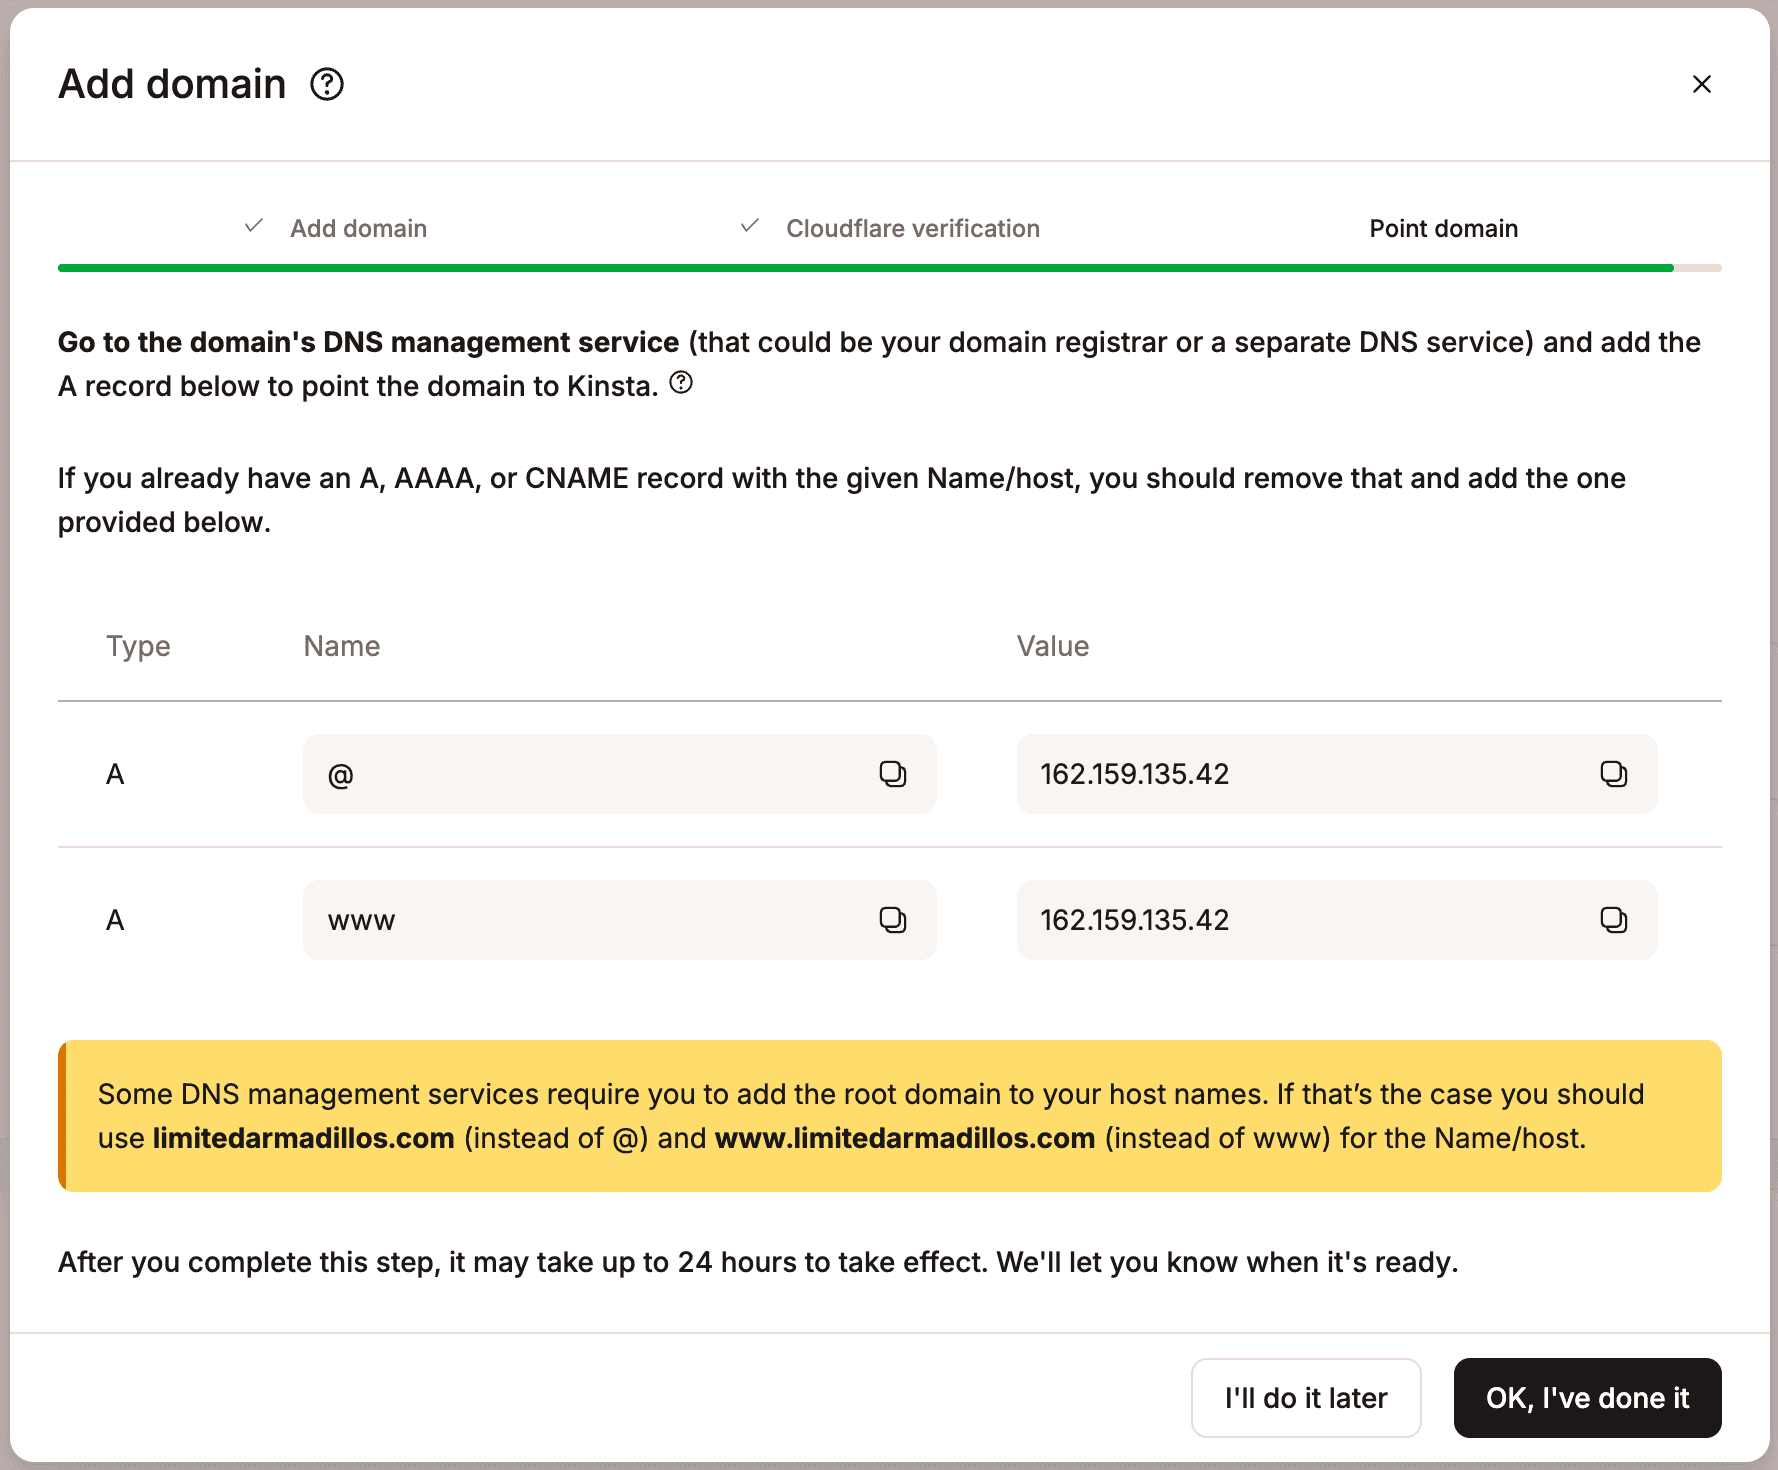
Once DNS has propagated:
- You’ll receive a confirmation email.
- A checkmark appears next to your domain in MyKinsta to confirm it’s pointed correctly.
Force HTTPS (optional)
Forcing your site to load over HTTPS is optional but recommended. Once your domain is verified, a free SSL certificate (with wildcard support) is automatically added via Kinsta’s Cloudflare integration.
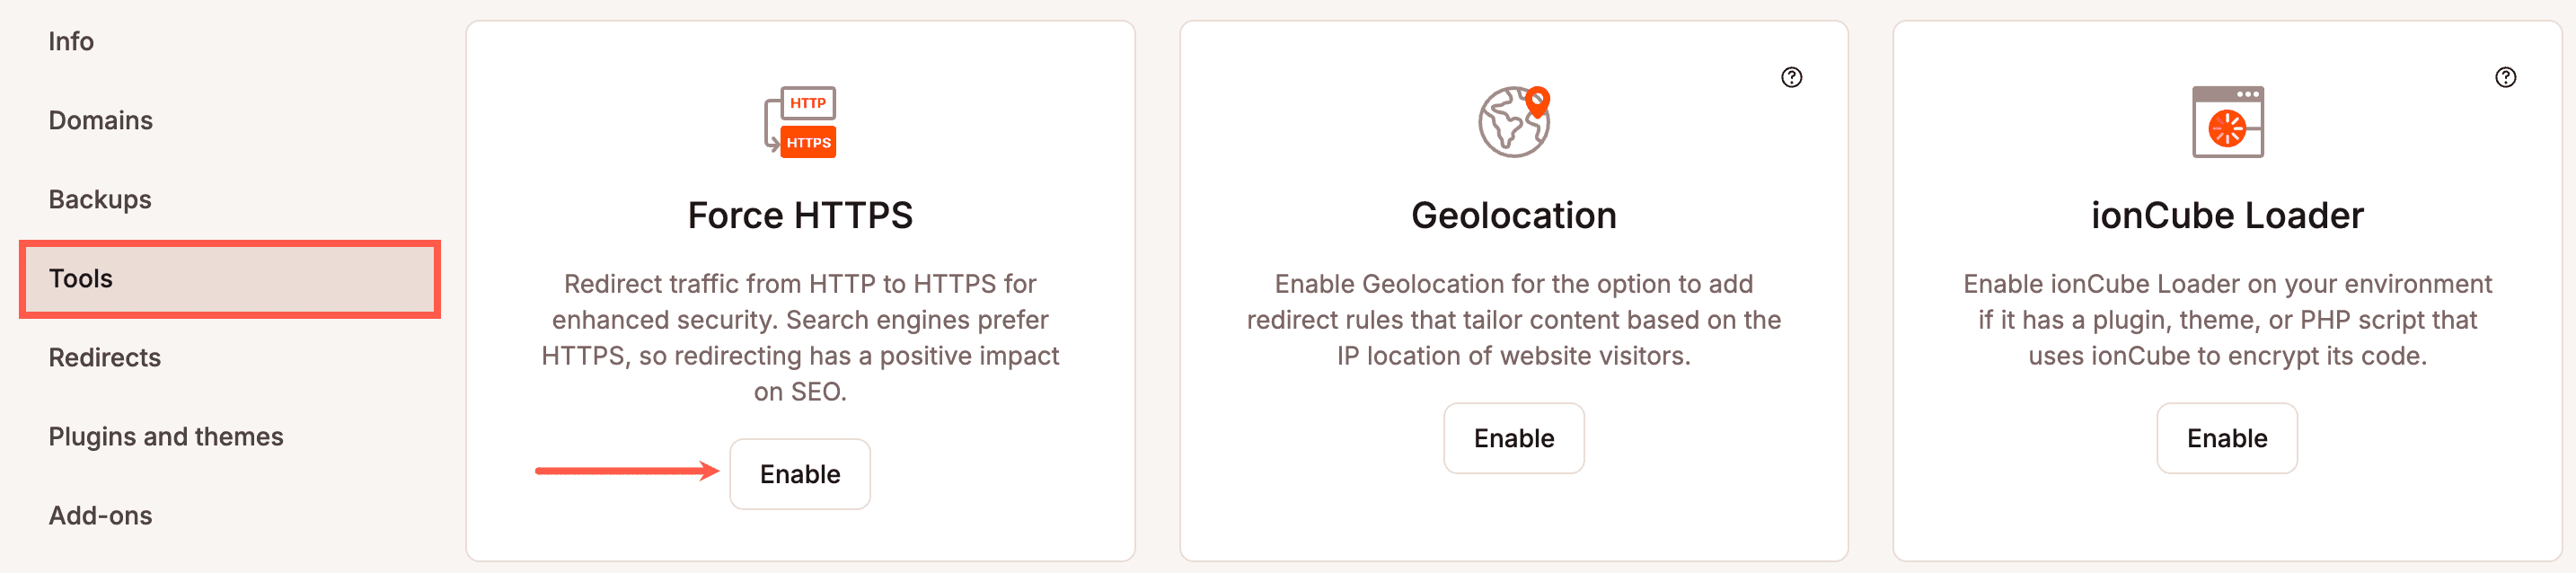
To enable it, go to your site in MyKinsta, then Tools, and click Enable under Force HTTPS.
Special setups
If your domain uses Cloudflare
If your domain is connected to your own Cloudflare account, for DNS, proxying, or both, it’s considered a Cloudflare domain, even if the proxy is disabled (DNS-only mode). If it isn’t connected to Cloudflare at all, it’s a non-Cloudflare domain.
When you add your domain in MyKinsta, we automatically detect which type it is and guide you through the right setup. You can continue using Cloudflare’s proxy, WAF, bot protection, caching, and other services alongside Kinsta.
A few things to know:
- For Cloudflare domains, verification records must initially be set to DNS only (proxy disabled) so verification can succeed. You can re-enable proxying afterward if you want traffic to keep passing through Cloudflare.
- If you use Cloudflare Pro or higher, CNAME Flattening can interfere with verification; temporarily disable it until verification completes.
- If verification still fails, you can temporarily disable Universal SSL in Cloudflare, then re-enable it once your domain is verified.
- Allowlist Kinsta’s monitoring bot in your Cloudflare security rules (such as WAF custom rules or bot protection) so our domain monitoring can run its checks. Add both of the following:
- User agent:
kinsta-bot - IP addresses:
35.194.36.163and34.135.149.39
- User agent:
If you need to include subdomains (wildcard)
Selecting Add domain with wildcard under Advanced settings includes all subdomains of your domain (e.g., *.example.com) in a single configuration. Verification, DNS pointing, and SSL issuance then apply automatically to all current and future subdomains, useful if you use multiple or dynamic subdomains.
If you choose this with Quick setup, you’ll also need to add TXT and CNAME records when pointing your domain, in addition to the usual records for that method.
If you want to use your own SSL certificate
Kinsta provides a free SSL certificate for every domain by default. If you’d rather use your own, select Use my own SSL certificate with this domain under Advanced settings, and paste in your.key and .cert file contents.
If there are errors with your certificate, resolve them before continuing, or disable this option and add your custom SSL certificate later instead.