Manage Plugins and Themes
Within MyKinsta, you can manage your plugins and themes in bulk for all of your sites within Sites, or you can manage the plugins and themes for each individual site within the site’s Plugins and themes tab.
All sites
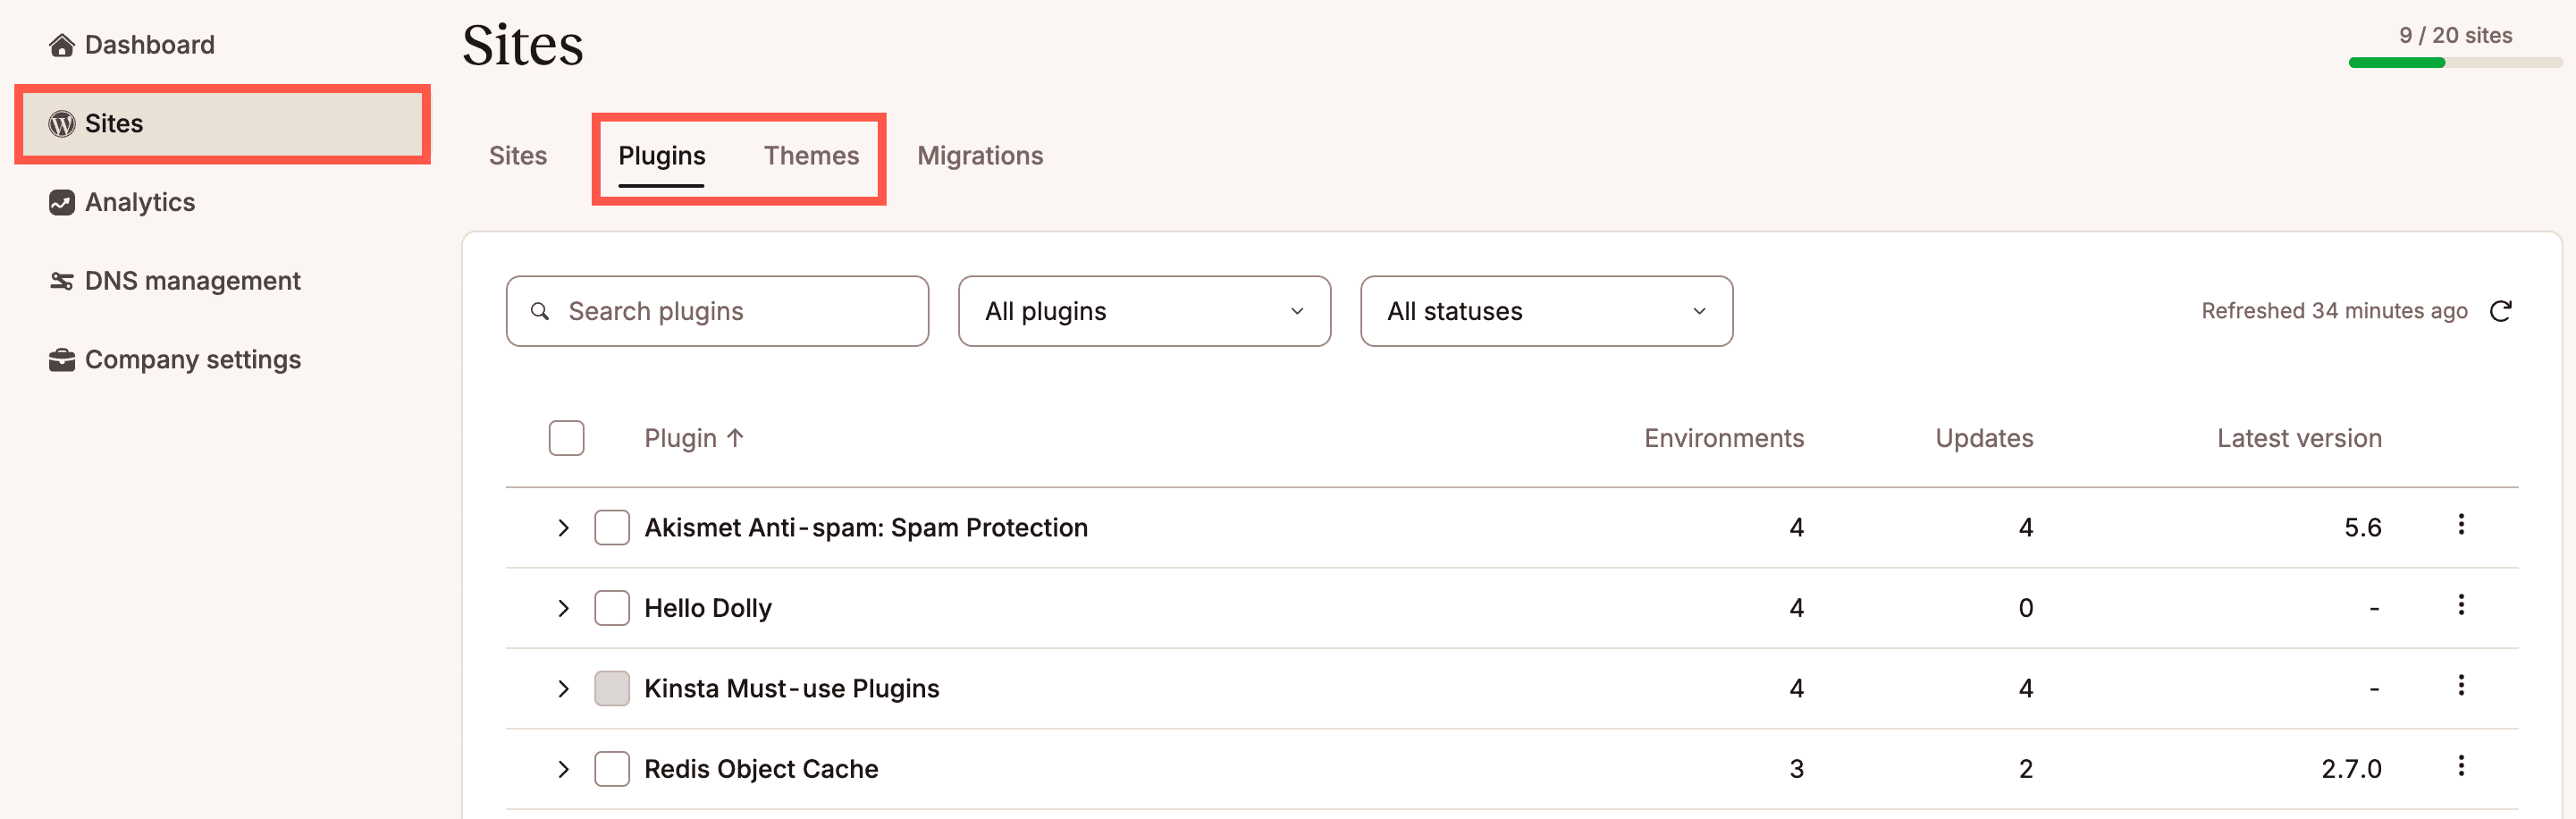
To see a list of plugins and themes installed on all sites, log in to MyKinsta, click Sites, and then click the Plugins or Themes tab. Within these tabs, you can filter and manually update, activate, or deactivate your plugins and themes. You can also enable automatic updates for multiple plugins and themes across all sites.
Filter plugins and themes
You can filter your plugins and themes to display only those with available updates or only vulnerable plugins or themes. You can also filter by status to show active or inactive plugins or themes. The example below shows active plugins with an update available.

Change automatic updates for multiple plugins and themes
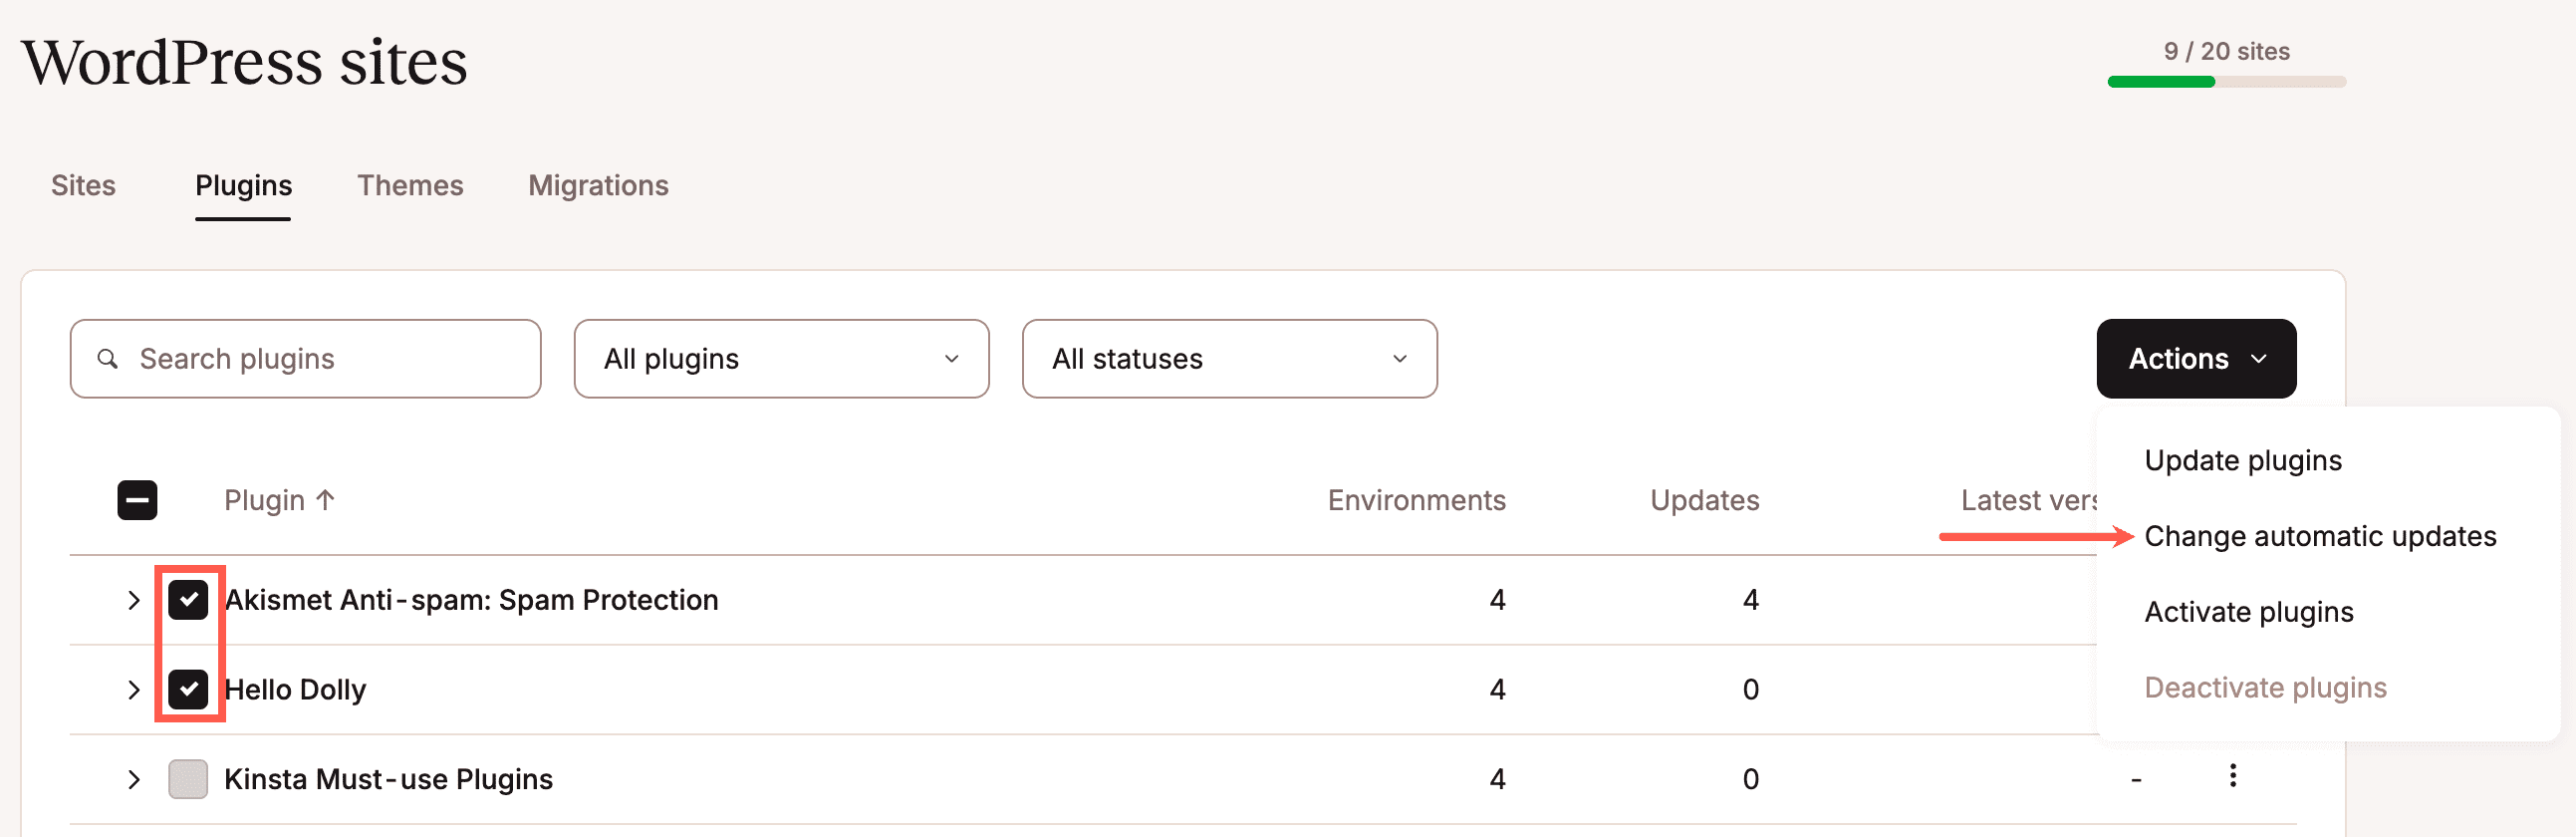
To change automatic updates for plugins and themes across multiple sites, select the required plugins, themes, or specific sites, click Actions, and select Change automatic updates.
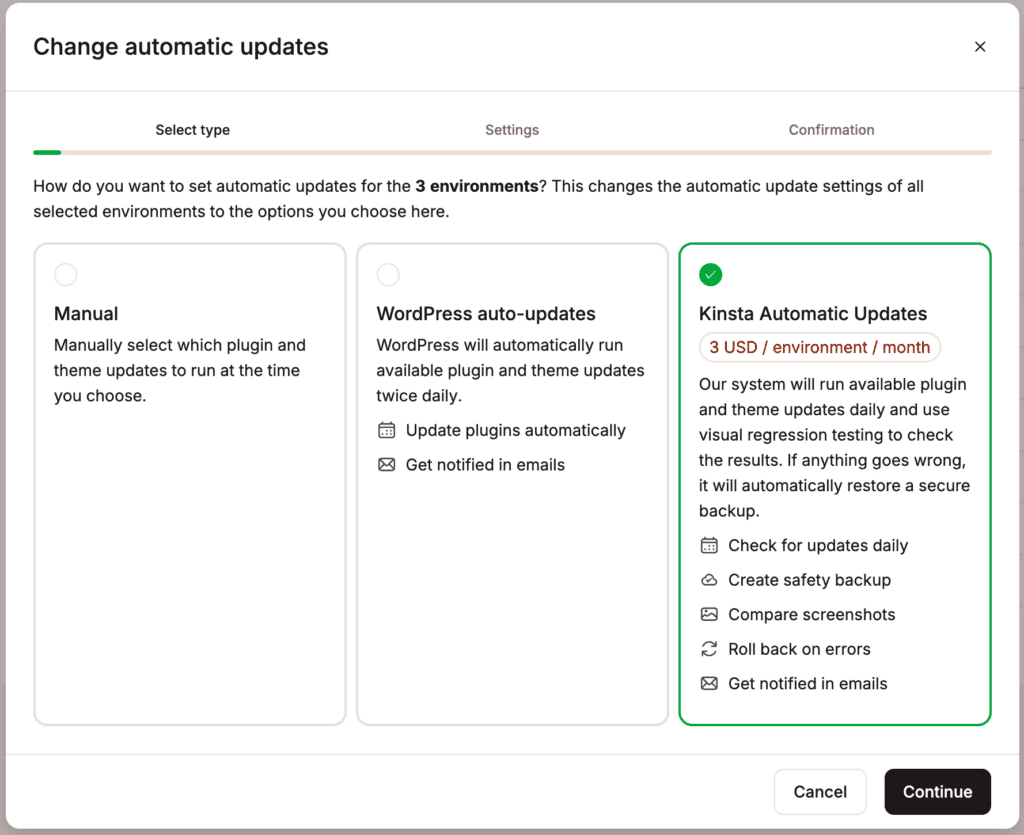
Select one of the following options:
- Manual: This disables all automatic updates for the selected plugins and themes.
- WordPress auto-updates: WordPress automatically installs plugin and theme updates twice daily. It does not run a regression test, so it cannot identify whether an updated plugin or theme causes issues.
- Kinsta Automatic Updates: Kinsta provides automatic daily updates for plugins and themes, which is free for the first month and just $3 per environment per month thereafter. Note: The first month of Kinsta Automatic Updates is free for all plans. If you’re on a Single 35k visits, Single 20GB bandwidth, or WP2 plan, you also get your first month of hosting free. These free periods run separately, meaning if you enable Kinsta Automatic Updates on day 15 of your plan, you’ll still receive a full month of free updates.
Kinsta conducts a visual regression test on your sites to detect significant changes before and after updates. By default, this test compares your homepage and four randomly selected pages from your sitemap to detect any significant differences caused by the update. If an issue is identified, Kinsta automatically restores a backup taken prior to the update, ensuring your site remains stable and secure. These backups are available for three days within Backups > System-generated, with a note specifying which plugin was updated when the backup was taken. You can also specify which pages to test within each site’s Automatic update settings.
Kinsta uses ScreenshotOne to capture and compare screenshots before and after the update. These screenshots, along with images highlighting any differences, are securely stored for 60 days. If your domain has strict security rules that block requests from unknown origins, you may need to configure an allowlist to enable these screenshots. You have two options to achieve this:- Set up a rule that permits requests containing the
User-Agent:kinsta-botheader. - Allow traffic from ScreenshotOne IP address ranges.
- Set up a rule that permits requests containing the
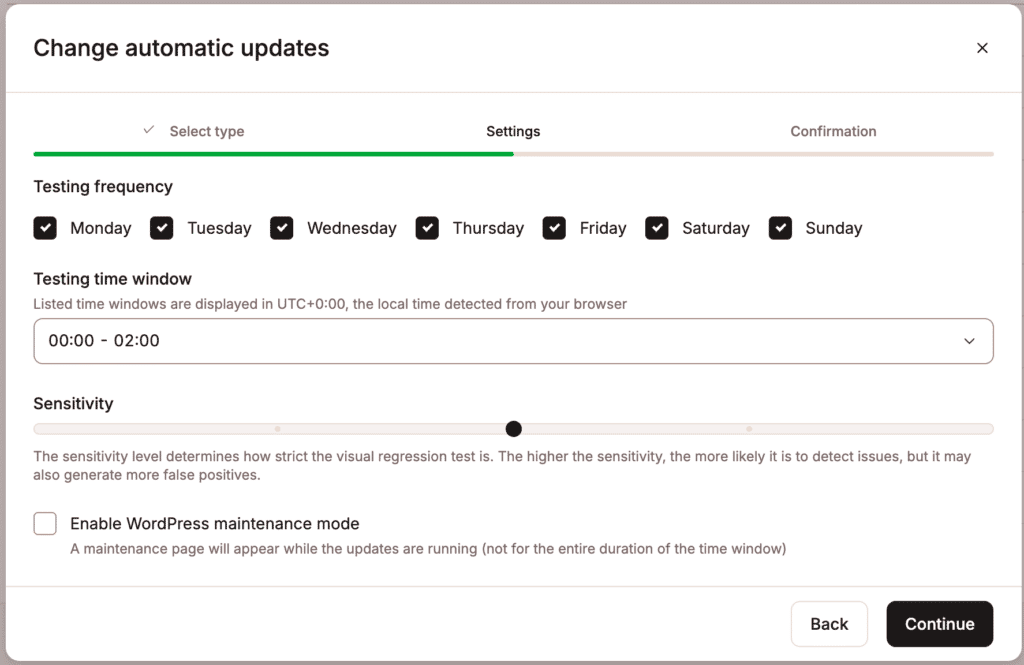
If you select Kinsta Automatic Updates, you can define the following settings:
- Testing frequency: Select the days you want the updates to occur on your site. For example, if you only want updates to take place on a weekend, select Saturday and Sunday only.
- Testing time window: When you want the updates to occur on your site.
- Sensitivity: This controls how strict the visual regression test is. This test compares each pixel in two images based on color and brightness, with the sensitivity setting determining the threshold for acceptable differences. It uses images of the homepage plus four random pages or images from the Test URLs if defined. Lower sensitivity allows minor differences to be ignored, while higher sensitivity is more likely to detect even subtle changes but may also increase the chances of false positives.
- Enable WordPress maintenance mode: Select this option to display a maintenance page when the updates are running. The maintenance page only appears while the updates are running and not for the entire duration of the Time window.
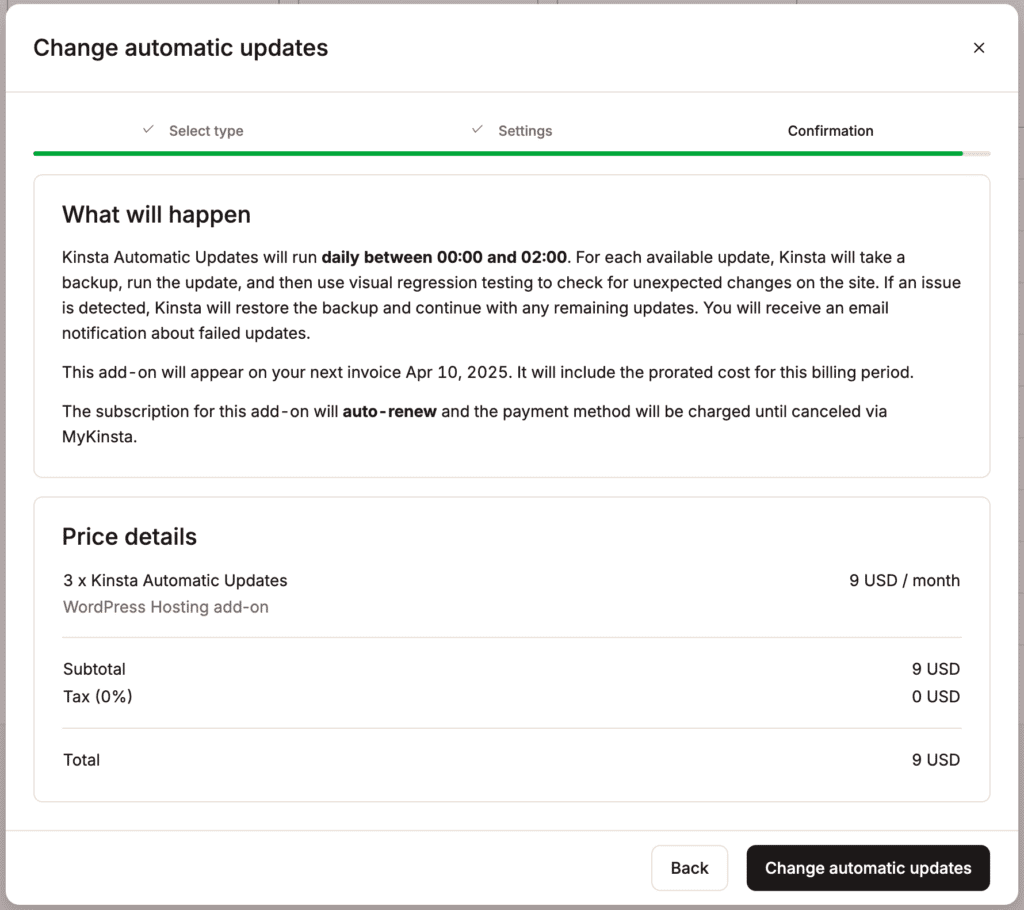
When you have selected the required options, click Continue. You can change these options, define specific URLs to perform the regression test on, and hide specific CSS selectors that may contain dynamic content within the site’s Automatic update settings.
This creates a Kinsta Automatic Updates add-on for each site; the price details are shown on the next screen, to confirm the add-on, click Change automatic updates. The subscription will appear on your next billing cycle and is automatically prorated for your current billing period.
Update, activate, or deactivate multiple plugins or themes
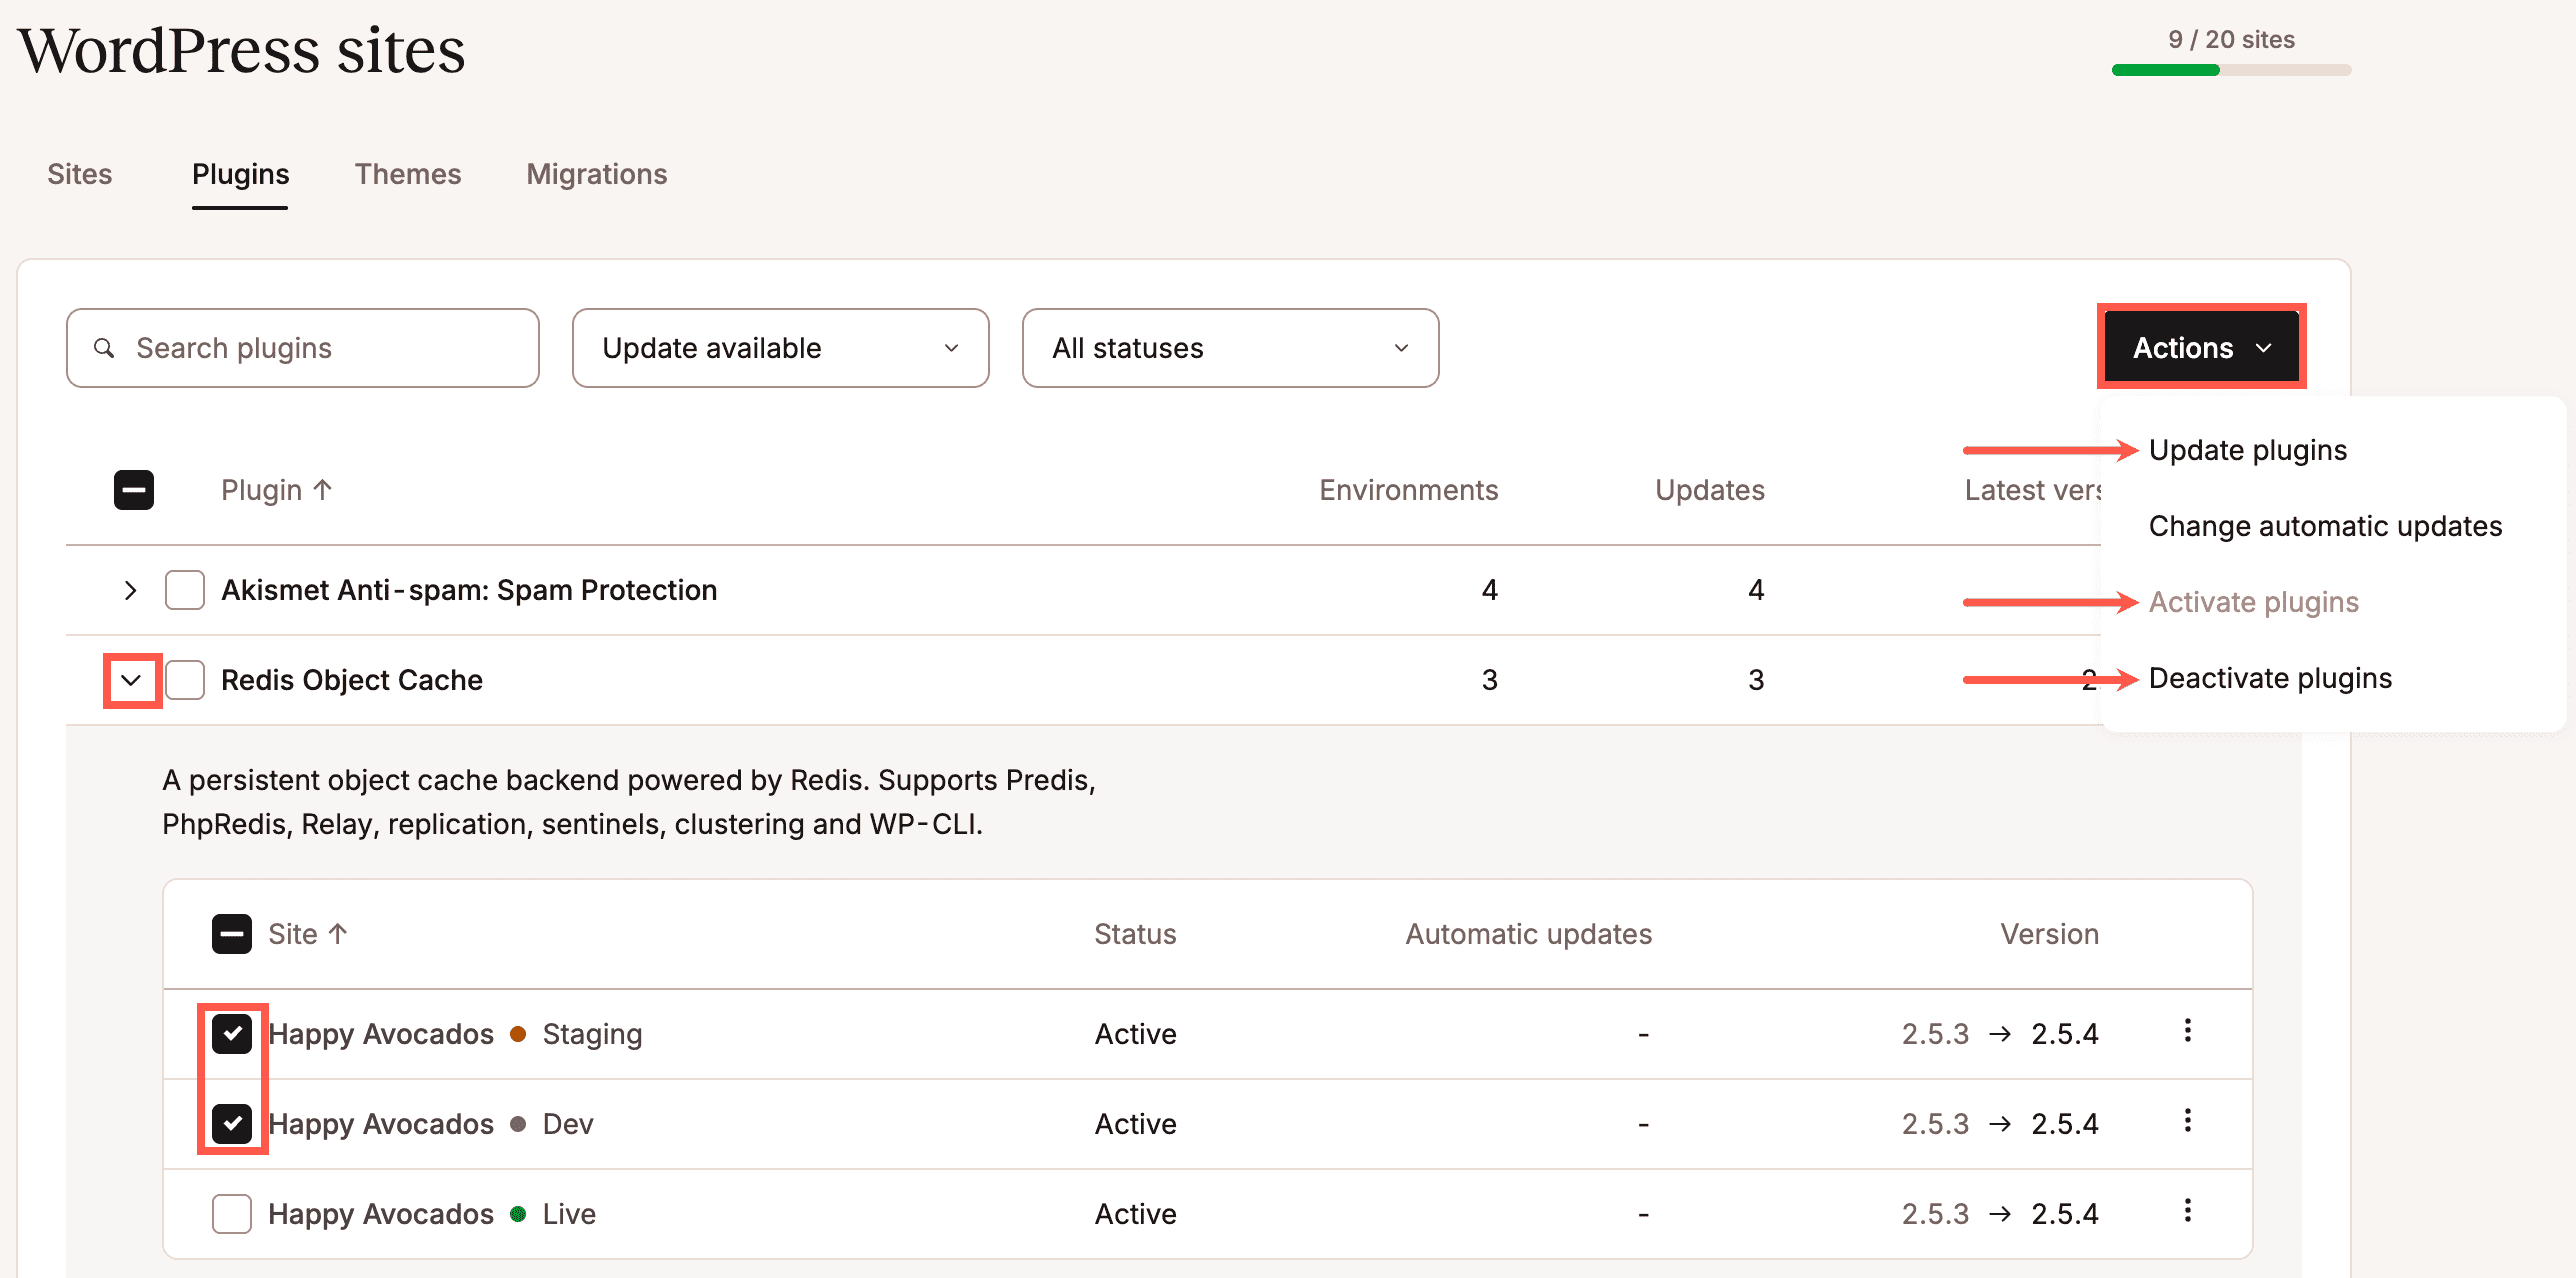
To update or activate multiple plugins or themes for multiple sites or deactivate multiple plugins for multiple sites, select the checkbox on each plugin or theme, click Actions, and select the required option.

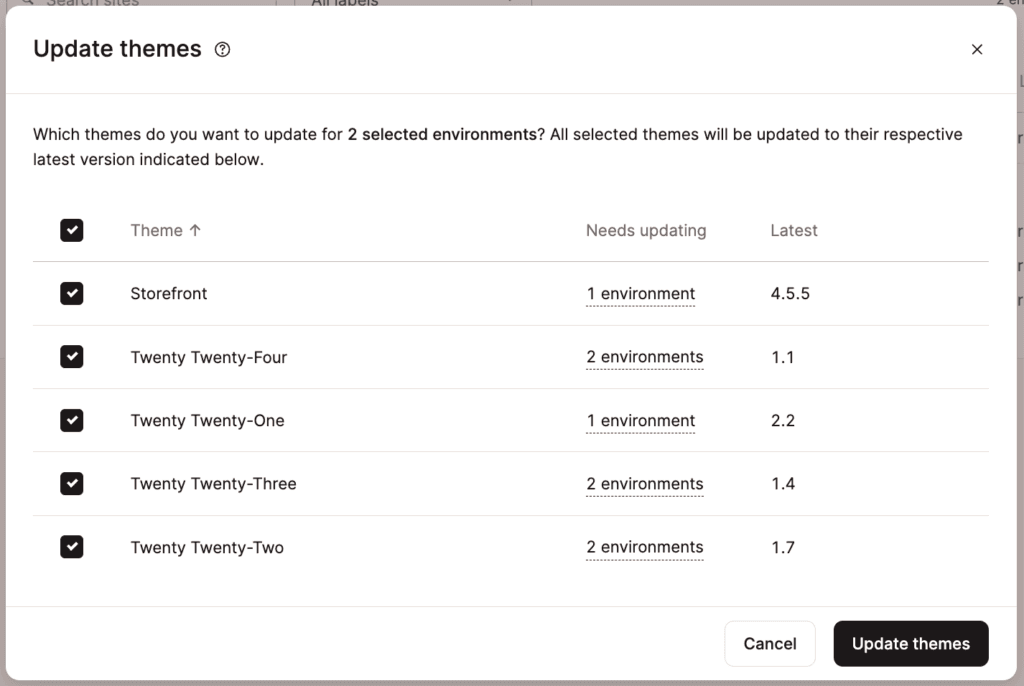
The confirmation window shows which plugins or themes will be updated, activated, or deactivated, and the environments to which this change applies. To continue the action, click Update, Activate, or Deactivate plugins or themes.

The action may take a few minutes, and a backup of each site is automatically generated.
Update, activate, or deactivate an individual plugin or theme for multiple sites
To update or activate an individual plugin or theme or deactivate a plugin for multiple sites, expand the plugin name, select the sites, click Actions, and select the required option.
The confirmation window shows the plugin or theme and the number of environments to which the change applies. To continue the update, click Update, Activate, or Deactivate plugin or theme.

The action may take a few minutes, and a backup of each site is automatically generated.
Update, activate, or deactivate an individual plugin or theme for an individual site
To update or activate a single plugin or theme or deactivate a plugin, expand the plugin name, click the ellipsis next to the version number, and then click the required action.

On the confirmation message, click Update, Activate, or Deactivate plugin or theme.

The action may take a few minutes, and a backup of your site is automatically generated.
Individual site
To see the plugins and themes installed on your site, log in to MyKinsta, select your site, and click on the Plugins and themes tab. On this page, you can:
- See a list of WordPress plugins and themes installed on your site, the status, the version number, the latest update, and if the plugin uses the WordPress automatic update feature. This includes custom plugins, provided the plugin appears when you run the
wp plugin listWP-CLI command. - Activate a theme.
- Activate or deactivate a plugin individually or in bulk.
- Update each plugin or theme individually or in bulk.
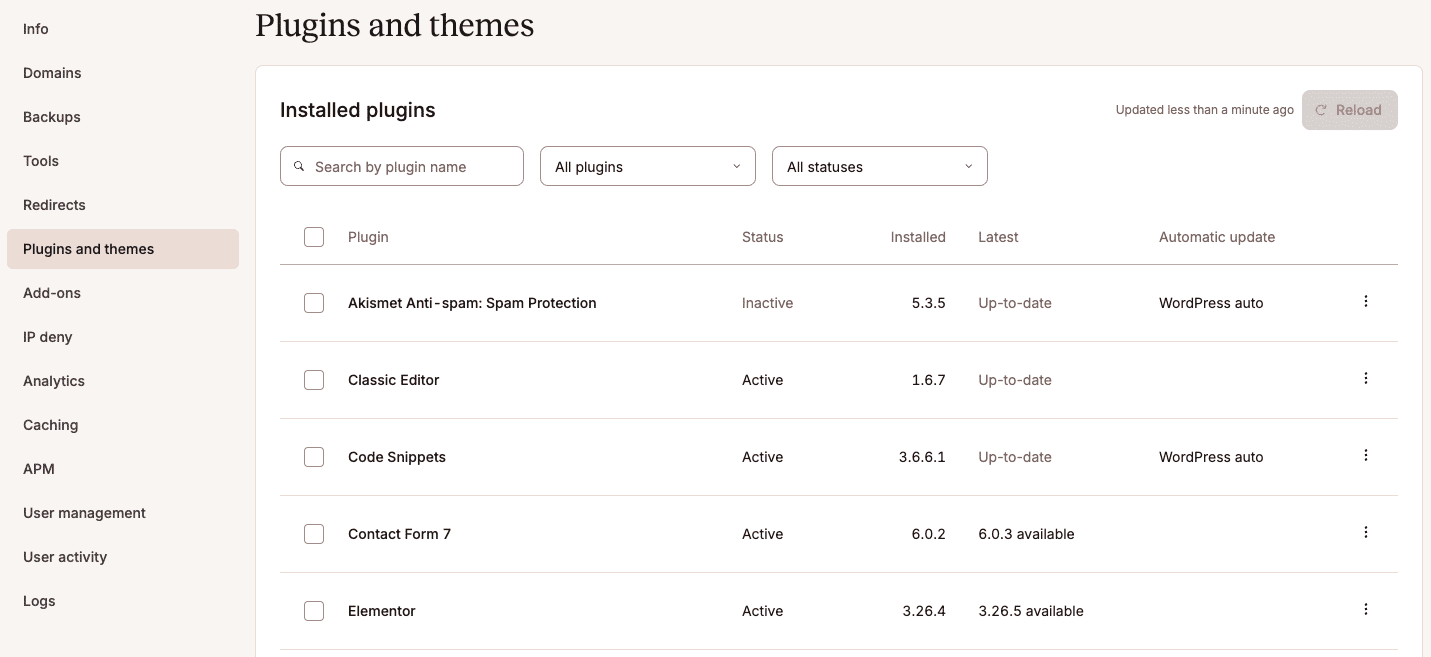
The current version of the theme or plugin is shown in the Installed column, and if an update is available, the latest version will be shown in the Latest column. The Automatic update column indicates if the plugin is configured to use WordPress’s automatic update feature.
Update plugins and themes
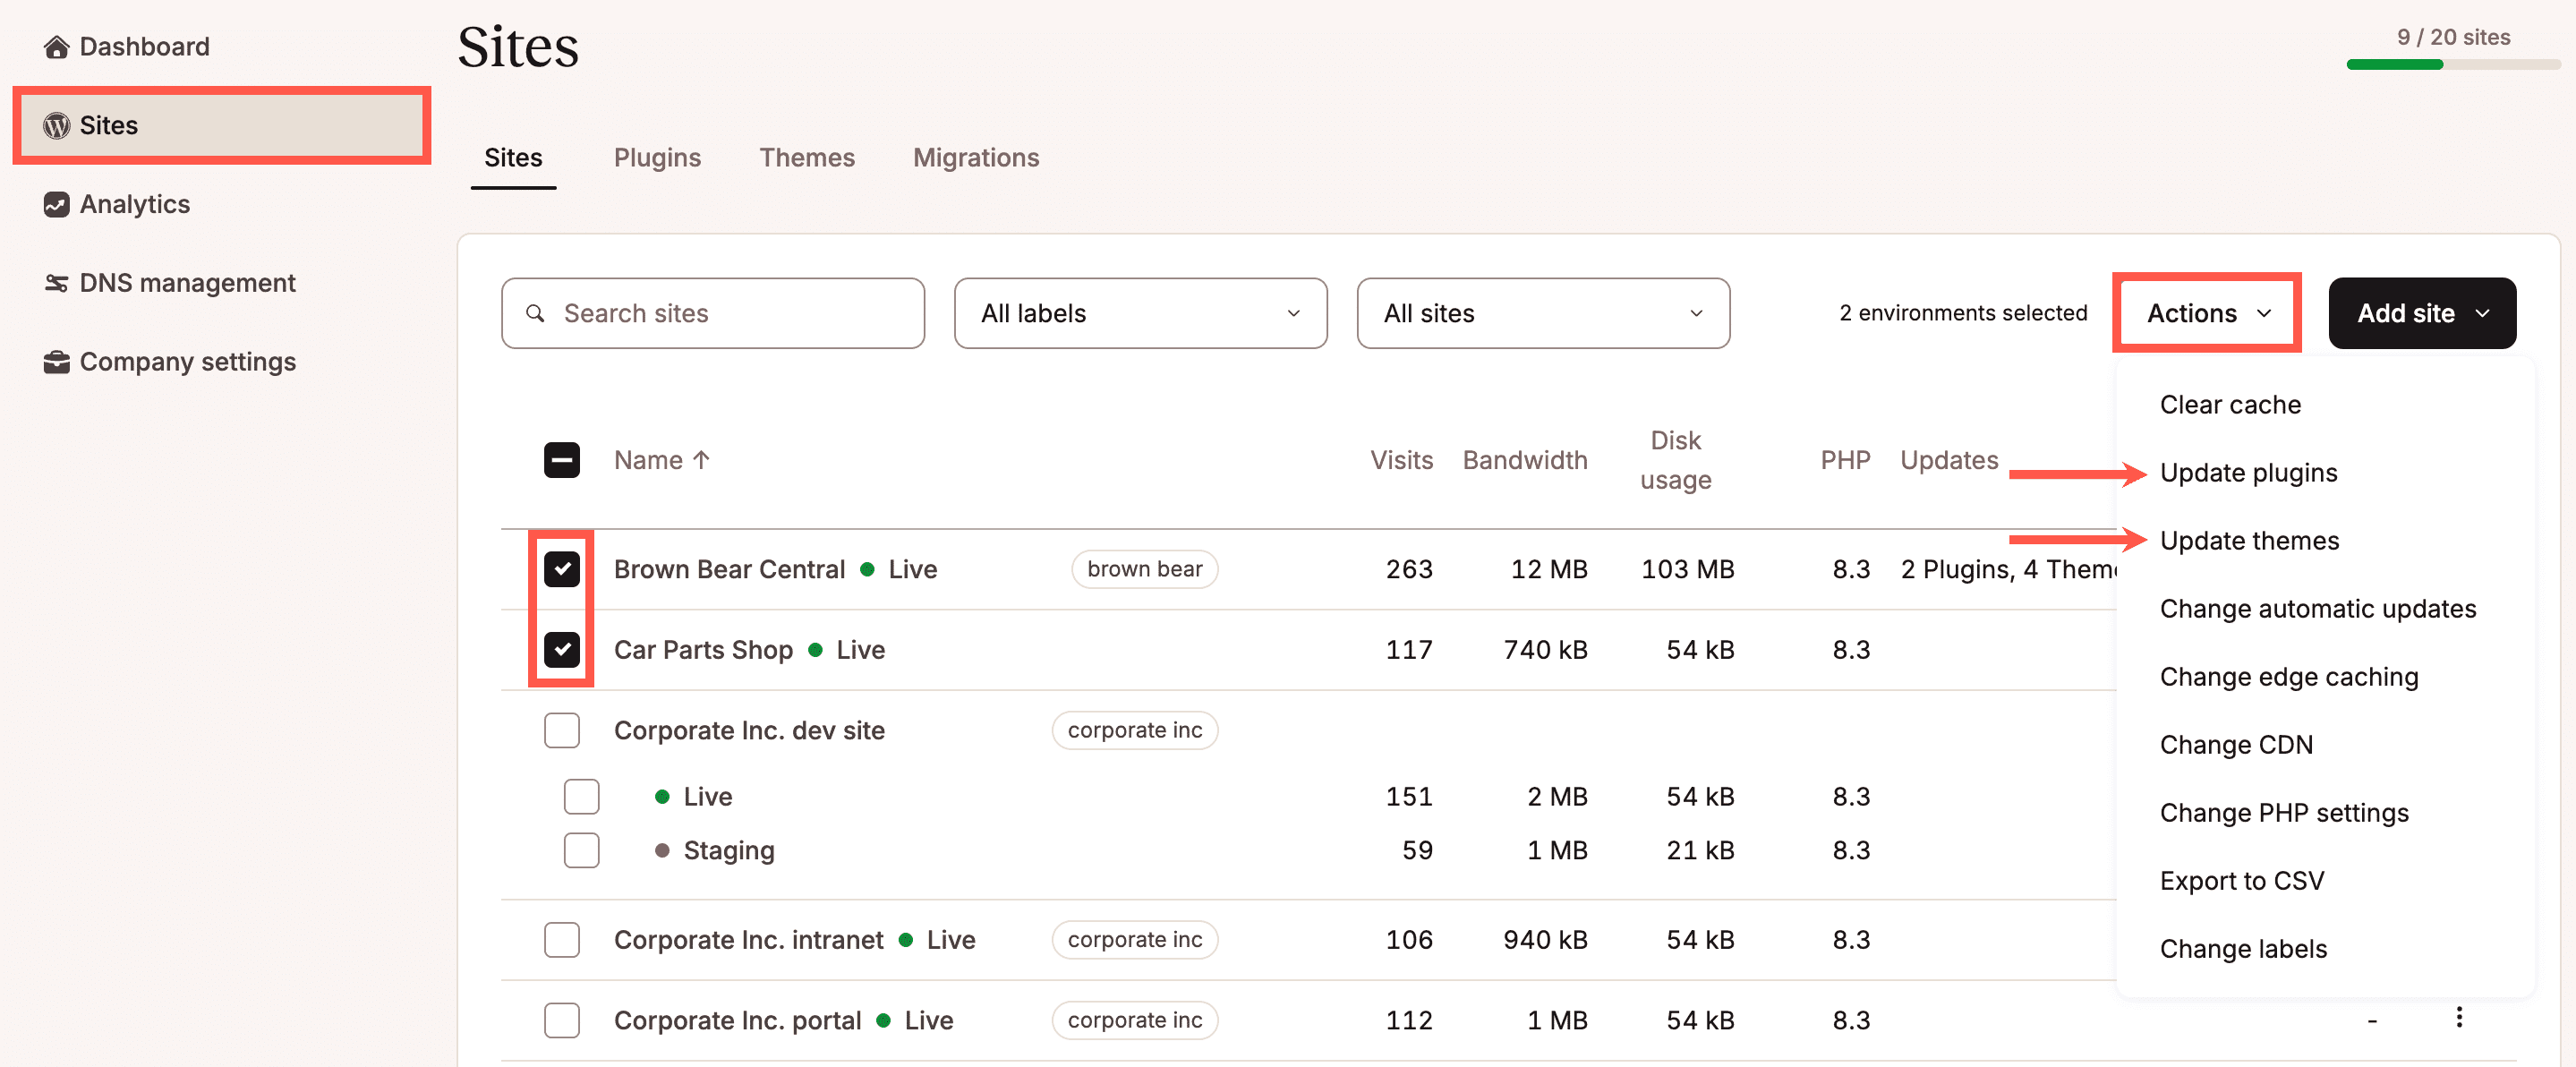
In MyKinsta, you can update plugins and themes for one or multiple sites, including staging sites, simultaneously from the Sites page. Select the checkboxes next to the sites you want to update the plugins and themes for, click Actions, and choose Update plugins or Update themes.
Any plugins or themes that have available updates are shown; select which plugins or themes you want to update and click Update plugins or Update themes.
While the update process is underway, actions on the Plugins and themes page for each site that is updating are disabled. Once the process is complete, a success message appears.
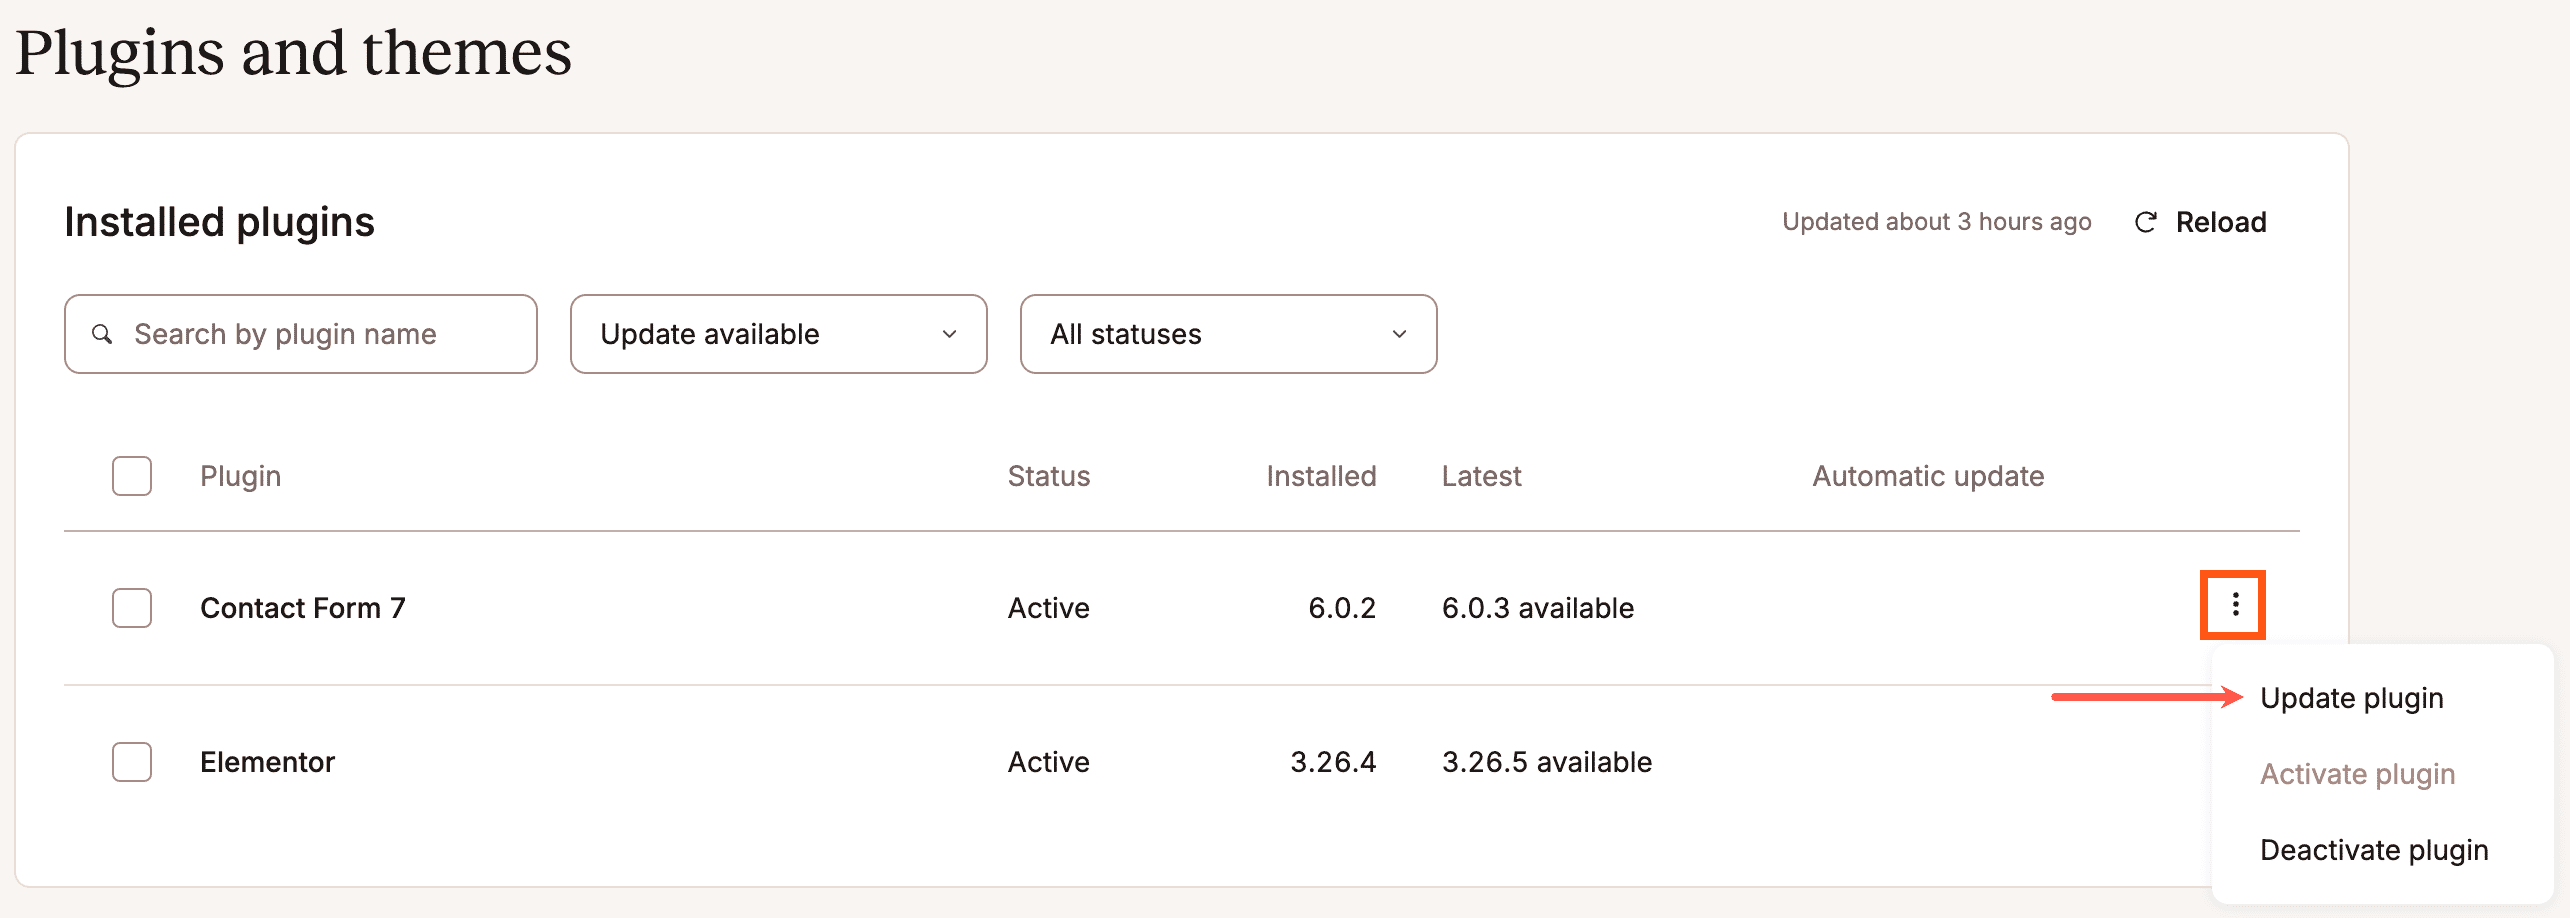
You can also update the plugins or themes for a single WordPress site within Sites > sitename > Plugins and themes. To update a single plugin or theme, click the kebab (three-dot menu) on that item and click Update.
To update multiple plugins or themes, select the checkbox next to each item and click Update. The checkbox in the table header can be used to select all items in the list.

In the Update modal/pop-up that appears, click Update to confirm the updates you want to perform and start the update process.
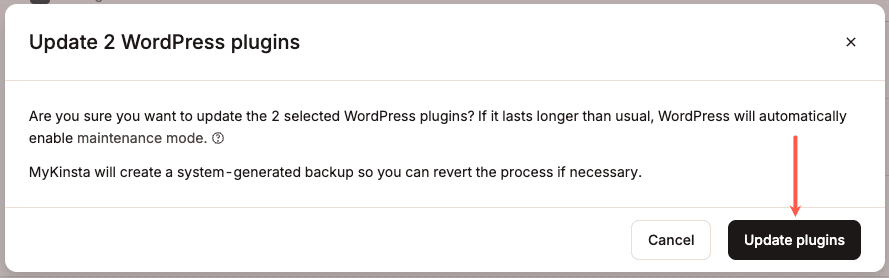
While the update process is underway, actions on the Plugins and themes page will be disabled. Once the process is complete, a success message appears.
Activate plugins and themes
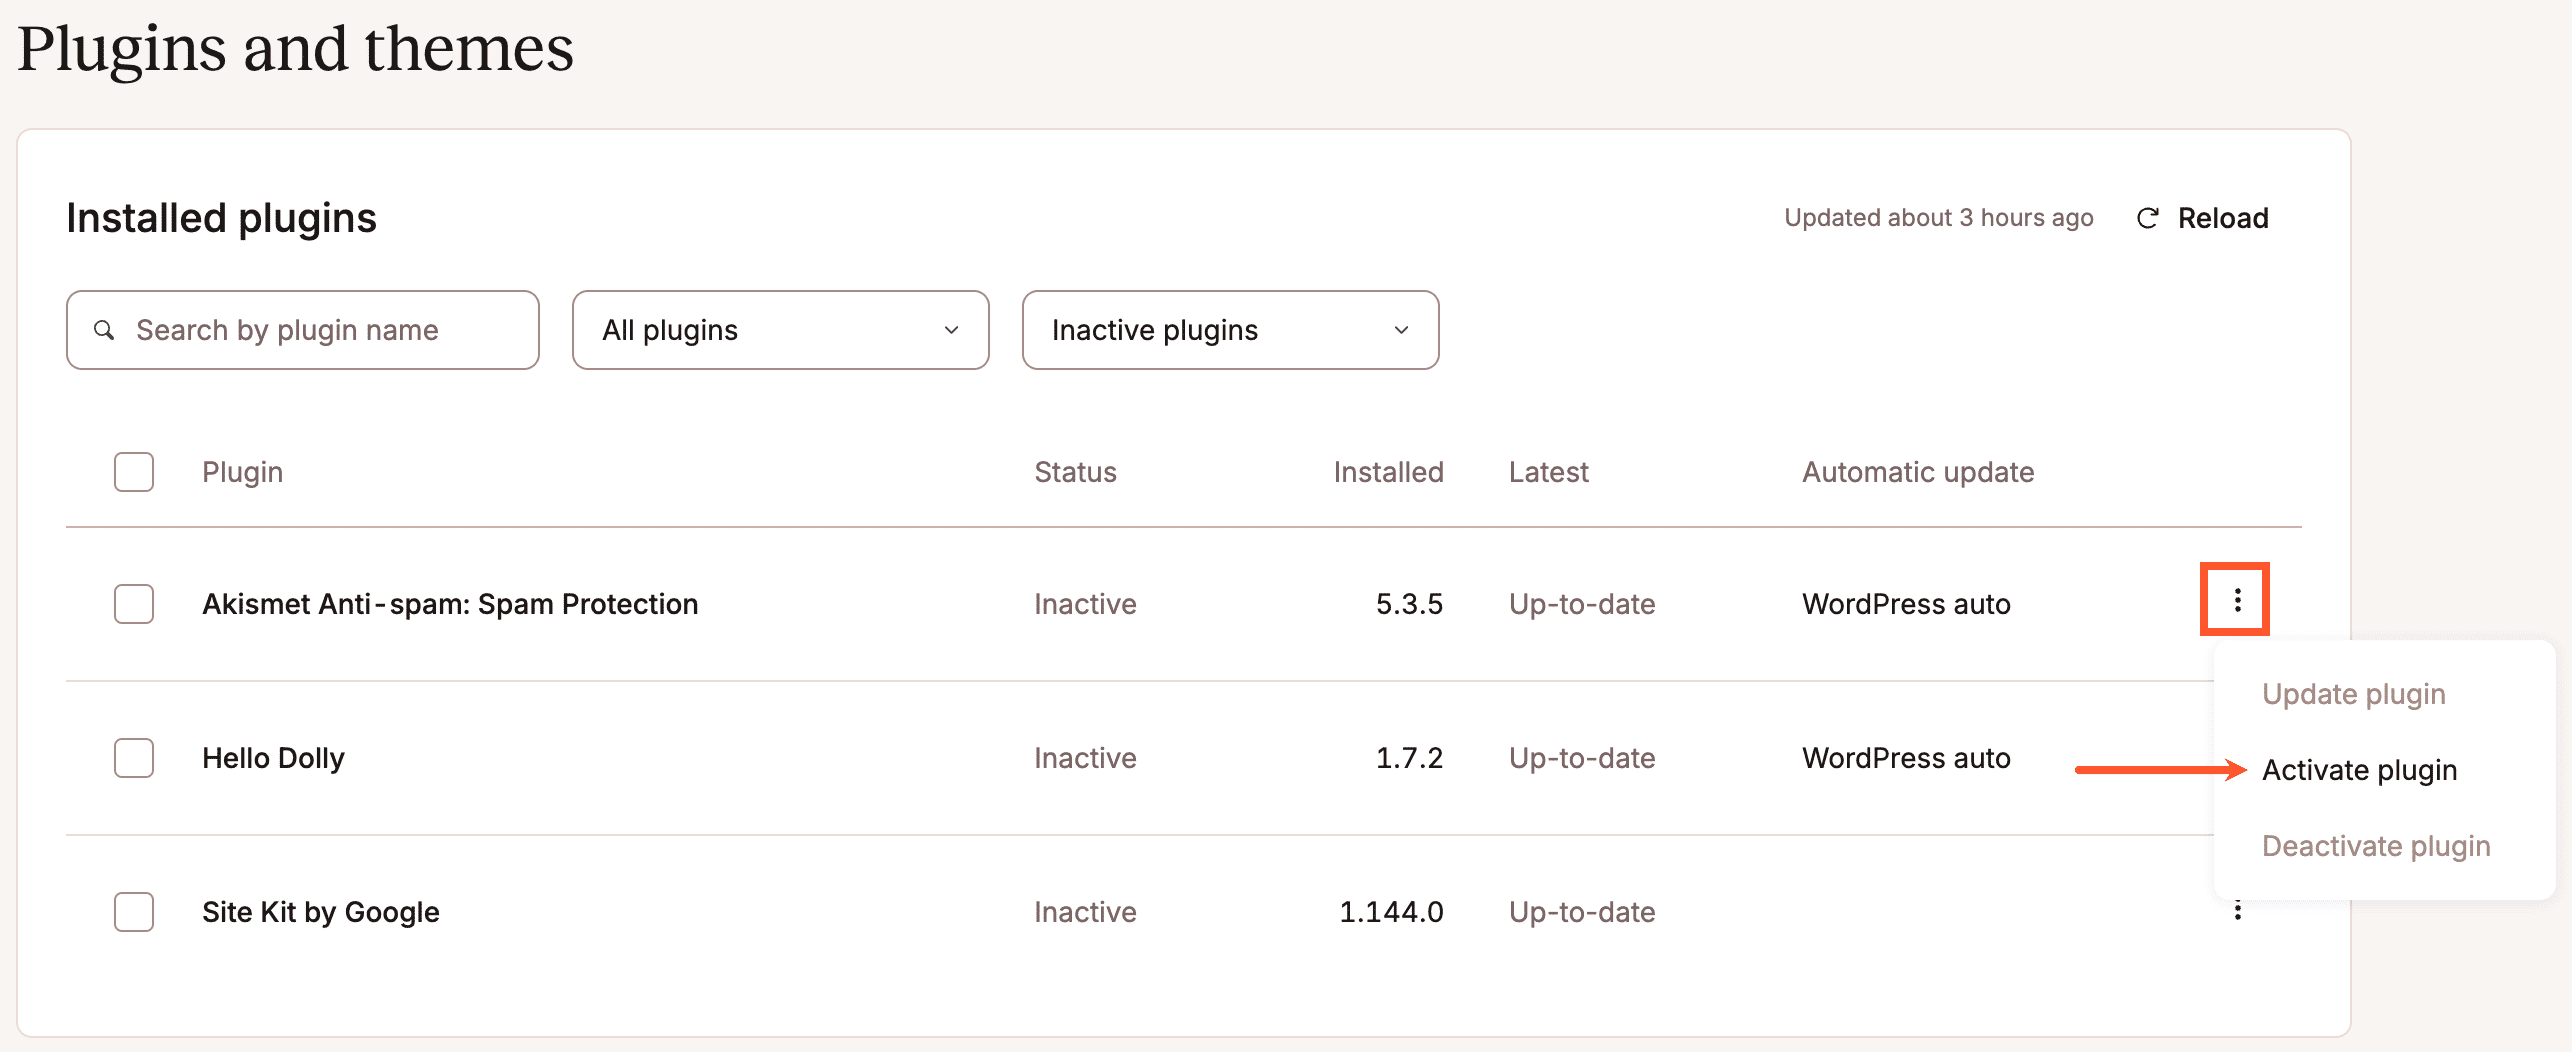
You can activate your plugins and themes within Sites > sitename > Plugins and themes. To activate a theme or a single plugin, click the kebab (three-dot menu) on that item and click Activate. You can only have one theme active at a time; activating a new theme deactivates any other theme.
To activate multiple plugins, select the checkbox next to each item and click Activate. The checkbox in the table header can be used to select all plugins in the list.
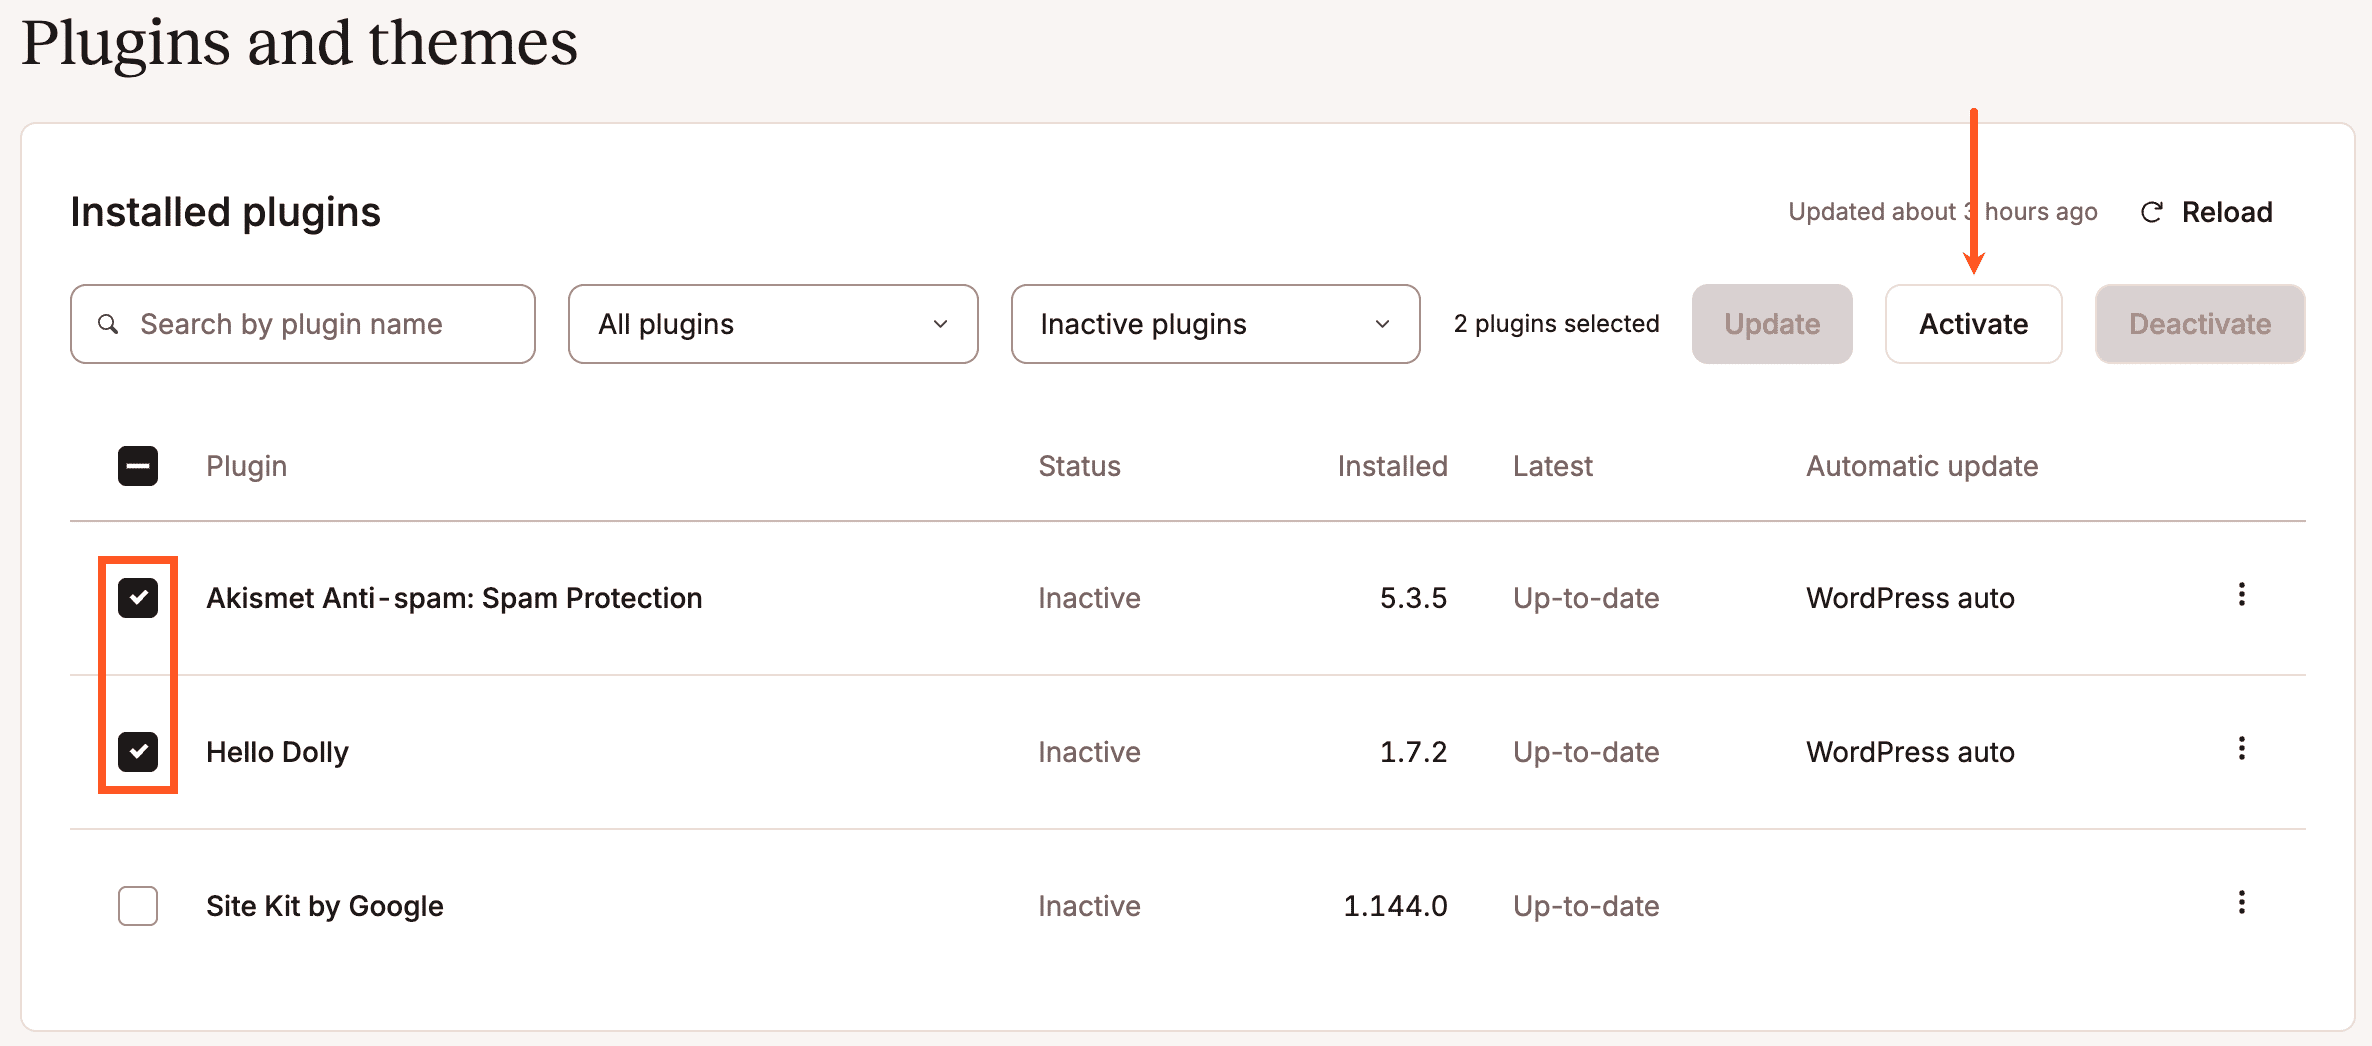
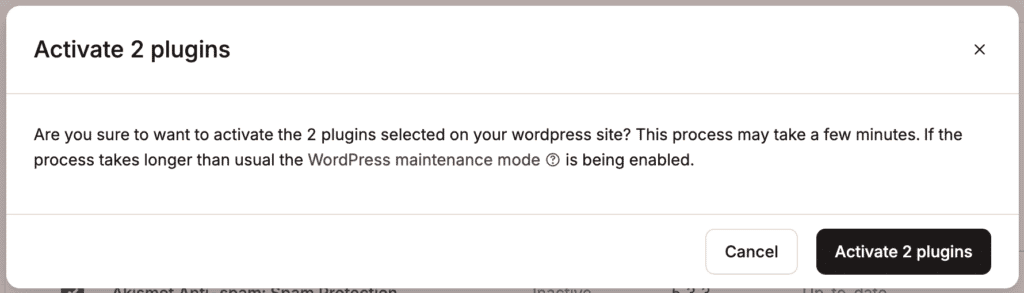
In the Activate modal/pop-up that appears, click Activate to confirm which theme or plugins you want to activate.
While the activation process is underway, actions on the site’s Plugins and themes page will be disabled. Once the process is complete, a success message appears.
Deactivate Plugins
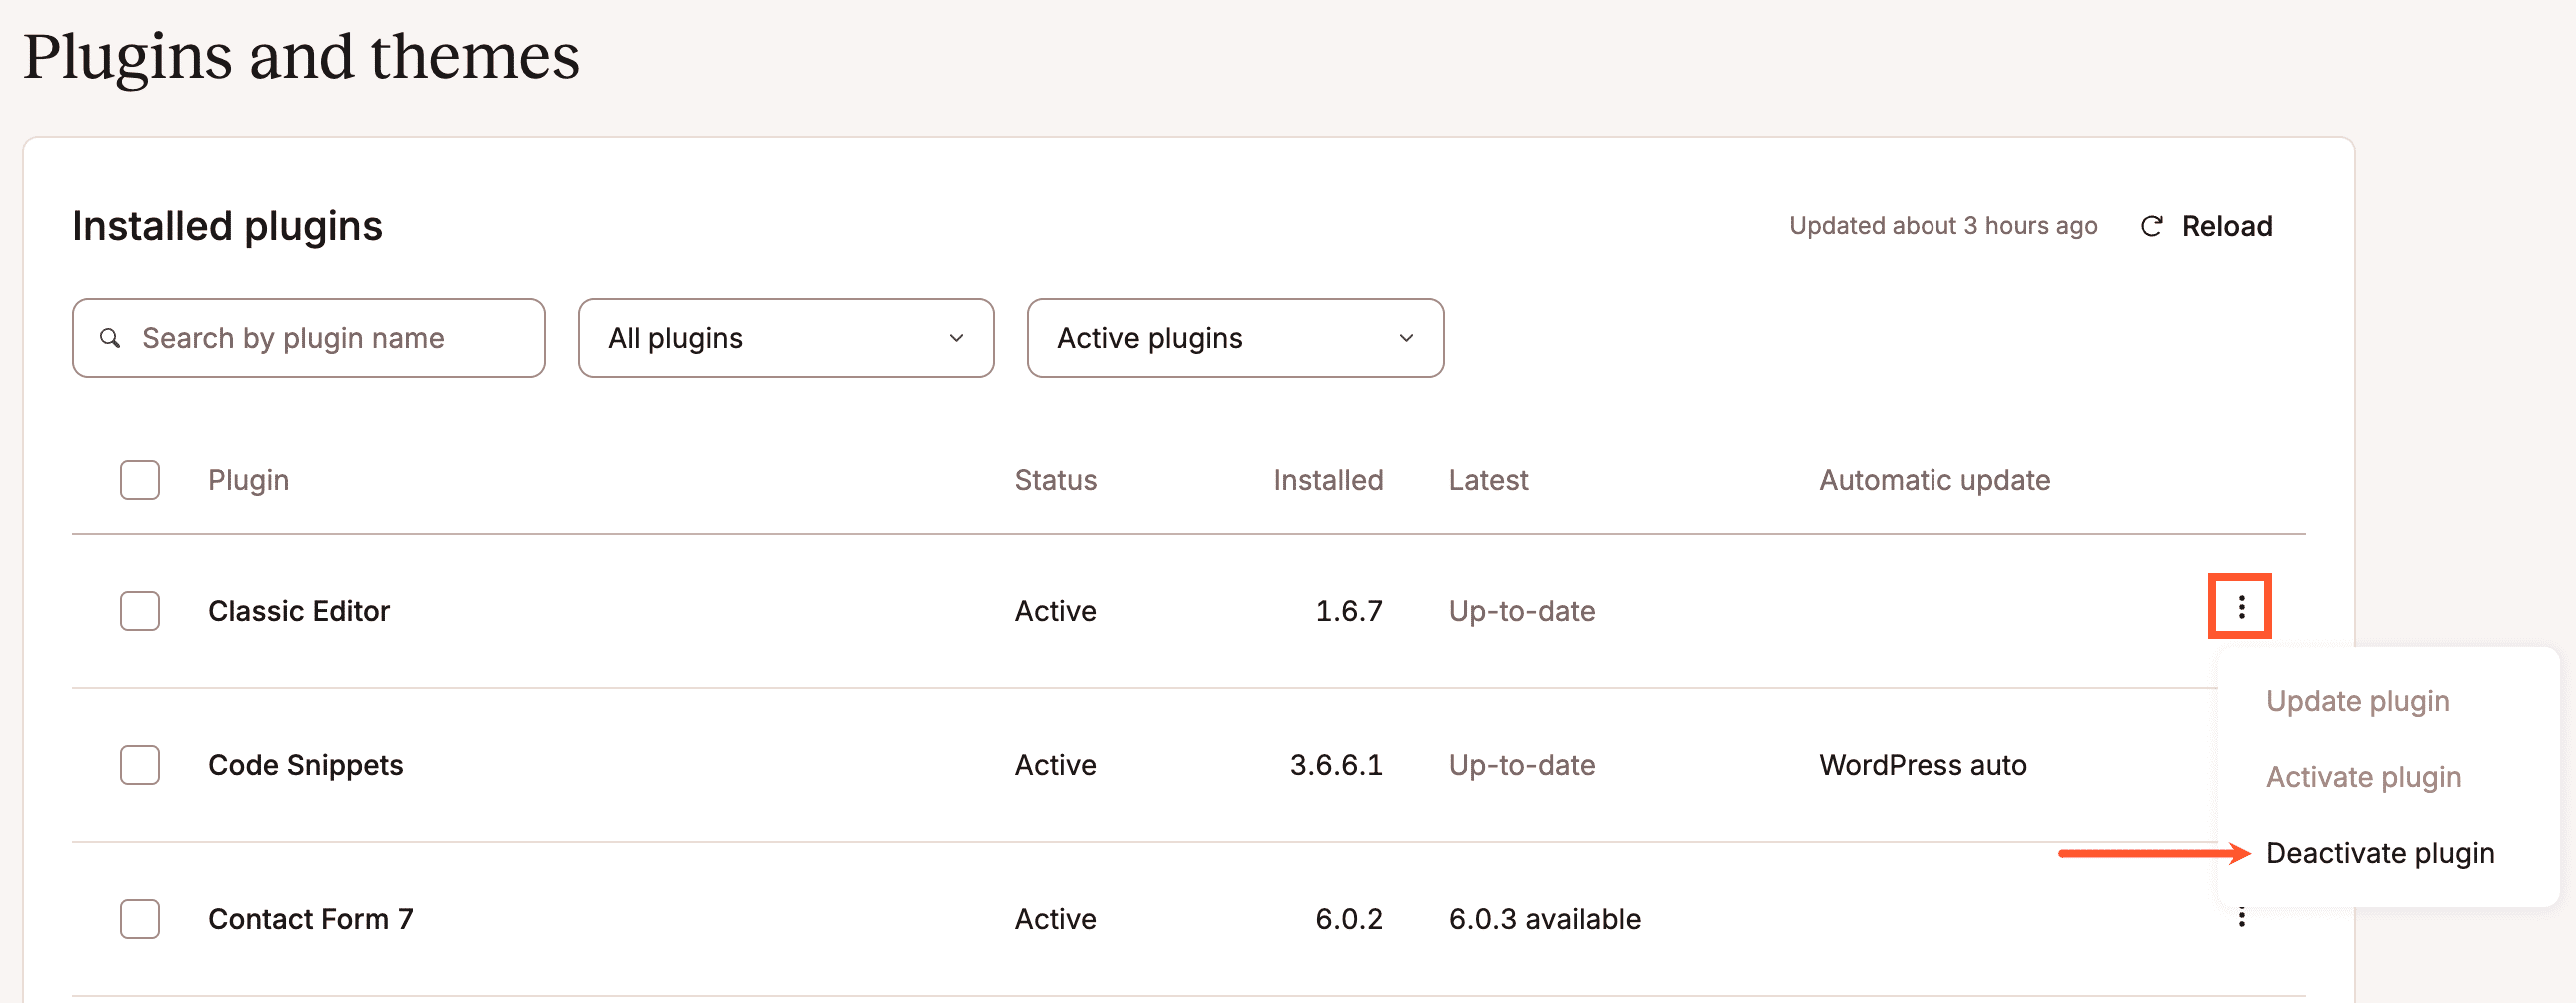
You can deactivate your plugins within Sites > sitename > Plugins and themes. To deactivate a single plugin, click the kebab (three-dot menu) on that item and click Deactivate.
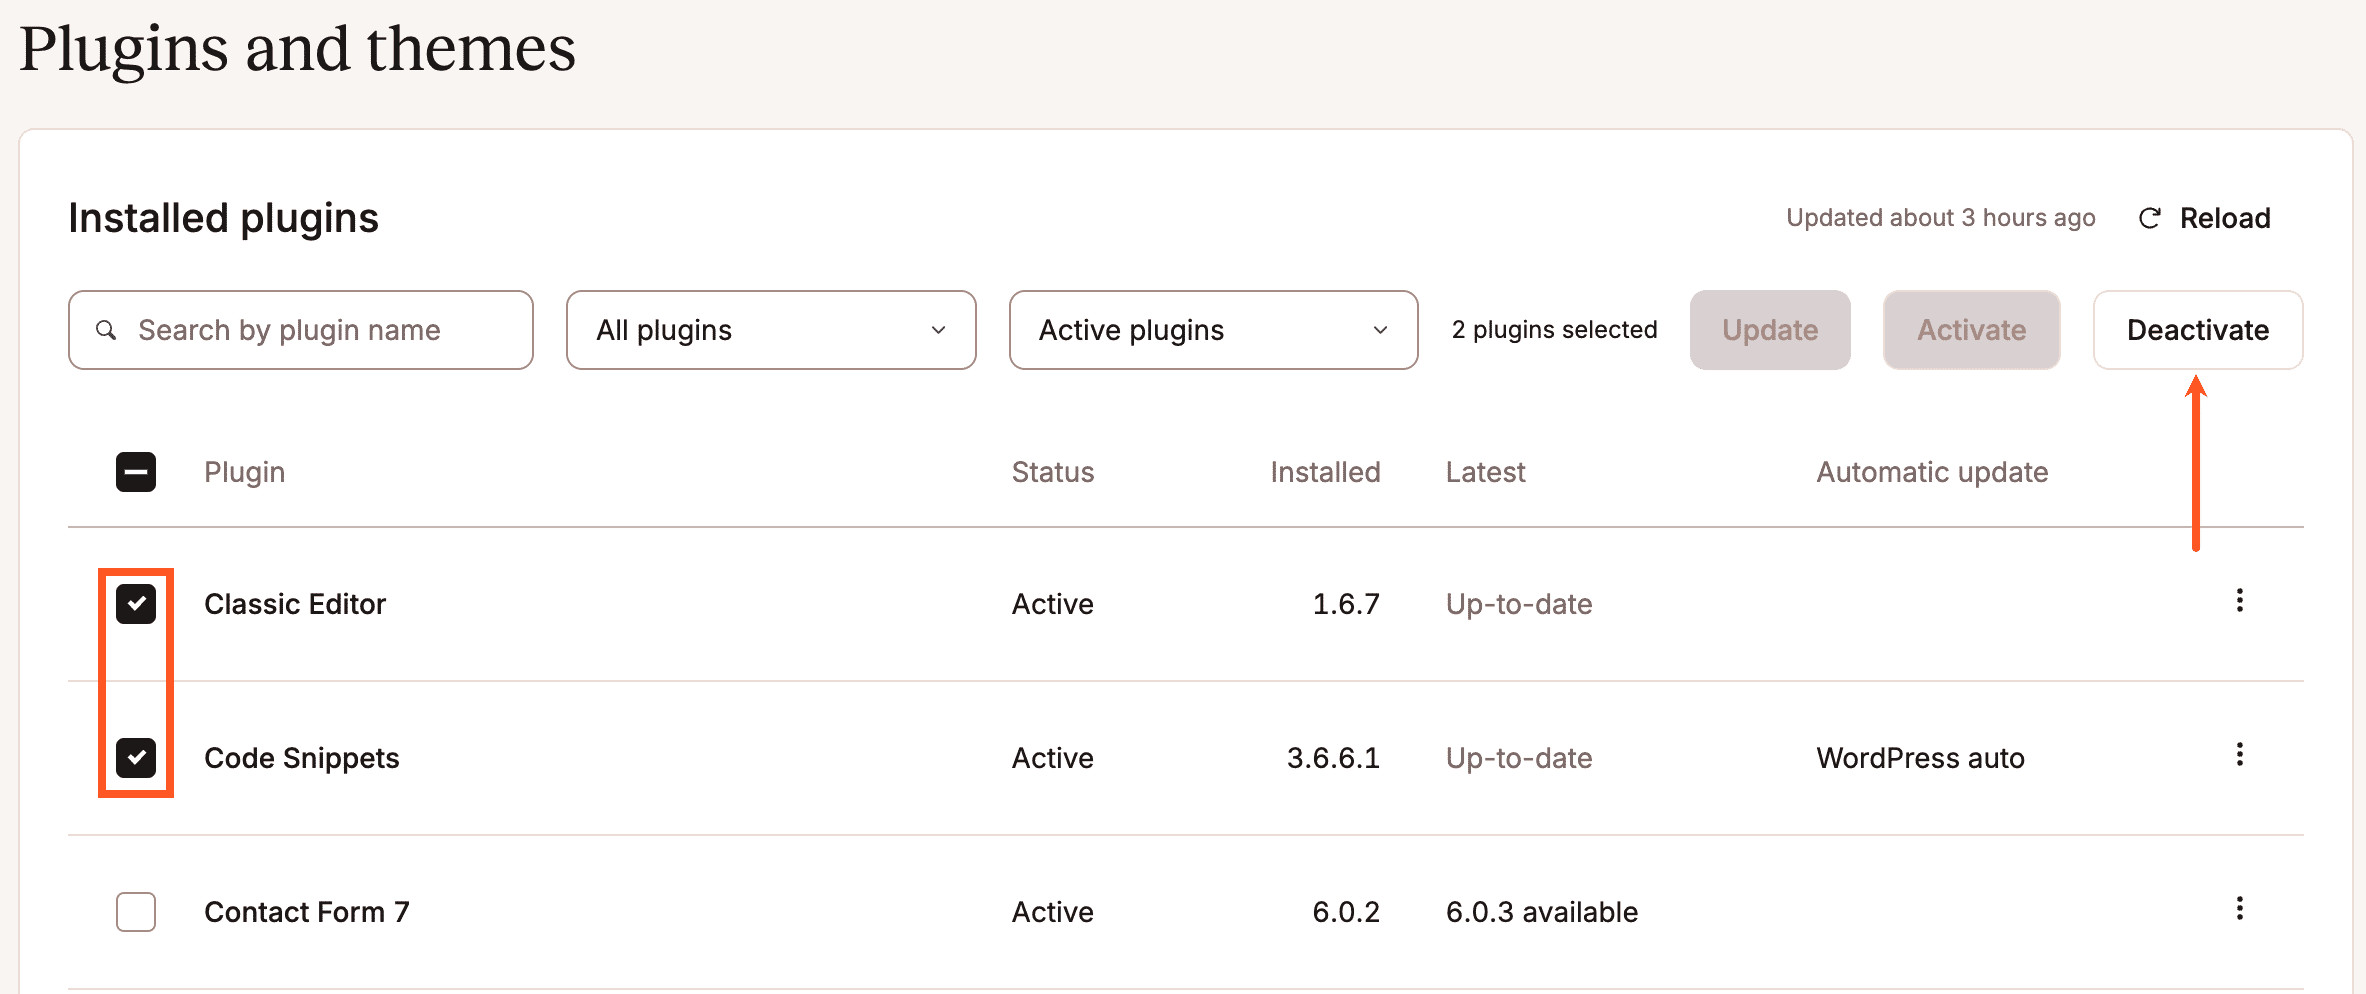
To deactivate multiple plugins, select the checkbox next to each item and click Deactivate. The checkbox in the table header can be used to select all plugins in the list.
In the Deactivate modal/pop-up that appears, click Deactivate to confirm which theme or plugins you want to deactivate.
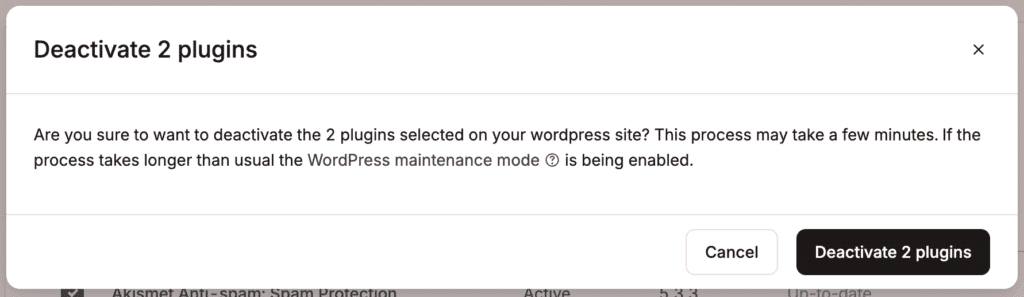
While the deactivation process is underway, actions on the site’s Plugins and themes page will be disabled. Once the process is complete, a success message appears.
Errors and troubleshooting
Failed update
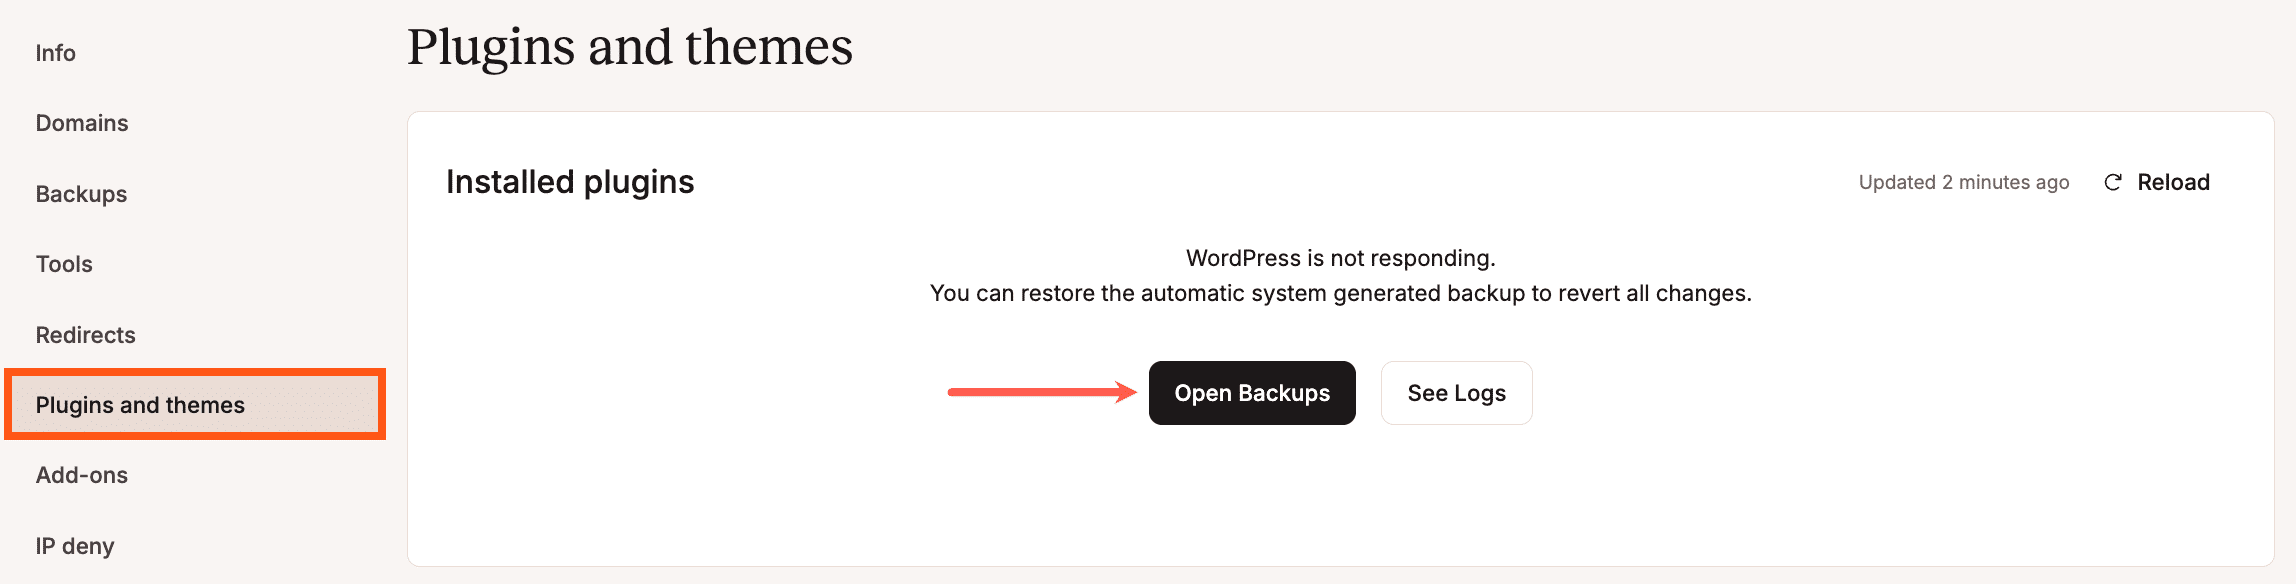
There may be situations where an update fails. If this happens, an error message will appear on the Plugins and themes page.
If an option to restore a backup appears on the page, click Open Backups to begin restoring a backup.
If a plugin or theme cannot be updated from MyKinsta, you can try updating from the WordPress dashboard or updating the plugin or theme manually.
Plugin or theme issues
If a plugin or theme uses its own caching and you’re seeing issues, such as resources loading from old URLs, missing updates, or layout problems, try clearing that plugin or theme cache first before clearing the site cache. For instructions, refer to the plugin or theme’s documentation. For example, the Avada theme maintains its own CSS and JS cache and provides documentation about how to manage it.
If your theme or plugin also includes CSS or JS optimization features separate from caching, regenerate those files and then clear the plugin or theme cache before clearing the server cache. For instance, Avada includes a Critical CSS feature and recommends regenerating it after updates, followed by clearing both plugin and server caches.
WordPress is not available
If you see an error message that WordPress is not available and you should reinstall WordPress and try again; this is usually due to a Bedrock or other non-standard WordPress installation with a custom public web root (document root). Start a new chat with our Support team, and they can add a new wp-cli.yml file to the ~/public directory, with the path pointing to the site’s WordPress installation.