Create a Site
This page will walk you through creating a WordPress site with DevKinsta. When you first launch DevKinsta, you’ll see three different site creation options.
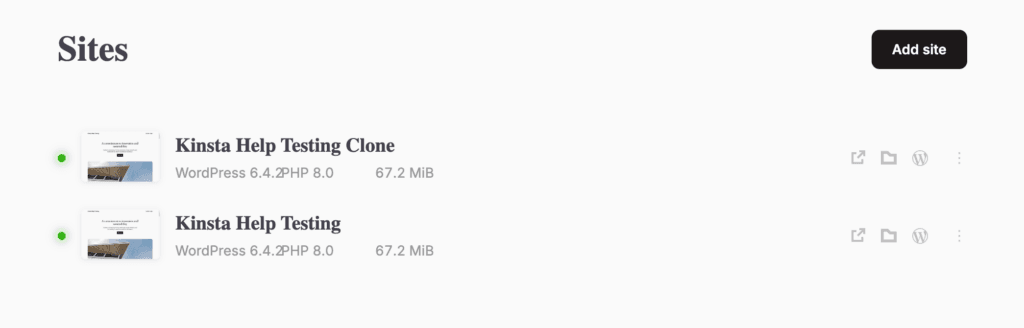
Once you have created at least one site, you will also have the option to clone a site from the Sites List.
New WordPress site
This option creates a new WordPress site configured with Nginx, MySQL, and the latest version of WordPress. To create a new WordPress site, follow the steps below.
- If this is your first site in DevKinsta, click New WordPress site. Otherwise, click Add Site in the upper-right corner of the site list and select the New WordPress Site option.
- Fill in the Site Name, WordPress Admin Username, and WordPress Admin Password fields.
- Click Create Site, and wait 30-60 seconds for the site to be created.
During the site creation process, you may need to provide your user account password (macOS) or accept a confirmation dialog (Windows). This is required because DevKinsta modifies the system’s hosts file.
After creating the site, you can view it in DevKinsta’s Sites list.
Import from MyKinsta
If you have WordPress sites in a Kinsta account, DevKinsta lets you clone your sites to your local computer. This makes local development of your Kinsta-hosted sites very convenient! To import a site hosted on Kinsta, follow the steps below.
- If this is your first site in DevKinsta, click Import from Kinsta. Otherwise, click Add Site in the upper-right corner of the site list and select the Import from Kinsta option.
- Log in to your Kinsta account. If you do not have a Kinsta account, use the Create MyKinsta account link to sign up and log in.
- Select a site environment (live or staging) to import.
- If your site is a multisite, specify whether it’s a subdomain or subdirectory multisite. If your site is not a multisite, select the No Multisite option.
- Click Import Site to start the import process.
During the site creation process, you may need to provide your user account password (macOS) or accept a confirmation dialog (Windows). This is required because DevKinsta modifies the system’s hosts file.
After creating the site, you can view it in DevKinsta’s Sites list.
Custom site
- If this is your first site in DevKinsta, click Custom site. Otherwise, click the Add New button in the top right corner of the site list and select Custom site.
- Choose Install WordPress, Empty site, or Import backup.
Install WordPress
Choose this option if you want to install a fresh WordPress site.
- Enter at least the Site name and WordPress admin username. You can modify the following settings:
- PHP version
- Database name
- Enable HTTPS
- WordPress site title
- WordPress version
- WordPress admin email
- WordPress admin username
- WordPress admin password
- Multisite
- Multisite type (if Multisite is enabled, choose between subdirectory or subdomain)
- During site creation, you must provide your password (on macOS) or click Accept in the confirmation dialog (on Windows). This is required because DevKinsta modifies the hosts file.
- It should take about 15-60 seconds. After creating the site, you can view it in DevKinsta’s Sites list.
Empty site
Choose this option if you want to create an empty site without WordPress.
- Fill out at least the Site name. You can modify the following settings:
- PHP version
- Database name
- Enable HTTPS
- After creating the site, you can view it in DevKinsta’s Sites list.
Import backup
Choose this option to create a site from a WordPress backup. For more details, see our Create a Site From a Backup guide. After creating the site, you can view it in DevKinsta’s Sites list.
Customizing sites
- Site name: this will show up in the site list.
- PHP version: We recommend always using the latest version. See our PHP versions guide for more information.
- Database name: The name of your database. You will likely not need to change this unless you are doing custom development.
- Site title: This will become your actual site title. It populates the WordPress setting of the same name.
- WordPress admin email: This will be the admin user’s email address. We recommend not using actual email addresses.
- WordPress admin username: This is the username of your admin user. You will use this to log in to your WordPress site.
- WordPress admin password: This is the password for your admin user. You will use this to log in to your WordPress site.
Steps of site creation
Updating NGINX config
In this step, DevKinsta sets up the required web server settings. You can check the sites.ini configuration file here: /Users/user/DevKinsta/kinsta/sites.ini
Modifying this file is not recommended. All changes are done by DevKinsta.
Creating MySQL database
DevKinsta creates a database for the site. If this step fails, you may want to try canceling the site creation, restarting DevKinsta, and creating the site again.
Installing WordPress x.y
If the webserver and database are ready, DevKinsta can start to install the latest WordPress. This step may take 10-40 seconds.
Updating host file
Here DevKinsta will ask for confirmation from the user. On macOS, you have to enter your password. On Windows, you have to click the OK button in the confirmation dialog.
DevKinsta needs this permission because it writes to the hosts file (macOS: /etc/hosts, Windows: C:/Windows/System32/drivers/etc/hosts). This allows your site to use a pretty URL instead of an IP address.
Generating thumbnail
In the last step, DevKinsta creates a preview of your site, which will be displayed inside DevKinsta.
Clone a site
With the clone site feature in DevKinsta, you can copy your entire WordPress site, including the database and files. This can be used with a “template” site to quickly create sites with the same theme, plugins, and settings.
To clone a site, go to the Sites page, click the kebab (three-dot) menu next to the site you want to clone and select Clone Site in the dropdown menu.
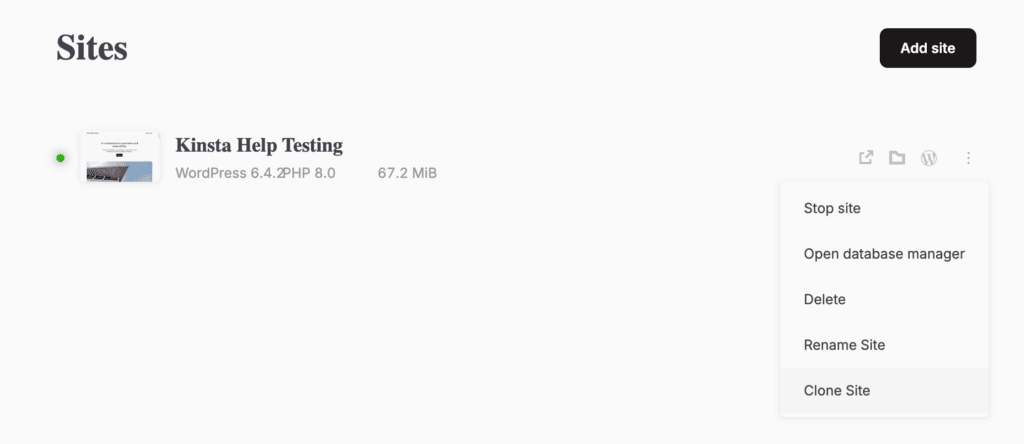
Enter the Site name for your new site and click Clone Site in the modal/pop-up.
It usually takes about 30-60 seconds for cloning to finish, but it could take up to 10-20 minutes, depending on the size of the site.
During the site cloning process, you may need to provide your user account password (macOS) or accept a confirmation dialog (Windows). This is required because DevKinsta modifies the system’s hosts file.
After cloning the site, you can view information about it on the Site info page or in the Sites list.