Multisite Network
WordPress multisite is an advanced feature that allows you to run multiple sites from the same WordPress installation. If you’re currently on a Single 35k visits plan or Single 20GB bandwidth plan and want to enable multisite, you’ll need to upgrade to a Single 65k visits plan or Single 40GB bandwidth plan or above.
Setting up and managing a WordPress multisite usually requires more attention than a standard single-site install and can become complicated. We recommend working with an experienced developer if you wish to switch an established site from a single site to a multisite network and for ongoing multisite configuration and maintenance.
Subdirectory vs subdomain
We support both subdirectory and subdomain setups.
- A subdirectory multisite is one that’s loaded from a subdirectory of a root domain (e.g. domain.com/multisite/).
- A subdomain multisite is one that’s loaded from a unique subdomain (e.g. multisite.domain.com).
Wildcard subdomain
When you add a root/apex domain (domain.com) to a site in MyKinsta, an additional wildcard subdomain (*.domain.com) is automatically added (unless you deselect the wildcard option under Advanced Options). If you’re running a subdomain multisite, you can point that wildcard subdomain to your Kinsta site the same way you point your root/apex domain, so you don’t have to add each subdomain individually in MyKinsta.
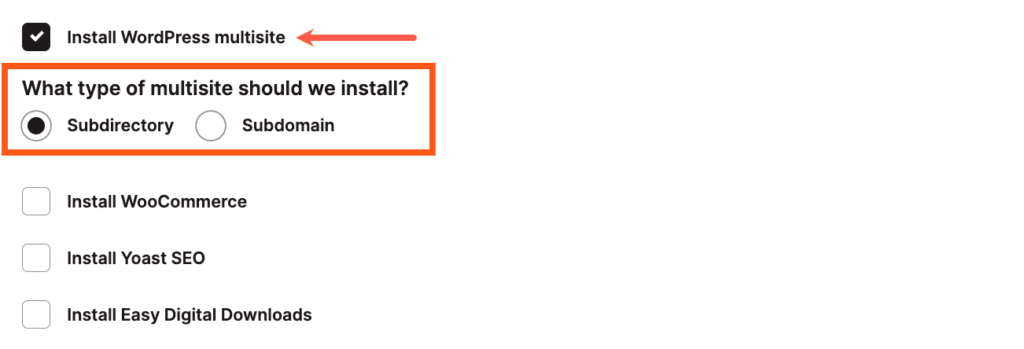
Install WordPress multisite
To install a WordPress multisite, select Install WordPress multisite when adding your new site in MyKinsta. Then, depending on the type of multisite network you want to install, select either the Subdirectory or Subdomain option.
If you want to switch an established single site to a WordPress multisite network, we recommend working with a WordPress developer who is familiar with that process and for ongoing multisite configuration and maintenance.
Add and point your primary domain
Add your site’s custom domain to MyKinsta and point it to Kinsta to make your multisite live. Go to your site’s Domains page, click Add Domain, add your custom domain, select Add domain with wildcard, and click Add domain. Verify and point the domain to Kinsta. For more information about adding domains, see our Domains and DNS guide.
Once your domain has been verified and pointed to Kinsta, you can make it the primary domain by opening the kebab (three-dot) menu beside your domain in the Domains list and selecting Make primary domain.

You can opt to run a search and replace to update your site’s database with your new primary domain. Note this will not affect email addresses. If those need to be updated, you can use the Search and replace tool in MyKinsta.
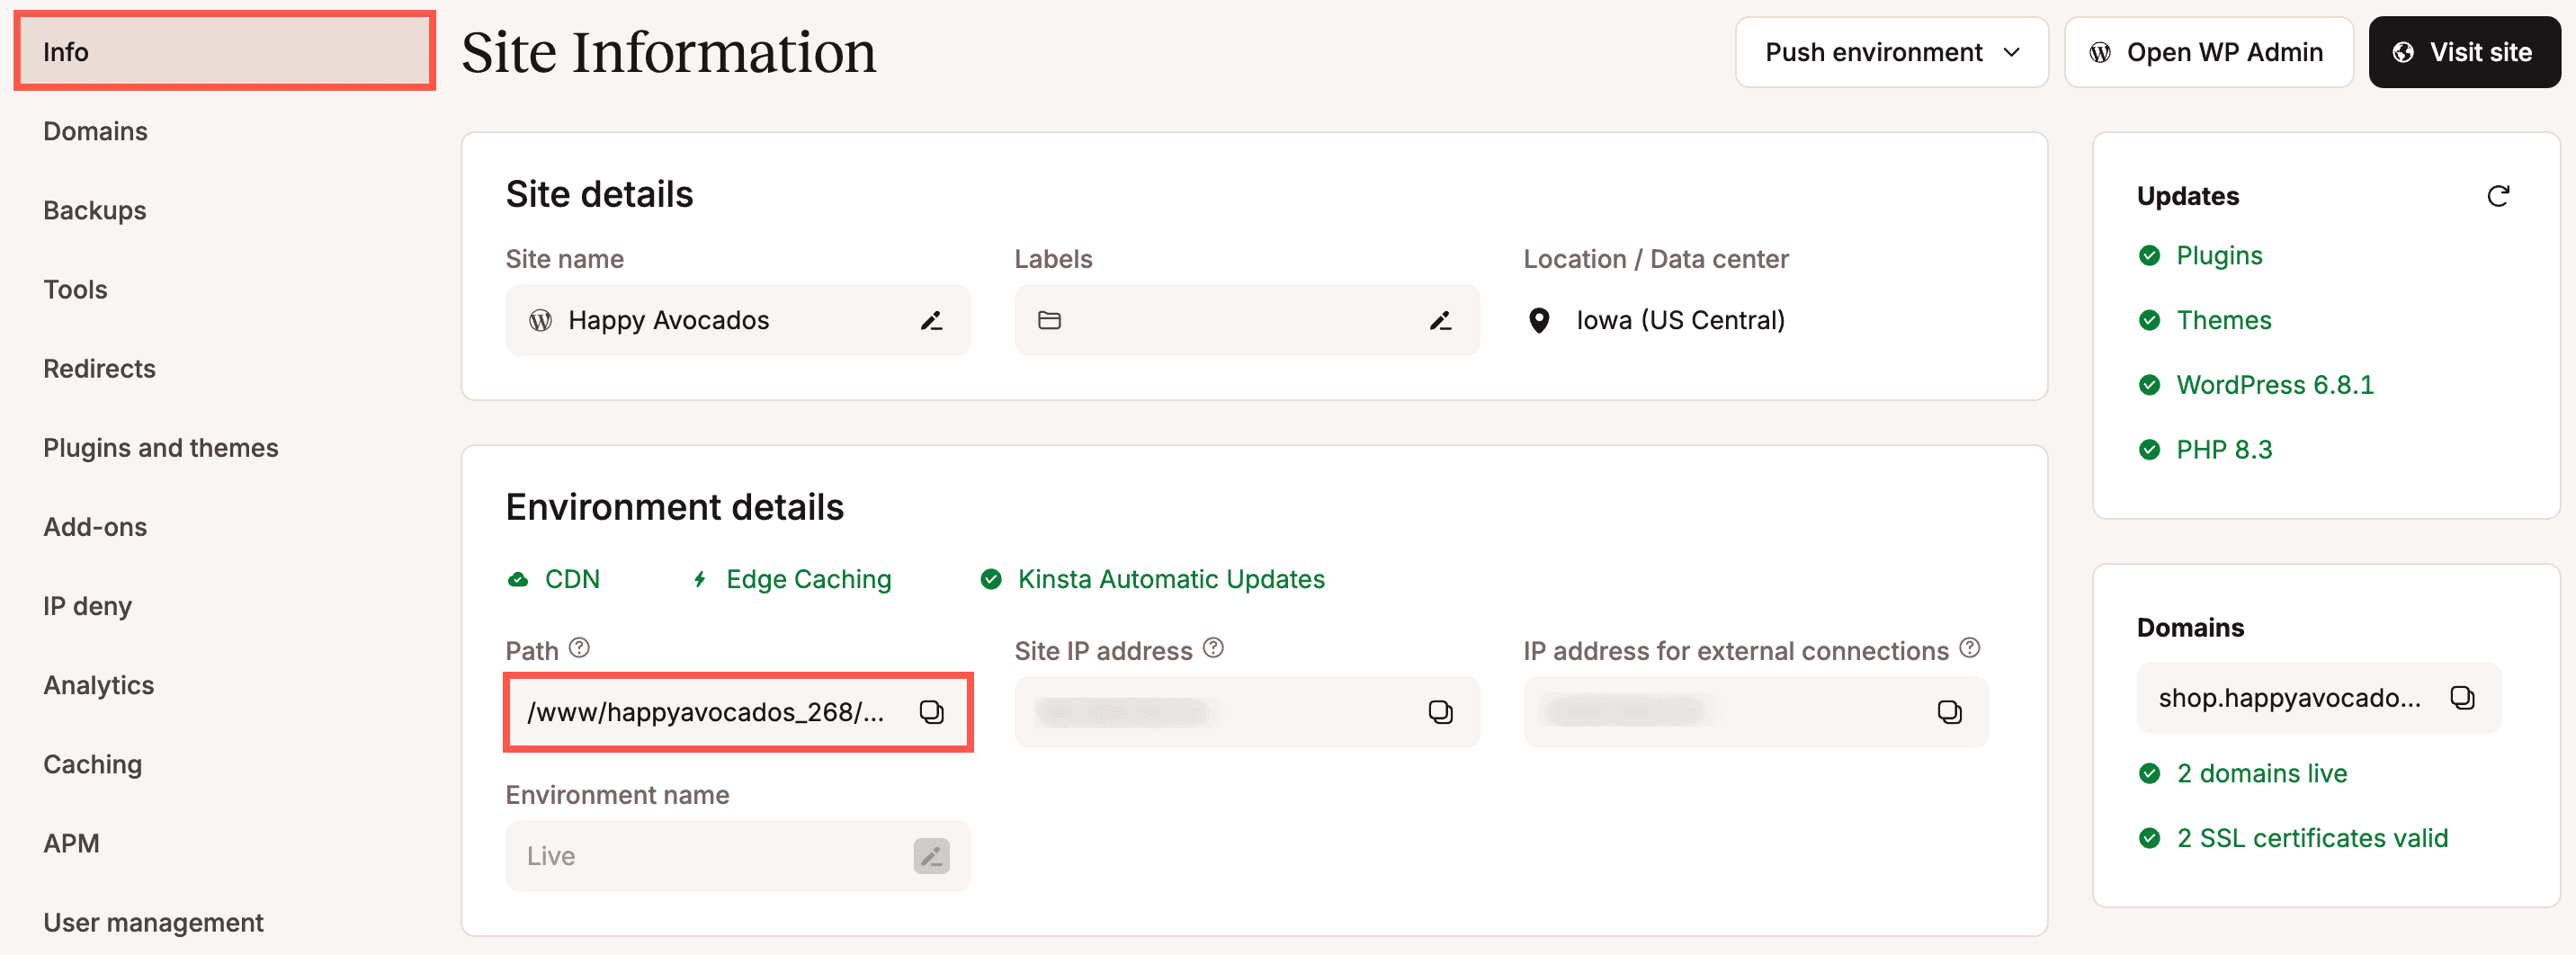
Update wp-config.php file
You need to update your site’s wp-config.php file to work correctly with your new primary domain. Your wp-config.php file can be found in your site’s root directory (aka document root). You can find this within MyKinsta, in sitename > Info > Environment details > Path.
To access and edit this, you can use SFTP (download, edit, and upload the updated file) or SSH (you can edit the file directly on the server).
On the line that begins with define( 'DOMAIN_CURRENT_SITE' — change the domain from the kinsta.cloud domain to your new primary domain. To make sure you can log into your multisite network, including your subsites, add this line just below the define( 'BLOG_ID_CURRENT_SITE' line:
define('COOKIE_DOMAIN', $_SERVER['HTTP_HOST'] );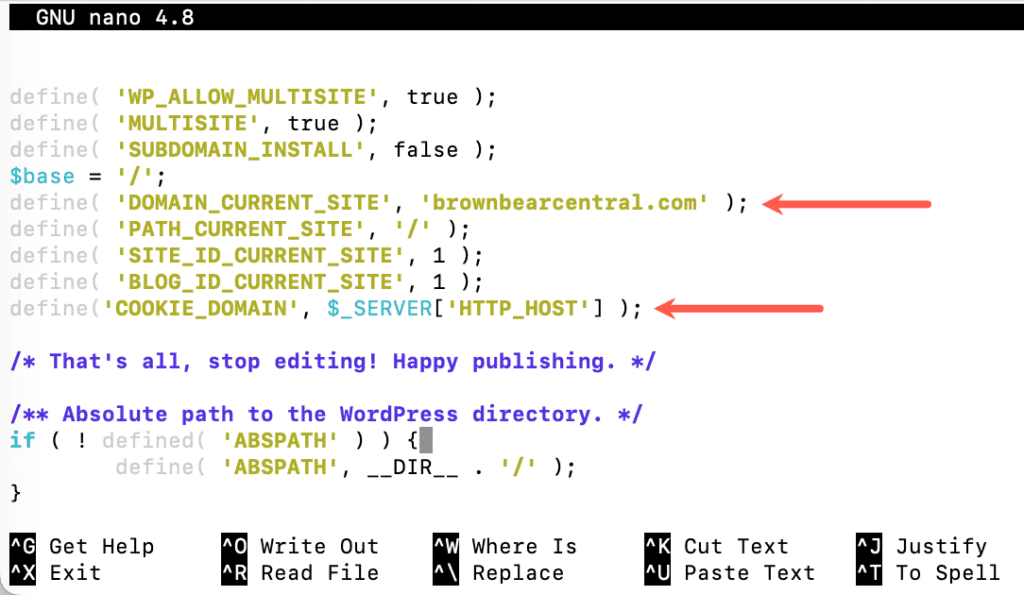
Save your changes, and if you’re using SFTP, upload the file to the server, overwriting the old version of the file.
Add subsites
Create your subsites in your multisite network. Log in as the Super Admin (the user you added when you created the site in MyKinsta above).
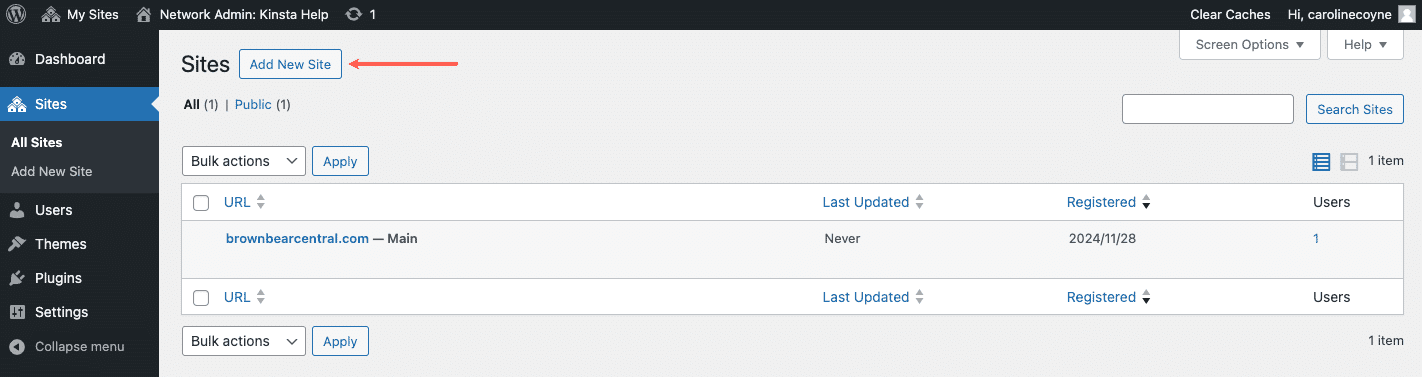
In the My Sites menu near the top left corner, go to Network Admin > Sites and click Add New Site.
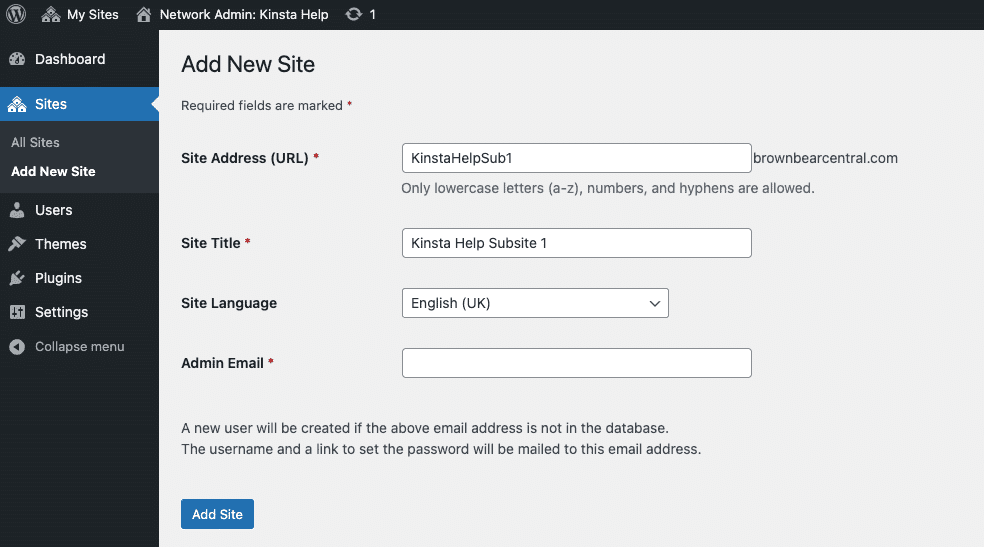
Enter the details of your new subsite in the fields provided and click Add Site. The Site Address will either be a subdomain or subdirectory of the main site’s domain.
Repeat these steps as needed to add any additional subsites.
Multisite staging environment
If you need a staging environment to test new WordPress versions, plugins, code, or general development work, our free WordPress staging environment may be an option.
Subdirectory multisites (example.com, example.com/subsite1, example.com/subsite2) are compatible with our staging environment.
With subdomain (example.com, subsite1.example.com, subsite2.example.com) or domain-mapped multisites (loads different subsites at completely different domains, e.g. example.com, example1.com, example2.com), it may be possible, depending on how your multisite is configured.
Multisite domain mapping
Multisite domain mapping allows you to map a custom domain to a subsite in your multisite network. This is a useful feature if you want to have individual domains for your subsites instead of subdomains (e.g. sub1.example.com) or subdirectories (e.g. example.com/sub1).
If you have an existing multisite with mapped domains in your site’s database and you’re just looking to set up those domains in MyKinsta, you can skip down to the Add a Subsite Domain to MyKinsta and Point DNS section below.
Map a custom domain to a subsite
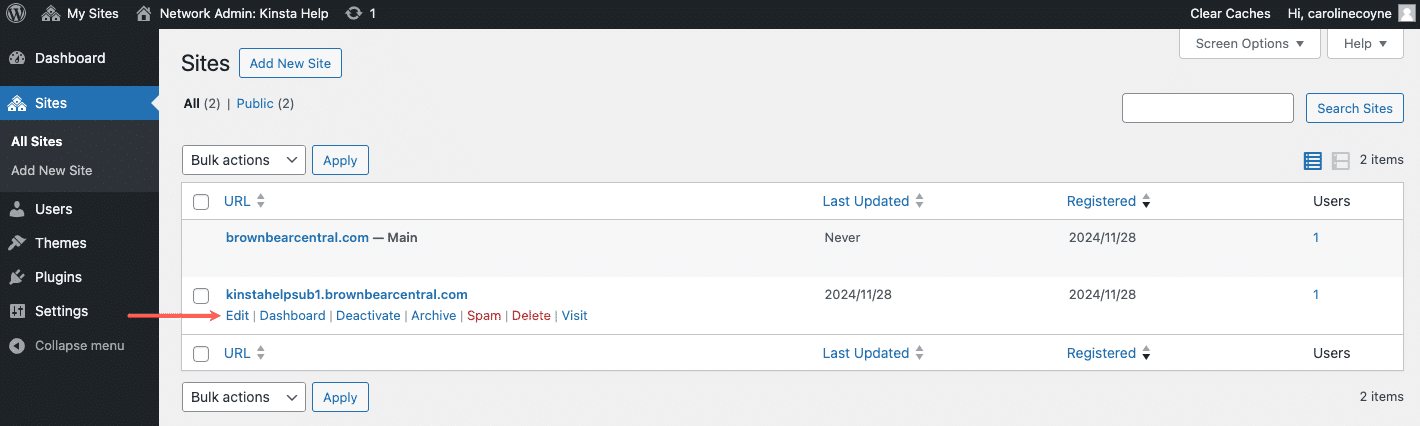
To map your custom domain to a subsite, on the Sites page, hover over the subsite URL and click on the Edit link that appears.
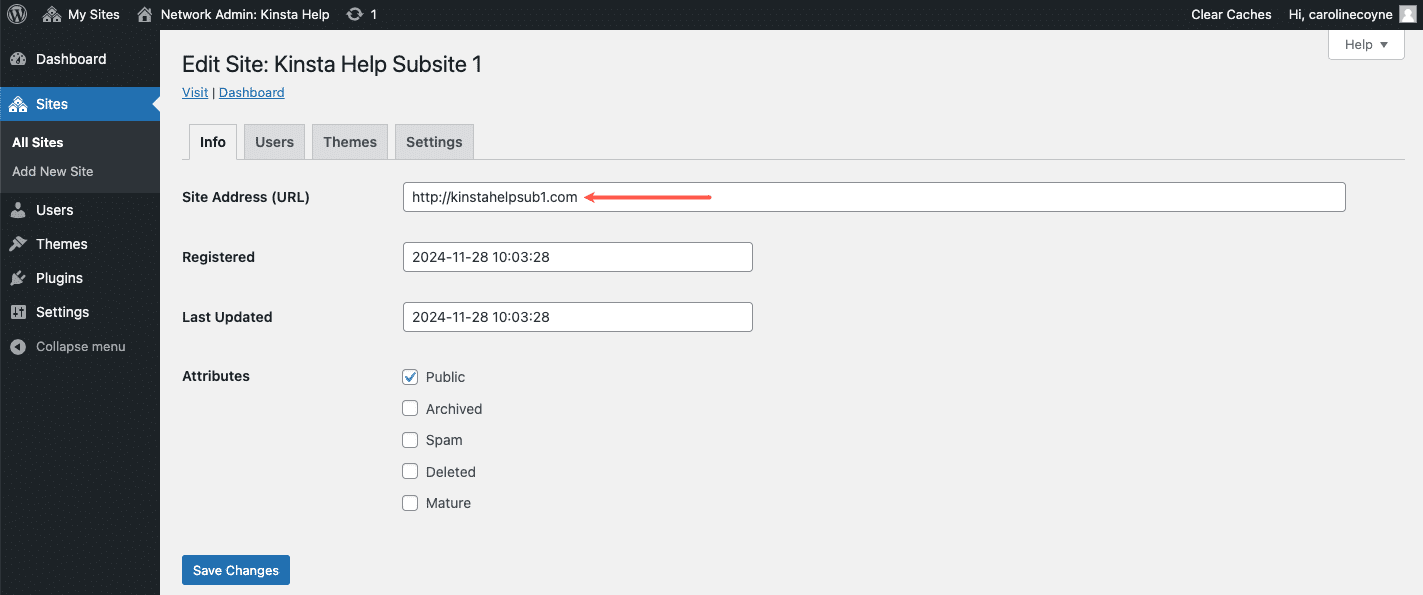
In the Site Address (URL) field, replace the existing URL with your custom domain’s full URL. Be sure to include the full URL to the domain, including the protocol (e.g. https://example.com).
Repeat these steps as needed to map custom domains to any additional subsites.
Add a subsite domain to MyKinsta and point DNS
To add your subsite’s custom domain to MyKinsta, log in to MyKinsta, go to WordPress Sites > sitename > Domains, and click Add Domain. Enter your custom domain (you can also enter multiple domains separated by commas), click Add domain, and complete the steps to verify and point your domain to Kinsta. For more details, see our guide for How to Add a Domain to a Site on Kinsta.
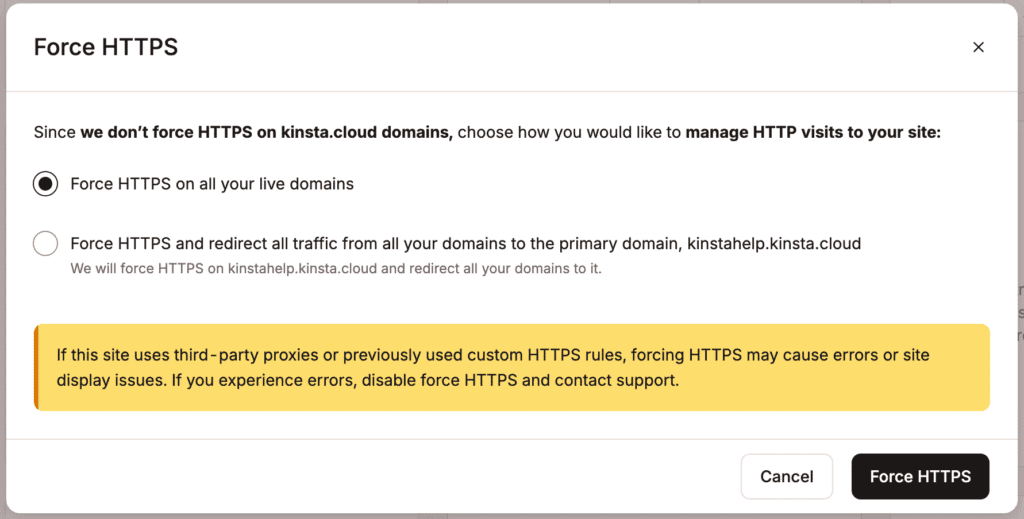
SSL and forcing HTTPS
At Kinsta, our Cloudflare integration includes free SSL certificates for all verified domains. When you add and point your domain to Kinsta, a free SSL certificate is generated.
If you need to update any URLs from HTTP to HTTPS, you can do that with the Search and replace tool in MyKinsta.
The last step is to force HTTPS by redirecting HTTP to HTTPS, which you can do on your site’s Tools tab in MyKinsta.