Edge Caching
Edge caching saves your Kinsta site/page cache (which is only saved to your site’s data center) to any of Cloudflare’s global network of 300+ data centers. When your site visitors load your website in their browser, cached responses will be delivered from the location closest to them, increasing performance and website speed by up to 40%.
Edge caching is included for free with all Kinsta plans. Unlike some similar caching solutions, there’s no additional cost to you, and edge caching doesn’t require a separate plugin.
By default, the cache expires every 24 hours; you can change the expiration time, and you can manually clear the cache. If you manually clear the cache either in MyKinsta, through the WordPress dashboard, or using WP-CLI, it is limited to 1 request every 10 seconds.
Things to know before enabling edge caching
- Edge caching does not currently respect narrow-scope geolocation cache variations (near country borders, state, city). When IP Geolocation is enabled in MyKinsta (Sites > sitename > Tools > Geolocation), the cache is saved in each PoP location based on the location of the first visitor to request that particular page.
- Advanced Site Cache custom exclusions (such as combinations of custom cookies and URIs) are not respected by edge caching.
- You can enable edge caching if our Support team has not configured custom cache rules for your site that use custom cookies or geolocation.
Enable edge caching
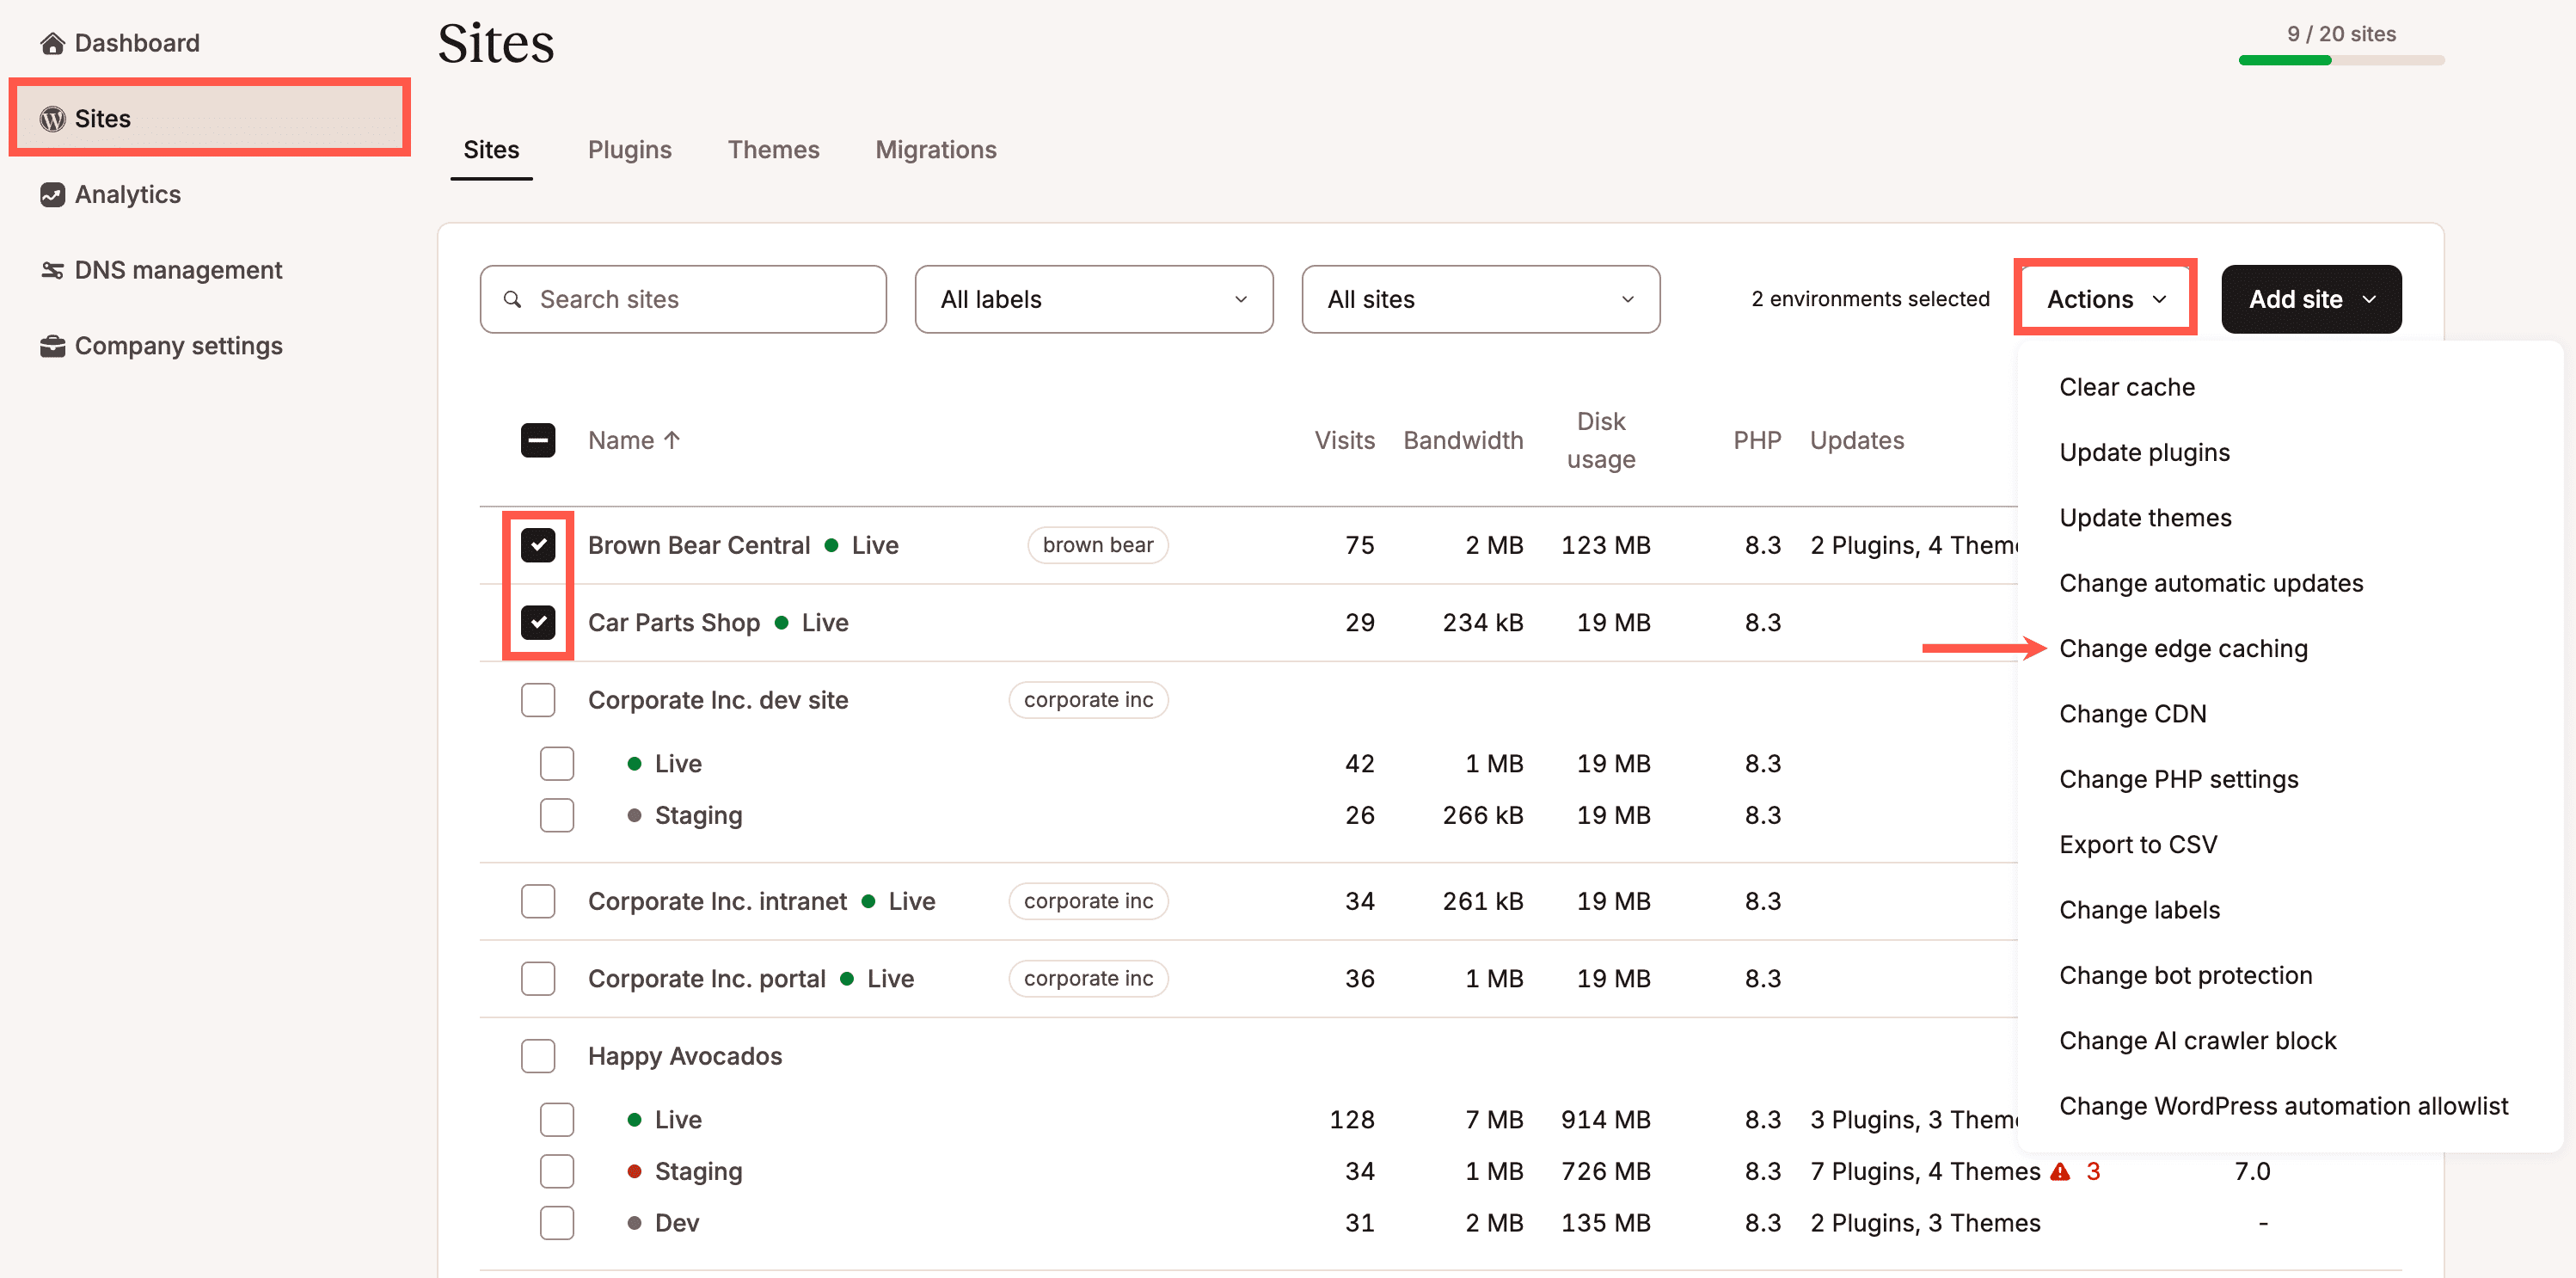
In MyKinsta, you can enable edge caching for one or multiple sites, including staging sites, simultaneously from the Sites page. Select the checkboxes next to the site(s) you want to enable edge caching for, click Actions, and choose Change edge caching.
Select Enable and click Change edge caching.
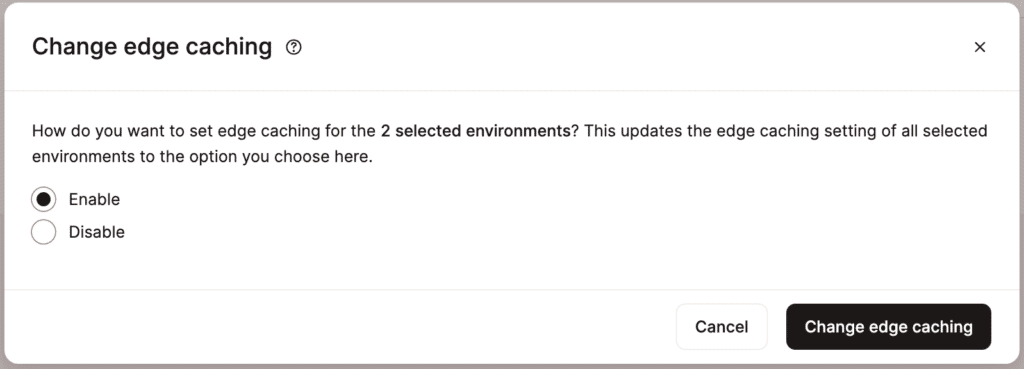
Once the process is complete, a success message will appear.
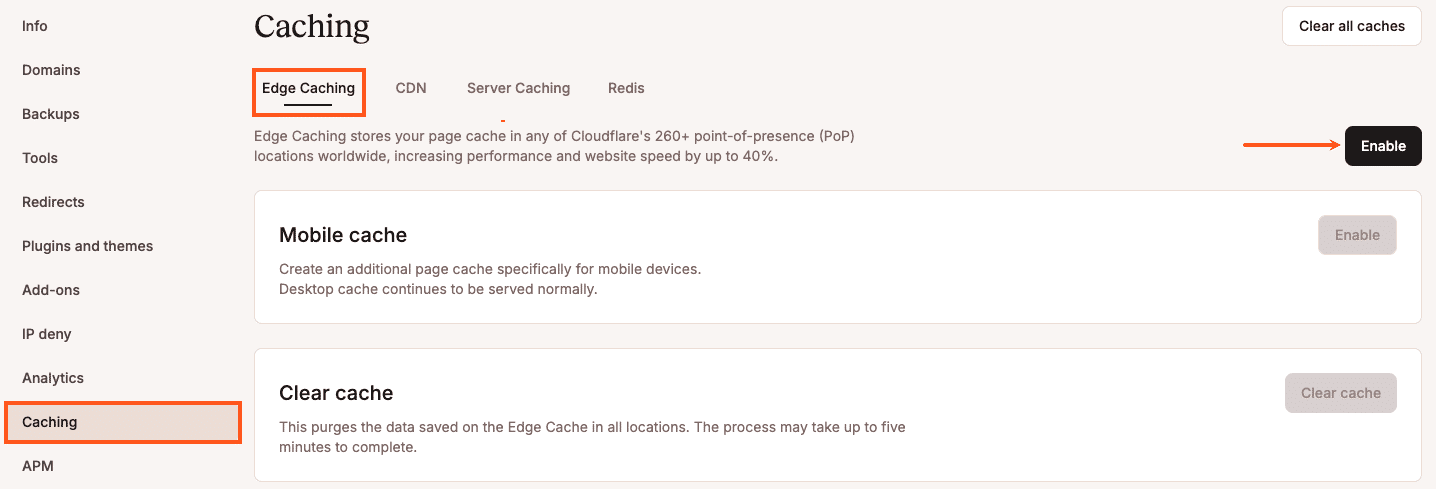
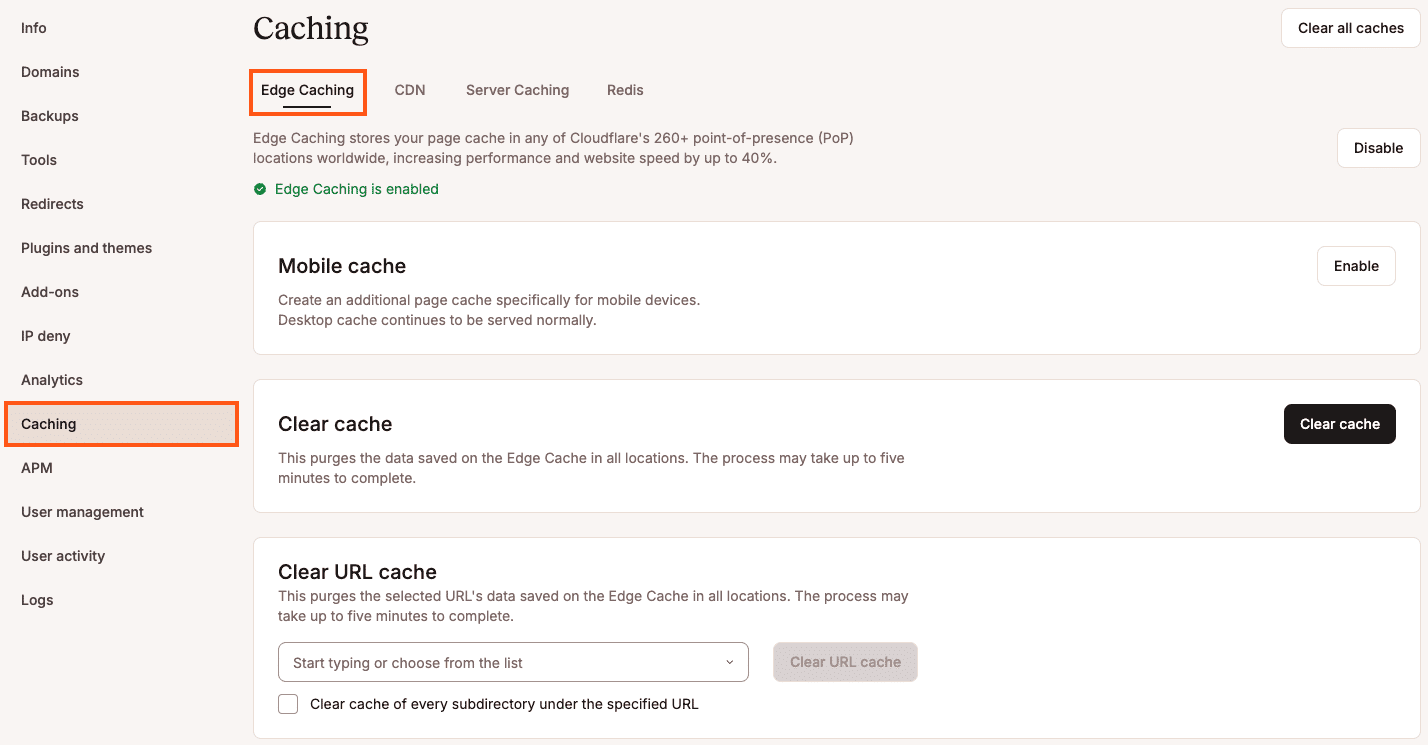
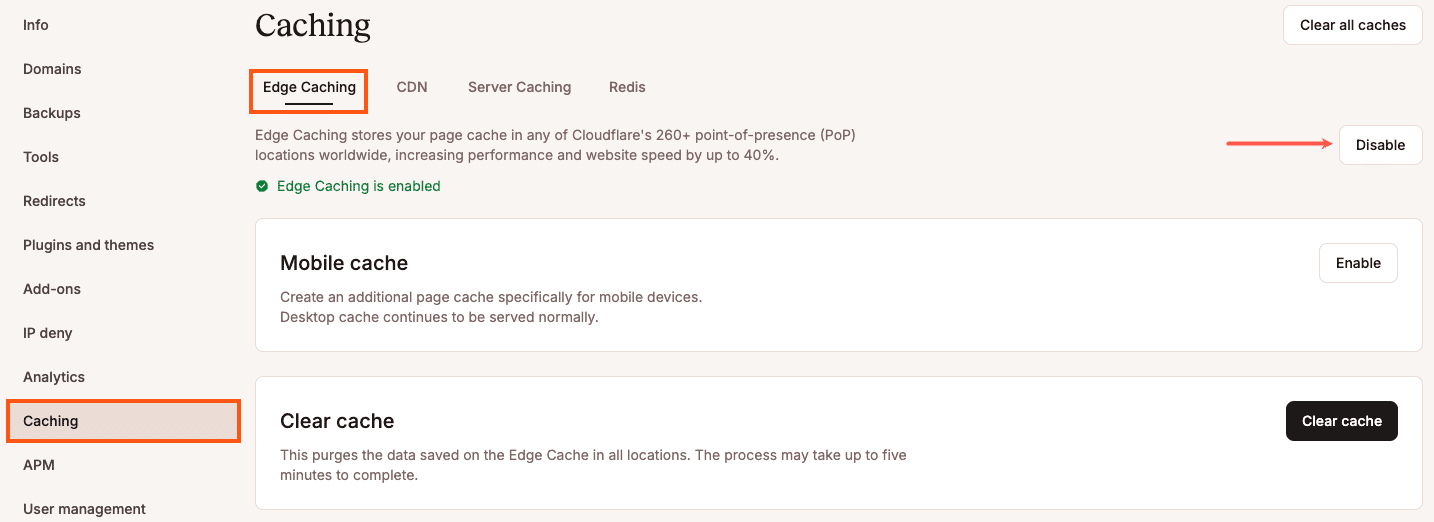
You can also enable edge caching for a single site within Sites > sitename > Caching > Edge Caching > Enable.
In the Enable Edge Caching modal/pop-up that appears, read through the list and click the Enable Edge Cache button if all looks well.
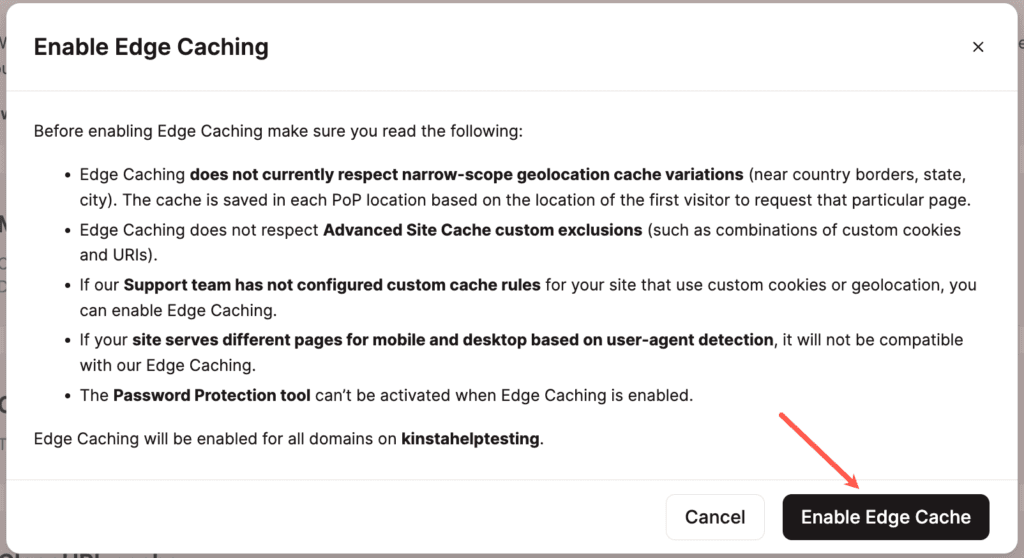
If we detect that custom cache rules have been added, a warning will be shown in the Enable Edge Caching modal. If you’re sure those rules will not conflict with edge caching, you can proceed by clicking on the Enable Edge Caching button. If you’re not sure, check with a developer to see if your site’s custom caching rules will be compatible with edge caching.
Once edge caching is enabled, you’ll see the Edge Caching settings.
Enable mobile cache
If your website detects mobile browsers and generates pages with markup unique to those devices, you can enable a mobile cache separate from the content for desktop users. If you are unsure about this, please consult with your site developer first.
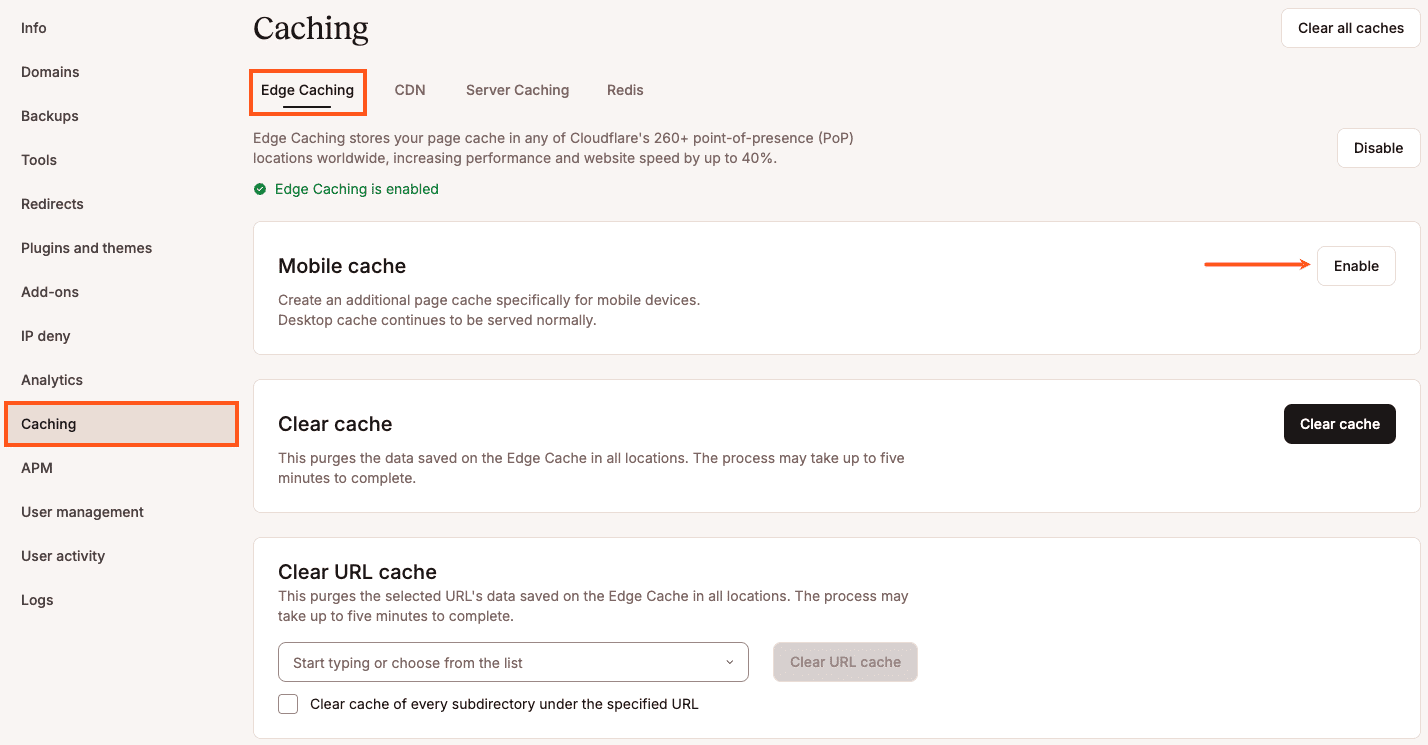
When edge caching is enabled, you can turn on mobile caching in your site’s Edge Caching settings (Sites > sitename > Caching > Edge Caching). Click the Enable Mobile Cache button to take advantage of edge caching for mobile devices.
Clear edge cache
There are a couple of ways you can clear your site’s edge cache. Note: If your theme or an active plugin on your site has built-in cache, we recommend clearing the cache there first.
Clear cache in MyKinsta
In MyKinsta, you can clear the server, CDN, and edge cache for one or multiple sites, including staging sites, simultaneously from the Sites page. This also clears the Redis object cache if you’ve added the Redis addon to your site.
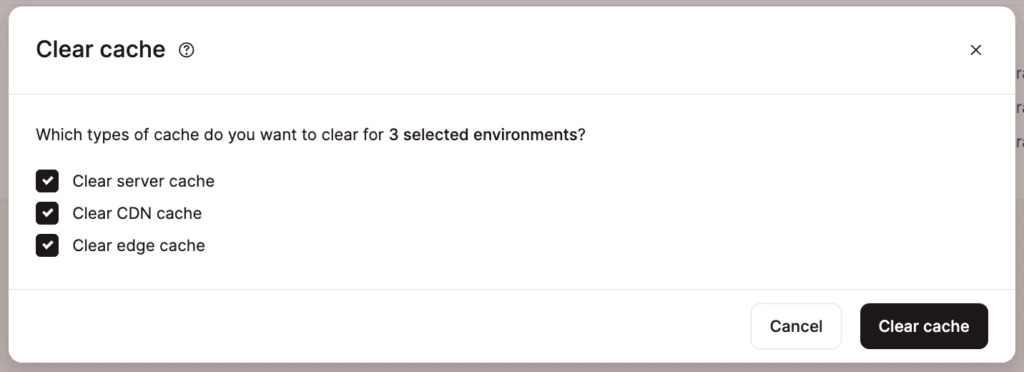
Select the checkboxes next to the site(s) you want to clear the cache for, click Actions, and choose Clear cache.

Select the types of cache you want to clear and click Clear cache.
Once the process is complete, a success message will appear.
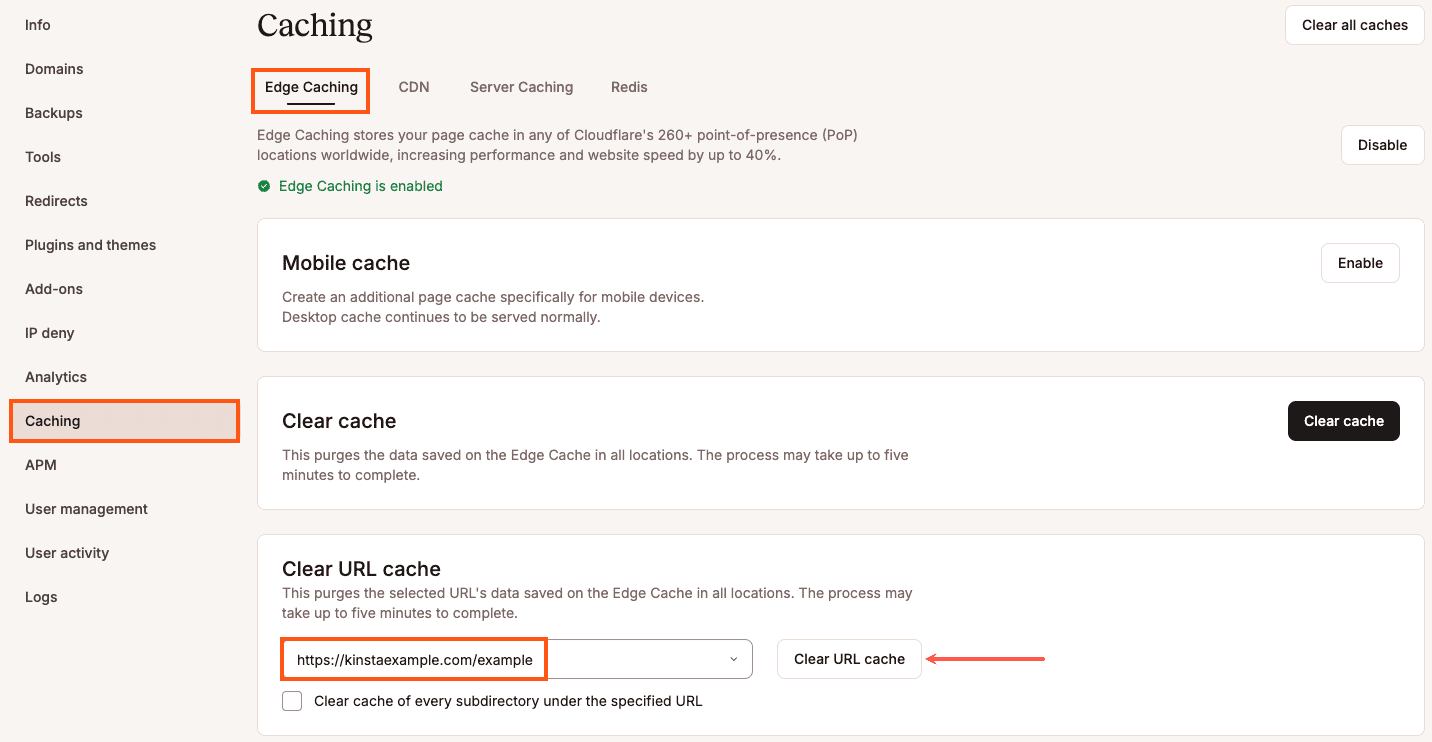
You can also clear the edge cache for a single site within Sites > sitename > Caching > Edge Caching > Clear cache.
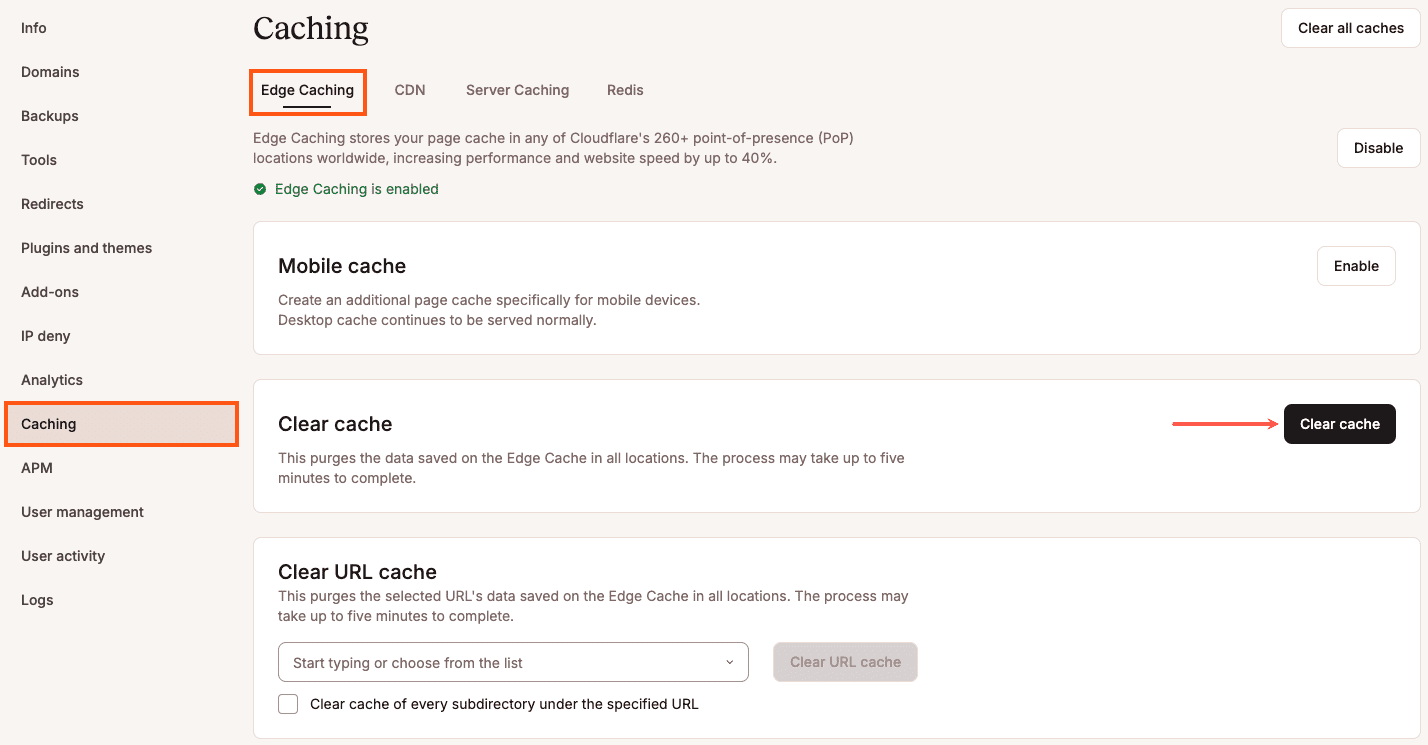
If you only need to clear specific URLs or paths, enter the URL in the Clear URL cache field in the format https://mydomain.com/path and click the Clear URL cache button. To also clear the cache for subdirectories under the URL, check the box next to Clear cache of every subdirectory under the specified URL.
Note: This only clears edge caching. If your site cache also needs to be cleared, you’ll need to clear that separately by going to Caching > Server Caching and clicking the Clear cache button.
Clear cache in your WordPress Dashboard
If the Kinsta Must Use (MU) plugin is installed, you can clear edge caching (and other types of cache) in your WordPress dashboard. Log in to your WordPress dashboard and do one of the following:
- Click the Clear All Caches button on the Kinsta Cache plugin page in your WordPress dashboard.
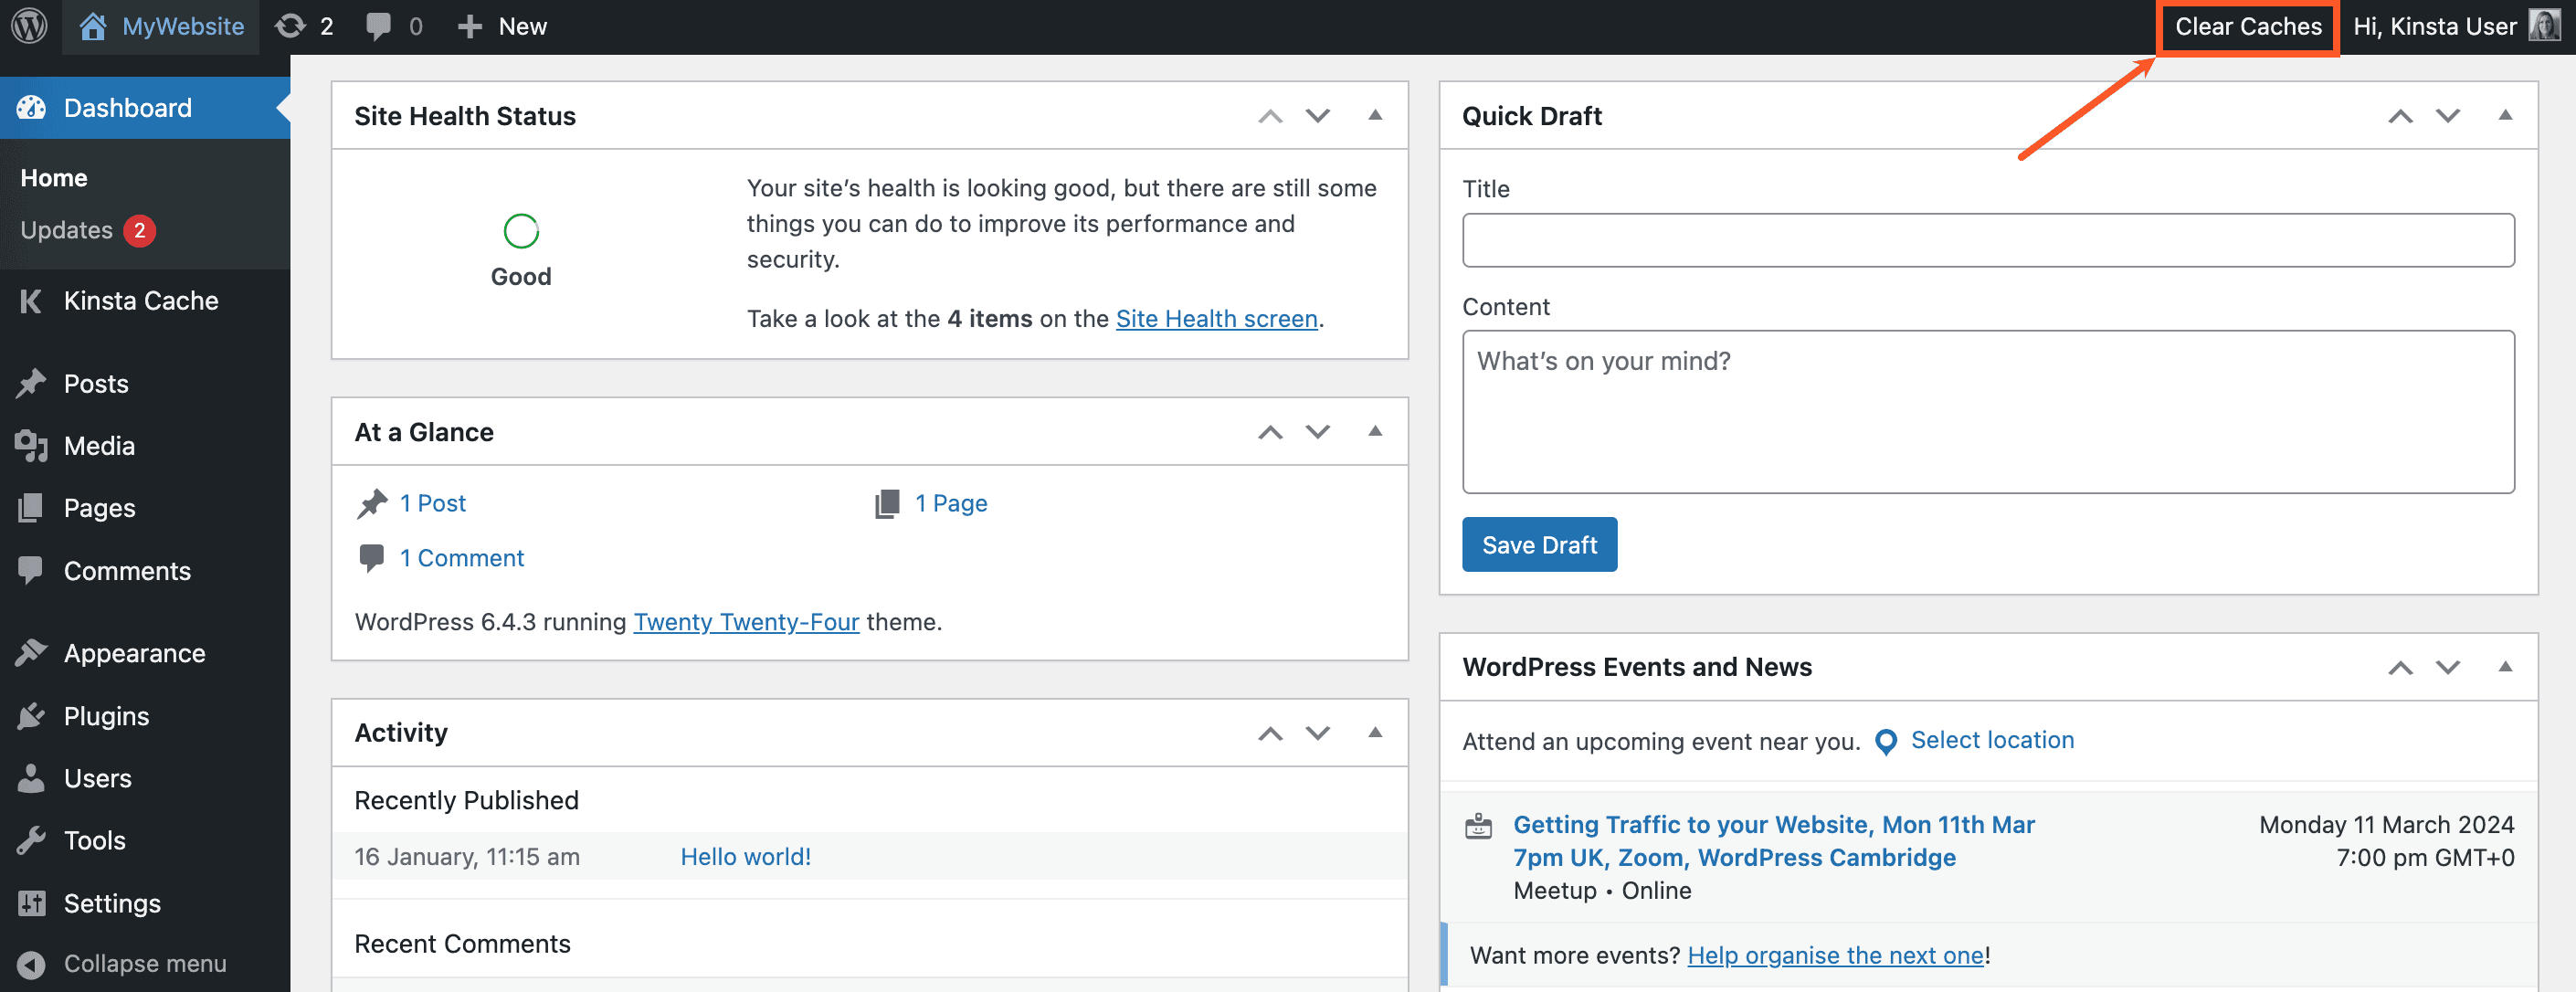
- Click the Clear Caches link on the WordPress admin toolbar.
Either of these methods will clear both edge caching and site cache.
If you would like the cache to be automatically cleared for specific URLs or paths when you make changes on your site, you can configure those in the Kinsta MU plugin Settings. Click Kinsta Cache in the left sidebar and add the URLs you want to purge when updates are made to your site. For more information, check out our guide on Adding Custom Caching URLs in the Kinsta MU plugin.
Clear cache with WP-CLI
If the Kinsta Must Use (MU) plugin is installed, you can clear edge caching (and other types of cache) with WP-CLI.
Connect to your server with SSH and navigate to your site’s document root:
cd publicIf the Kinsta Must Use (MU) Plugin is installed on the site, you can clear the full-page cache and the edge cache (when edge caching is enabled) with this command:
wp kinsta cache purgeTo clear all cache, add the --all flag:
wp kinsta cache purge --allEdge cache expiration
The cache is set to expire every 24 hours by default, but you can adjust this to be longer if needed. To change the cache expiration:
- Go to MyKinsta > Sites > sitename > Caching > Server Caching.

Change the cache expiration in the Caching tab in MyKinsta. - Select Change cache expiration, in the modal/pop-up that appears, select your desired cache expiration, and click Change expiration.

Select the cache expiration time.
This changes the server cache and edge cache expiration. For sites that don’t often change, having a longer cache expiration can be beneficial for performance.
Test edge caching
Before testing your site with a website speed test tool, we recommend inspecting the HTTP headers of a page to confirm it is loading from the edge cache. Below are a few ways to check your site’s HTTP headers.
Check edge caching with Kinsta’s HTTP status and redirect checker
You can check the HTTP status and redirect chain of any URL with our free HTTP status and redirect checker. Using this tool, you can review the response headers to check whether edge caching is working.
Choose a page that should be served from the edge cache and copy the URL from your browser’s address bar. Paste this URL into the redirect checker tool and run the check.
You should see results like this:
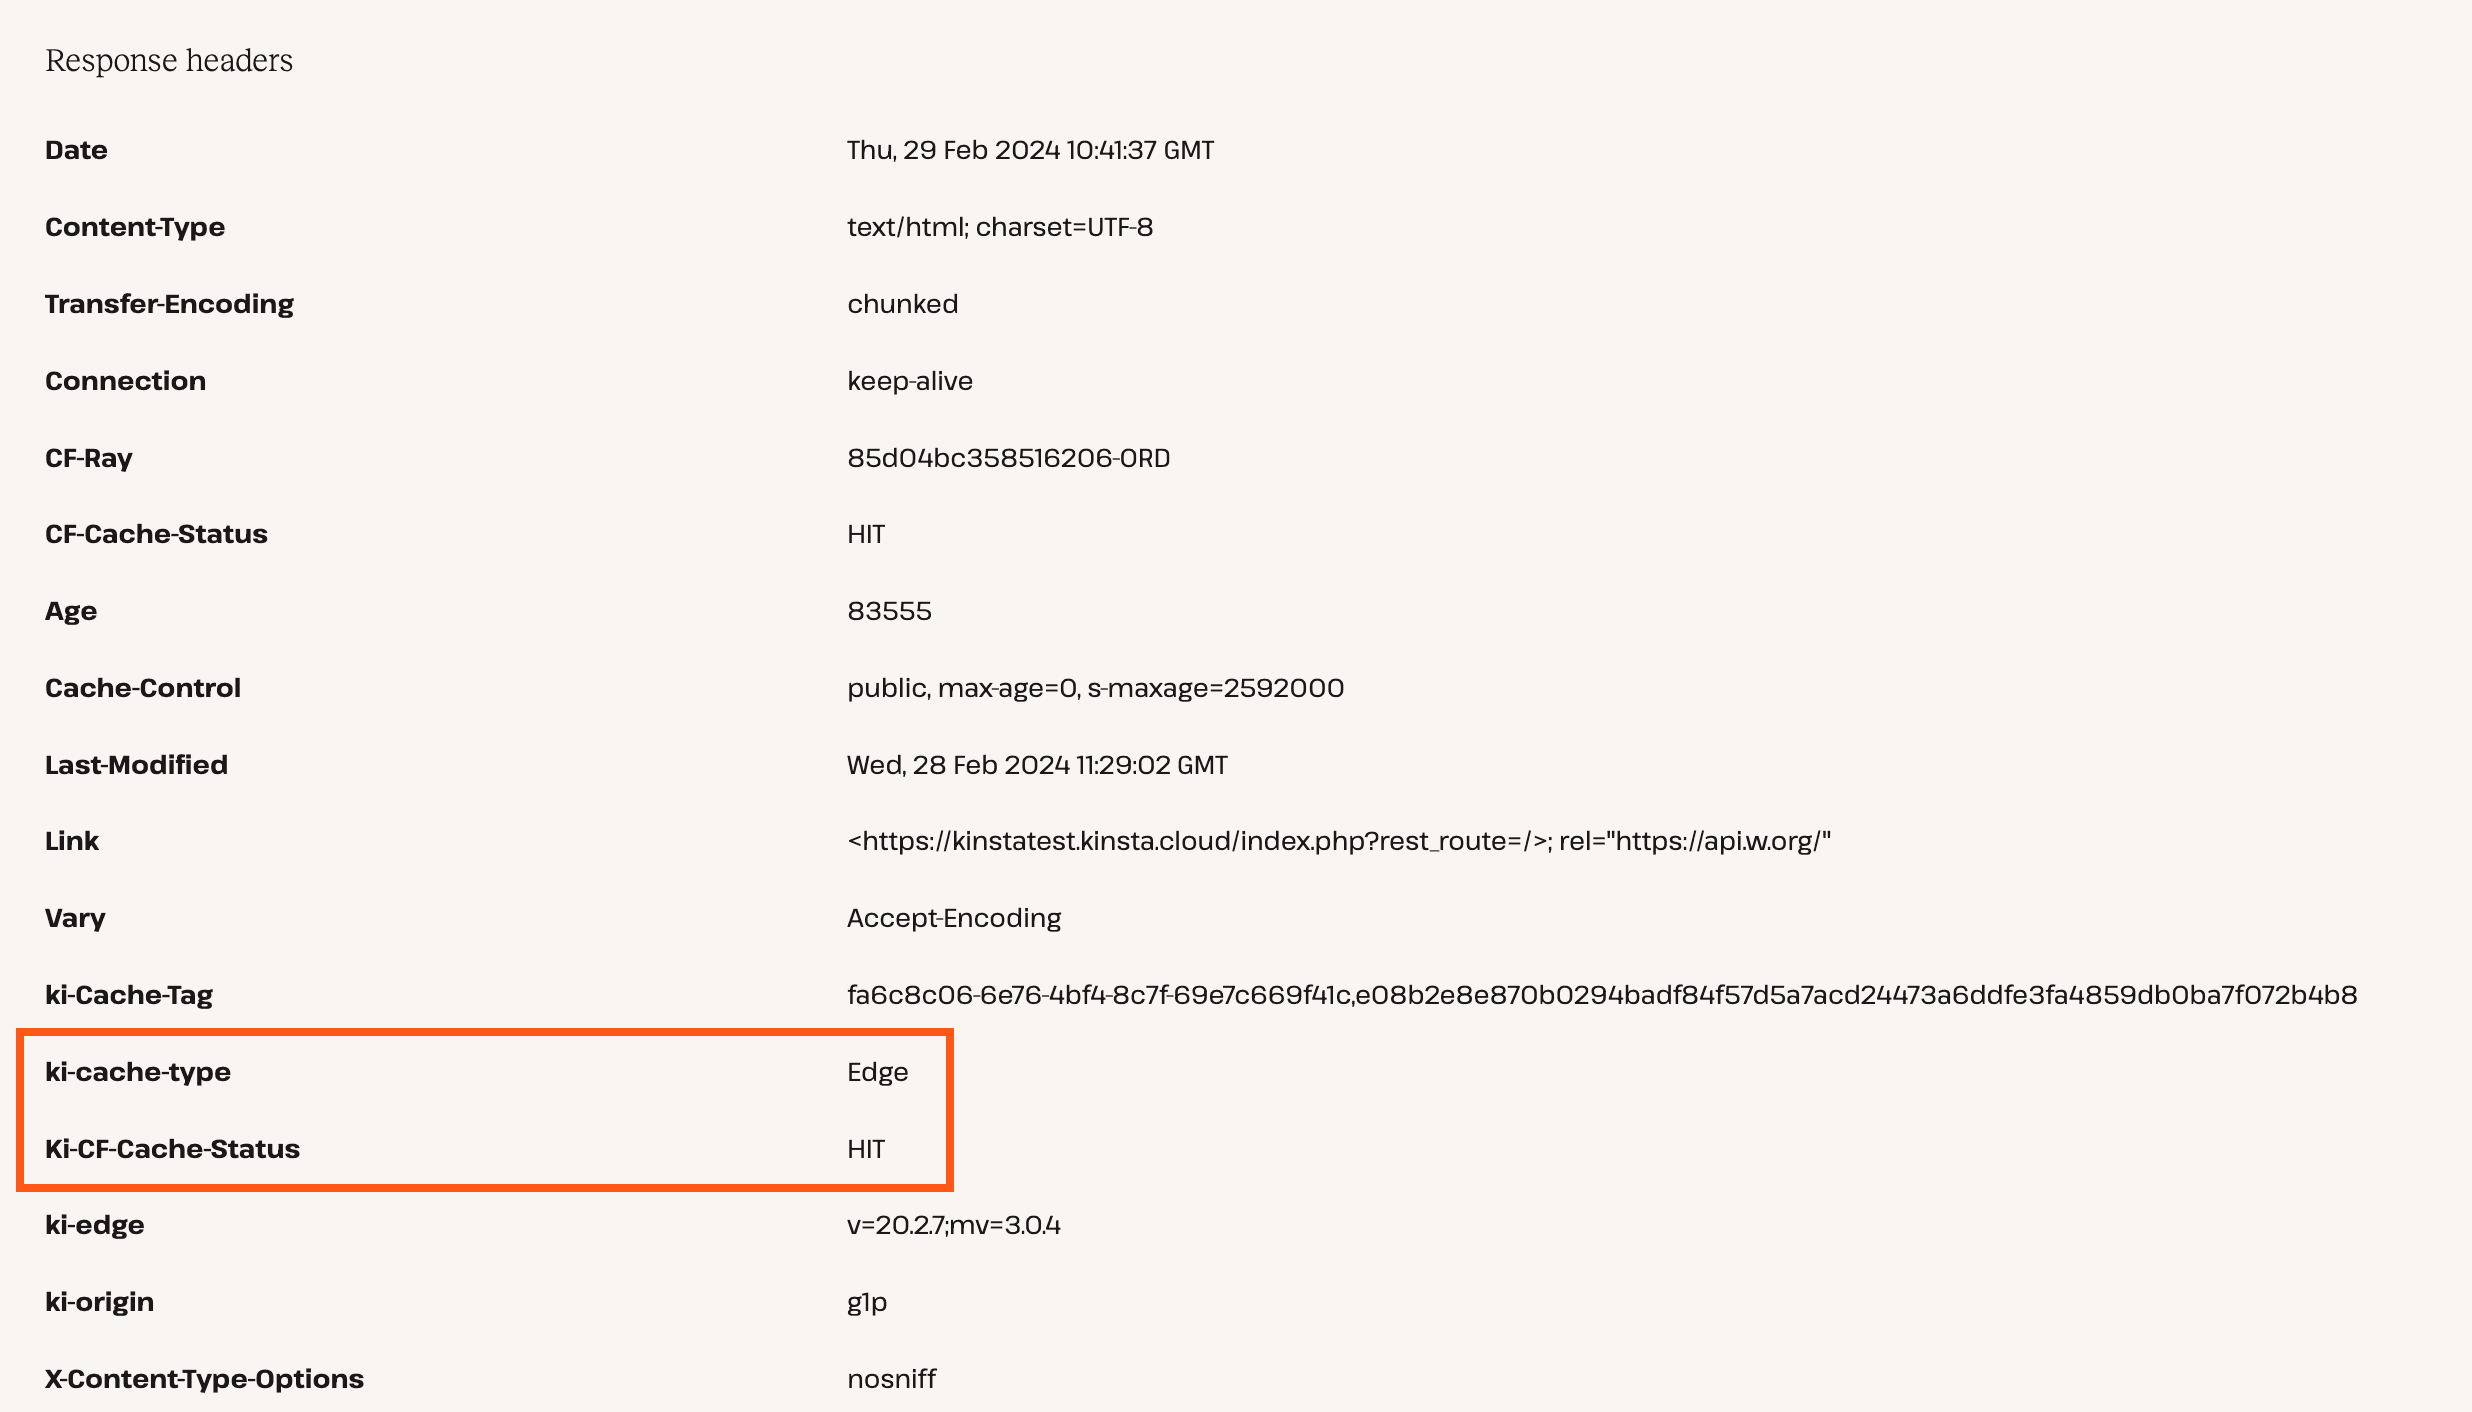
Scroll down until you see Response headers. In this section, there are two headers to check the values of: ki-cache-type and Ki-CF-Cache-Status. The ki-cache-type header should have a value of Edge. The Ki-CF-Cache-Status header should have a value of HIT or SAVING.
Check edge caching with a web browser
You can use your web browser’s built-in developer tools to check whether edge caching is working. For this example, we’ll use Google Chrome to inspect HTTP headers for our site’s homepage. To launch the Chrome developer tools, right-click anywhere on the page and click Inspect.

Next, click on the Network tab and reload the page. As the page loads, you’ll see a list of the requests on the left-hand side of the developer tools window. Click on the initial page request to verify that edge caching is working correctly.
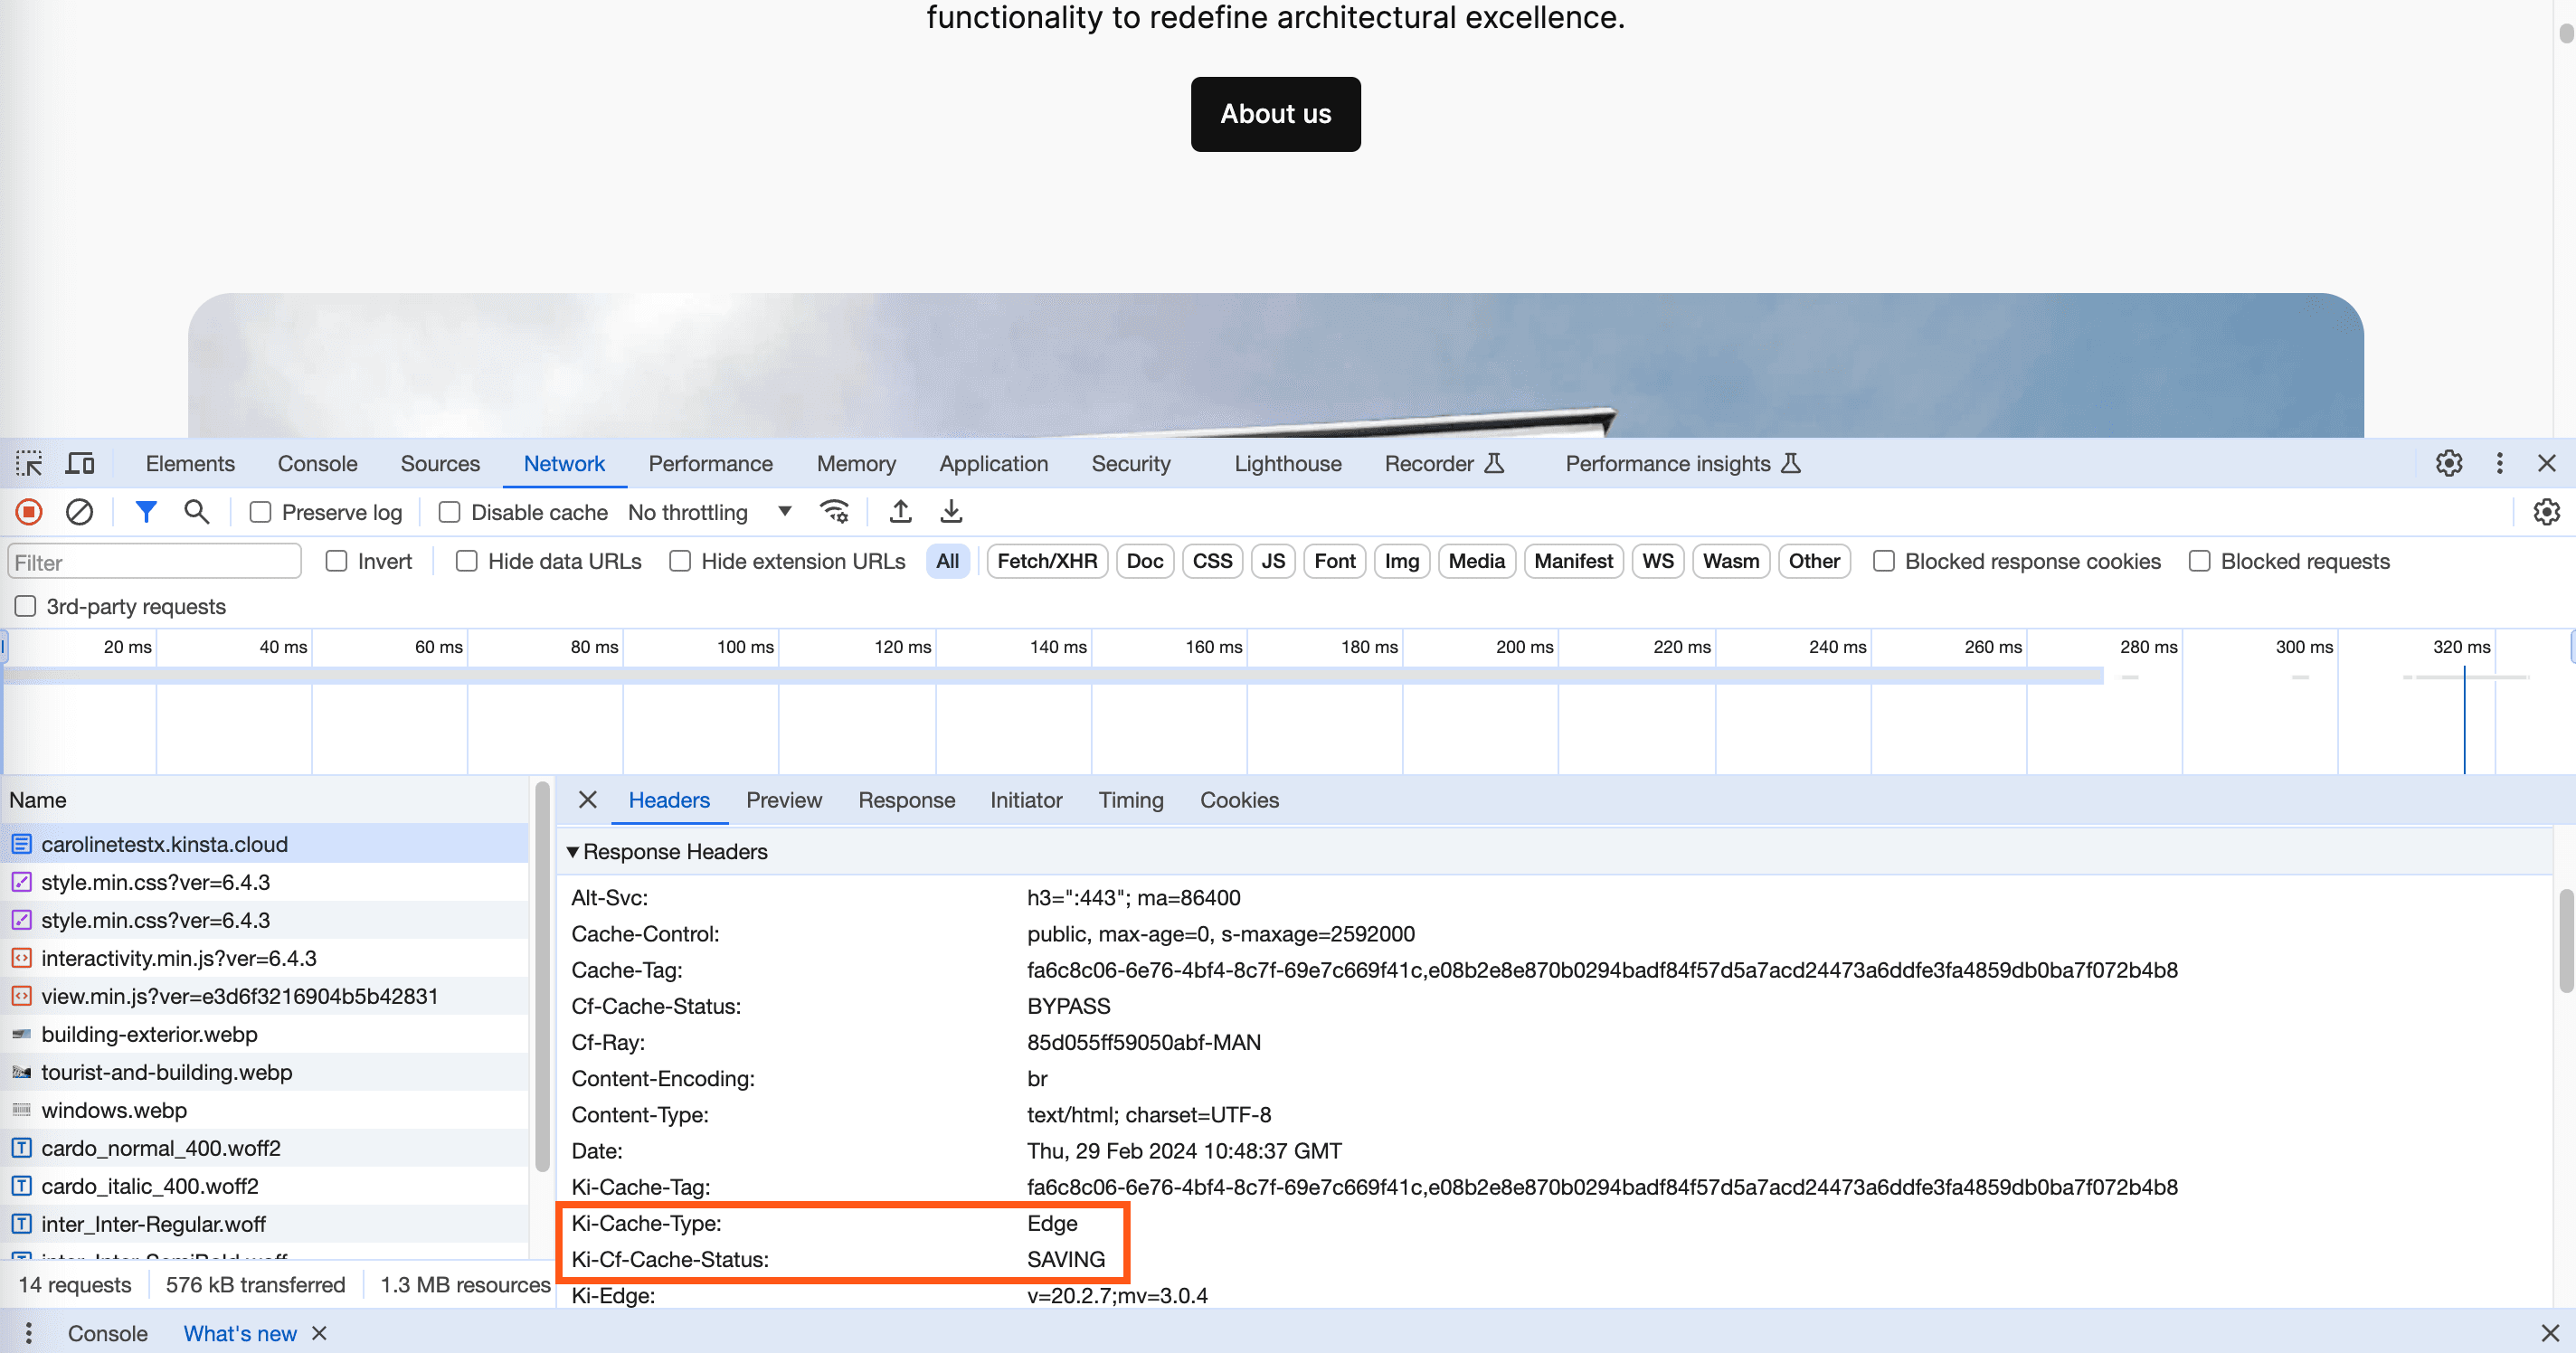
In the Headers tab, scroll down until you see the Response Headers. In this section, there are two headers to check the values of: ki-cache-type and Ki-CF-Cache-Status. The ki-cache-type header should have a value of Edge. The Ki-CF-Cache-Status header should have a value of HIT or SAVING.
Check edge caching in Terminal
If you’re familiar with using Terminal (command line), you can also check HTTP headers with the curl command. Use the command below and substitute the URL at the end of the command with your site’s URL.
curl -L -s -o /dev/null -D - https://kinstaexample.comAfter running this command, you should get a response like this:
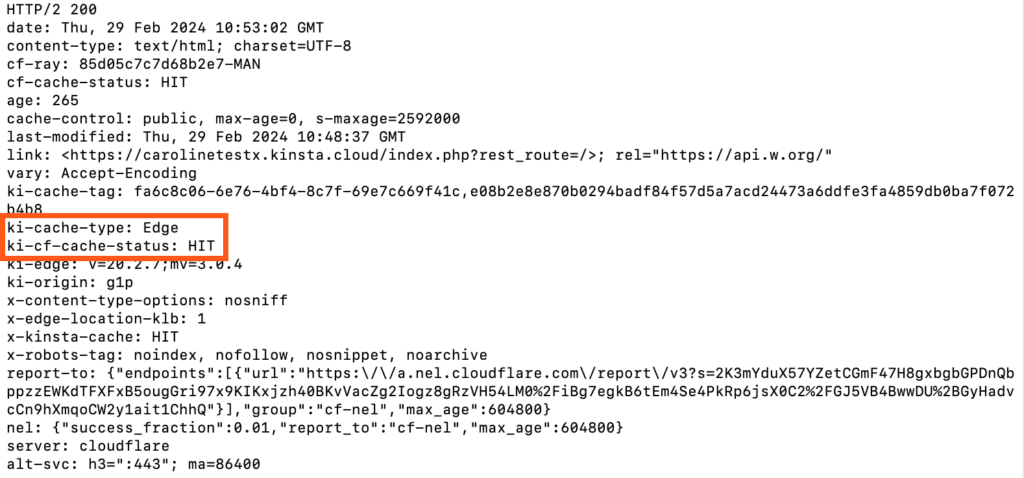
There are two headers to check the values of: ki-cache-type and Ki-CF-Cache-Status. The ki-cache-type header should have a value of Edge. The Ki-CF-Cache-Status header should have a value of HIT or SAVING.
Troubleshooting edge caching
If edge caching doesn’t seem to be working, there are a few things you can check for:
- The value of the
X-Kinsta-Cacheheader: Edge caching only caches the response if it was already cached in Site cache (full page caching). If the value ofX-Kinsta-Cacheisn’tHIT, then the page isn’t cached in Site cache and cannot be cached by edge caching. - If you expect the page to be cached and it isn’t one commonly excluded from the cache (e.g. wp-admin, cart, my-account, checkout, etc.), you can check with our Support team to make sure the page doesn’t contain an excluded URL pattern or cookie in the site’s Nginx settings.
Disable edge caching
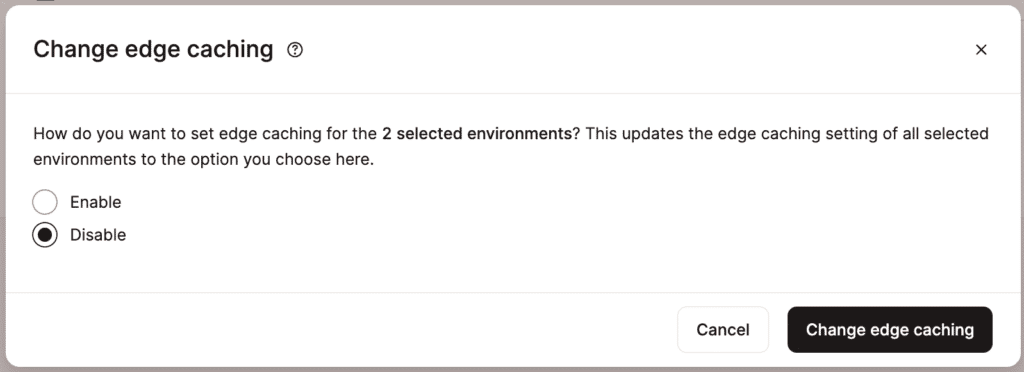
In MyKinsta, you can disable edge caching for one or multiple sites, including staging sites, simultaneously from the Sites page. Select the checkboxes next to the site(s) you want to disable edge caching for, click Actions, and choose Change edge caching.
Select Disable and click Change edge caching.
Once the process is complete, a success message will appear.
You can also disable edge caching on a single site within Sites > sitename > Caching > Edge Caching > Disable.
Important notes
- Edge caching will be enabled by default in the near future.
- Clearing edge cache in all of Cloudflare’s data centers may take 2-5 minutes to fully complete. Once you see the completion notice in MyKinsta, please allow 2-5 minutes for the cache to be cleared in all data centers. If you have a page that needs to be updated more often, our Support team can help you exclude that page from edge caching.
- Edge caching can be enabled on live sites and Premium Staging Environments. It cannot be enabled for Standard Staging Environments.
- Edge caching is incompatible with narrow-scope geolocation cache variations or advanced site cache custom exclusions like combinations of custom cookies and URIs.
- Edge caching serves your Kinsta site/page cache but does not serve static assets like images, JavaScript files, and CSS files. Kinsta CDN, which is independent of edge caching, can be enabled to serve your site’s static assets. If Kinsta CDN is enabled, your site has an additional caching layer managed separately from edge caching. The CDN cache can be cleared with the Kinsta MU plugin, with WP-CLI (if the Kinsta MU plugin is installed), or by clearing the CDN cache in MyKinsta.
- We have caching rules in place for edge caching to work with standard WordPress, BuddyPress, WooCommerce, and Easy Digital Downloads sites. We exclude common private URIs and cookies, so your WordPress dashboard, forums, cart pages, or anywhere a user is logged in will automatically bypass caching. If you’re using a customized WordPress setup, there may be additional sections of your site that need to bypass the cache or additional rules that need to be added for compatibility. If that is the case, you can always contact our Support team.
- Edge caching will not work for requests that return a
Set-CookieResponse Header. By default, theSet-Cookieresponse header is removed from cached responses in all newly created sites at Kinsta. ASet-Cookieresponse header is typically used to provide data intended for a specific client. Caching that response header could show visitors data that isn’t intended for them. - When updating pages in WordPress, there’s no need to manually clear the Site cache or edge caching; both will be automatically cleared.
- If you use your own Cloudflare account for your site, you can use edge caching if you do not use Cloudflare’s Automatic Platform Optimizations (APO). These two caching methods are incompatible, so you’ll want to use one or the other, not both.
- If you have blocked malicious IP addresses with the IP Deny tool in MyKinsta and do not want those blocked IP addresses to reach even a cached version of your site or be counted in analytics, do not enable edge caching. IP addresses blocked with the IP Deny tool are blocked at the Nginx level, not at the Cloudflare level. Since the Cloudflare level doesn’t have the details about IP addresses blocked at the Nginx level, when edge caching is enabled, a cached version of your site could be served to a blocked IP address from a Cloudflare data center. If you do not care whether or not a blocked IP address reaches a cached version of your site, you can enable edge caching. Note: visits to cached pages are counted in analytics, even if the IP address is blocked at the Nginx level.
- Edge caching is incompatible with geolocation-based blocking (geo-blocking), such as only allowing certain countries access to your site. Geo-blocking happens at the Nginx level, not at the Cloudflare level. Because Cloudflare doesn’t have your site’s geo-blocking details, when edge caching is enabled, a cached version of your site could be served to a blocked location from a Cloudflare data center. If you do not care whether or not a blocked location reaches a cached version of your site, you can enable edge caching.
Performance data
During our beta phase, we gathered performance data from 91 sites to test the speed improvements of our new edge caching feature. Here are the results:
- The average HTML load time for a site using our page cache (
X-Kinsta-Cache: HIT) was 0.4909 seconds. The average load time with edge caching was 0.2239 seconds, a 45.6% improvement in speed, or almost cutting load time for HTML in half! - The average TTFB difference was 51% (0.4025 – 0.2069).
Summary
If you want a way to speed up your site, give edge caching a try. It makes serving cached content from multiple data centers possible with minimal setup and no additional plugin required.