Site Management
You can manage many aspects of your site in MyKinsta, including contacting our Support team for assistance with tasks like moving a site to a new location or increasing the max upload file size.
Bulk actions
To save you the time and effort of updating and changing sites individually, you can use bulk actions to perform multiple actions on multiple sites, including staging sites, simultaneously from the Sites list. Within the Sites list, select the required sites, click Actions, and choose from the following to update all selected sites simultaneously:
- Clear cache: This allows you to clear the server, CDN, and Edge Cache.
- Update plugins: This shows a list of plugins with available updates so you can select which to update. Only plugins that have available updates are shown.
- Update themes: This shows all of the themes with available updates so you can select which to update. Only themes that have available updates are shown.
- Change automatic updates: This allows you to enable or disable WordPress auto-updates or Kinsta automatic updates for your plugins and themes.
- Change edge caching: Use this option to enable or disable Edge Caching.
- Change CDN: Use this option to enable or disable the Kinsta CDN.
- Change PHP settings: This allows you to change the PHP version and enable or disable Automatic PHP updates.
- Export to CSV: Exports a list of selected sites to a CSV file.
- Change labels: Use this option to update the site labels.

Search and filter sites
Within the WordPress sites list, you can search for a specific site, filter by the site label, or filter by plugin and theme updates. The plugin and theme filter allows you to filter by the following:
- Update available: Shows all sites that have a plugin or theme update available.
- Plugin update available: Shows all sites that have plugin updates available.
- Theme update available: Shows all sites that have theme updates available.
- Vulnerable: Shows all sites that have vulnerable plugins or themes, which require an update for security purposes.

Rename a site in MyKinsta
With Kinsta’s site renaming tool, you can change the display name of your Kinsta site in MyKinsta.
This tool is useful if you’ve recently changed your WordPress site’s domain name or rebranded your business and want the name in MyKinsta to reflect that change.
The site renaming tool is available for the Company Owner, Company Administrator, Company Developer, and Site Administrator (learn more about user roles in MyKinsta).
Here’s how you can use the site renaming tool to rename your Kinsta site.
In MyKinsta, navigate to Sites > sitename > Info, and click the edit (pencil) icon next to the Site name.

You can also rename your site from your Sites list by clicking the kebab (three-dot) icon and selecting Rename site in the menu that appears.

Next, enter a new name for your site, and click Rename site.

The name change takes place immediately, and your site’s new name will appear in the MyKinsta top navigation bar and the WordPress Sites list.
Reset a WordPress site
You can reset your site to reinstall WordPress while keeping some of the site configuration, such as the domains and site options that were set when the site was created. Note that resetting is only available for sites with WordPress installed. If the site is empty (without WordPress), the reset option will not be available. When you reset a site:
- It removes all of the WordPress files, the database, and all standard and premium staging environments and installs a new WordPress.
- The PHP threads and memory per thread within PHP performance are retained, including any add-ons.
- Your backups and activity log are retained.
- Your domain name(s) are also retained; therefore, no DNS changes are required unless you change the domain.
- Redirects are removed and need to be added again if still required.
- You cannot configure the site options that you selected when the site was created. For example, if you selected Install Yoast SEO when the site was first created, this option remains enabled when you reset the site and cannot be changed.
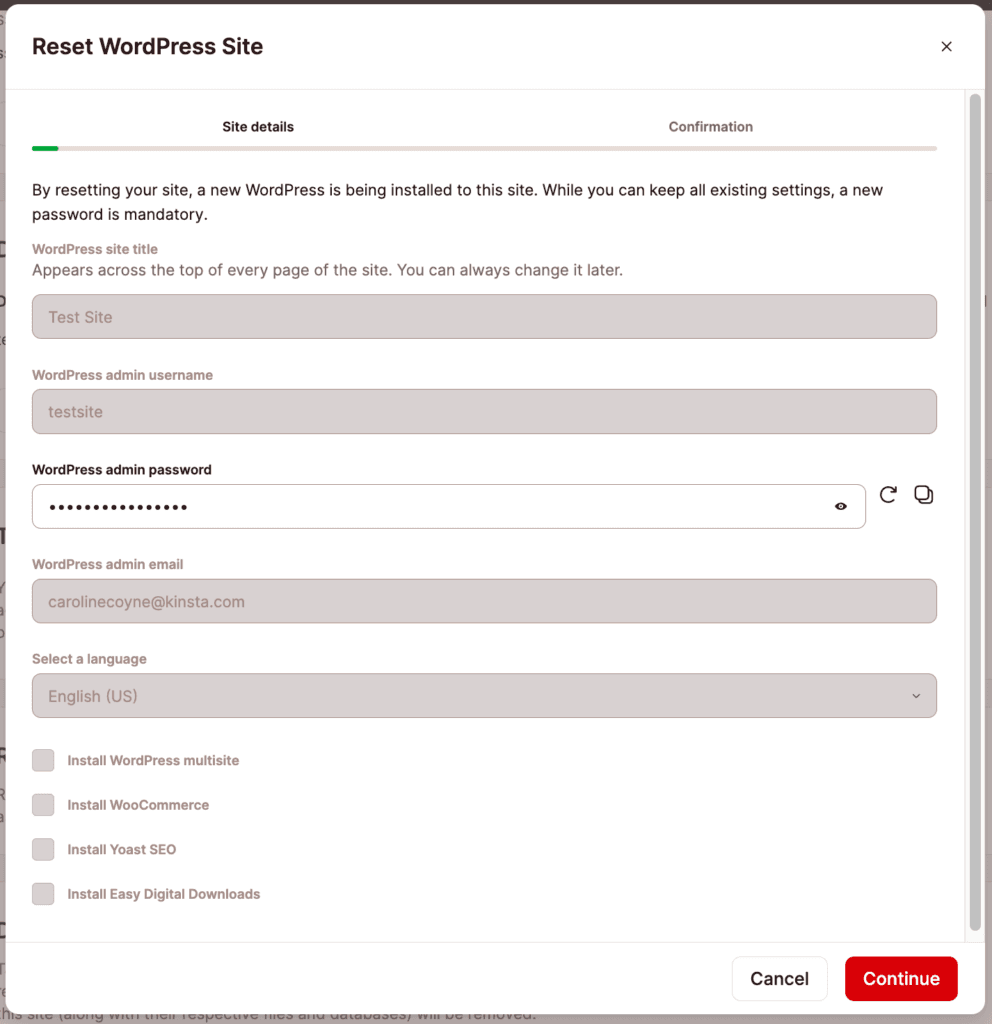
- You must set a new WordPress admin password.
- Kinsta performs a system backup before the site reset so you can restore your site if required.
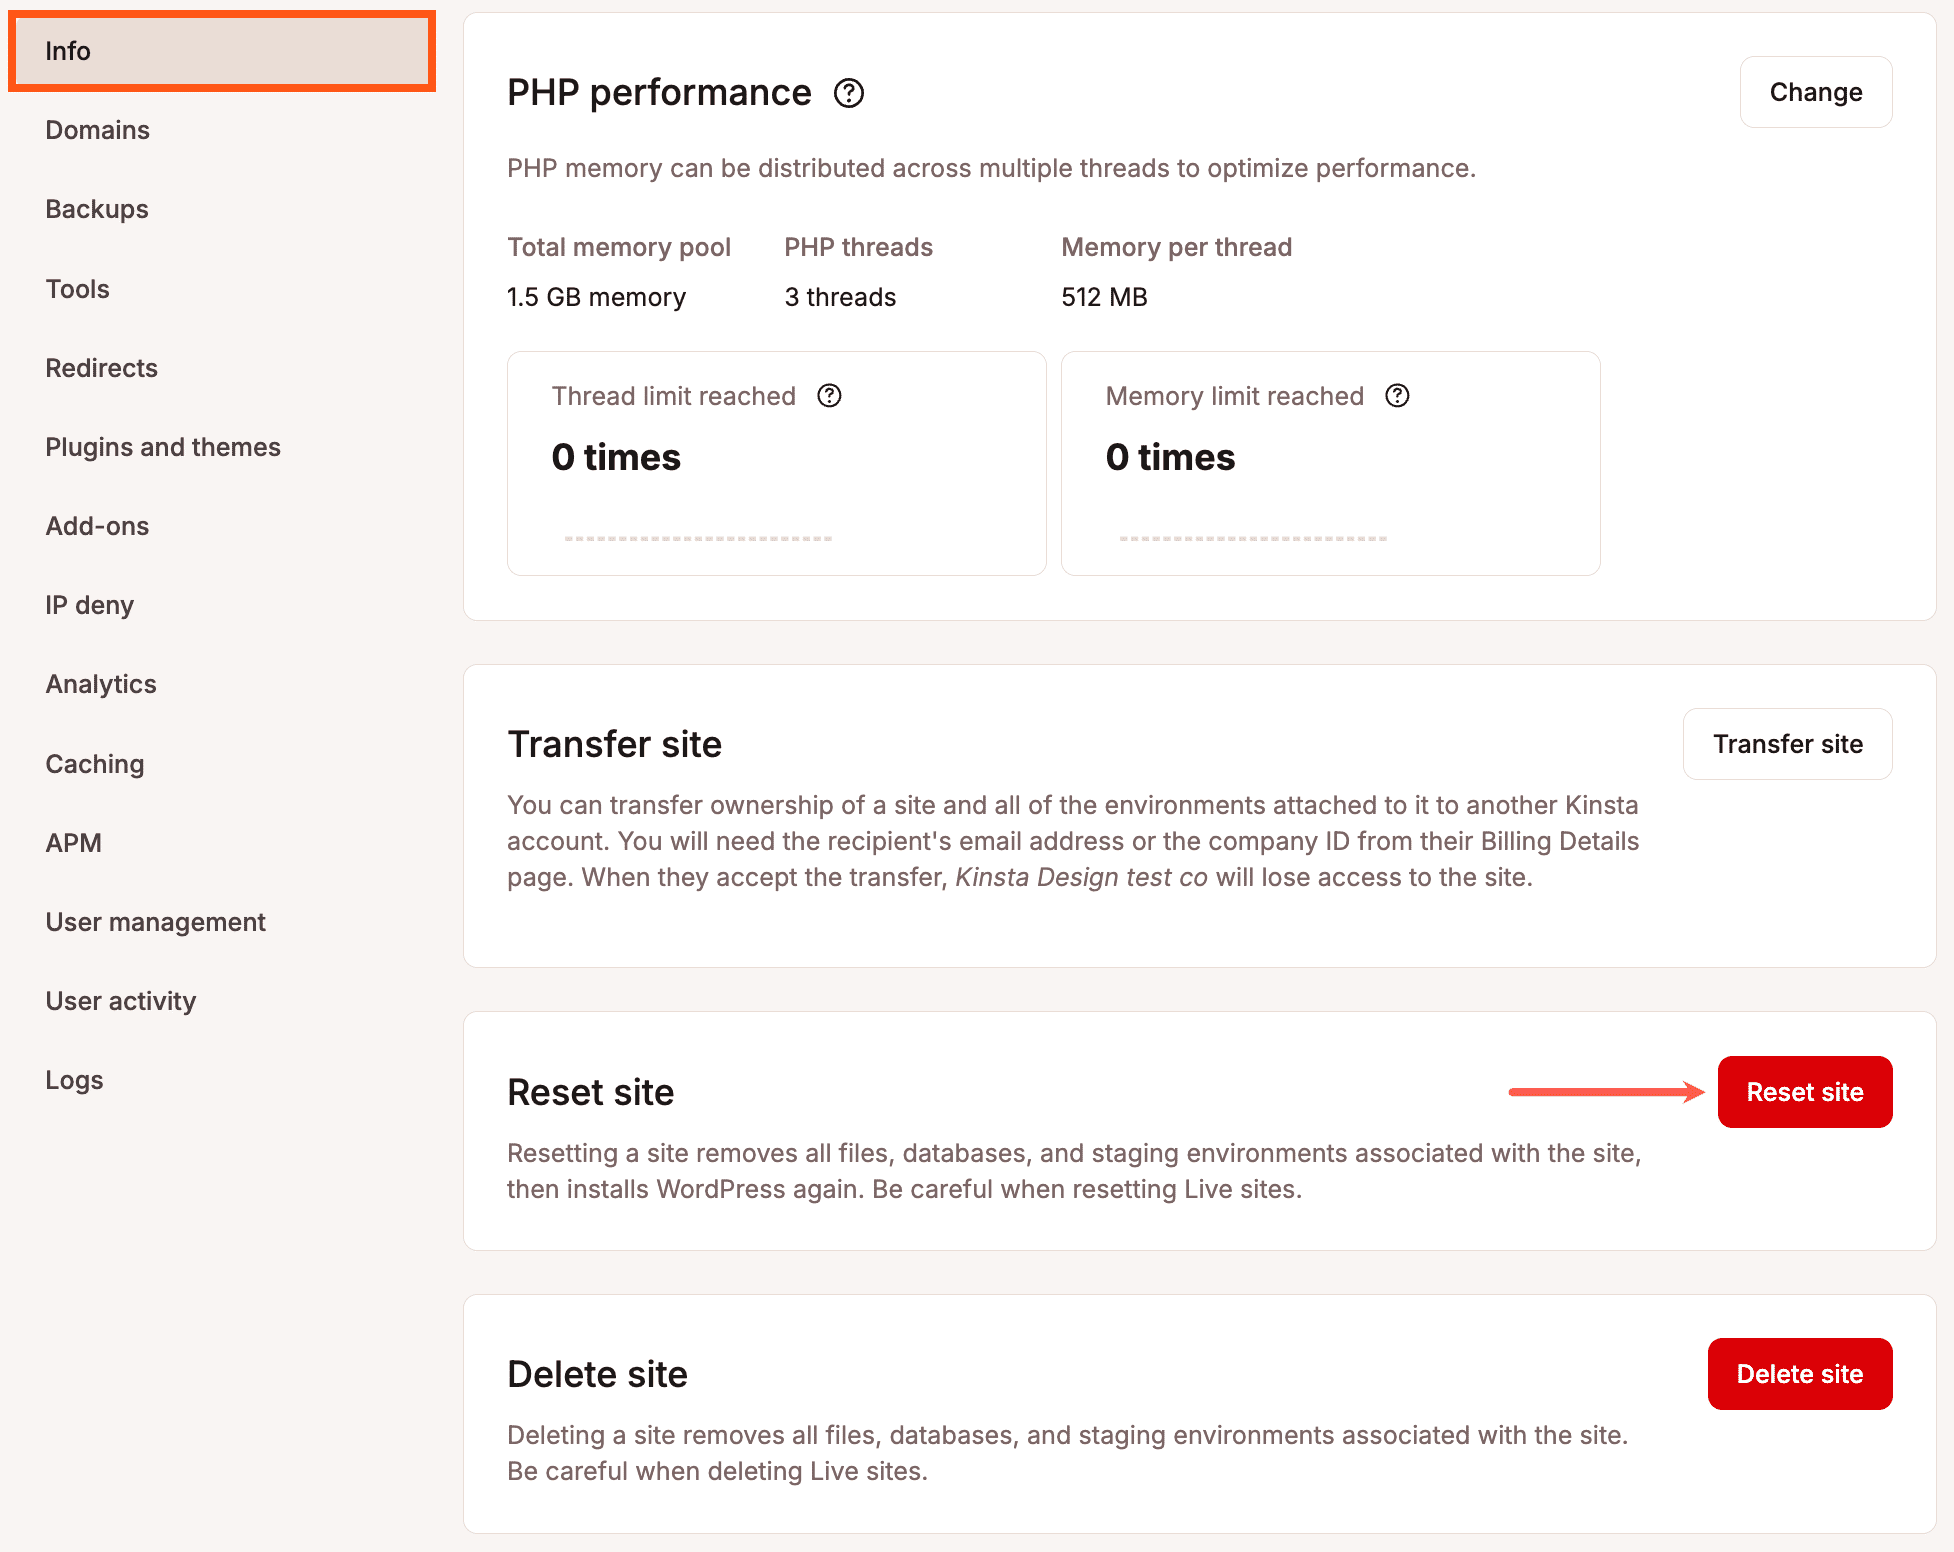
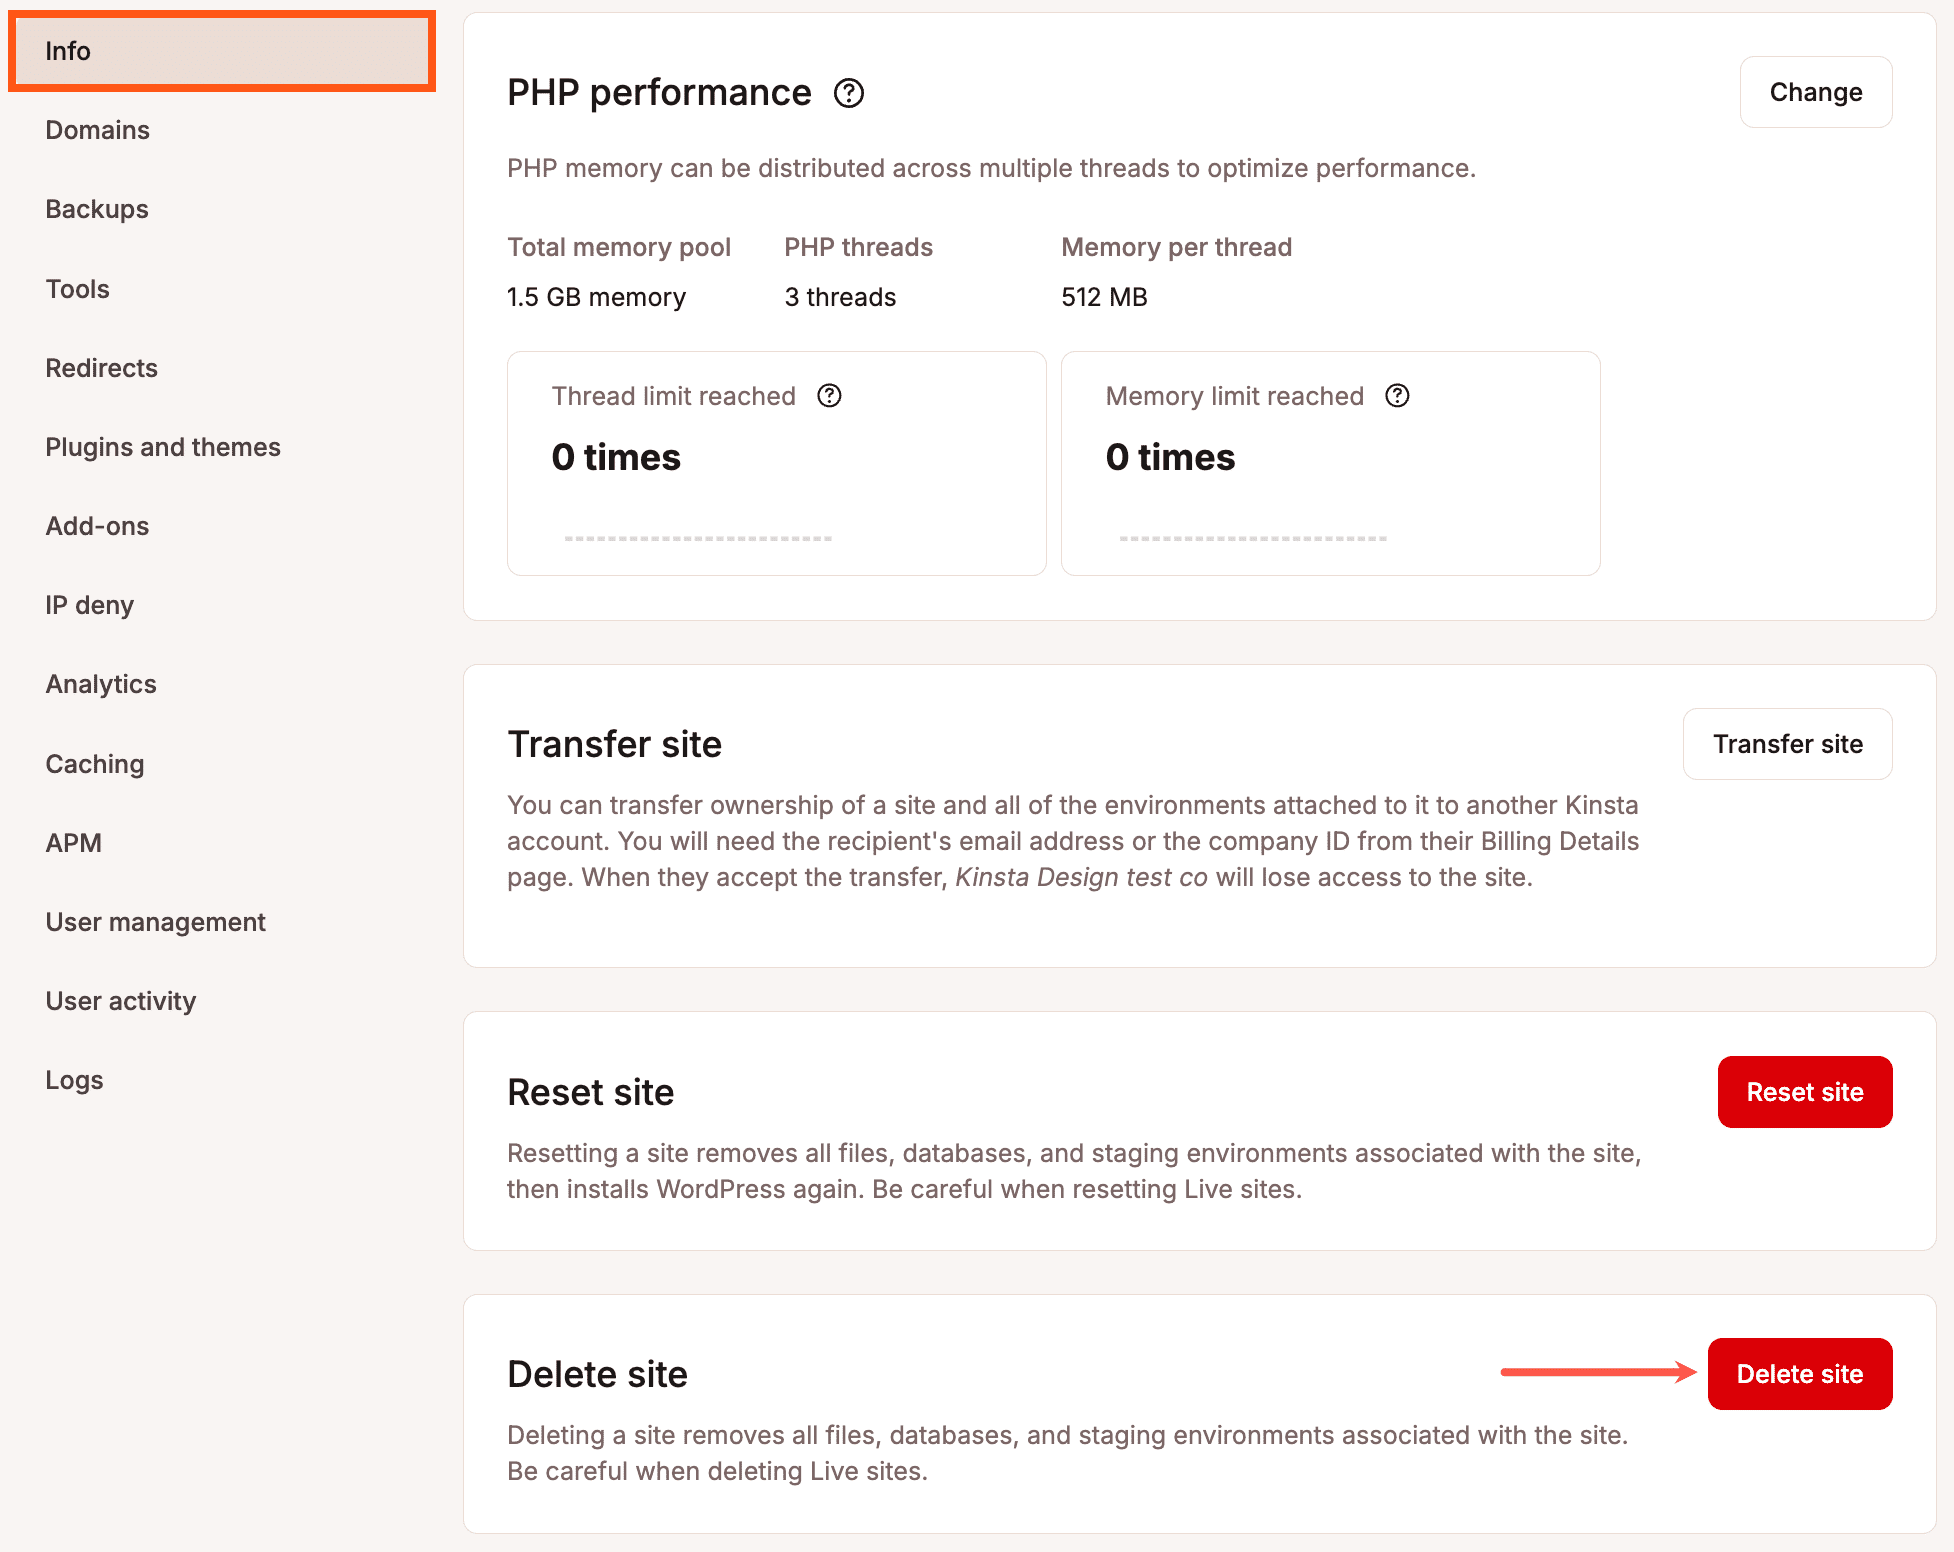
To reset your site, click Sites > sitename > Info > Reset site.
Enter a new WordPress admin password and click Continue.
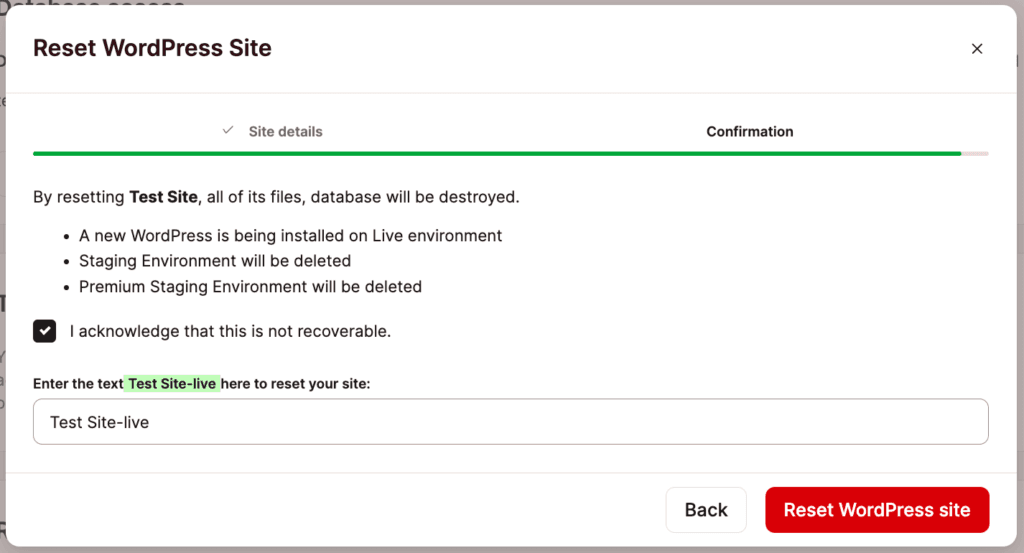
Select the acknowledgment check box, enter your site name followed by -live, and click Reset WordPress site.
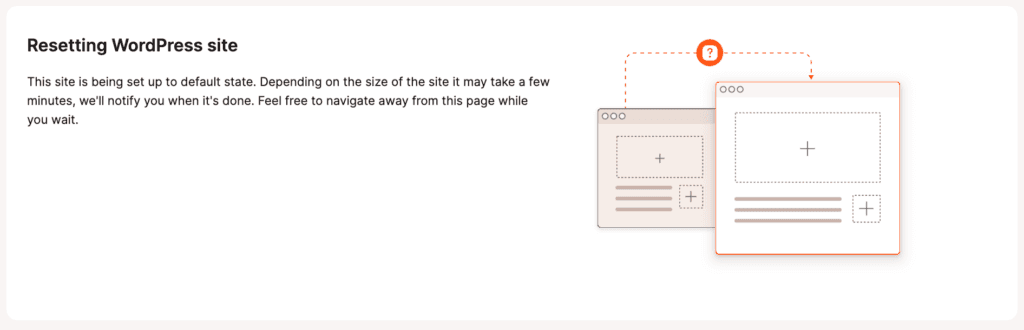
It may take a few minutes to reset the site, and the Resetting WordPress site screen will show until the reset is complete.
Delete a WordPress site
If you need to remove a site you’re no longer using or need to start over with a site you’re developing, you can delete your site from within MyKinsta.
Click on Sites, select the site you want to delete, scroll down, and click on the Delete Site button.
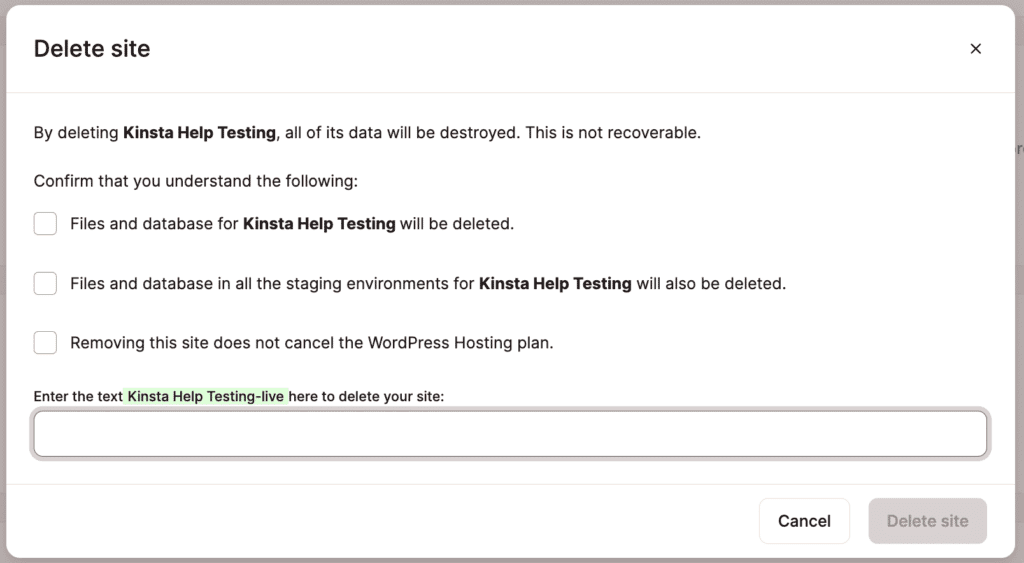
You’ll get a modal/pop-up asking you to confirm the deletion of your site.
You have to accept the following prompts:
- The files and database for your site will be deleted.
- The files and database in the staging environments for your site will also be deleted.
- Removing the site does not cancel the WordPress Hosting plan. This prompt only appears if the site you are deleting is the only WordPress site on your plan.
Then, enter your site’s name followed by a dash and the word “live” (sitename-live) in the field and click Delete Site.
Once the site is deleted, you’ll have an open spot in your plan for a new site. If you also want to cancel your WordPress Plan, you can do this within Company settings > My Plan > Cancel plan; refer to Cancel WordPress Plan.
Change your site’s path
The site path is where your WordPress files (such as wp-config.php, wp-content, wp-admin, and wp-includes) are located. You can view the site path within Environment details on your site’s Info page.
The default path for your site is /www/$site_path/public. You can customize this path by adding a subfolder using the Kinsta API, for example: /www/$site_path/public/site.

Export a list of WordPress sites
From the Sites list, you can export a list of selected WordPress sites to a CSV file. Select the sites you want to include in the export and click Actions > Export to CSV.

The CSV export includes the following information about your sites:
- Site name
- Environment name
- Identifier
- Staging type
- Location (data center location)
- Visits
- Bandwidth – In the
.csvfile, this is shown in bytes; in MyKinsta, this is rounded up to MB or GB. - Disk Usage – In the
.csvfile, this is shown in bytes; in MyKinsta, this is rounded up to MB or GB. - Force HTTPS (enabled or disabled)
- Domains
- Primary domain
- IP
- Load balancer
- Path
- Port
- Staging port
- Current External IP address
- PHP version
- Create at (date)
Max upload size for files
At Kinsta, we set the uploaded file size limit to 128MB, which is quite large for a single file.
Max upload file size for WordPress
If you’re trying to upload a file to your WordPress site and see either of the following error messages, that means that your file is larger than 128MB:
- “The uploaded file exceeds the upload_max_filesize directive in php.ini.”
- “file_name exceeds the maximum upload size for this site.”
To request an increase in the allowed size beyond the default 128 MB limit, you can open a chat with our Support team in MyKinsta.
Max upload file size for WordPress multisite
In a WordPress Multisite Network, you can set the max upload file size for the subsites in the WordPress Network Admin. Log in to your WordPress dashboard and go to Settings > Network Settings. Scroll down to the Upload Settings section.
To increase the max upload file size for your network’s subsites beyond the 1500KB (~1.5MB) default, enter the new value in the Max upload file size field and click the Save Changes button.
Move an existing site to a new location
If your site needs to be moved to a different data center, that requires some additional steps from our team. Open a new chat with our Support team in MyKinsta to get that started.
Moving the site to a new data center will change the Host IP address (used for SFTP and SSH connections) and may require an external IP address change. The external IP address is the one other parties see when your site makes an external connection to an external server. This is sometimes used for integrations with payment processors like PayPal or added to allow lists for some services.
Note: The Site IP (the IP you point your domain’s A record to) is separate and will not change.
Here at Kinsta, we’re constantly upgrading MyKinsta with new features to make managing your WordPress sites easier. Be sure to subscribe to our newsletter to stay up to date on our latest features and best articles!