Block IP Address
There may be times when you need to block an IP address (or addresses) to prevent malicious behavior from bots, spammers, or others. All Kinsta plans include a free IP Deny tool, which lets you block specific IP addresses and ranges from hitting your site. When you add IP addresses to the IP Deny tool, they are blocked at the Cloudflare Edge, preventing access before reaching the server. The block applies globally to all domains associated with the environment.
Identifying IP addresses to block in MyKinsta
One example of an IP address you may need to block is one that’s making a lot of uncached requests to your site in a short amount of time. Uncached requests can lead to excessive resource usage and cause issues for your site.
To view the top IP addresses that are visiting your site, you can use MyKinsta’s analytics dashboard. Log in to MyKinsta and go to WordPress Sites > sitename > Analytics > Geo & IP. Under the Top client IPs section, look for any IP addresses that are making more requests than other IPs by a factor of 5-10x or more. These are usually the IP addresses you want to investigate further.
You can use a reputation checker like CleanTalk or Spamhaus to see if the IP address has been identified as a bot, spammer, or other malicious IP address. Even if the IP address isn’t listed, it isn’t a guarantee that it’s legitimate. The IP address may not yet be identified and listed in their database as malicious. If the IP address is making a request that is causing your site to return an error or go down, blocking the IP address as a troubleshooting step is worth a try.
Blocking an IP address in MyKinsta
To block an IP address or range of IP addresses in MyKinsta, you can use the IP Deny tool.
The IP Deny tool is a powerful feature and, if used incorrectly, could block a legitimate service or individual. If you have questions about a certain IP address, please open a chat with our Support team.
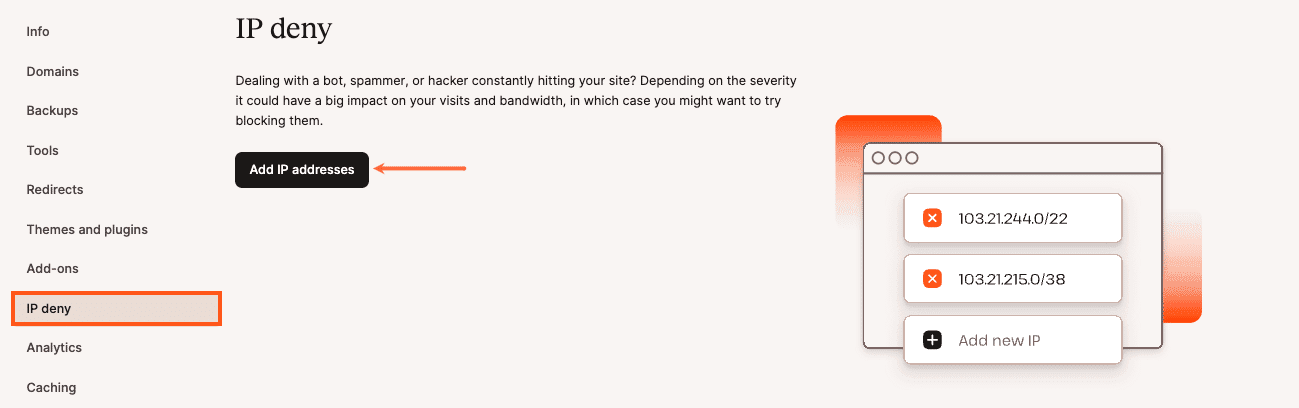
In MyKinsta, go to WordPressSites > Your Site > IP Deny and click Add IP Addresses.
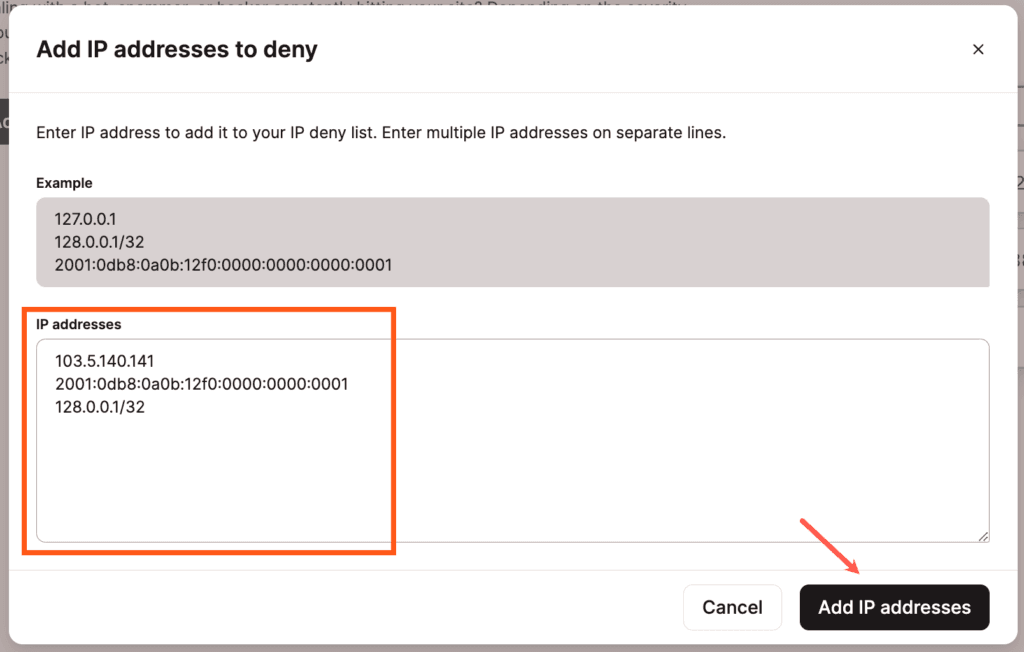
In the Add IP Addresses to Deny modal/pop-up that appears, you can add IPV4 addresses, IPV6 addresses, and CIDR (Classless Inter-Domain Routing) IP address ranges to the block list. With CIDR ranges, you can block a sequential range of IP addresses (e.g. 127.0.0.1 to 127.0.0.255). To generate a valid CIDR range, we recommend using a tool like IPAddressGuide.com.
Here are a few examples of IP addresses you can block:
- IPV4 Address – 103.5.140.141
- IPV6 Address – 2001:0db8:0a0b:12f0:0000:0000:0000:0001
- CIDR Range – 128.0.0.1/32
Once you’ve added the IP address(es) to block, click the Add IP Addresses button.
The IP address and any others you’ve added will now be shown on the IP deny list. On this same page, you can Edit (edit/pencil icon) or Delete (delete/trash can icon) any IP address or range.
Block IP addresses in Cloudflare
If you’re a Cloudflare user, you can use the IP Access Rules tool in the Cloudflare dashboard to block IP addresses and IP ranges.
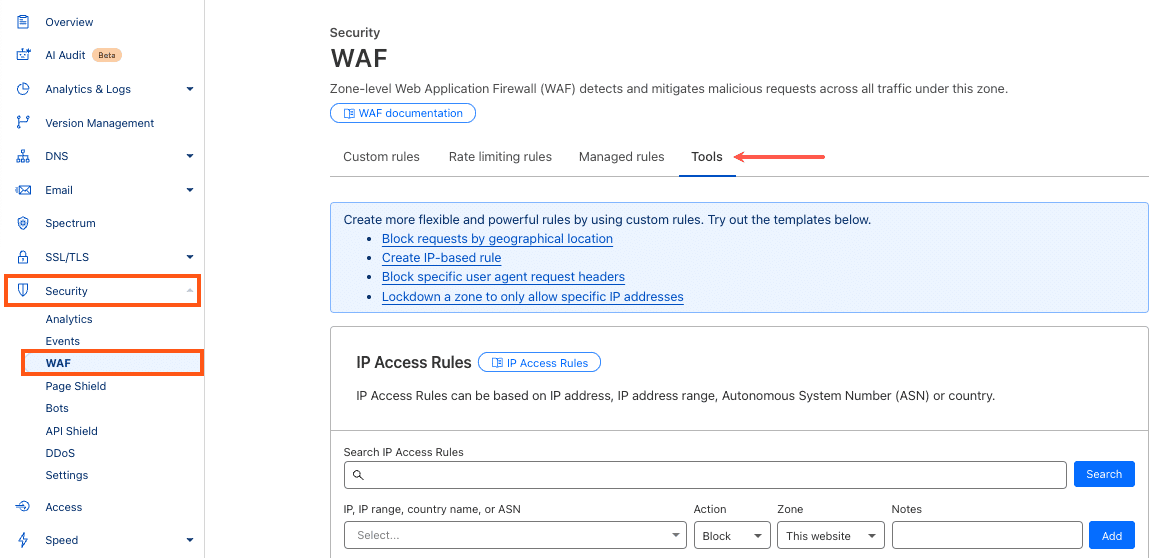
In the Cloudflare dashboard, navigate to Security > WAF > Tools.
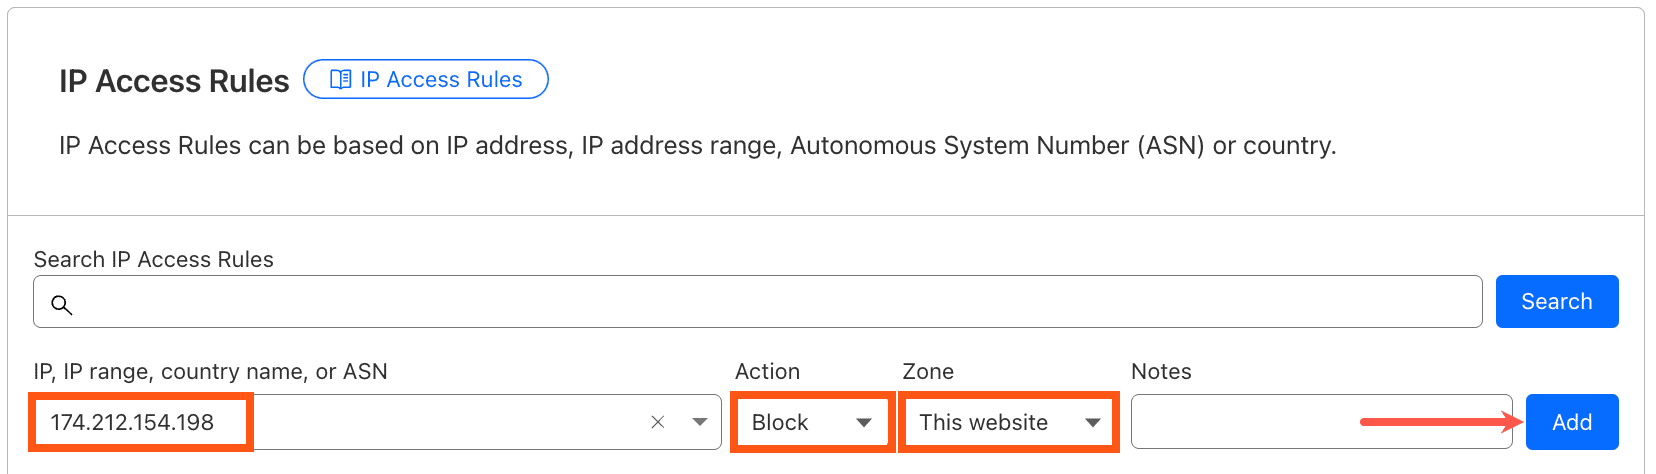
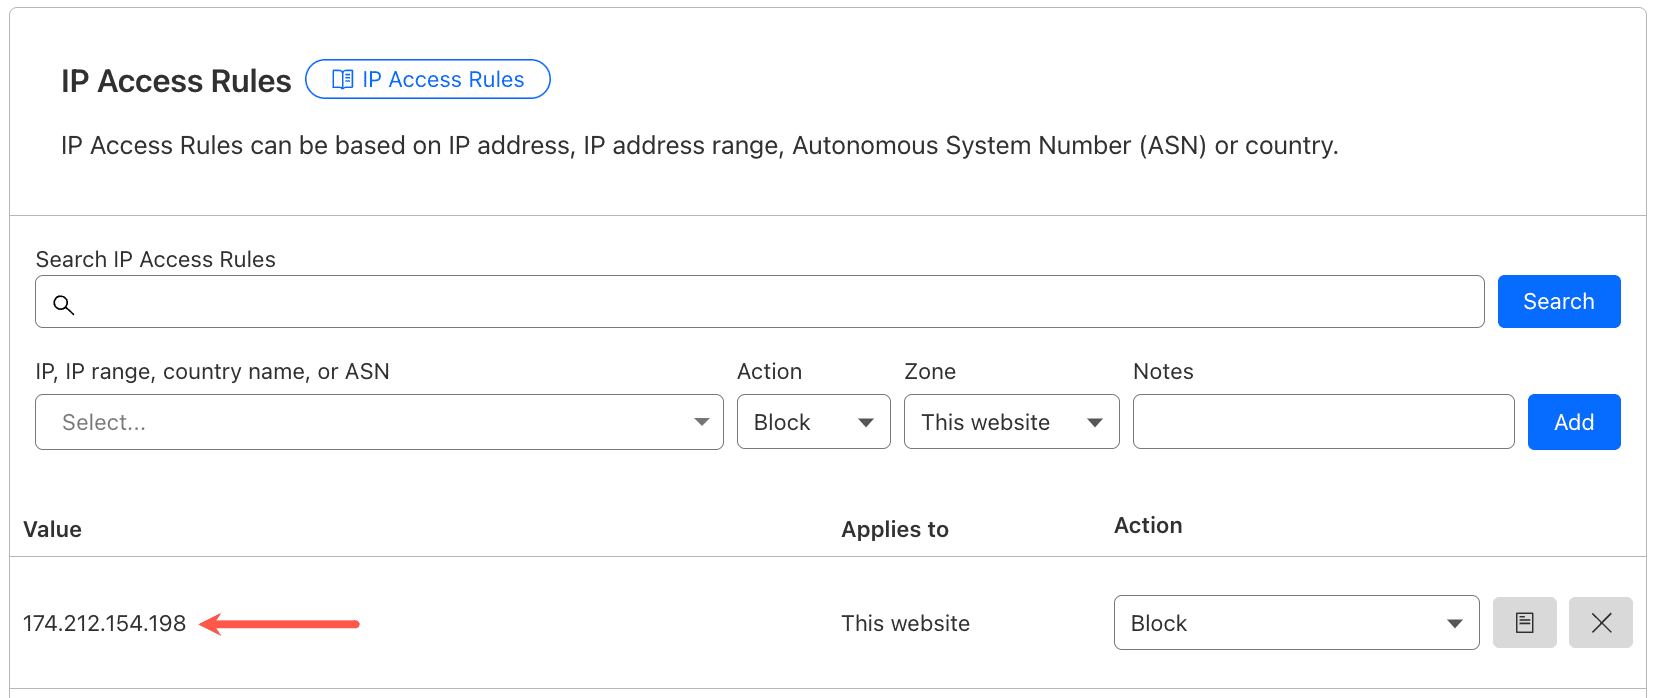
To create a new IP access rule, add an IP address, select the Block action, select This Website (or All Websites in Account if you want the rule to apply across all your Cloudflare domains), and click Add.
After adding the access rule, it appears in the IP Access Rules list. Here, you can make changes to the access rule, such as changing the action, adding notes, and deleting the rule.
In addition to the Block action, Cloudflare supports Challenge, Allow, and JavaScript Challenge. Depending on your goal, you may want to use one of these other actions instead of Block.
Block IP range, country, and ASN in Cloudflare
In addition to single IP addresses, Cloudflare’s IP access rules also support IP ranges, country names, and ASNs (autonomous system numbers).
- To block an IP range, specify a CIDR range for the IP access rule value.
- To block a country, specify it’s Alpha-2 country code.
- To block an ASN (a list of IPs controlled by a single network operator), specify a valid ASN that starts with “AS”.