Must Use (MU) Plugin
The Kinsta MU (must-use) plugin is designed to work specifically on our WordPress hosting platform. It handles things such as our full-page caching technology and Kinsta’s CDN integration.
By default, the Kinsta MU plugin is installed on every site we host and is available from the left-hand side of your WordPress admin dashboard. The plugin is required to ensure your site runs smoothly in our environment and cannot be removed.
The plugin is regularly updated with new features, improvements, and fixes. To see what’s changed, check the Kinsta MU Plugin Changelog.
Install the Kinsta MU plugin
If you’ve migrated your site yourself or installed WordPress manually, you may not have installed the Kinsta MU plugin. We periodically install and update the plugin for every Kinsta site that doesn’t use Composer or manage the entire wp-content directory or mu-plugins directory in Git. If you prefer or need to manually install the Kinsta MU plugin, you can do so by following one of the applicable methods below.
Installing via SFTP
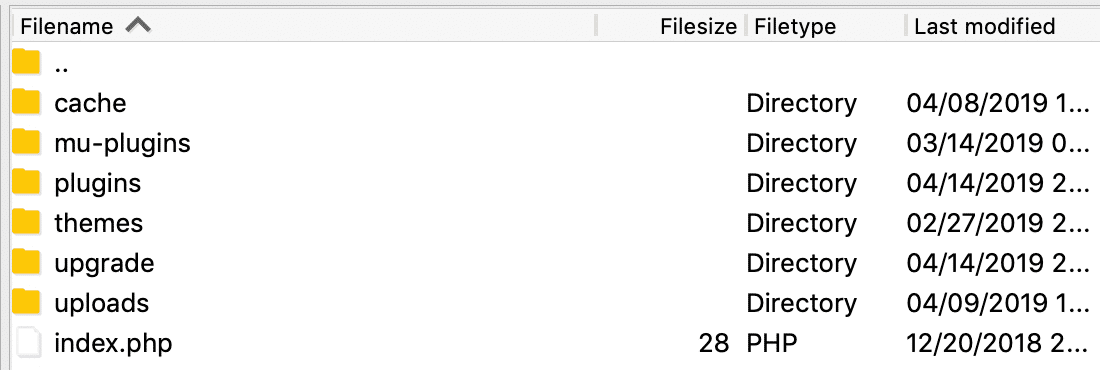
1. Create mu-plugins folder
Connect to your site via SFTP and create a folder called mu-plugins in your wp-content folder if it doesn’t already exist (finished path: /wp-content/mu-plugins/).
2. Download and unzip the plugin
After ensuring the mu-plugins folder has been created, download the Kinsta MU plugin and unzip it.
3. Upload to site
Upload the kinsta-mu-plugins folder and kinsta-mu-plugins.php file to the /wp-content/mu-plugins/ directory.

This installs the plugin, which you can view in your WordPress dashboard by logging in and navigating to Plugins > Must-Use.
Installing via Composer
If your site is built with Bedrock or any boilerplate or framework that uses Composer, you’ll need to take some extra steps to install the Kinsta Must Use plugin on your site.
1. Declare the Kinsta MU plugin package repository
Begin by declaring the Kinsta MU plugin as a package repository in the repositories array in your composer.json file:
{
      "type": "package",
      "package": {
        "name": "kinsta/kinsta-mu-plugins",
        "type": "wordpress-muplugin",
        "version": "2.3.7",
        "dist": {
          "url": "https://kinsta.com/kinsta-tools/kinsta-mu-plugins.zip",
          "type": "zip"
        }
      }
    }
Note: While you can technically set the version number to anything valid (because you’re installing the plugin from a specific zip file), this will need to be changed each time you need to update the plugin, so we recommend checking the version in the latest download of the Kinsta MU plugin.
2. Require the Kinsta MU plugin
Next, run the following command in your site’s bedrock directory (or the directory where your composer.json file is located).
composer require kinsta/kinsta-mu-pluginsOr, add the Kinsta MU plugin to the require array in your composer.json file. Here’s an example require array from a Bedrock site after adding the Kinsta MU plugin:
"require": {
    "php": ">=7.4",
    "composer/installers": "^2.1",
    "vlucas/phpdotenv": "^5.4",
    "oscarotero/env": "^2.1",
    "roots/bedrock-autoloader": "^1.0",
    "roots/bedrock-disallow-indexing": "^2.0",
    "roots/wordpress": "5.9.3",
    "roots/wp-config": "1.0.0",
    "roots/wp-password-bcrypt": "1.1.0",
    "kinsta/kinsta-mu-plugins": "^2.3"
  },
3. Fix the path for Kinsta MU plugin assets
To fix the path to assets used by the MU plugin, add the following to your site’s configuration file (bedrock/config/application.php in Bedrock sites):
/**
 * Fix for Kinsta's CDN with Bedrock
 */
define('KINSTA_CDN_USERDIRS', 'app');

/**
 * Fix Kinsta MU Plugins URL path with Bedrock
 */
$mu_plugins_url = Config::get('WP_CONTENT_URL') . '/mu-plugins';
define('KINSTAMU_CUSTOM_MUPLUGIN_URL', "{$mu_plugins_url}/kinsta-mu-plugins");Installing via Git
If you use Git with your site, installing the Kinsta MU plugin depends on what parts of the site you manage with Git.
If you manage the entire wp-content directory or mu-plugins directory in your Git repo, you’ll need to download and install the plugin in your local repo, commit that change, and then deploy it to your site. You can install the plugin locally by downloading it and placing the plugin files in your site’s mu-plugins directory.
If you do not maintain a copy of the Kinsta MU plugin in your Git repository, we’ll automatically install it for you. Alternatively, you can use SFTP to install it manually.
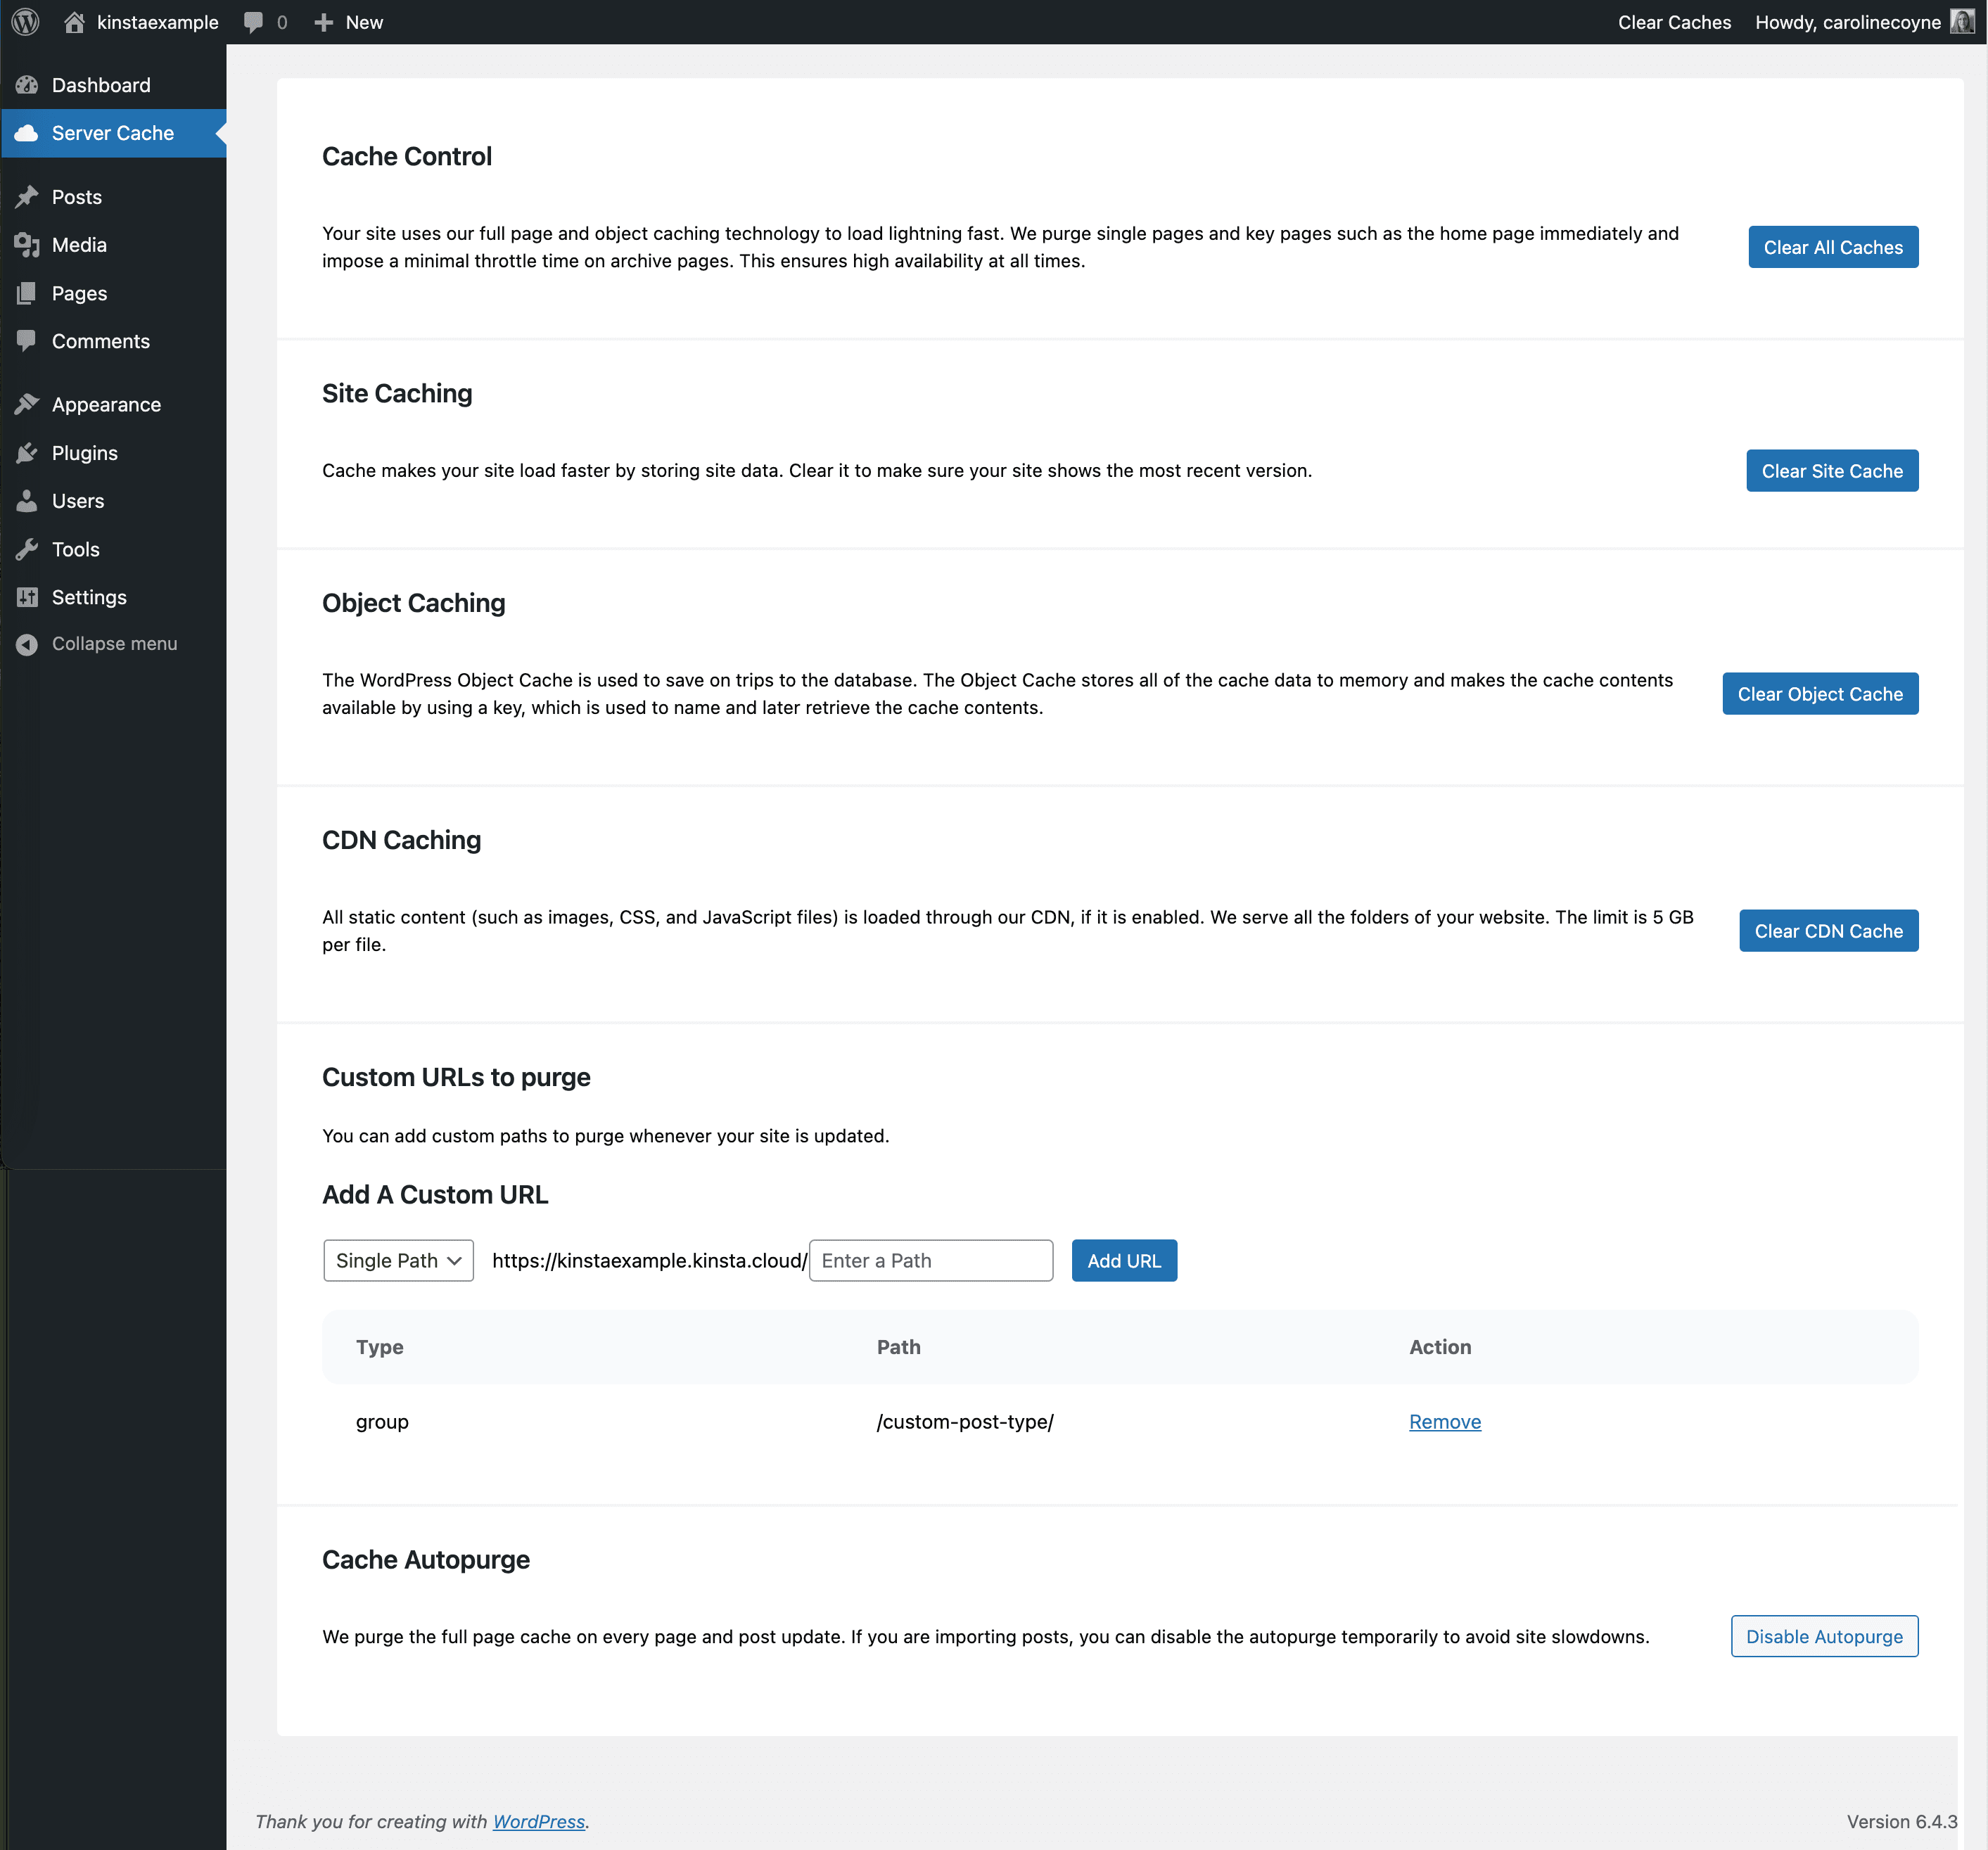
Kinsta MU plugin settings
The Kinsta MU plugin is set to work harmoniously with WordPress and our infrastructure. On most sites, no modifications will be needed. The plugin enables automatic clearing of cache on important parts of your site when you update your page and post content.
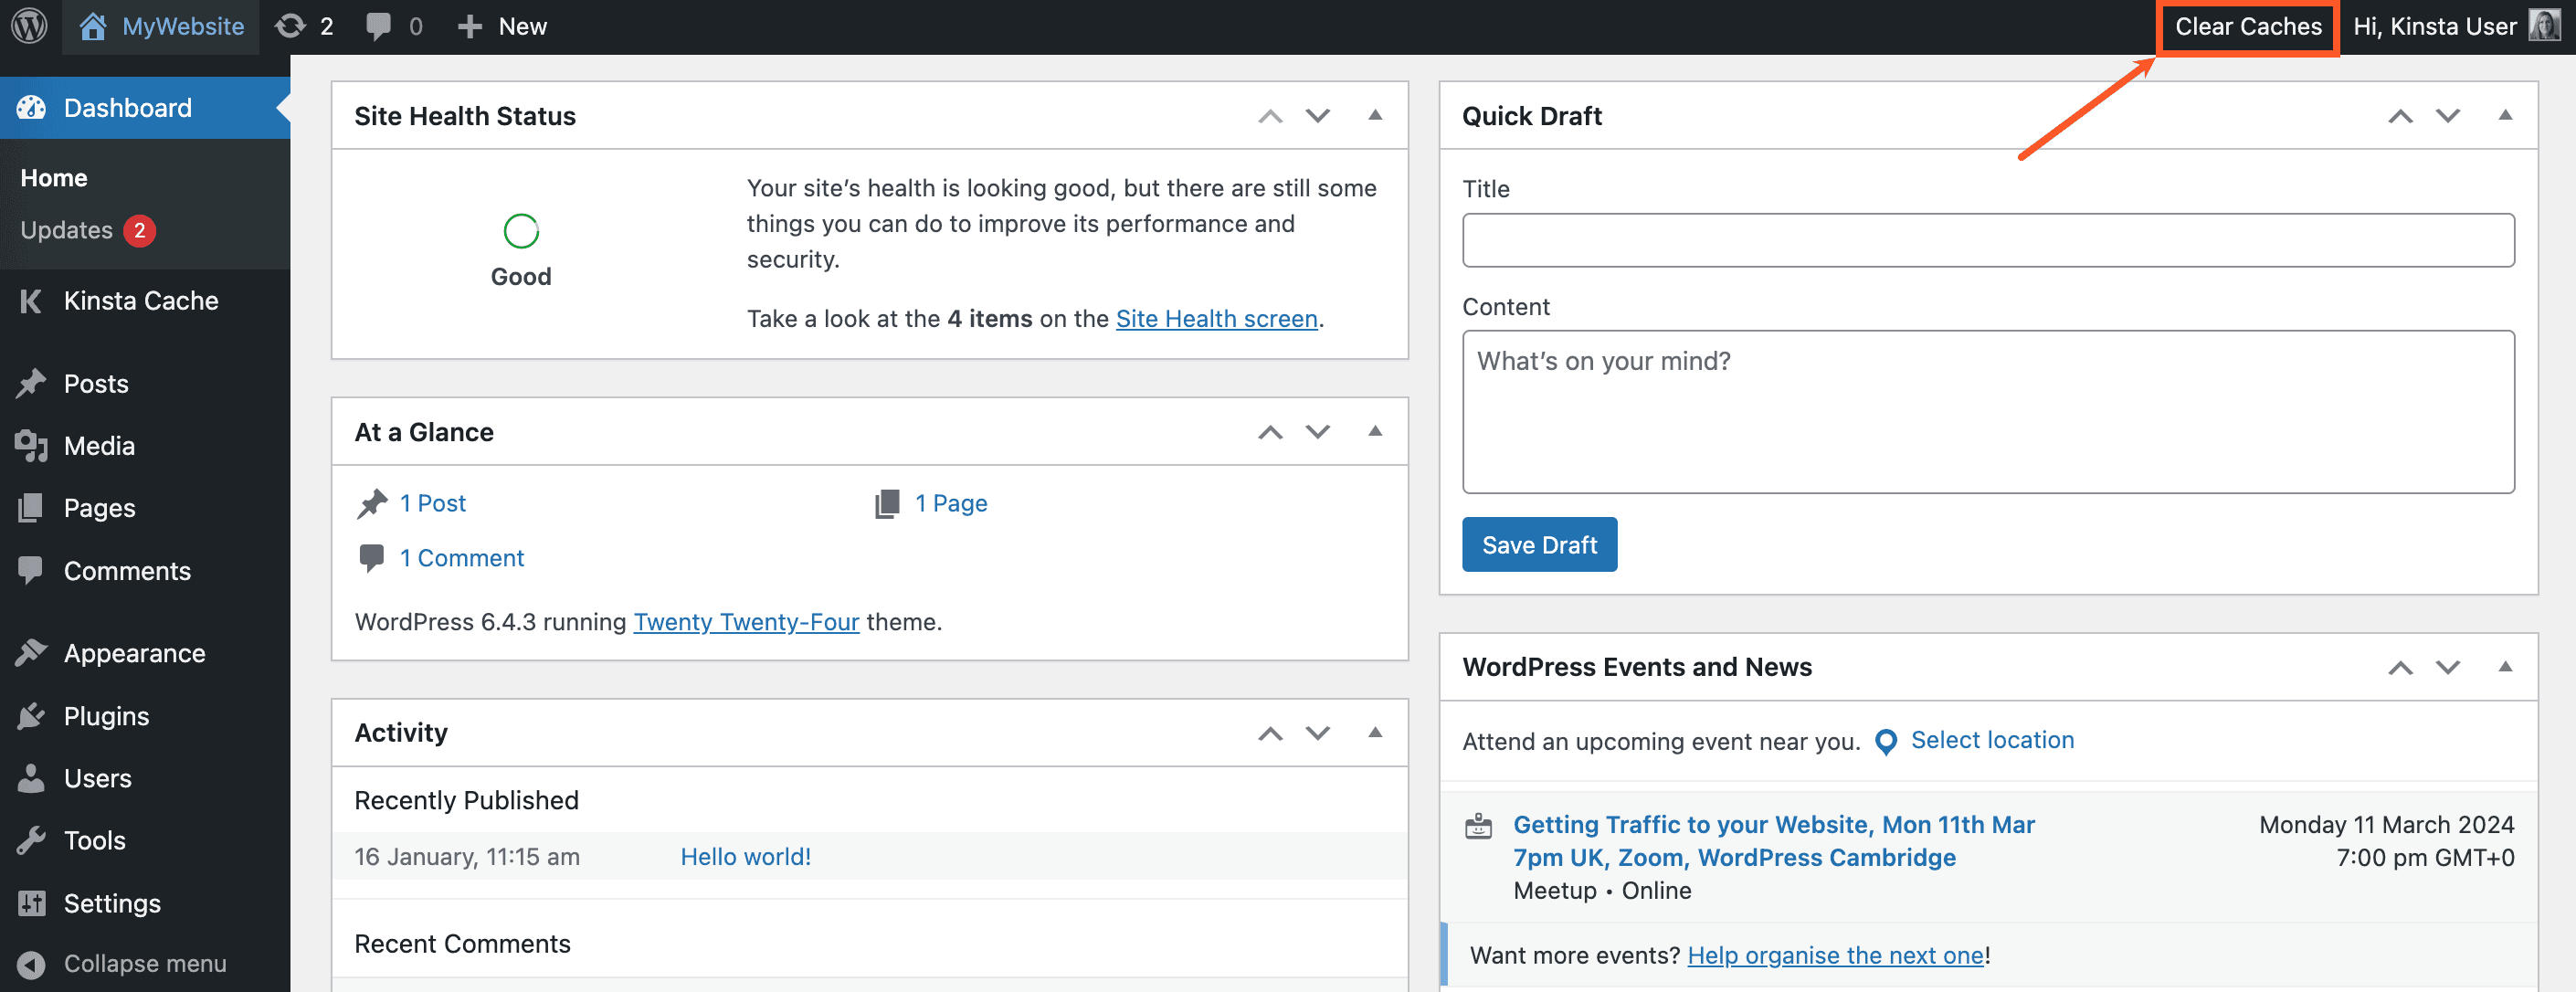
The plugin will appear as Kinsta Cache in the left sidebar of your WordPress dashboard. A Clear Caches link is also added to the WordPress admin toolbar.

Manually clear cache
You can also manually clear the cache on your WordPress site with any of the following methods.
- Click the Clear All Caches button on the Kinsta Cache plugin page in your WordPress dashboard.
- Click the Clear Caches link on the WordPress admin toolbar.
- Clear the Site cache and CDN cache in MyKinsta. (When Edge Caching is enabled, clearing the Site cache in MyKinsta also clears the Edge Cache.)
- Run
wp kinsta cache purge --allin the command line.
Add custom caching URLs
We immediately purge key pages, such as the home page, and impose a minimal throttle time on archive pages. This ensures high availability at all times. However, depending on your site’s configuration, additional caching rules may be needed. You can add custom paths to purge whenever your site is updated.
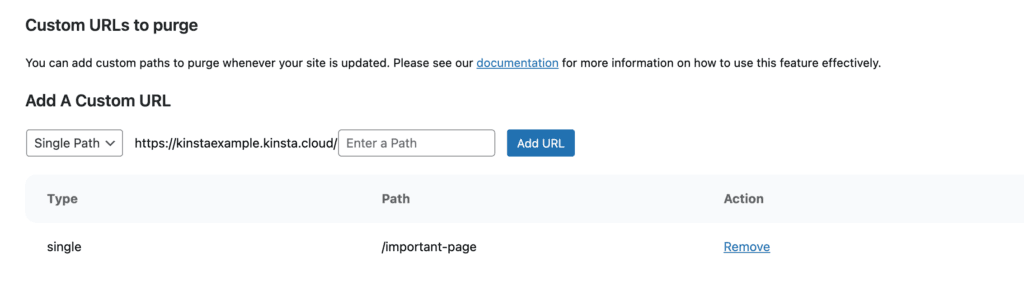
1. Add single path custom URL
If you need cache cleared on an exact URL (post or page), enter this as a single path rule on the Kinsta Cache plugin page in your WordPress dashboard. Examples:
important-pageimportant-page/
2. Add group path custom URL
The group path purges all the URLs that start with that specific URL. This can be especially useful if you have a custom post type and need the cache cleared on it and the posts underneath it. For example, if you add https://yourdomain.com/custom-post-type/ as a group path URL, then it will purge the cache on the following:
https://yourdomain.com/custom-post-type/
https://yourdomain.com/custom-post-type/post-1
https://yourdomain.com/custom-post-type/post-2
https://yourdomain.com/custom-post-type/post-3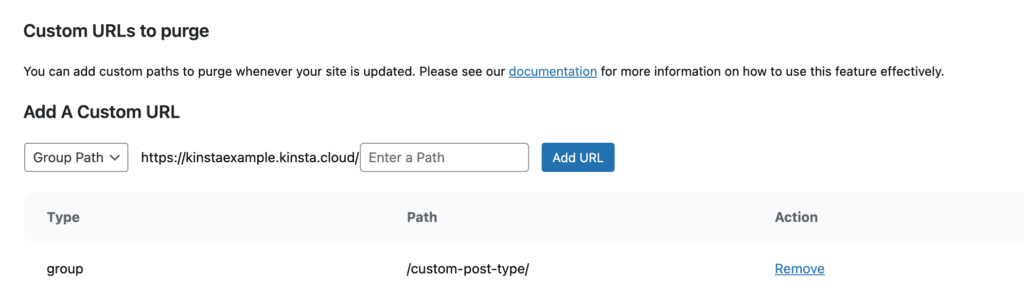
Cache autopurge
When you make updates to a post or page, the Kinsta MU Plugin clears the cache automatically. However, if you’re importing a large number of updates, this cache-clearing process might slow down your site. To prevent this, you can disable Autopurge by deactivating the automatic cache-clearing feature. Clear the Enable Autopurge checkbox and then click Save Settings. Once you’ve completed your updates, to re-enable automatic cache clearing, select Enable Autopurge and click Save Settings.

WP-CLI commands for autopurge
You can manage the autopurge setting in WP-CLI using the following commands:
wp kinsta cache autopurge disable: Disables the global autopurge feature. Actions that normally clear the cache, such as updating posts or options, will no longer clear it. This is equivalent to addingKINSTA_DISABLE_AUTOPURGEtowp-config.php.wp kinsta cache autopurge enable: Enables the autopurge feature. You can use this to re-enable autopurge after it has been disabled.wp kinsta cache autopurge status: Displays whether the global autopurge feature is currently enabled or disabled.wp kinsta cache autopurge list: Lists all autopurge controllers and their status. Each controller handles a specific integration that triggers cache clearing (e.g., when a post is updated or a site option changes).wp kinsta cache autopurge toggle <controller> <on|off>: Enables or disables a specific controller without affecting others. For example, you can disable cache clearing on post updates while keeping all other automatic purge actions active.
WordPress hooks for autopurge
These hooks allow you to customize exactly how Kinsta’s autopurge system behaves. You can enable or disable specific controllers, or control which WordPress options trigger an automatic cache purge.
Filter: Control Autopurge Controllers
Autopurge controllers handle various events, such as post updates, option changes, or comment actions, that normally trigger automatic cache clearing. This filter lets you selectively disable or enable those triggers.
Hook
apply_filters('kinsta/kmp/cache/autopurge', $status, $controller_name);Parameters
$status(bool): The current autopurge status for the controller (true= enabled,false= disabled).$controller_name(string): The name of the controller being checked. You can list available controllers by runningwp kinsta cache autopurge list.
Example
add_filter('kinsta/kmp/cache/autopurge', function($status, $controller_name) {
    // Disable clearing cache automatically when option is updated.
    if ($controller_name === 'wp_option_controller') {
        return false;
    }
    return $status;
}, 10, 2);
Filter: Choose Which WP Options Trigger Autopurge
This filter allows you to customize which WordPress options trigger a cache purge when updated.
Hook
apply_filters('kinsta/kmp/cache/autopurge/wp/options', $option_names);Parameters
$option_names(array): A list of option names that will trigger automatic cache clearing when updated.
Default options
[
		'blogname',
		'blogdescription',
		'date_format',
		'time_format',
		'language',
]
Example
add_filter('kinsta/kmp/cache/autopurge/wp/options', function($option_names) {
    // Only clear cache when the blog name is updated.
    return ['blogname'];
}, 10, 2);
Update the Kinsta MU plugin
The Kinsta MU plugin must be manually updated within Kinsta or using the Kinsta API.
To update the plugin for all sites, within MyKinsta, go to Sites and select Plugins. On Kinsta Must-use Plugins, click the kebab (three dots) and select Update plugin.

Confirm you want to update the plugin for the selected environments and click Update plugin.

You can also update the plugin for each individual site within Sites > sitename > Plugins and themes > on the Kinsta Must-use plugins, click the kebab (three dots), and click Update plugin.

White label and customize the Kinsta MU plugin
In the Kinsta MU plugin, we’ve added Kinsta naming and customizations to help you navigate around the WordPress admin dashboard more easily. For example, the Kinsta Cache tab in the admin dashboard sidebar allows you to quickly locate the correct place to clear your site’s cache when needed.
For agencies and other Kinsta customers who wish to remove the Kinsta branding from the WordPress admin dashboard, we offer a built-in white labeling option. This feature is especially useful if you’re using hosting for or reselling to your own clients.

Enabling white labeling changes the following elements in the WordPress dashboard:
- The Kinsta Cache sidebar link is changed to an unbranded Server Cache link, or what you define in the array.
- The Thanks for creating with WordPress and hosting with Kinsta message near the bottom of the dashboard is replaced with Thank you for creating with WordPress.
- The links to Kinsta documentation and support are removed.
- In the URL, any instances of
kinstain the menu slug and the query string are replaced withserver, or what you define in the array. For example,https://testsite.kinsta.cloud/wp-admin/admin.php?page=kinsta-tools&kinsta-cachebecomeshttps://testsite.kinsta.cloud/wp-admin/admin.php?page=server-tools&server-cache.
How to white label a Kinsta site
To white label your admin, you’ll need to define a constant, preferably in the wp-config.php file, before the * That's all, stop editing! Happy publishing. */ line. Setting KINSTAMU_WHITELABEL to true removes Kinsta branding as described above.
Here’s an example of a white label configuration in wp-config.php.
/* Kinsta MU Plugin White Labeling */
define('KINSTAMU_WHITELABEL', true);

/* That's all, stop editing! Happy publishing. */
You can customize the menu slug, title, and icon by passing an array that defines these values, using the following properties:
menu_key: Changes the menu slug and query string in the URL.menu_title: Changes the menu title in the WordPress admin menu.menu_icon: Changes the menu icon. To find out how to format the URL for the icon, refer to theicon_urlparameter within WordPress Developer Resources.
For example:
/* Kinsta MU Plugin White Labeling */
define('KINSTAMU_WHITELABEL', [
	'menu_key' => 'agency',
	'menu_title' => 'Agency',
	'menu_icon' => 'dashicons-admin-users',
]);

/* That's all, stop editing! Happy publishing. */
Define a custom path to the MU plugin directory
The plugin uses the WPMU_PLUGIN_URL WP variable to define paths to the plugin’s assets. While this generally works on all sites, if it doesn’t, you can define the path to your MU plugin folder with the KINSTAMU_CUSTOM_MUPLUGIN_URL constant.
Here’s an example of a custom MU plugin path in wp-config.php.
/* Custom MU plugin path */
define( 'KINSTAMU_CUSTOM_MUPLUGIN_URL', 'http://kinstaexample.com/custom-wp-content/mu-plugins')

/* That's all, stop editing! Happy publishing. */
Define a capability for access
The KINSTAMU_CAPABILITY constant defines what capability a user must have to use the plugin admin functionality. It accepts any of the default WordPress Roles and Capabilities, like: activate_plugins or publish_pages. Here’s an example with the KINSTAMU_CAPABILITY constant added:
/* Capability to use the caching plugin */
define('KINSTAMU_CAPABILITY','publish_pages');

/* That's all, stop editing! Happy publishing. */
Disable white labeling
To disable white labeling, just remove any constants from wp-config.php. White labeling is just one example of Kinsta’s extensive feature set for WordPress agencies and single users alike. If you’re interested in other site management features on Kinsta, check out our site labeling and site renaming tools!