Domains
When you host your application with Kinsta, it’s automatically assigned a free kinsta.app domain as the primary domain upon successful deployment. This allows you to build, test, and preview your application before connecting your custom domain. If required, you can change the temporary domain name.
When you’re ready to make your application live, you can add your custom domain on the Domains page. Every custom domain you add automatically includes a free SSL certificate. The temporary kinsta.app domains are automatically covered by the wildcard certificate of kinsta.app domain. (*.kinsta.app). If you want to add a custom SSL certificate, please contact our Support Team, who can manually upload this for you.
Add domain
In MyKinsta, go to Applications > application name > Domains.
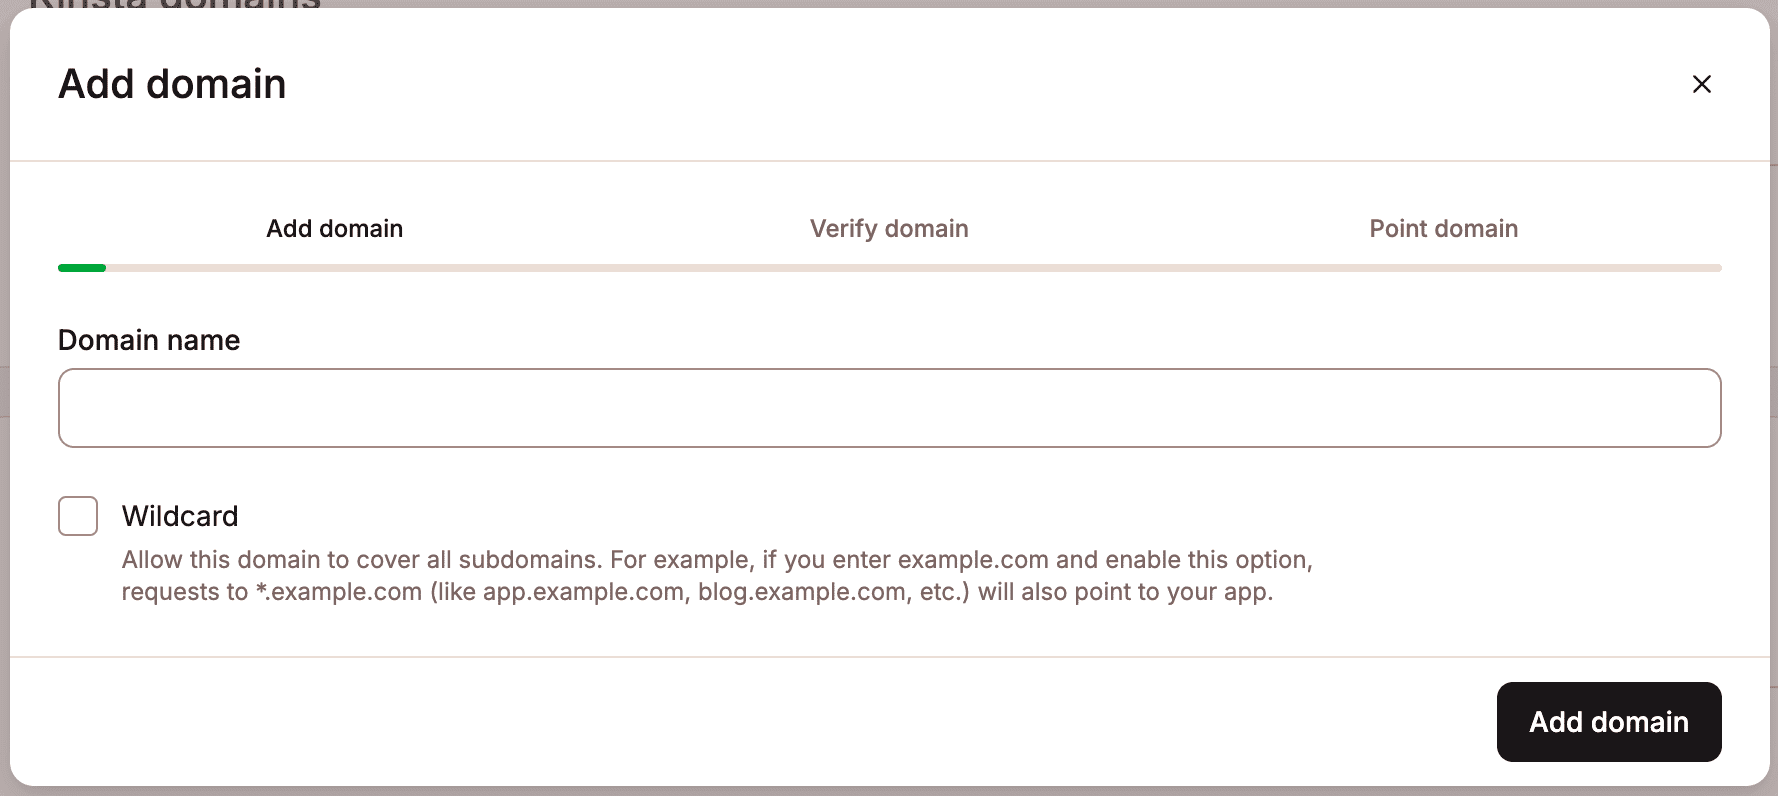
Click Add domain and enter your domain name. If you want to cover all subdomains, select Wildcard and then click Add domain.

Verify domain
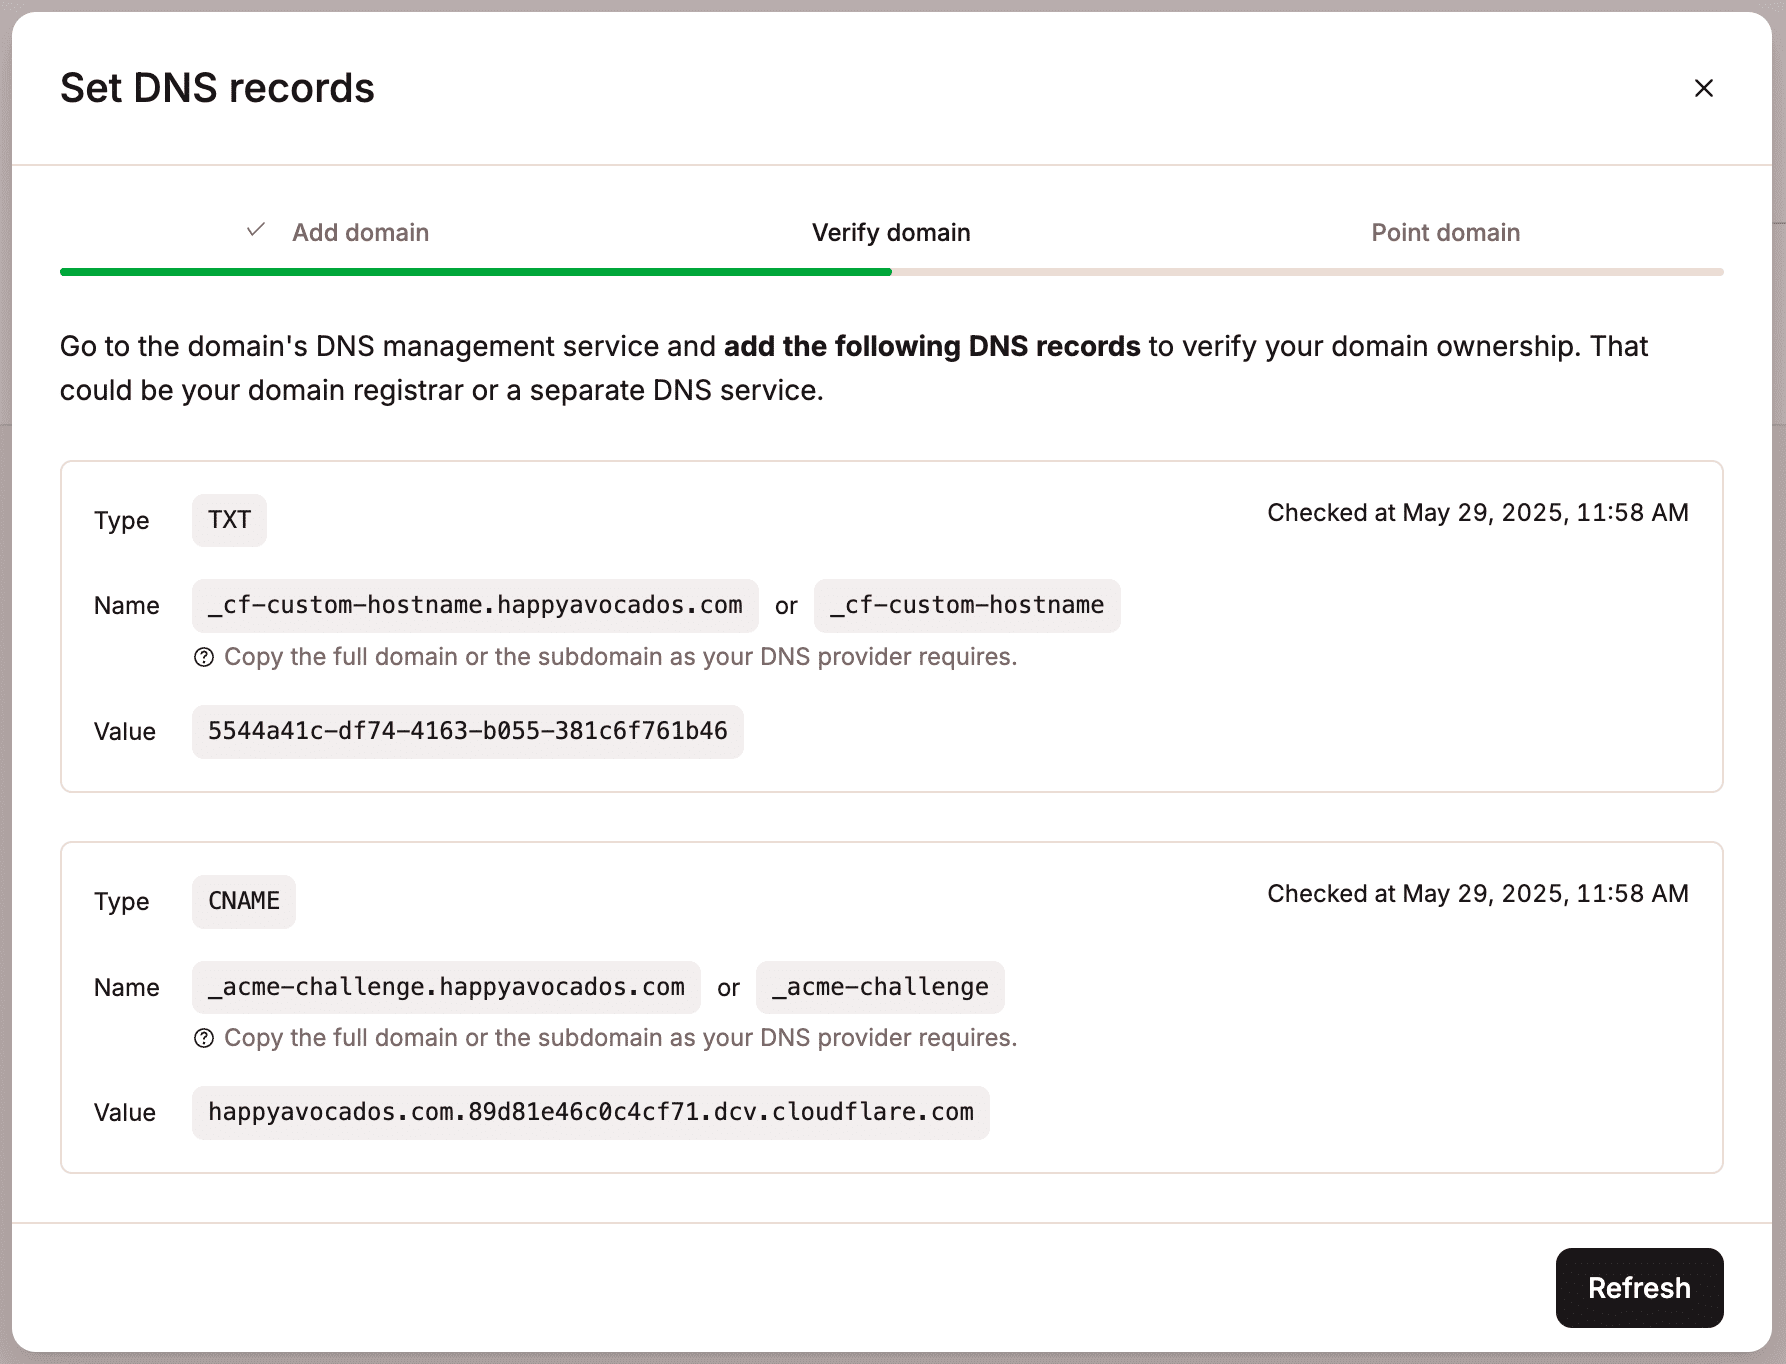
To verify your domain, you need to add the TXT record and CNAME record shown to your domain’s DNS records. Some DNS providers, such as Namecheap, Spaceship, and Squarespace, need the short version of DNS record names. MyKinsta automatically provides both the full and short versions of each record, so you can use whichever format your DNS provider needs.

TXT record
The TXT record allows Cloudflare to verify that you own the domain and are authorized to use their services for that domain. Once the domain is fully validated, you can remove this record from your DNS if necessary.
- Name:
_cf-custom-hostname - Value: Unique UUID value from MyKinsta (xxxxxxxx-xxxx-xxxx-xxxx-xxxxxxxxxxxx)
CNAME record
Kinsta uses this DNS entry to update the domain with the necessary tokens for your SSL certificate. As long as this record exists in your DNS, you won’t need to manually renew your SSL certificate; Kinsta manages it for you. We don’t recommend removing this DNS entry, as you will need to re-add it each time the SSL certificate requires renewal.
- Name:
_acme-challenge - Value:
example.com.[unique verification token].dcv.cloudflare.com
Allow 5-10 minutes for DNS to propagate. If propagation doesn’t occur as expected, you can use a DNS lookup tool, such as dnschecker.org or mxtoolbox.com, to verify if the record is resolving correctly.
Point domain
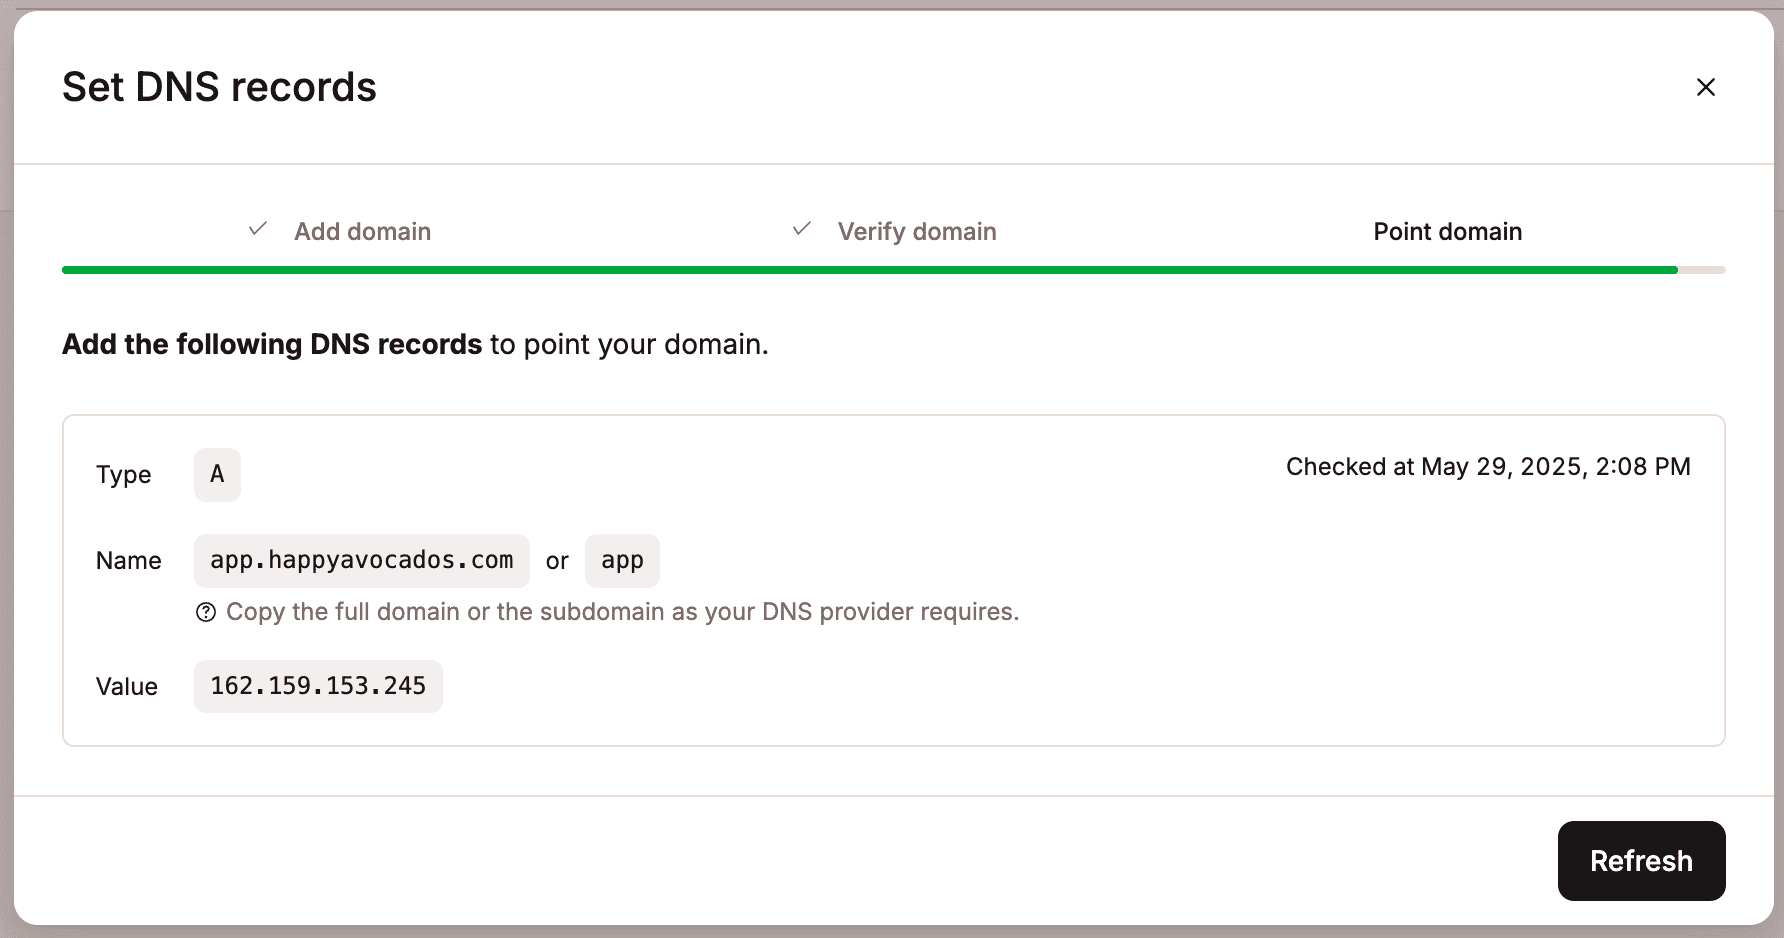
Once your domain is successfully verified, you can point it by adding the required A records to your domain’s DNS settings.
Some DNS providers, such as Namecheap, Spaceship, and Squarespace, need the short version of DNS record names. MyKinsta automatically provides both the full and short versions of each record, so you can use whichever format your DNS provider needs.
If you select the Wildcard option, an additional A record for *.yourdomain.com appears to add to your domain’s DNS settings, this ensures all subdomains are covered.

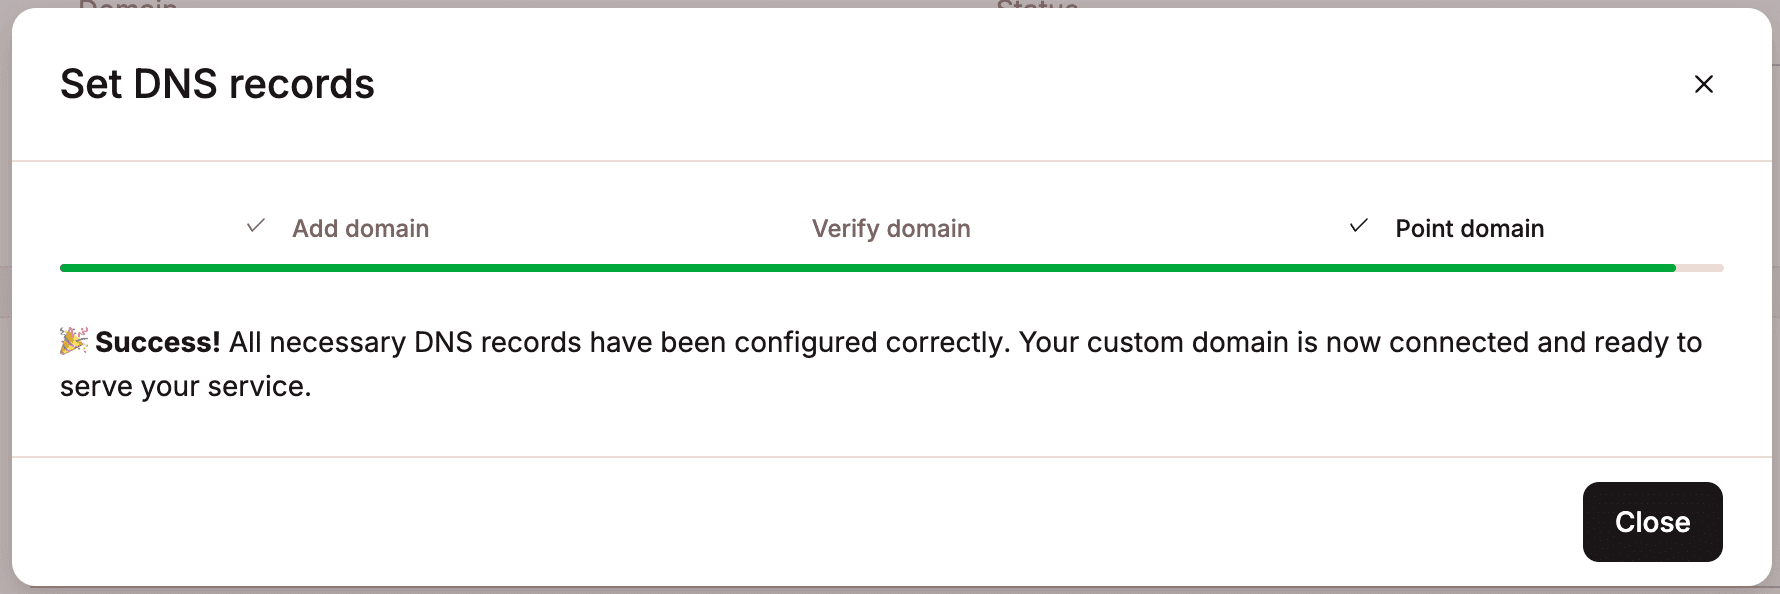
When the domain is successfully pointed, a success message appears.

Point WWW domain
We recommend you point the www version of your domain to Kinsta (if you haven’t already). You’ll need to add the www version of the domain to MyKinsta and repeat the steps to verify and point the subdomain.
Change your primary domain
In the domains list, locate the domain you want to be the primary domain, click the kebab (three-dot) menu and Make primary domain. Verify the correct domain is selected and click Make primary.

Change your temporary domain
If required, you can update the automatically generated temporary domain name for your application. Within Domains, on the temporary domain, click the kebab menu (three-dots) and select Update.

Enter the required domain name, and click Update.

IP address
The IP address is shown when you point your domain. We use Cloudflare to secure our hosting infrastructure, so the corresponding IP you see for your application is a Cloudflare IP address. This means the owner of the IP address is Cloudflare, Inc., located in the United States of America.
The IP address doesn’t reflect the physical place where your application is hosted, nor does it add any further latency to your application. Your application files are stored in the data center location you choose. We do not create copies of your application and store those copies elsewhere.
We do not offer dedicated IP addresses because they aren’t necessary for most configurations. Since our infrastructure is secured by Cloudflare, sites, applications, and databases hosted on Kinsta use a range of shared IP addresses provided by Cloudflare. Our Cloudflare IP addresses are reserved for Kinsta customers only, so you won’t share an IP address with spam or adult sites or applications hosted elsewhere.
Troubleshooting the Fix domain error
During the domain verification process, if a Fix domain error button appears next to the domain, this means a CAA record conflict is occurring.
A CAA record is an optional DNS record that lets you specify which certificate authorities (CAs) are allowed to issue SSL certificates for your domain. If a domain has no CAA records, any CA can generate an SSL certificate for it if requested. If a domain has a CAA record, only the CA(s) specified in the CA record can generate an SSL certificate for the domain.
To resolve this error, click the Fix domain error button and update the CAA record as indicated in the modal/pop-up. Alternatively, if you do not need a CAA record on your domain, you can remove the CAA record.