Amazon CloudFront
Amazon CloudFront is a secure and programmable content delivery network. Once you’ve launched your site at Kinsta, if you would like to use Amazon CloudFront instead of Kinsta’s CDN, this guide shows you how.
Some of the security features of CloudFront include field-level encryption and protection against network and application layer DDoS attacks.
Request custom SSL certificate
Part of your Cloudfront distribution setup includes applying a custom SSL certificate. Because this may take anywhere from a few minutes to several hours to complete, we recommend requesting the custom SSL certificate before starting the process of creating a new distribution.
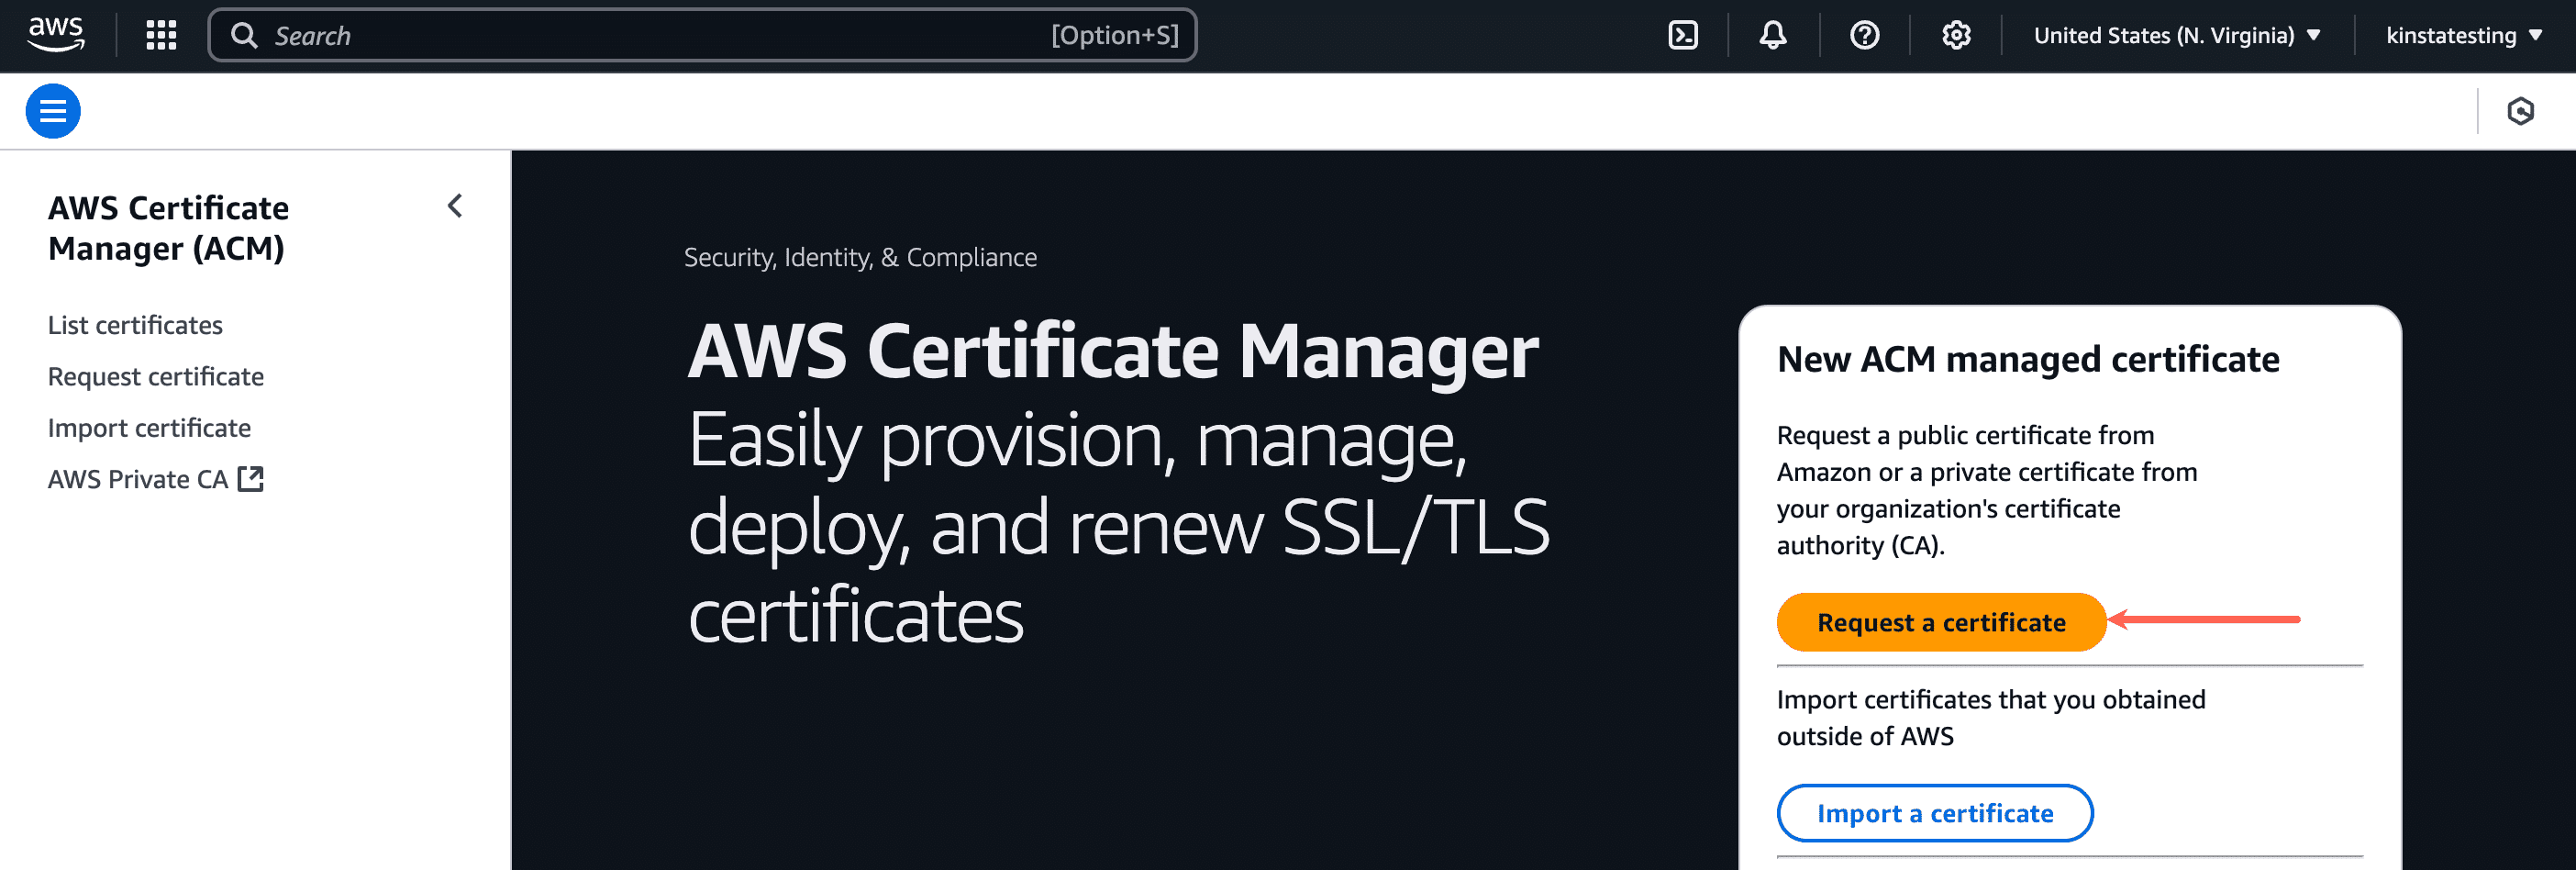
If you don’t already have an AWS account, you can create one here. Once you’ve logged in to your AWS account, search for “certificate manager” using the search box in the menu bar, and click Certificate Manager under Services.

In Certificate Manager, click Request a certificate.
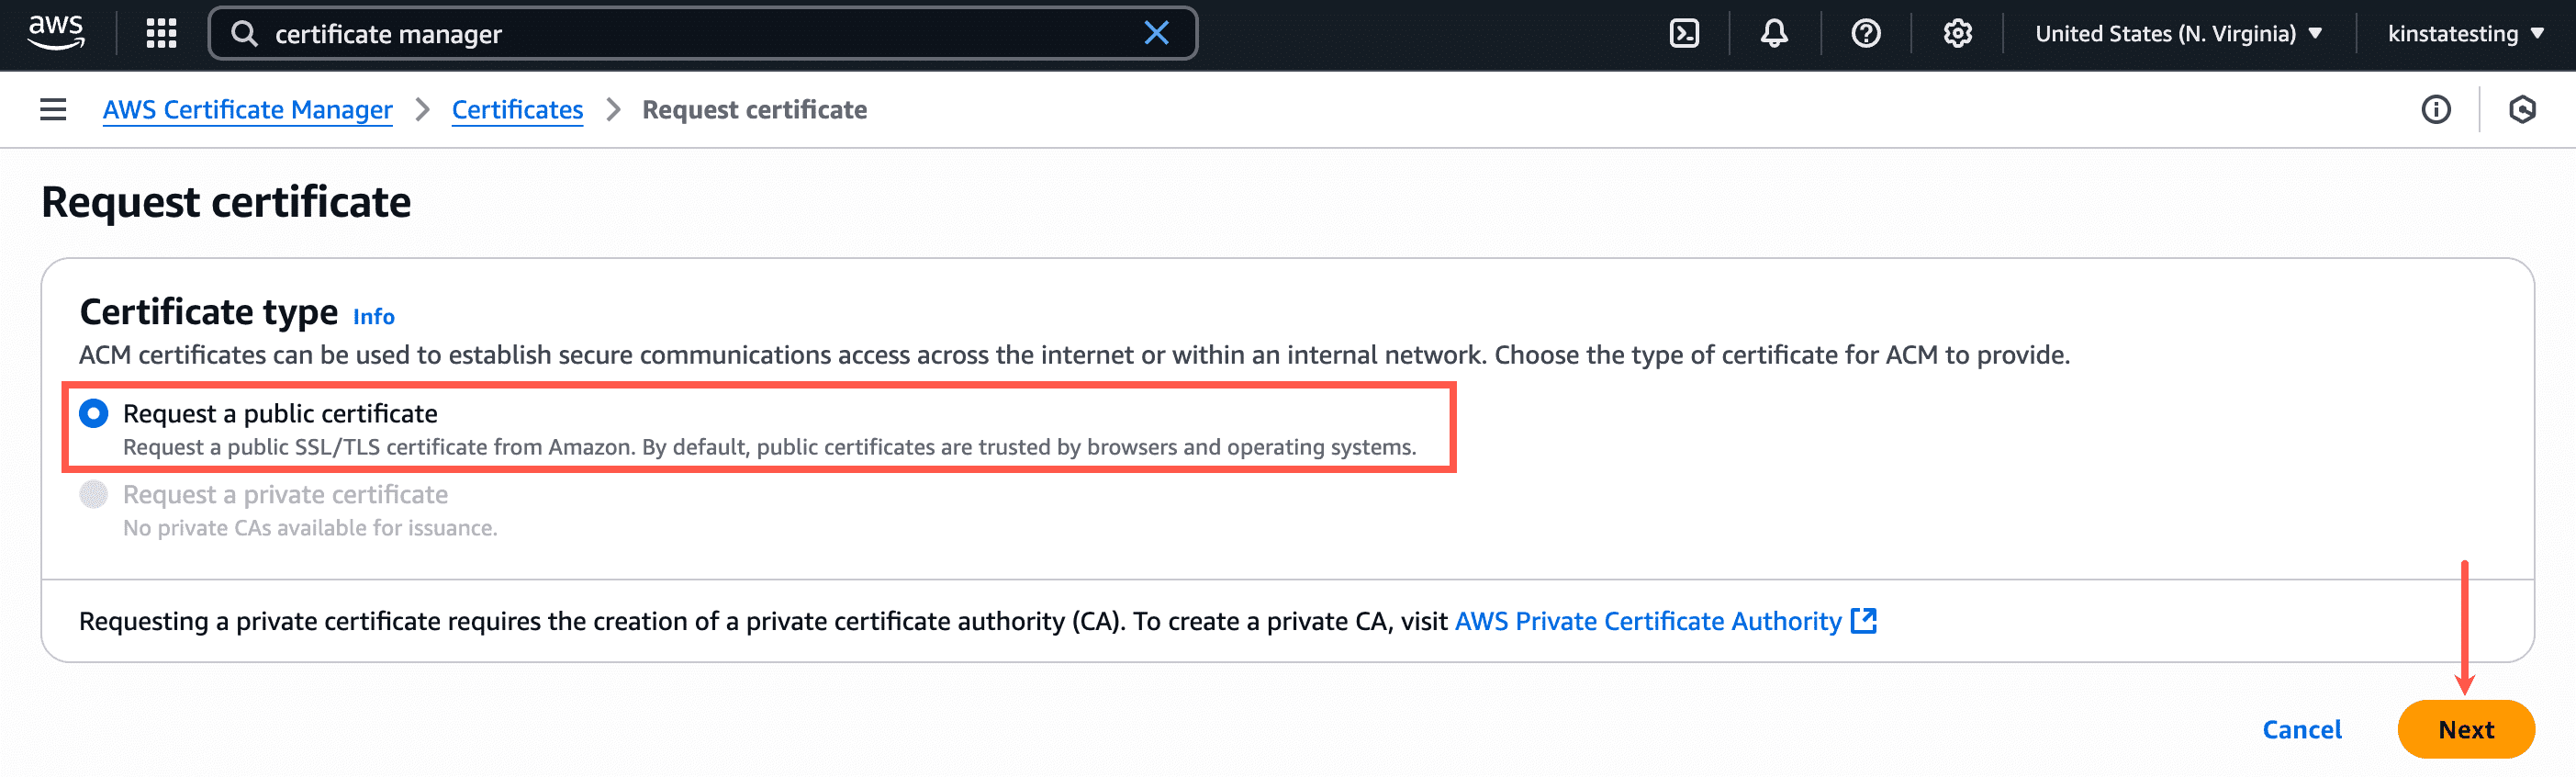
On the next page, select Request a public certificate and click Next.
Complete the Request public certificate form as follows:
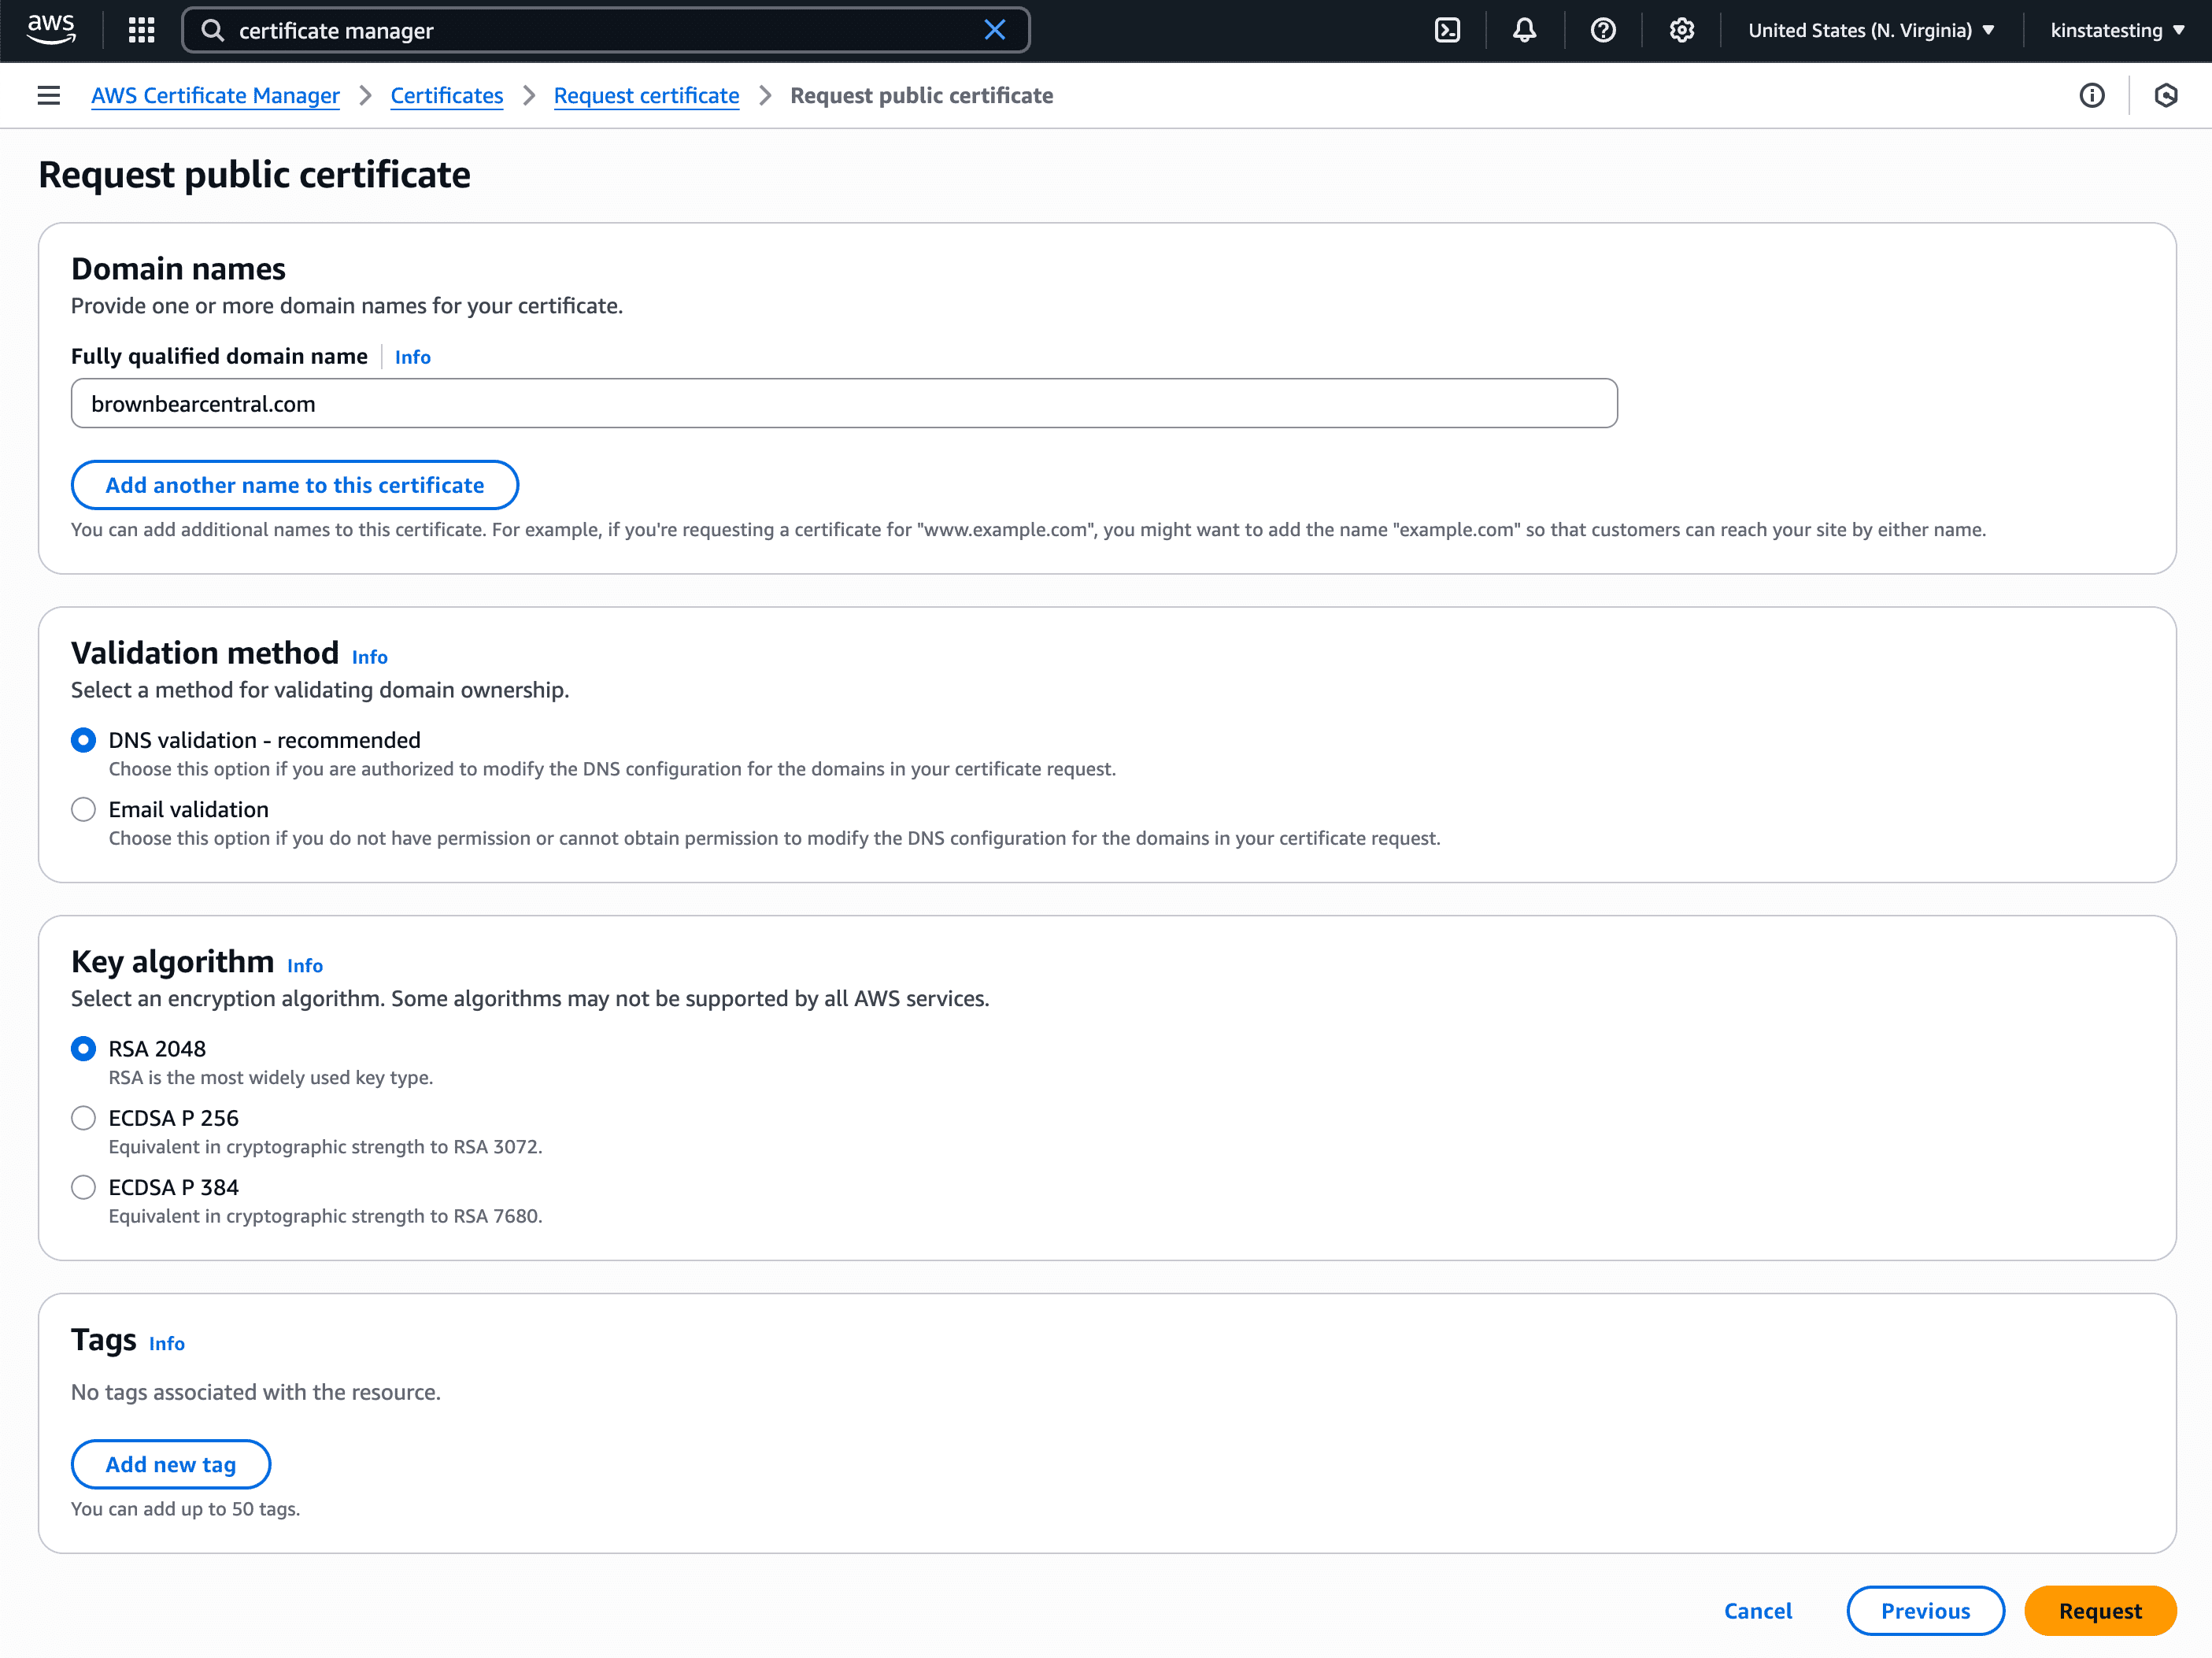
- Domain names: Add your custom domain (your site’s primary domain at Kinsta) to the domain name list (if you’re adding a root domain, be sure to add both the non-www and www domain or add the wildcard domain like *.example.com).
- Validation method: Choose either email or DNS validation for your SSL certificate. If your domain registration doesn’t have privacy protection that hides your contact information from WHOIS lookups, or if the email sent to the proxy email address is forwarded to your real email address, you can use the email validation method to validate your certificate request. You’ll receive up to 8 emails for each domain you added to the certificate, and you’ll need to act on at least one email for each domain to complete the validation. If you’re unable to receive emails at the email address shown in WHOIS lookups, you’ll need to use the DNS validation method.
- Key algorithm: Select RSA 2048.
- Tags: Add some optional tags if necessary.
Click Request to proceed to the validation step.
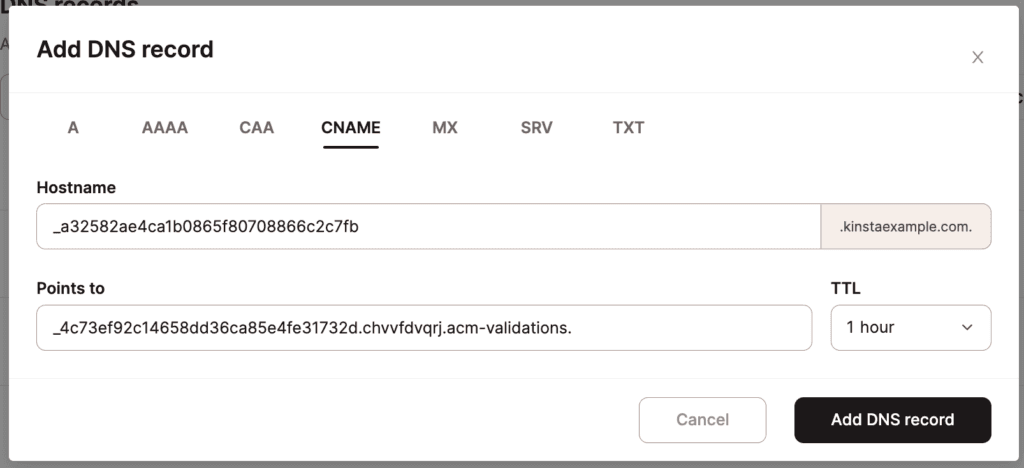
The Domains section shows the CNAME details for validation. You’ll need to create a CNAME record for your custom domain with these details.

To add this new CNAME record, log in to where you manage your domain’s DNS. For this example, we’ll show you how to add the CNAME record in Kinsta’s DNS. If you have a different DNS provider (could be your registrar or another DNS host, depending on where you’ve pointed your domain’s nameservers), the steps may be a little different.
- Click DNS management and then Manage for the domain you want to add a DNS record to.
- Click Add a DNS record, select the CNAME tab, and complete as follows:
- Hostname: Use the CNAME name from CloudFront.
- Points to: Use the CNAME value from CloudFront
- Click Add DNS record.
Note: Depending on your DNS record’s TTL setting, it may take anywhere from a few minutes to hours for the DNS record to propagate.
Once the CNAME record propagates and has been validated, the SSL certificate status will change from Pending to Issued.
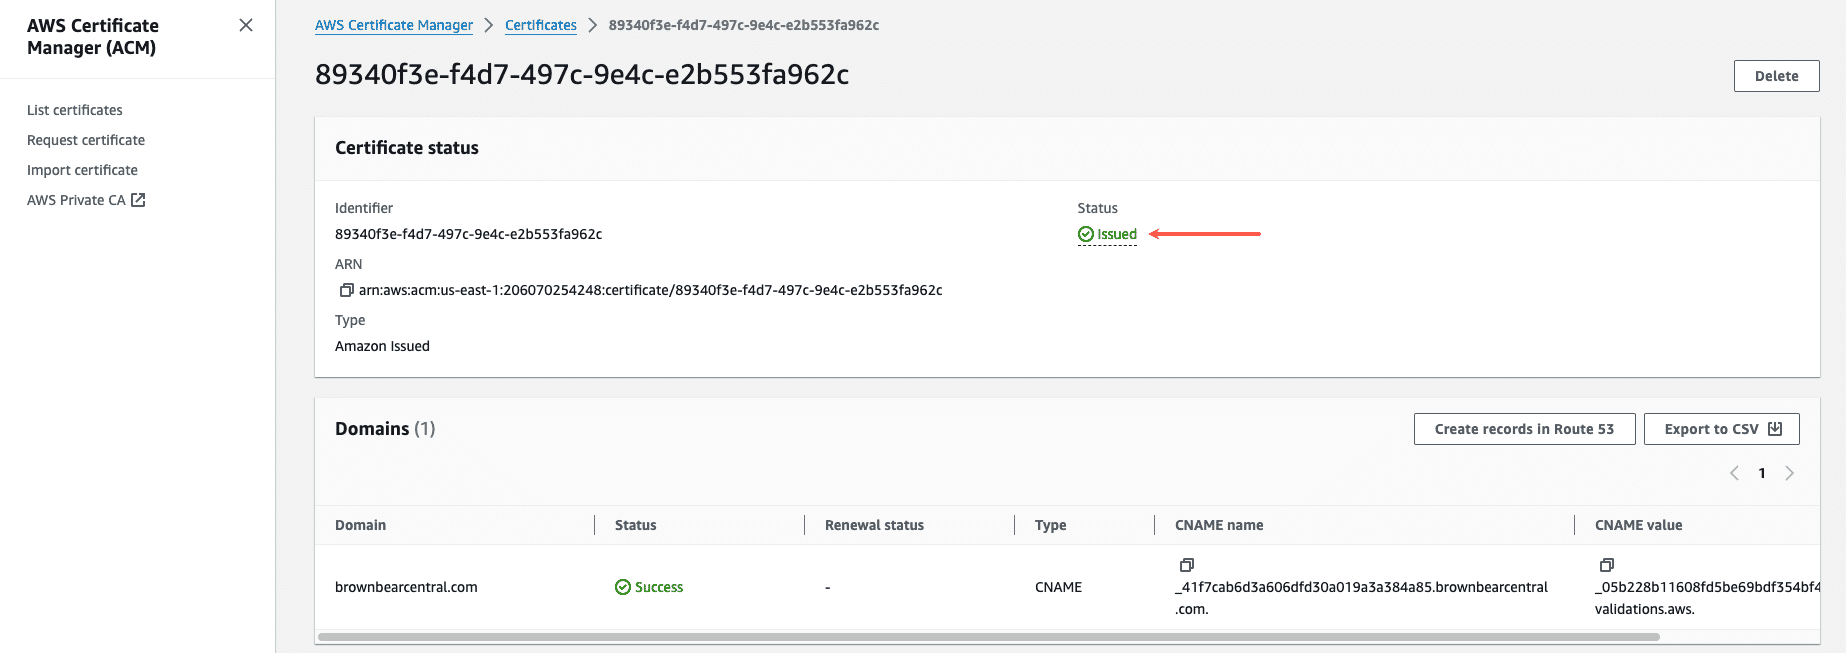
Your new SSL certificate is ready to be used with your new CloudFront distribution, and you can begin setting that up now.
Configure and deploy CloudFront zone
The next step is to configure and deploy a CloudFront zone. In your AWS account, search for “Cloudfront” using the search box in the menu bar, and click CloudFront under Services.

Within Distributions, click Create distribution.

You can configure the details for a new CloudFront zone on the Create distribution page. We recommend the following configuration for maximum compatibility with Kinsta’s Cloudflare integration:
Distribution options
Select Single website or app.

Origin
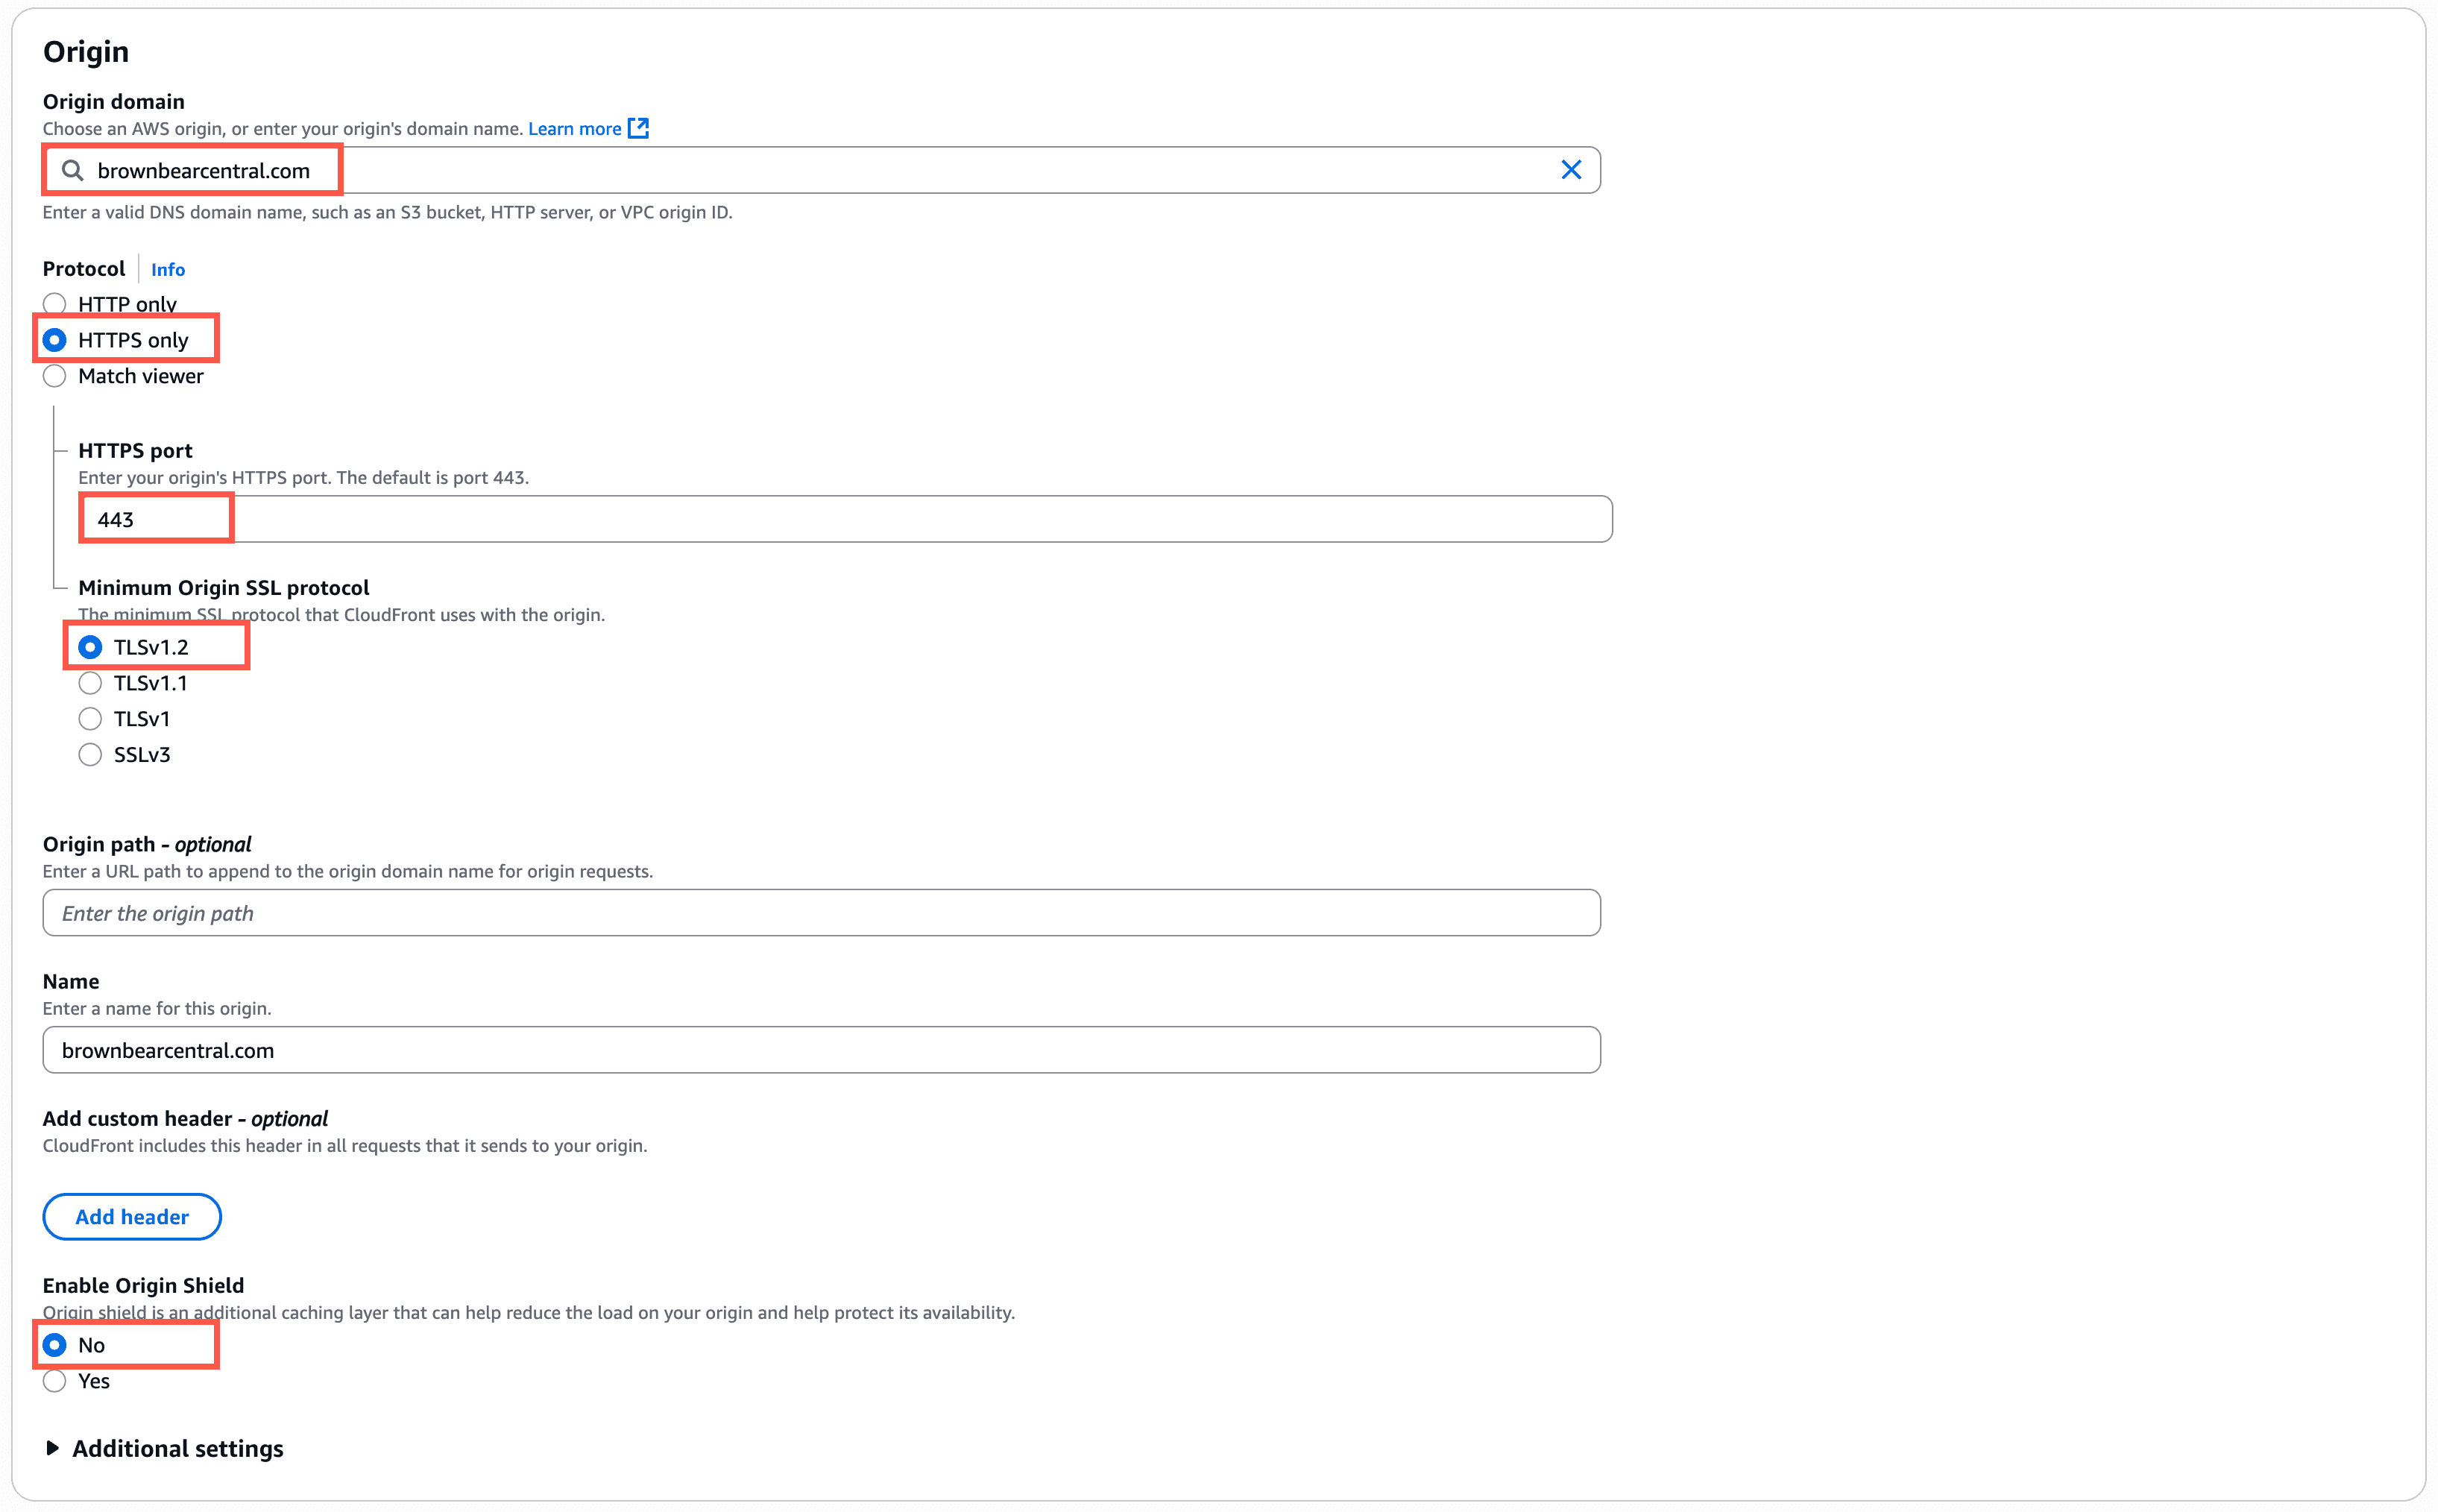
Recommended Origin settings:
- Origin domain: Your site’s primary domain (in our example here: brownbearcentral.com). CloudFront does not accept an IP address as the origin, so you must use your site’s primary domain in this field.
The following 3 fields appear once you enter your origin domain:- Protocol: HTTPS only
- HTTPS port: 443
- Minimum Origin SSL protocol: TLSv1.2
Note: Kinsta currently uses TLS v1.3 for all SSL certificates, ensuring strong security and compatibility with all major browsers. Since this setting is the minimum TLS version, TLS v1.2 is sufficient for compatibility with Kinsta. If you specifically require TLS v1.2, please reach out to our Support Team for assistance.
- Origin path: Leave this blank.
- Name: You can enter a custom name for the origin here, but it isn’t required.
- Enable Origin Shield: No.
Default cache behavior
While configuring the cache behavior settings, you’ll need to create two CloudFront policies: cache policy and request policy, which we’ve outlined for you below.
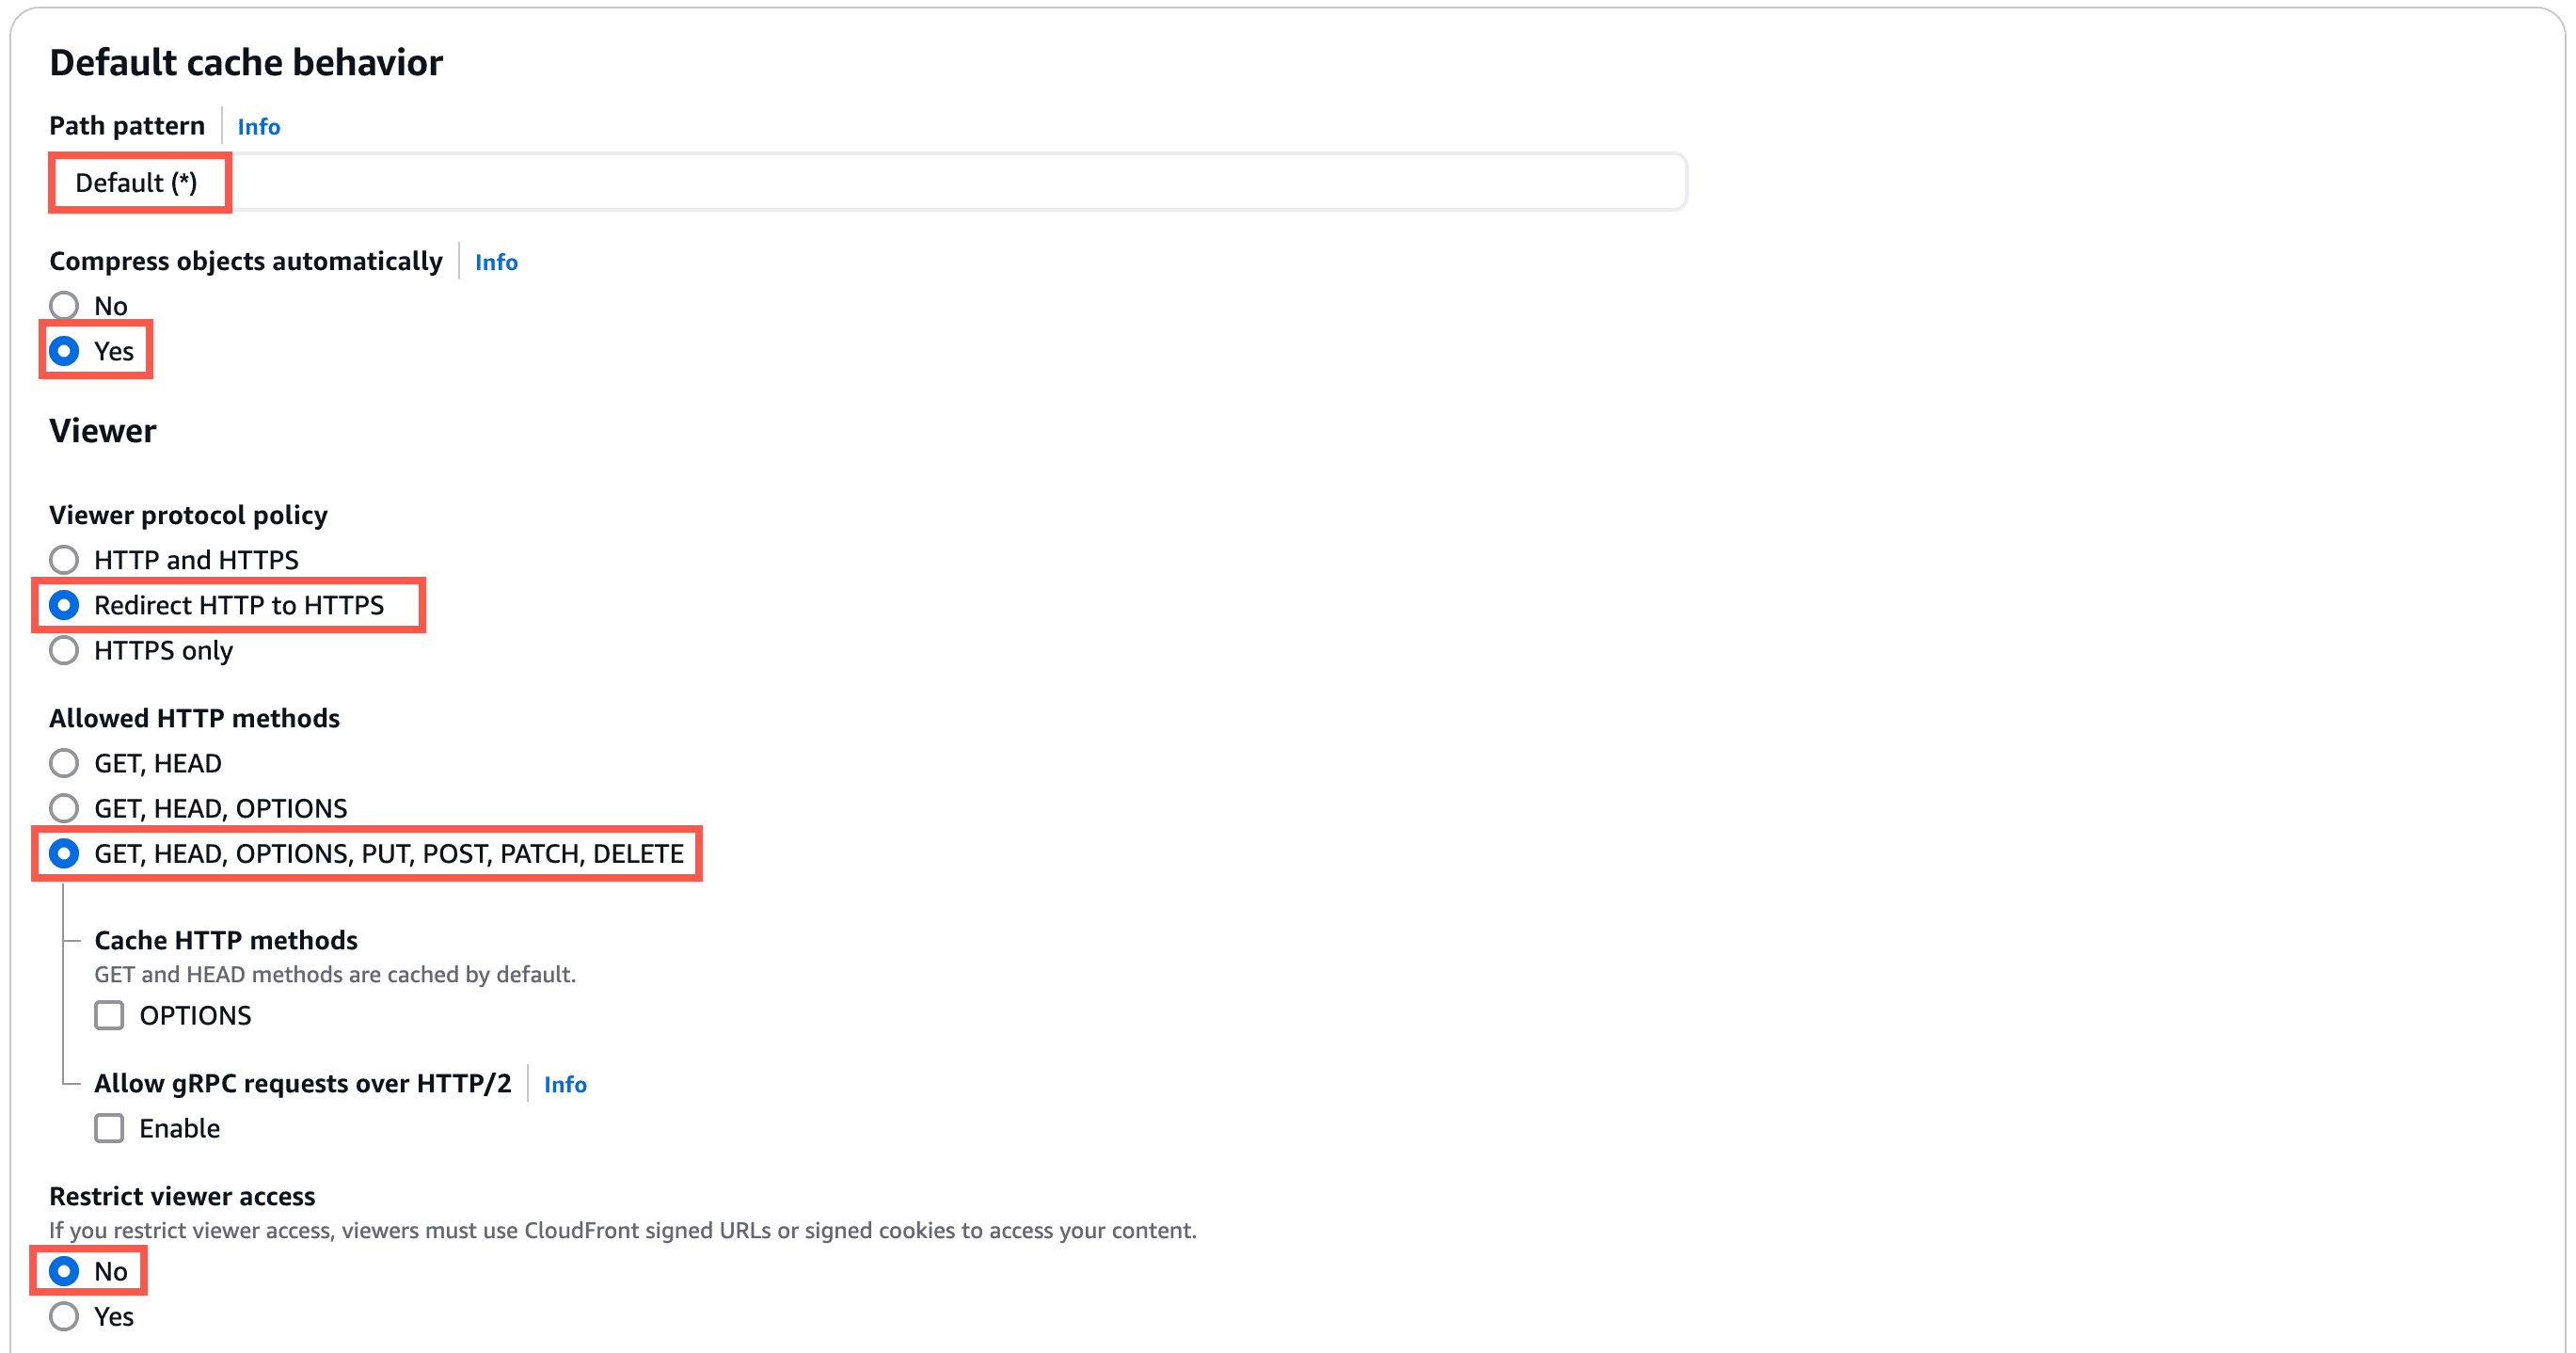
Recommended settings for the Default Cache Behavior section:
- Path pattern: Default (*).
- Compress objects automatically: Yes.
- Viewer protocol policy: Redirect HTTP to HTTPS.
- Allowed HTTP methods: GET, HEAD, OPTIONS, PUT, POST, PATCH, DELETE.
- Restrict viewer access: No.
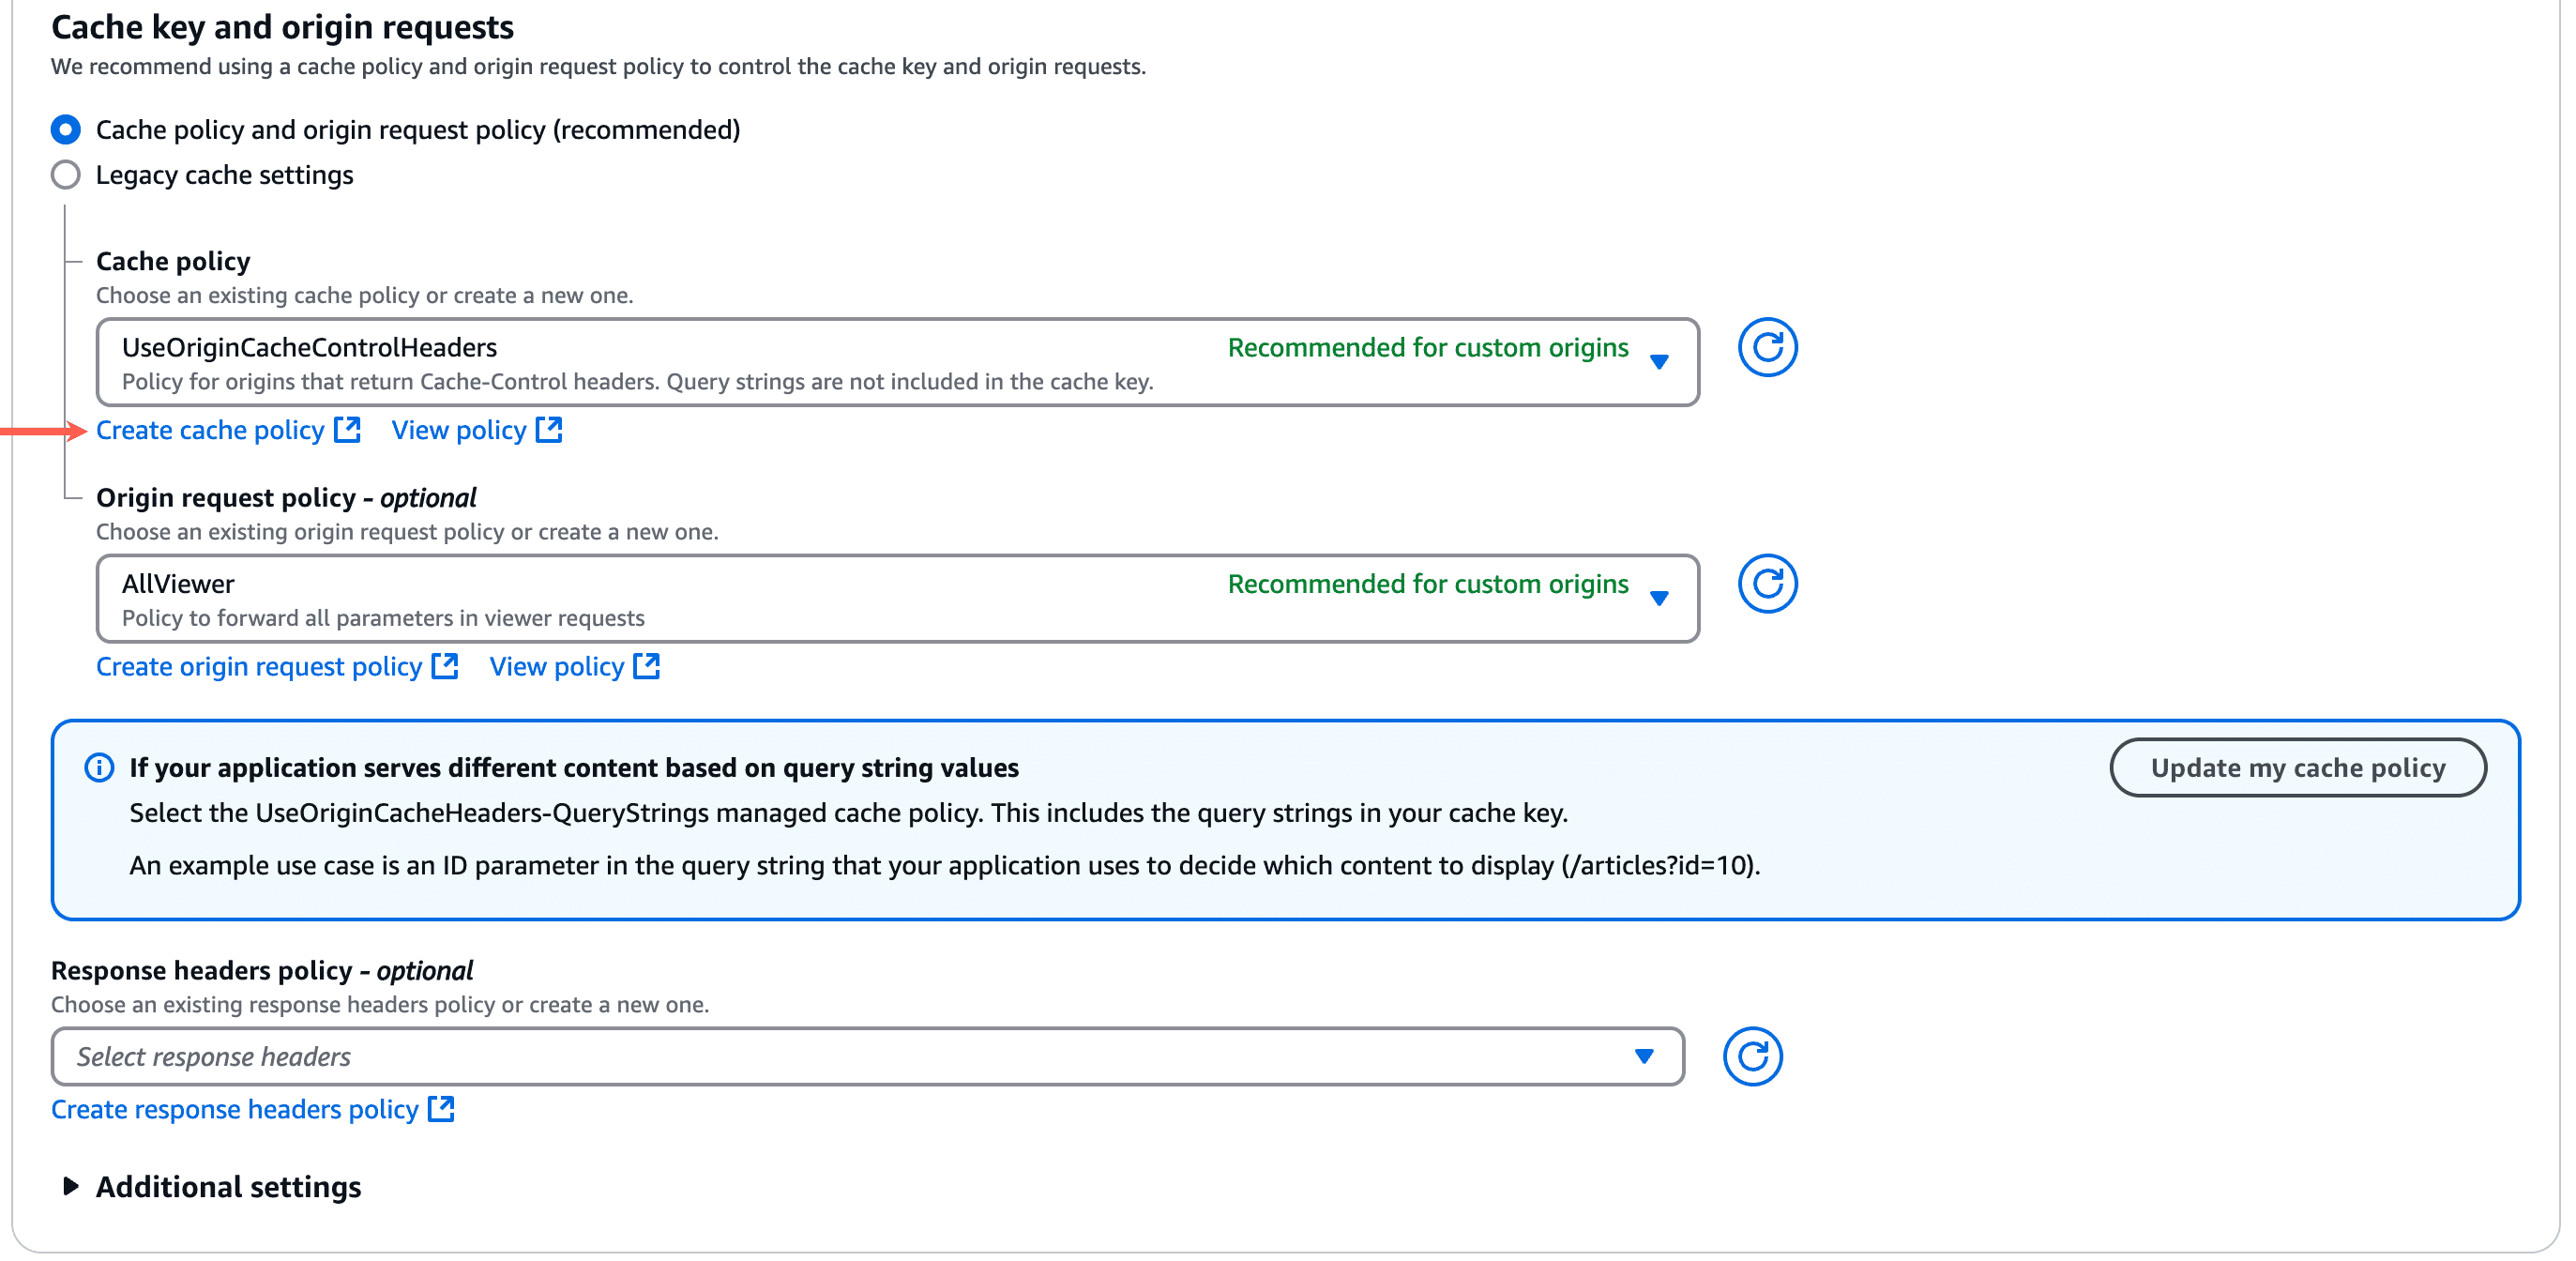
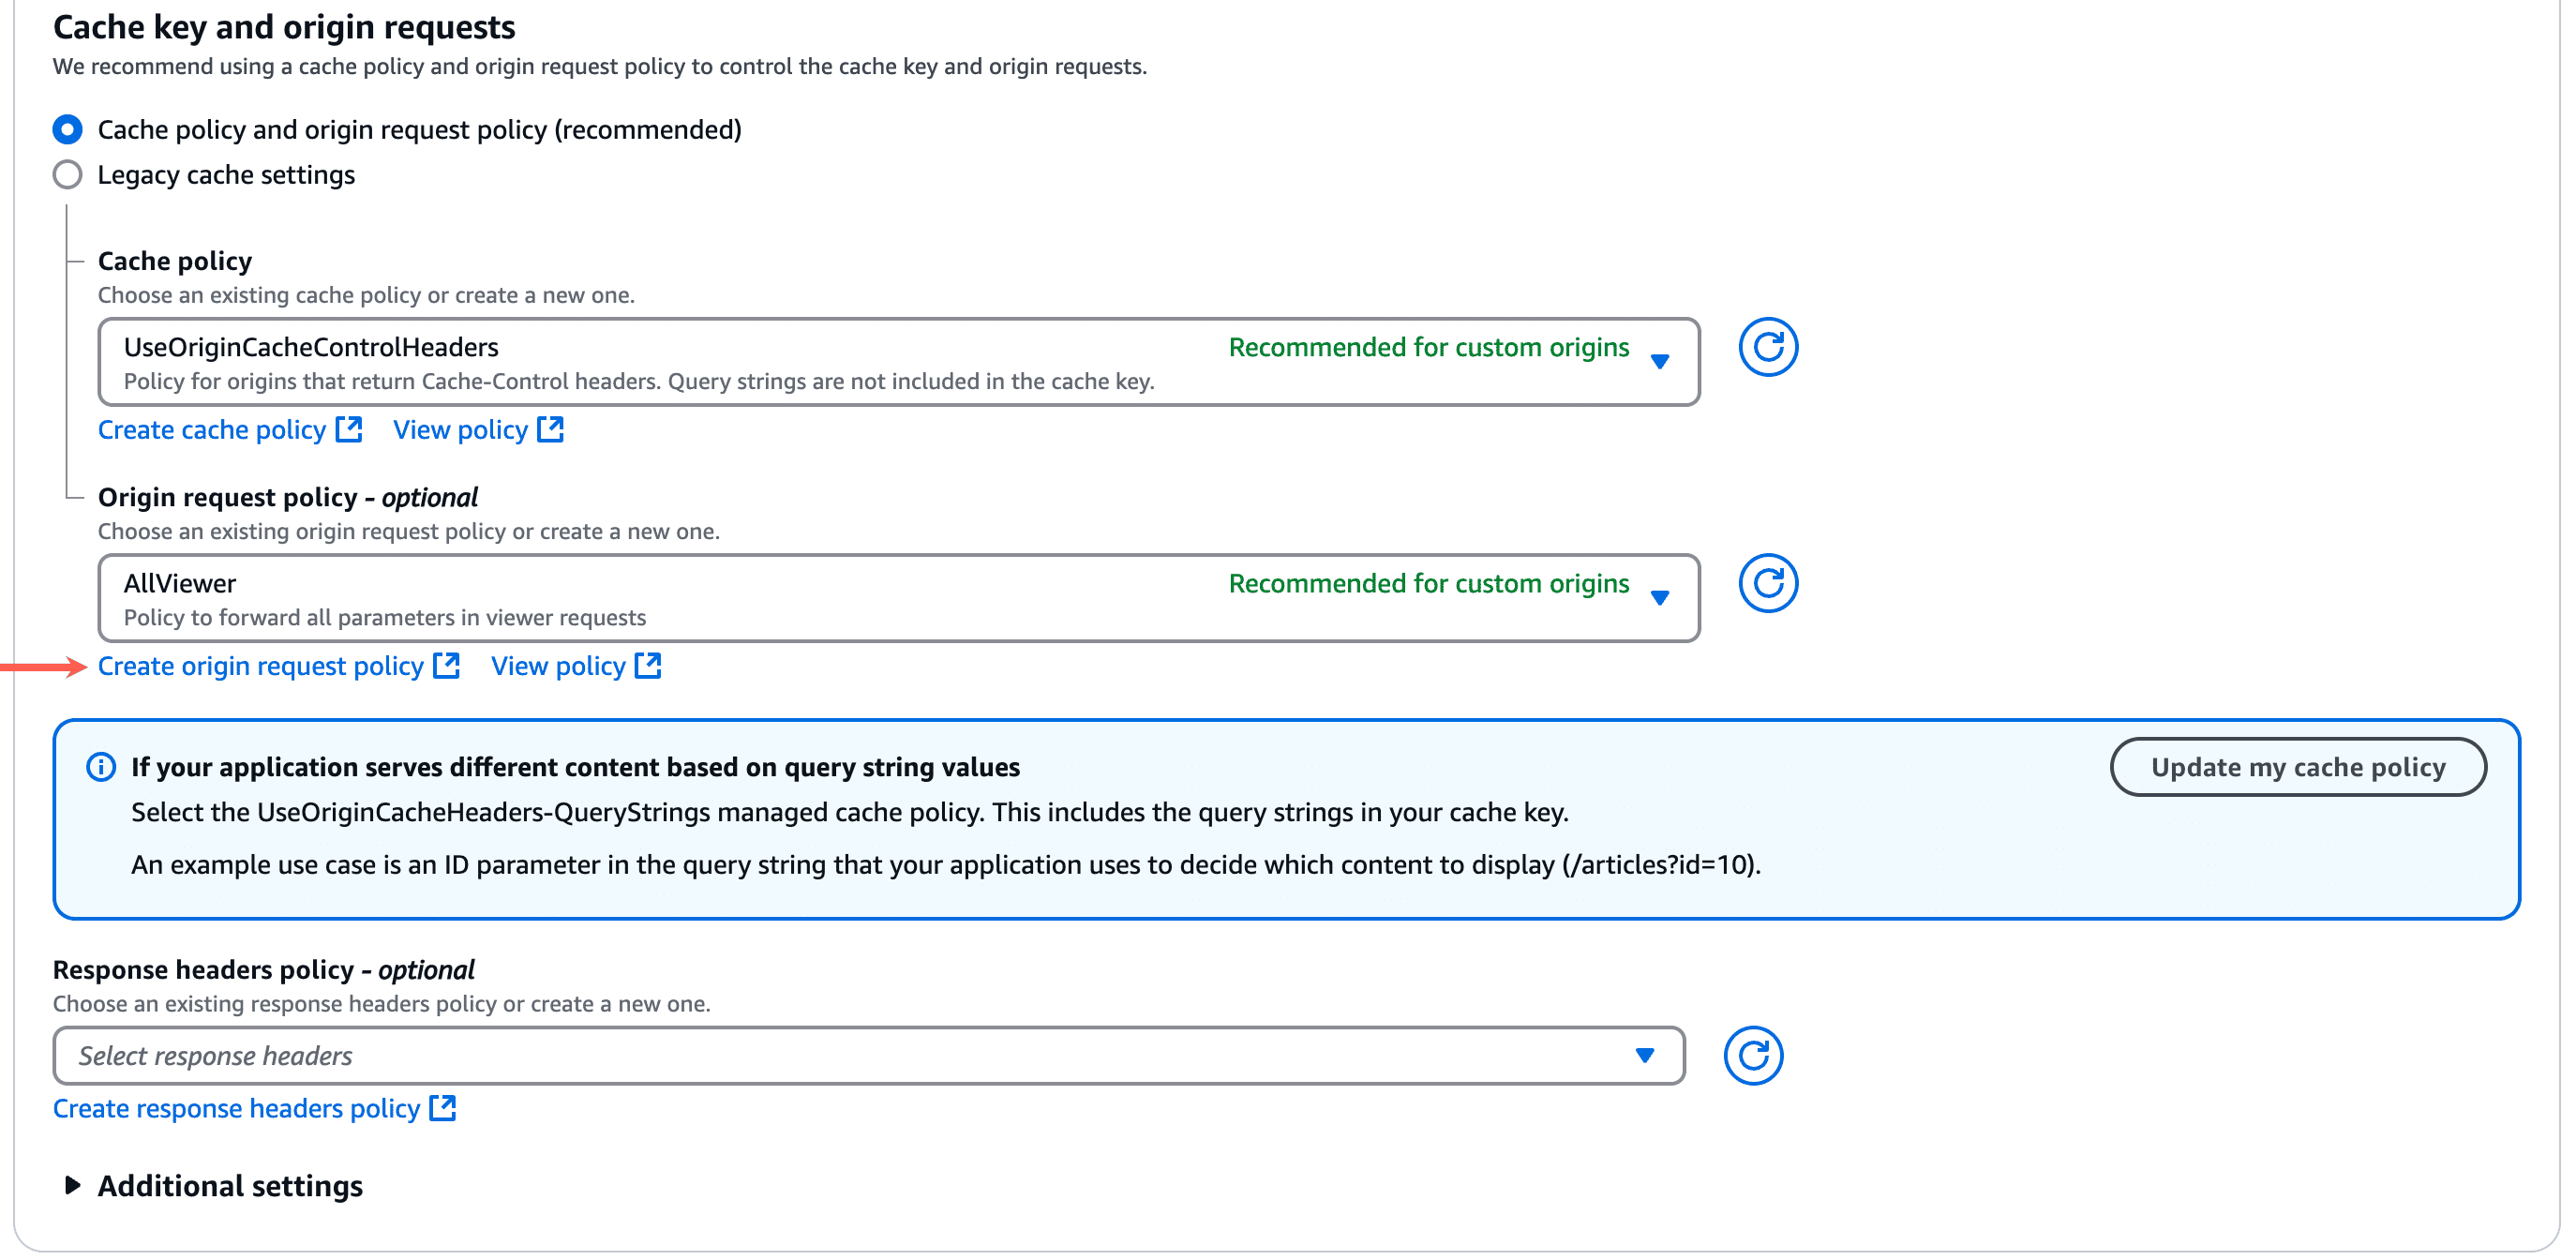
- Cache key and origin requests: Cache policy and origin request policy.
- Cache policy: Select your new custom cache policy (see steps to create below).
- Origin request policy: Select your new custom origin request policy (see steps to create below).
How to create a CloudFront cache policy
In the Cache policy section, click Create cache policy. This will launch the cache policy creation page in a new tab in your browser.
In the Details section, specify a name (e.g. KinstaCachePolicy) for the cache policy.
In the TTL Settings section, use the following settings:
- Minimum TTL: 0
- Maximum TTL: 31536000
- Default TTL: 86400
In the Cache key settings section, use the following settings:
- Headers: None
- Query Strings: All
- Cookies: All
In the Compression support section, select Gzip and Brotli, then click Create.

Close this browser tab and return to the tab where you’re creating your new CloudFront distribution.
Click the refresh button next to the Cache policy dropdown and select your new custom cache policy in the dropdown.
How to create a CloudFront origin request policy
In the Origin request policy section, click Create origin request policy. This will launch the Create origin request policy page in a new tab in your browser.
In the Details section, specify a name (e.g. KinstaOriginPolicy) for the origin request policy.
In the Origin request settings section, select the following:
- Headers: All viewer headers
- Query strings: All
- Cookies: All
Click Create to finalize the request policy.

Close this browser tab and return to the tab where you’re creating your new CloudFront distribution.
Click the refresh button next to the Origin request policy dropdown and select your new custom origin request policy in the dropdown.
Function associations
We recommend not setting any Function associations. These let you assign AWS Lambda serverless functions to different triggers within the request lifecycle (e.g. viewer request, viewer response, origin request, etc.).
While it’s possible to use function associations alongside Kinsta’s CDN, there may be some scenarios where a Lambda function can conflict with Kinsta’s CDN. If you’d like to use custom Lambda functions on your site, we recommend working with a developer to troubleshoot issues if they come up.
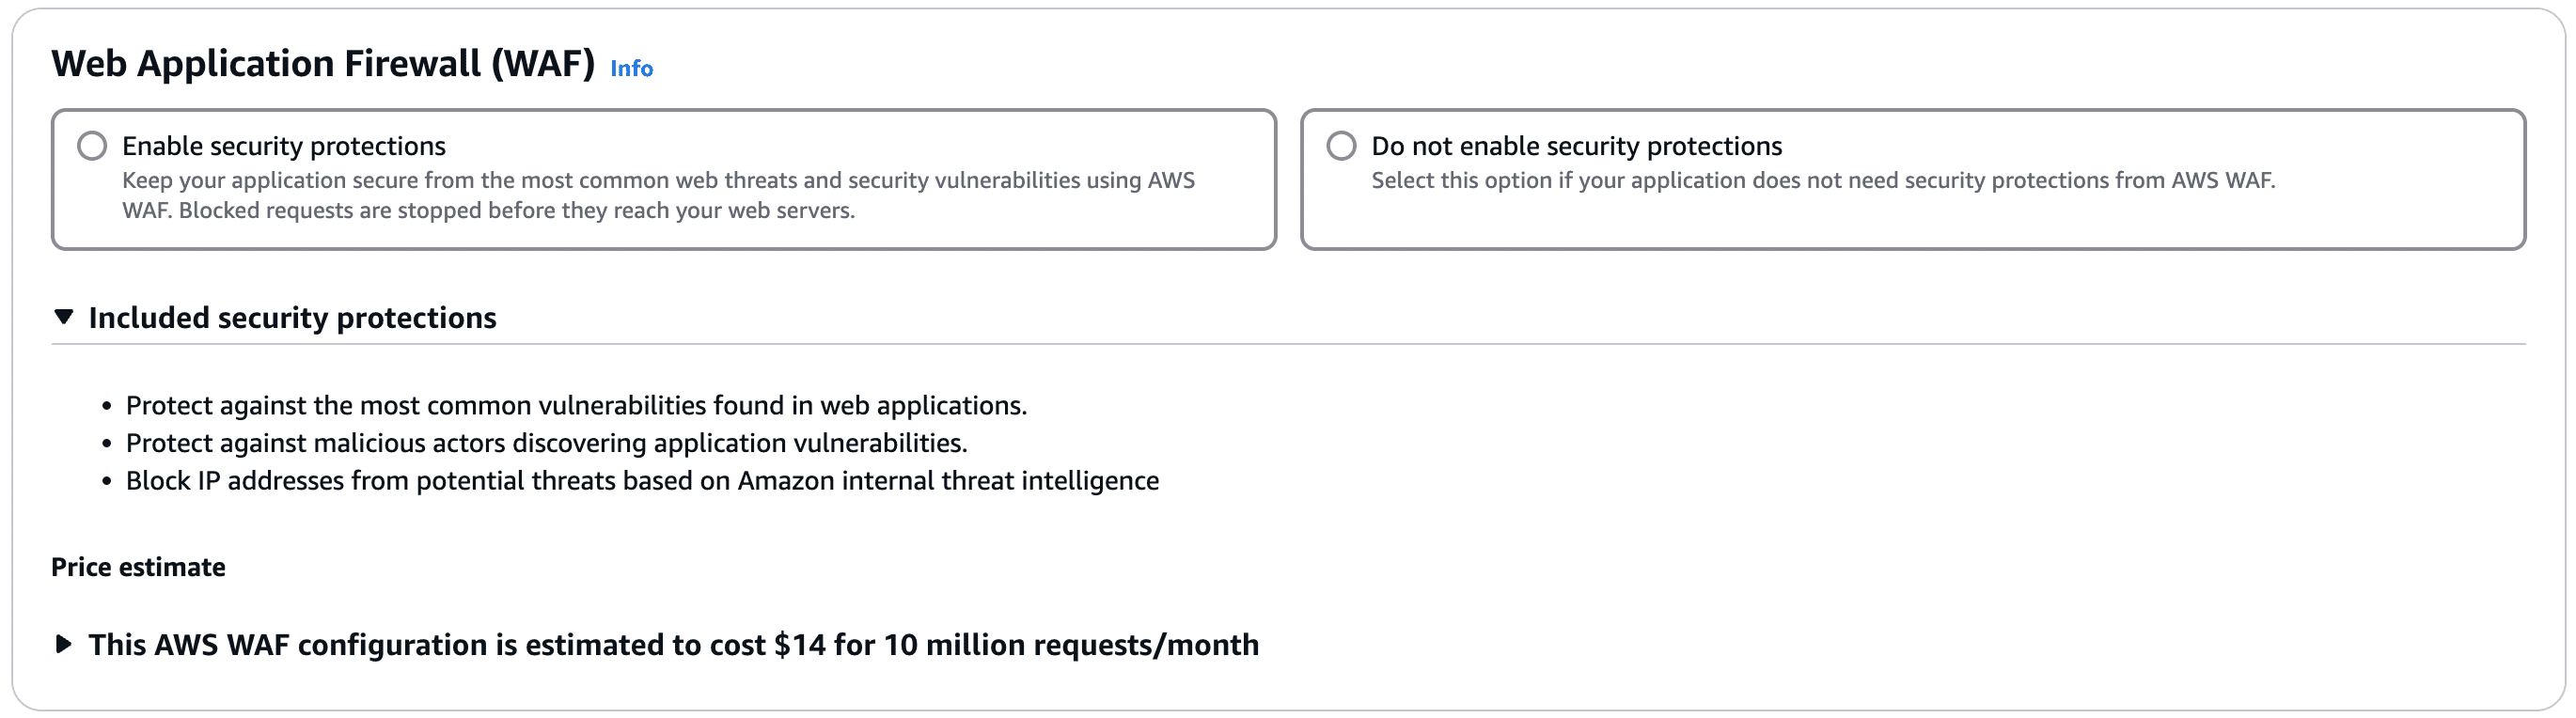
Web Application Firewall (WAF)
Select the desired option. If you enable security protections this does incur an additional cost from AWS.
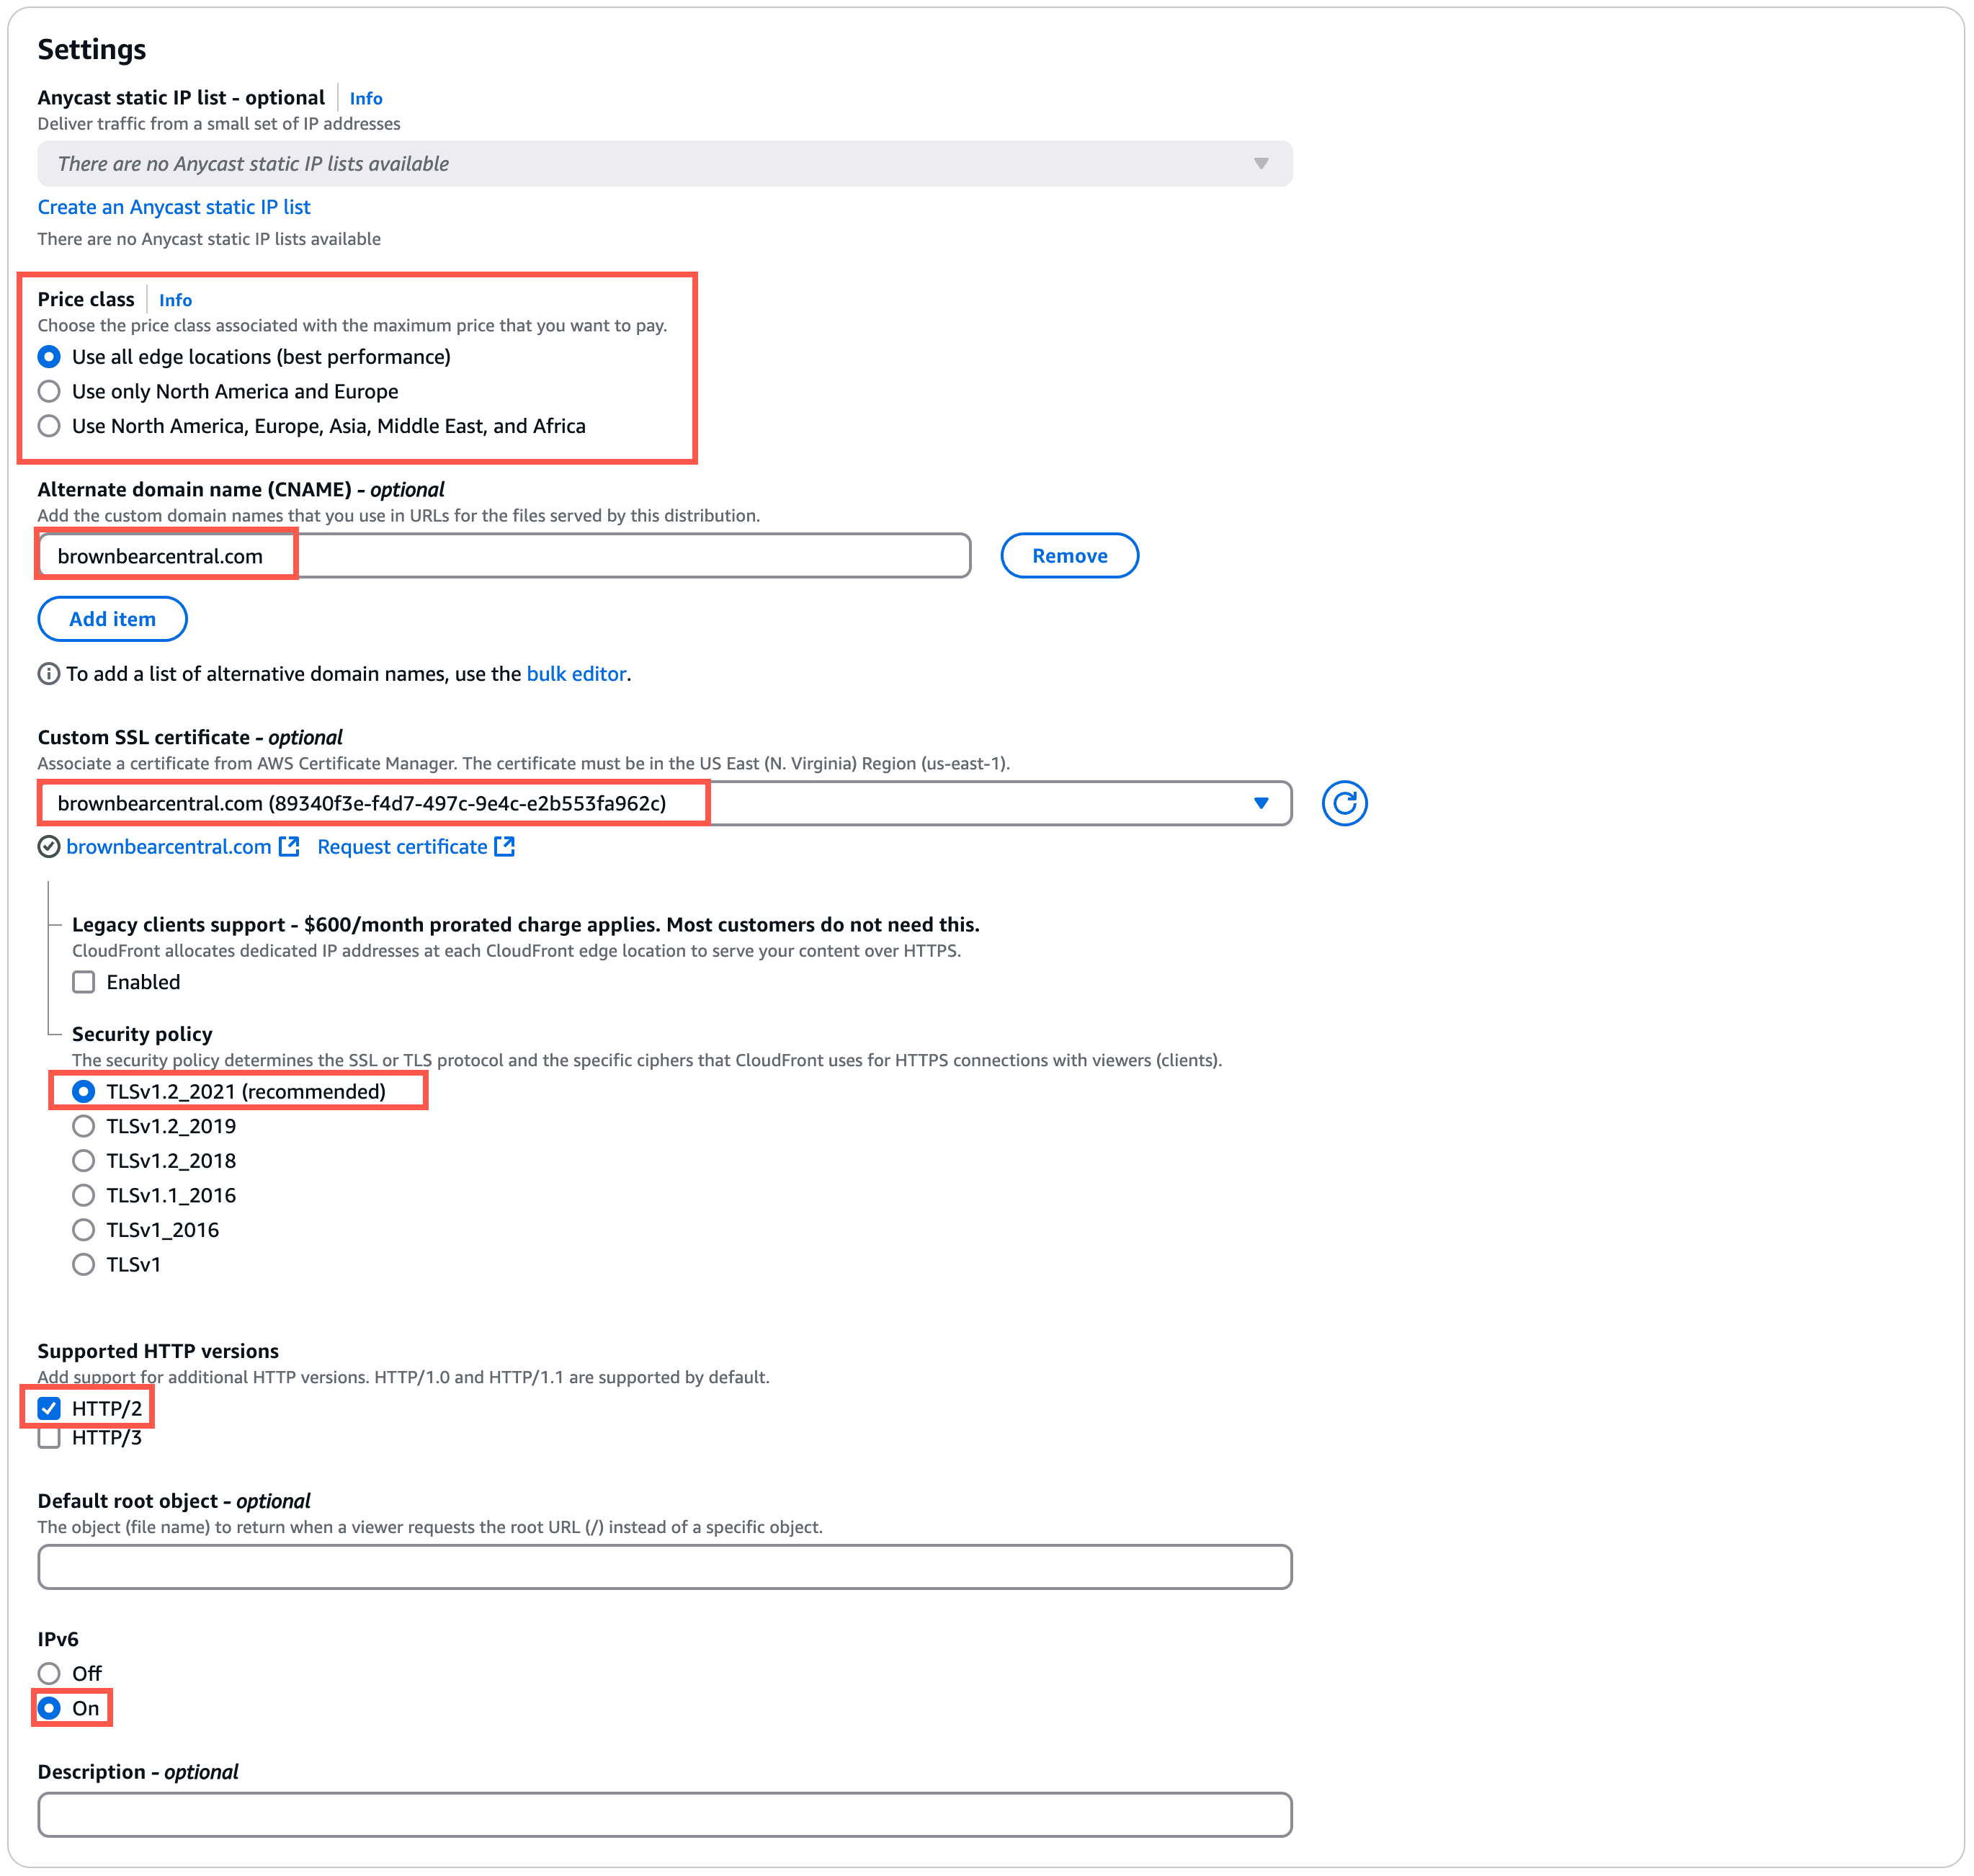
Settings
Recommended configuration for the Settings section:
- Price class: Select the CloudFront regions you’d like to use with your site.
- Alternate domain name: Click Add item and specify the custom domain (your site’s primary domain at Kinsta).
- Custom SSL certificate: Select the custom SSL certificate you created at the beginning of this tutorial.
You’ll see a few additional options after selecting the custom SSL certificate:- Legacy clients support: Leave this unchecked/disabled.
- Security policy: TLSv1.2_2021
- Supported HTTP versions: HTTP/2
- IPv6: On
Standard logging
This should be set to Off.

Click Create distribution to finish creating your new CloudFront zone.
Troubleshooting common CloudFront issues
502 errors
If you see 502 errors on your site after creating your CloudFront distribution, double-check the Origin Domain in your Origin Settings. This needs to be your site’s kinsta.cloud domain, not your live domain.
Changes aren’t showing up on your site
Setting your site up to use CloudFront creates an additional layer of caching that will need to be cleared anytime you need to clear the cache. If you’re having trouble seeing changes on your site or a plugin isn’t behaving as expected after installing or reinstalling, be sure you clear cache at all layers, including:
- Plugins (if applicable)
- Themes (if applicable)
- Site/server cache at Kinsta (from either MyKinsta or the Kinsta MU plugin)
- Cache at CloudFront (Do this by invalidating objects. Using /* for the object path to invalidate will clear all cache.)
- Browser cache
IP address blocked by false positive
If you have DDoS mitigation or bot detection enabled at CloudFront and you or a site visitor are being incorrectly blocked from viewing your site, this may be due to a false positive. If this happens, you’ll need to work with both AWS support and Kinsta Support to pinpoint where the block is occurring.
HTTP-HTTPS redirect loops
If any HTTP to HTTPS redirect loops occur, make sure the Protocol is set to HTTPS Only in your CloudFront Origin settings for your domain.
IP Geolocation redirects not working properly
Page Cache, which is enabled by default at CloudFront, may interfere with any IP Geolocation redirections you set at Kinsta. If this occurs, you’ll need to disable caching at CloudFront or configure your cache policy to only cache the files that aren’t specific to a location. If you run into issues setting that up, we recommend working with a developer to configure your custom cache policy.
Unable to log in to the WordPress Dashboard
Login won’t work without POST support. Other functionality on the website may also be affected. Make sure the Allowed HTTP methods under Default cache behavior are set to GET, HEAD, OPTIONS, PUT, POST, PATCH, and DELETE.
Advanced settings and compatibility
Restrict viewer access with signed URLs and signed cookies
Some options, such as Restricting access to files on custom origins, may not work because Cloudflare will always cache static requests.