SFTP
To ensure your data remains safe and encrypted, Kinsta only supports SFTP connections. When you’re connected to a WordPress site via SFTP, you gain direct access to the files and folders on the server, allowing you to perform a variety of tasks that can be especially useful for troubleshooting, customizing, or managing your site, such as:
- Upload, download, and edit files.
- Manage your plugins and themes.
- Fix errors and restore access.
- Back up your site.
- Delete files.
- Manage permissions.
MyKinsta includes a primary SFTP user with full access to all files and directories on your WordPress site. You can also create additional SFTP users with customizable permissions, including read-and-write or read-only access. You can also restrict their access to a specific subdirectory, giving you greater control over who can access different parts of your site.
SFTP clients
If you don’t already have an SFTP client installed on your computer, we recommend one of the following:
- Cyberduck (Free — macOS or Windows)
- WinSCP (Free — Windows)
- FileZilla (Free — macOS, Windows, or Linux)
- Transmit (Premium — macOS)
You can connect via SFTP with your SFTP client using the primary SFTP/SSH user or one of the Additional SFTP users.
Primary SFTP/SSH user
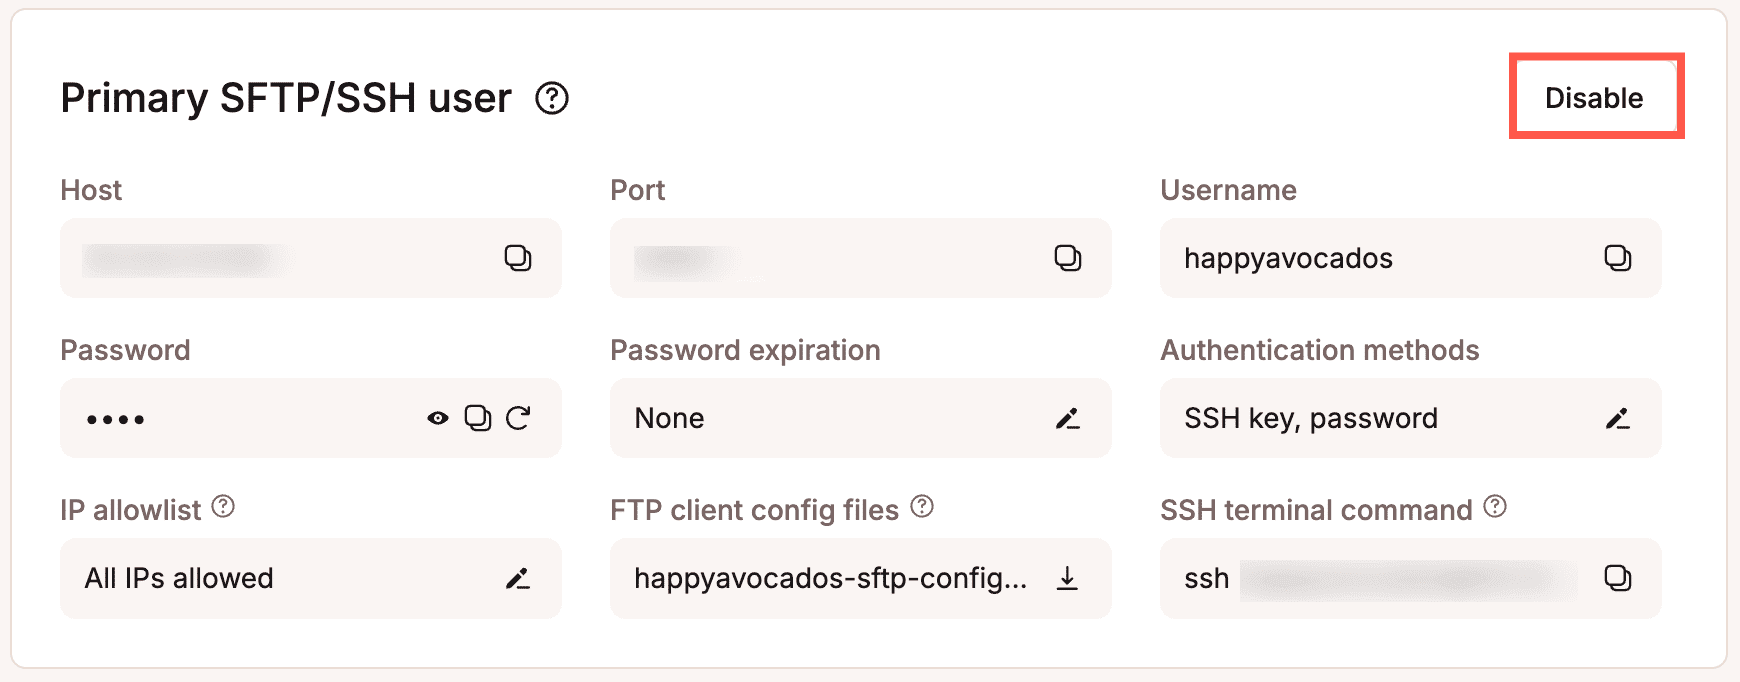
The Primary SFTP/SSH user has full read and write access to all files and folders on your WordPress site. The credentials you need to access your site via SFTP can be found in MyKinsta under Sites > sitename > Info > Primary SFTP/SSH user.
Kinsta only supports SFTP connections; therefore, you should ensure the connection type is always SFTP. The Host may be described as the Address, URL, or Hostname within the SFTP client.
You can also use an SSH key in addition to your username and password.

Some SFTP clients may default to FTP as the connection type, so be sure SFTP is selected as the connection type. If you don’t, you might see an error similar to:
Cannot establish FTP connection to an SFTP server. Please select proper protocol.
Download primary SFTP user settings
Rather than manually inputting your SFTP settings, you can download a configuration file that contains all of the Primary SFTP user settings required for the SFTP connection for FileZilla, Cyberduck, or Terminus. In MyKinsta, under Sites > sitename > Info > Primary SFTP/SSH user, click the download icon under FTP client config files.
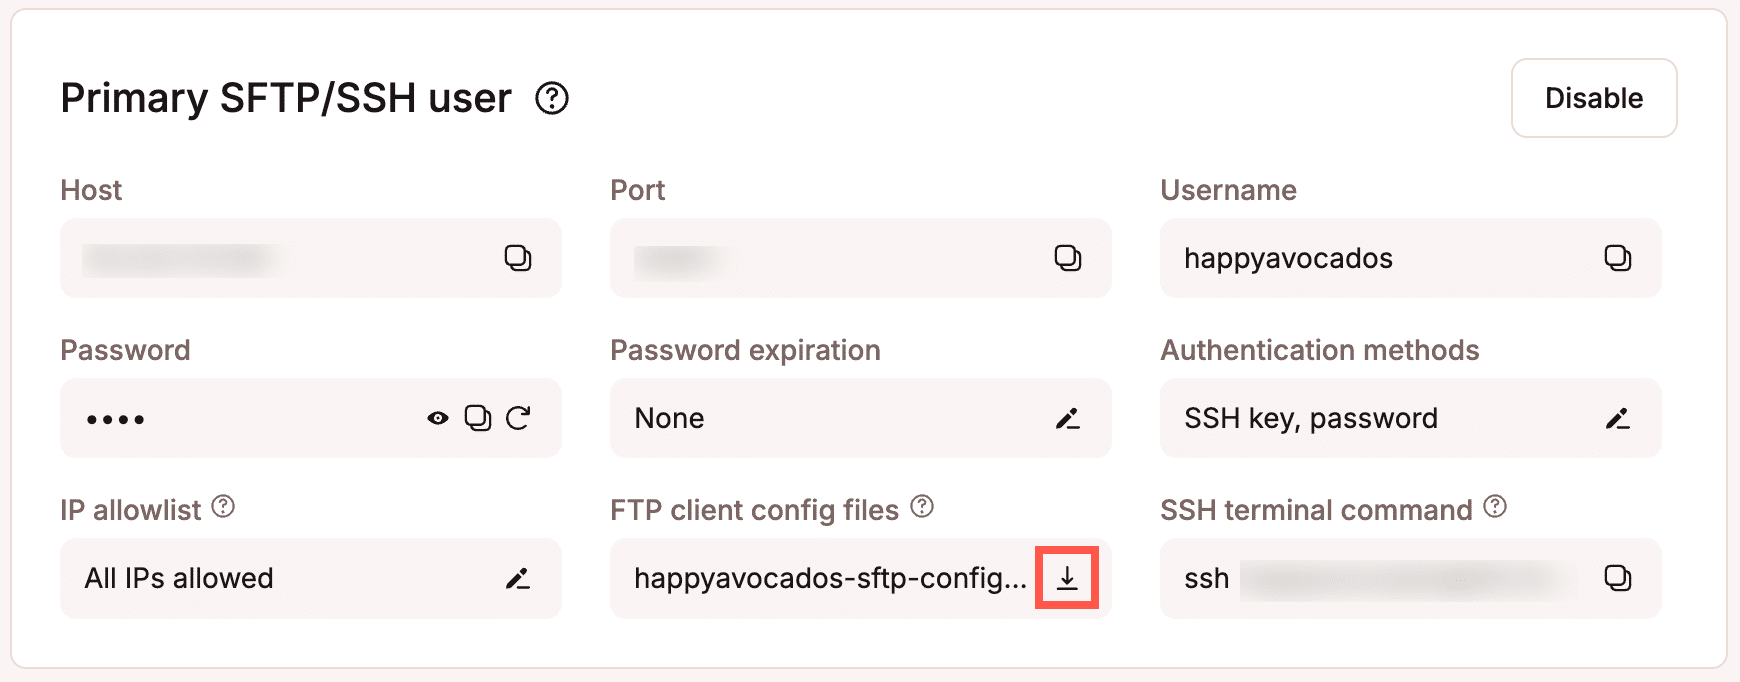
This downloads a zip file that contains the following files:
- .xml – This can be used to import the SFTP settings into FileZilla. For support with the import, refer to FileZilla’s documentation.
- .duck – This can be used with Cyberduck. If you open the file, it starts the Cyberduck application and creates the connection. If you need further support with this, refer to Cyberduck’s documentation.
- .csv – This can be used to import the SFTP settings into Terminus. For support with the import, refer to Terminus support.
Change the primary SFTP/SSH user password
If you want to update the primary SFTP/SSH user password for the current environment, hover over the password and click Generate new SFTP password.
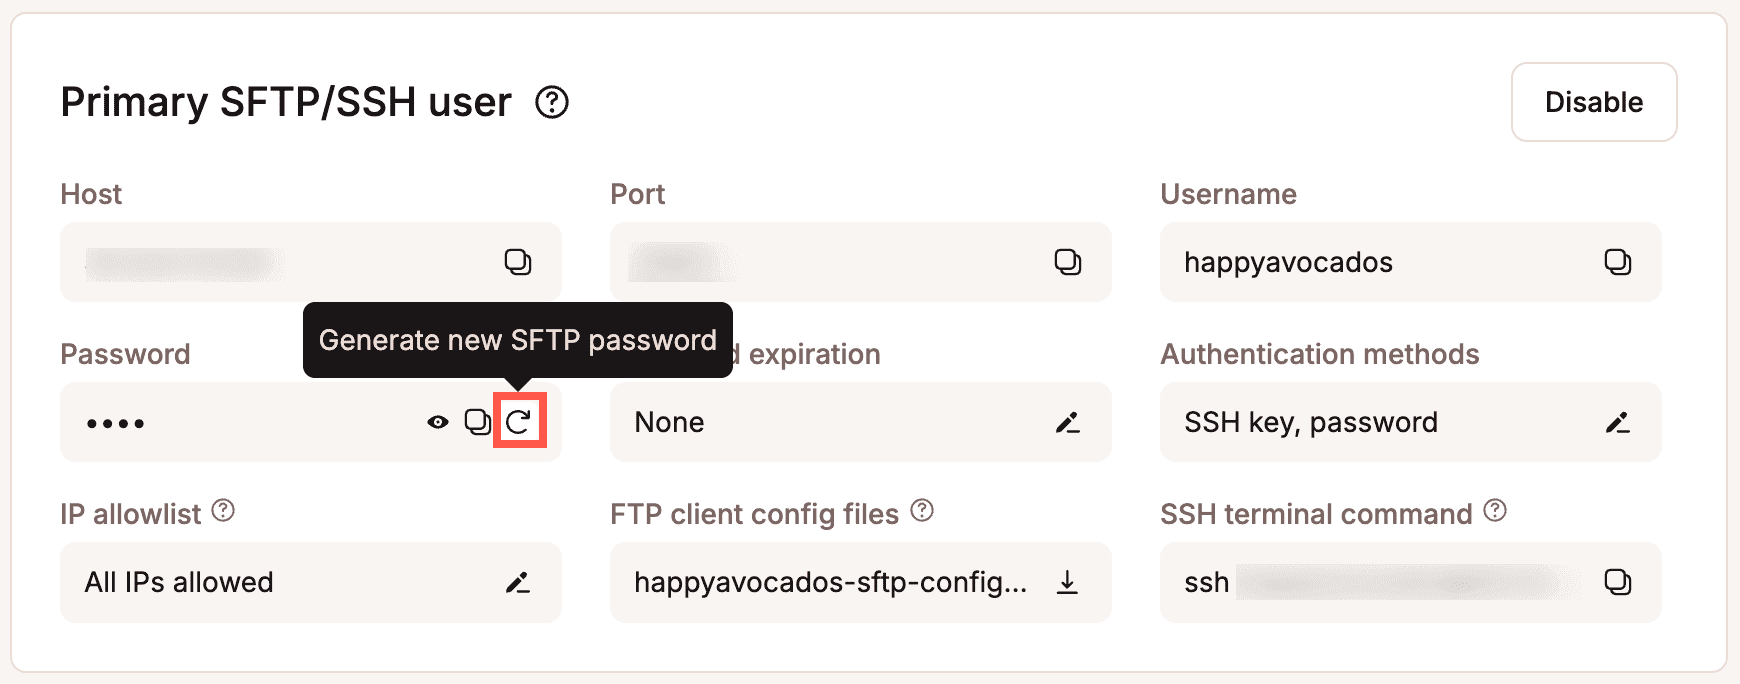
To confirm the password change, click Generate new password.

Copy and paste the new password into your SFTP client as needed.
Set a password expiration for the primary SFTP/SSH user
If you want the primary SFTP/SSH user password to expire and regenerate automatically at regular intervals for the current environment, click the edit icon under Password expiration.
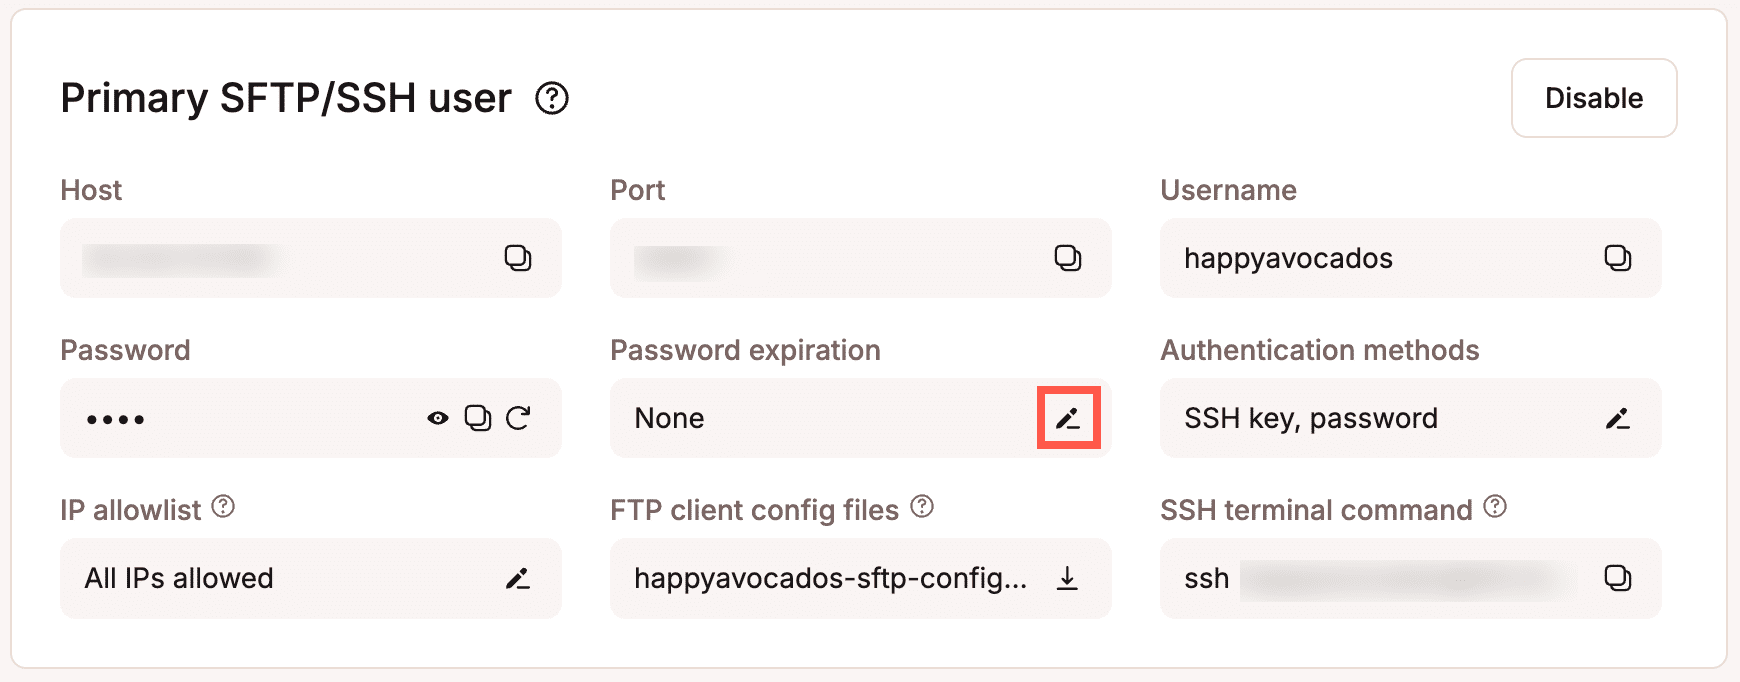
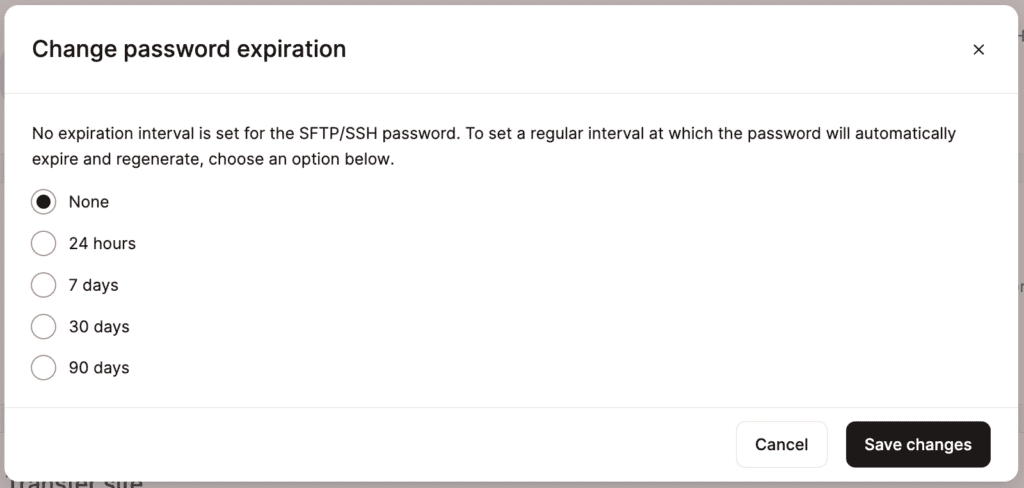
Choose how often you want the password to expire and regenerate, and click Save changes.
Authentication methods for primary SFTP/SSH user
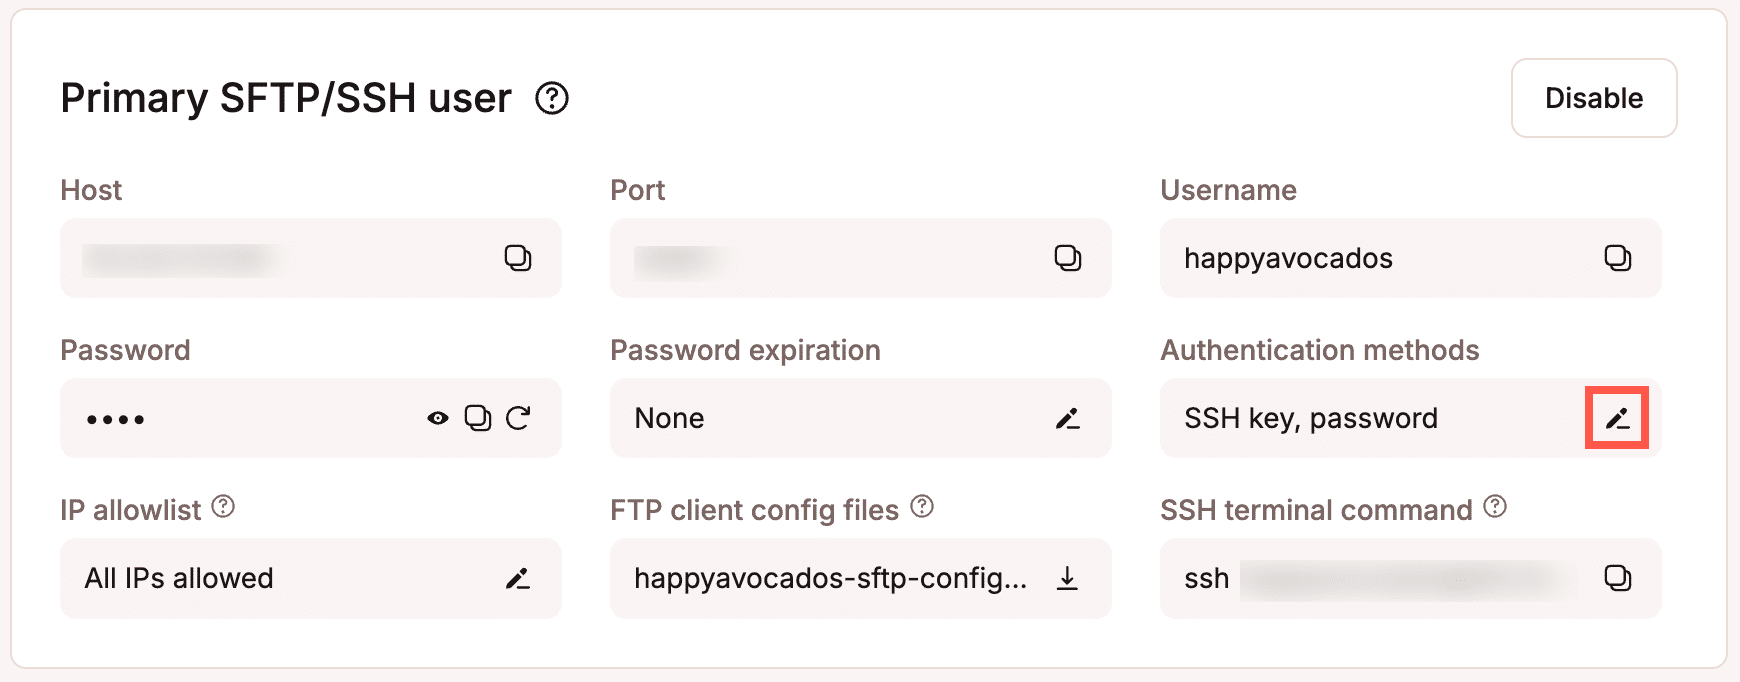
To change the primary SFTP/SSH user authentication methods to enable or disable access with a username and password for the current environment, click the edit icon under Authentication methods.
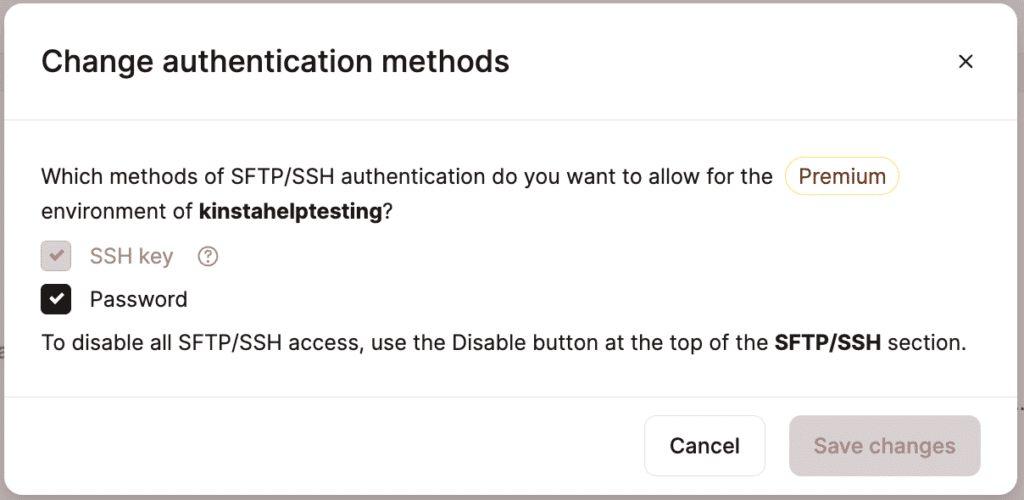
Select Password to enable or disable primary SFTP/SSH user access with a username and password, and click Save changes. You cannot disable access using an SSH key; however, you can disable all SFTP/SSH access.
IP allowlist for primary SFTP/SSH user
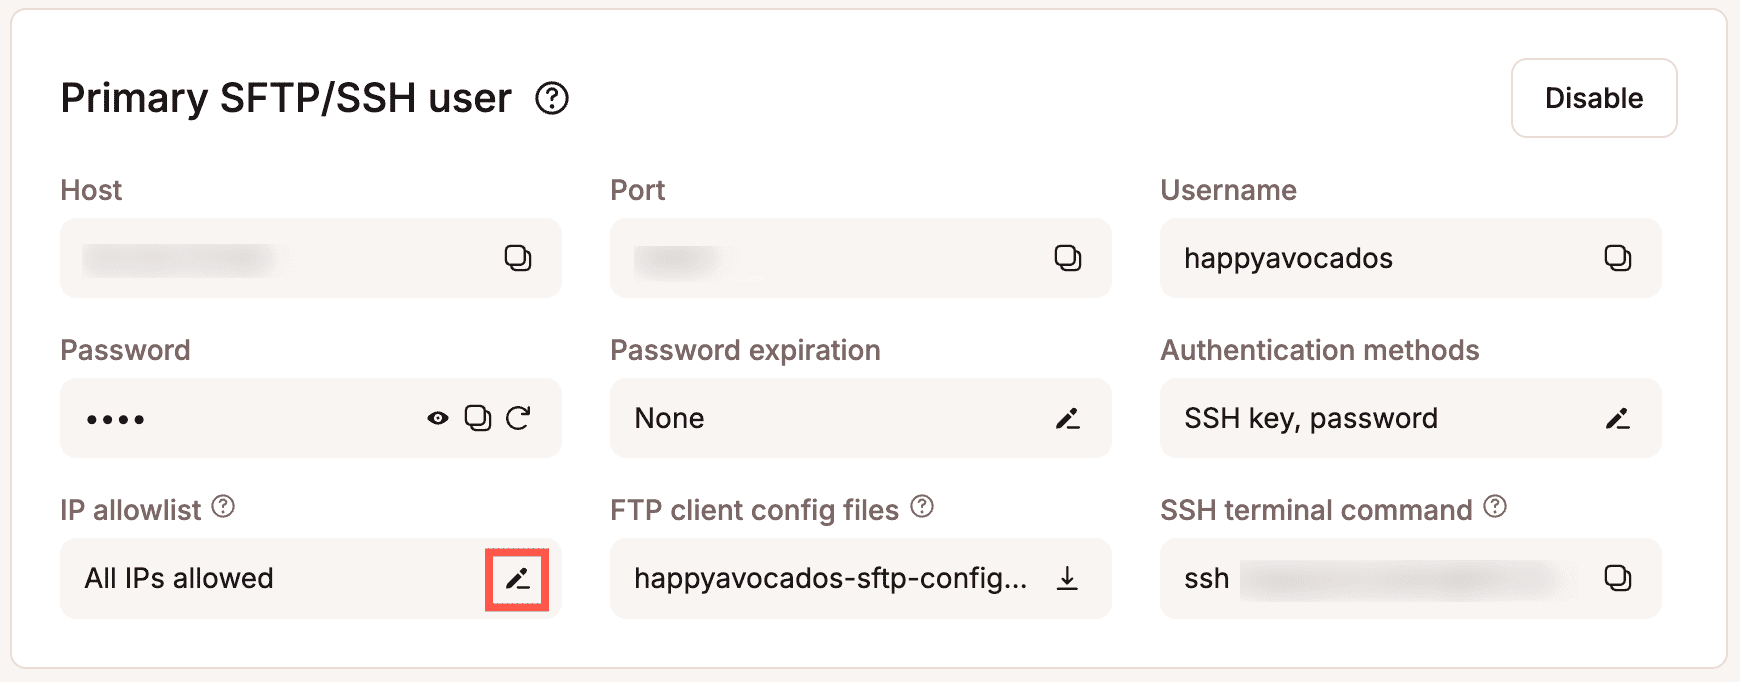
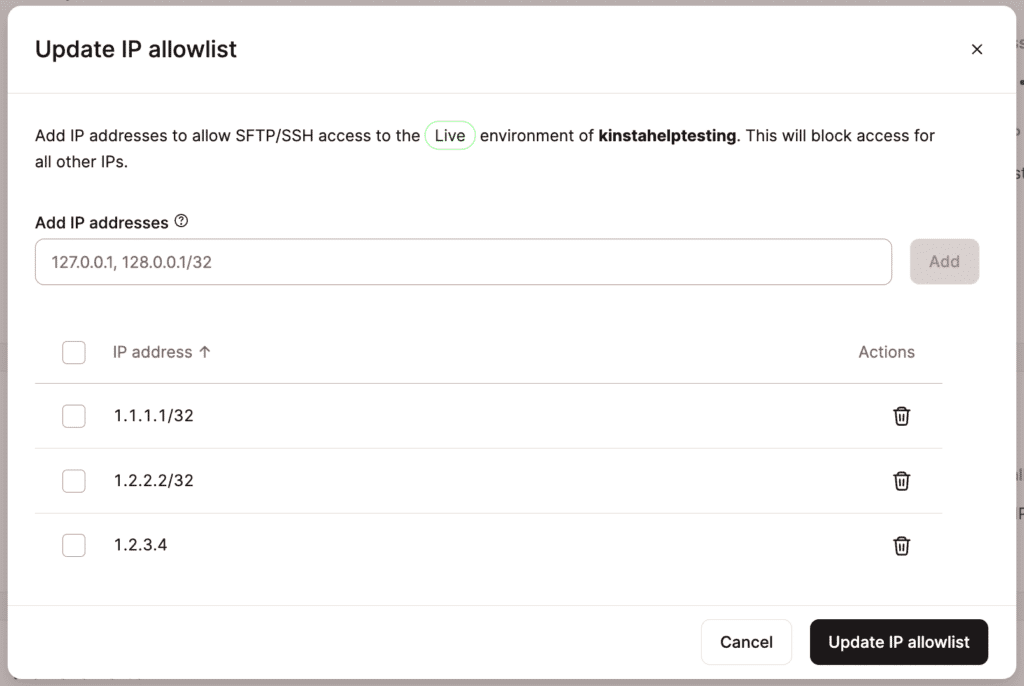
To specify a list of IP addresses that are allowed to access your environment with the primary SFTP/SSH user credentials via STFP/SSH, click the edit icon under IP allowlist.
Enter the IP addresses you want to allow access via SFTP/SSH and click Add. You can specify multiple addresses separated by a comma, e.g., 1.1.1.1, 2.2.2.2. You can also specify a range of IP addresses using a slash, e.g., 1.1.1.1/32.
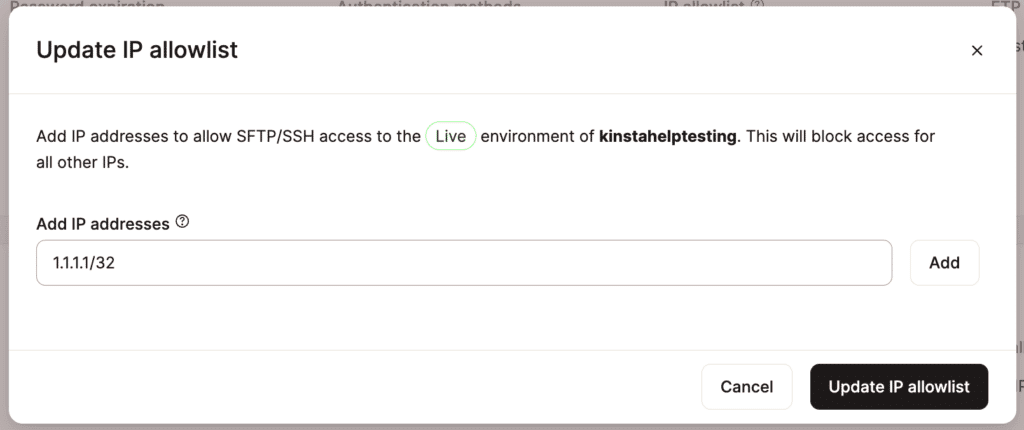
Once you have entered all of the required IP addresses, click Update IP allowlist.
Disable/enable primary SFTP/SSH user access
If you want to disable the primary SFTP/SSH user access so users with the primary user credentials cannot connect via SFTP/SSH within Primary SFTP/SSH user, click Disable.
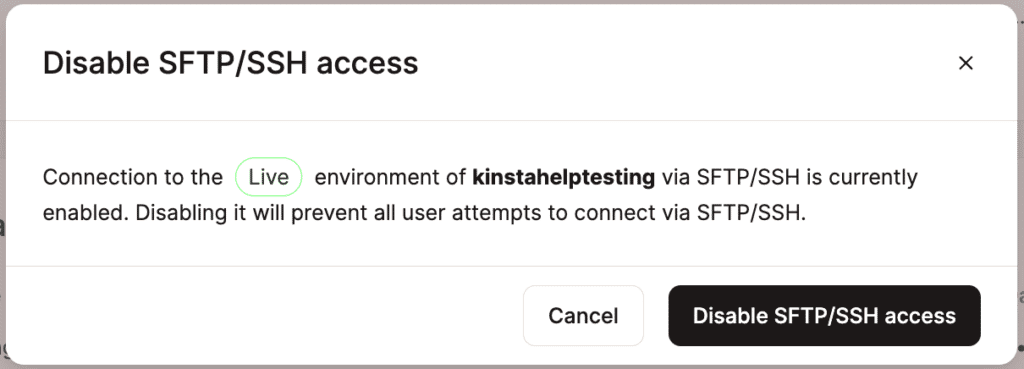
To confirm the changes, click Disable SFTP/SSH access.
When SFTP/SSH access is disabled, the connection details are no longer shown.

If you want to enable access and show the connection details, click Enable > Enable SFTP/SSH access.
Additional SFTP users
In addition to the primary SFTP/SSH user, you can create additional SFTP users with customizable permissions. Additional SFTP users are unique to each environment, and you can limit their access to read and write or read-only and further restrict their access to specific directories within your site. For example, if you want a user to only manage plugins, you can limit their access to the /wp-content/plugins/ subdirectory. This provides greater control and security when granting access to developers, contractors, or team members.
You can add SFTP users within Sites > sitename > Info > Additional SFTP users > Add new user.

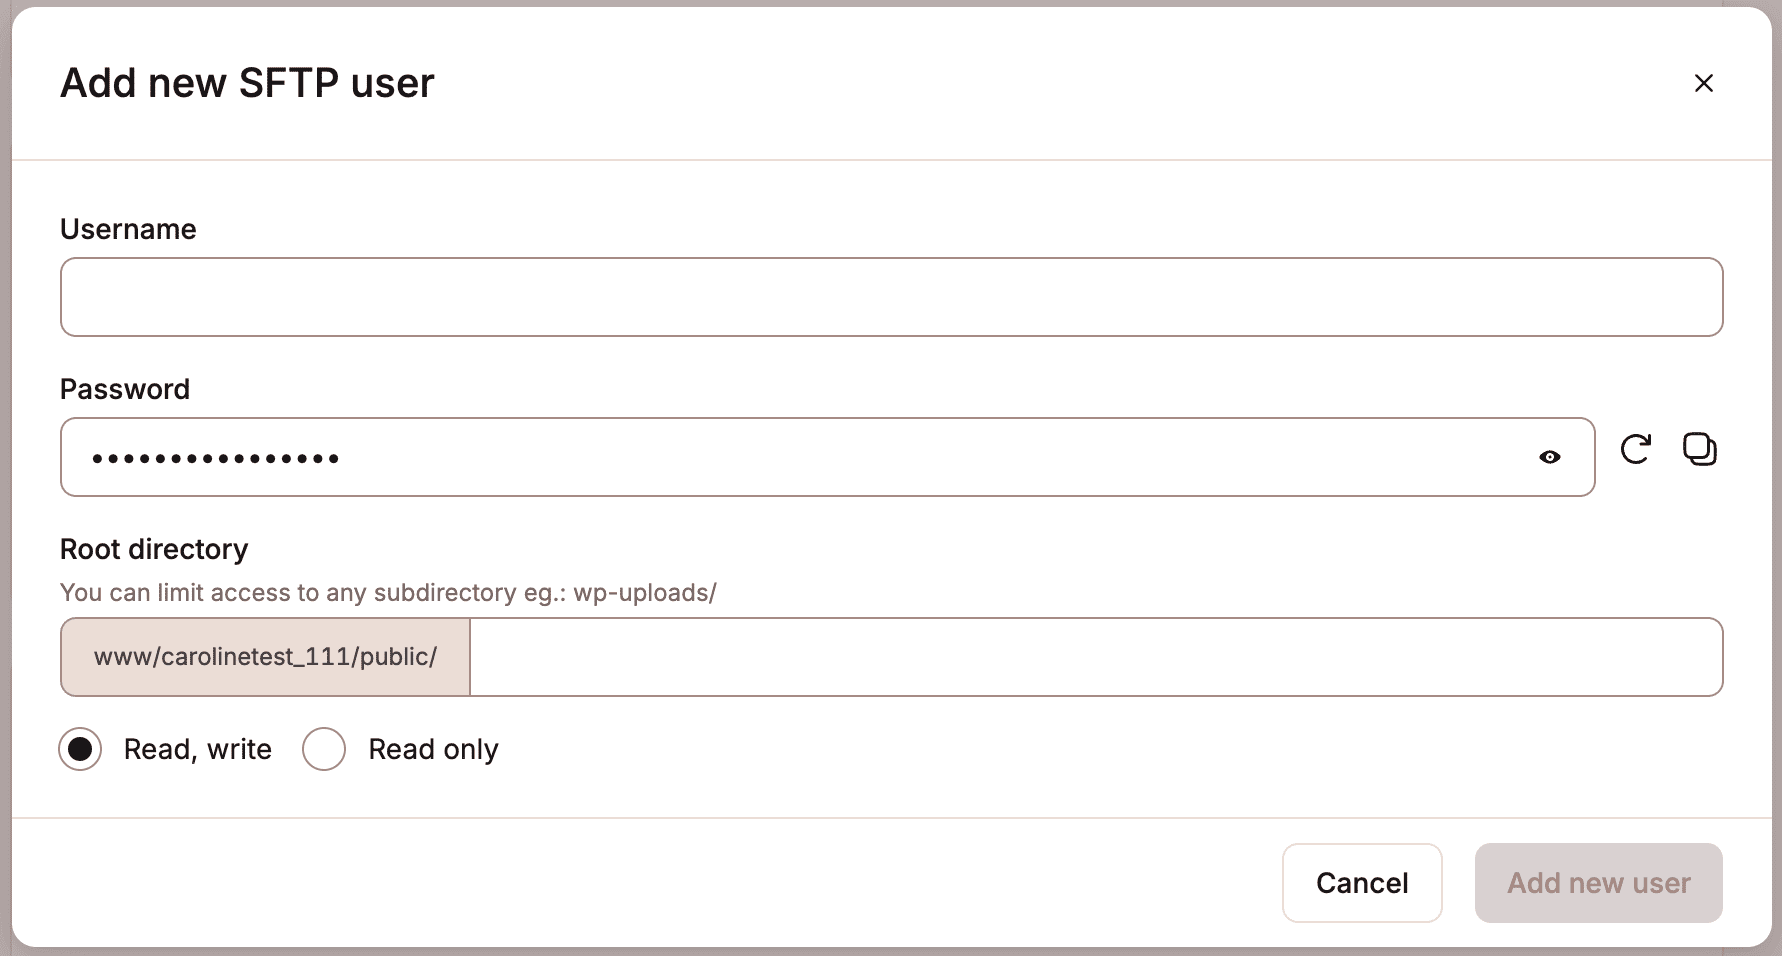
Complete the new user’s details as follows:
- Username: This is unique to the environment; it is case-sensitive and only accepts letters, numbers, underscores (_), and dashes (-).
- Password: Enter a password for the user, this must be at least 16 characters.
- Root directory: To restrict access to a specific subdirectory, enter the path to the folder here. For example, to limit access to your plugins folder, enter
/plugins/. The folder must already exist in your directory; if the folder does not exist, when you add the new user, the action will fail. You can create new folders using the Primary SFTP/SSH user. - Read, write, or Read only: Choose the required level of access for the user.
Click Add new user.
Important notes
- New SFTP users share the same Host as the primary SFTP/SSH user but use a different Port.
- When you push an environment to Live or Staging, any additional SFTP users created in the environment you are pushing from are not transferred. Instead, the SFTP users already associated with the environment you are pushing to are retained and remain unchanged.
- When you clone an environment, any additional SFTP users are not carried over to the new environment; you’ll need to set them up again manually if needed.
- When you reset an environment, any additional SFTP users are removed.
- The only file you cannot set as the Root directory is the
logsfile, as it is owned by the super user. You can assign any other file or directory as the Root directory for additional SFTP users. - If you want to limit access to a specific subdirectory, the folder must already exist in the site’s directory. You can create new folders using the Primary SFTP/SSH user.
- Additional SFTP users do not have SSH access.
Edit an SFTP user
To change the details of an additional SFTP user, click the kebab (three dots) and click Edit.

You can change the username, password, subdirectory access, or the level of access they have. If you change the Root directory to limit access to a specific subdirectory, the folder must already exist in the public directory; if the folder does not exist, when you edit the user, the action will fail. You can create new folders using the Primary SFTP/SSH user.
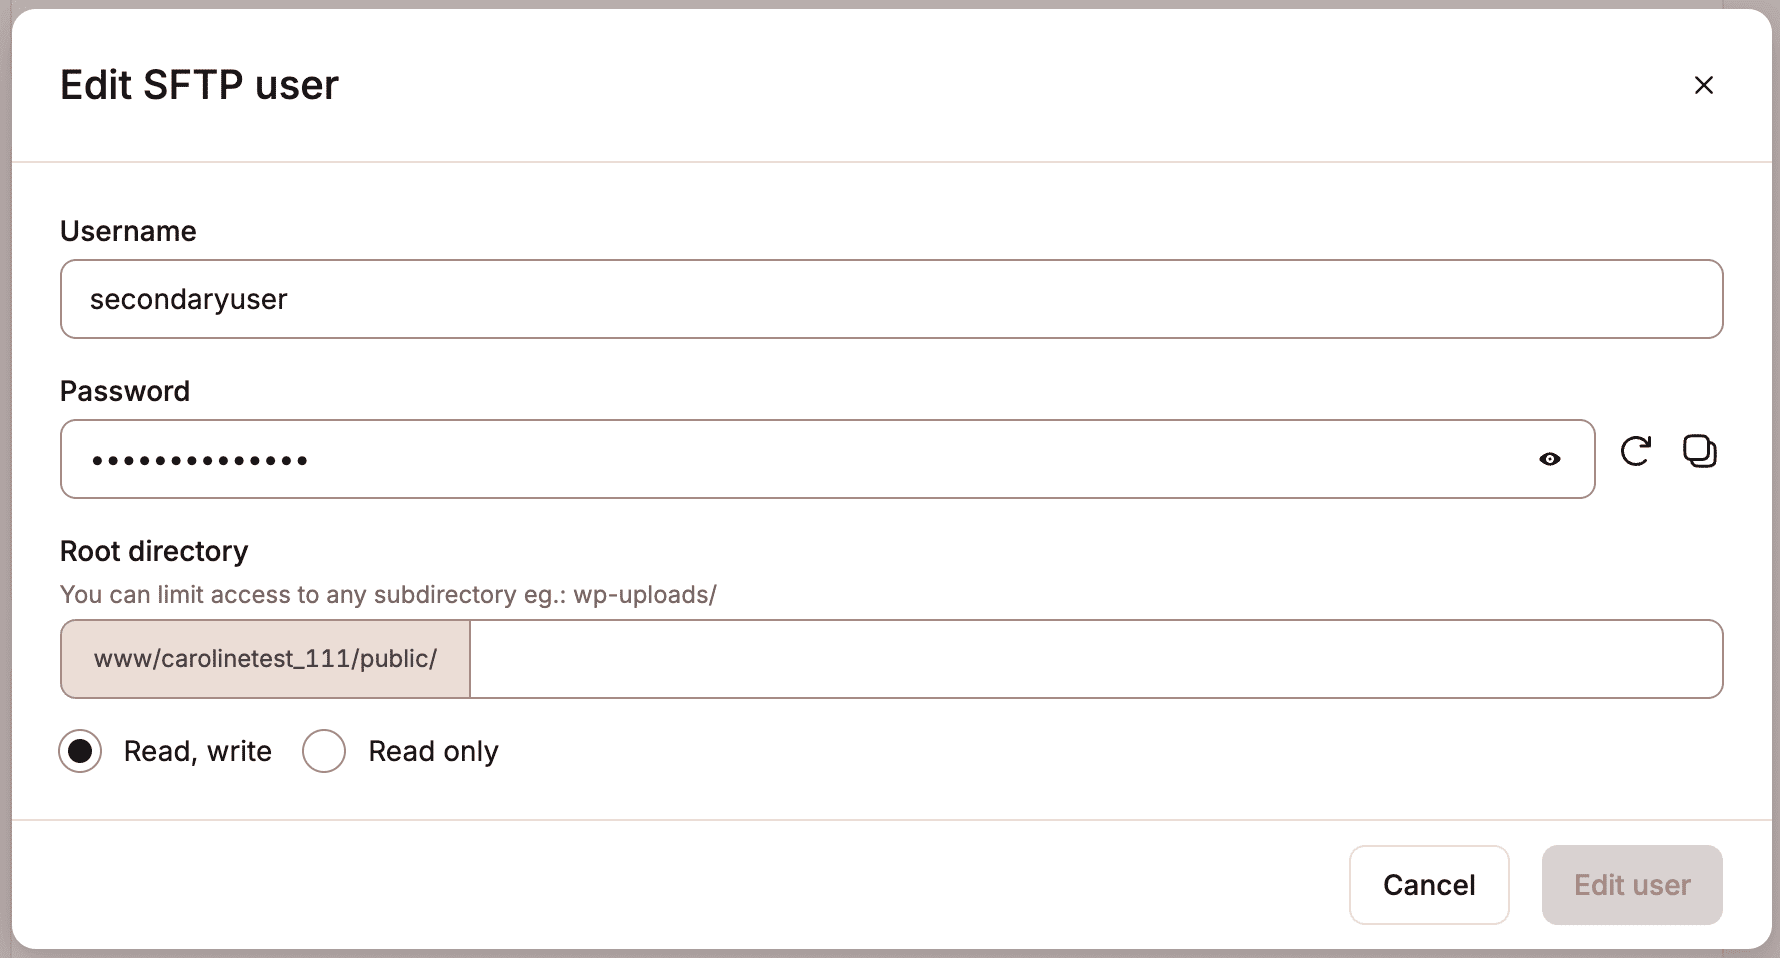
Once you’ve made the changes, click Edit user.
Remove an SFTP user
To remove an SFTP user, click the kebab (three dots) and click Remove.

To confirm the removal, click Remove SFTP user.

Disable/enable additional SFTP users
To disable additional SFTP users, click Disable.

To confirm you want to disable access for the additional SFTP users, click Disable Additional SFTP access. This does not remove the users, if you re-enable additional SFTP access the same users will be retained. If you want to completely remove a user, see Remove an SFTP user.
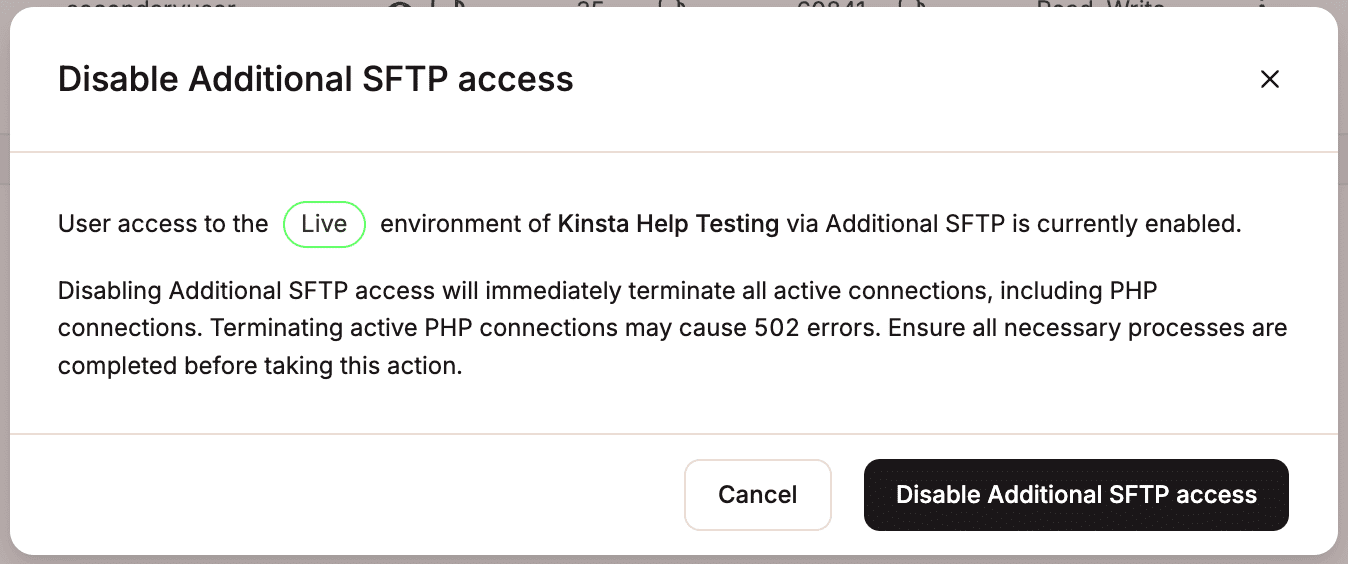
Once disabled, if you want to enable additional SFTP users again, click Enable. Any SFTP users that existed prior to disabling will be retained.

Client examples
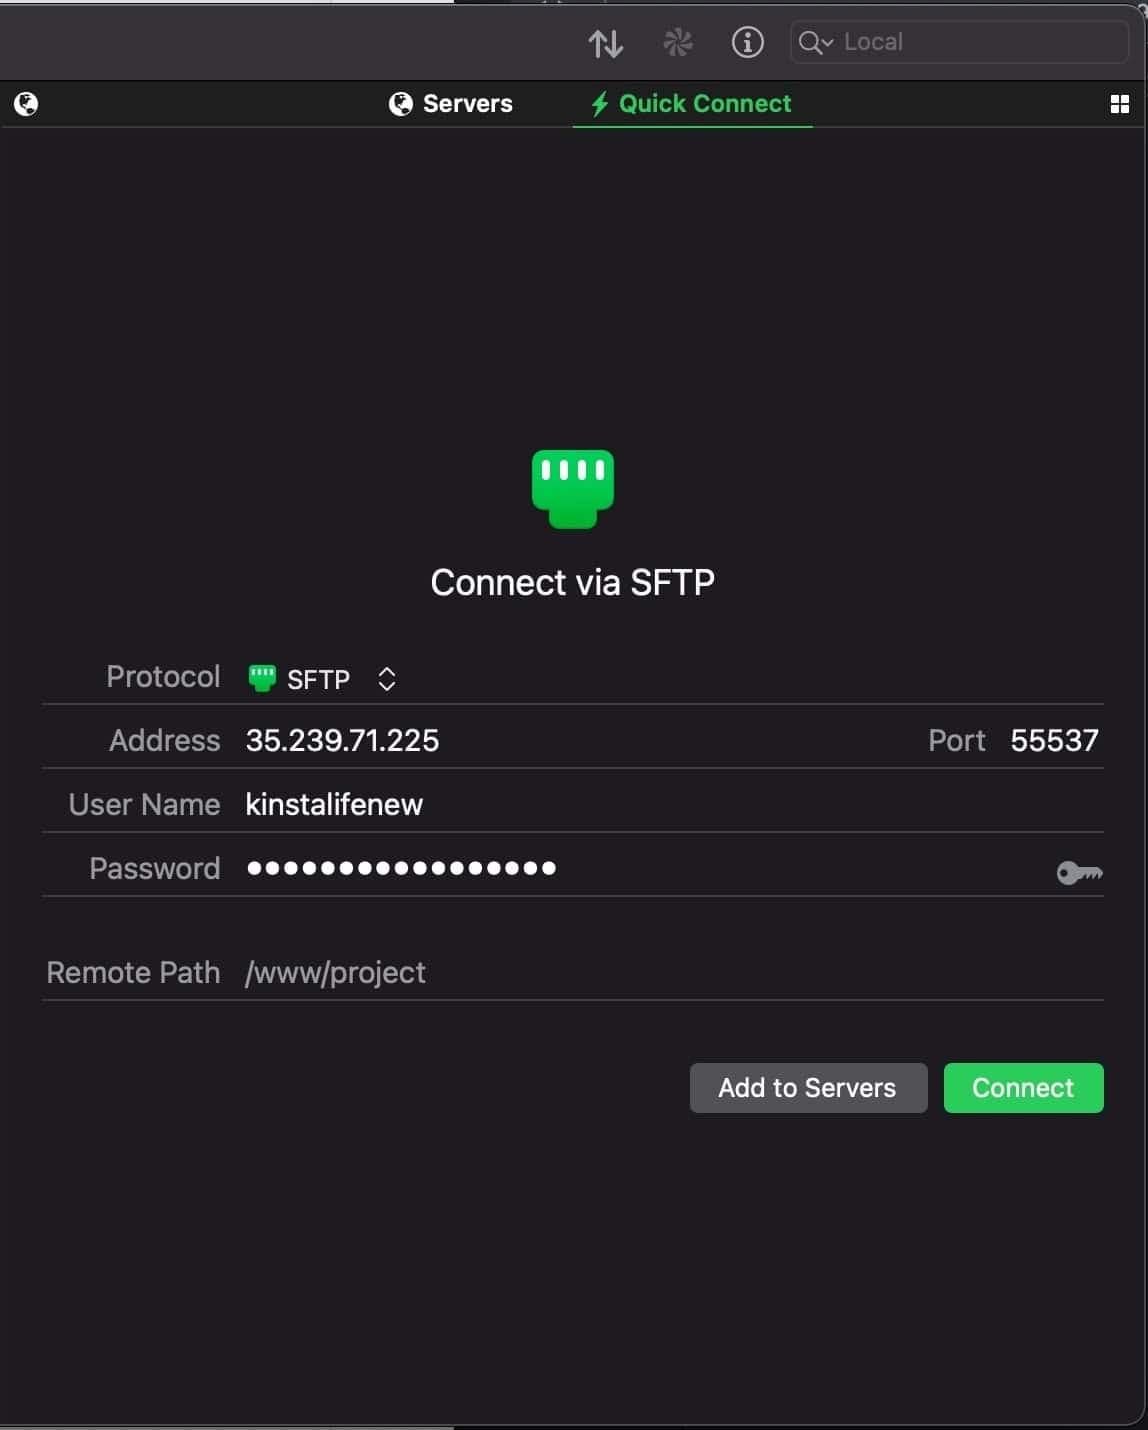
Here are a few examples of settings in FTP clients.
Cyberduck
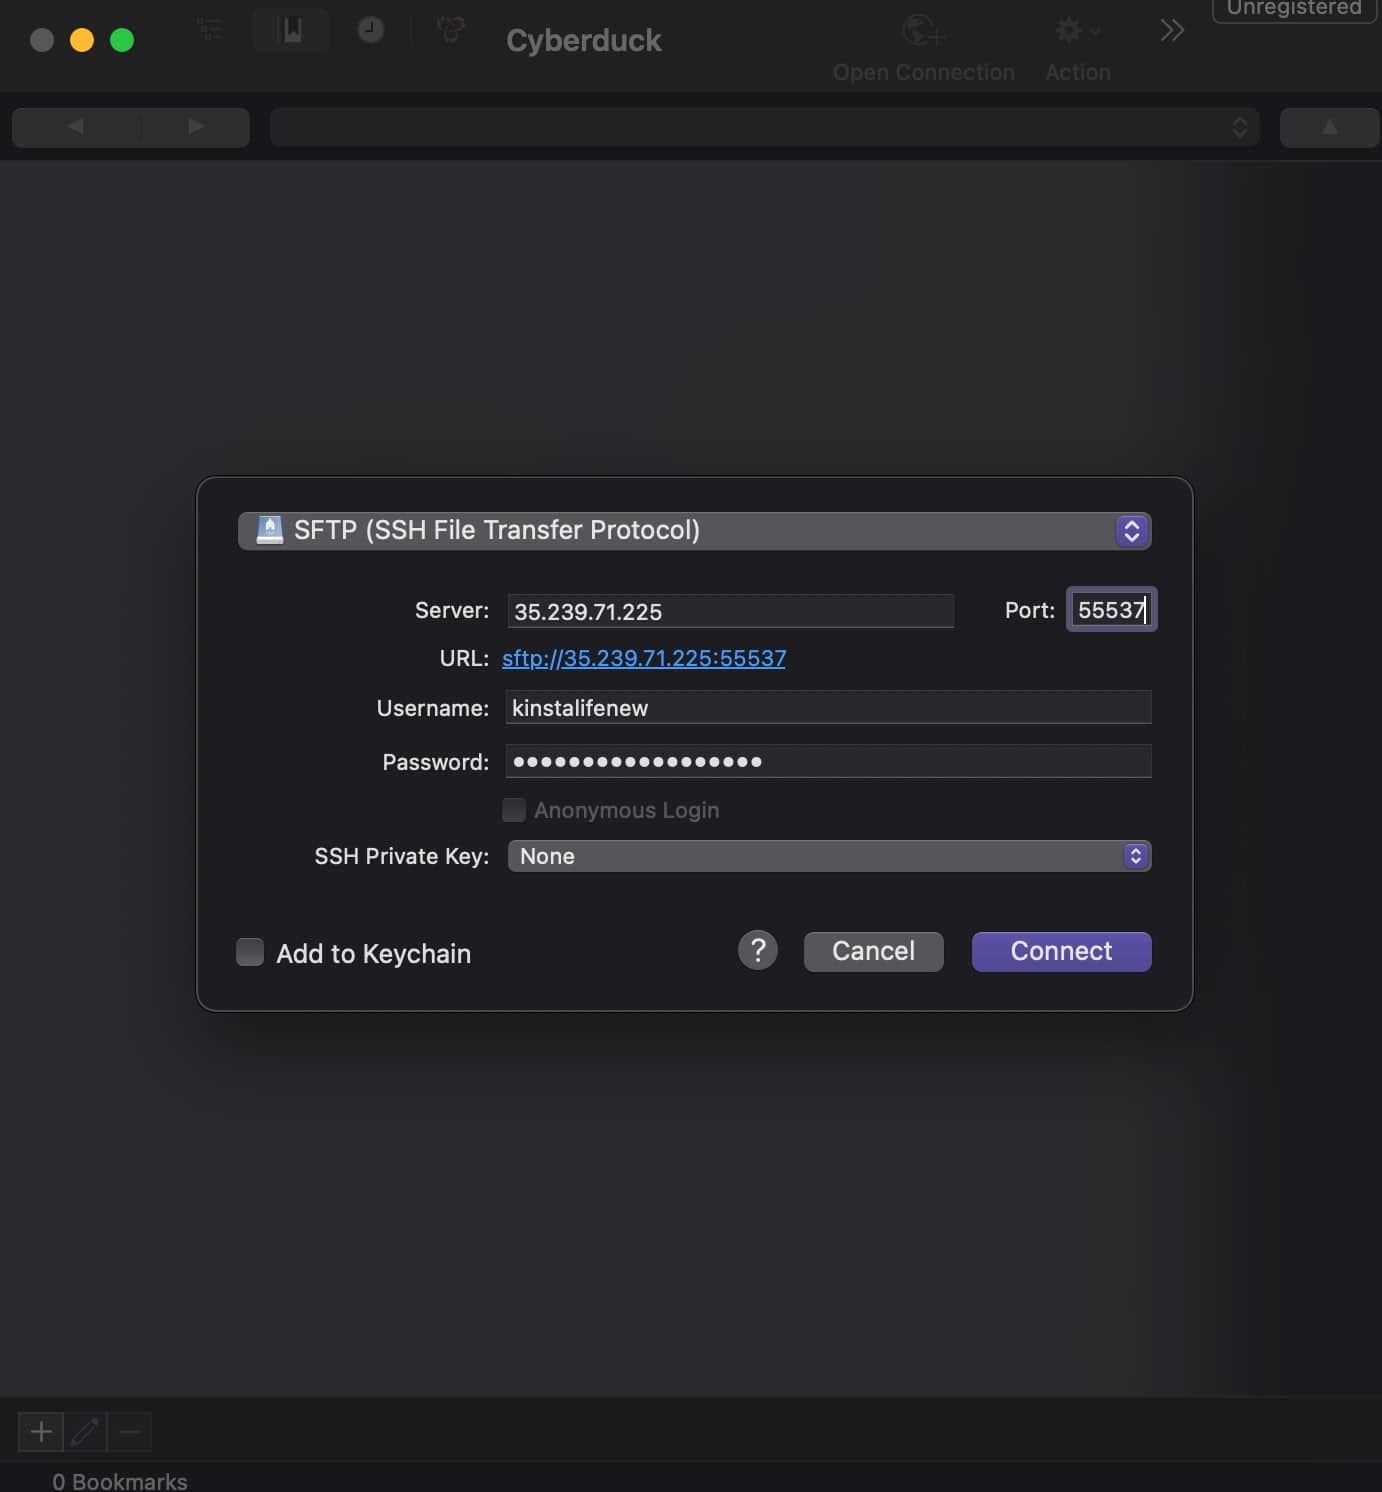
WinSCP
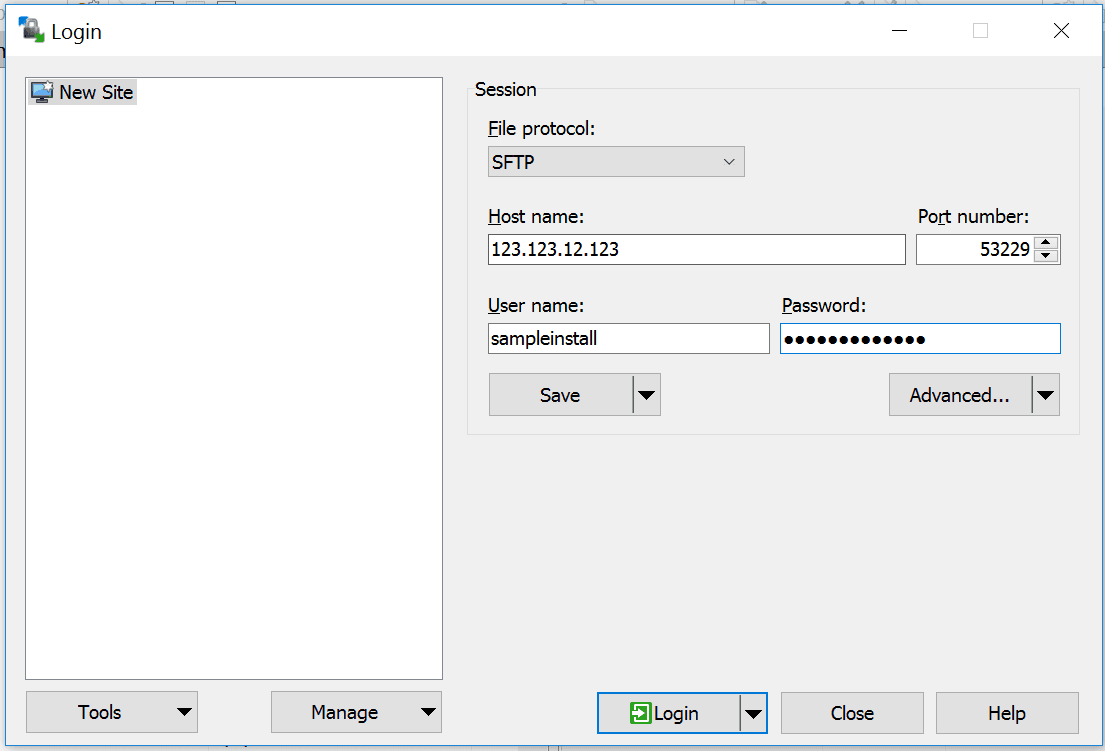
FileZilla

Transmit
More information
SFTP is a secure way to connect to your website files and the only supported file transfer protocol at Kinsta. For more details about how SFTP is more secure, be sure to check out the difference between FTP and SFTP.