Kinsta CDN
At Kinsta, maximizing the performance of our customers’ sites is one of our top priorities. Every part of our hosting stack, from our virtual machines to our highly tuned software configurations, is selected with performance in mind.
A content delivery network (CDN) is a crucial component of a modern hosting stack. We’re proud to offer a premium CDN powered by Cloudflare at no additional cost. In this article, you’ll learn more about Kinsta’s CDN and how to enable it for your WordPress site.
Kinsta’s CDN is enabled by default on all new sites here at Kinsta.
Kinsta’s CDN
Our free Cloudflare integration secures all sites hosted on Kinsta. In addition to an enterprise-level firewall and DDoS protection, Kinsta customers also have access to a high-performance HTTP/3 CDN powered by Cloudflare’s robust global network.
How fast is Kinsta’s CDN?
To test the performance of Kinsta’s CDN, we ran a series of benchmark tests from 10 locations around the world. For this test, we used a WordPress blog with a custom theme and a variety of text and graphical content hosted in a data center in Iowa, USA. In total, the page we tested made over 30 static asset requests (JS, CSS, images, fonts, etc.) and weighed in at 3.2 MB. Lastly, we measured the full page load time three times per location and calculated the average time in each location.
During our performance benchmark tests, we found that enabling Kinsta’s CDN resulted in up to a 44% reduction in page load time. In the table below, you can see the before vs after results compared for different locations.
Keep in mind that locations close to the site’s server, where we used to run our tests (Iowa, USA), may not see a performance boost with Kinsta’s CDN.
| Location | No CDN (seconds) | Kinsta’s CDN (seconds) | Percent Diff |
|---|---|---|---|
| Frankfurt | 2.64 | 2.19 | -17.05% |
| Amsterdam | 3.05 | 1.7 | -44.26% |
| London | 2.78 | 1.55 | -44.24% |
| New York | 1.16 | 0.835 | -28.02% |
| Dallas | 0.721 | 0.849 | +17.75% |
| San Francisco | 1.1 | 1.2 | +9.09% |
| Singapore | 4.91 | 3.41 | -30.55% |
| Sydney | 4.72 | 3.95 | -16.31% |
| Tokyo | 2.83 | 2.18 | -22.97% |
| Bangalore | 4.43 | 4.82 | +8.80% |
With a network that spans 300+ cities in more than 100 countries, Cloudflare operates one of the largest CDN networks in the world. Comparatively, other popular CDN providers like KeyCDN, and Bunny CDN have less than 60 points-of-presence (PoPs).
This means that by enabling Kinsta’s CDN, your WordPress site will be able to serve static assets from many more locations across the world without the need to pay for additional services!
Advantages of Kinsta’s CDN
By leveraging Cloudflare’s network, Kinsta’s CDN offers a number of advantages over traditional CDN providers. Let’s go over a few of the CDN’s biggest advantages:
HTTP/3 support
Kinsta’s CDN comes with native support for HTTP/3, the latest revision of the HTTP protocol. Compared to HTTP/2, HTTP/3 offers faster 0-RTT handshakes, SSL encryption requirements, better performance, and more.
Now that major web browsers like Chrome and Firefox have added HTTP/3 support, it’s important for CDN providers to start supporting it as well. At this time, Kinsta’s CDN is one of the few CDNs that support HTTP/3. With that said, you don’t have to worry if your visitors’ browsers don’t support HTTP/3 yet, as Kinsta’s CDN will automatically fall back to HTTP/2 when necessary.
Primary domain support
Cloudflare is a reverse proxy service, which means you won’t need a secondary domain just to take advantage of its various features. Thanks to Kinsta’s CDN, your site’s cached assets can be served from your primary domain instead of a secondary CDN domain.
While Google claims there is no SEO benefit to serving images from your primary domain, there are still a few advantages to not having to rely on a secondary CDN domain. For example, if you share an image URL that uses a secondary CDN domain, it may return an HTTP 404 error if you switch your CDN provider in the future. By caching and serving static assets via your primary domain, you won’t have to worry about this problem.
Lastly, being able to serve assets from the primary domain without dealing with URL rewrites for a secondary domain also improves compatibility with WordPress multisite.
Image optimization
Kinsta’s CDN offers image optimization, which automatically converts your PNG, GIF, and JPEG images to the WebP format to improve your website speed and performance.
Code minification
How to enable Kinsta’s CDN
When CDN is enabled, we serve all static content (such as images, CSS, and JavaScript files) through our Content Delivery Network. The limit is 5 GB per file.
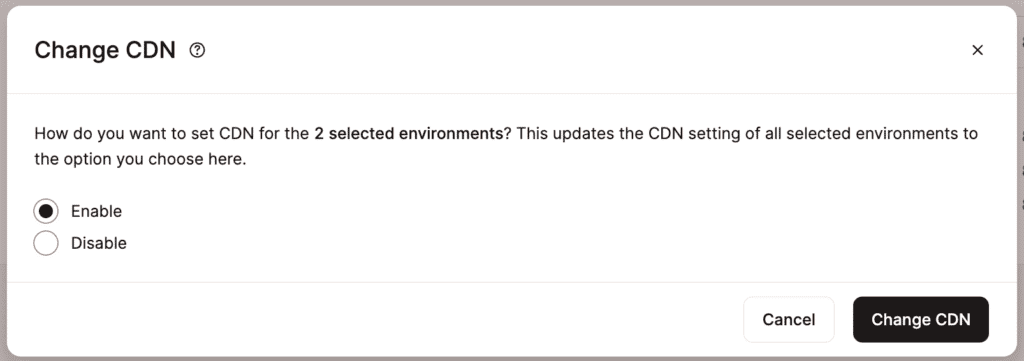
In MyKinsta, you can enable the CDN for one or multiple sites, including staging sites, simultaneously from the Sites page. Select the checkboxes next to the site(s) you want to enable the CDN for, click Actions, and choose Change CDN.

Select Enable and click Change CDN.
Once the process is complete, a success message will appear.
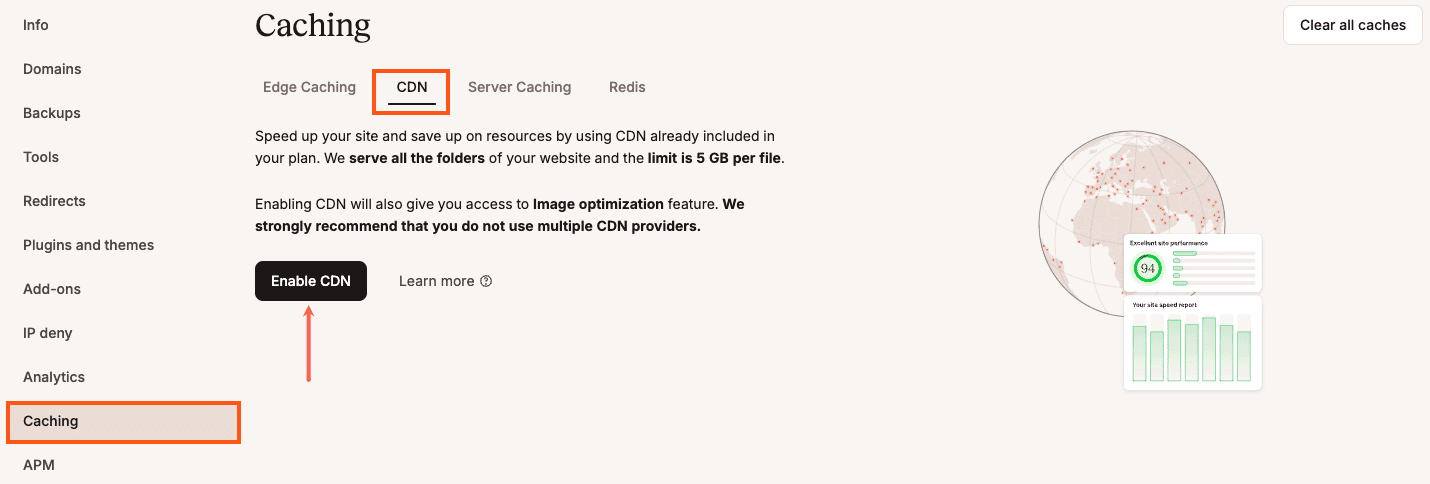
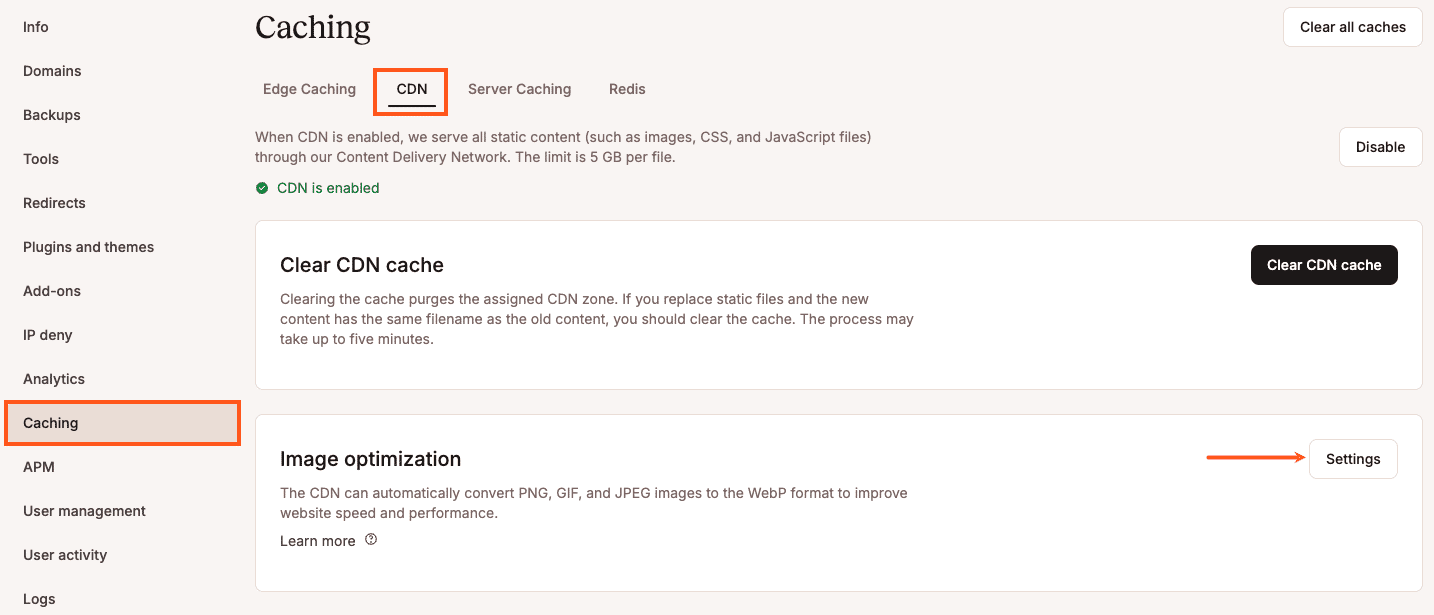
You can also enable the CDN for a single site within Sites > sitename > Caching > CDN > Enable CDN.
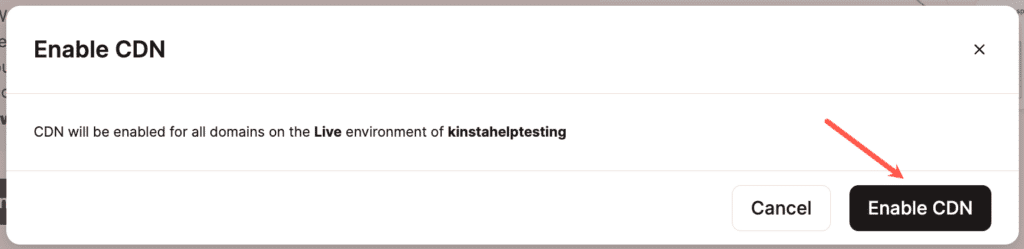
Enable Kinsta’s CDN in MyKinsta. Next, confirm this change by clicking on the Enable CDN button in the pop-up/modal window.
File types cached by Kinsta’s CDN
Files are cached based on the file extension, not the MIME type. If you would like to exclude some content from the CDN, check out CDN Default File and URL Exclusions.
| 7z | afm | apk | avi | avif | bmp | bz2 | cff |
| css | cur | data | dmg | doc | docx | eot | epub |
| exe | ffil | flac | flv | geojson | gif | glb | gz |
| heic | heif | ico | img | iso | jfif | jpeg | jpg |
| js | json | lottie | lwfn | m4a | m4v | map | md |
| mid | midi | mkv | mov | mp3 | mp4 | mpga | odp |
| ods | odt | ogg | ogv | otf | pfb | pfm | |
| png | ppt | pptx | pro | qt | rar | rtf | scss |
| std | svg | svgz | tar | tgz | tif | tiff | ts |
| ttf | txt | usdz | wasm | wav | webm | webp | wmv |
| woff | woff2 | xls | xlsx | xml | xsf | zip | zst |
CDN default file and URL exclusions
When you enable CDN, we exclude certain files by default from being served by the CDN:
- The robots.txt file.
- Any files in the .well-known directory.
- Any file name that contains the word “sitemap” (whether it’s at the beginning, middle, or end of the file name).
CDN exclusion settings
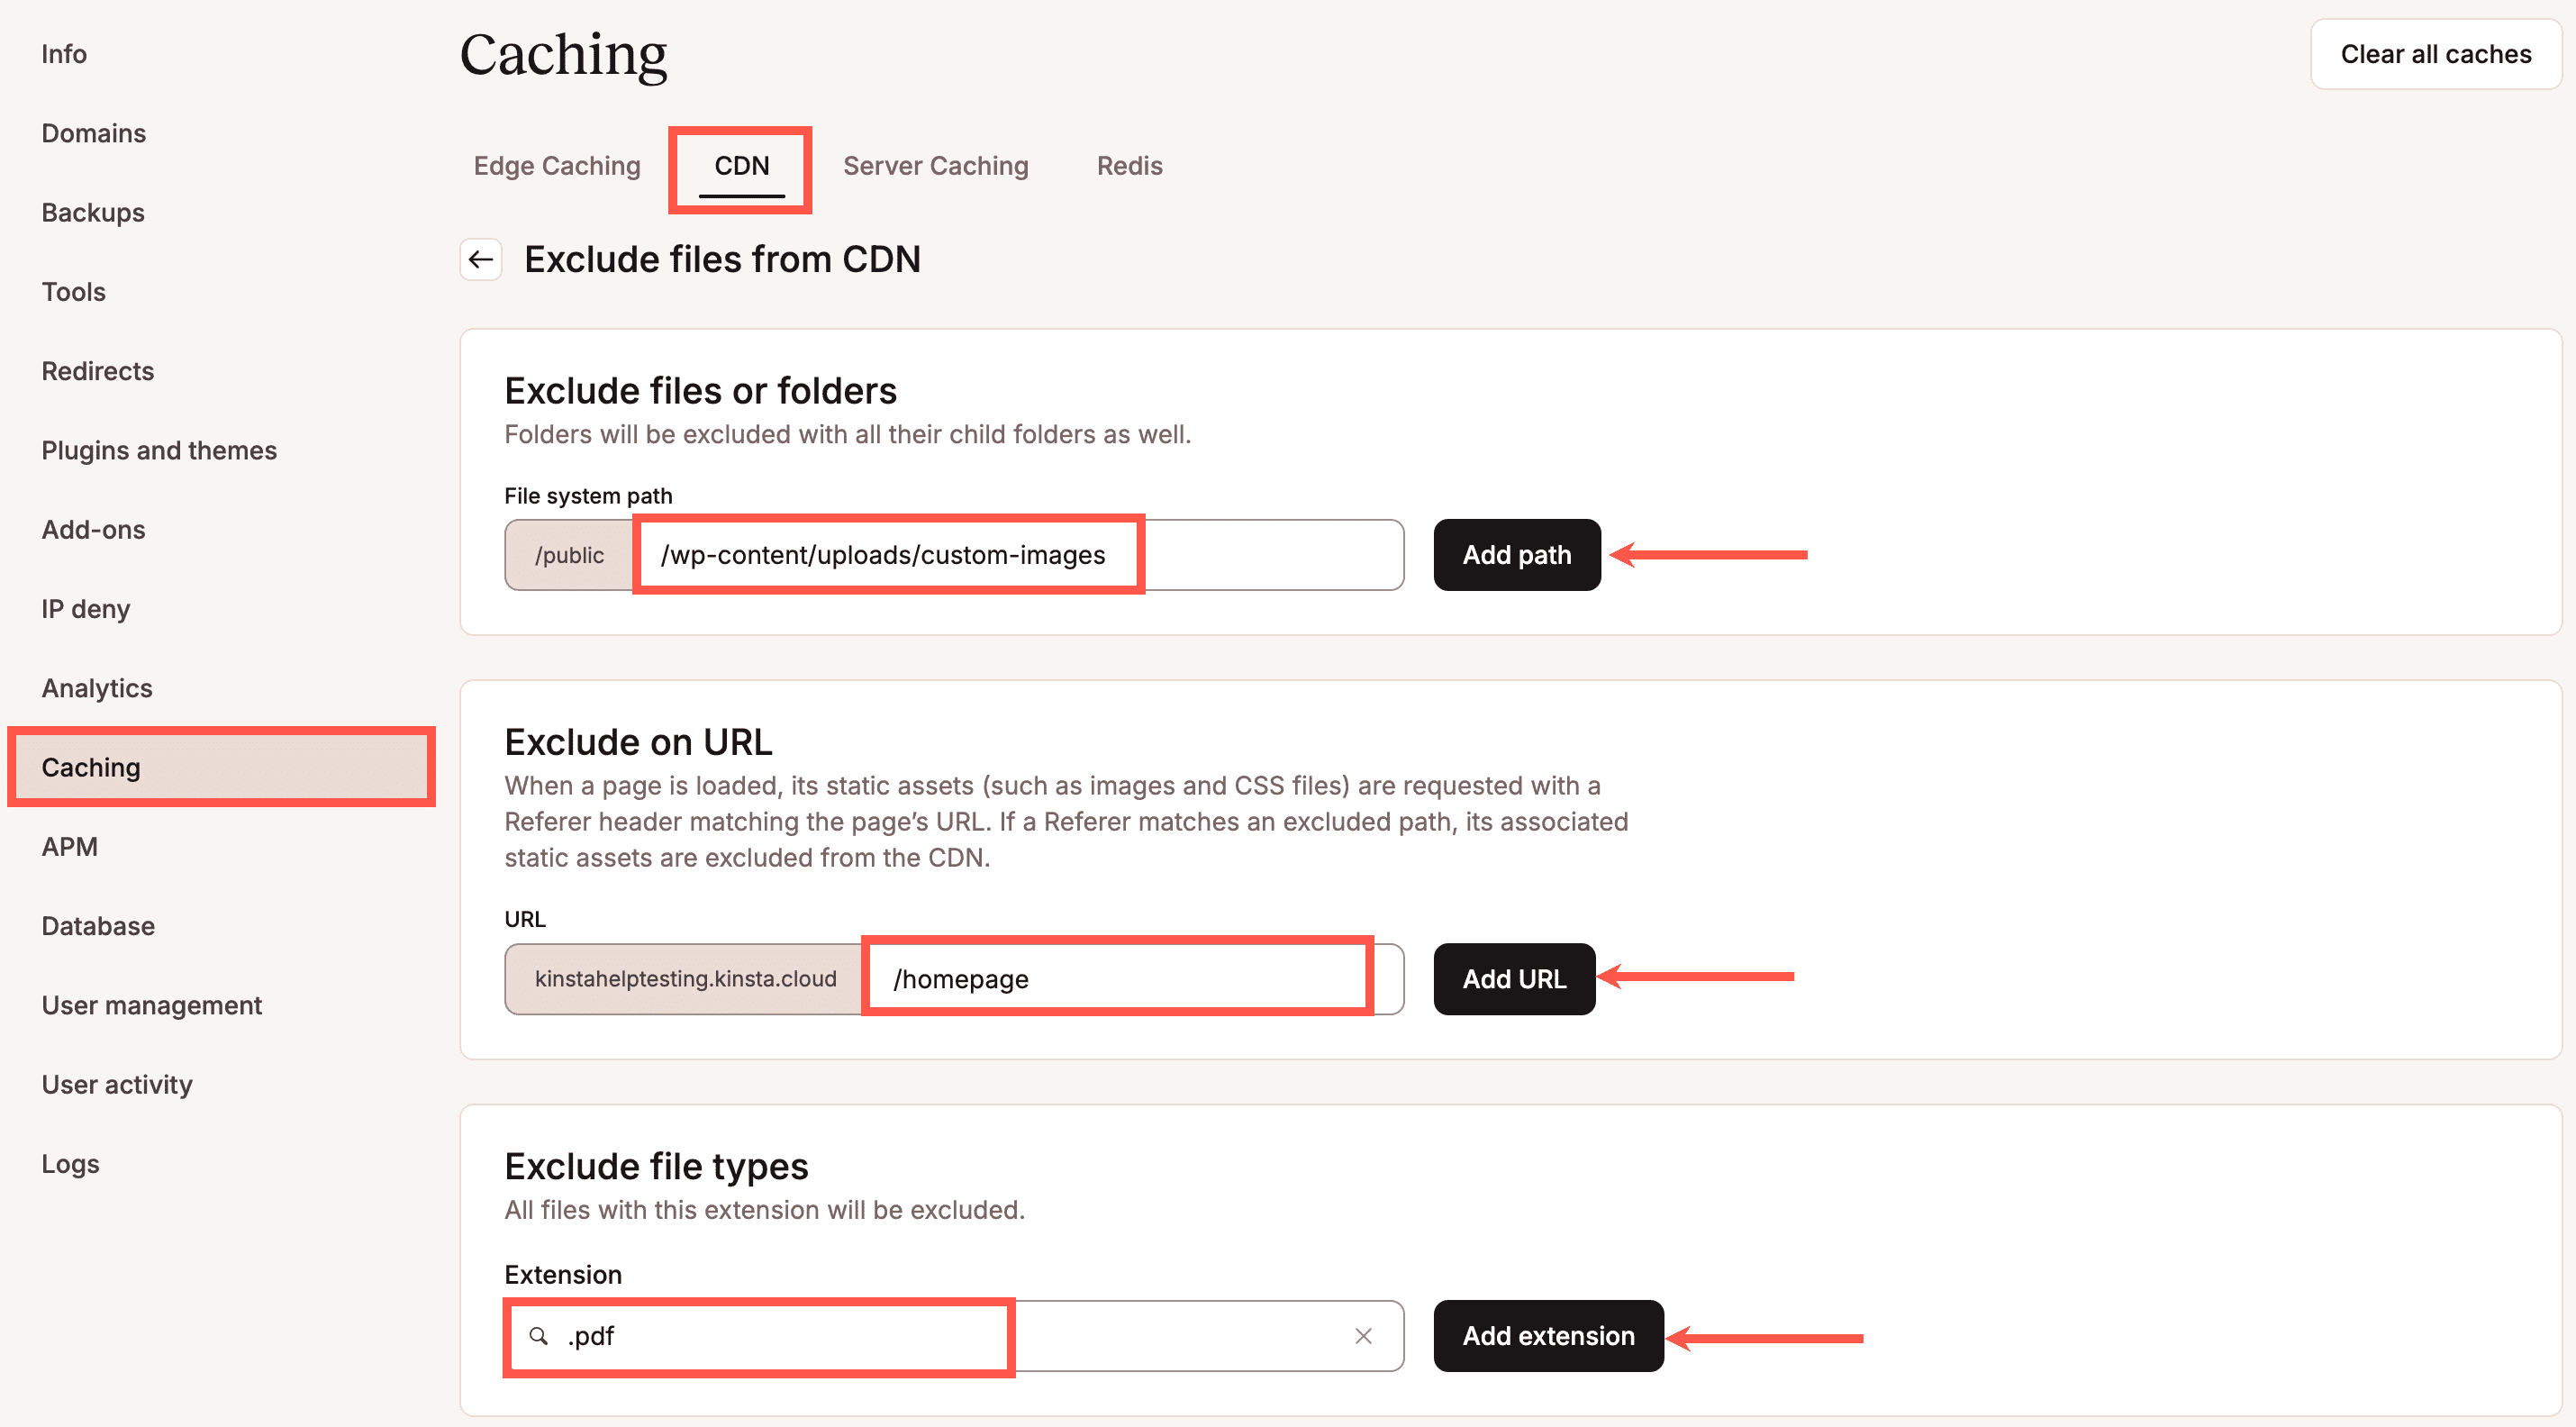
On the CDN page, under the Exclude files from CDN section, click on the Settings button to configure additional directory paths, URL paths, and/or file extensions to be excluded from the CDN. Excluding files from being cached will increase your resource usage.
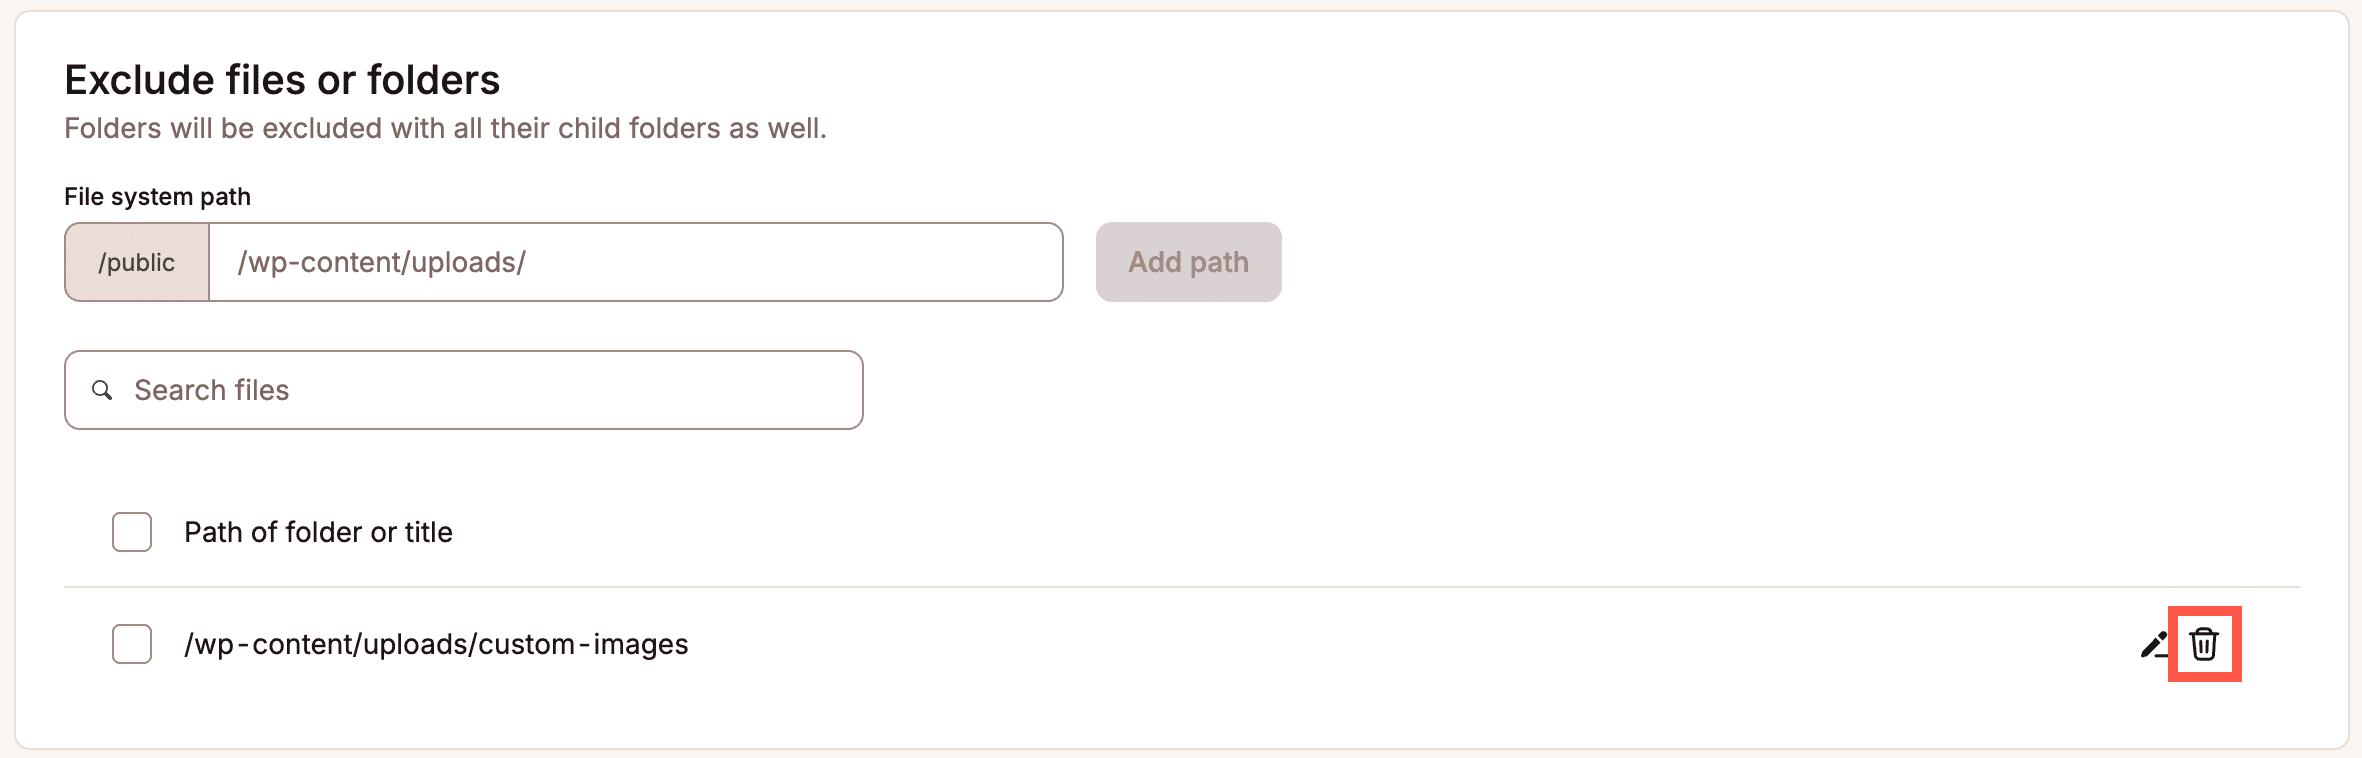
Exclude files or folders
Exclude all static assets within a specific folder and its subdirectories, or exclude a specific file. Enter the relative path to the directory or file (starting from the public folder), e.g.:
- /wp-content/uploads/custom-image-folder
- /my-documents
- /data-feed.txt
Click Add path to apply the exclusion.
All static assets within the specified directory (and any subdirectories, if present) or the specific file will be excluded from the CDN.
Exclude on URL
Exclude assets based on the Referer URL of the page where they are loaded. Enter the URL path (omit the domain and protocol), one page at a time, e.g.:
- /homepage
- /blog/2021
- /shopping
Click Add URL to save the exclusion.
When a page is loaded, its static assets are requested with a Referer header matching the page’s URL. If a Referer matches an excluded path, its associated static assets are excluded from the CDN.
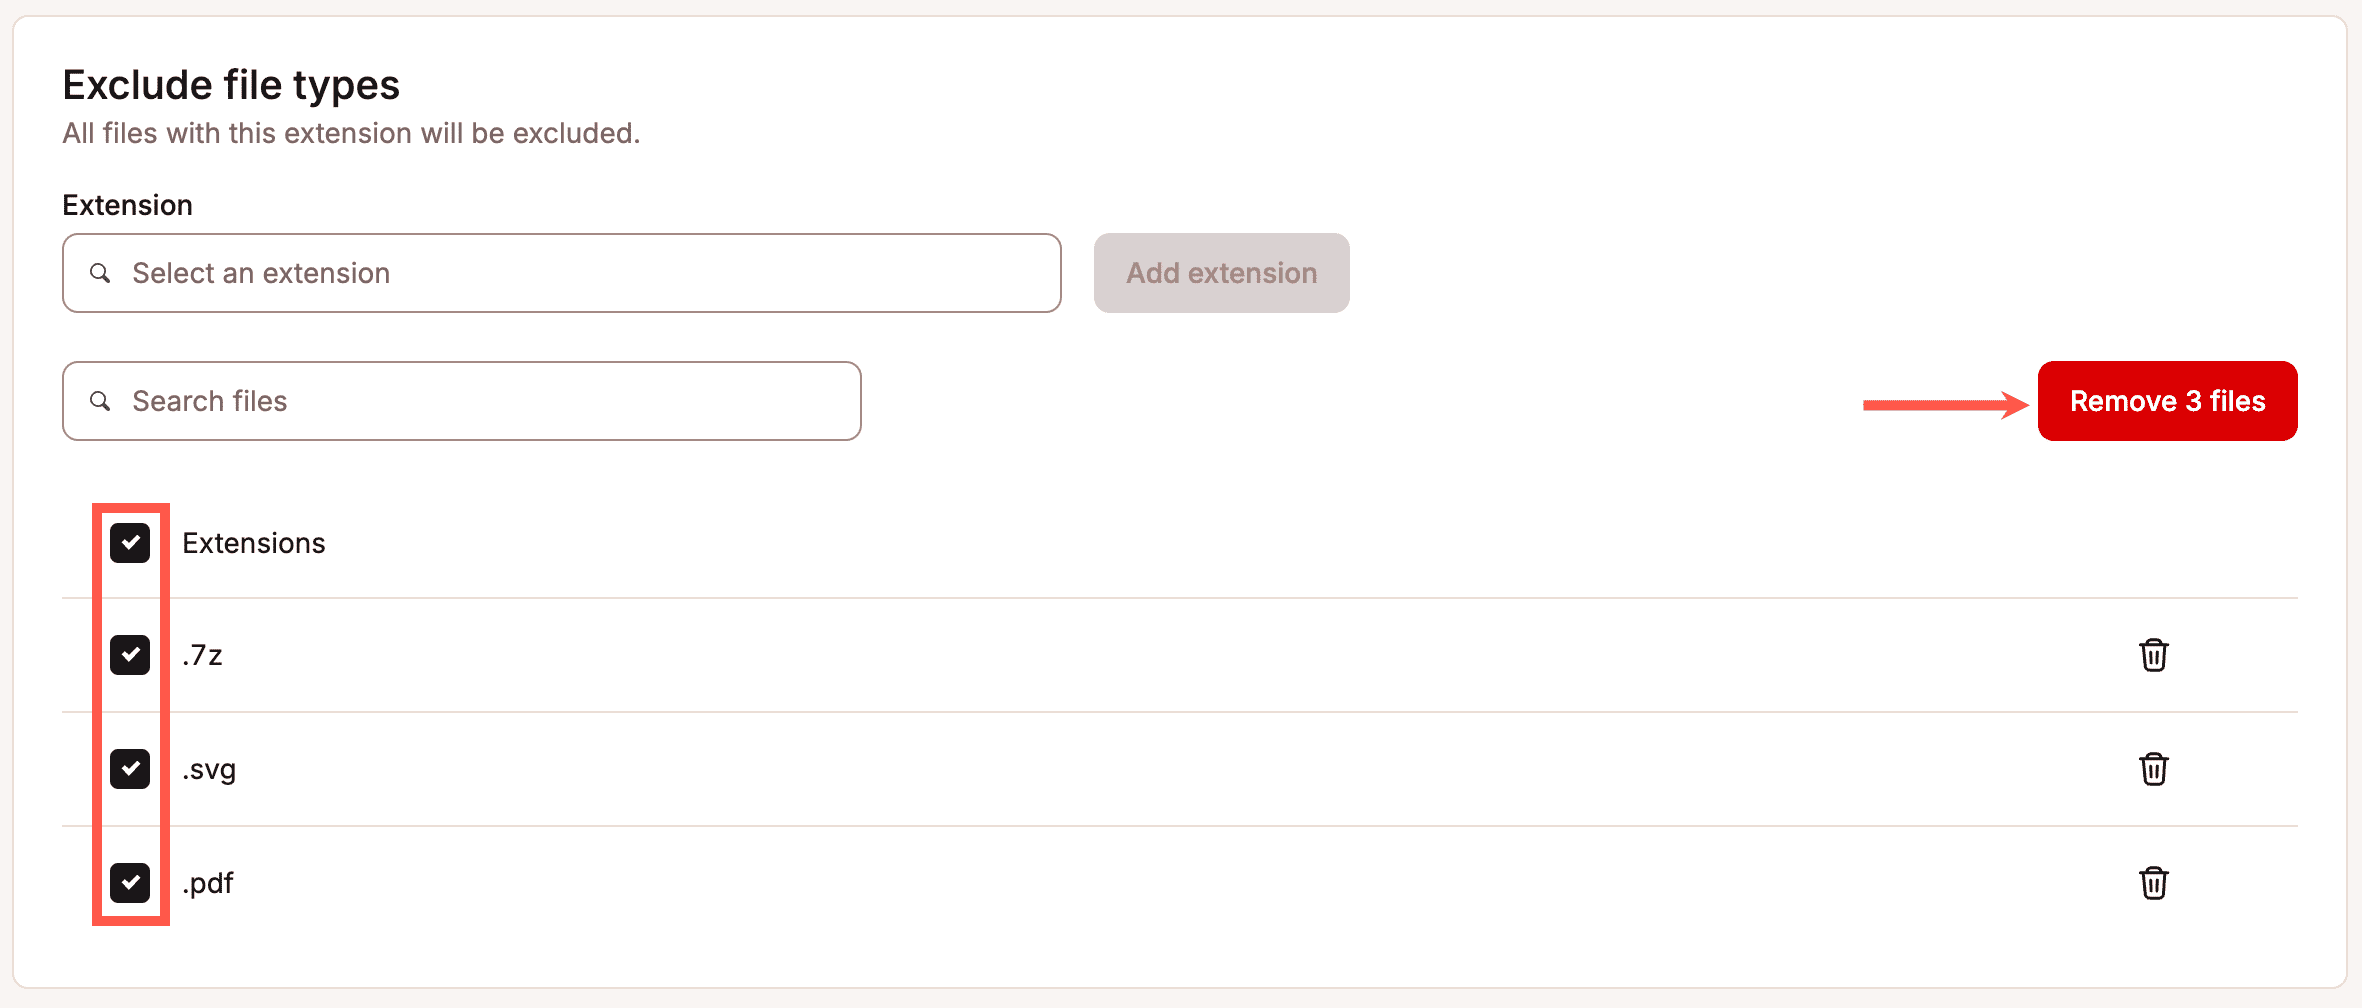
Exclude file types
Exclude all files of a specific type, regardless of their location in your site. Select one or more file extensions (e.g., .jpg, .jpeg, .gif) from the dropdown menu and click Add extension for each extension you want to exclude. You can quickly search for a file extension by typing it in the field.
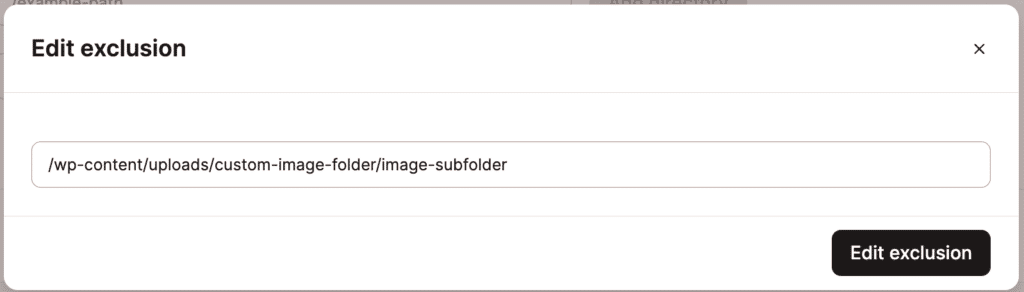
Edit exclusions
To edit the path or URL exclusions, click the pencil (edit) icon next to that exclusion.

Make your desired changes to the exclusion and click Edit exclusion to save your changes.
Delete exclusions
To delete an exclusion, click the trash can (delete) icon next to that exclusion.
You can also select multiple exclusions by selecting the checkbox next to each one or check the multi-select box at the top of each exclusion list to select all exclusions in that list.
Important notes
- Percent-encoding (aka URL encoding) is a method for encoding spaces and certain special characters in URLs. If needed, this is handled in the background. If you enter a URL path with spaces or other reserved characters, it will be shown in MyKinsta the way you enter it, but will be stored and used with the encoded value, so it works as intended. If you’re unsure whether a URL path is encoded, visit the page or asset’s URL and copy the path from your browser’s address bar.
- Subpaths of a directory path or URL path are also excluded. For example, if /blog is entered, subpages like /blog/category-1 and /blog/category-1/some-post-title will also be excluded from the CDN. If you do not want those subpages to be excluded, you’ll need to enter the entire path of the page to be excluded. Entering /blog/category-2/some-title will exclude that page from the CDN, while other pages like /blog, /blog/category-1, and even /blog/category-2/some-other-title will still be served by the CDN.
- Only one path or file extension can be entered at a time.
- A single, specific file can be excluded by adding the directory path and file name to the Exclude files or folders field.
Exclusion examples
Exclude all static assets in the /public/wp-content/my-custom-folder directory
Add /wp-content/my-custom-folder to Exclude files or folders.

Visiting any page that loads static assets from that directory and viewing the Network tab of browser developer tools will show that those static assets are bypassing the CDN.
Exclude the data-feed.txt file in the public directory
Add /data-feed.txt to Exclude files or folders.

Exclude all static assets on the /shop/item-1 page
Add /shop/item-1 to Exclude on URL.

Visiting the https://example.com/shop/item-1 page and viewing the Network tab of browser developer tools will show that all static assets loaded on that page are bypassing the CDN.
Exclude all PDF files from the CDN
Add the PDF extension to Exclude file types.

Visiting any page that includes a PDF file and viewing the Network tab of browser developer tools will show that the file is bypassing the CDN.
Image optimization
Images account for the bulk of most websites’ load times. With a few clicks, Image Optimization can improve load times and make you and your visitors happier. Image Optimization is only available when Kinsta’s CDN is enabled.
Image optimization does not alter the images stored in your site files; it creates new images. The new images don’t require additional storage, and they will not count toward the disk space use of your Kinsta plan.
When Lossless is enabled, the CDN automatically creates WebP versions of GIF and PNG images on the fly using Cloudflare’s Polish service. With Lossy enabled, it creates WebP versions of GIF, PNG, and JPEG images. The WebP versions are cached in Cloudflare’s CDN and are delivered if:
- the Accept header in the visitor’s browser includes WebP, and
- the WebP version is significantly smaller.
Enabling image optimization
On the CDN page, click Image optimization Settings to configure and enable image optimization on your WordPress site.
That will bring you to a new window where you can choose between Lossless or Lossy image optimization:
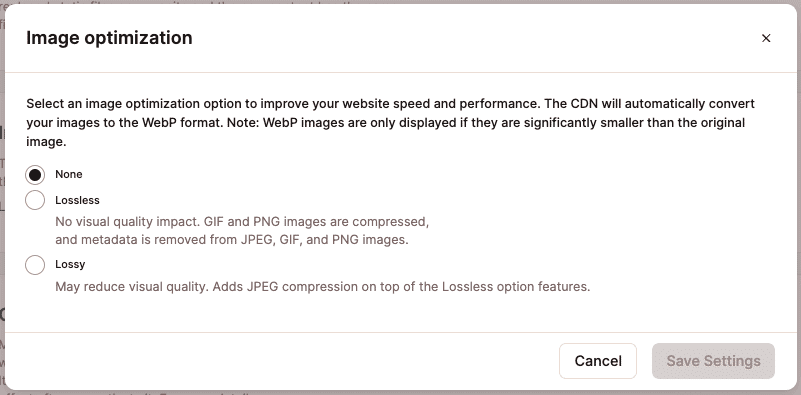
Lossless image optimization
Lossless Image Optimization is done with lossless compression and has no impact on the quality of your images. Only GIF and PNG images are compressed, and WebP versions of those images are created. Metadata is removed from all images.
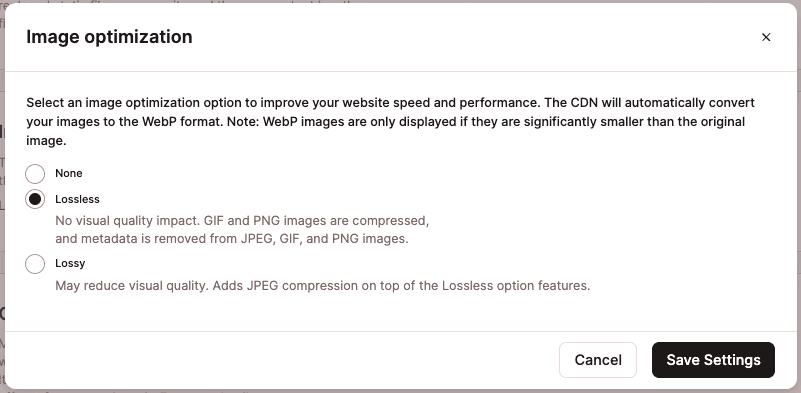
Select this option if retaining your image quality is essential. If you want to compress and make WebP versions of JPEG images, you’ll need to select the Lossy option.
After you click the Save Settings button, the CDN page should look like this:
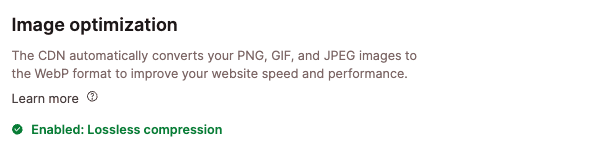
Lossy image optimization
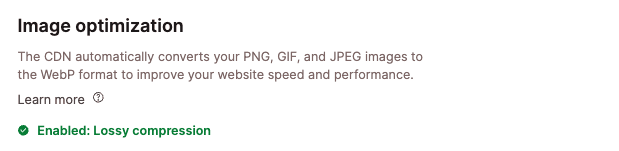
Lossy Image Optimization may reduce the quality of your JPEG images because it uses lossy compression to make those images as small as possible. This option will compress GIF and PNG files the same as the lossless option and remove metadata from all images. It will also create Webp versions of all images, but the Webp version is only used if it is significantly smaller than the lossy or lossless compressed image.
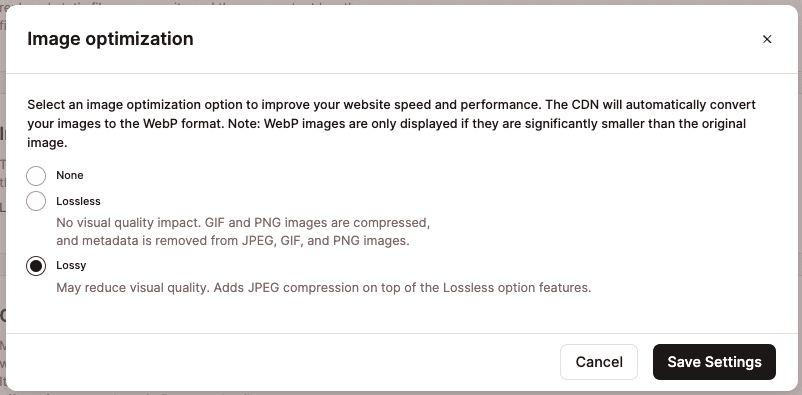
Select this option to maximize image optimization, understanding that it may impact image quality.
After you click the Save Settings button, the CDN page should look like this:
Test image optimization
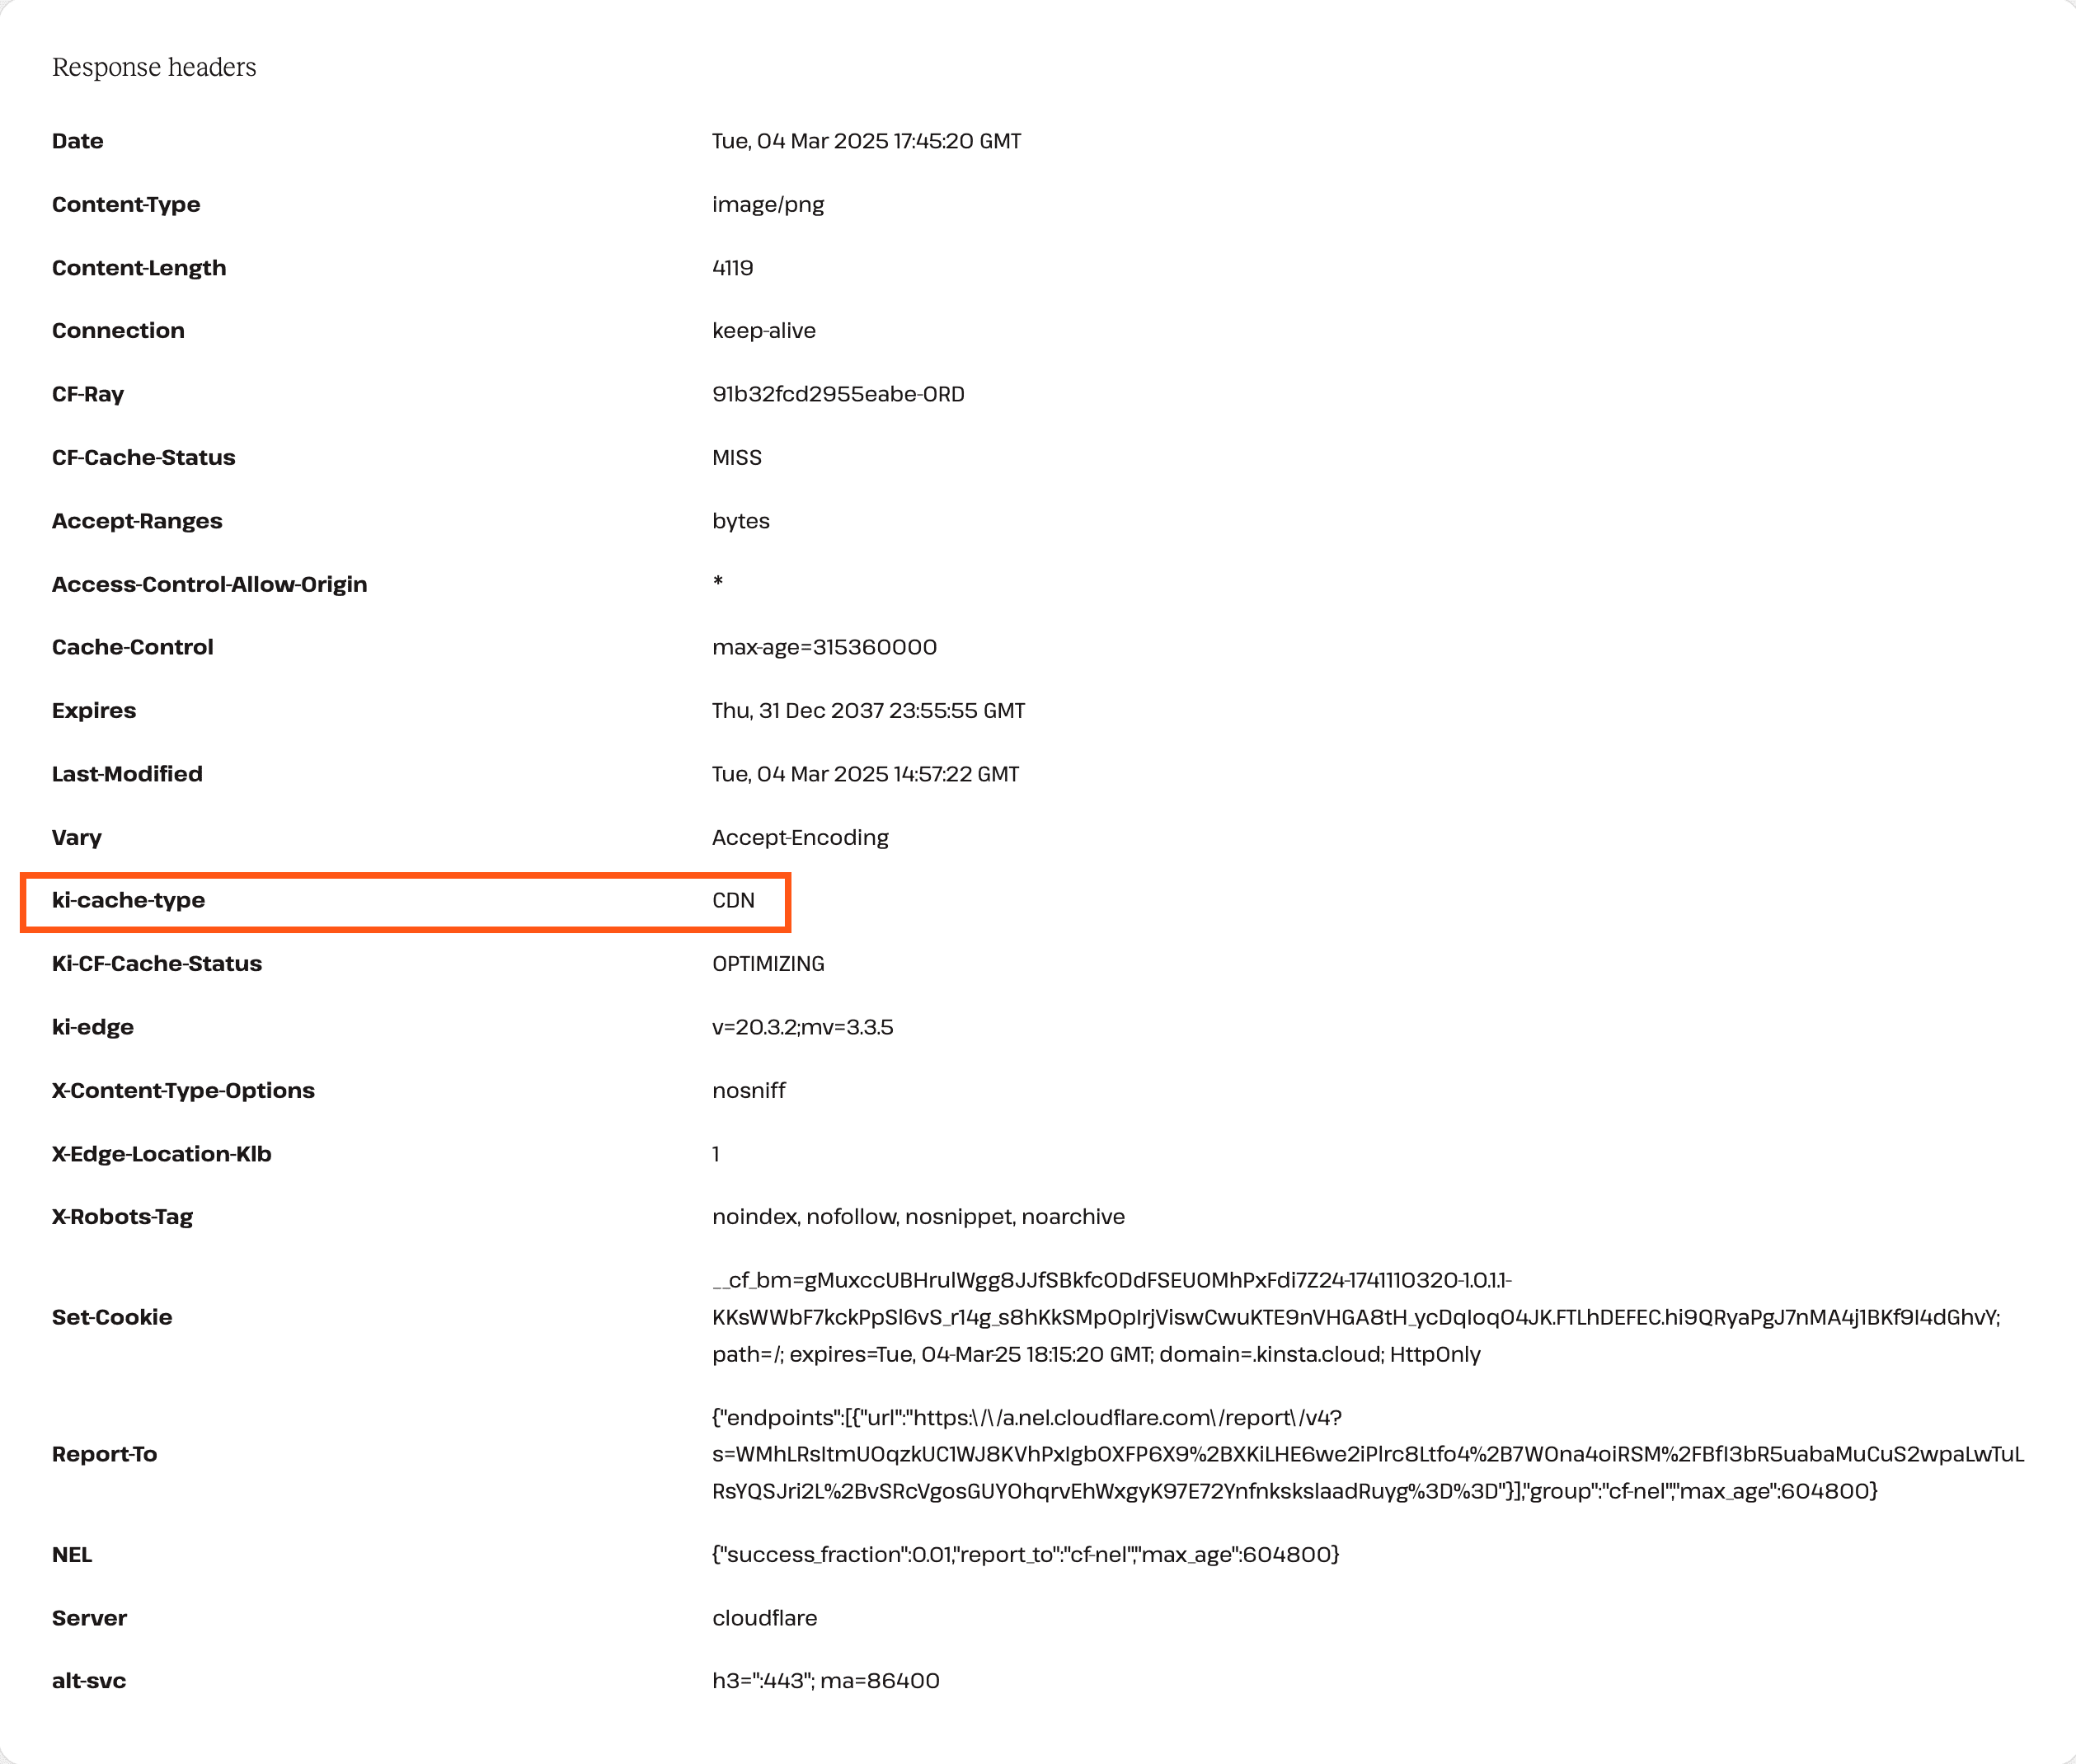
Image Optimization doesn’t change the URL or file extension of the image, and it will not alter the HTML of your website’s pages. To confirm Image Optimization is working, you can inspect the HTTP headers of an image on your site with your browser’s built-in developer tools.
- Visit your site and open developer tools in your browser (right-click on the page or an image and click Inspect).
- On the Network tab, reload the page if needed and select an image.
- In the Headers tab for the selected image, scroll down until you see the Response Headers and look for these headers and values:
cf-polished: This shows you the original format and file size of the image. If the generated WebP version of the image is a larger file size than the original image, the original image is still used.content-type: This shows you what file format is being served, regardless of the URL or file extension.ki-cache-type: This should have a value ofCDN.ki-cf-cache-status: This should have a value ofHIT. This, in combination with aki-cache-typeheader value ofCDNshows that the image is being served by Kinsta’s CDN.
Disabling image optimization
To disable Image Optimization on your website, log in to MyKinsta, go to Sites > sitename > CDN and click on Settings for Image Optimization. From the new window, select None and click on Save Settings.
The CDN page will now reflect that no Image Optimization settings are applied and will look like this:
How to clear Kinsta’s CDN cache
Clear CDN cache in MyKinsta
Clearing the CDN cache is a good first troubleshooting step if you see discrepancies on the front end of your site. For example, if you make some changes to your CSS but don’t see the changes on the front end, the old CSS file may be cached. Clearing the CDN cache would be one of the first things to try in your troubleshooting process.
In MyKinsta, you can clear the server, CDN, and Edge Cache for one or multiple sites, including staging sites, simultaneously from the Sites page. This also clears the Redis object cache if you’ve added the Redis addon to your site.
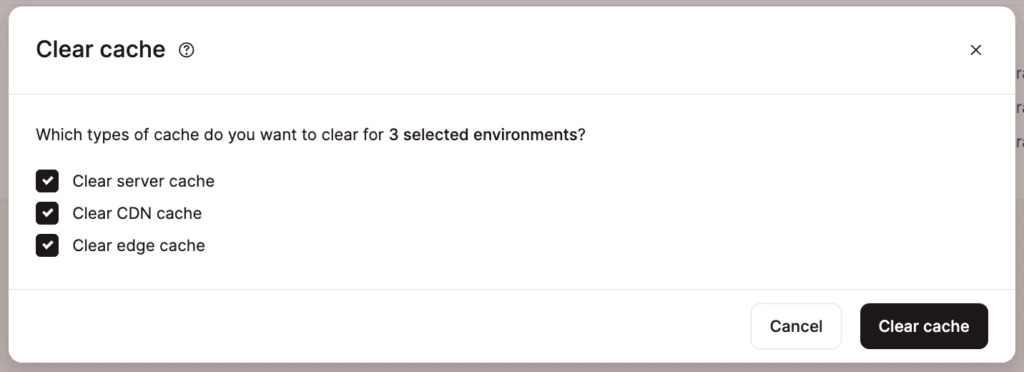
Select the checkboxes next to the site(s) you want to clear the cache for, click Actions, and choose Clear cache.

Select the types of cache you want to clear and click Clear cache.
Once the process is complete, a success message will appear.
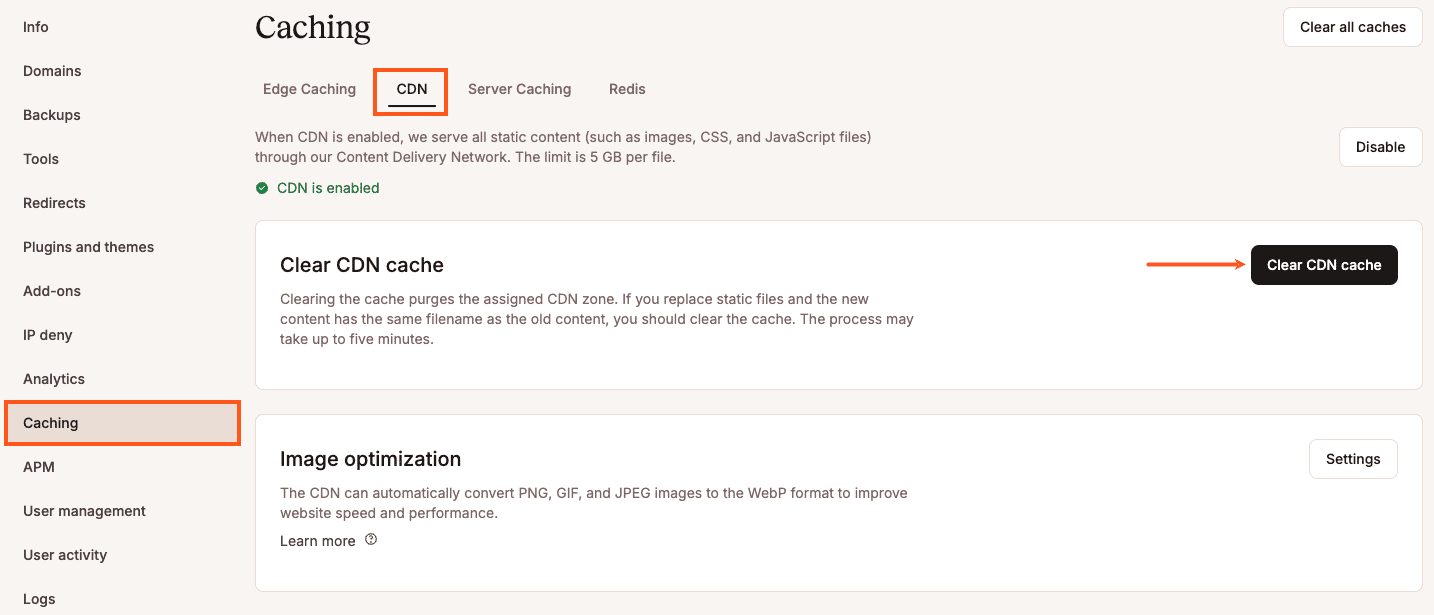
You can also clear the CDN for a single site within Sites > sitename > Caching > CDN > Clear CDN cache.
This process may take up to 5 minutes to complete.
Clear CDN cache with the Kinsta MU plugin
With the Kinsta MU plugin installed on your site, you can clear the CDN cache in your WordPress dashboard or use WP-CLI to clear the CDN cache with this command:
wp kinsta cache purge --cdnHow to disable Kinsta’s CDN
In MyKinsta, you can disable the CDN for one or multiple sites, including staging sites, simultaneously from the Sites page. Select the checkboxes next to the site(s) you want to disable the CDN for, click Actions, and choose Change CDN.
Select Disable and click Change CDN.
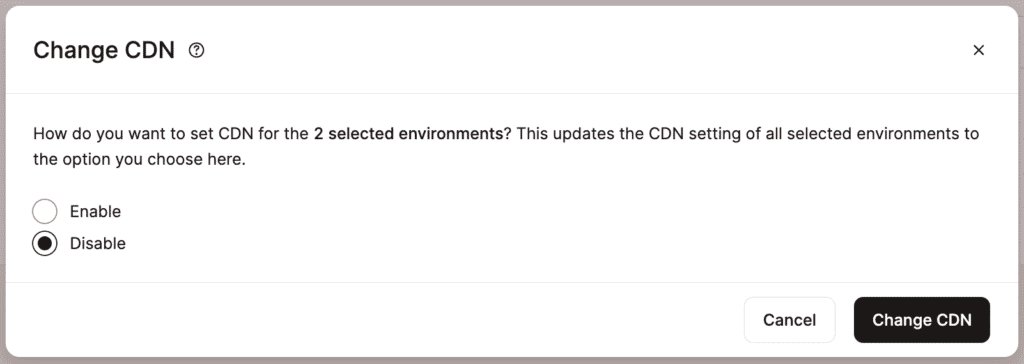
Once the process is complete, a success message will appear.
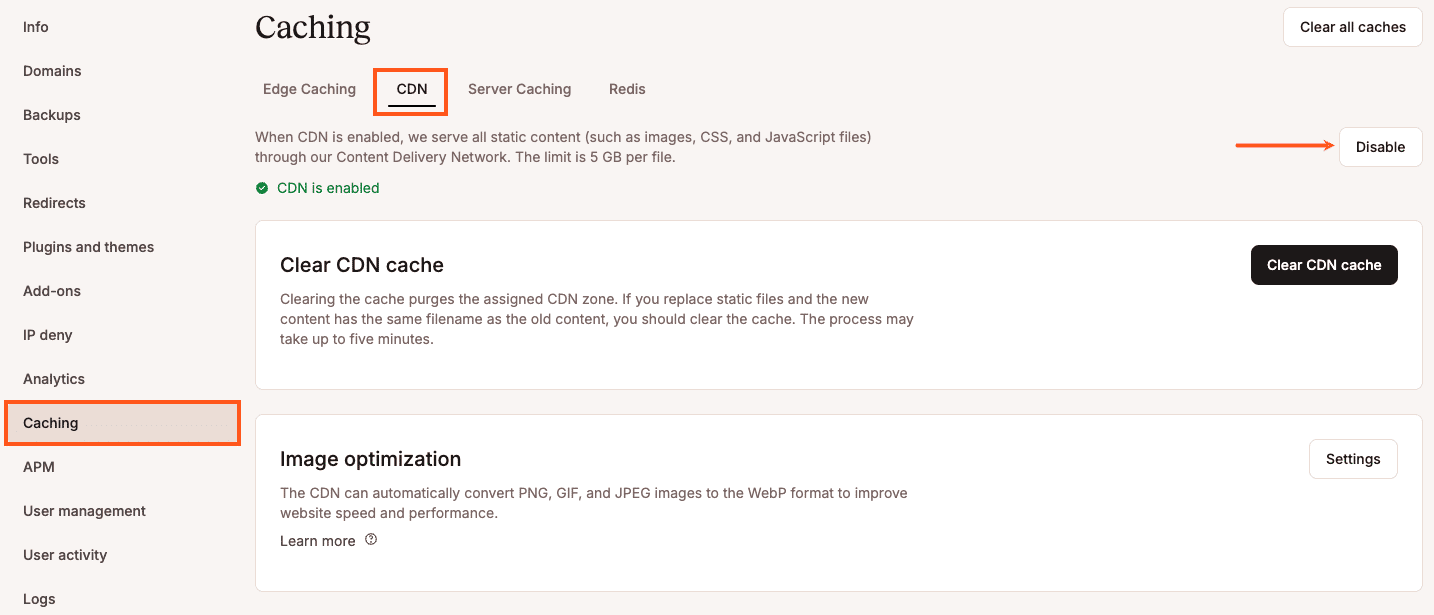
You can also disable the CDN for a single site within Sites > sitename > Caching > CDN > Disable.
Testing Kinsta’s CDN
Since Kinsta’s CDN doesn’t use a secondary CDN domain, you can’t verify that the CDN is working by inspecting the URL of your static files, but you can test it with a website speed test tool.
Before you proceed with speed tests, we recommend inspecting the HTTP headers of a static asset to confirm it is loading from Kinsta’s CDN. Below are a few ways to check your site’s HTTP headers.
How to check Kinsta’s CDN with Kinsta’s HTTP status and redirect checker
You can check the HTTP status and redirect chain of any URL with our free HTTP status and redirect checker. Using this tool you can review the response headers to check whether Kinsta’s CDN is working.
First, you’ll need to find the URL of a static asset on your site. To do this, right-click on an image on your site, and copy the URL. Paste this URL into the redirect checker tool and run the check.
You should see results like this:
Scroll down until you see Response headers. In this section, you can check the following headers to determine which cache is being used and if the asset is being served from the cache or not:
Ki-Cache-Type
- CDN: Indicates that the requested content is either being served from the Kinsta CDN cache or is in the process of being cached.
- None: Displayed when Kinsta CDN is turned off.
- Edge: Shows that Edge Caching is active, either delivering cached pages or attempting to cache them.
Ki-CF-Cache-Status
This header indicates if the cache was returned from Kinsta’s Cloudflare integration.
- SAVING: The Kinsta CDN is attempting to cache the fetched response.
- HIT: Displayed after the response has been cached successfully.
- BYPASS: The Kinsta CDN is either turned off or a custom BYPASS page rule is in place. In this case, Cloudflare does not attempt to pull or serve a cached version.
- OPTIMIZING: Image Optimization or Minify is enabled. The asset is already cached but is still being optimized. Once optimization is complete, this status changes to HIT.
- REVALIDATED: The cache has expired, but Cloudflare successfully revalidated the content, making it similar to a HIT response.
CF-Cache-Status
This header indicates that the cache is returned from your own Cloudflare account.
- EXPIRED: The asset was previously cached in Cloudflare but has expired and is no longer available in the cache.
- HIT: The asset was successfully served from Cloudflare’s cache, reducing the need for a server request.
- DYNAMIC: A Cloudflare Page Rule is bypassing the CDN, often due to a custom rule that forces dynamic content delivery.
- MISS: Cloudflare did not have a cached copy of the asset when the request was made, so it had to be fetched from the site’s server.
If the value of cf-cache-status is DYNAMIC or BYPASS and the value of ki-cf-cache-status is HIT, this shows Kinsta’s CDN is enabled while CDN is disabled (usually with a Page Rule) in your Cloudflare account.
How to check Kinsta’s CDN with a web browser
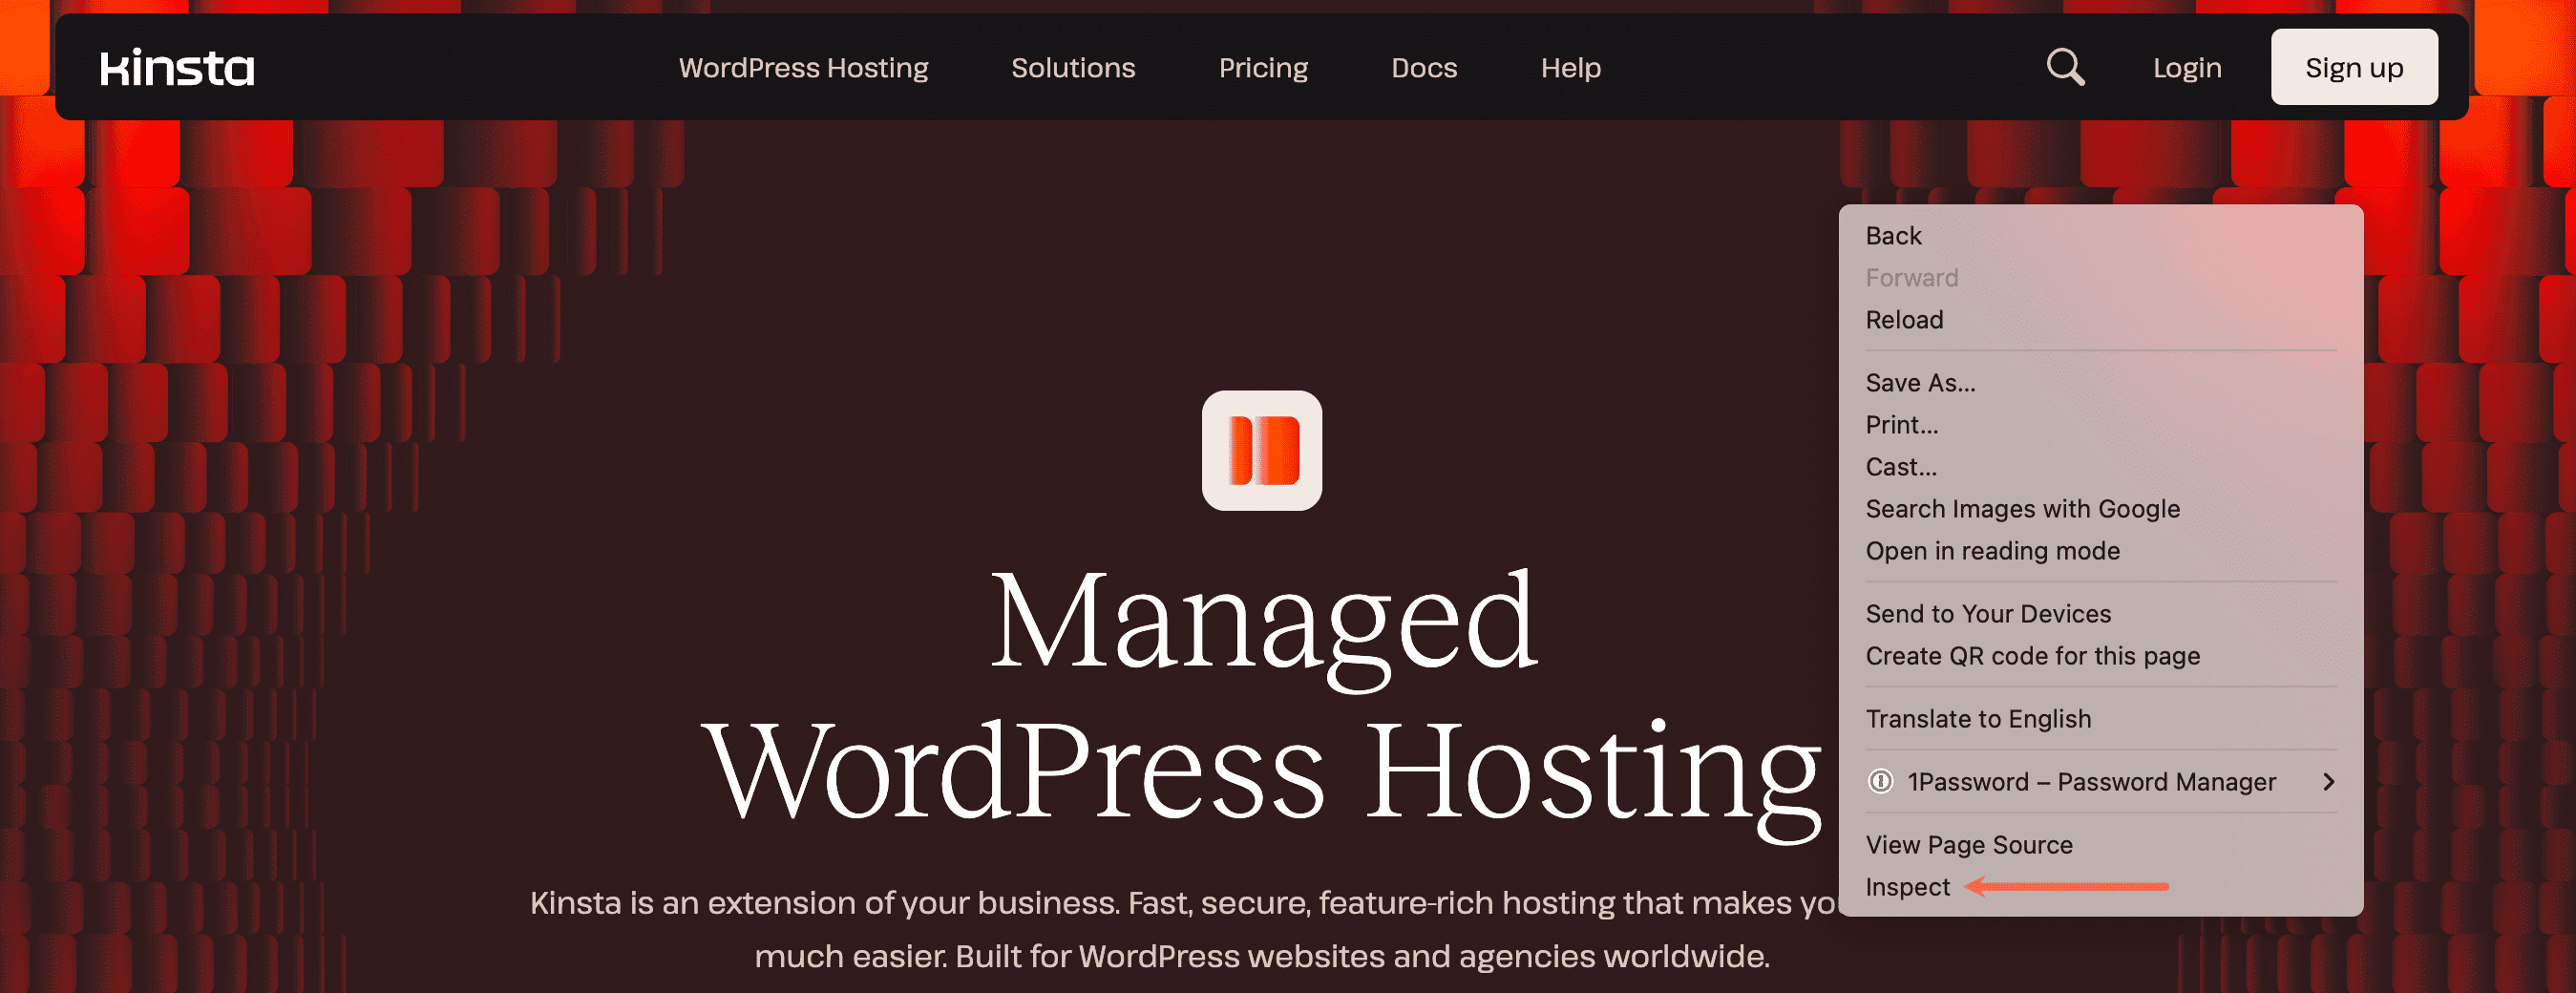
You can use your web browser’s built-in developer tools to check whether Kinsta’s CDN is working. For this example, we’ll use Google Chrome to inspect HTTP headers for a static asset. To launch the Chrome developer tools, right-click on the page and click Inspect.
Next, click on the Network tab and reload the page. As the page loads, you’ll see a list of the page’s static assets on the left-hand side of the developer tools window. To verify that Kinsta’s CDN is working correctly, click on any static asset (CSS, JS, image file, or web font) that loads from your domain.
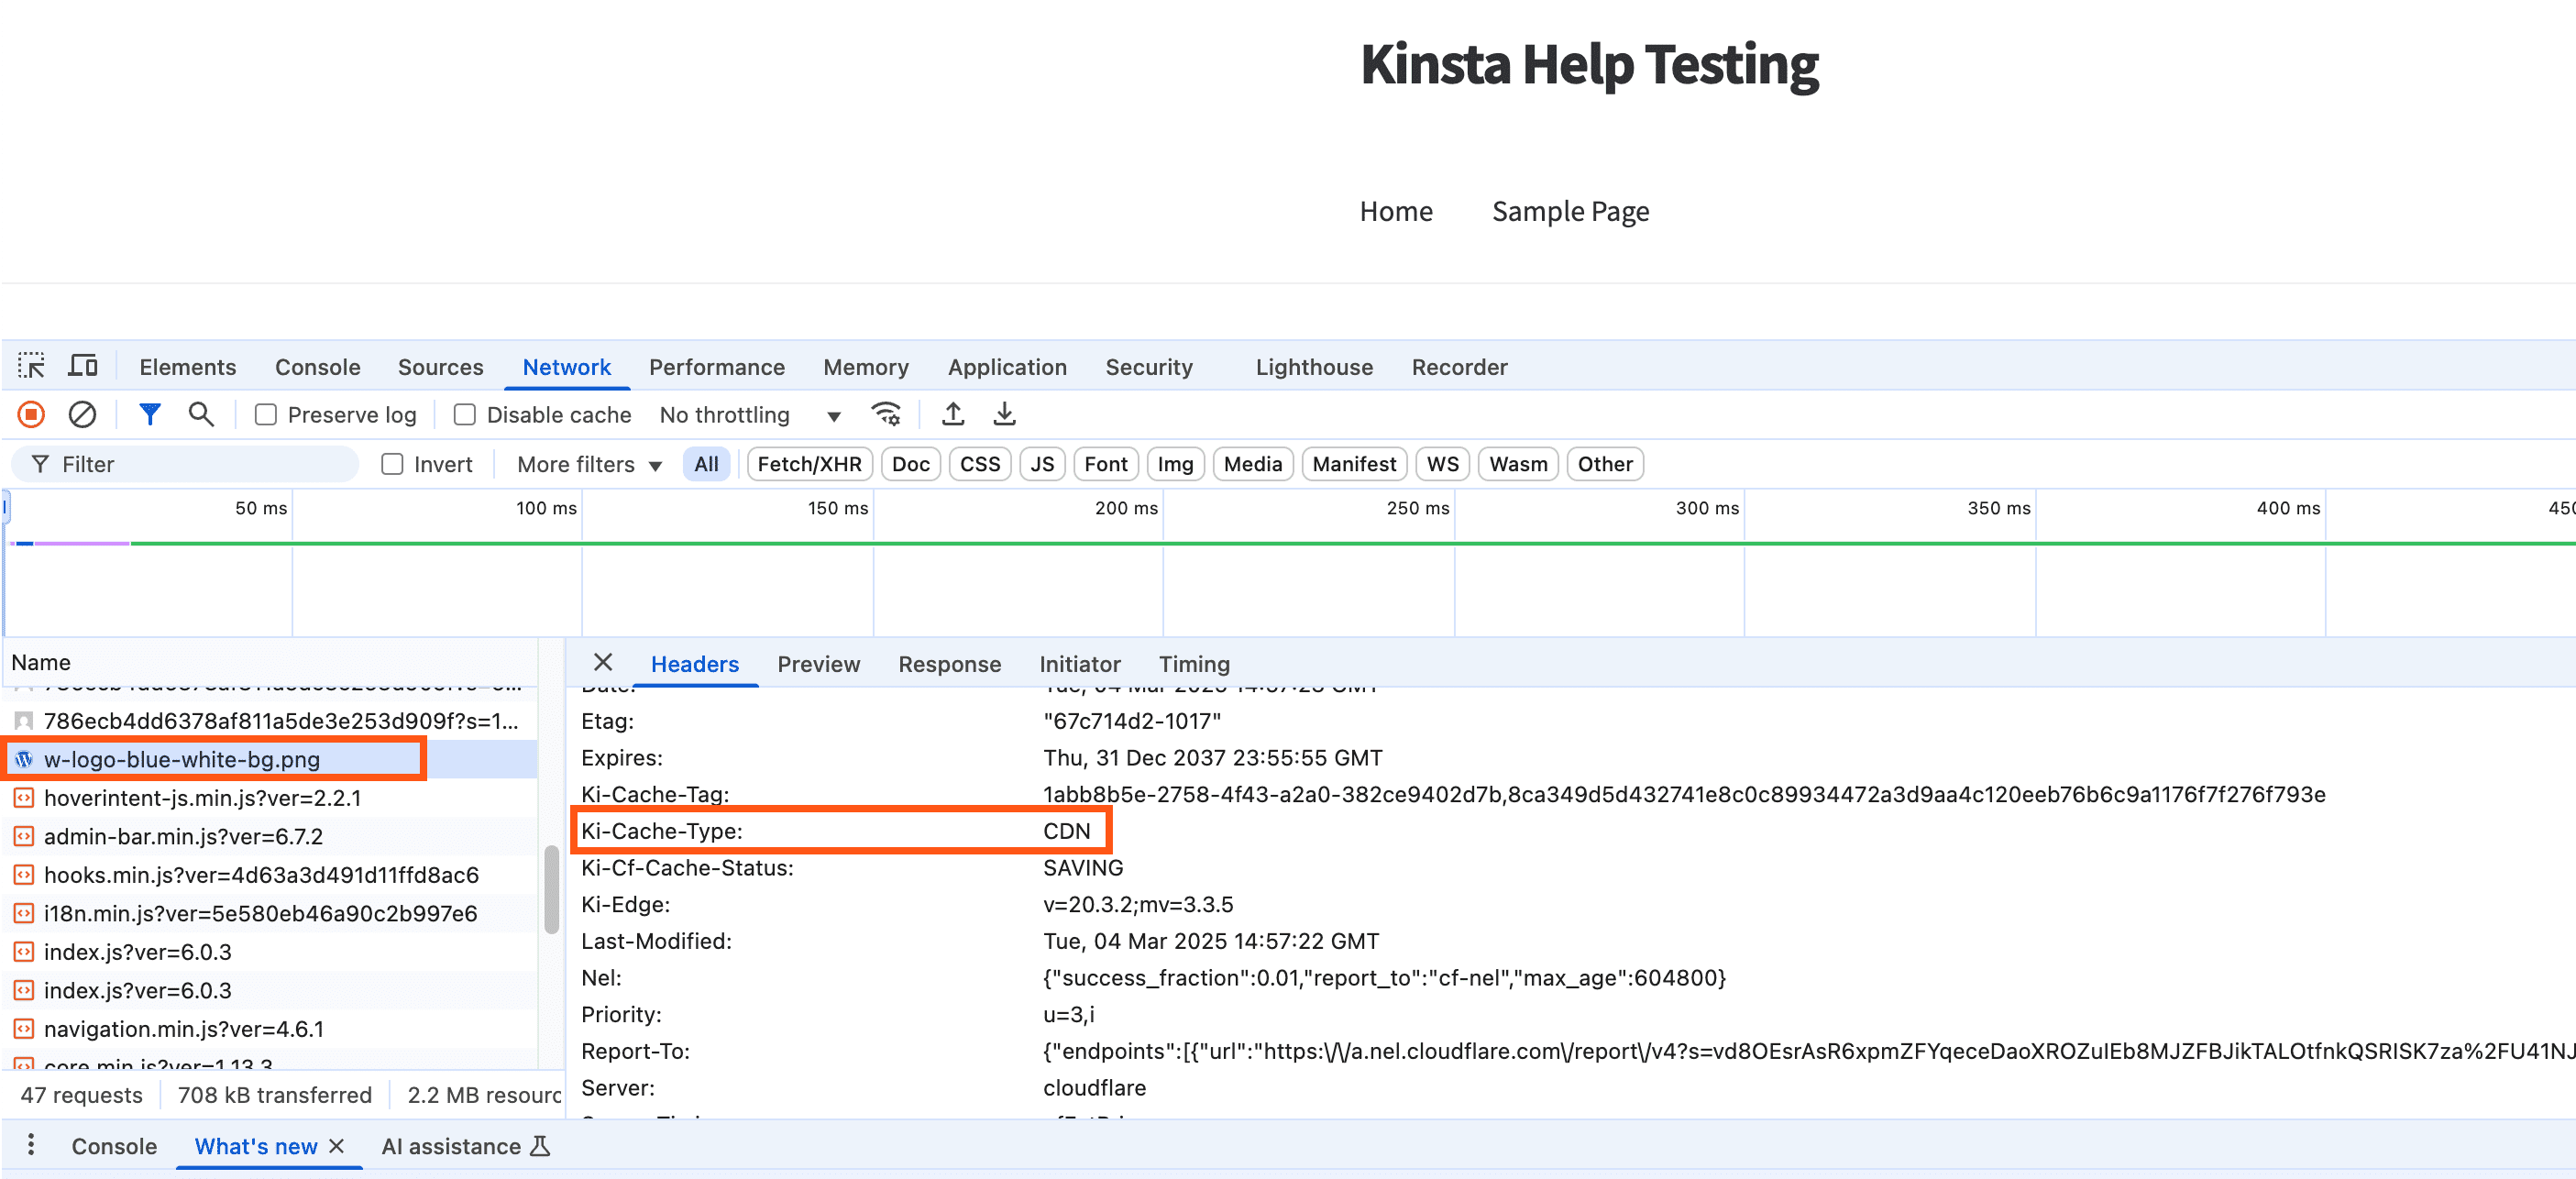
In the Headers tab, scroll down until you see the Response Headers. In this section, you can check the following headers to determine which cache is being used and if the asset is being served from the cache or not:
Ki-Cache-Type
- CDN: Indicates that the requested content is either being served from the Kinsta CDN cache or is in the process of being cached.
- None: Displayed when Kinsta CDN is turned off.
- Edge: Shows that Edge Caching is active, either delivering cached pages or attempting to cache them.
Ki-CF-Cache-Status
This header indicates if the cache was returned from Kinsta’s Cloudflare integration.
- SAVING: The Kinsta CDN is attempting to cache the fetched response.
- HIT: Displayed after the response has been cached successfully.
- BYPASS: The Kinsta CDN is either turned off or a custom BYPASS page rule is in place. In this case, Cloudflare does not attempt to pull or serve a cached version.
- OPTIMIZING: Image Optimization or Minify is enabled. The asset is already cached but is still being optimized. Once optimization is complete, this status changes to HIT.
- REVALIDATED: The cache has expired, but Cloudflare successfully revalidated the content, making it similar to a HIT response.
CF-Cache-Status
This header indicates that the cache is returned from your own Cloudflare account.
- EXPIRED: The asset was previously cached in Cloudflare but has expired and is no longer available in the cache.
- HIT: The asset was successfully served from Cloudflare’s cache, reducing the need for a server request.
- DYNAMIC: A Cloudflare Page Rule is bypassing the CDN, often due to a custom rule that forces dynamic content delivery.
- MISS: Cloudflare did not have a cached copy of the asset when the request was made, so it had to be fetched from the site’s server.
If the value of cf-cache-status is DYNAMIC or BYPASS and the value of ki-cf-cache-status is HIT, this shows Kinsta’s CDN is enabled while CDN is disabled (usually with a Page Rule) in your Cloudflare account.
How to check Kinsta’s CDN in Terminal
If you’re familiar with using Terminal (command line), you can also check HTTP headers with the curl command. First, you’ll need to find the URL of a static asset on your site. To do this, right-click on an image on your site, and copy the URL.
Next, use the command below and substitute the full URL including the domain at the end of the command with your asset URL including your own domain.
curl -L -s -o /dev/null -D - https://kinstacdn.kinstalife.com/wp-content/uploads/2021/01/post-one.jpgAfter running this command, you should get a response like this:
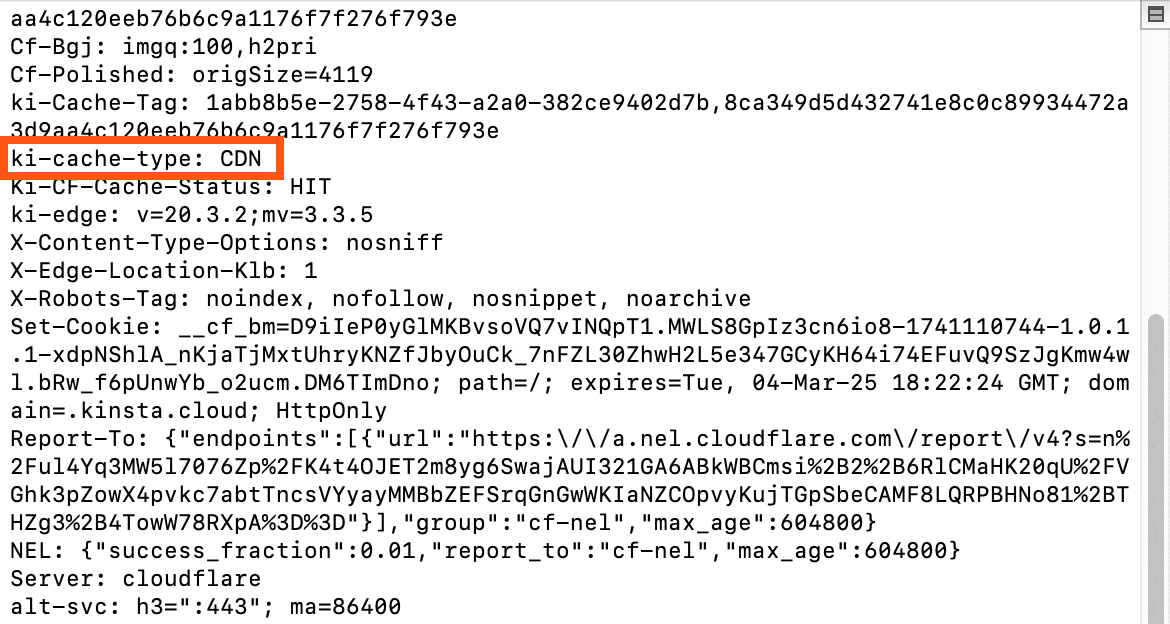
You can check the following to determine which cache is being used and if the asset is being served from the cache or not:
Ki-Cache-Type
- CDN: Indicates that the requested content is either being served from the Kinsta CDN cache or is in the process of being cached.
- None: Displayed when Kinsta CDN is turned off.
- Edge: Shows that Edge Caching is active, either delivering cached pages or attempting to cache them.
Ki-CF-Cache-Status
This header indicates if the cache was returned from Kinsta’s Cloudflare integration.
- SAVING: The Kinsta CDN is attempting to cache the fetched response.
- HIT: Displayed after the response has been cached successfully.
- BYPASS: The Kinsta CDN is either turned off or a custom BYPASS page rule is in place. In this case, Cloudflare does not attempt to pull or serve a cached version.
- OPTIMIZING: Image Optimization or Minify is enabled. The asset is already cached but is still being optimized. Once optimization is complete, this status changes to HIT.
- REVALIDATED: The cache has expired, but Cloudflare successfully revalidated the content, making it similar to a HIT response.
CF-Cache-Status
This header indicates that the cache is returned from your own Cloudflare account.
- EXPIRED: The asset was previously cached in Cloudflare but has expired and is no longer available in the cache.
- HIT: The asset was successfully served from Cloudflare’s cache, reducing the need for a server request.
- DYNAMIC: A Cloudflare Page Rule is bypassing the CDN, often due to a custom rule that forces dynamic content delivery.
- MISS: Cloudflare did not have a cached copy of the asset when the request was made, so it had to be fetched from the site’s server.
If the value of cf-cache-status is DYNAMIC or BYPASS and the value of ki-cf-cache-status is HIT, this shows Kinsta’s CDN is enabled while CDN is disabled (usually with a Page Rule) in your Cloudflare account.
Important notes
Here are some important notes regarding Kinsta’s CDN integration.
- If you’re using a third-party CDN, we recommend disabling it before enabling Kinsta’s CDN. Using multiple CDN services for a single site can cause asset purging issues.
- If you use your own Cloudflare account alongside Kinsta’s Cloudflare integration, some caching and optimization settings may override the Kinsta settings or vice versa, depending on the setting. In this case, enabling Kinsta’s CDN will only offer the benefit of letting you cache larger files than what the Free, Pro, and Business Cloudflare plans offer.
- The maximum cacheable file size is 5 GB.
- Static assets are not automatically served over HTTPS. To ensure all assets are served over HTTPS, enable Force HTTPS in MyKinsta.
- When Kinsta’s CDN is enabled, the cache-control header is set as follows:
"Cache-Control", "public, max-age=31536000, s-maxage=31536000"
This Cache-Control header overrides anyExpiresorCache-Controlheaders set in Nginx or your Cloudflare account’s Browser Cache TTL.
Summary
Kinsta’s CDN is a high-performance CDN available to all Kinsta customers at no additional cost. It’s powered by our free Cloudflare integration and automatically serves your content from 300+ PoPs across the globe. If you have any questions about Kinsta’s CDN, feel free to reach out to our 24/7 Support team for further assistance!