Ezoic
Ezoic is an AI-powered platform for publishers with a set of tools to improve website performance and ad revenue. Think of split-testing, site speed and UX improvements, better ad positioning, and more, all combined in one tool. Once you’ve launched your site at Kinsta, if you would like to use Ezoic instead of Kinsta’s CDN, this guide shows you how.
Turn off Ezoic’s Cloudflare integration
Unfortunately, Ezoic’s Cloudflare integration method isn’t compatible with Kinsta’s Cloudflare integration. If you currently have Ezoic configured with Cloudflare (either your own Cloudflare account or an Ezoic-owned Cloudflare DNS zone), you’ll need to turn that off and use the name server integration method with Ezoic before starting the Cloudflare integration steps (Get Cloudflare button) in MyKinsta.
First, make a note of or take screenshots of your existing DNS records so that you can compare them after you’ve switched to the name server method outlined below.
- In your Ezoic account, go to Settings and under Cloudflare or Site Integration, click the Remove Cloudflare button to disconnect the Cloudflare integration method.
- If you have your own Cloudflare account, log in to your Cloudflare account and delete your site’s domain there. If Ezoic owns your Cloudflare DNS zone (you don’t have your own Cloudflare account), you can skip this step.
Now you’re ready to configure your site to use Ezoic’s name servers as detailed below. Once you have that set up and DNS has fully propagated, you can begin the steps in MyKinsta to add your domain to MyKinsta or enable Kinsta’s Cloudflare integration for an existing domain in MyKinsta. If you see a message in MyKinsta that your domain is using Cloudflare or have any trouble enabling Kinsta’s Cloudflare integration, contact our Support team.
Install and configure Ezoic
If you don’t already have an Ezoic account, you should visit their registration page to join. During the registration process, you’ll be asked to add your site’s live domain, i.e. the one visitors will use to reach your site.
In this article, we’ll cover two methods for connecting your site hosted at Kinsta to Ezoic. Specifically, we’ll cover how to do that using:
- Ezoic’s Name Servers
- Ezoic’s WordPress Plugin
Method 1: Connect your site using Ezoic’s name servers (recommended)
This method is preferred because it doesn’t require a plugin to do the heavy lifting, which means your site will usually perform a bit better using this option. Here’s how to get started.
1. Log in and select name servers
Log in to your Ezoic account and click Settings > Name Servers > View Instructions.
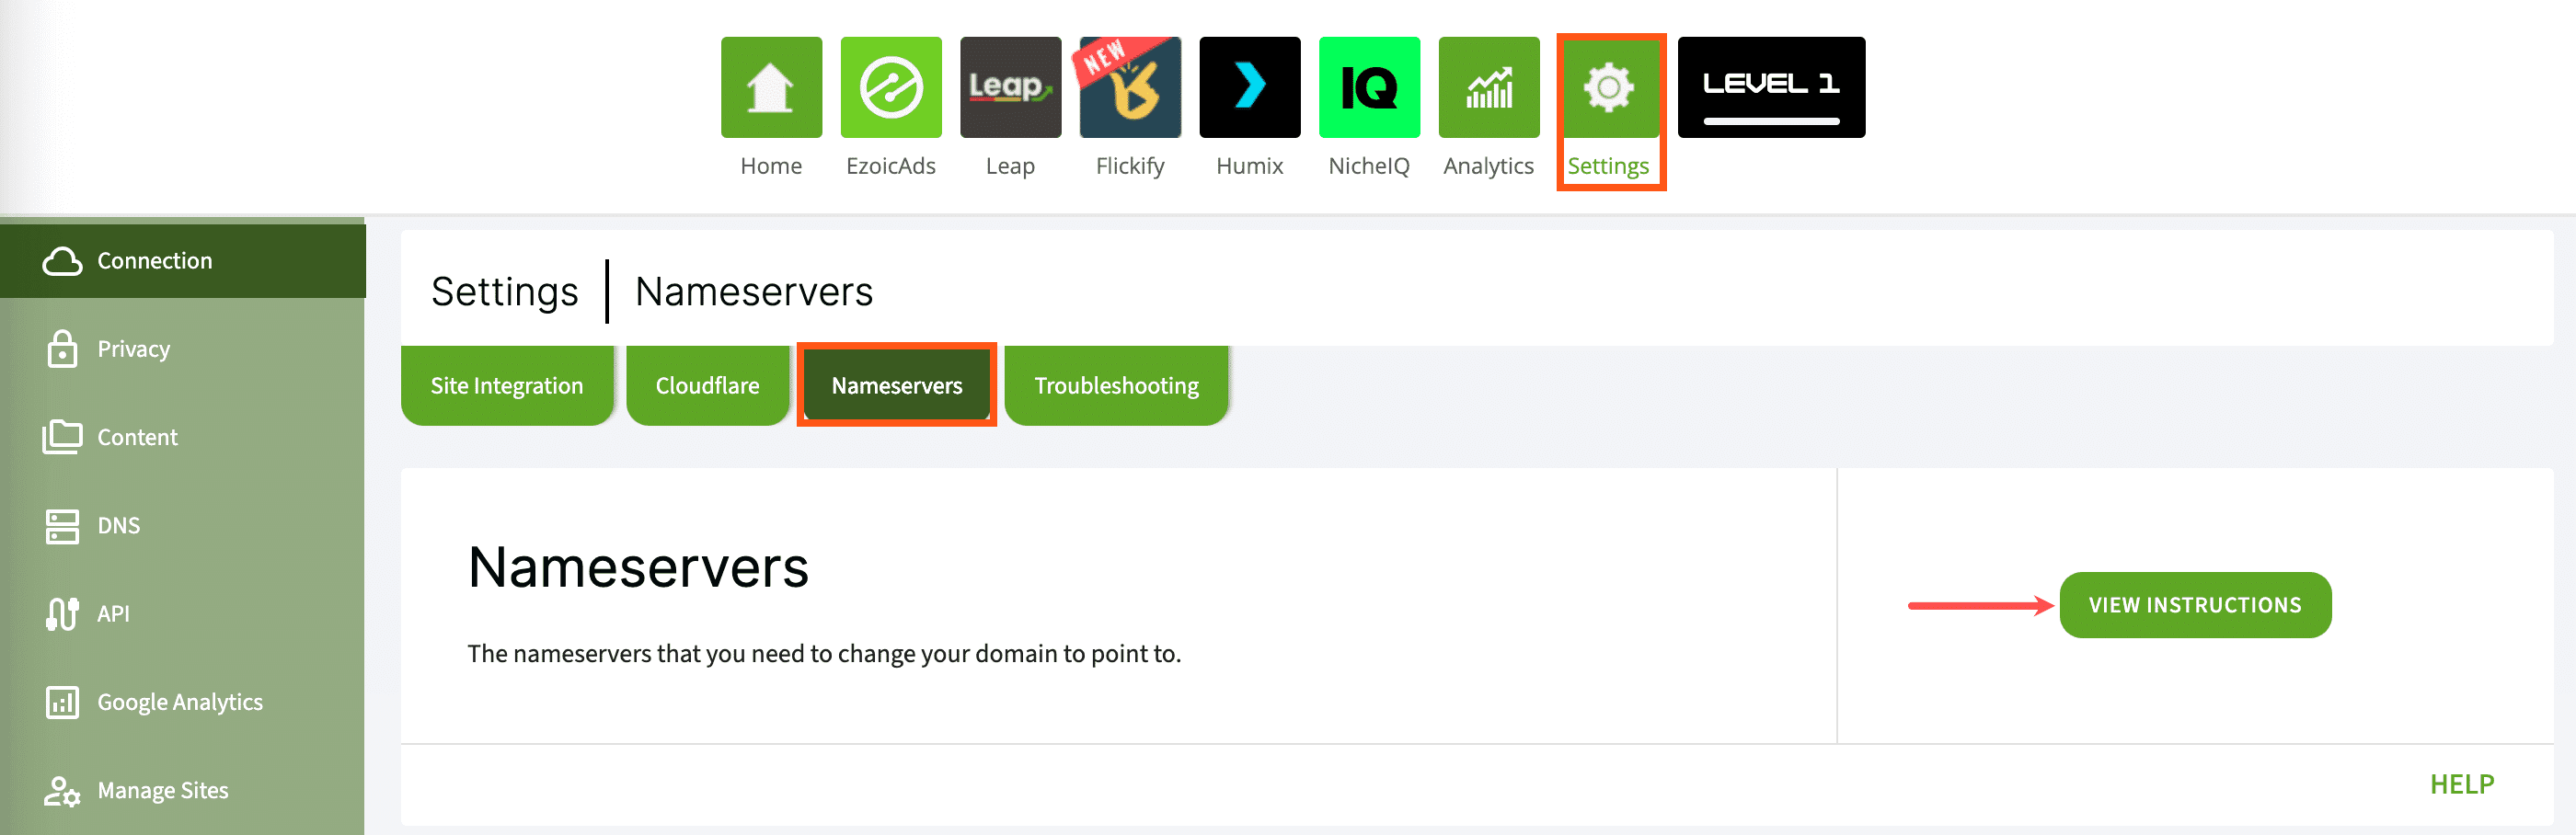
2. Copy name servers
This will show you a table of your Ezoic name servers. Keep this information handy (like opened in a different tab), so you’ll be able to copy your name servers more quickly using the copy icon next to each one.
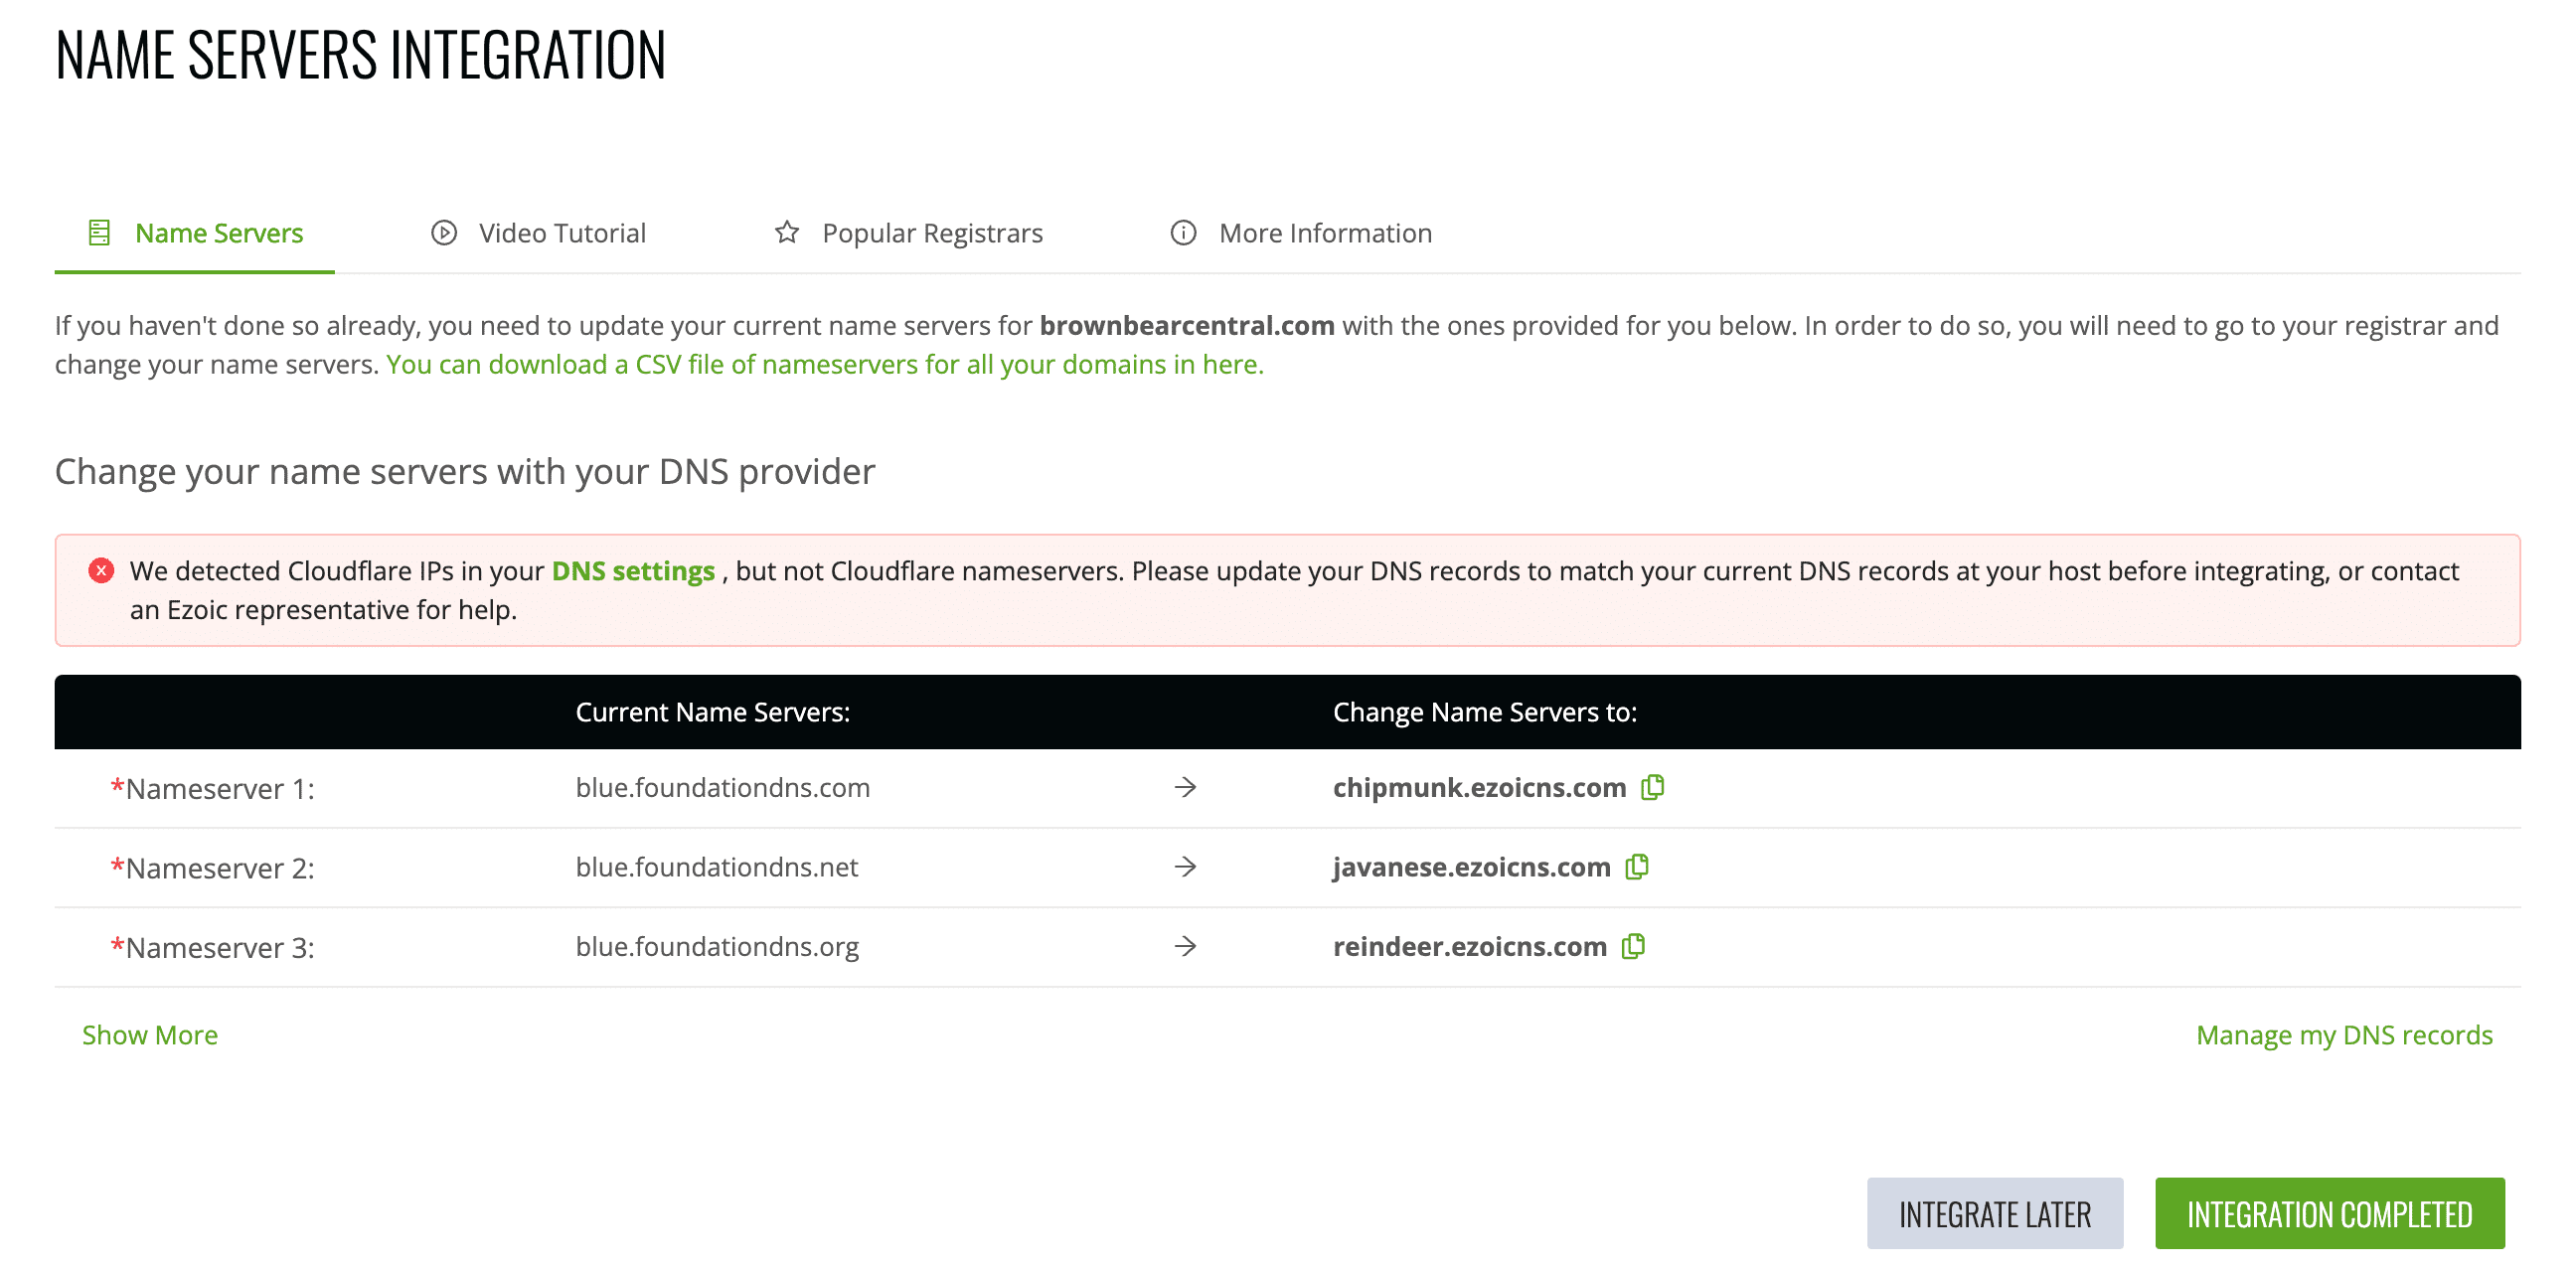
Alternatively, to remove any warnings related to Cloudflare IP addresses, you can update the www (or other subdomain) CNAME record pointing to hosting.kinsta.cloud and set an ALIAS record for the root/apex domain (@) pointing hosting.kinsta.cloud as well. Once those are set, you can delete the A record pointing to your Site IP Address.
3. Log in to your domain registrar
In a new browser tab, log in to your domain registrar. If you’re not sure how to do that at your registrar, check their support documentation or contact their support team to help you with that.
4. Paste name servers into your registrar
Before updating your name servers, this is a good time to note or take screenshots of your existing DNS records so that you can compare them to the records imported by Ezoic later on. Copy each of the name servers from Ezoic and paste them in at your registrar. Be sure to either overwrite the existing name servers or delete them and add the new ones.
5. DNS propogation
Allow for DNS to propagate the name server change. This will usually be in 24 hours, but in some cases may take 48–72 hours.
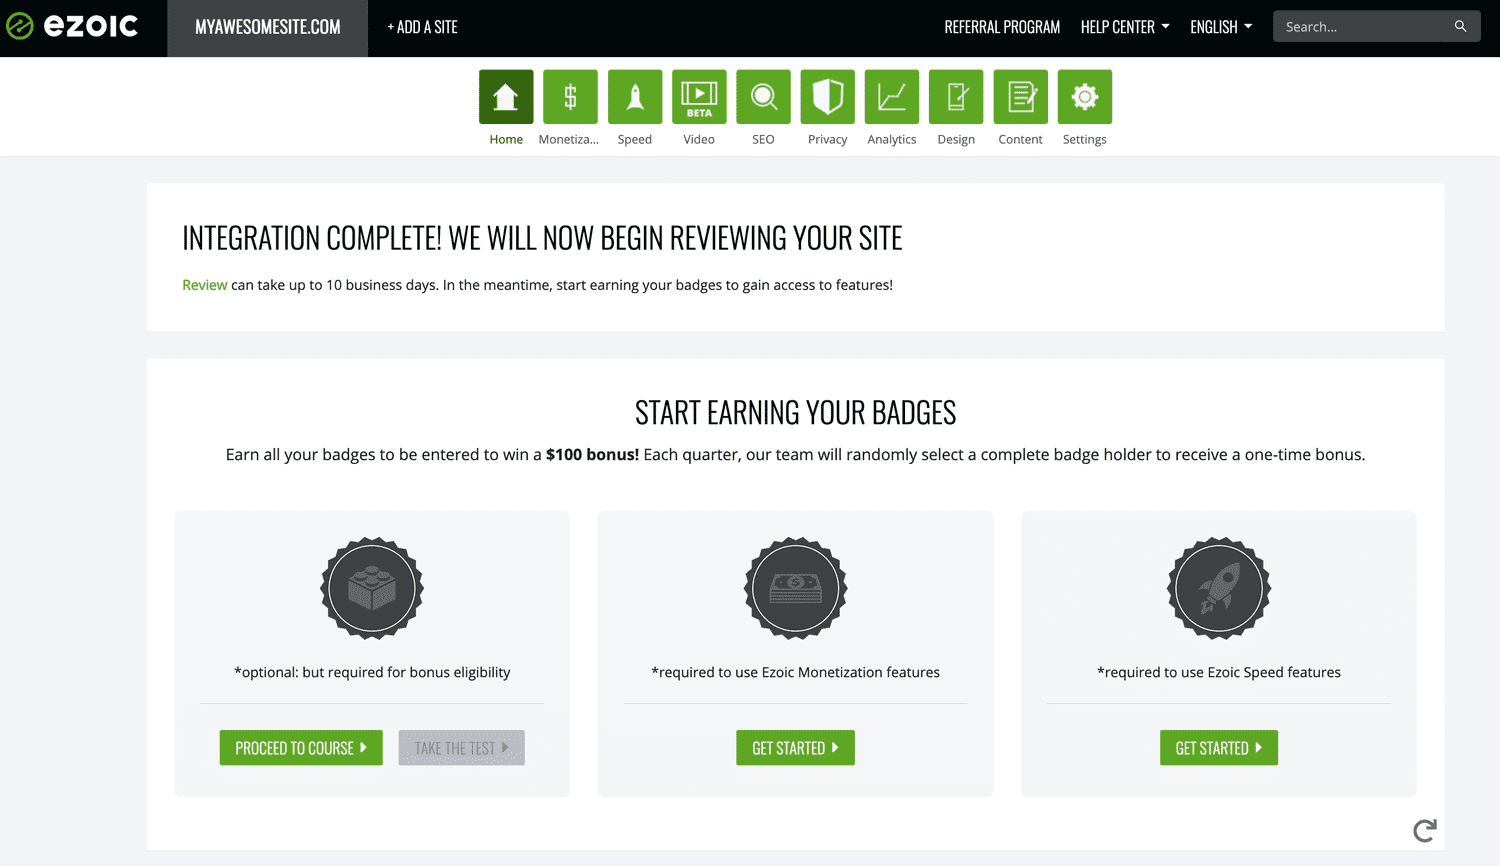
Once propagation is finished, your site integration will show as complete in Ezoic.
6. Check DNS records
On the Settings tab, scroll down to the DNS Settings to double-check that your DNS records match those at your previous DNS provider. These should have been automatically imported in, but it’s best to make sure everything is there and configured properly.
Just want to test things out without changing DNS records? Then, let’s take a look at the second method you can use.Method 2: Connect your site using Ezoic’s WordPress plugin
While using the Ezoic WordPress plugin on its own for Ezoic integration isn’t generally recommended as a long-term integration method, it can be helpful for initial set up or if you’re unable to point your name servers to Ezoic. To integrate your site with Ezoic using the plugin method, log in to your WordPress dashboard, then install and activate the Ezoic plugin (here’s a guide on installing a plugin). It may take up to an hour for the WordPress plugin option to be displayed and be marked as integrated under Settings > Site Integration in your Ezoic dashboard. Once the process successfully goes through, you can then manage your settings as needed in your Ezoic dashboard as normal. If you’re using this connection method temporarily as recommended, when you are ready to change your name servers, Ezoic recommends keeping the plugin active on your site for CDN management and automated cache clearing.
Troubleshooting common issues with Ezoic
Now that your site is connected to Ezoic, there may be times when something isn’t working quite right. Here are some tips and recommendations for fixing some of the typical issues you may see.
SSL errors or redirect loops
If you’ve enabled the SSL option Ezoic, make sure Full SSL is selected there to prevent any conflicts with Kinsta’s Cloudflare integration or other SSL issues.
Changes aren’t showing up on your site
Using Ezoic with your sites means there’s an additional layer of caching that will need to be cleared anytime you need to clear the cache. If you’re having trouble seeing changes on your site or a plugin isn’t behaving as expected after installing or reinstalling, be sure you clear cache at all layers, including:
- Plugins (if applicable)
- Themes (if applicable)
- Site/server cache at Kinsta (from either MyKinsta or the Kinsta MU plugin)
- Caching in the Ezoic Caching App
- Browser cache
Discrepancies in analytics
Due to differences in the data collected and the calculation method, it’s possible that analytics shown in your Ezoic dashboard may vary from those shown in MyKinsta. This is common with any third-party analytics tool and is expected.
Automatic cache clearing with Ezoic’s WordPress plugin
To automatically purge pages from the Ezoic CDN whenever a post or page is updated, you can install and activate the Ezoic WordPress plugin. This can be used (and is recommended) along with the name server Ezoic integration method.
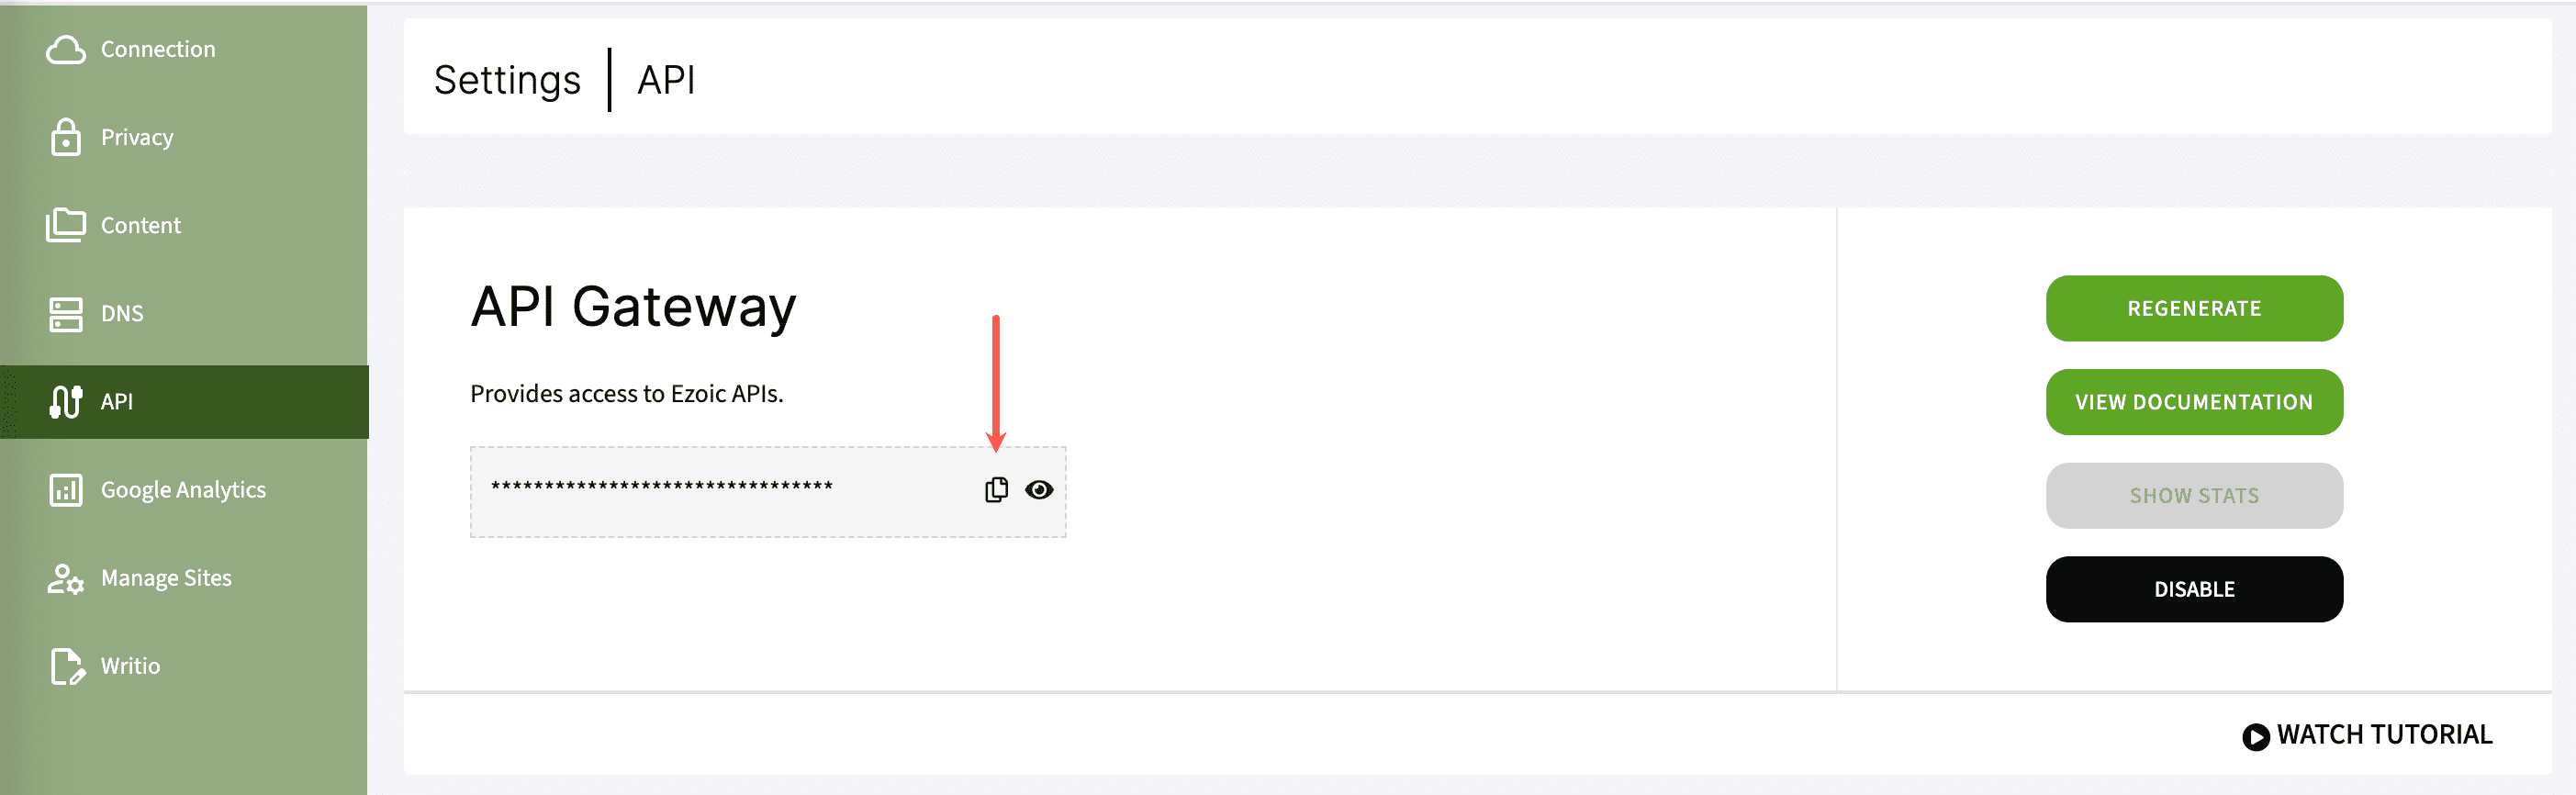
1. Enable Ezoic API
After installing the Ezoic WordPress plugin on your site, on your Ezoic dashboard go to Settings > API > Enable.
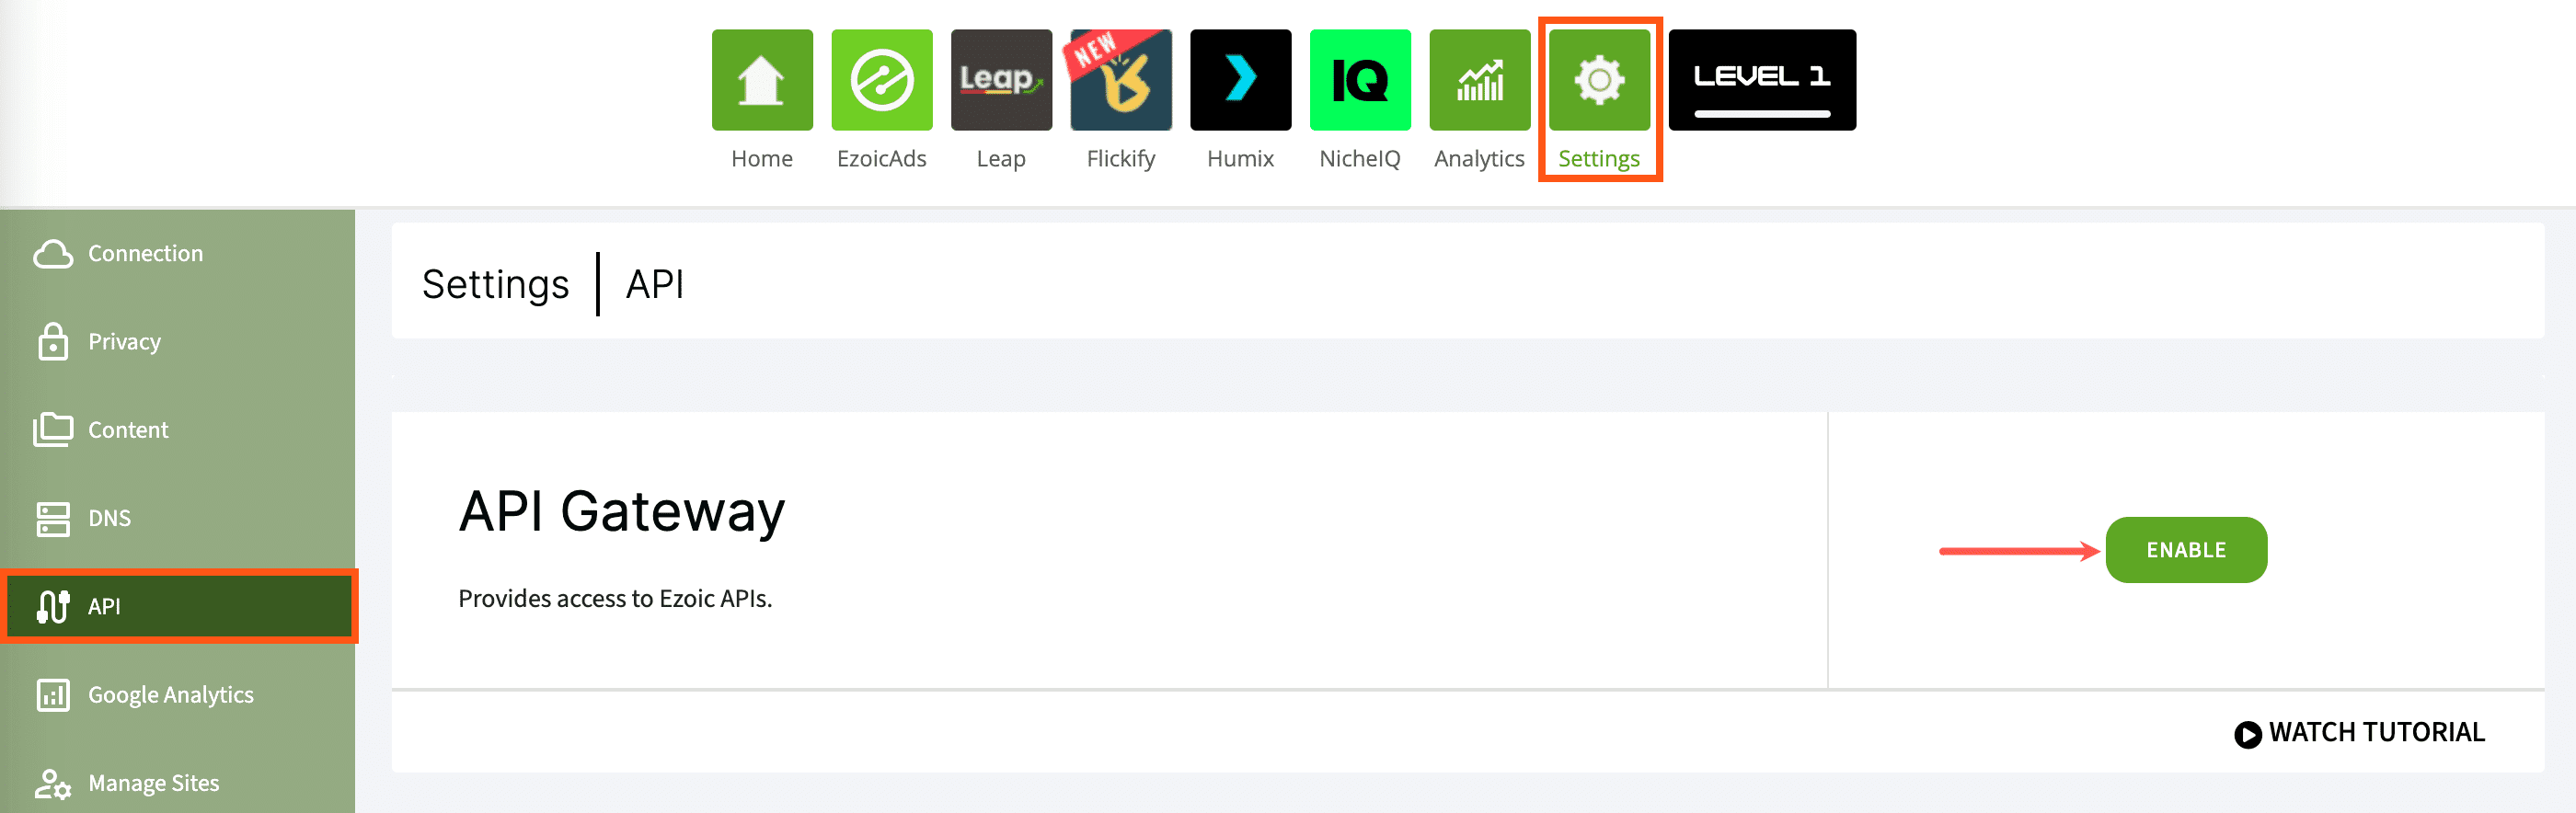
2. Copy API key
Copy the API key once it’s generated.
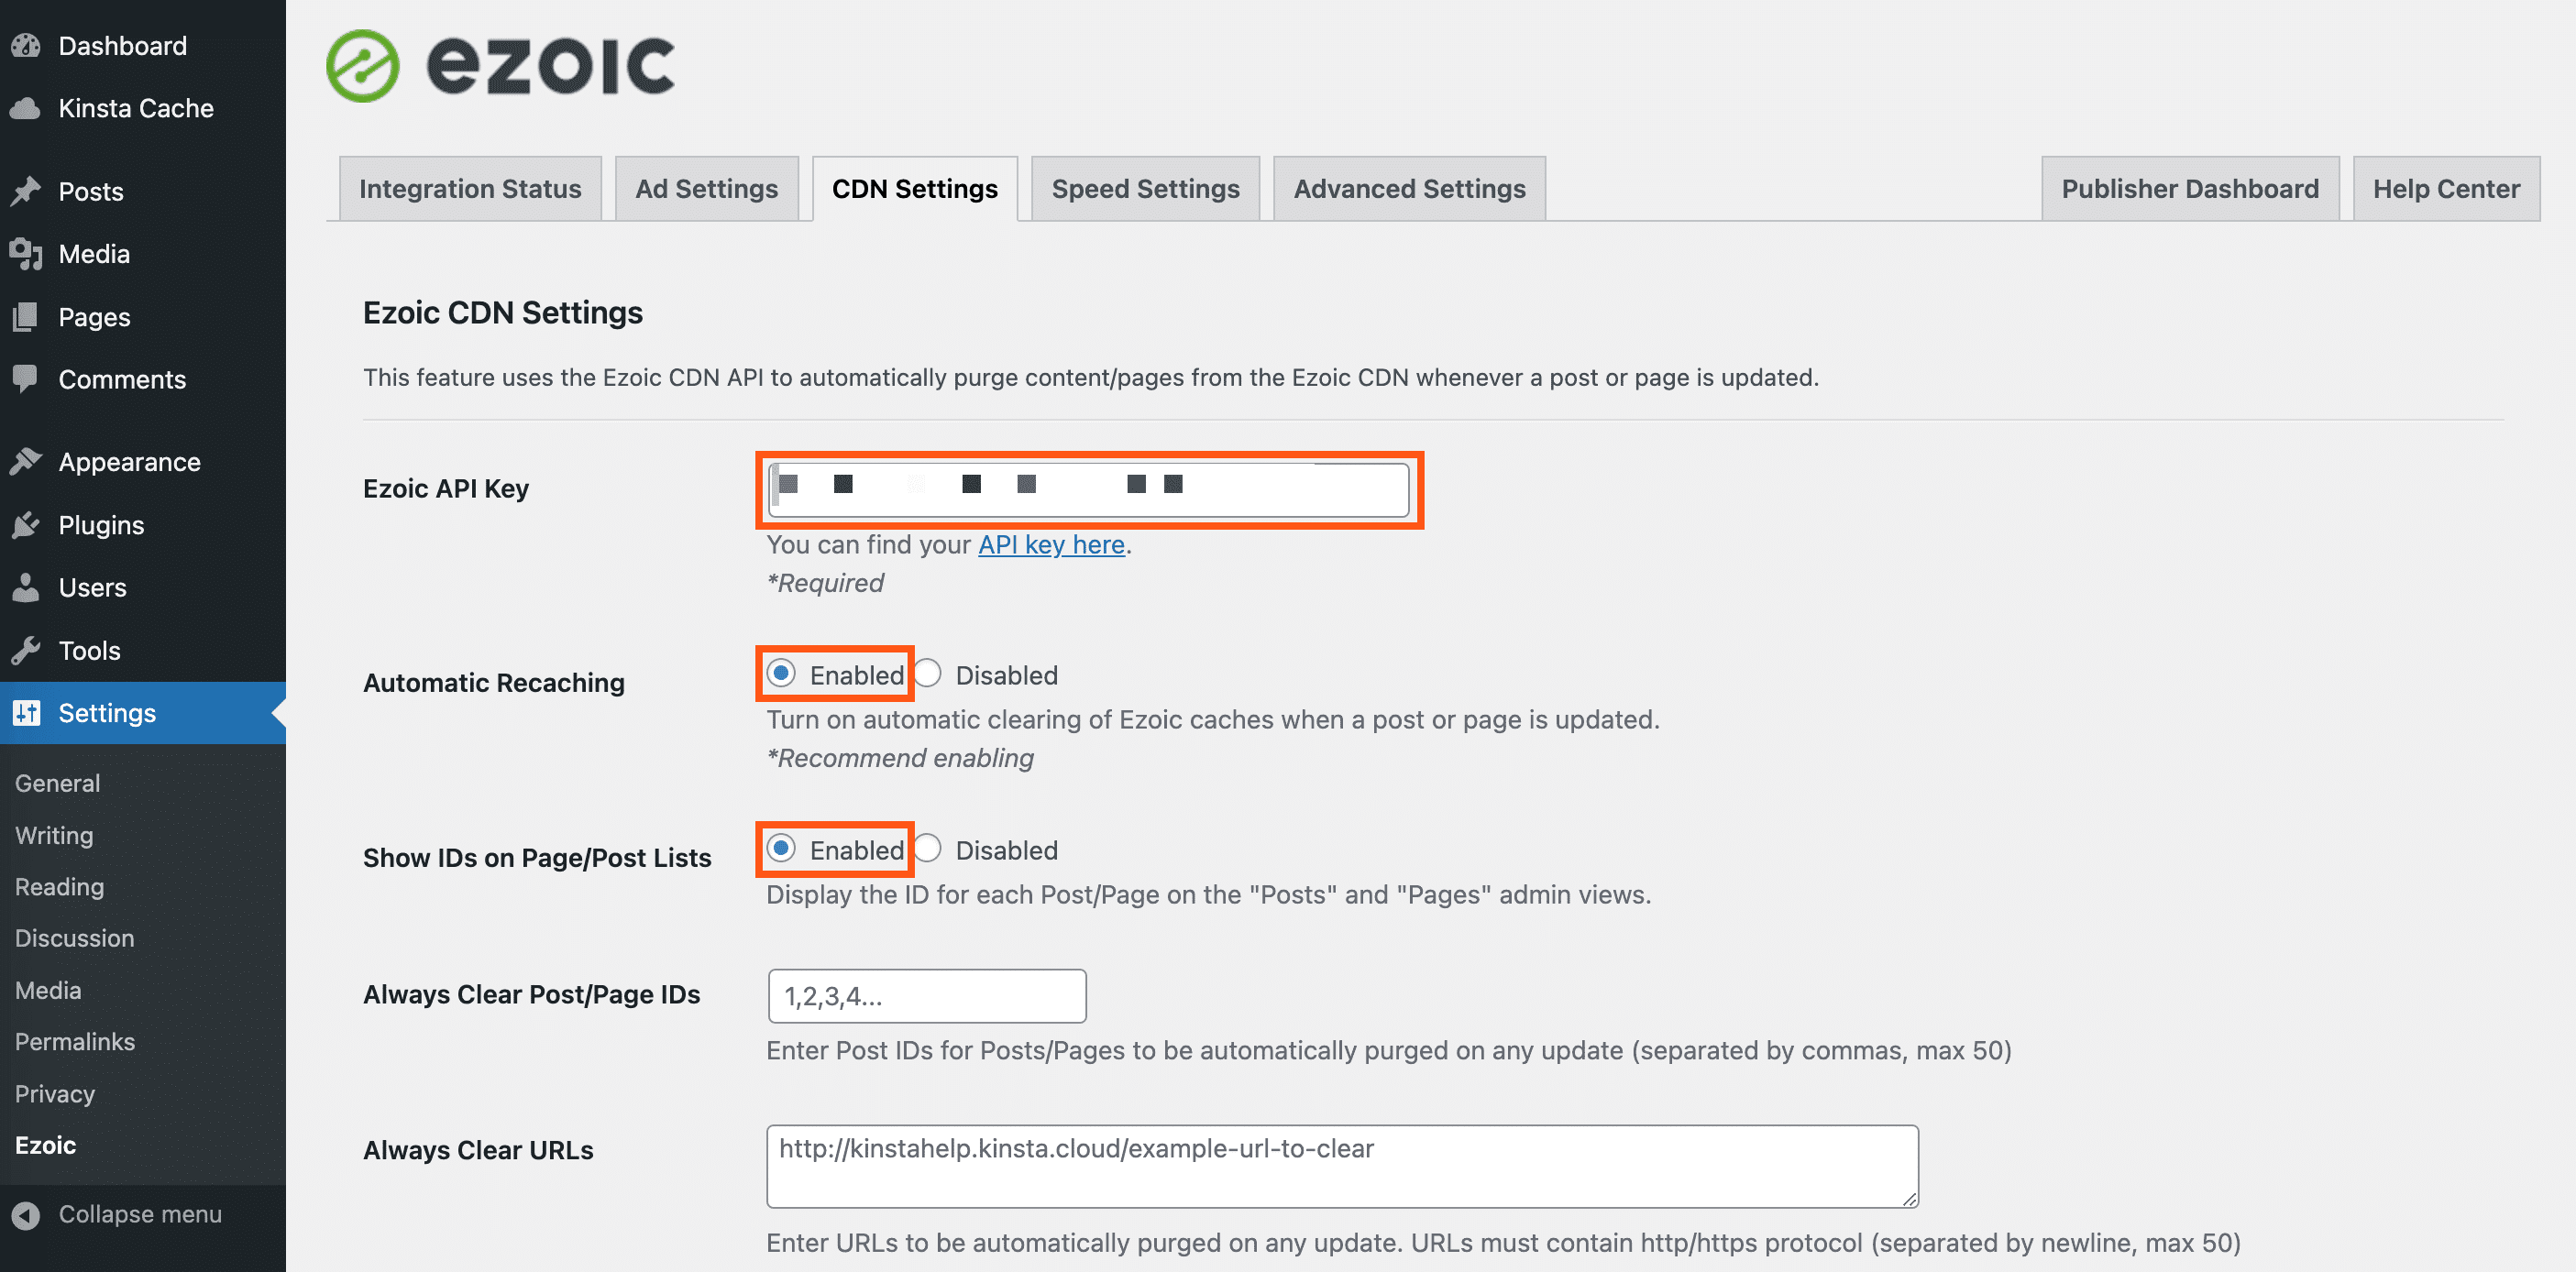
3. Paste API key in WordPress
Back in your WordPress dashboard, go to Settings > Ezoic > CDN Settings, paste in your API Key, enable Automatic Recaching, enable Purge Home, then click Save Settings.
Summary
Your site is now ready to take advantage of the features in Ezoic. If you’re experiencing any server-side issues, feel free to reach out to Kinsta support, and we’ll be happy to help. If you have any trouble with your Ezoic integration or any of its settings, make sure to check with their support team instead.