We’ve published a lot of WordPress speed optimization tutorials over the years with ways to optimize and speed up WordPress. But sometimes it can be confusing trying to find everything you need in one place. So today we’re going to share with you everything we know about turbocharging WordPress, over 15 years worth of experience and hard lessons learned, all in one ultimate guide. Whether you’re just starting to use WordPress or are a seasoned developer, we promise you’ll find something useful in this guide!
Over 43.2% of the web is now powered by WordPress. While this is awesome, it also means there are thousands of different themes, plugins, and technologies all having to coexist. For the everyday WordPress user, this can quickly turn into a nightmare when their site starts to bottleneck and they don’t know why or even where to start troubleshooting.
In our previous guide on page speed, we went over a lot of the fundamentals of performance and how it can have a huge impact on the success of your business. But today we’ll be diving into applicable steps you can take right now to see improvements on your own WordPress sites. We’ll also share some resources that have been invaluable to us.
WordPress Site Types: Static or Dynamic
Before we dive into the WordPress speed optimizations, it’s important first to understand that not all WordPress sites are the same. This is why a lot of users have problems, as you can’t go about tackling every issue the same way. We always give WordPress sites a classification: static or dynamic. So let’s first explore the differences between these two types of sites.
Mostly Static Sites
Static would typically include sites such as blogs, small business sites, lower volume news sites, personal, photography sites, etc. By static, we mean that the data on these WordPress sites is not changing very often (perhaps a couple of times a day). Even most of our Kinsta site would be considered a static website.
This becomes incredibly important as many of the requests can be served directly from cache on the server at lightning-fast speeds! Don’t worry; we’ll dive into the topic of caching in length further below. This means they will have fewer database calls and not as many resources will be needed to achieve google performance.
Highly Dynamic Sites
On the flip side, we have highly dynamic sites. These include sites such as eCommerce (WooCommerce or Easy Digital Downloads), community, membership, forums (bbPress or BuddyPress) and learning management systems (LMS). By dynamic, we mean that the data on these WordPress sites is frequently changing (server transactions are taking place every few minutes or even every second). This means that not all requests to the server can be served directly from cache and require additional server resources and database queries.
These sites also typically have a large number of concurrent visitors and sessions. On an informational or corporate WordPress site which is mostly static, a visitor might stay for five or 10 minutes until they find what they need (and this is a high number, usually bounce rates are much higher). On dynamic sites, you have the opposite happening. Visitors typically come to the site to engage with something or someone. If they’re going through an online course, it’s not unusual for them to stay for hours.
You can see where this is going. The concurrent visitors connected to your WordPress host adds up fast. To make it worse, you then have a large number of concurrent visitors on top of an “uncacheable content” problem.
Choose High-Performance WordPress Hosting
A WordPress host is a company that stores all of your website’s data. You sign up for a plan and all your images, content, videos, etc., reside on a server sitting in the host’s data center. The WordPress host gives you an easy way to access the data, manage it, and route it to your visitors. Pretty simple right? Well, not quite.
There are three very different types of WordPress hosts you’ll encounter around the web. Let’s dive into the pros and cons of each. It’s important you choose the right one from the beginning, otherwise, you’ll simply cause yourself headaches and wasted time down the road.
1. Shared WordPress Hosting
The first and most popular type of WordPress hosting is what we call “shared hosting.” These include the largest hosts in the industry such as EIG companies like Bluehost and HostGator as well as providers like Siteground, GoDaddy, Media Temple, GreenGeeks and InMotion Hosting. They typically utilize cPanel, and the average customer usually pays between $3 to $25 a month.
Anyone using this type of hosting will at some point experience slowness, it’s just a matter of time. Why? Because shared hosts tend to overcrowd their servers, which in turn can impact the performance of your site. Site suspensions or seeing frequent 500 errors are common things you’ll experience as they have to place limits on everything and consolidate resources to survive. Or even worse, website downtime. Even though you don’t know it, your WordPress site is most likely sitting on the same server as 200+ other people. Any issues that pop up with other sites can trickle over into your site.

No matter how you do the math, after expenses, $3 a month isn’t generating any revenue for the hosting company. Especially when you attribute support into that. One support ticket and they’re already in the red. The way they make a lot of their money is on upselling and hidden fees. These upsells include things like migrations, domain registrations, SSL certificates, etc. Another common tactic is to provide huge signup discounts. But once the renewal comes around, you get the real bill.
Most of these hosts offer what they call their “unlimited resources” plan. You have probably all seen this. Well, there is no such thing in the real world as unlimited resources. What hosts do behind the scenes is throttle the clients using up a lot of the resources. This, in turn, ends up with those angry clients leaving, making room for more clients that don’t use a lot of resources. In the end, you have a vicious cycle of the hosting company pushing cheap plans and signing up customers who they hope won’t use a lot of resources and will purchase upsells.
Customer service and support with shared hosting are almost always subpar due to the sheer volume of sites vs. support representatives. Shared hosts have to spread themselves very thin to even make a profit and this usually leads to an unpleasant experience for the client.
Make sure to check out an in-depth article from our CFO on the shocking truths behind how cheap WordPress hosting really works.
2. DIY VPS WordPress Hosting
The second type of WordPress hosting is DIY VPS, or “Do it yourself on a virtual private server.” This crowd is typically made up of bootstrap startups and users with a little more development, server management, and WordPress experience. They are the DIY crowd. These folks are typically still trying to save money, but they are also usually concerned with performance and realize its importance in the success of their business. Commons setups might include using a third-party VPS provider such as Digital Ocean, Linode, or Vultr; along with a tool like ServerPilot to manage it more easily.
A small VPS from DigitalOcean starts at $5 a month and the popular plan at ServerPilot starts at $10 a month. So depending on your setup, you could be looking at a cost of between $5 to $15 or more a month. The DIY approach can cut costs, but it also means that you are responsible if something breaks, and for optimizing your server for performance.
The DIY approach can be great, but it can also backfire on you if you aren’t careful. Don’t go this route if you aren’t tech-savvy or just because you want to tinker! Your time is worth money and you should be spending it on growing your business.
3. Managed WordPress Hosting
The third type of hosting is what we offer at Kinsta and that is managed WordPress hosting. These types of hosts handle all the back-end server related tasks for you, along with providing support when you need it. They are typically fine-tuned to work with WordPress and usually include features such as one-click staging environments and automatic backups. Their support teams will be more knowledgeable when it comes to knowing their way around the CMS as they are focused on one platform on a daily basis.
If you want to save time, managed WordPress hosting is the way to go! 👍
Plans for managed WordPress hosting typically range anywhere from $25 to $150 a month or more depending on the size of your site and needs. Large companies like jQuery, Intuit, Plesk, Dyn, Nginx, and even The White House are all using WordPress to host their website. Some popular managed WordPress hosts you are probably familiar with, or maybe also are currently using include WP Engine, Flywheel, Pressable, Media Temple, Pressidium, and Pagely.
Kinsta Takes a Different Approach
Kinsta however, takes WordPress hosting to the next level. Our hosting platform doesn’t fall into any of the traditional hosting categories. Our entire infrastructure is built on Google Cloud Platform and is different from traditional shared, VPS, or dedicated infrastructure, making it one of the fastest WordPress hosting solutions available.
Every WordPress site on our platform runs in an isolated software container that contains all of the software resources required to run the site (Linux, Nginx, PHP, MySQL). This means that the software that runs each site is completely private and is not shared even between your own sites.
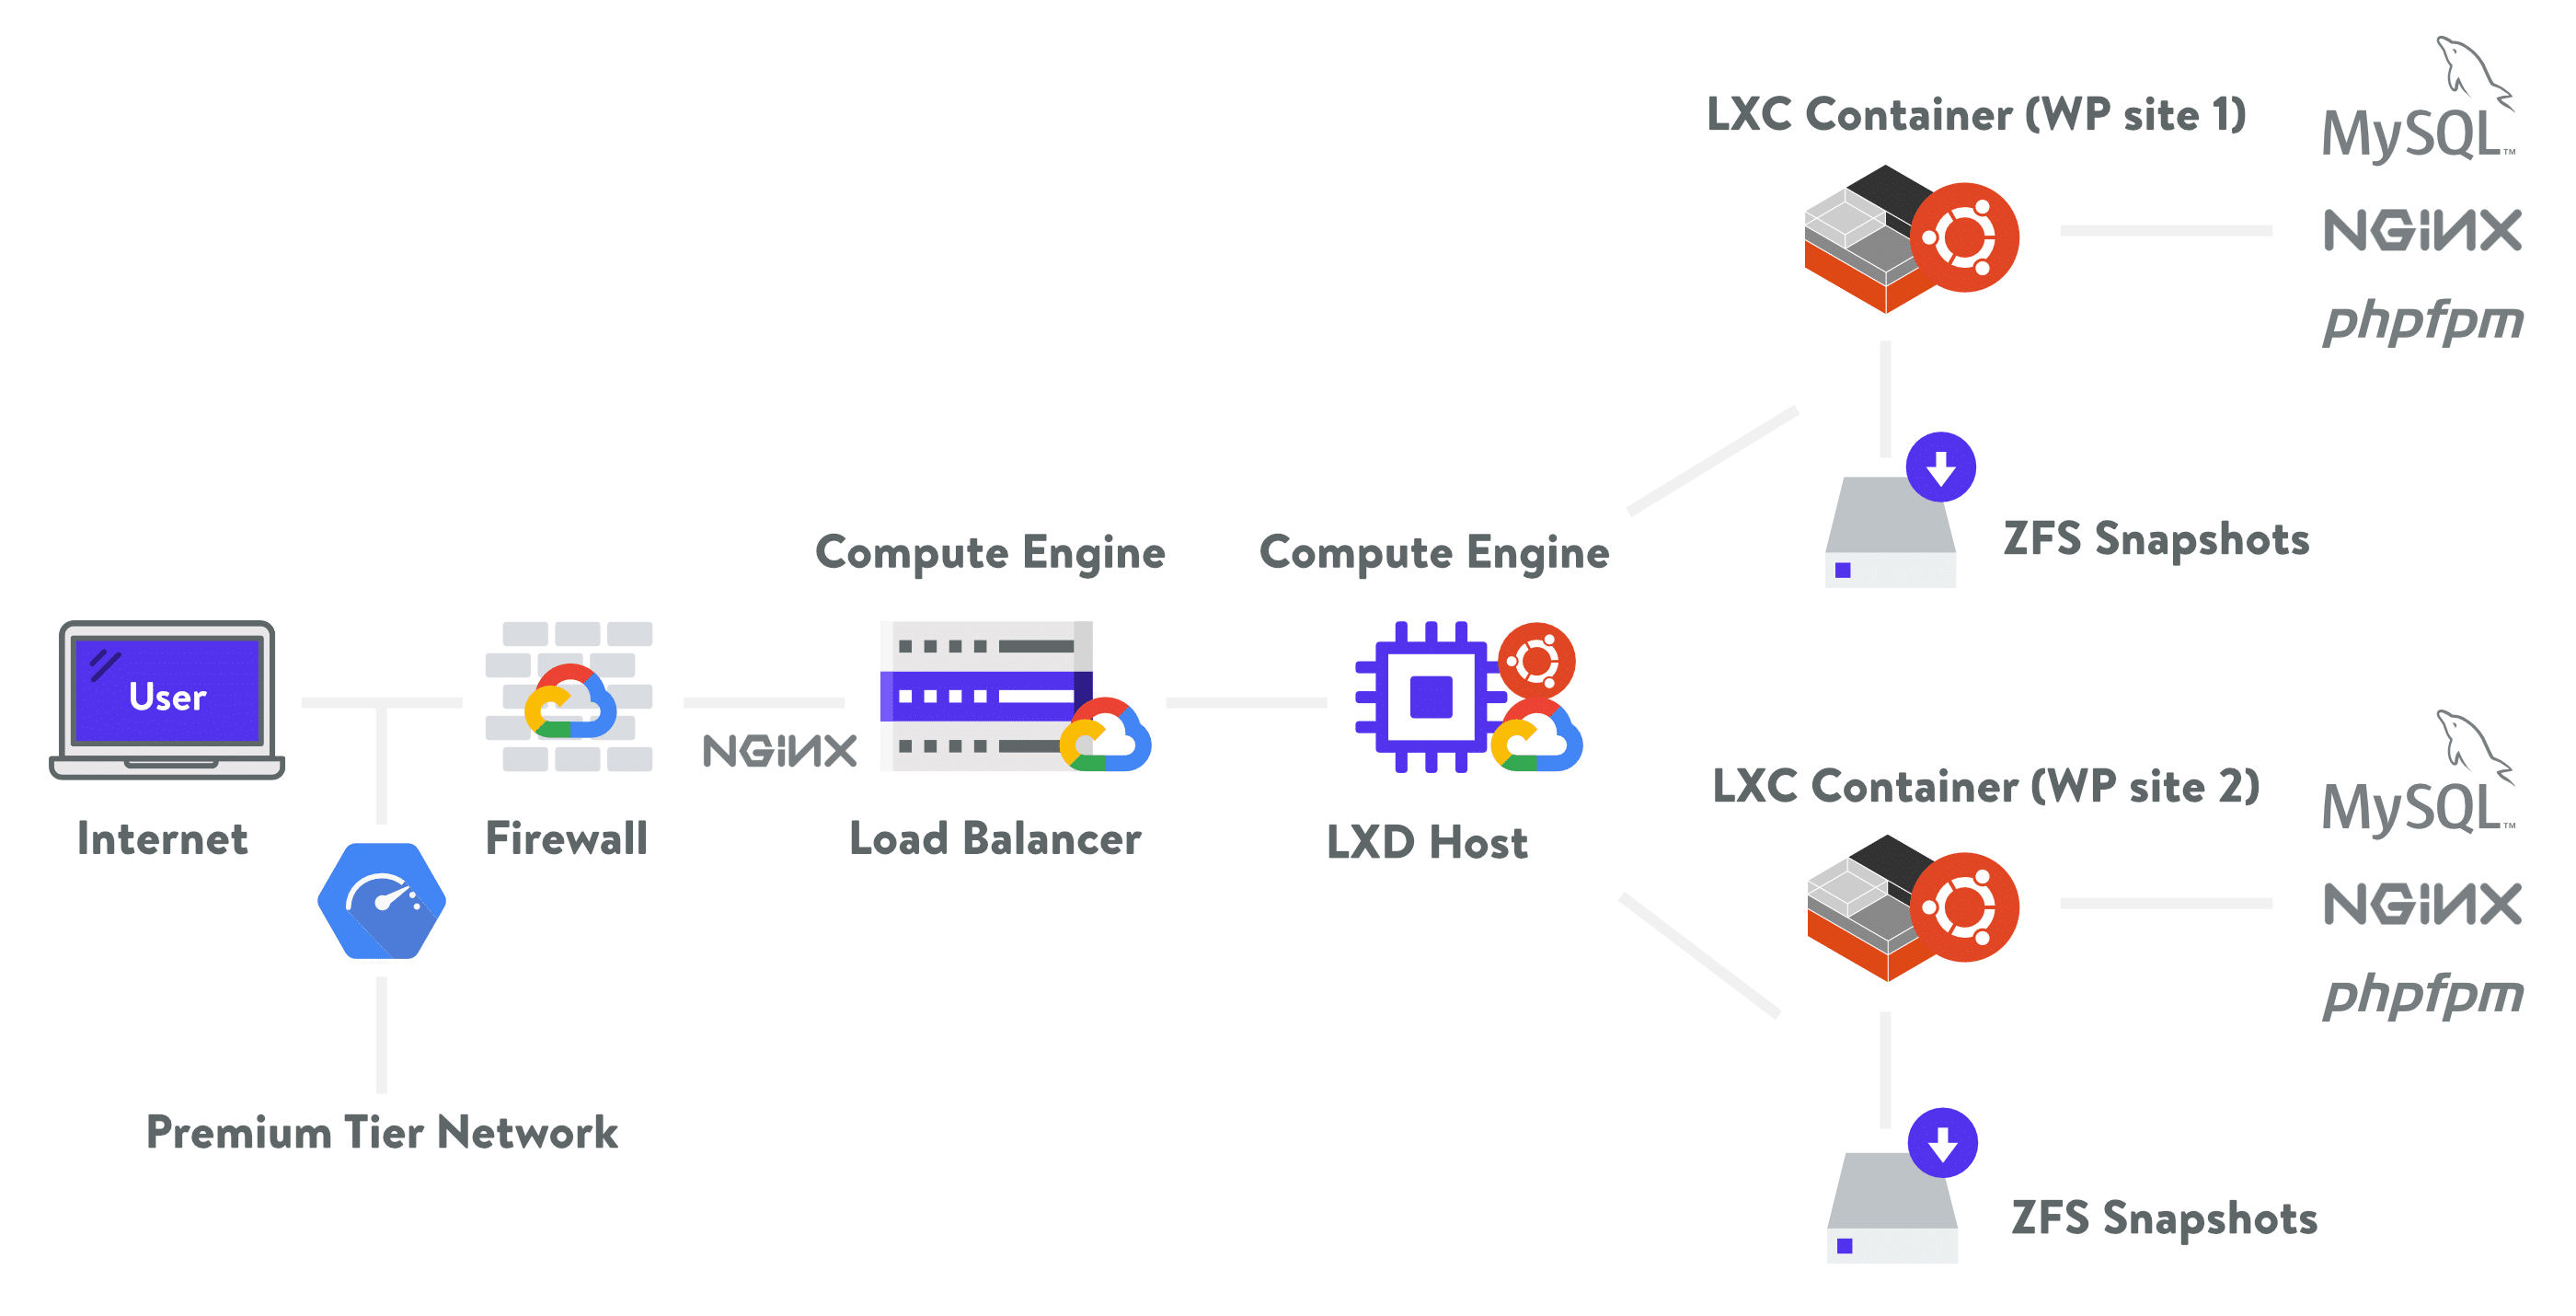
Each site container runs on virtual machines in one of multiple GC data centers, and utilizes Google Cloud Platform’s premium tier network for optimized low-latency data transfer. Each machine has up to 96 CPUs and hundreds of GB of RAM. Hardware resources (RAM/CPU) are allocated to each site container automatically by our virtual machines on an as-needed basis.
Unlike other hosts that use Google Cloud Platform’s general purpose virtual machines, we make compute-optimized C2 and compute engine general-purpose C3D VMs available for all our customers in supported regions. Google Cloud’s C2 machines feature the latest generation Intel Xeon scalable processors capable of sustaining 3.8 GHz all-core turbo speeds, while the C3D machine series powered by 4th Generation AMD EPYC™ Processors. Both are popular for CPU-heavy use cases like scientific modeling and machine learning, but they’re also great for high-performance WordPress hosting. During our testing, we found that migrating a WordPress site from a general purpose VM to a C2 VM resulted in a 2x increase in performance, while migrating from a C2 to C3D saw response times increase by a further 20% to 50%.
Every year Review Signal releases their WordPress hosting performance benchmarks, and we are proud that five years in a row, Kinsta has proven to be the best company across all tiers! And not just on one or two of our plans, but every plan, from Single 35k all the way up to our Enterprise and Agency WP plans. 🤘
Kinsta had essentially perfect LoadStorm and Blitz tests. They also had no flaws in any other tests. I’m at a loss for words to praise their performance.
We also don’t have level 1 or level 2 support reps. Our entire support team is made up of WordPress developers and Linux hosting engineers many of whom have managed their own servers, created themes and plugins, and contributed back to core. This ensures you’ll receive expert advice from someone who actively uses and develops with WordPress.
You get to chat with the same support team members that back our Fortune 500 and enterprise clients. We are so picky about the quality of our support team that we only hire less than 1% of applicants who apply. You won’t find better support anywhere else!
With WP Engine, basic issues are usually taken care of easily. However, for any issues which are complex, a resolution will take some time and there will be a lot of back and forth. This is a problem when you are running a high-end WordPress site and there is a pressing issue that needs to be handled quickly. If you are asking for my single recommendation between the two, in my opinion, Kinsta is better. They offer much more than they promise. You never have to worry about site slowness, downtime, getting quality support, or any other hosting-related issues.
To learn more about why you should choose Kinsta for managed WordPress hosting, read why us – how Kinsta is different. But regardless of who you choose as your hosting provider, you should always look for these following server features to ensure your website runs as fast as possible.
PHP 8 or Higher for the Best Performance
PHP is an open-source, server-side scripting and programming language that’s primarily used for web development. The bulk of the core WordPress software is written in PHP, along with your plugins and themes, which makes PHP a very important language for the WordPress community. You should ensure your WordPress host offers at least PHP 8 or higher.
There are different versions of PHP that your host will provide you on your server, with the newer PHP 8.2 offering huge performance improvements. Faster speeds plus improved security is why Kinsta always offers the most recent versions of PHP.
You can change PHP versions with a single click. And be wary of any WordPress hosts offering HHVM as an alternative to PHP. HHVM is no longer a suitable solution for WordPress hosting.
Pick a Host That Uses Nginx
Behind the scenes, every WordPress host uses a web server to power your WordPress sites. The most common choices are Nginx and Apache.
We strongly recommend going with a host that uses Nginx because of its roots in performance optimization under scale. Nginx often outperforms other popular web servers in benchmark tests, especially in situations with static content or high concurrent requests, which is why Kinsta uses Nginx.
Some high-profile companies using Nginx include Autodesk, Atlassian, Intuit, T-Mobile, GitLab, DuckDuckGo, Microsoft, IBM, Google, Adobe, Salesforce, VMWare, Xerox, LinkedIn, Cisco, Facebook, Target, Citrix Systems, Twitter, Apple, Intel, and many more.
According to W3Techs, Nginx powers 34.2% of all websites, making it the most used option. It’s used by some of the most resource-intensive sites in existence, including Netflix, NASA, and even WordPress.com.
Read more in our web server showdown: Nginx vs Apache.
Your Host’s Network Matters
When choosing a WordPress host you might not even think to ask or research into what network they’re using, but you should. The network can have a huge impact on your site’s performance and even the snappiness of your WordPress dashboard. Many hosts will leave this out of their marketing as they’ll opt for the cheapest network to cut costs.
Here are a few questions you should be asking:
- Which networks are you transmitting data over? Is the majority of it over public ISP networks or private infrastructures such as Google or Microsoft? These big providers have networks which are built and optimized for low latency and speed. They even have their own internet cables under the ocean!
- Are the networks you’re using redundant? What happens if a cable is accidentally cut? This happens more often than you think.
Back in 2017 Google announced its standard tier network, which is a slower network but at a cheaper cost. At Kinsta we utilize the premium tier network for all of our hosting plans. While this is an extra cost for us, it ensures you get lightning-fast speeds.
According to Google, the premium tier network achieves improved networking performance by reducing the duration of travel on the public internet; packets enter (and leave) Google’s network as close to the user as possible and then travel on Google’s backbone before getting to the VM. The standard tier delivers outbound traffic from GCP to the internet over public transit (ISP) networks instead of Google’s network.
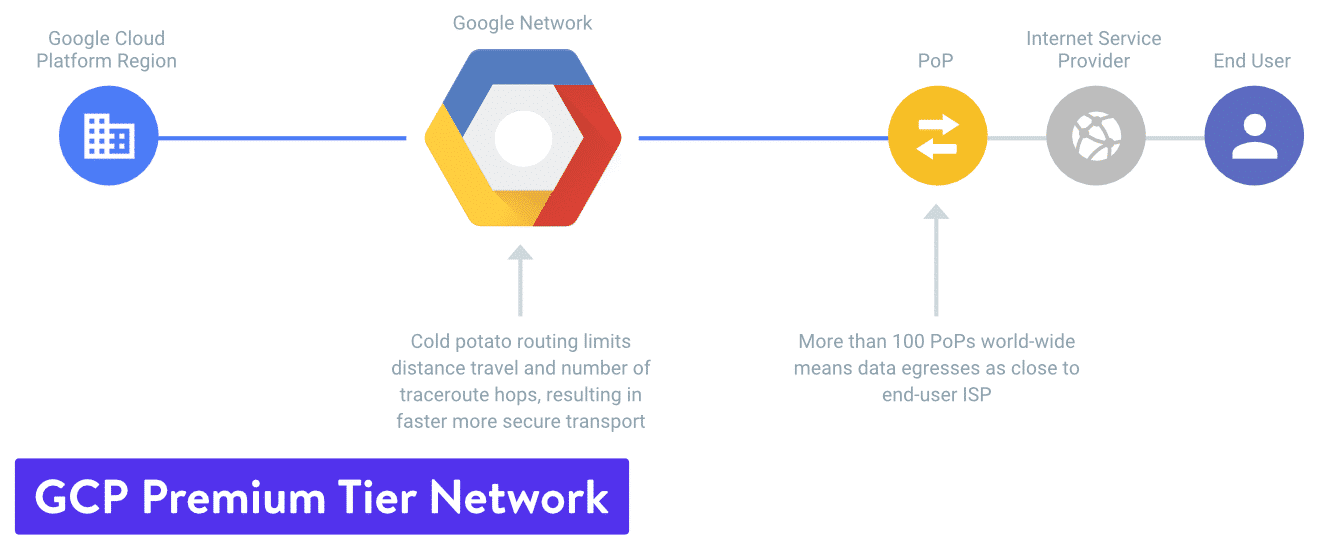
To put it another way that might be easier to understand:
- Premium tier packets spend more time on Google’s network, with less bouncing around, and thus perform better (but cost more).
- Standard tier packets spend less time on Google’s network, and more time playing hot potato on public networks, and thus, perform worse (but cost less).
How much of an impact does this have? Well, for data traveling across continents, the premium tier network is about 41% faster, on average, than the standard tier network. For data traveling to a nearby region (same continent), the premium tier is about 8% faster. While networking only makes up a fraction of your total page load times, every millisecond adds up!
Redundancy is also key, and that’s why Google uses at least three independent paths (N+2 redundancy) between any two locations on the Google network, helping ensure that traffic continues to flow between the locations even in the event of a disruption.
As you can probably tell by now, a lot is going on behind the scenes when it comes to networking. Make sure your WordPress host is using a reputable one and aren’t opting for the lower tiers to cut costs.
HTTP/2 is a Must-Have
HTTP/2 is a web protocol released in 2015 which was designed to speed up how websites are delivered. Because of browser support, it requires HTTPS (SSL). If your WordPress host doesn’t support HTTP/2 you should start looking for a new provider. With the move of the entire web to HTTPS, this is no longer just a nice feature to have; it’s a necessity.
The improvement in performance with HTTP/2 is due to a variety of reasons such as support better multiplexing, parallelism, HPACK compression with Huffman encoding, the ALPN extension, and server push. There used to be quite a bit of TLS overhead when it came to running over HTTPS, but this is now a lot less thanks to HTTP/2 and TLS 1.3. Kinsta supports HTTP/2 and TLS 1.3 on all of our servers and CDN.
Another big win with HTTP/2 is that with most WordPress sites you no longer need to worry about concatentation (combining files) or domain sharding. These are now obsolete optimizations.
Choose a Server Closest to Your Visitors
One of the very first things you should do when hosting your WordPress site is to determine where the majority of your visitors or customers are coming from. Why is this important? Because the location at which you host your website plays a significant factor in determining your overall network latency and TTFB. It also impacts your SFTP speeds and WordPress admin dashboard responsiveness.
Network Latency: This refers to the time and or delay that is involved in the transmission of data over a network. In other words, how long it takes for a packet of data to go from one point to another. Nowadays this is typically measured in milliseconds; however, it could be seconds depending upon the network. The closer to zero the better.
Check out our in-depth post on network latency.
TTFB: This stands for time to first byte. To put it simply, this is a measurement of how long the browser has to wait before receiving its first byte of data from the server. The longer it takes to get that data, the longer it takes to display your page. Again, the closer to zero the better.
Check out our in-depth post on TTFB.
We won’t bore you with all the technical details in this post, all you need to know is that you want your network latency and TTFB to be as low as possible. One of the easiest ways to accomplish this is to choose a server closest to your visitors. You can determine the best location by following the tips below.
Tip 1 – Check the Geolocation of Your Visitors in Google Analytics
One of the very first things you can do is look at the geolocation of your visitors in Google Analytics. You can find this under “Reports → User Attributes → Demographic details.”
In this example below, you can see that most of the traffic is coming from the United States. So in most cases, you would want to place your WordPress site on a server in the United States. You could also filter down the data even further to cities. This is especially important if you’re a local company. But typically we would recommend a central location like Iowa, USA.

Tip 2 – Check Ecommerce Data
If you run an eCommerce store, make sure also to check to see where your customers are coming from. This is of course how you generate revenue, so these are your most important visitors. This should coincide with your traffic above; however, this is not always the case. If you have eCommerce data setup or goals in Google Analytics, you can easily overlay that information on top of the geolocation data to make a more informed decision. Or check location information stored in your eCommerce platform’s database.
Tip 3 – Do a Quick Latency Test
There are a lot of handy free tools out there to measure latency from your current location for different cloud providers. This can help you quickly evaluate which region might be the best choice for your site.
- GCP Ping (measure latency to Google Cloud Platform regions, including Kinsta servers)
- CloudPing.info (measure latency to Amazon Web Services regions)
- Azure Latency Test (measure latency to Azure regions)
In this example below, we can see that the Oregon, USA (us-west1) is the fastest from where we are located. However, if you are serving customers across the entire United States, it might be better to choose Iowa, USA (us-central1) to ensure low latency for visitors from both the west and east coast.

Here at Kinsta, we offer 35 different data centers across the globe. You can easily choose a site that will have both low latency and low TTFB! This also helps to reduce network hops.

Additional Ways to Reduce Latency and TTFB
Beyond choose a close server location, here are a few other ways to reduce latency.
- Implement caching on your WordPress site. In our tests caching reduced our TTFB by a whopping 90%!
- Utilize a content delivery network (CDN) to serve cached assets from POPs around the globe. This helps negate the network latency for visitors who might not be close to your host server.
- Take advantage of the HTTP/2 protocol to minimize the number of round trips, thanks to parallelization. HTTP/2 is enabled on all Kinsta servers.
- Reduce the number of external HTTP requests. Each of these can have their own added latency based on the location of their server.
- DNS plays a part in TTFB, so you should use a premium DNS provider with fast lookup times.
- Utilize prefetch and prerender to perform tasks behind the scenes while the page loads.
Don’t worry; we’ll cover all of the recommendations mentioned above further below in this post.
SFTP Speeds and WordPress Admin Dashboard
Your visitors and customers should always be your priority. But another aspect of performance that many don’t talk about is how some of these decisions affect your day to day work. The data center location you choose has an impact on how fast your SFTP download and upload speeds (transferring files with an FTP client) are, as well as the responsiveness of your WordPress admin dashboard.
So while you want to make sure and choose a location that is best for your visitors, also keep in mind that it can affect site management. Tasks like uploading files to the WordPress media library will be faster when your site is hosted on a data center closer to you.
We consistently hear from clients at Kinsta that they are surprised by how much faster their admin dashboard is with us. There is a multitude of factors that influence this, but having 35 different data centers is a big one! Pick a location that works both for your visitors and for you! After all, you’re the one that’s probably going to be spending thousands of hours working on your website.
Premium DNS is Better Than Free DNS
DNS, short for Domain Name System, is one of the most common yet misunderstood components of the web landscape. To put it simply, DNS helps direct traffic on the Internet by connecting domain names with actual web servers. Essentially, it takes a human-friendly request – a domain name like kinsta.com – and translates it into a computer-friendly server IP address – like 216.58.217.206.

You can find both free DNS and premium DNS. All Kinsta customers get access to premium DNS via Amazon Route 53. And in general, we believe that premium DNS is a necessity in today’s world.
One big reason for choosing premium DNS is speed and reliability. Looking up DNS records and directing traffic takes time, even if it’s just a matter of milliseconds.
Typically, the free DNS that you’ll get from your domain name registrar is comparatively slow, whereas premium DNS often offers better performance. For example, in our tests, we found the free NameCheap DNS to be 33% slower than Amazon Route 53 premium DNS. Additionally, premium DNS can offer better security and availability, especially when you’re under a DDoS attack.
You can use a tool like DNSPerf to check your DNS lookup times. It also provides excellent performance data on all the top DNS providers.
For a good middle-ground between the free DNS provided by your domain registrar and premium DNS, Cloudflare DNS is a free service that still offers many of the benefits of premium DNS. And they are blazing fast with under 20 ms average response times around the globe (as seen below).

Cloudflare integration comes with all Kinsta plans. If you’re primarily serving visitors in the United States, DNS Made Easy is another great premium DNS provider you might want to check out. They have a reputation for providing some of the best DNS uptime over the past decade.
In the last 30 days, DNSPerf shows the following uptime from these providers:
- DNS Made Easy: 99.99% which equals 4m 23.0s monthly downtime.
- Amazon Route 53: 99.88% which equals 52m 35.7s monthly downtime.
- Cloudflare: 99.85% which equals 1h 5m 44.6s monthly downtime.
Does downtime matter that much with DNS providers? The answer to this is really yes and no. DNS is typically cached with ISPs using the time to live value (TTL) on the DNS record. Therefore if a DNS provider goes down for 10 minutes, you’re most likely not going to notice anything. Downtime does matter though if the provider consistently has longer and frequent outages, or if your ISP and DNS records both are using really low TTL values.
Your WordPress Theme Matters
Everybody loves a brand new WordPress theme, but be careful before you go out and grab the one with all the new shiny features. First, you should check out our article on the differences when it comes to free vs. paid themes. In regards to performance, every element you see in a theme has some impact on the overall speed of your website. And unfortunately, with thousands of themes out in the wild, there are both good ones and bad ones.
So how are you supposed to know which one to choose? We recommend going with one of the following two options:
- A fast lightweight WordPress theme that is built with only the features you need, nothing more.
- A more feature-rich WordPress theme, but you can disable features that aren’t in use.
Things such as Google Fonts, Font Awesome icons, sliders, galleries, video and parallax scripts, etc. These are just a few of the many things that you should be able to turn off if you aren’t using them. You don’t want to be trying to tweak these manually after the fact. And we aren’t going to show you 50 different ways to strip things out. Instead, you should start or switch to a WordPress theme that is either lightweight from the beginning or gives you these options.
Below are a couple of WordPress themes that we recommend and that you can’t go wrong with! Trust us, you’ll be thanking us later. 😉
Every theme mentioned below is fully compatible with WooCommerce and Easy Digital Downloads, WPML, BuddyPress, and bbPress.
1. GeneratePress
GeneratePress is a fast, lightweight (less than 1MB zipped), mobile responsive WordPress theme built with speed, SEO and usability in mind. Built by Tom Usborne, a developer from Canada. It is actively updated and well supported. Even a few Kinsta team members use GeneratePress for their projects.
There is both a free and premium version available. If you take a look at the WordPress repository, the free version currently has over 200,000 active installs, 2+ million downloads, and an impressive 5 out of 5-star rating (over 850 people have given it 5 stars).
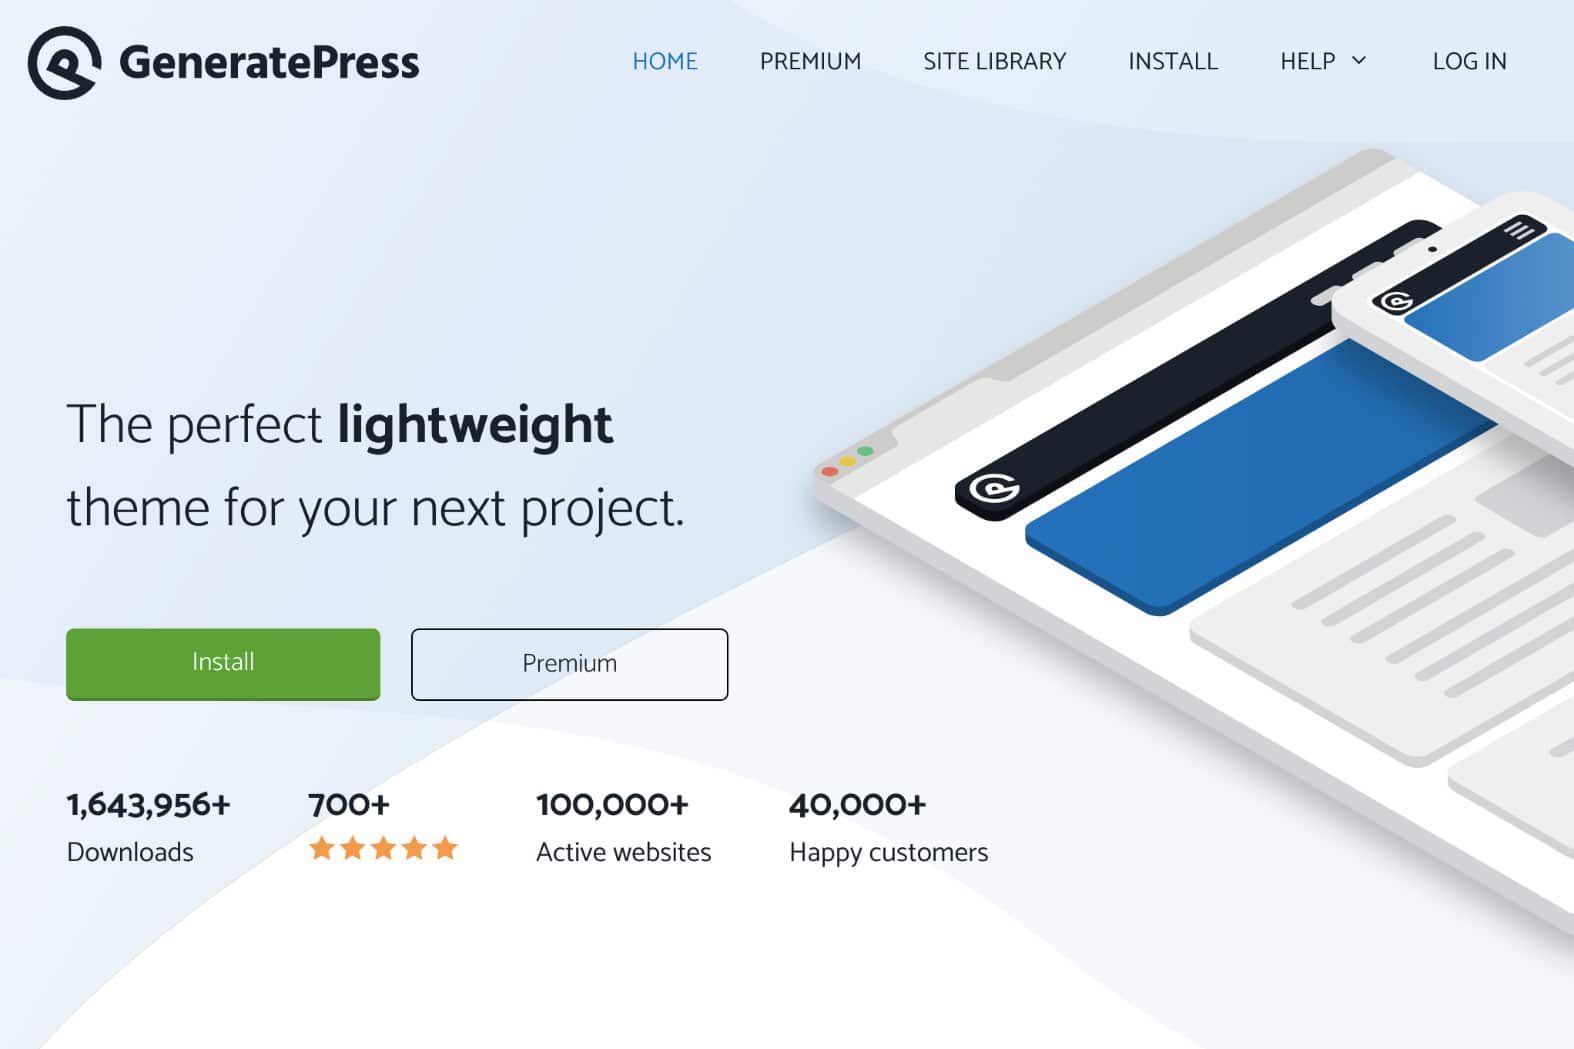
One of the great things about GeneratePress is that all the options use the native WordPress Customizer, meaning you can see every change you make instantly before pressing the publish button. This also means you don’t have to learn a new theme control panel.
Just how fast is it? We did a fresh install of GeneratePress, ran five speed tests in Pingdom, and took the average. The total load time was 305 ms with a total page size of only 16.8 KB. It’s always good to have a baseline test to see what the theme is capable of in terms of raw performance.

We then ran another set of tests with one of the pre-built themes from the GeneratePress site library. This contains images, backgrounds, new sections, etc. One advantage GeneratePress has is that it has a lot of pre-built themes that don’t require a page builder plugin. You can see that it’s still clocked under 400 ms.

Now of course, in a real-world environment you might have other things running such as Google Analytics, Facebook remarketing pixel, Hotjar, etc. But you should be able to aim for under the 1-second mark easily. Check out an in-depth review of GeneratePress over on woorkup.
We’ll be showing you more ways you can optimize and speed up WordPress below.
2. OceanWP
The OceanWP theme is lightweight and highly extendable. It enables you to create almost any type of website, such as a blog, portfolio, business website or WooCommerce storefront with a beautiful & professional design. Built by Nicolas Lecocq, it is also actively updated and well supported.
Just like with GeneratePress, there is both a free and premium version available. If you take a look at the WordPress repository, the free version currently has over 400,000 active installs, and another impressive 5 out of 5-star rating (over 2,600 people have given it 5 stars).

Just how fast is it? We did a fresh install of OceanWP, ran five speed tests in Pingdom, and took the average. The total load time was 389 ms with a total page size of only 230.8 KB. The scripts in OceanWP are slightly larger, but nothing to write home about.

We then ran another set of tests with one of the demo themes from the OceanWP site library. This contains images, backgrounds, new sections, and required the Elementor page builder plugin. You can see that it’s still clocked under 600 ms.

You can check out a more in-depth review of OceanWP on our blog.
3. Astra
Astra is a fast, fully customizable & beautiful theme suitable for blogs, personal portfolios, business websites, and WooCommerce storefronts. It is very lightweight (less than 50 KB on frontend) and offers unparalleled speed. Built by the team at Brainstorm Force, it is actively updated and well supported. You might recognize them as the creators of the popular All In One Schema Rich Snippets plugin which has been around for many years.
Just like with GeneratePress and OceanWP, there is both a free and premium version available. If you take a look at the WordPress repository, the free version currently has over 400,000 active installs, 1.6+ million downloads, and another impressive 5 out of 5-star rating (over 2,500 people have given it 5 stars).

Just how fast is it? We did a fresh install of Astra, ran five speed tests in Pingdom, and took the average. The total load time was 243 ms with a total page size of only 26.6 KB.

We then ran another set of tests with one of the demo themes from the Astra Starter kit site library. This contains images, backgrounds, new sections, and required the Elementor page builder plugin. You can see that it’s still clocked under 700 ms. Note: the images in this demo were fully compressed, but they chose very high-resolution ones from the start.

It’s important to take the differences between the speed tests with these three themes with a grain of salt. The problem is that it’s almost impossible to run a completely accurate side by side comparison. The important thing we wanted to show you is that all of these WordPress themes are blazing fast, both out of the box and full demos! 🚀
Warning About Page Builders
As you probably noticed, OceanWP and Astra both required page builders to use their site library themes. Here are a few things to keep in mind when using a page builder plugin:
- Some page builders might increase load time on your site. This is because they have to load additional CSS and JS to make things work for you without code. That is how the magic happens! We always recommend speed testing your WordPress site before and after installing a page builder.
- You’re making committing and locking yourself into that page builder for design. Make sure you pick one that is regularly updated and has everything you need for the long haul.
With that being said, we are still big fans of page builders like Elementor and Beaver Builder. For the most part, they are developed with performance in mind and only add a little bit of overhead. For most, the functionality and usability are worth it, as these plugins allow you to create anything you can dream up! They might also be faster in some cases as they might be a replacement for 5+ other plugins that you would have had to use otherwise.
However, if you don’t need a page builder plugin, by all means, don’t just install one for kicks. It will also be interesting to see how the new Gutenberg editor will play a role in site design over the next couple of years.
The Lowdown on WordPress Plugins
Now for the scoop on WordPress plugins. You might have been told that you shouldn’t install too many plugins or it would slow down your WordPress site. While this is sometimes true, it’s not the most critical factor. The number of plugins isn’t as important as the quality of the plugins. There, we said it. 😜
Just like with themes, it matters how the plugin is developed and if it was built with performance in mind. We have many clients at Kinsta that are running 30-40 plugins and their sites still load in well under a second.
While it’s fun to add code to your site, this isn’t always practical for the following reasons:
- You have to maintain the code yourself and keep it updated as standards change. People are busy, why not rely on the fantastic developers who know the standards better than most?
- Most of the time, a well-coded plugin isn’t going to introduce much more overhead than the code itself.
- You have to remember a majority of the WordPress community isn’t as tech-savvy as the developer crowd. Plugins are solutions that help solve problems.
With that being said, there are of course not so great plugins out there which you want to stay away from. Trust us; we’ve seen the worst of the worst at Kinsta. Many, not all, of the plugins that we ban at Kinsta we’ve seen cause performance issues first-hand.
However, it can’t be ignored that one of the things people love about WordPress is its massive library of third-party plugins. But with 59,000+ free plugins listed at WordPress.org alone and thousands more listed elsewhere, it can be hard to find the one plugin that you need. Talk about a needle in a haystack!
We try only to share things we use on a daily basis. And yes, we use WordPress plugins on our site just like the rest of you. Many of the team members at Kinsta even develop and sell plugins.
One Big Issue with WordPress Plugins
One big issue with WordPress plugins is the uninstall process. Whenever you install a WordPress plugin or theme, it stores the data in the database. The problem is that when you delete a plugin using one of the standard methods, it typically leaves behind tables and rows in your database. Over time this can add up to a lot of data and even begin to slow your site down. In our example, we uninstalled the Wordfence security plugin, and it left behind 24 tables in our database (as seen below). It’s even worse if they’re behind data in your wp_options table.
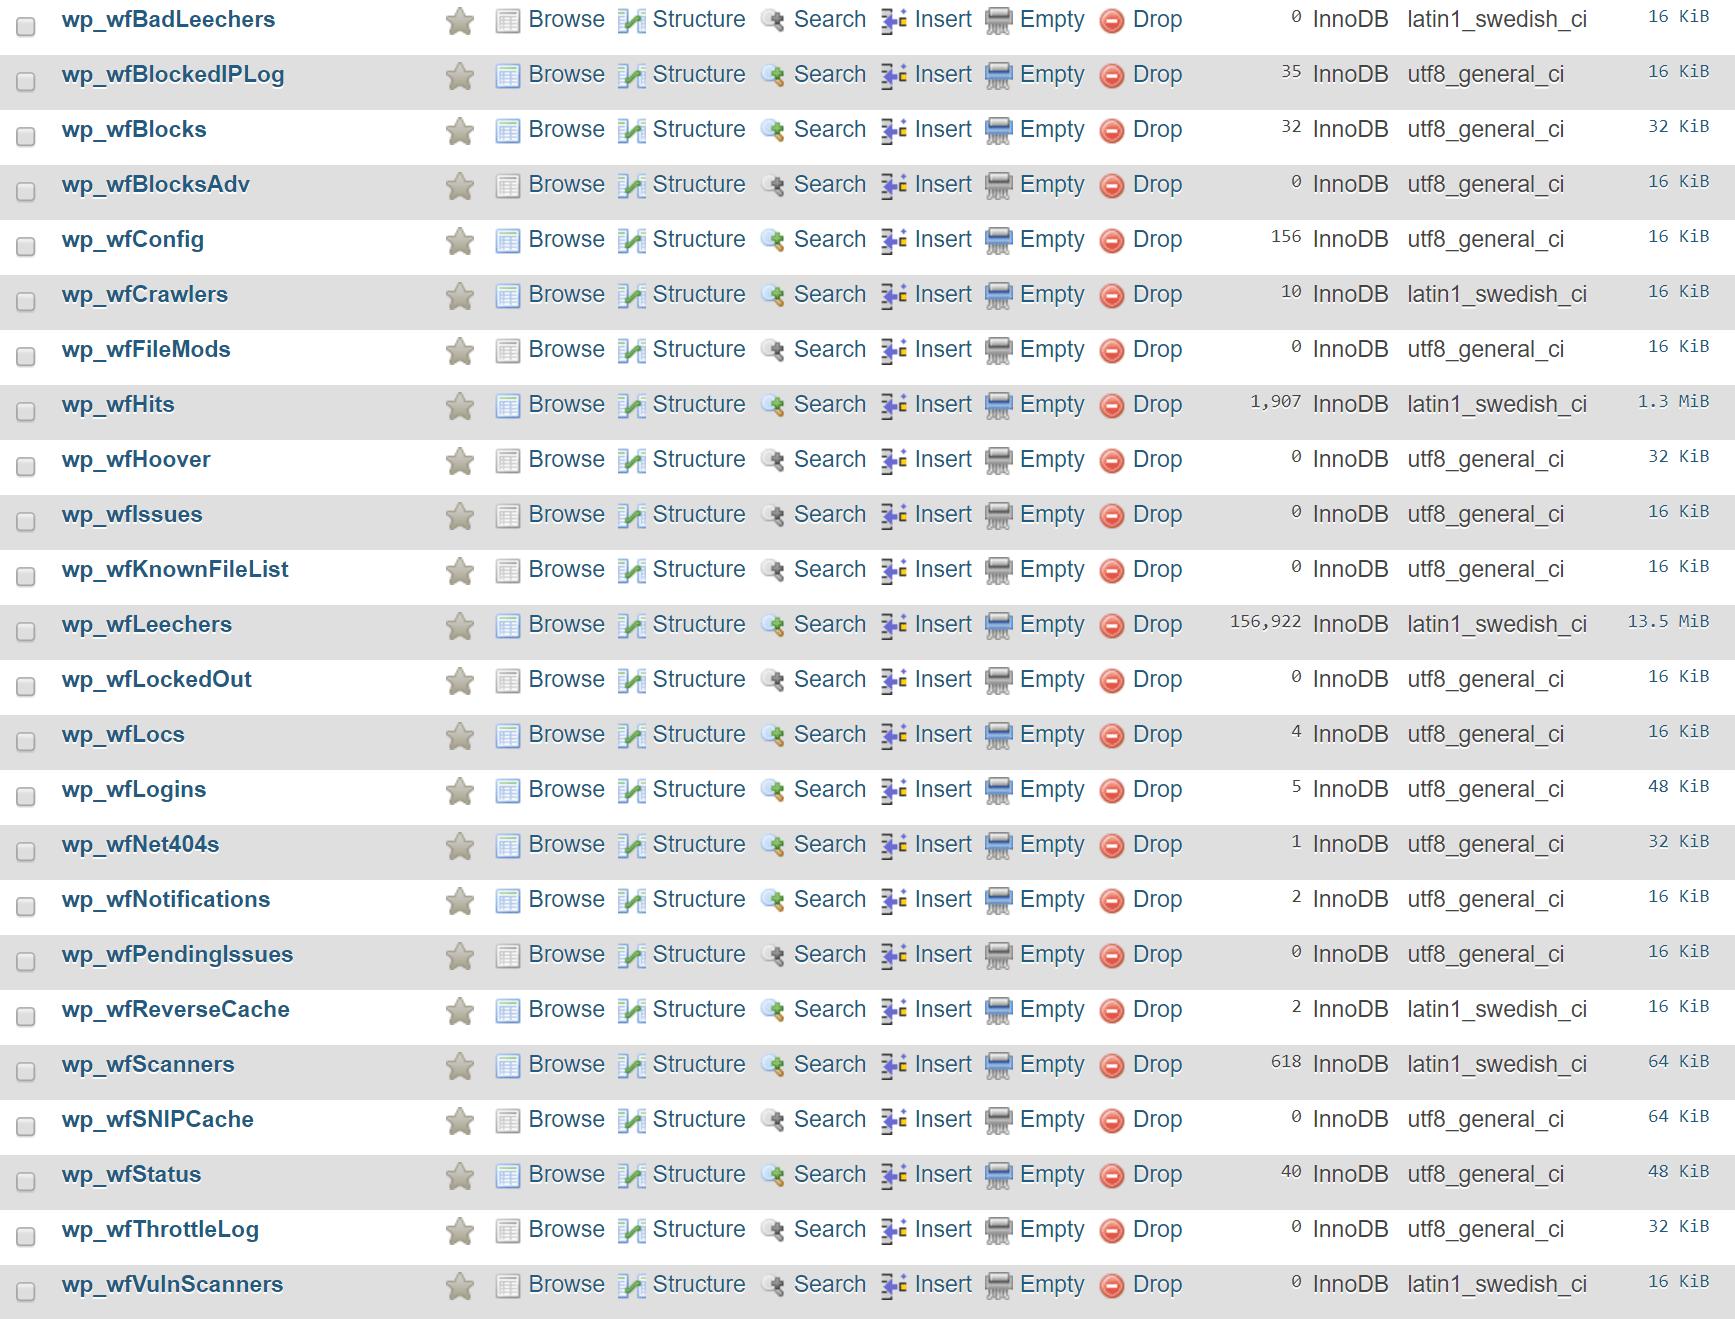
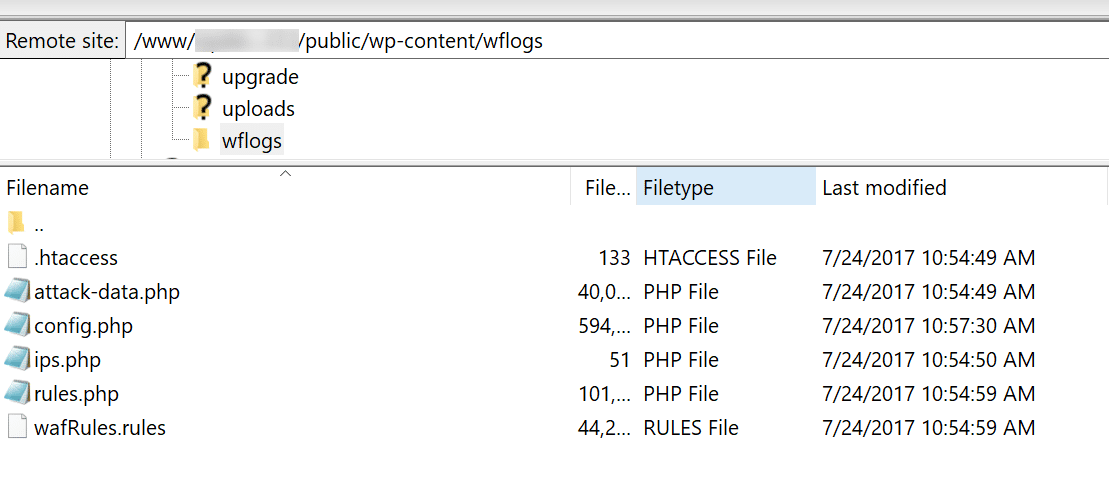
And besides the database, a lot of plugins also leave behind additional folders and files. In our experience, this is commonly seen with security and caching plugins which create additional directories for logging. For example, after the Wordfence plugin was deleted, we were left with a “wflogs” folder in our wp-content directory. And we aren’t trying to pick on Wordfence, the majority of plugins and themes on the market work this way.
Why Do Developers Do This?
So you are probably wondering, why don’t developers have self-cleanup options when you uninstall and delete a plugin? Well, they do. But, here are a couple of reasons why they probably aren’t as obvious right off the bat.
- They want to retain settings for the user. If you delete a WordPress plugin and decide to try it again later, all your settings and data will still be there. While this is super convenient, it’s not the most efficient way.
- They don’t care about performance. Some developers might argue that leaving tables behind doesn’t impact performance. But imagine a site over the course of ten years, having used hundreds of plugins, that have generated possibly thousands of rows or tables. Database queries have a significant impact on your WordPress site’s performance, and plugins can make a lot of these requests if the developer wasn’t careful. Generally, a well-written plugin should only query the tables or rows in which it is tied to, however, this is not always the case. We’ve seen this first hand at Kinsta, long database queries bringing a site to crawl due to unnecessary autoloaded data in the wp_options table which has been left behind.
- They made a mistake. The WordPress plugin handbook even says that “less experienced developers sometimes make the mistake of using the deactivation hook for this purpose.”
The good news? There are ways to clean up and get rid of a plugin properly. 👏 Check out our following tutorials:
Optimal WordPress Settings
Now to move on to optimal WordPress settings. Here are a couple of changes you can make to help speed up your WordPress site. Many of these are very subtle changes, but everything helps!
1. Change Your WordPress Login URL
By default your WordPress site’s login URL is domain.com/wp-admin/. One of the problems with this is that all of the bots, hackers, and scripts out there also know this. By changing the URL, you can make yourself less of a target, better protect yourself against brute force attacks, and decrease the bandwidth used by the bots that hit this URL repeatedly.
Changing your WordPress login URL can also help prevent common errors like “429 Too Many Requests.” This is not a fix-all solution, it’s merely one little trick that can help protect you and decrease the load on that page.
To change your WordPress login URL we recommend using one of the following plugins:
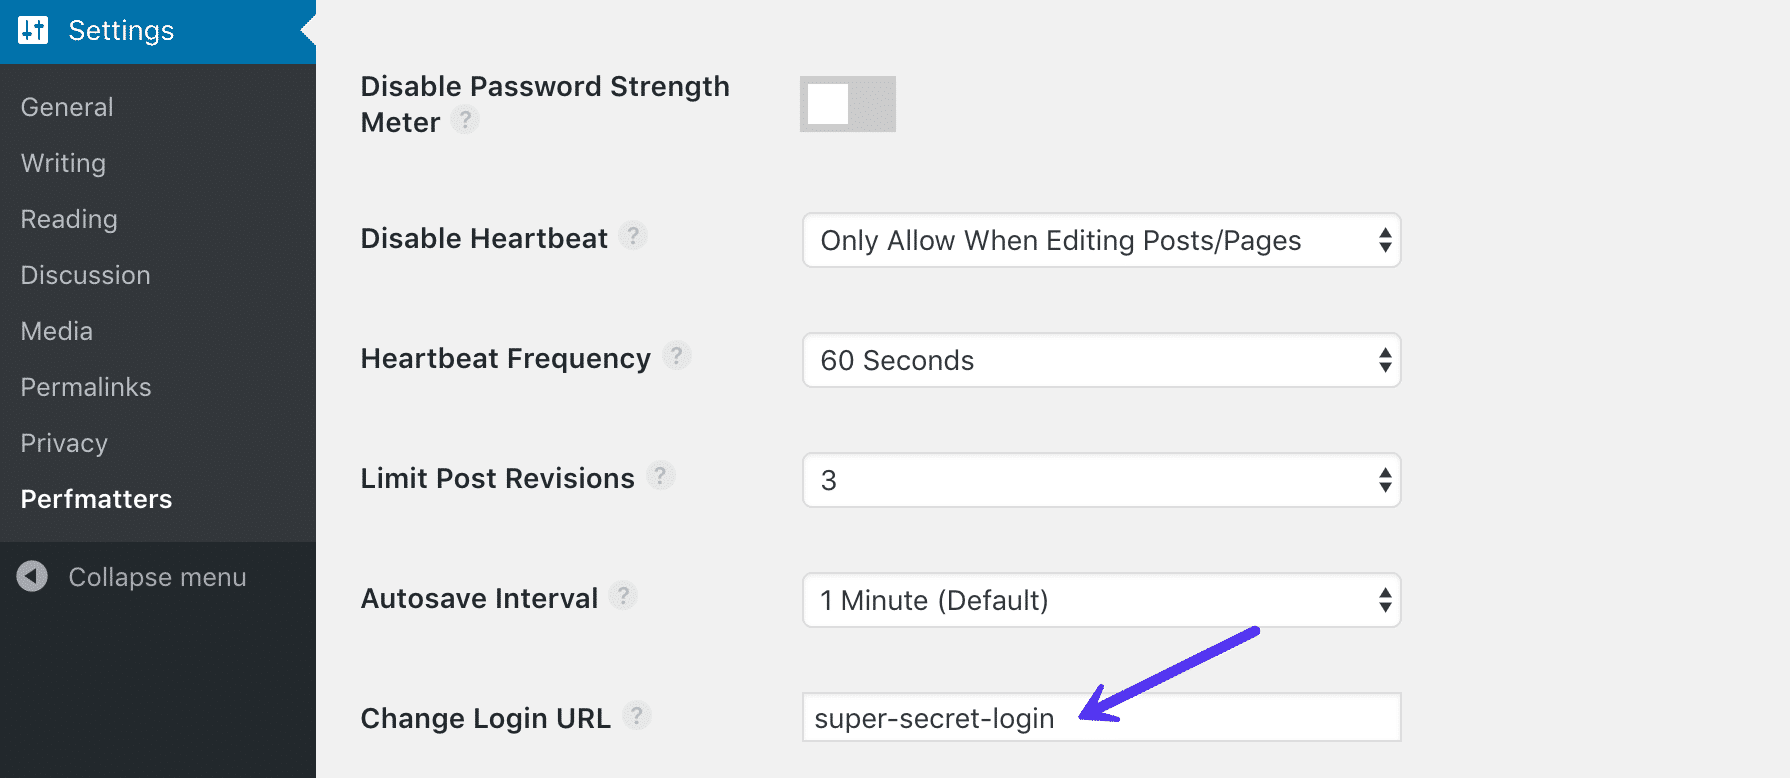
- WPS Hide Login (free)
- Perfmatters (premium, but includes other performance optimization settings. Developed by a team member at Kinsta)
2. Disable or Tweak Plugin and Theme Updates
Slow WordPress admin dashboards can be impacted by the network, data center location, and even PHP versions. But another factor that not a lot of people talk about is the WordPress update checker that runs in the background. This is one instance where having a lot of WordPress plugins and themes could hurt you.
Essentially the problem is that the built-in WordPress update checker makes an external GET request behind the scenes (https://third-party-plugin/update-check.php). Sometimes this can be periodic or very frequently. If it’s happening all the time, this could bring your admin dashboard to a crawl.
This is more of a problem with how the update checker in WordPress is built. If you’re suffering from slow WordPress admin dashboard load times, you might want to give this a try. The remedy is to disable automatic updates. Warning: Only do this if you intend to check for updates manually. Many updates include security and bug fixes.
To disable updates, we recommend using one of the following plugins:
- Disable All WordPress Updates: Completely free with no settings. Does what it says well.
- Easy Updates Manager: Provides more control over selective updates. The core version is free.
You could easily set yourself a calendar reminder, disable the plugin once a week, check for updates, and then re-enable it.
3. Disable Pingbacks
A pingback is an automated comment that gets created when another blog links to you. There can also be self-pingbacks which are created when you link to an article within your own blog.
We recommend simply disabling these as they generate worthless queries and additional spam on your site. Remember, the less calls your WordPress site has to make the better, especially on high-traffic sites. Not to mention the fact that a pingback on your own website is just downright annoying. Follow the steps below to disable pingbacks.
Step 1 – Disable Pingbacks From Other Blogs
In your WordPress dashboard, click into “Settings → Discussion.” Under the Discussion Settings section uncheck the option “Allow link notifications from other blogs (pingbacks and trackbacks) on new articles.”

Step 2 – Disable Self-Pingbacks
When it comes to disabling self-pingbacks you have a couple of options. You can use the free No Self Pings plugin. Or you can use a premium plugin like Perfmatters.

Alternatively, you could also disable self-pingbacks by adding the following code to your WordPress theme’s functions.php file. Warning, editing the source of a WordPress theme could break your site if not done correctly. Tip, you can easily add PHP snippets like this with the free Code Snippets plugin. This means you never have to touch your theme.
function wpsites_disable_self_pingbacks( &$links ) {
  foreach ( $links as $l => $link )
        if ( 0 === strpos( $link, get_option( 'home' ) ) )
            unset($links[$l]);
}

add_action( 'pre_ping', 'wpsites_disable_self_pingbacks' );
4. Limit Posts on Your Blog Feed
Whether your blog feed is set as your homepage or is another page of your site, you don’t need 50 thumbnails all loading at the same time. For those that run high-traffic blogs, your homepage is the most important page of your site, and you want this to load fast. The fewer requests and media the better in terms of performance.
Also, this is precisely why pagination was invented (as seen below). Pagination is what you see at the end of blog feeds that allow you to browse to the next page. Typically these are numbers, or they might use “next/previous” posts. Your WordPress theme will most likely already have customized pagination built-in.

WordPress by default sets the limit on fresh WordPress installations to 10, but we’ve seen this changed so many times we’ve lost count. So make sure to double-check what value you’re using. We recommend somewhere between 8 and 12. If you’re curious, we are using 12 on our Kinsta blog homepage.
You can find this option in your WordPress admin dashboard under “Settings → Reading.” You can then change the value for “Blog pages show at most.”

Why Cache Is so Important
Caching is by far one of the most important and easiest ways to speed up WordPress! But before we show you how to use caching, it’s essential first to understand how it works and the different kinds of caching available.
What is Caching?
In short, every webpage visited on your WordPress site requires a request to the server, processing by that server (including database queries), and then a final result sent from the server to the user’s browser. The result is your website, complete with all of the files and elements that make it look the way it does.
For instance, you might have a header, images, a menu, and a blog. Since the server has to process all of those requests, it takes some time for the complete webpage to be delivered to the user–especially with clunky or larger websites.
That’s where a WordPress caching plugin comes into play! Caching instructs the server to store some files to disk or RAM, depending on the configuration. Therefore, it can remember and duplicate the same content it’s been serving in the past. Basically, it reduces the amount of work required to generate a page view. As a result, your web pages load much faster, directly from cache.
Some other benefits of caching include:
- Your server uses fewer resources – This ties into speed, since the fewer resources make for a faster site. However, it also puts less of a strain on your server. This is very important when it comes to highly dynamic sites, such as membership sites, and determining what you can and cannot serve from cache.
- You’ll see lower TTFB – Caching is one of the easiest ways to lower your TTFB. In fact, in our tests caching typically reduces TTFB by up to 90%!
Types of Caching
When it comes to types of caching, there are two different approaches commonly used:
1. Caching at the Server-Level
Caching at the server-level is by far one of the easiest approaches for the end-user. What this means is that the WordPress hosting provider handles it for you. At Kinsta, we utilize the following four types of cache, which are all automatically done at the software or server-level:
This means you don’t need to worry about messing with any complicated and confusing caching plugins. You can stop Googling around for the “best caching plugins of 2026” and focus on more productive tasks. 👏
An instant 37% reduction in the loading time after moving @WPColt to @kinsta! (NO CACHING PLUGINS) 🚀🚀🚀
— WPColt (@WPColt) January 3, 2018
The page cache is configured to work right out of the box with standard WordPress. You don’t have to do a thing! Simply launch your WordPress site and page caching will start happening.
We also have caching rules in place for ecommerce sites such as WooCommerce and Easy Digital Downloads. By default, certain pages that should never be cached, such as cart, my-account, and checkout, are excluded from caching. Users automatically bypass the cache when the woocommerce_items_in_cart cookie or edd_items_in_cart are detected to ensure a smooth and in-sync checkout process.
You can easily clear your WordPress site’s cache at any time from the admin toolbar.

It’s also integrated into our MyKinsta dashboard. Just click into Tools and click on “Clear Cache.”

2. Caching with a Plugin
If you’re hosting provider doesn’t provide cache, you can use a third-party WordPress caching plugin. Based on our experience, we recommend one of the following:
- WP Rocket (premium)
- Cache Enabler (free)
- W3 Total Cache (free)
You can also check out some additional options in our in-depth post on WordPress caching plugins.
We also fully support WP Rocket at Kinsta! We usually don’t allow caching plugins in our environment because they conflict with our built-in caching solution. However, as of WP Rocket 3.0, their page caching functionality will automatically be disabled when running on Kinsta servers.
This allows Kinsta clients to use our fast server-level caching but still take advantage of the fantastic optimization features WP Rocket has to offer.
No Caching vs Caching
How much does caching help? The proof is in the pudding.
We ran a few speed tests with Kinsta’s server-level caching so you can see the difference it makes, both in terms of overall speed and TTFB.
No Caching
We first ran five tests on Pingdom without caching enabled and took the average.

No Caching TTFB
It’s also important to note the difference in TTFB without and with caching. TTFB in Pingdom is represented by the yellow “waiting” bar. As you can see the TTFB with no caching is 192 ms. You can see that it’s not serving from cache as the x-kinsta-cache header is showing a MISS.

With Caching Enabled
We then enabled server-level caching and ran five tests on Pingdom and took the average.

As you can see server-level caching decreased our page load time by 33.77%! And that’s without any extra work involved. This site we tested is also fairly optimized, so larger unoptimized sites are bound to see even greater differences.
TTFB with Caching Enabled
Now if we take a look at the TTFB with caching enabled, we can see that it’s under 35 ms. You can see that it’s serving from cache as the x-kinsta-cache header is showing a HIT.

CDN cache is also equally as important as cache from your WordPress host. We’ll dive more into CDNs further below.
Issues with Caching and Membership Sites
Membership sites contain a lot of uncacheable content and pages that are continuously changing. Things such as the login page for community members (which could be getting hit constantly depending on the size of the site), checkout pages for digital goods or courses, and discussion boards are common culprits and pain points, as these cannot typically be cached.
However, it doesn’t end there. On standard WordPress sites, the WordPress dashboard is also not cached for “logged-in” users. This is fine when you have just a few authors and admins, but when you suddenly have thousands of members using the dashboard, this immediately causes performance issues as none of it can serve from the cache on the server. This means you need the power and architecture behind the scenes to back it up. Shared hosting providers will usually cripple under these circumstances.
Object Caching for Highly Dynamic Sites
When it comes to WordPress membership sites, your common caching setups are usually not enough as they don’t always take full advantage of it. This is where object caching comes into play.
Object cache stores the results of database queries so that the next time that particular bit of data is needed it can be delivered from cache without querying the database. This speeds up PHP execution times and reduces the load on your database. This becomes extremely important with membership sites! With WordPress, you can implement object caching in a couple of different ways:
- A third-party caching solution such as W3 Total Cache
- Redis (recommended)
- Memcached
We offer Redis as an add-on at Kinsta so you can take full advantage of persistent object caching for your membership sites.
Analyzing Cache
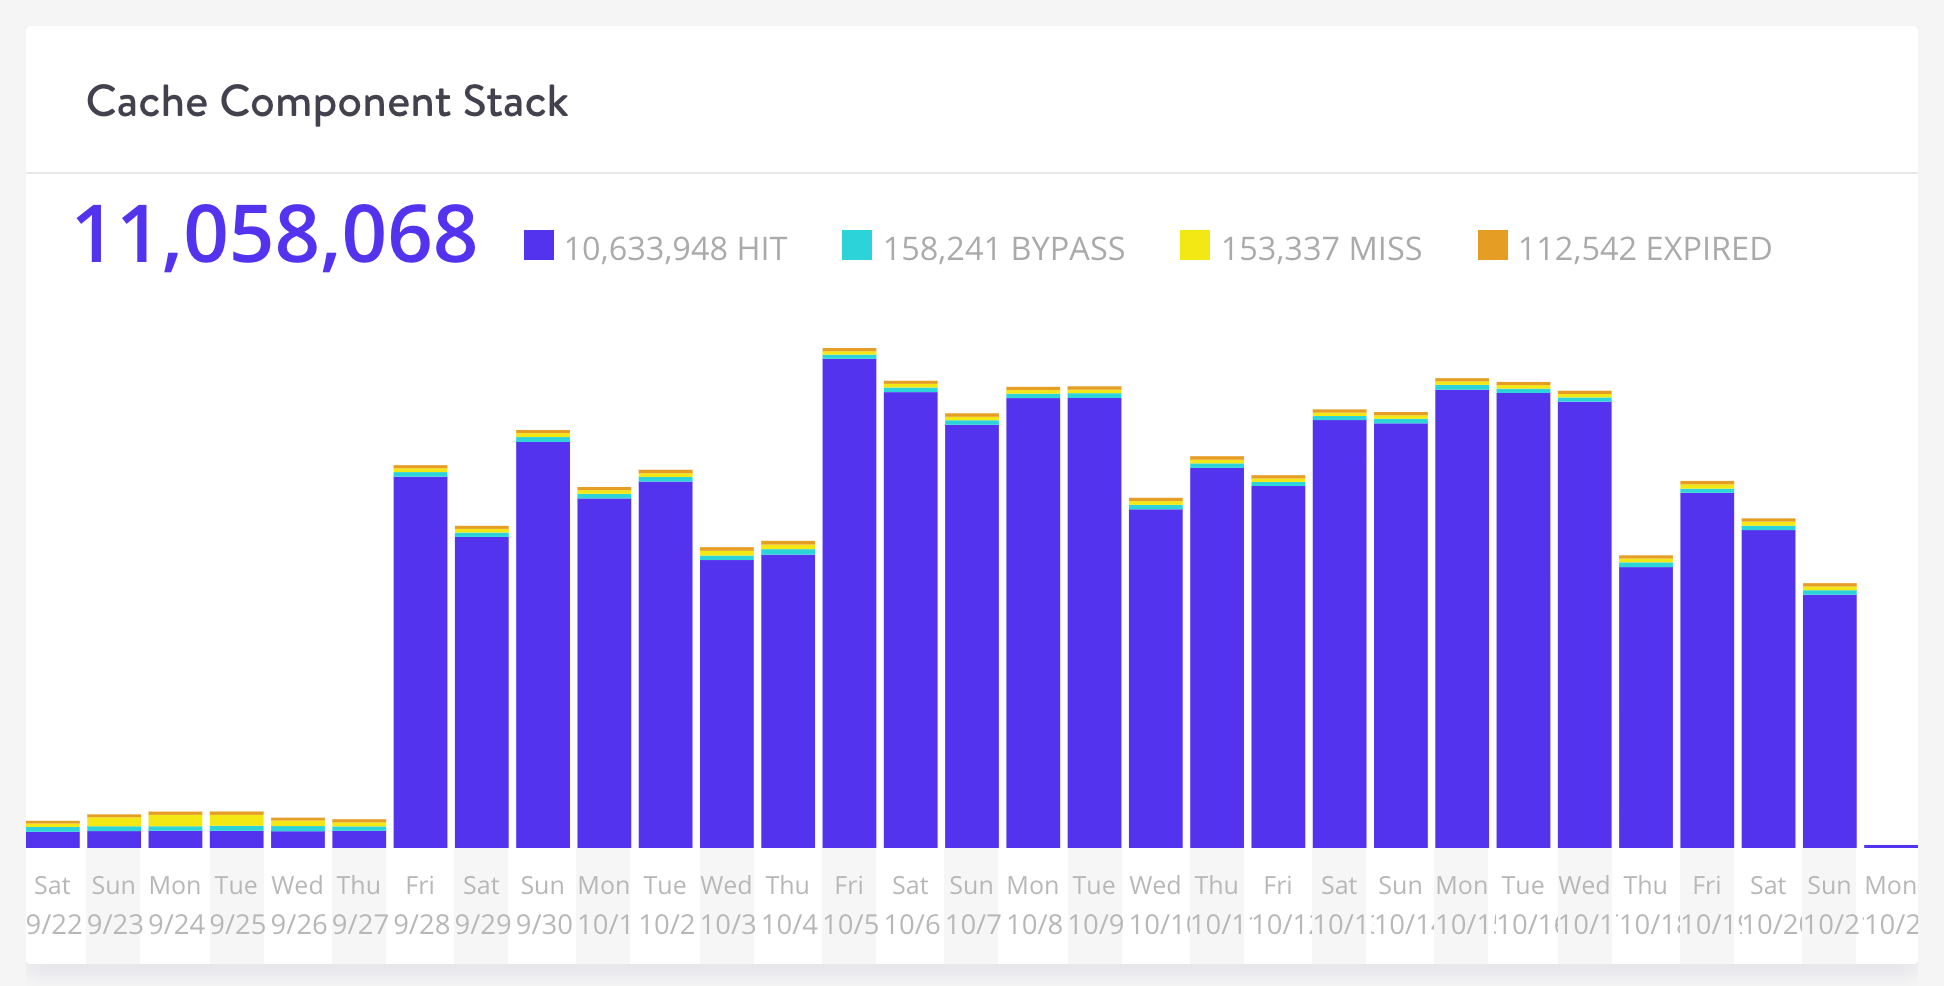
Remember that x-kinsta-cache header we mentioned above? Depending on your hosting provider or caching solution the header might be named something slightly different. Every time a request is made from your WordPress site that header has a value, such as HIT, BYPASS, MISS, and EXPIRED. This allows you to see how your cache is performing.
Increasing your WordPress site’s cache hit ratio is important because you want as much of your site to be served from cache as possible. At Kinsta you can analyze the data in our MyKinsta analytics tool and the kinsta cache logs to determine if there are cache BYPASSing GET requests that could be cached or POST requests that could be eliminated.
The cache component stack (as shown below) lets you see the status of each request, whether it was a HIT, BYPASS, MISS, or EXPIRED. You can filter the data by the past 24 hours, 7 days, or 30 days.
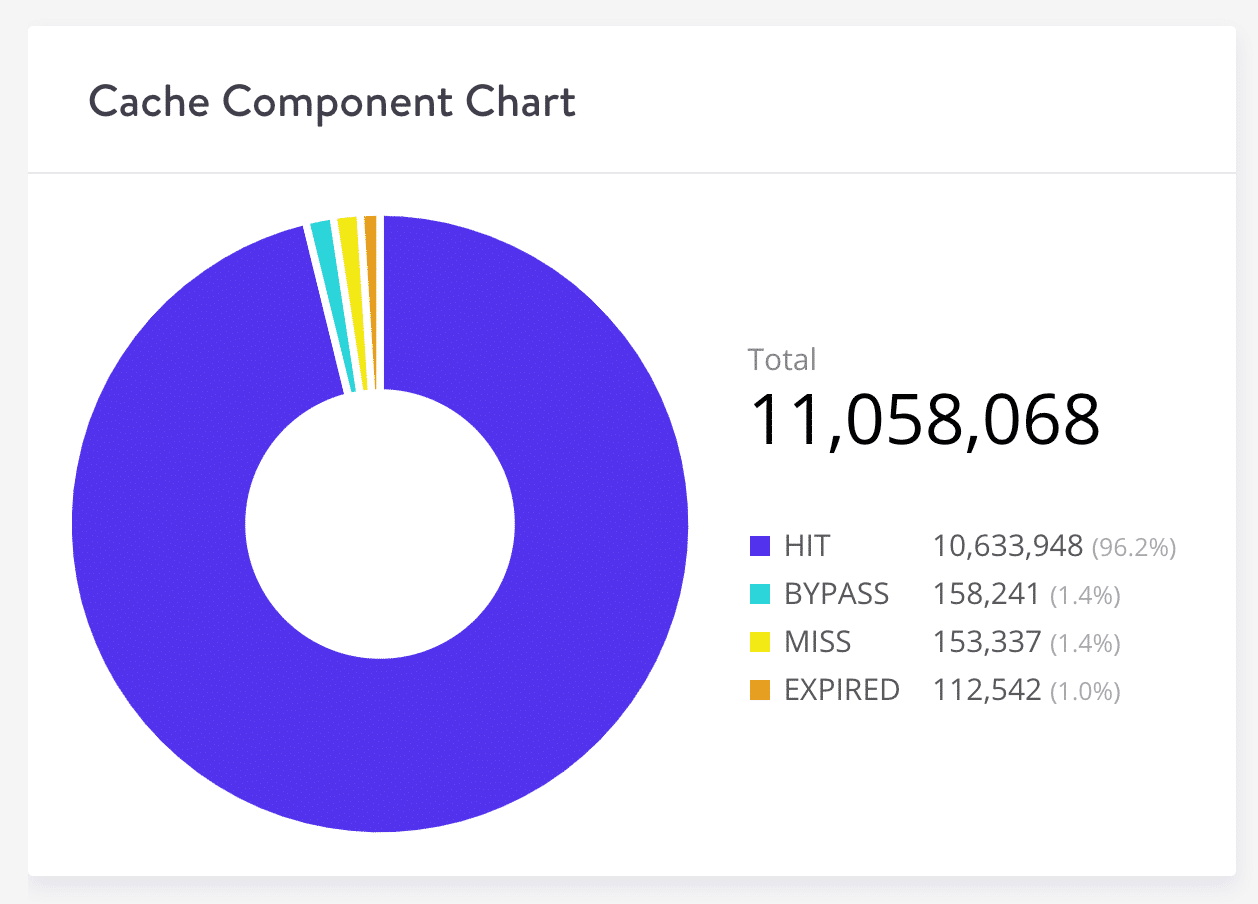
The cache component chart gives you a glance at your caching ratio. The more requests you serve from cache the better. As you can see in the example below, this WordPress site is at a 96.2% HIT cache ratio. Which is good!
The top cache bypasses section lets you see which requests are not being served from cache. Typically these might include CRON jobs, admin-ajax requests, ecommerce checkout pages, query strings, and UTM parameters, etc.
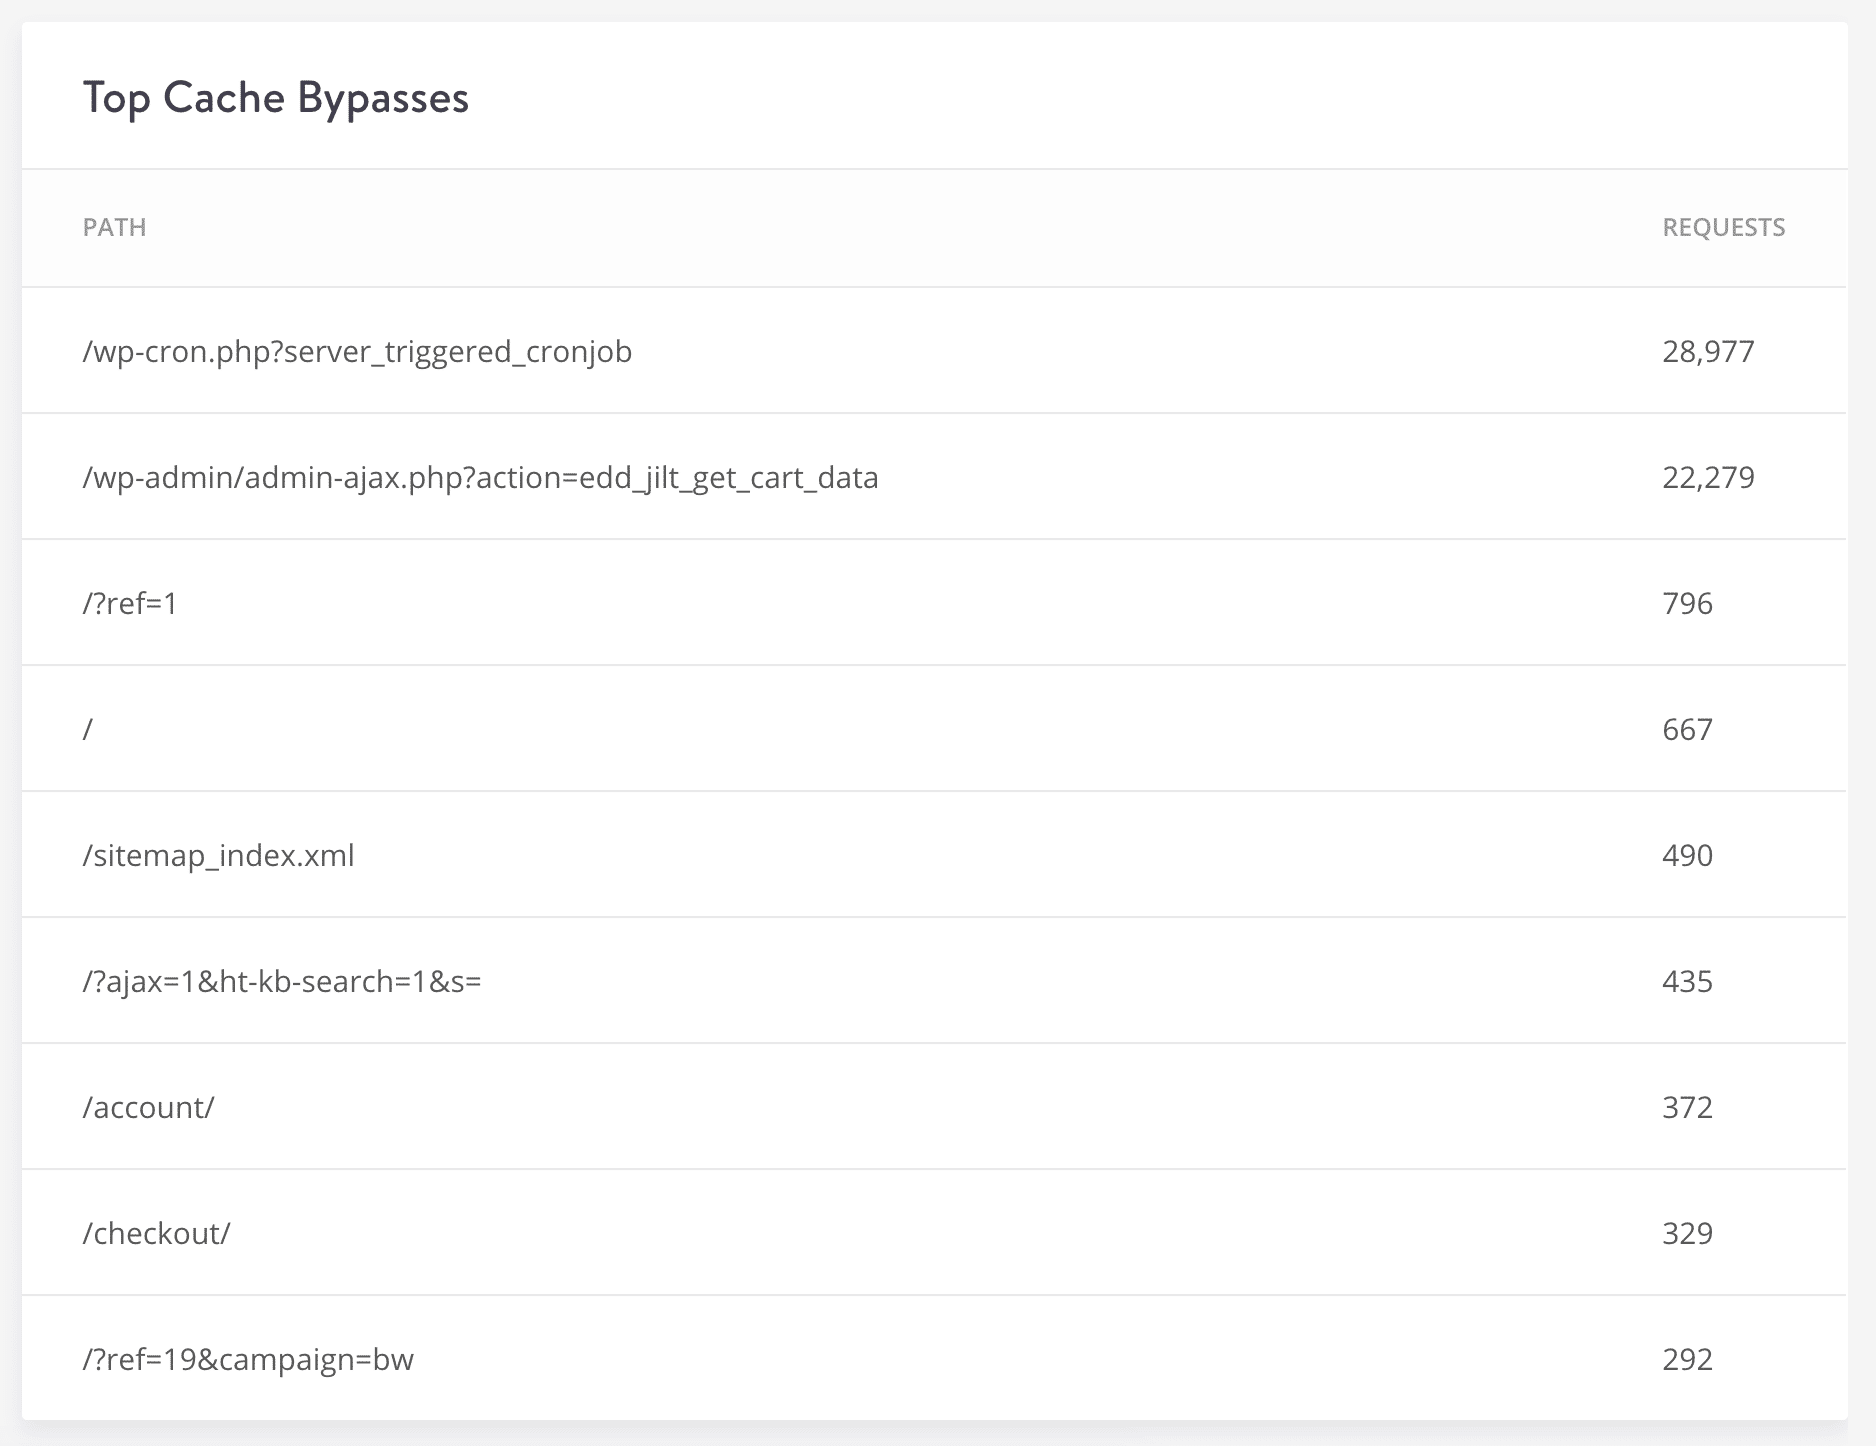
Image Optimization Is a Must
Image optimization is another straightforward thing you can do which has a significant impact on your overall page load times. This isn’t optional; every site should be doing this!
Large images slow down your web pages which creates a less than optimal user experience. Optimizing images is the process of decreasing their file size, using either a plugin or script, which in turn speeds up the load time of the page. Lossy and lossless compression are two methods commonly used.
According to HTTP Archive, images make up on average of 34% of a total webpage’s weight. So after videos, which are much harder to optimize, images by far are the first place you should start! It’s more important than JavaScript, CSS, and Fonts. And ironically, a good image optimization workflow is one of the easiest things to implement, yet a lot of website owners overlook this.

It appears the web as a whole is getting better at image optimization, but this still can’t be ignored. If you don’t have any video content on your website, images are still probably your #1 pain point for page weight.
Finding the Balance (File Size and Quality)
The primary goal of formatting your images is to find the balance between the lowest file size and acceptable quality. There is more than one way to perform almost all of these optimizations. One of the most basic ways is to compress them before uploading to WordPress. Usually, this can be done in a tool like Adobe Photoshop or Affinity Photo. Or using the new online Squoosh app from Google. However, these tasks can also be performed automatically using plugins, which we will go into more below.
The two primary things to consider are the file format and the type of compression you use. By choosing the right combination of file format and compression type you can reduce your image size by as much as 5 times. You’ll have to experiment with each image or file format to see what works best.
Before you start modifying your images, make sure you’ve chosen the best file type. There are several types of files you can use:
- PNG – produces higher quality images, but also has a larger file size. Was created as a lossless image format, although it can also be lossy.
- JPEG – uses lossy and lossless optimization. You can adjust the quality level for a good balance of quality and file size.
Ideally, you should use JPEG (or JPG) for images with lots of color and PNG for simple images.
You should also consider using WEBP images on your website.
What about GIFs? Animated GIFs are always fun, but they kill web performance. A lot of GIFs are over 1 MB in size. We recommend keeping these for social media and Slack. If there is one that you can’t live without in your blog post, take a look at how you can compress animated GIFs.
Compression Quality vs. Size
Here is an example of what can happen if you compress an image too much. The first is using a very low compression rate, which results in the highest quality (but larger file size). The second is using a very high compression rate, which results in a very low-quality image (but smaller file size). Note: The original image untouched is 2.06 MB.


As you can see the first image above is 590 KB. That is pretty large for one photo! It is generally best if you can keep a webpage’s total weight under 1 or 2 MB in size. 590 KB would be a fourth of that already. The second image looks horrible, but then it is only 68 KB. What you want to do is find a happy medium between your compression rate (quality) and the file size.
So we took the image again at a medium compression rate, and as you can see below, the quality looks good now, and the file size is 151 KB, which is acceptable for a high-resolution photo. This is almost 4x smaller than the original photo with low compression. We try to keep most of our images under the 100 KB mark for the best performance.

Lossy vs. Lossless Optimization
It’s also important to understand that there are two types of compression you can use, lossy and lossless.
Lossy compression involves eliminating some of the data in your image. Because of this, it means you might see degradation (reduction in quality or what some refer to as pixelated). So you have to be careful by how much you’re reducing your image. Not only due to quality but also because you can’t reverse the process. Of course, one of the great benefits of lossy compression and why it’s one of the most popular compression methods is that you can reduce the file size by a considerable amount.

Lossless compression, unlike lossy, doesn’t reduce the quality of the image. How is this possible? It’s usually done by removing unnecessary metadata (automatically generated data produced by the device capturing the image). However, the biggest drawback to this method is that you won’t see a significant reduction in file size. In other words, it will take up a lot of disk space over time.
You will want to experiment with what works best for you. But for the majority of users, we recommend using lossy compression due to the fact that you can easily compress an image well over 70% (sometimes even over 90%!) without much quality loss. Multiply this by 15 images on a page, and it will play a significant role in reducing your site’s load time.
Image Compression Plugins
The great news is that there are some amazing WordPress image compression plugins you can use to automate the entire process. Here are some plugins we recommend:
- Imagify (lossy and lossless – optimizes images externally)
- WP Smush (lossy and lossless – optimizes images externally)
- Optimole (lossy and lossless – optimizes images externally)
The most important thing when choosing an image optimization plugin is to use one that compresses and optimizes images externally on their servers. This, in turn, reduces the load on your site. All of the ones above do this.
If you’re curious, we use the Imagify plugin on the Kinsta website. It automatically compresses images when we upload them to the WordPress media library. So we never have to worry about a thing. Over time you can get a feel for what image compression level you want to use. It offers Normal, Aggressive, and Ultra.
We use the Aggressive mode at Kinsta and typically see 60-70% savings depending on the image. Note: we use a lot more PNGs than JPEGs due to the fact that most of our images are icons and illustrations, not photos.

How much faster will your WordPress site be if you use image compression? It all depends on the sizes of your original images and what they are after compression. However, we ran some speed tests and found that a quality image compression solution can decrease page load times by over 80%!
Lazy Loading
If you have a lot of images, you might consider lazy loading them. This is an optimization technique that loads visible content but delays the downloading and rendering of content that appears below the fold.
Check out our guide on how to implement lazy loading in WordPress. This can be especially important on blog posts with lots of gravatar icons from comments. Google also just released their recommendations for lazy loading.
Additional Image Optimization Tips
Here are a few final image optimization tips to walk away with.
- The days of uploading images only sized to the width of the column or DIV are over. Responsive images work out of the box in WordPress (since version 4.4) and will automatically display smaller image sizes to mobile users.
- SVGs can be another awesome alternative to using images. All of the hand-drawn illustrations you see around the Kinsta website are SVGs (vectors). SVGs are typically a lot smaller in file size, although not always. Check out our tutorial on how to use SVGs on your WordPress site.
- Use icon fonts instead of placing text within images – they look better when scaled and take less space. And if you use a font generator, you can optimize them even more. Check out how we decreased the size of our icon fonts file by a whopping 97.59% using a font generator.
Fine-Tune Your Database
Next up are some tips on how to fine-tune your WordPress database. Just like a car your database needs upkeep as over time it can become bloated.
Membership sites especially make it tricky, as they usually generate more complex queries, which in turn adds additional latency in retrieving the information from the MySQL database. A lot of this is due to all the additional moving parts and large amounts of data sites like these have. This might also be caused by sites that heavily rely on search queries for navigation or use WP_Query.
Not to mention, you also have large amounts of concurrent users continuously querying the database.
1. Use the InnoDB MySQL Storage Engine
A lot of older sites are still using the MyISAM storage engine in their database. Over recent years, InnoDB has shown to perform better and be more reliable.
Here are a couple of advantages of InnoDB over MyISAM:
- InnoDB has row-level locking. MyISAM only has full table-level locking. This allows your queries to process faster.
- InnoDB has what is called referential integrity which involves supporting foreign keys (RDBMS) and relationship constraints, MyISAM does not (DMBS).
- InnoDB supports transactions, which means you can commit and roll back. MyISAM does not.
- InnoDB is more reliable as it uses transactional logs for auto recovery. MyISAM does not.
So now you might be wondering, are you running InnoDB or MyISAM? If you are running on a fairly new WordPress site chances are you are already using the InnoDB MySQL storage engine. But with older WordPress sites you might want to do a quick check. Some sites might even have mixed and matched MyISAM and InnoDB tables, in which you could see improvements by converting them all over.
Follow these simple steps below to check.
Step 1
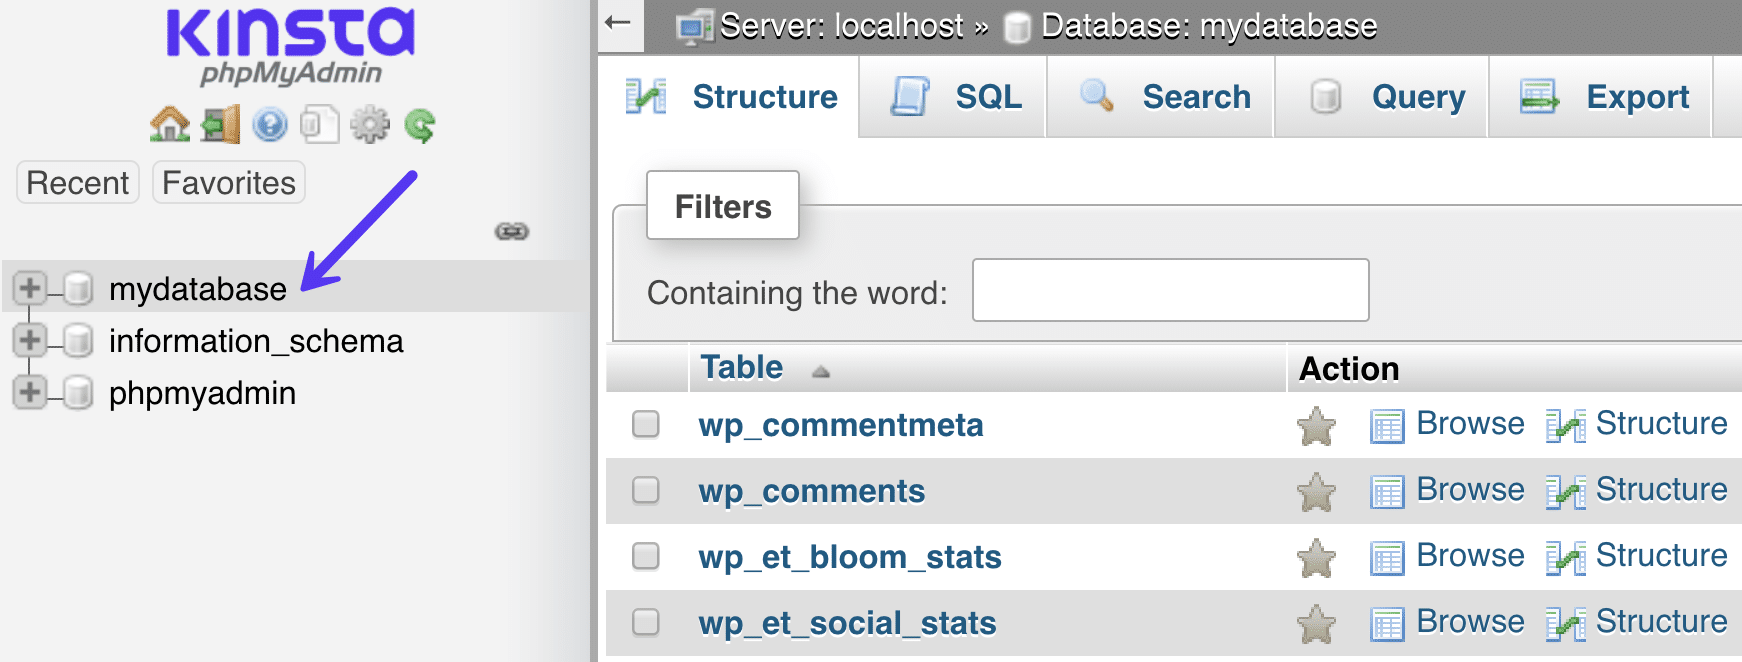
Login to phpMyAdmin and click on your MySQL database.
Step 2
Do a quick scan or sort of the “Type” column, and you can see which Storage Engine types your tables are using. In this example below, you can see that two of the tables are still using MyISAM.

If you found some, then it’s probably time to move them to InnoDB. We always recommend reaching out to your host and asking if they can do this for you. At Kinsta, every client’s database tables automatically get converted to InnoDB by our migration team.
But you can always follow these tutorials below to convert your MyISAM tables to InnoDB manually:
2. Delete and Limit Page and Post Revisions
Whenever you save a page or post in WordPress, it creates what is called a revision. This occurs in both drafts and already published posts that are updated. WordPress revisions can be helpful in case you need to revert to a previous version of your content.
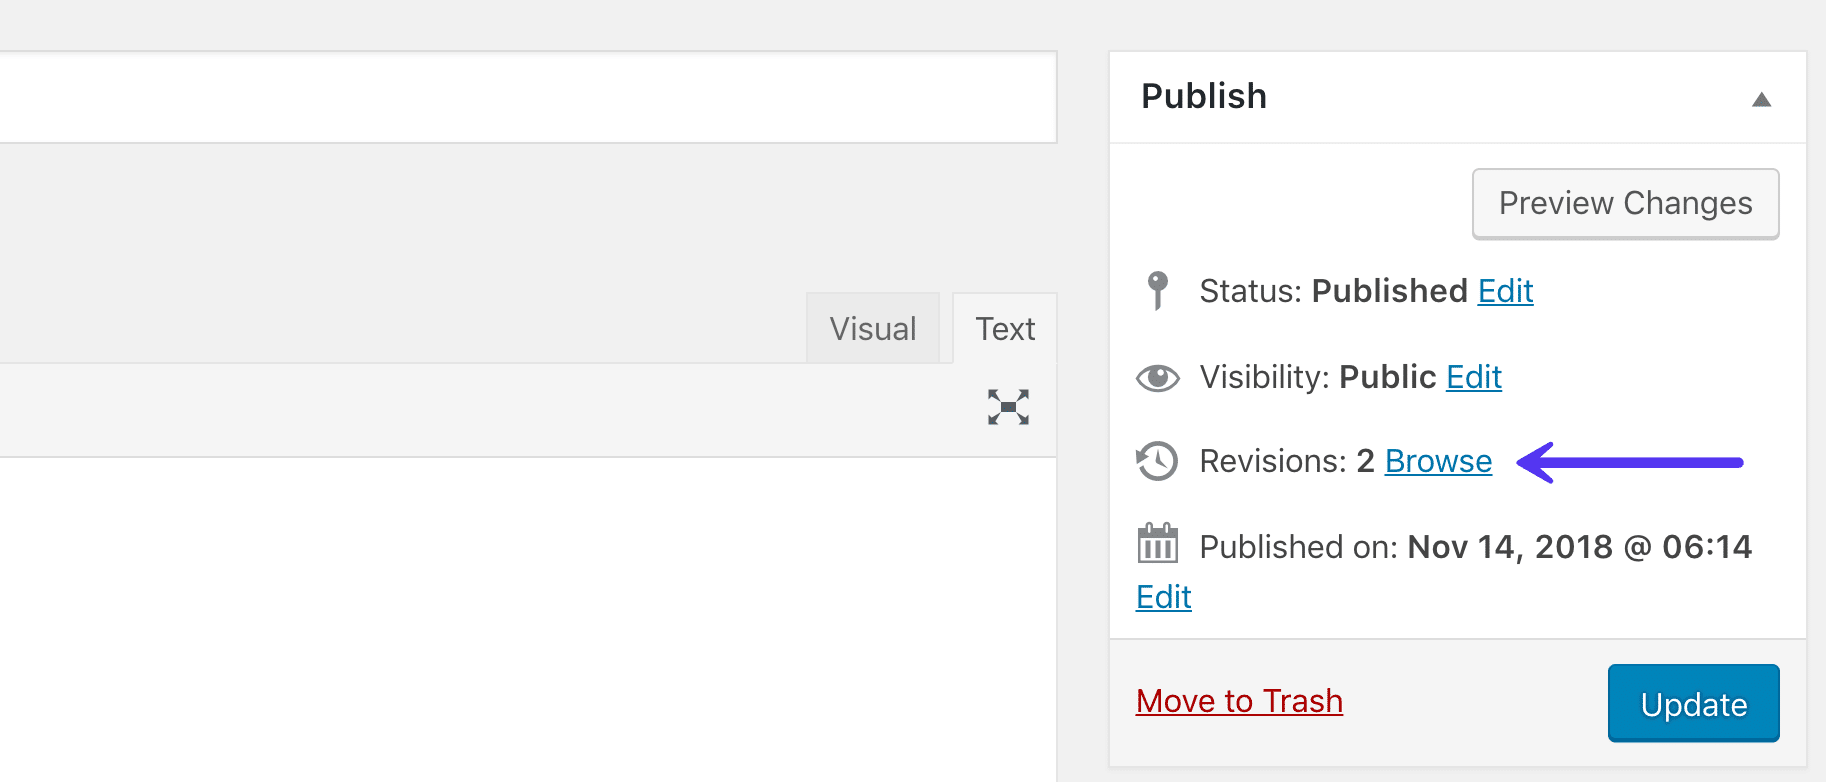
However, revisions can also hurt the performance of your WordPress site. On large sites, this can add up very quickly to thousands of rows in your database which are not necessarily needed. And the more rows you have, the larger your database in size, which takes up storage space. While indexes were created for this very purpose, we’ve still seen this issue cripple WordPress sites. There are a couple of things you can do.
Delete Old Revisions
If you have an older WordPress site with a lot of pages and posts, it might be time to do a quick cleanup and delete those old revisions. You can do this with MySQL, but with all the bad snippets of code floating around the web, we recommend doing a backup of your site and using a free plugin like WP-Sweep.
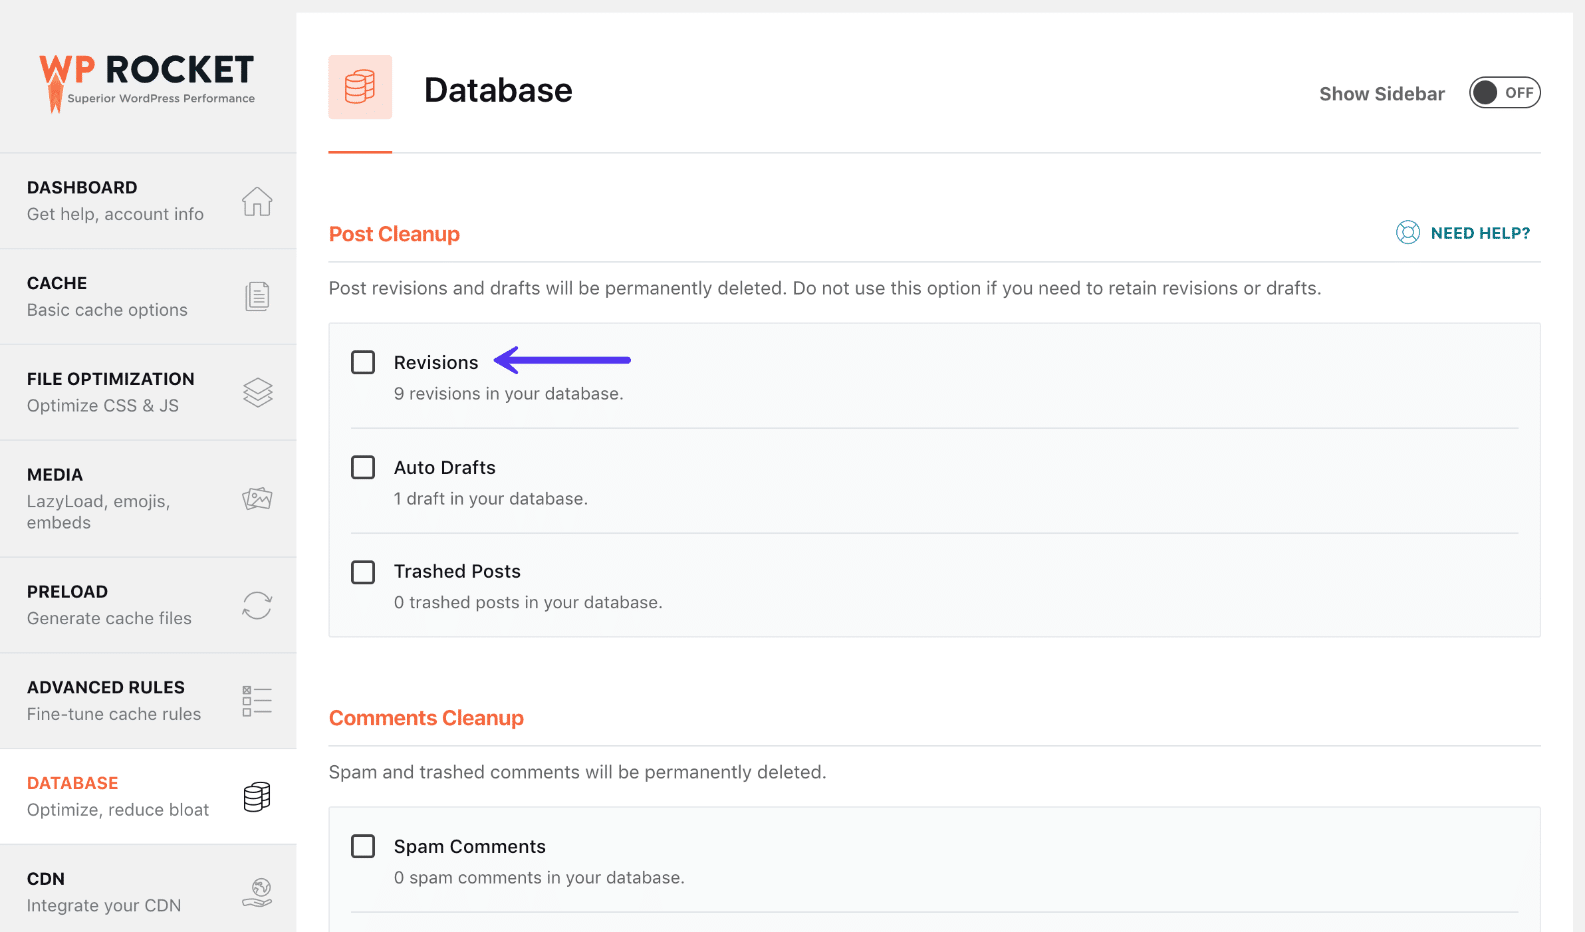
Another one of our favorite plugins, WP Rocket, also has a database optimization feature to clear out revisions.
If you’re handy with WP-CLI, there’s a couple of commands you can use for this.
Login to your server via SSH and run the following command to get and see the number of revisions currently in the database.
wp revisions list
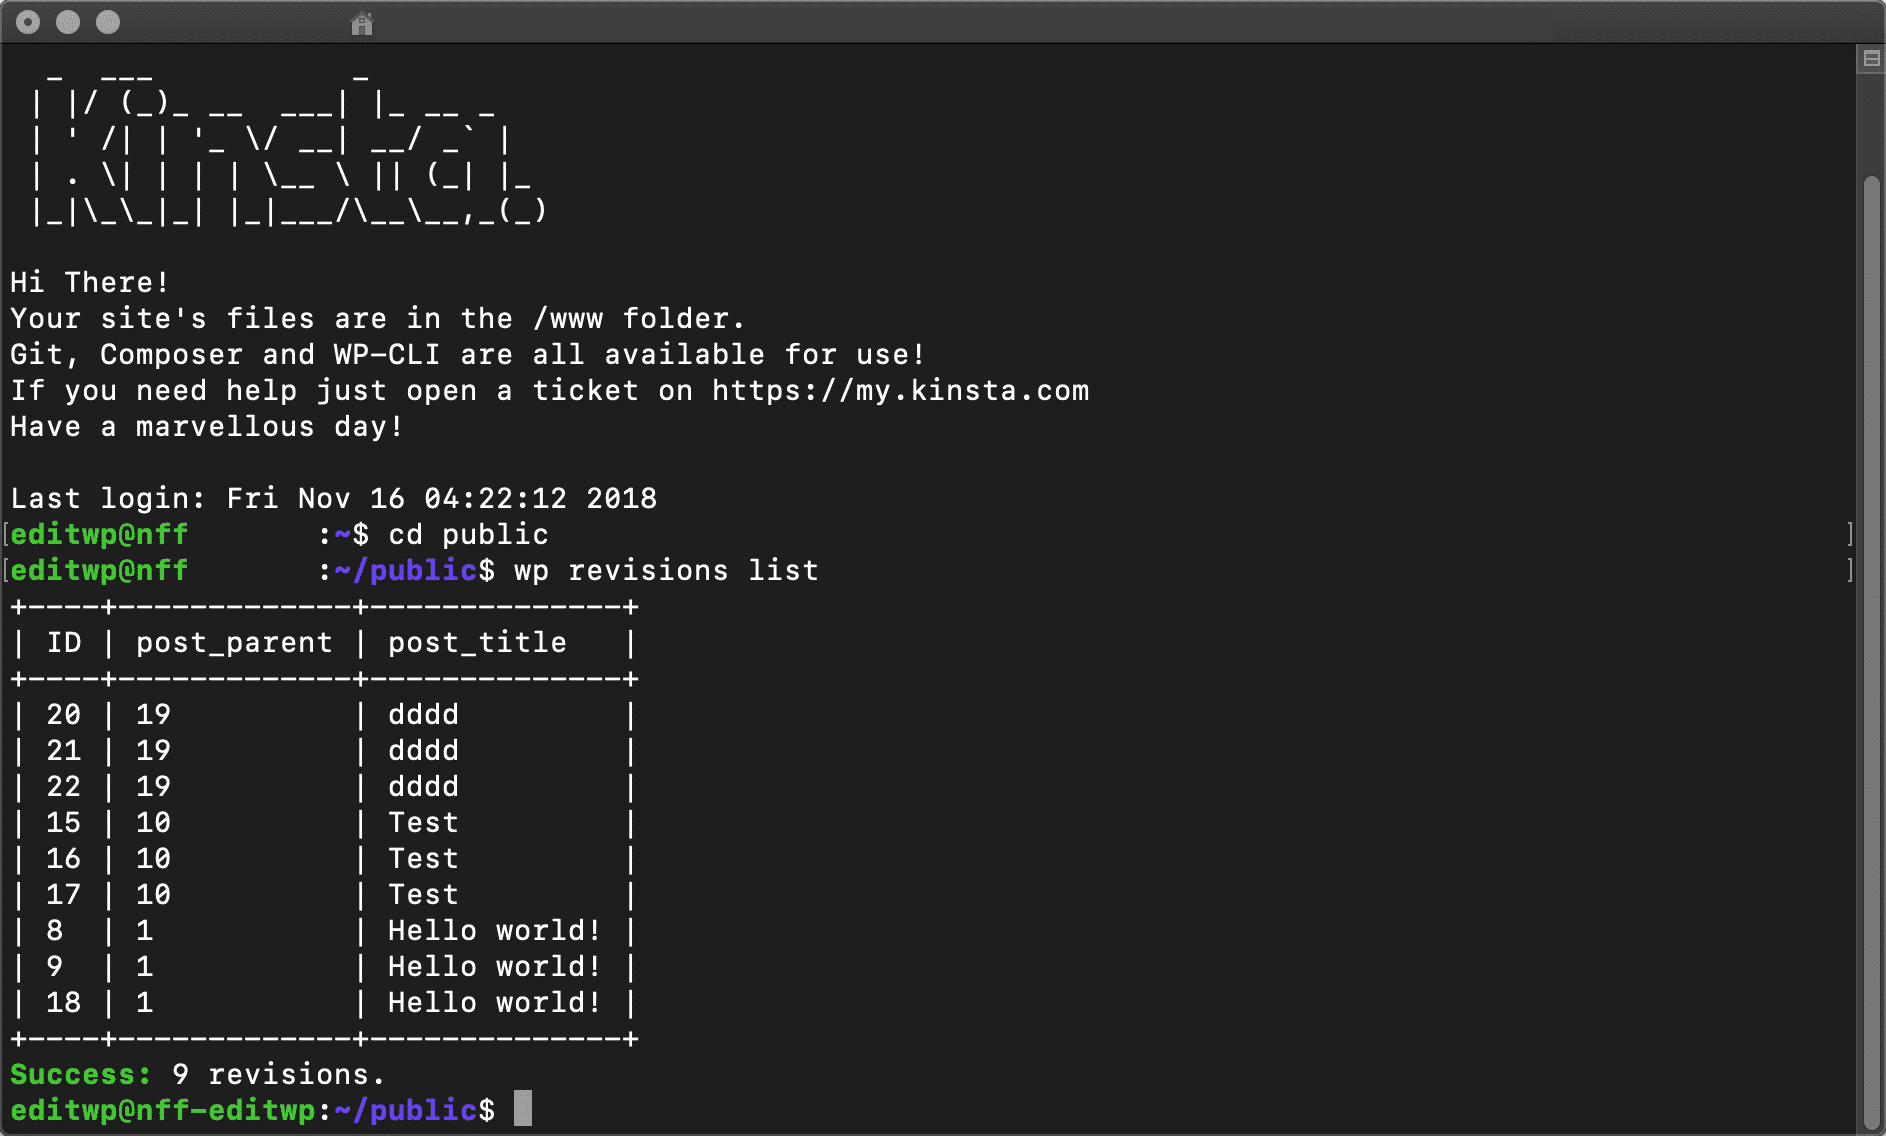
If you get an error, you might need to first install the wp-revisions-cli package with the following command:
wp package install trepmal/wp-revisions-cli
You can then run the following command to clean up the revisions:
wp revisions clean
Limit Revisions
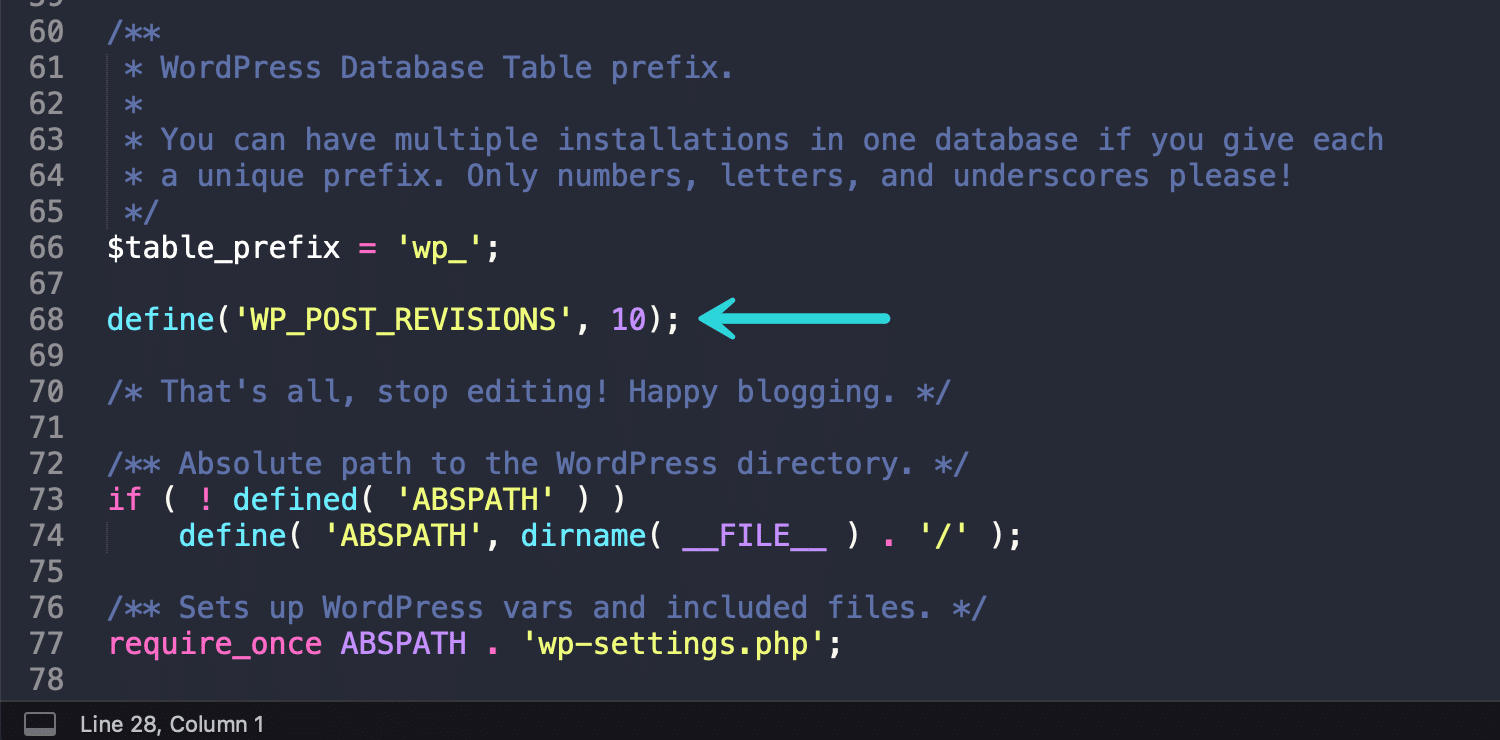
Another good strategy and one that we use at Kinsta is to limit the number of revisions that can be stored per post or page. Even setting it to something like ten will keep revisions from getting out of hand, especially if you do a lot of updating.
To limit revisions, you can add the following code to your wp-config.php file. The code below needs to be inserted above the ‘ABSPATH’ otherwise it won’t work. You can change the number to however many revisions you want to keep stored in your database.
define('WP_POST_REVISIONS', 10);
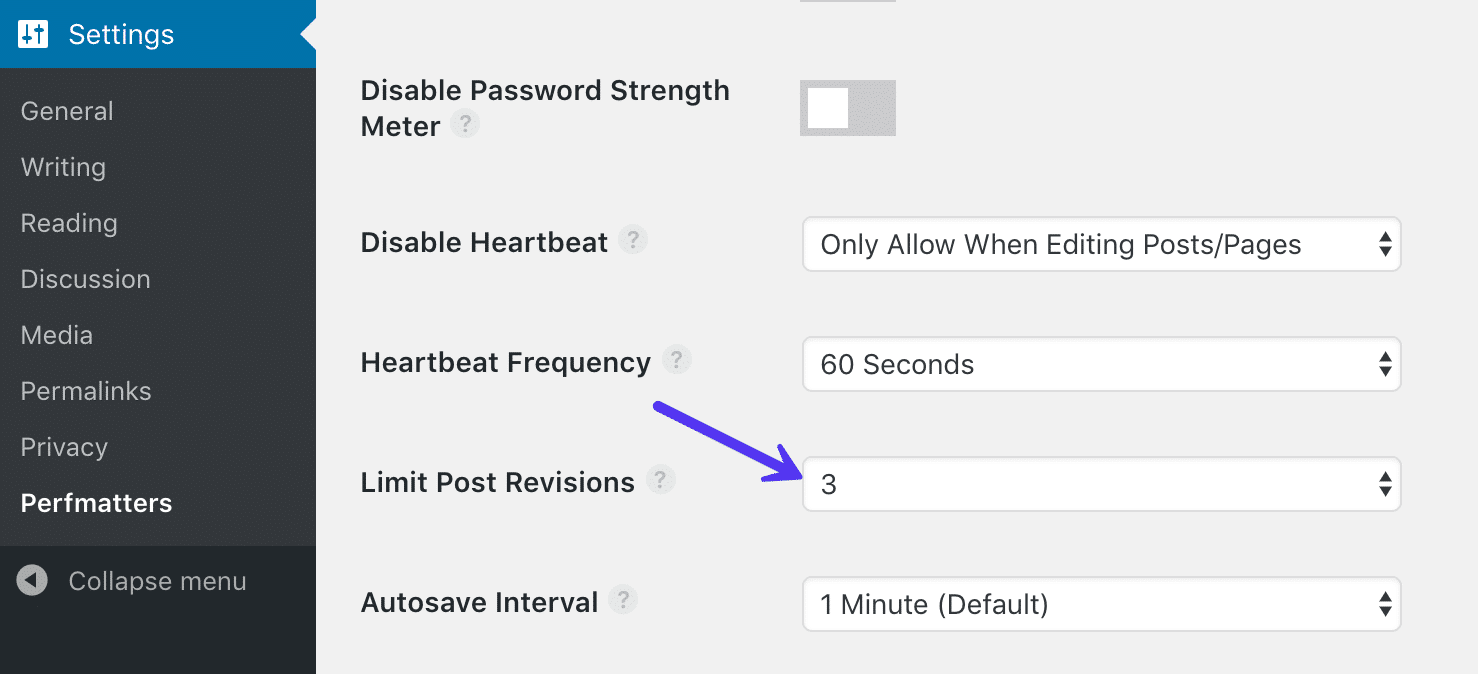
Or you can utilize a plugin like Perfmatters to limit revisions.
Disable Revisions
And last but not least, you can also disable revisions on your site altogether. If you’re going this route, we highly recommend following the first option above to delete revisions and then disabling them afterward. This way your database is completely free from all old revisions and no new ones will be added going forward.
To disable revisions, you can add the following code to your wp-config.php file. The code below needs to be inserted above the ‘ABSPATH’ otherwise it won’t work.
define('WP_POST_REVISIONS', false);
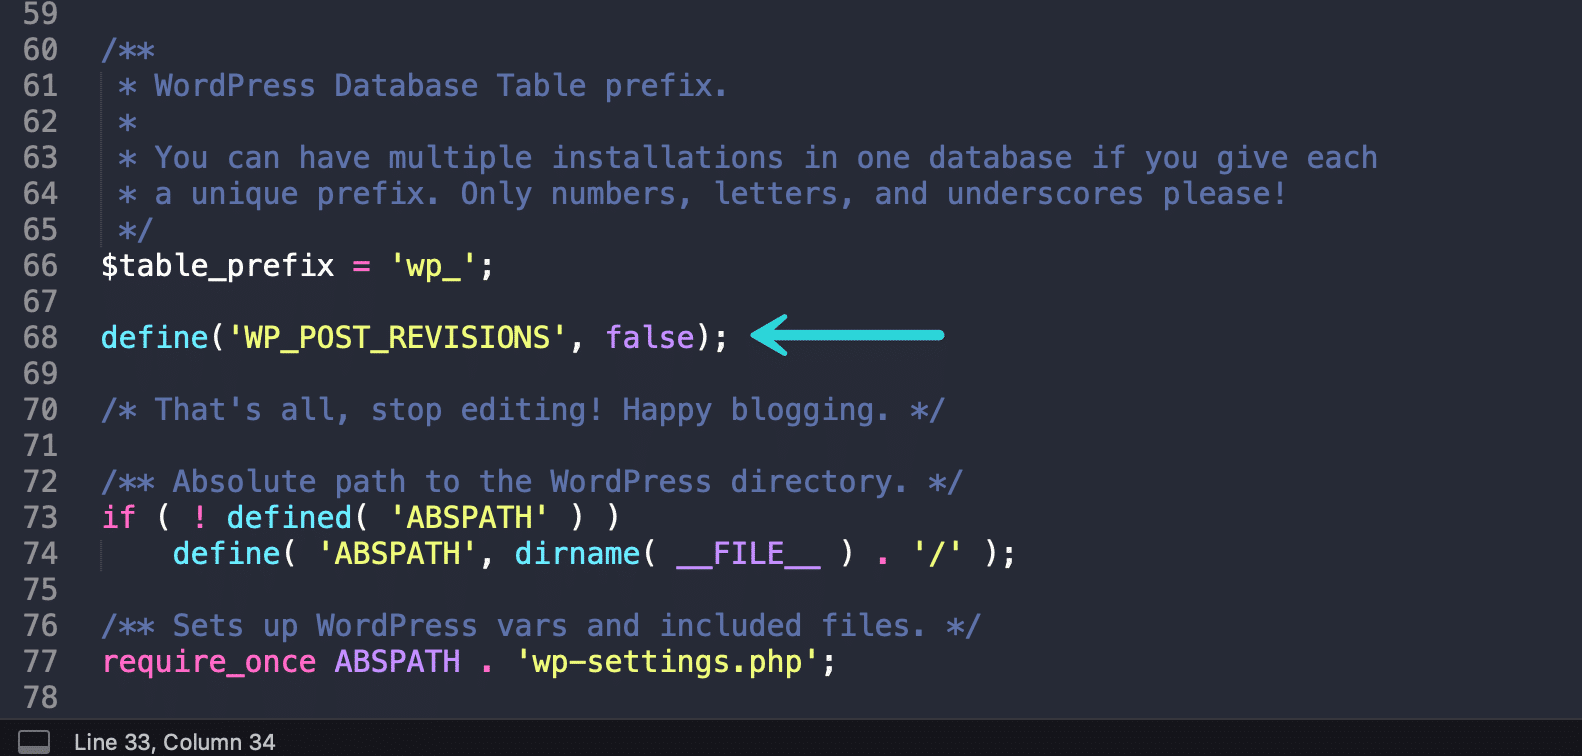
Or you can utilize a plugin like Perfmatters to disable revisions.

3. Clean up Your wp_options Table and Autoloaded Data
The wp_options table often gets overlooked when it comes to overall WordPress and database performance. Especially on older and large sites, this can easily be the culprit for slow query times on your site due to autoloaded data that is left behind from third-party plugins and themes. Trust us; we see this every single day!
The wp_options table contains all sorts of data for your WordPress site such as:
- Site URL, home URL, admin email, default category, posts per page, time format, etc
- Settings for plugins, themes, widgets
- Temporarily cached data
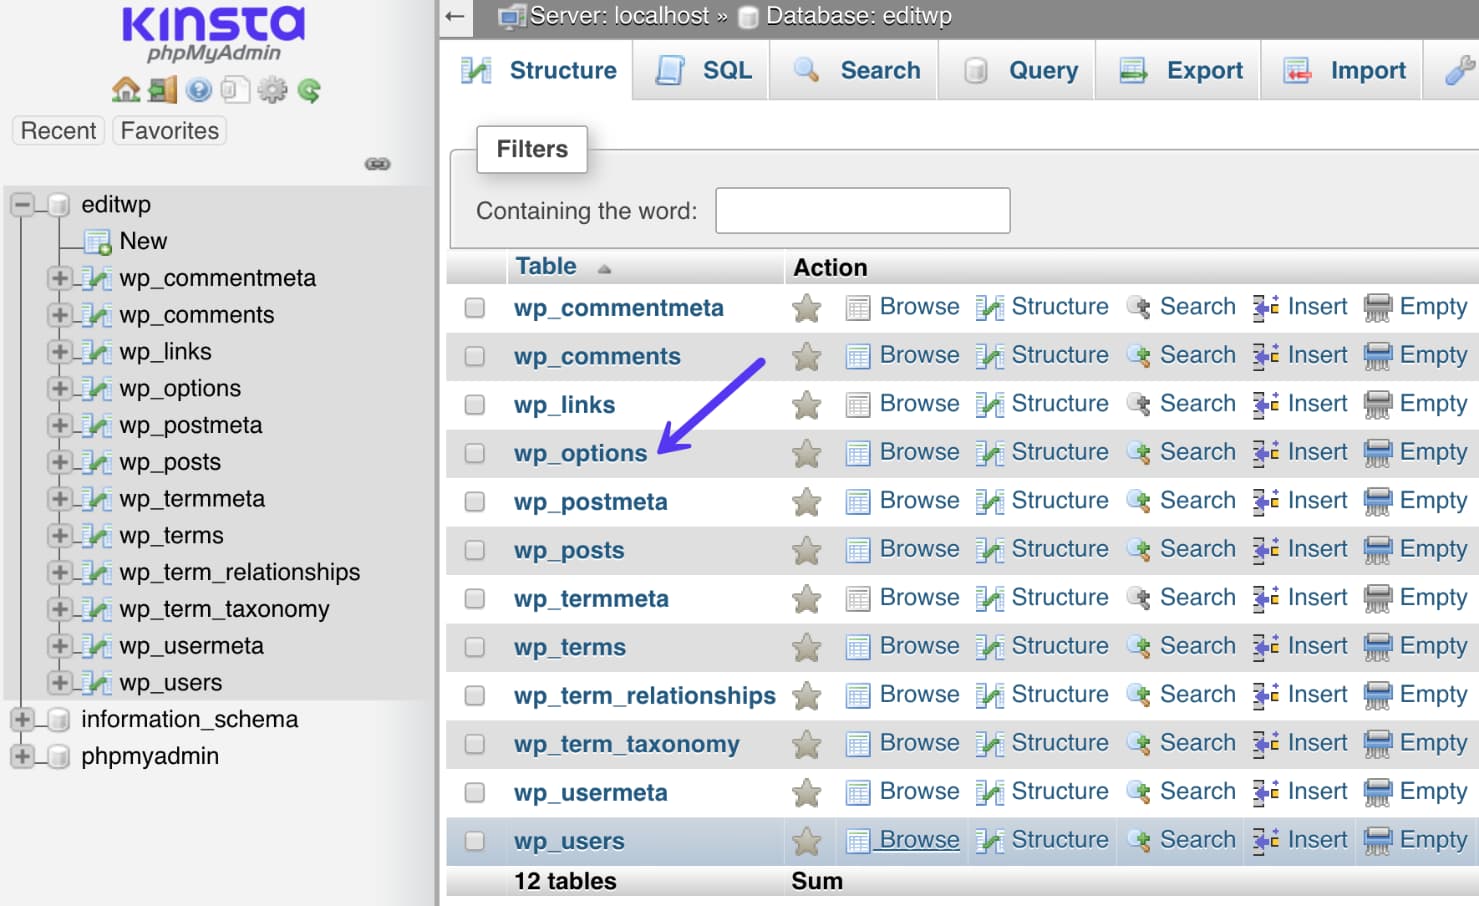
This table contains the following fields (columns):
- option_id
- option_name
- option_value
- autoload (this is the one we care about when it comes to performance)

One of the important things to understand about the wp_options table is the autoload field. This contains a yes or a no value (flag). This essentially controls whether or not it is loaded by the wp_load_alloptions() function. Autoloaded data is data that is loaded on every page of your WordPress site. Just like we showed you how to disable certain scripts from loading sitewide, the same idea applies here. The autoload attribute is set to “yes” by default for developers, but not every plugin should theoretically load their data on every page.
The problem WordPress sites can run into is when there is a large amount of autoloaded data in the wp_options table. This is typically a result of the following:
- Data is being autoloaded by a plugin when it should be set to “no.” A good example of this would be a contact form plugin. Does it need to load data on every page or just the contact page?
- Plugins or themes have been removed from the WordPress site, but their options are still left behind in the
wp_optionstable. This could mean unnecessary autoloaded data is getting queried on each request. - Plugin and theme developers are loading data into the
wp_optionstable instead of utilizing their own tables. There are arguments to both sides of this, as some developers prefer plugins that don’t create additional tables. However, thewp_optionstable also wasn’t designed to hold thousands of rows.
How much is too much-autoloaded data? This can vary of course, but ideally, you want this to be between 300 KB to 1MB.
Once you start approaching the 3-5 MB range or more, there are most likely things that can be optimized or removed from being autoloaded. And anything above 10 MB should be addressed right away. This doesn’t always mean it’s going to cause an issue, but it’s a good place to start.
Because this is such a problem we have a whole separate tutorial you’ll want to read on how to best troubleshoot autoloaded data as well as how to clean it up.
4. Clean up Transients
Unless you’re using an object cache, WordPress stores transient records in the wp_options table. Typically these are given an expiration time and should disappear over time. However, that is not always the case. We have seen some databases where there are thousands of old transient records. In fact, in on one site, we dealt with some corrupt transient records in which over 695,000 rows were generated in the wp_options table. Yikes!
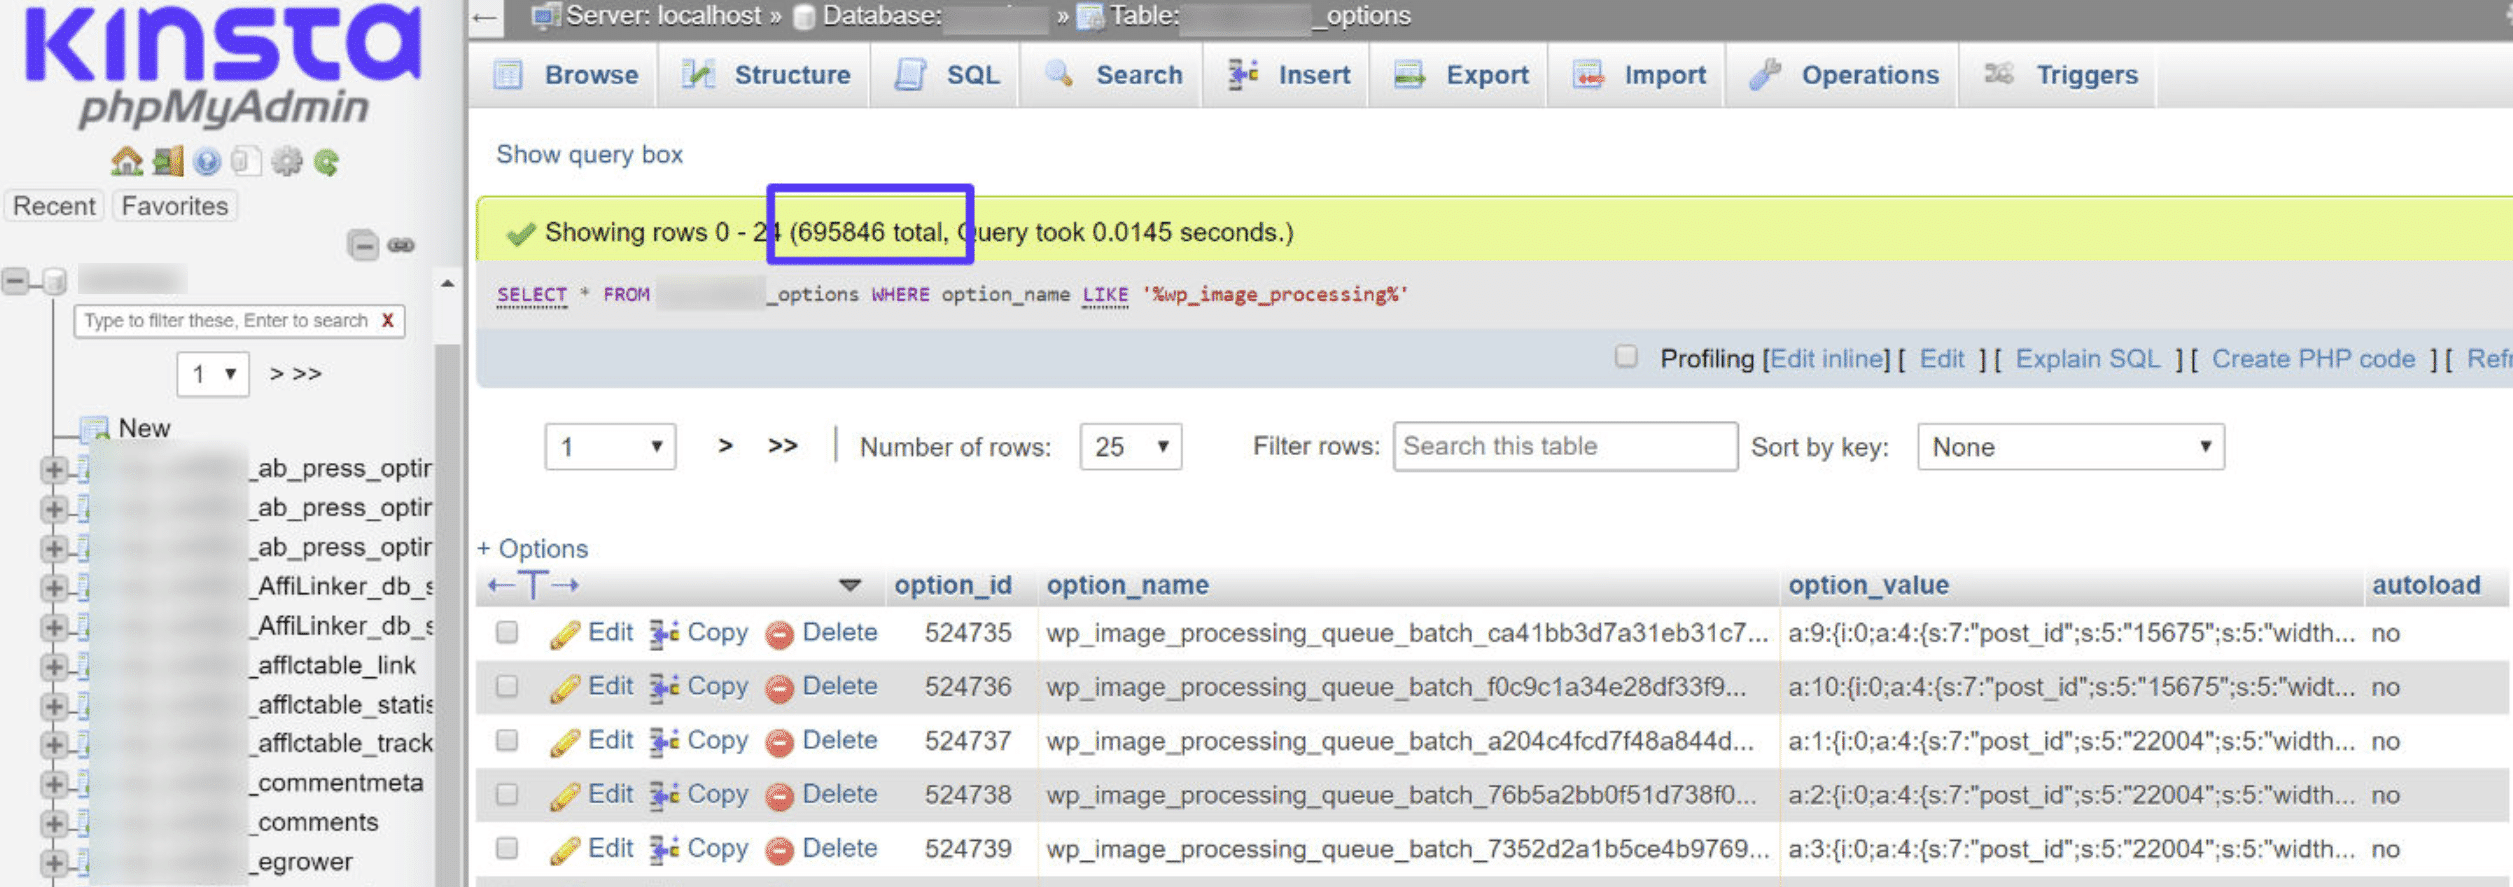
It’s also important to note that transients are not to autoloaded by default. You could use a query like the below to see if there are any autoloaded transient data.
SELECT *
FROM `wp_options`
WHERE `autoload` = 'yes'
AND `option_name` LIKE '%transient%'
A better and safer option would be to utilize a free plugin like Transient Cleaner or Delete Expired Transients which can clean up only the expired transients from your wp_options table. However, it appears there is now a function in WordPress, added in 4.9, that housekeeps expired transients. So hopefully that is happening automatically on your site now.
WP Rocket also has the ability to cleanup transients in their database optimization options.

5. Clean up WordPress Sessions
Another common issue we’ve seen is sometimes cron jobs get out of sync or don’t fire properly, and therefore sessions don’t get cleaned up. You can wind up getting tons of _wp_session_ rows in your database. In this example below the site in question wound up with over 3 million rows in their wp_options table. And the table had grown to over 600 MB in size.

You could use a query like the one below to see if you’re running into this issue:
SELECT *
FROM `wp_options`
WHERE `option_name` LIKE '_wp_session_%'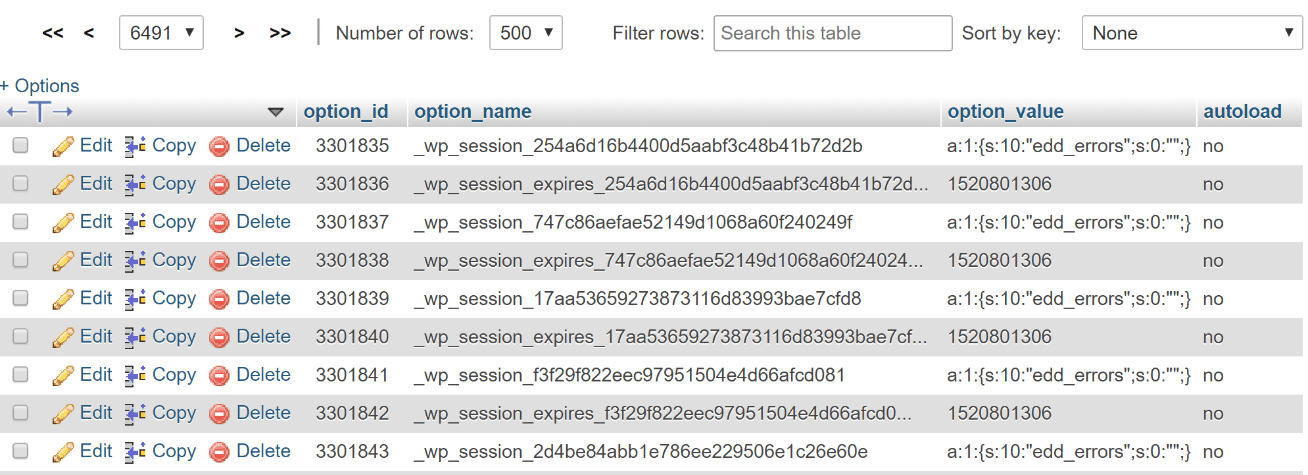
In most cases you can then safely delete these (as a cron job should have) with the following command:
DELETE FROM `wp_options`
WHERE `option_name` LIKE '_wp_session_%'
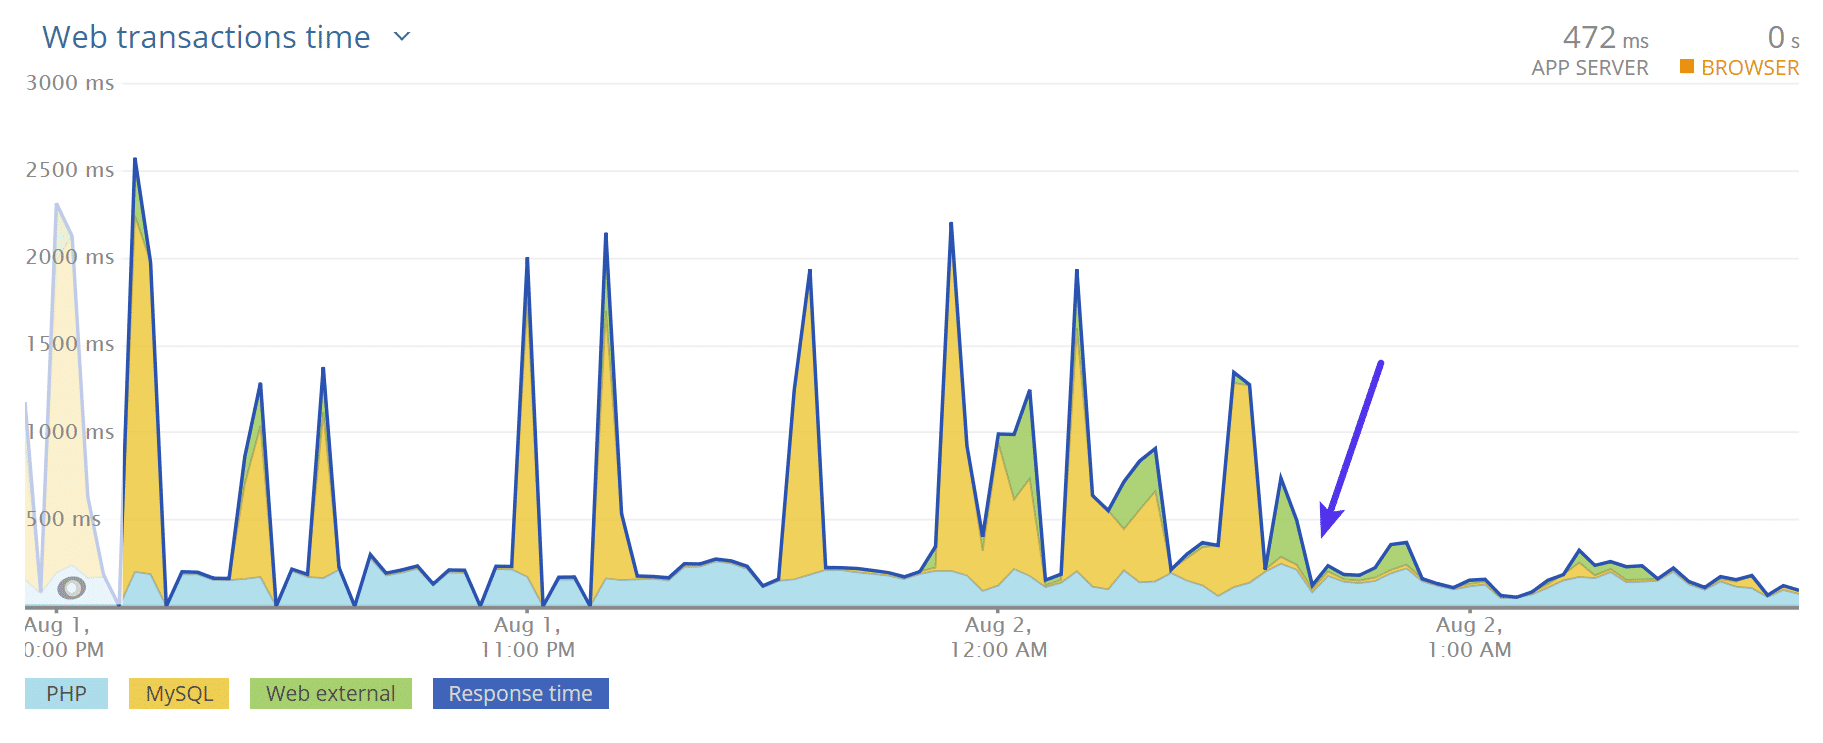
After cleaning up all the leftover _wp_session_ rows the table had less than 1,000 rows and was reduced to 11 MB in size.

It also fixed the spikes the site was getting in MySQL.
6. Add an Index to Autoload
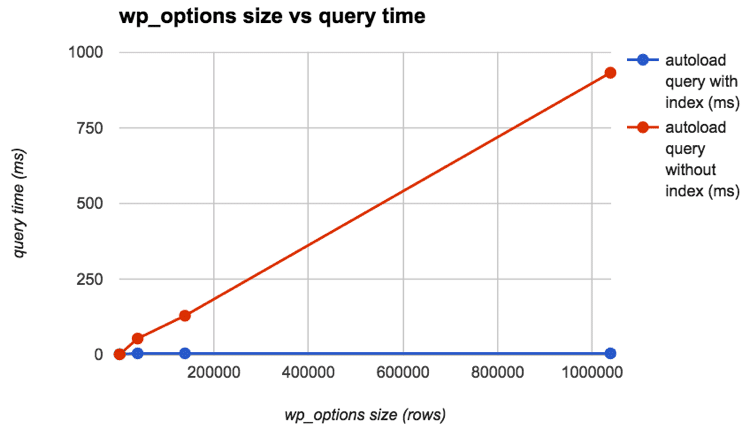
If cleaning up your wp_options table wasn’t enough, you could try adding an “index” to the autoload field. This essentially can help it to be searched more efficiently. The awesome team over at 10up performed some test scenarios on a wp_options table with a typical number of autoloaded records to show how adding an autoload index to wp_options queries can boost performance.
We also recommend checking out these two additional resources from WP Bullet:
7. Use Redis as a Persistent Object Cache for WordPress
Redis is an open-source, in-memory data structure store. In the context of WordPress, Redis can be used to store the values generated by WordPress’ native object cache persistently so that cached objects can be reused between page loads.
Using a persistent object cache such as Redis allows for the reuse of cached objects rather than requiring the MySQL database to be queried a second time for the same object. The result is that Redis can reduce the load on a website’s MySQL database, simultaneously decreasing the response time of the site and increasing the site’s ability to scale and handle additional traffic.

Highly dynamic websites (WooCommerce, membership sites, forums, discussion boards, blogs with extremely active comment systems) that cannot make good use of page caching are potential candidates for a persistent object caching option such as Redis.
If you’re a Kinsta client, we offer a Redis add-on. Check out how to add Redis to your hosting plan.
8. Use Elasticsearch to Speed Up WordPress Search
Elasticsearch is an open-source full-text search engine. It is used to index data and search that data incredibly quickly.
In the context of WordPress, Elasticsearch can be used to speed up querying of the WordPress database. This is done by building an index of the content of your site’s database and then using Elasticsearch to search this index much more quickly than a MySQL query is capable of performing the same search.

If you have the time and ability, Elasticsearch can be integrated with a WordPress site by a highly knowledgeable WordPress and Elasticsearch developer. If your site makes relatively standard use of WP_Query, Elasticsearch can also be integrated by installing ElasticPress, a free WordPress plugin from 10up, available from WordPress.org, which automatically integrates with the WP_Query object to generate query results with Elasticsearch rather than MySQL.
Any site that makes heavy use of WP_Query can benefit from Elasticsearch. Examples of sites that can benefit from Elasticsearch:
- Sites where search is the primary means of navigation.
- WooCommerce sites with a huge number of orders where site admins need to be able to search the list of orders regularly.
- Any site with a large number of posts where MySQL queries are producing unacceptably slow results.
9. Disable Non-Critical Features That Are Database-Intensive
This might seem a little obvious, but it can make a world of difference if you disable non-critical plugins and theme features that are database-intensive.
- Popular and or related post widgets and plugins are horrible. They typically have heavy sitewide queries.
- Image optimization plugins that compress images using your server. You should always use an image optimization plugin that optimizes images externally.
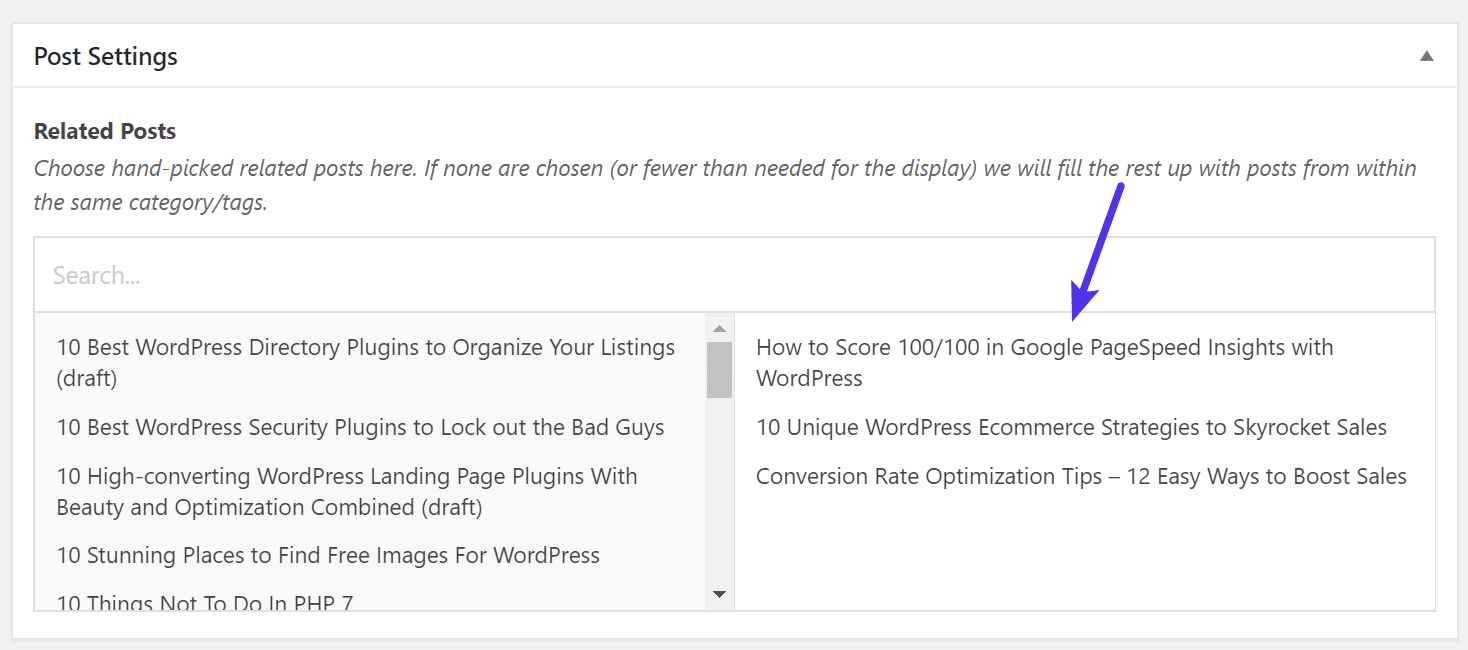
If you visit the Kinsta blog and scroll down to the end of a post, you’ll notice that we have what we call “hand-picked” related articles. These are selected by us manually and assigned to the post. This reduces the query to almost nothing and won’t hurt the performance of your entire site. Does it take more work? Yes, but it can be even better as you can choose what you want readers to see.
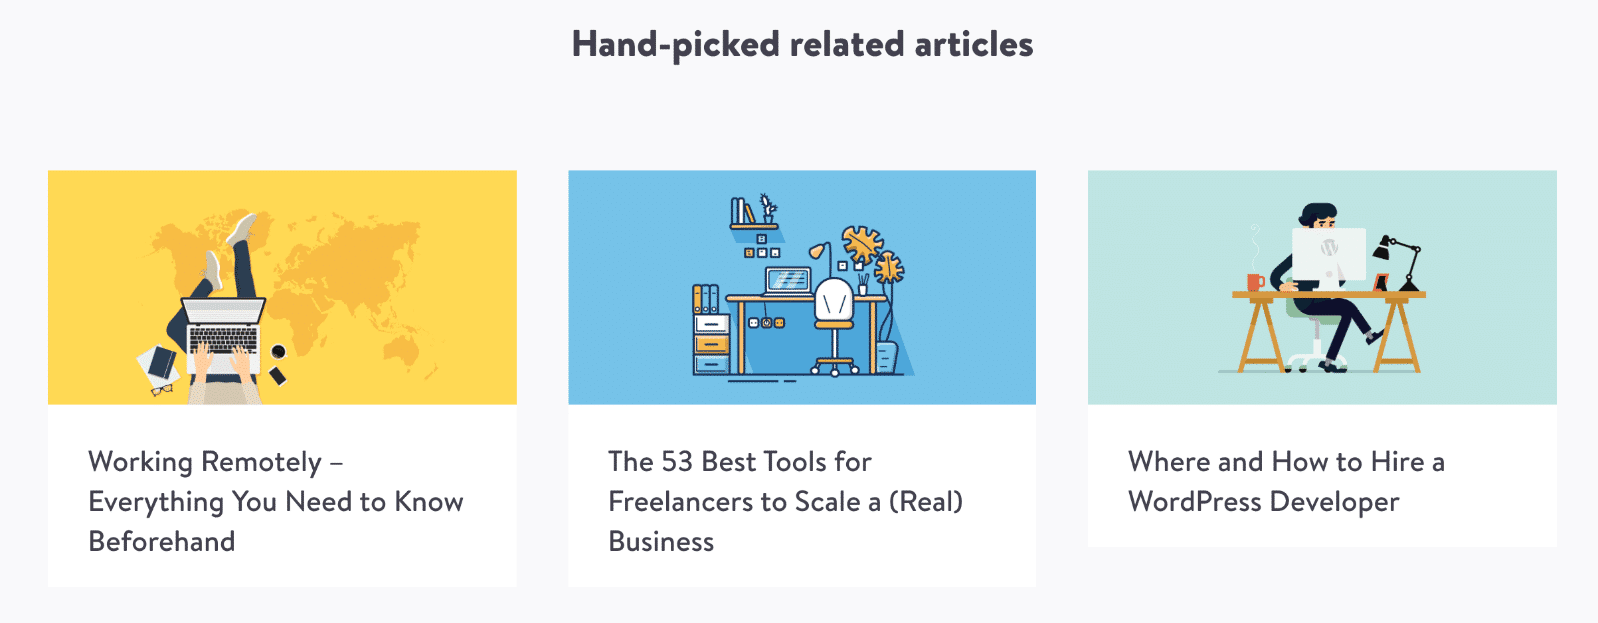
So how did we accomplish this? We used the amazing Advanced Custom Fields plugin and then assigned these fields to our blog post type. This allows us to search and assign whatever related content we want to each of our blog posts (as seen below).
We also recommend staying away from plugins that add a view/post counter to your site, unless you absolutely need it. For example, avoid things like “792 posts” next to a user’s avatar in forum posts or “5,243 views” when listing forum posts. When you have a long discussion, these counters will take a huge toll on your database. In general, minimize the use of counters and only use them if necessary.
This also goes for a lot of social counters. For example, on this site below you can see the response time from the popular Social Warfare plugin is 30x more than the next plugin below it. Caching is enabled, but obviously, this plugin has a considerable performance toll. After disabling the plugin on the site, load times instantly improved and the responsiveness of the WordPress admin dashboard improved.

Use a Content Delivery Network (CDN)
CDN is short for content delivery network. These are a network of servers (also known as POPs) located around the globe. They are designed to host and deliver copies of your WordPress site’s static (and sometimes dynamic) content such as images, CSS, JavaScript, and video streams.
First off, you don’t want to get a CDN confused with your WordPress host. These are entirely separate services. A CDN isn’t a replacement for your hosting provider, but rather an additional way to increase the speed of your site. While our hosting here at Kinsta is blazing fast, a CDN can make your site even faster.
How a CDN Works
How does a CDN work exactly? Well, for example, when you host your website with Kinsta you have to choose a physical data center location, such as the USA, Europe, Asia-Pacific, or South America.
Let’s say you choose US Central. This means your website is physically located on a “host server” in Council Bluffs, Iowa. When people over in Europe visit your website it is going to take longer for it to load versus someone visiting it from say Dallas, TX.
Why? Because the data has to travel a further distance. This is what is known as latency. Latency refers to the time and or delay that is involved in the transmission of data over a network. The further the distance the greater the latency.
Types of CDNs
There are two different types of content delivery networks:
- Traditional Pull CDN
- Reverse Proxy CDN
Traditional pull CDNs cache a copy of all of your content and media, but a request from the client is still made directly to your hosting provider. KeyCDN and CDN77 are examples of traditional CDNs.
A reverse proxy CDN is slightly different. While it still acts likes a CDN, it intercepts all incoming requests and acts as an intermediary server between the client and your host. Cloudflare and Sucuri are examples of reverse proxy CDNs. This is one reason why you have to point your DNS directly to these providers instead of your host.
The benefit of these is because they act as an intermediary server, they can provide strong web application firewalls which can help block the bad traffic from ever hitting your WordPress site and or hosting provider. One downfall to this is that they do come with a little additional overhead in terms of performance compared to a traditional pull CDN. But with additional performance and security features, this could be argued as negligible.
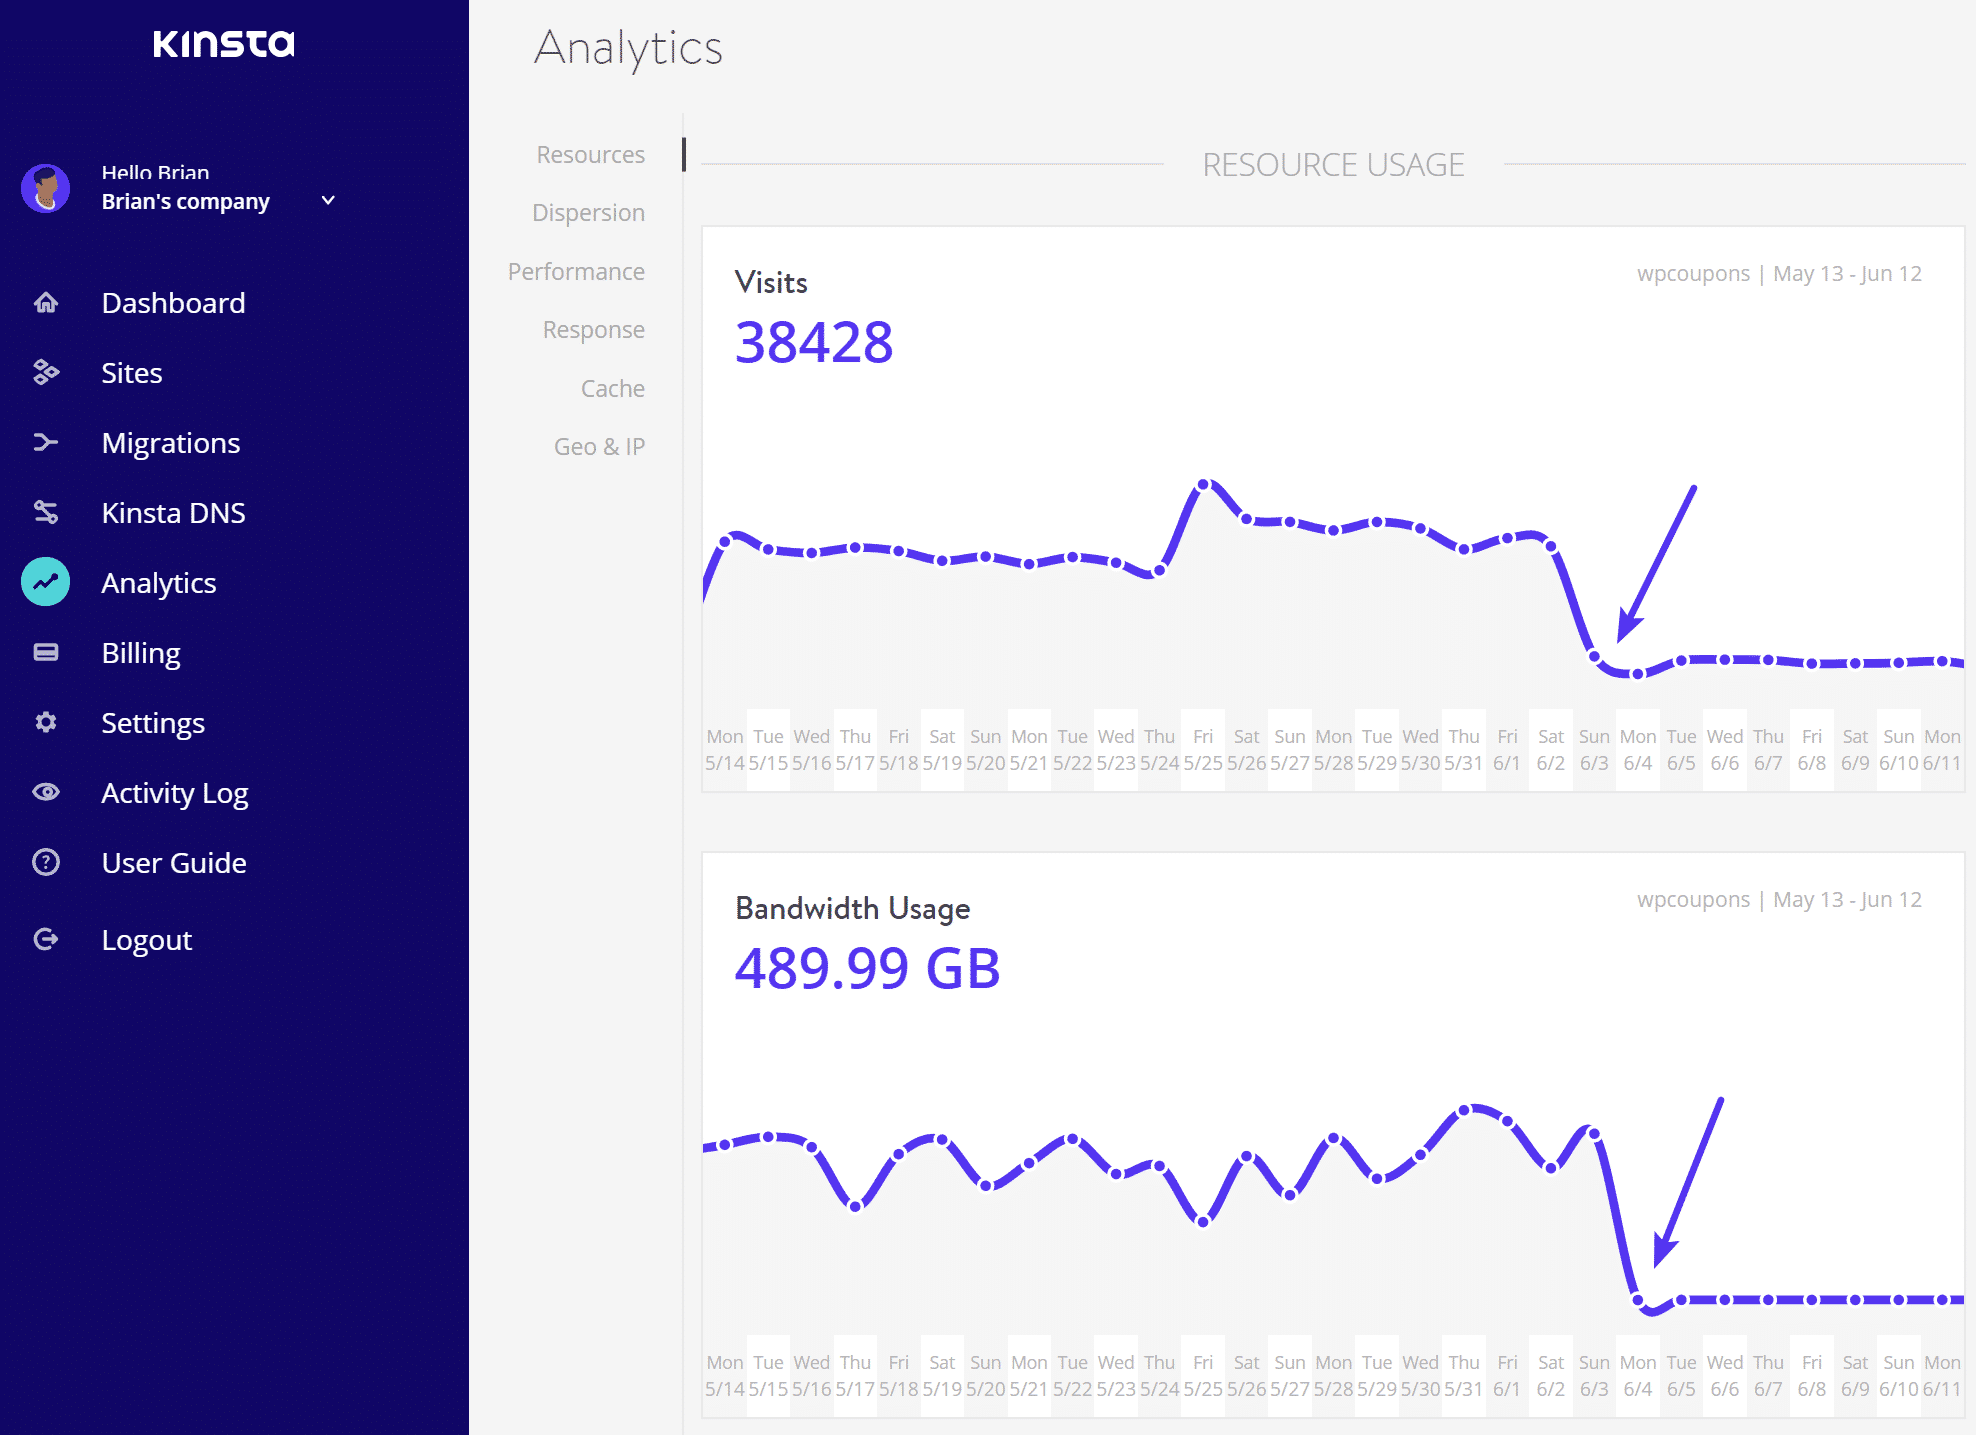
Below is an example of what happened after enabling Sucuri on a client’s site. As you can see it had a dramatic impact on the amount of bad traffic that was coming through. In the end, these types of services can help you save on your hosting costs.
CDN Speed Tests
Earlier we talked about the huge benefits of WordPress caching. Well, CDN caching is also super powerful. This is because CDNs typically have a lot more server locations than hosting providers. This means they can cache all of your assets (images, JS, CSS) closer to your visitors and serve them up at lightning-fast speeds.
Let’s do a few quick tests to see just how much faster your site could be with a CDN.
Without CDN
Our test website is hosted at Kinsta and is physically located at the Iowa, USA data center. We first ran five speed tests in Pingdom (without the CDN enabled), and took the average. Important: We are using the Europe – United Kingdom – London location at Pingdom to demonstrate the real power of a CDN. The total load time was 1.03 s.

With CDN
We then enabled our CDN and ran five additional speed tests in Pingdom. Our total load time is now 585 ms from the Europe – United Kingdom – London Pingdom test location. So by using the CDN, we were able to decrease our page load times by 43.2%! That is huge.

The reason for such a drastic difference is because the CDN has a data center in London. This means all the assets are cached in that location and ready to be served with minimal latency.
TTFB without CDN
Remember that the yellow bar in Pingdom stands for wait time, which is time to first byte (TTFB). On our speed tests without the CDN running the average TTFB on assets was around 98 ms.

TTFB with CDN
Once we enabled the CDN, the average TTFB on assets dropped to an average of 15 ms. So by using a CDN our average TTFB dropped by 84.69%. This is primarily because the assets were being served directly from the CDN’s cache.

How to Enable a CDN
Enabling a CDN on your WordPress site doesn’t have to be hard, it’s quite easy! Just follow these steps.
Step 1
Select a CDN provider and subscribe to their service. These are typically billed on a monthly basis or by data usage. Most providers will have a calculator to estimate your costs.
- If are looking into deploying KeyCDN yourself, we recommend reading this article on CDN for dummies. Each CDN provider should also have documentation to help you get started.
- We have in-depth tutorials on how to install Cloudflare and how to install Sucuri.
Step 2
If you’re using a traditional pull CDN, you can utilize free plugin like CDN Enabler, WP Rocket, or Perfmatters to integrate it with your WordPress site. These plugins automatically link up your assets to the CDN. There is no work needed on your part to get your content on the CDN; this is all hands-off! Reverse Proxy CDNs typically don’t require any plugins, although sometimes they have them to enable additional features.
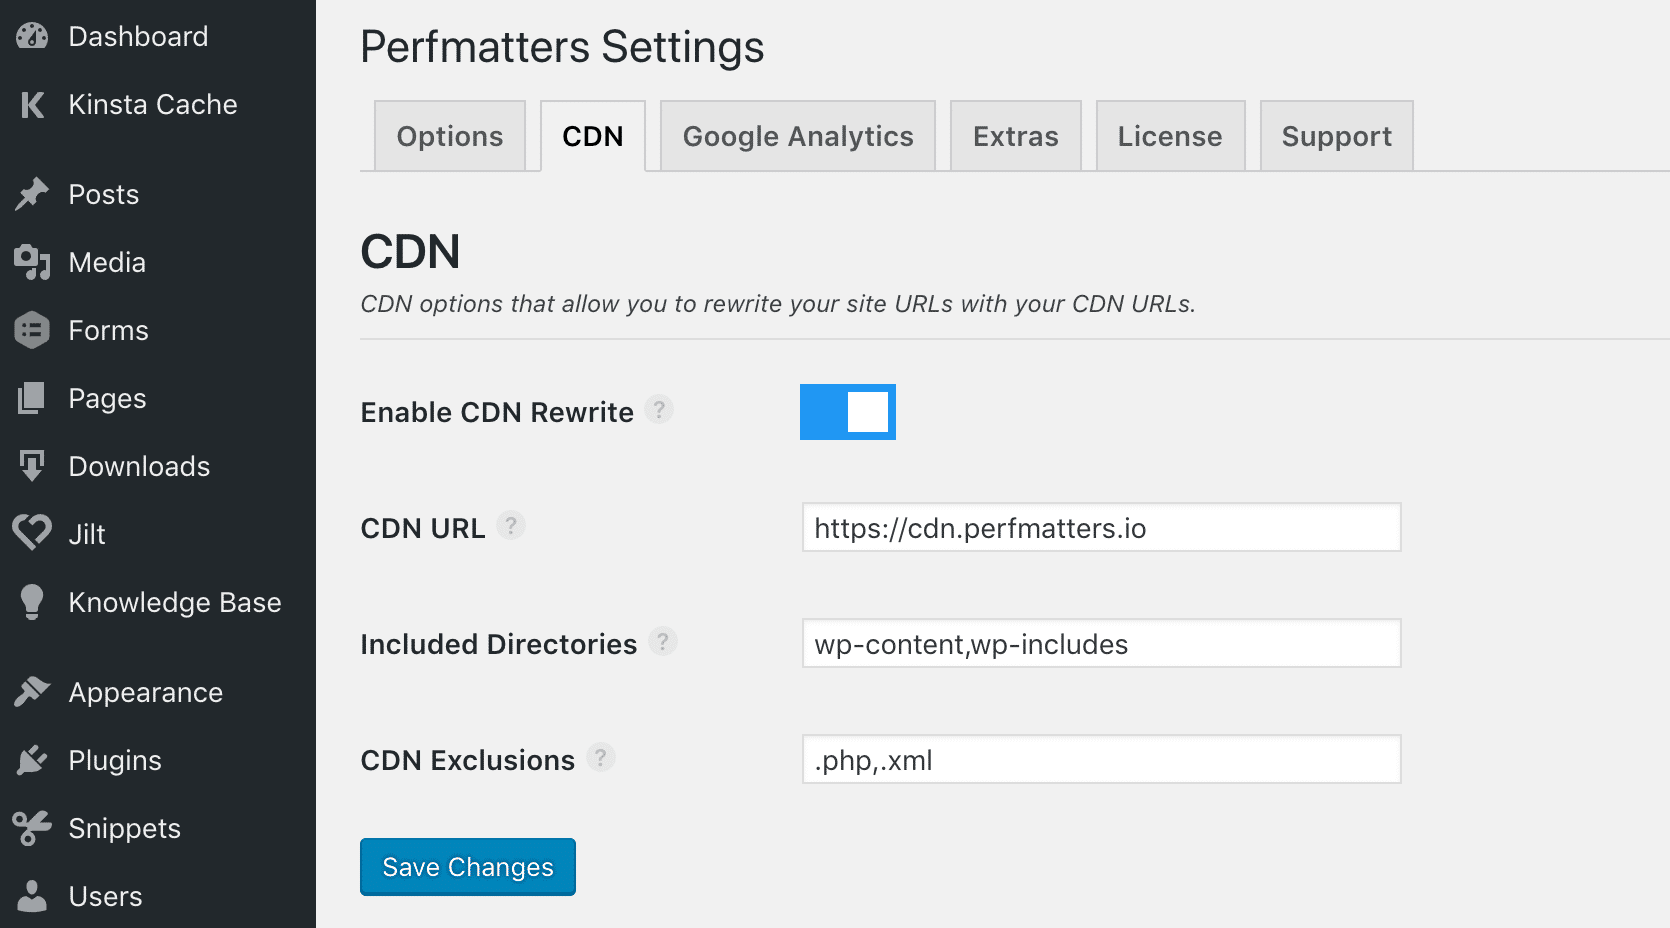
How to Enable the Kinsta CDN
Did you like those CDN speed tests above? We were using KeyCDN in those tests. The great news is that our Kinsta CDN is powered by KeyCDN. It’s an HTTP/2 and IPv6-enabled content delivery network with 200+ locations, to turbocharge your assets and media around the globe. Currently served regions include America, South America, Europe, Africa, Asia, and Australia.

If you’re a Kinsta client, we include free CDN bandwidth on all of our hosting plans. You can enable the Kinsta CDN in two simple steps.
Step 1
First, log in to your MyKinsta dashboard. Click on your site and then on the Kinsta CDN tab.
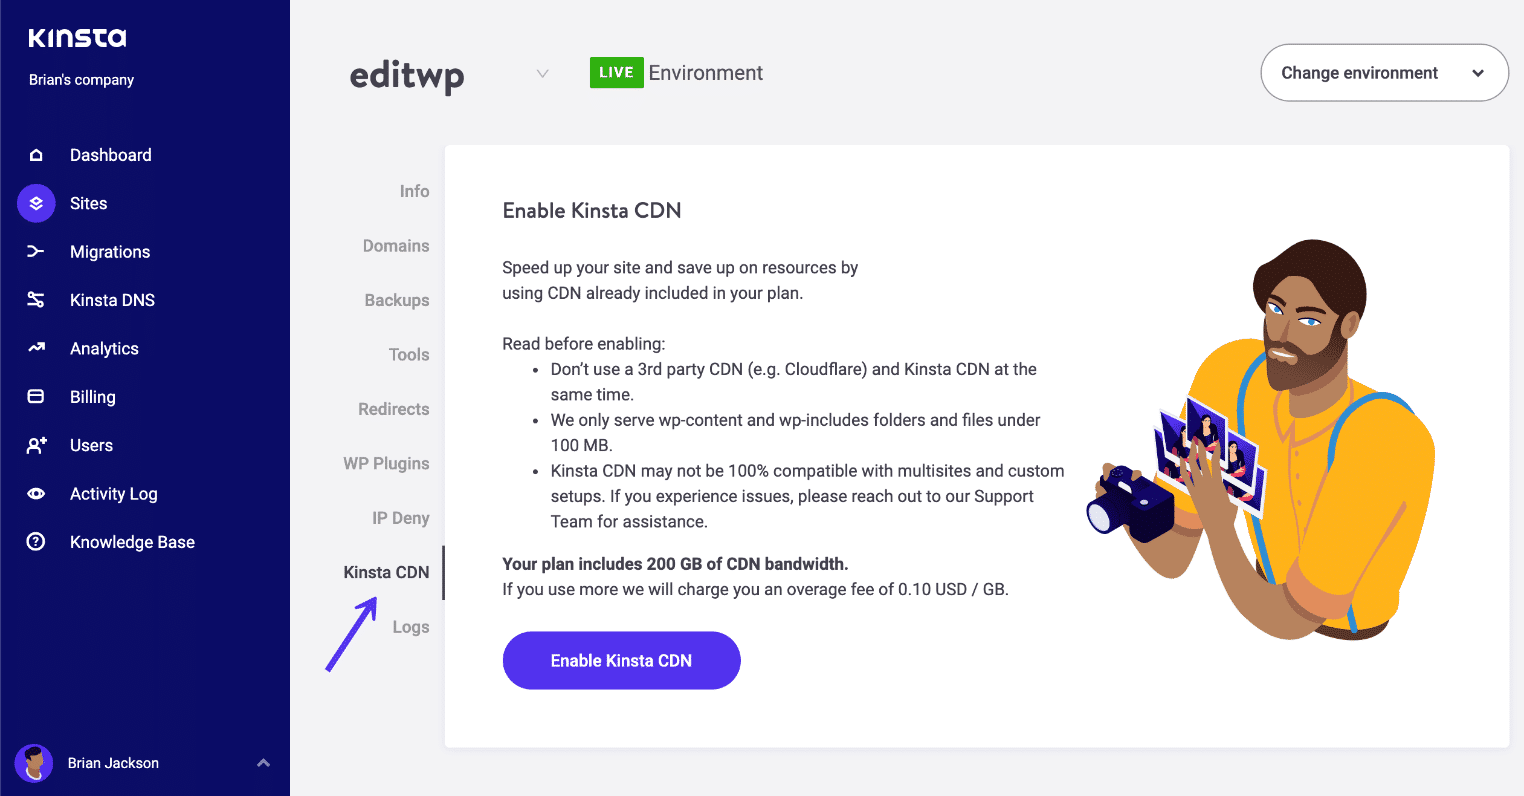
Step 2
Then click on “Enable Kinsta CDN.” After a few minutes, the CDN is automatically deployed, and your assets will be serving from cache around the globe. That’s all there is to it. 😄

Additional CDN Optimizations
Here are a few additional CDN optimizations you might want to check out or think about.
- If you have a lot of comments, gravatars can generate a lot of requests. They load from
secure.gravatar.com. Check out this tutorial on how to load gravatars from your CDN instead. We do this on the Kinsta website. 👍 - You can host your custom web fonts from your CDN or even Google fonts on your CDN. Check out our in-depth tutorial on local fonts.
- Make sure to load your favicon from your CDN. Even though it’s small, every request counts!
Offload Media and Email When Needed
Everything that generates a request has an impact on your site’s performance in one way or another. For sites with hosting hundreds of thousands of files or large media, it may be wise offload this completely. Offloading is different than serving it up via a CDN. With a CDN the original data still resides at your host, the CDN simply has multiple copies of it
When caching expires on your CDN assets it re-queries your host for the latest copies of the files. CDNs are meant to cache files for long periods of time. But due to the fact that they have so many POPs, there could be a lot of re-querying going on as cache expires in different regions.
When you offload media or files it means actually moving the original physical location of them off of your hosting provider. So while it might appear that the files are served from your site, they are really located somewhere else entirely. Besides reducing additional queries back to the host, the number one reason obviously is to also save on disk space.
Offload Media to Amazon S3
One of the most popular offloading solutions is Amazon S3. Amazon S3 is a storage solution, and part of Amazon Web Services many products. Typically this is used for large sites that either need additional backups or are serving up large files (downloads, software, videos, games, audio files, PDFs, etc.). Amazon has a proven track record of being very reliable, and because of their massive infrastructure, they can offer very low storage costs. Some of S3’s customers include Netflix, Airbnb, SmugMug, Nasdaq, etc.
Because they deal entirely with bulk storage, you can almost guarantee that pricing will be cheaper than your WordPress host. Offloading media to AWS can be a great way to save money and is free for your first year (up to 5 GB storage). Also, because the requests for your media is served directly from Amazon, this puts less load on your WordPress site, meaning faster load times.
Check out our in-depth tutorial on how to offload WordPress media to Amazon S3. You can also use a CDN with the offloaded media for the best of both worlds.
Offload Media to Google Cloud Storage
Another popular offloading solution is Google Cloud Storage. Since Kinsta is powered by the Google Cloud Platform, we are big fans of their technology and infrastructure. Due to Google’s massive infrastructure and the fact that they deal with storage in bulk, they can offer very low storage costs. Some of their customers include Spotify, Vimeo, Coca-Cola, Philips, Evernote, and Motorola.
Check out our in-depth tutorial on how to offload WordPress media to Google Cloud Storage.
Offload Transactional and Marketing Emails
Whether you think so or not, emails do have an impact on your server and server resources. With some hosts, especially shared hosts, abusing this could even get you suspended. This especially becomes a problem with those trying to send bulk emails. This is the reason why third-party transactional email providers exist and why a lot of hosting providers block email delivery on standard ports altogether. We never recommend using your hosting provider for email.
If you are sending newsletters or bulk emails, we always recommend the following alternatives to get the best results:
- Use a third-party professional email marketing software that isn’t part of WordPress
- Use a transactional email service provider (HTTP API or SMTP) along with WordPress
Other advantages of using a third-party service include:
- Better email deliverability. Let the email providers do what they do best!
- Less chance to get blacklisted.
- It might not always be possible to set up DMARC records with your hosting provider.
Email Marketing Tools
Some examples of marketing emails include newsletters, product and feature announcements, sales, event invitations, onboarding reminders, etc. Here are a few email marketing tools we recommend:
- MailChimp – We use MailChimp at Kinsta.
- MailerLite
- Drip
Transactional Email Services
Some examples of transactional emails include purchase receipts from WooCommerce or EDD, account creation notifications, shipping notifications, app error messages, password resets, etc. If you’re a Kinsta client, we rely on a third-party SMTP provider to ensure high deliverability. But depending on your volume, we always recommend moving this offsite. Here are a few transaction email services we recommend:
- SendGrid – We use SendGrid at Kinsta.
- Mailgun – See how to configure Mailgun in WordPress.
- MessageBird
How To Find Bottlenecks and Slow Plugins
Now we’ll dive into some tips on how to find bottlenecks on your WordPress site and what you can do about it.
1. Use New Relic to Identity Slow Plugins and Database Queries
There are some great tools on the market which can help you pinpoint and identify slow database queries and plugins that are consuming a lot of time. We are huge fans of New Relic at Kinsta and use it on a daily basis. New Relic is a PHP monitoring tool you can use to get detailed performance statistics on your website.
If you’re a Kinsta client, you can even add your own New Relic license key on our MyKinsta dashboard.
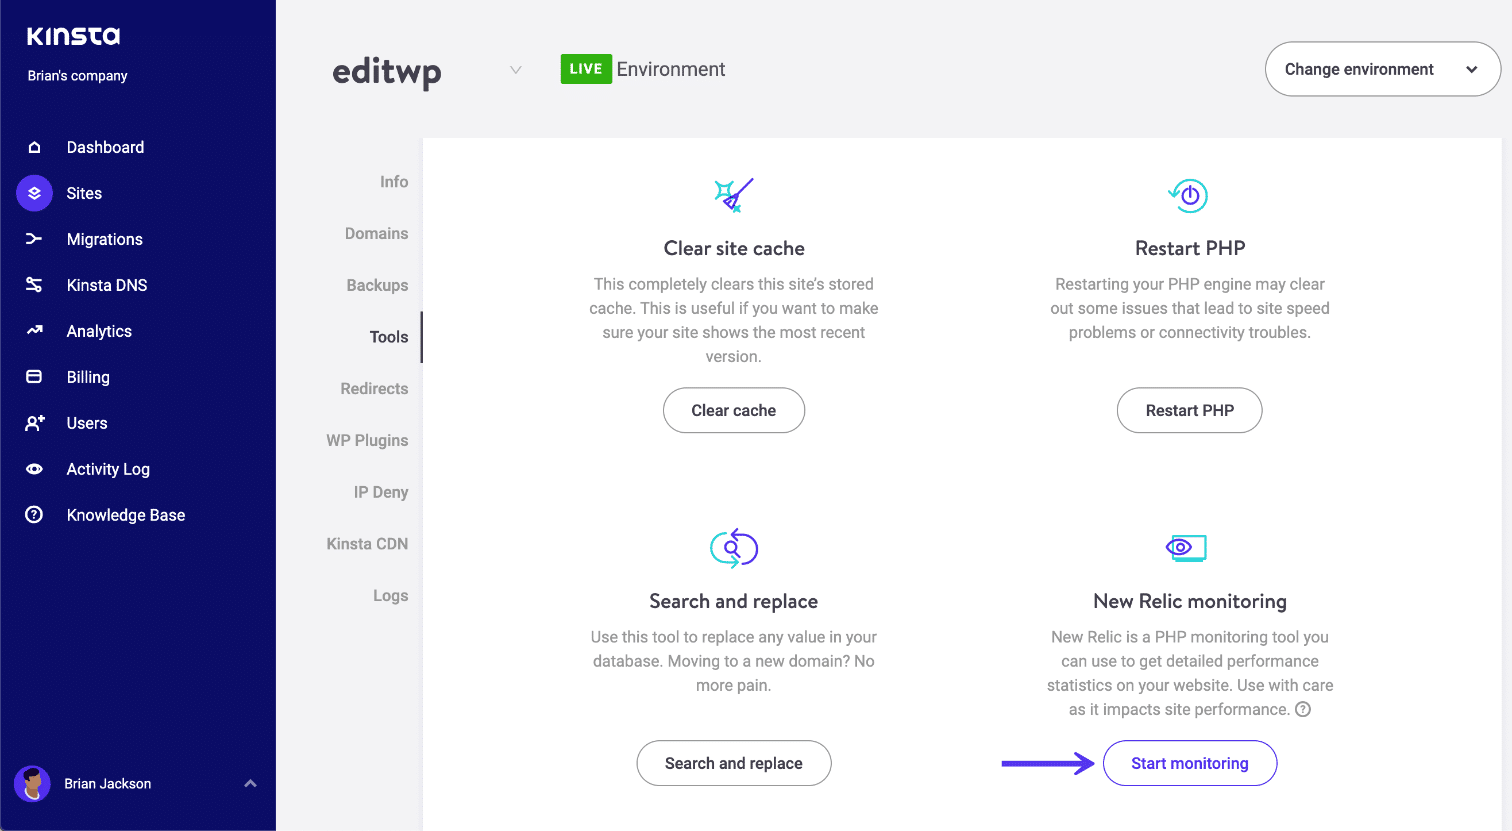
However, use New Relic with care as it impacts site performance. It adds JavaScript to your website. We recommend enabling it when you need to troubleshoot performance and then disabling it afterward.
Finding Slow Plugins
When a WordPress plugin is causing overall slowness the symptoms will vary based on the activity the plugin is performing. However, in many cases, you’ll find that a slow plugin will affect every page of a WordPress site. In the case of the site whose data you see in the image below, overall slowness was observed on every front-end page of the site. Here’s what New Relic had to say about the performance of the plugins on the site.

Immediately you can see that the adinjector plugin is consuming more than 15 times the amount of time as the next slowest plugin.
When you see data like this, it can be tempting to immediately dismiss the plugin as poorly coded or somehow ineffective. While this is sometimes the case, it is not always the case. Plugin misconfiguration, database slowness, or external resources that are slow to respond may cause a plugin to consume a lot of time.
So when you see a plugin that is responding slowly, it’s a good idea to check several other screens in New Relic to find additional information. The transactions, databases, and external resources should all be checked before deciding that deactivating the plugin is the best or only way forward.
Overall Slowness Caused by an Overwhelmed Database
A poorly optimized database can cause overall slowness on a WordPress site. Earlier we went over a lot of different things you can do to fix this. In New Relic, this database related slowness will most likely show up in two places:
- First, you’ll see an outsized amount of MySQL activity in the overview.
- Second, you’ll see one or more database tables consuming a lot of time in the databases tab.
Starting with the overview screen, a site with a struggling database might look something like this:
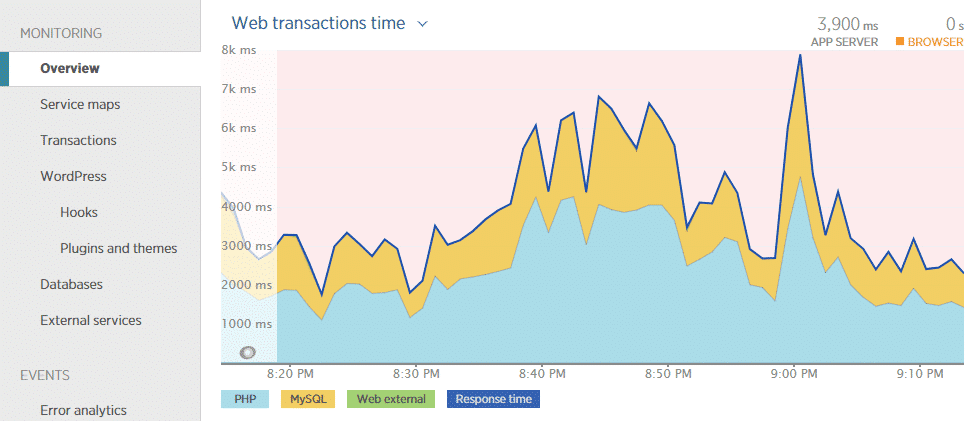
To get a better handle on which database table or query is causing the issue, head for the databases tab.
The databases tab will point out the table and the type of query consuming the most time. If you select one of the entries in the list, you can see more detail including some sample queries.
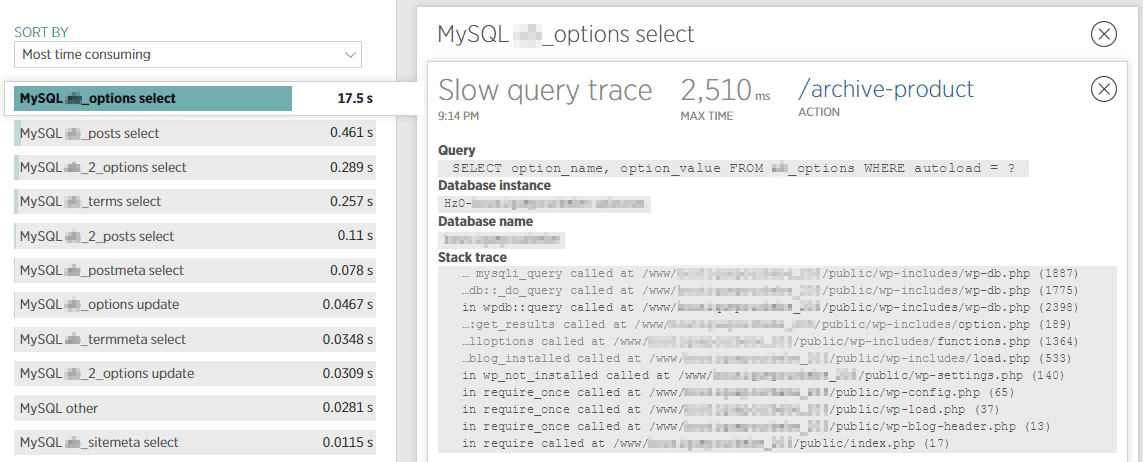
In this case, the data points a finger at autoloaded data in the wp_options table. Remember, we went over this earlier. Sure enough, a quick analysis of the wp_options table confirms that nearly 250 MB of data are autoloaded from this table, making this site an obvious candidate for database maintenance and optimization.
Make sure to check out our in-depth tutorial on how to use New Relic to debug performance issues on your WordPress site.
2. Use the Free Query Monitor Plugin
You can also use the free Query Monitor WordPress plugin. Use it to identify and debug slow database queries, AJAX calls, REST API requests, and much more. In addition, the plugin reports back website details such as script dependencies and dependents, WordPress hooks that fired during page generation, hosting environment details, conditional query tags met by the current page, and a lot more.
Check out our complete tutorial on how to use Query Monitor.
3. Utilize Staging Sites Without Touching Production
We don’t know what we would do without staging environments. These can be invaluable when it comes to troubleshooting performance issues. Thankfully, Kinsta has one-click staging environments. If your WordPress host doesn’t offer staging environments, you could also use a plugin like WP Staging, although it’s not as easy.
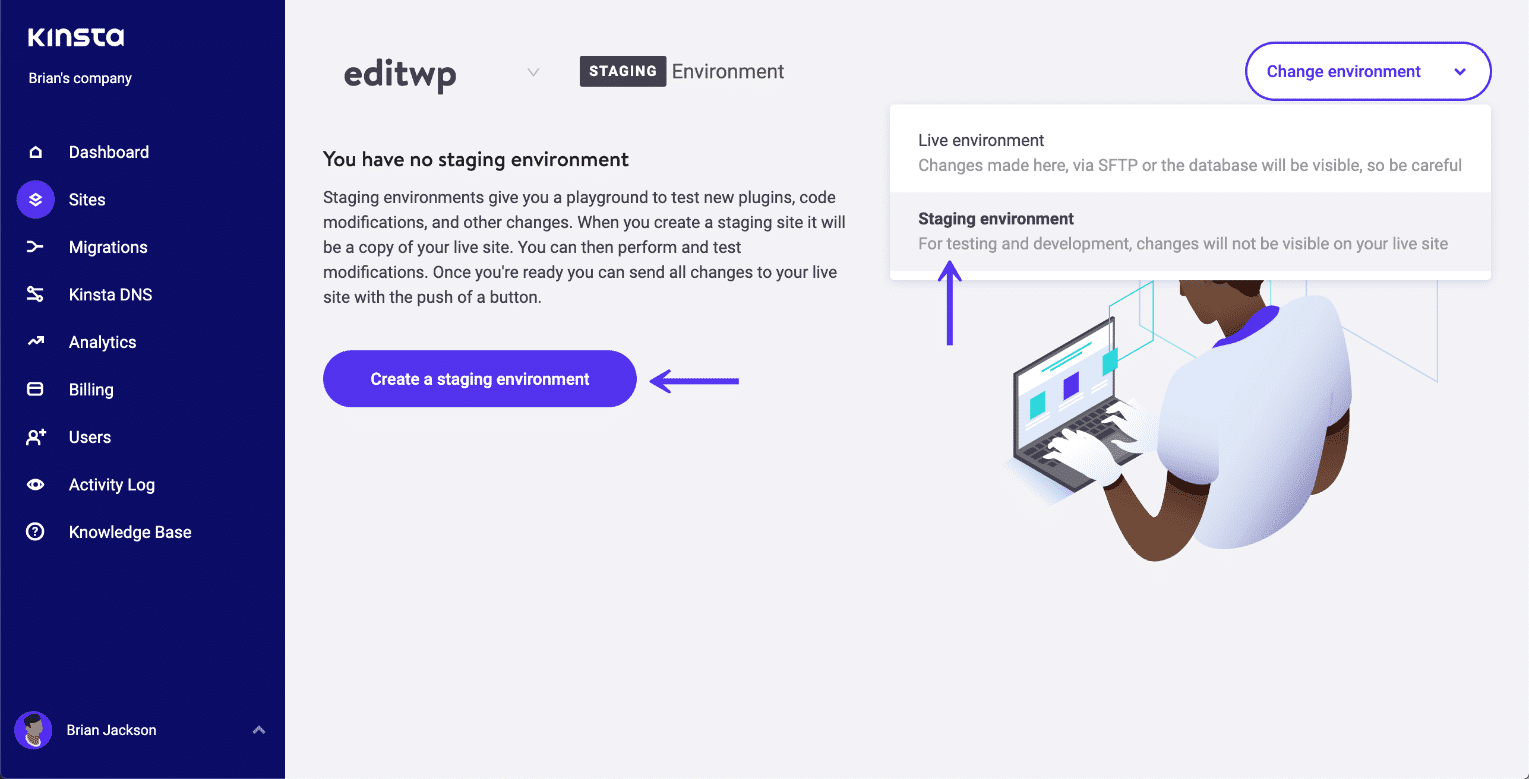
After you have a staging site up and running, the first thing you can do is disable all of your plugins. Since this is a copy of your live site, you don’t have to worry about breaking anything. It’s by far one of the easiest ways to narrow down issues. Simply go to Plugins, select all of them and choose “Deactivate” from the bulk options.
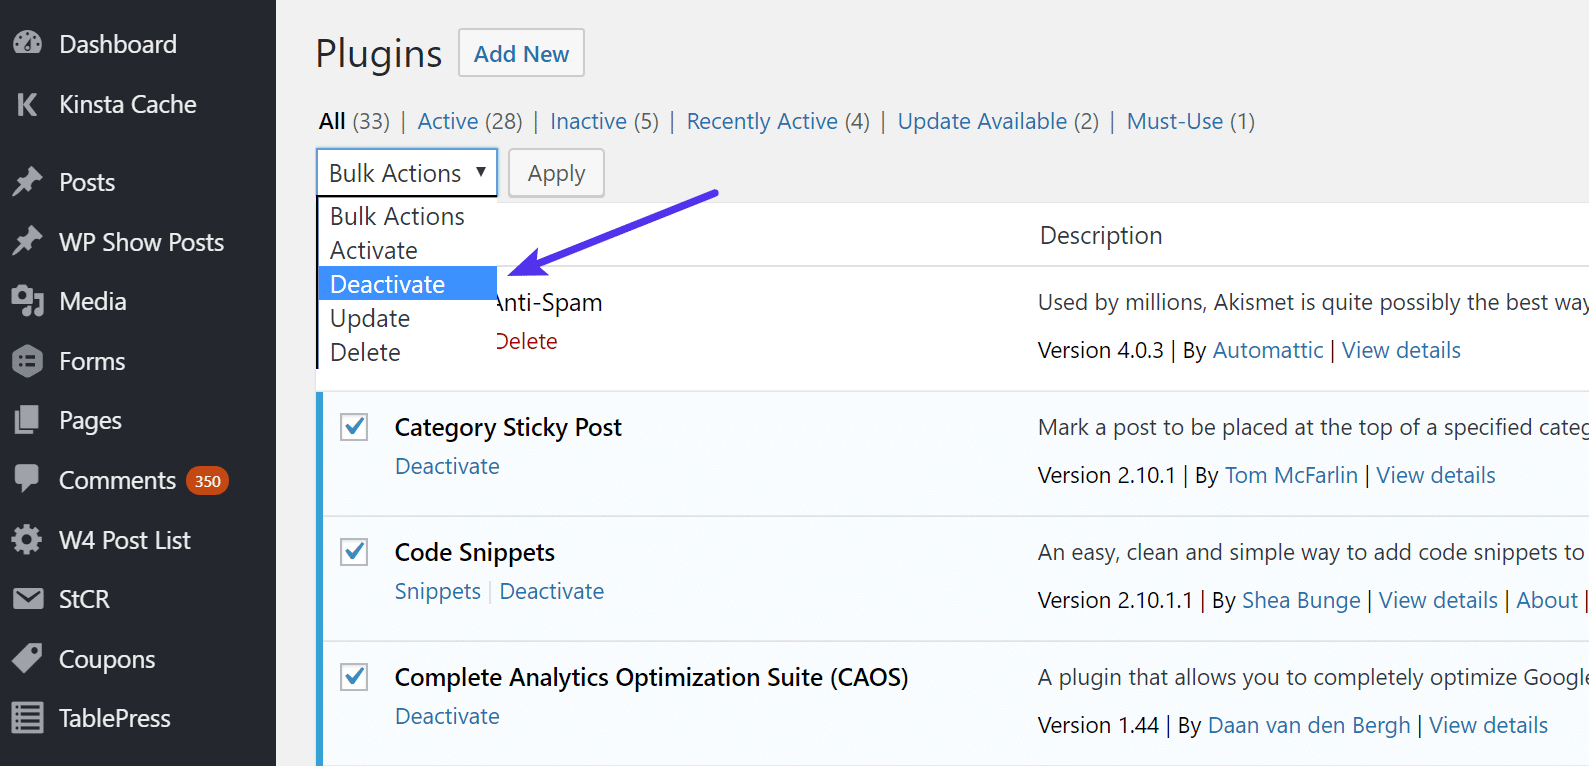
After doing this, you can monitor response times in New Relic or Query Monitor and see what happens. In this example below the response times immediately dropped back down to normal on the site, so we knew it was one of the plugins causing an issue. You can then re-enable them one by one, repeating the same process until you find the culprit.
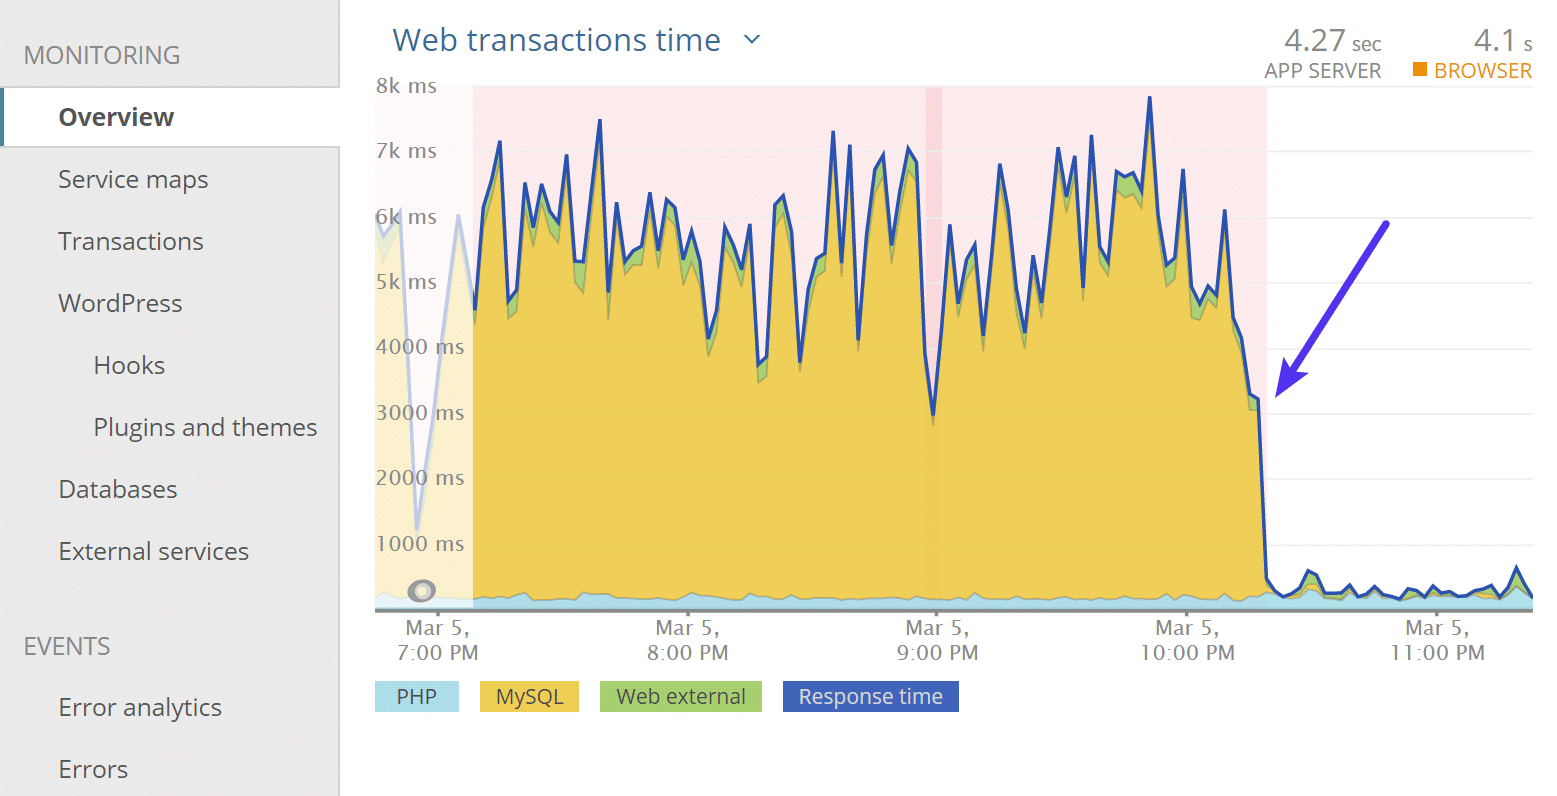
Here is an example of what happened when we enabled the plugin that was causing the problem. Load times (web transaction times) immediately went back up.
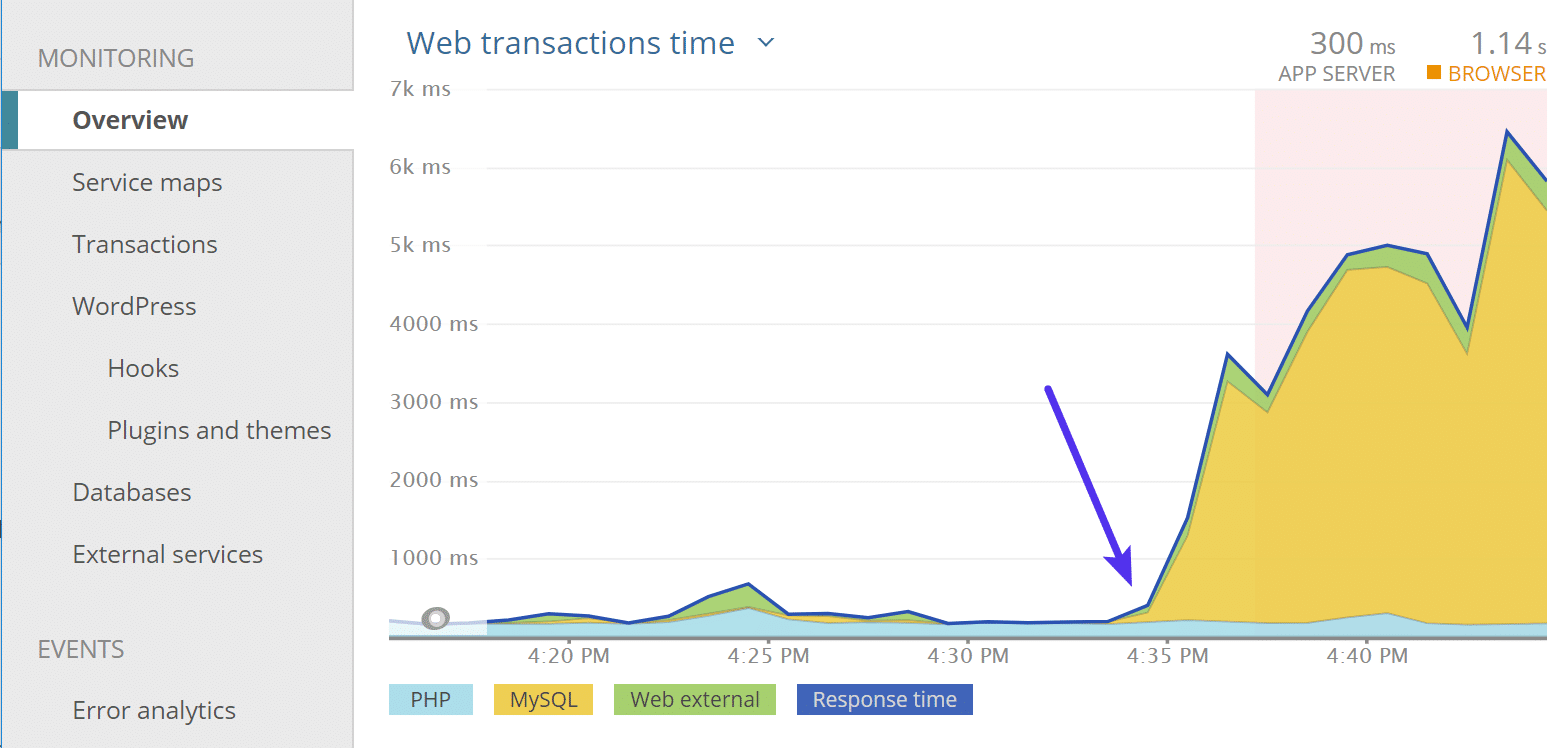
What should you do after you find the plugin causing the slowness? Here is what we advise:
- Update your plugins and themes to the latest version if you haven’t already.
- Reach out to the developer of the plugin or theme and ask them for assistance.
- Find an alternative plugin that can deliver the same functionality.
- Perhaps your PHP version is causing an issue. Change your PHP engine to a lower version and see if the plugin or theme then works.
You can also hire a WordPress developer to fix the issue. If it’s performance related, we have to give a personal shout-out to Mike Andreason at WP Bullet. He is a full-time Codeable developer specializing in performance optimization, who has helped many clients here at Kinsta with complex installations take their site to the next level.
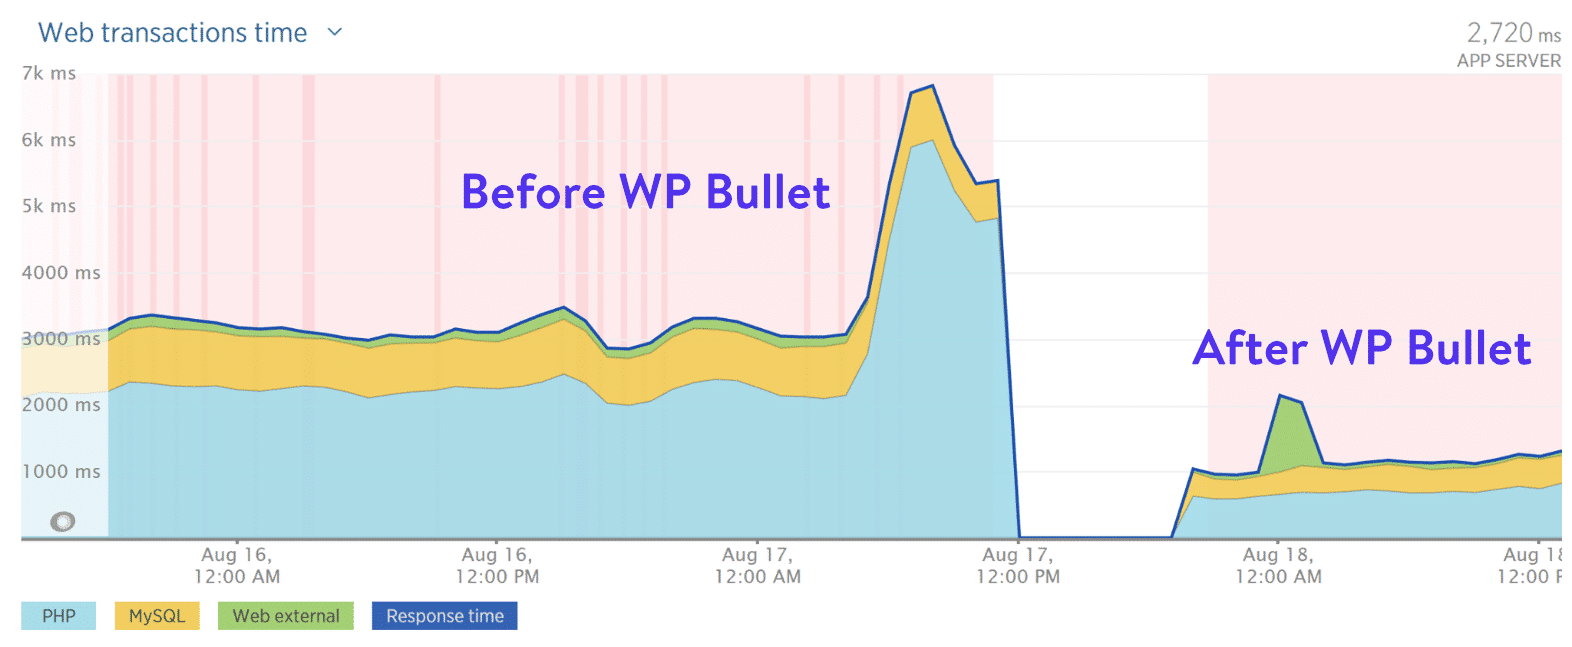
4. Check Your Error Logs
Checking error logs is never fun, but can reveal a lot about performance issues with WordPress plugins. If you’re a Kinsta client, you can easily view your error logs, cache logs, and access logs right from the MyKinsta dashboard.

You can also enable error logs by adding some code to your wp-config.php file. First, you will want to connect to your site via SFTP. Then download your wp-config.php so you can edit it. Note: Always make a backup of this file first!

Find the line that says /* That's all, stop editing! Happy blogging. */ and just before it, add the following (as seen below):
define( 'WP_DEBUG', true );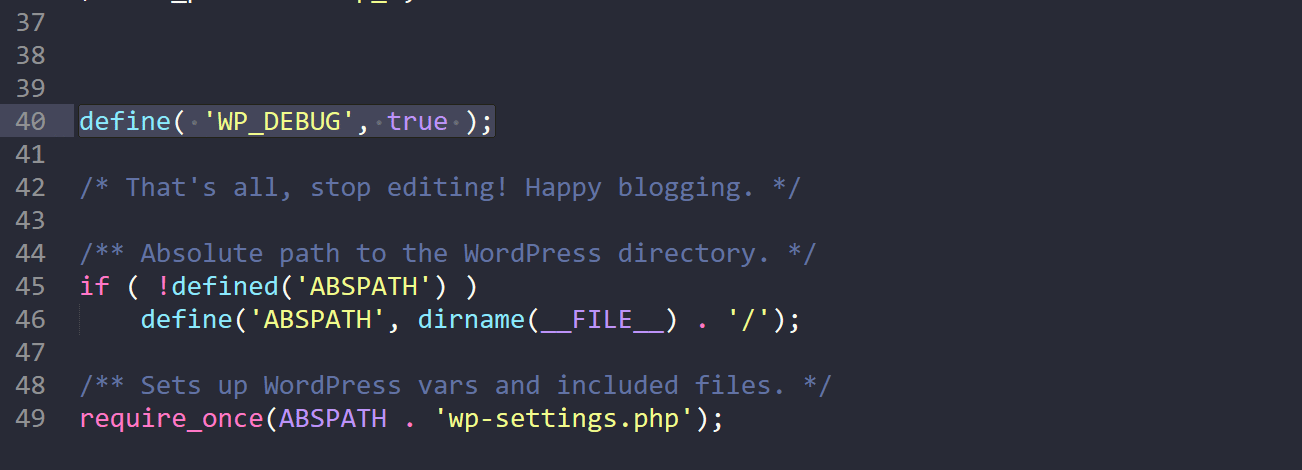
If the above code already exists in your wp-config.php file but is set to “false,” simply change it to “true.” This will enable debug mode. Note: You will also see warnings or error in your WordPress admin if they exist.
You can then enable the debug log to send all errors to a file by adding the following code just after the WP_DEBUG line (as seen below):
define( 'WP_DEBUG_LOG', true );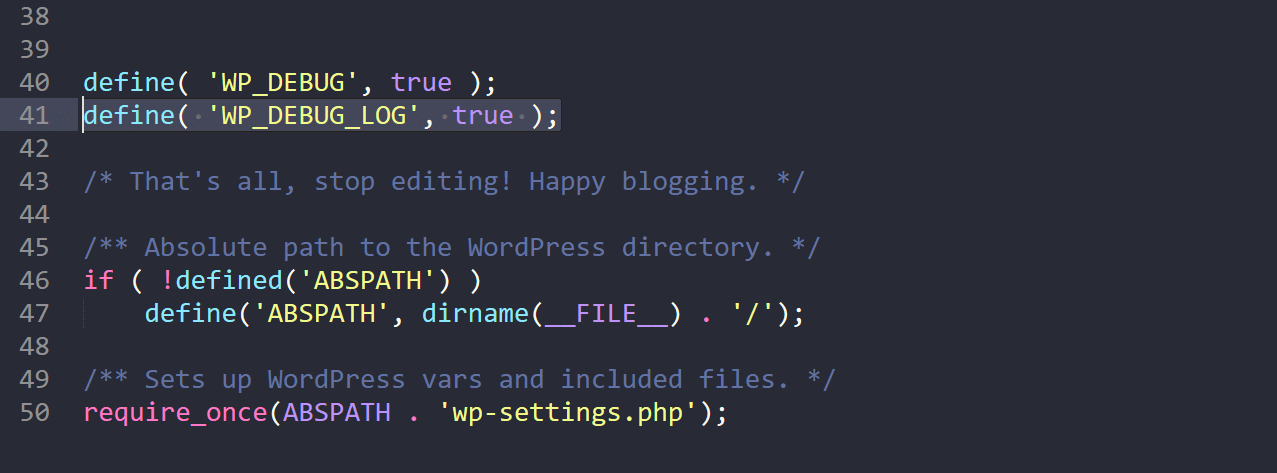
Save your changes and re-upload this to your server. The errors will then get logged to the debug.log file within your /wp-content/ folder. If for some reason you don’t see this file, you can always create one.
5. Use MyKinsta Analytics
If you’re a Kinsta client, you can take advantage of the performance insights we have built into our MyKinsta Analytics tool.
Under the performance monitoring section, you can view your average PHP + MySQL response time, PHP throughput, AJAX usage, top average upstream time, and top maximum upstream time.
Average PHP + MySQL Response Time
Whenever you visit your WordPress site, PHP and MySQL are used to compile and query the data you see on the page. This chart shows you the average response time of the PHP engine and the MySQL engine for every non-cached dynamic request. Knowing these response times can help you troubleshoot slowness.
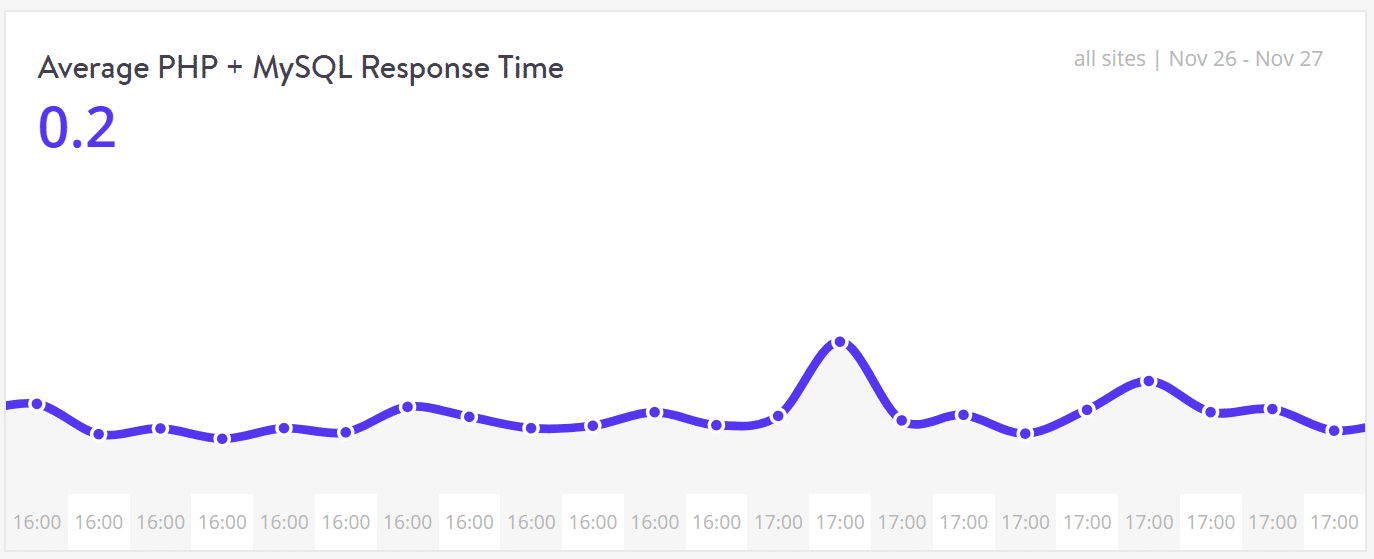
PHP Throughput
Throughput indicates the number of transactions per second an application can handle, and in this report, it is referring to PHP throughput from your WordPress site. In other words, it shows you how many times a PHP asset was requested.
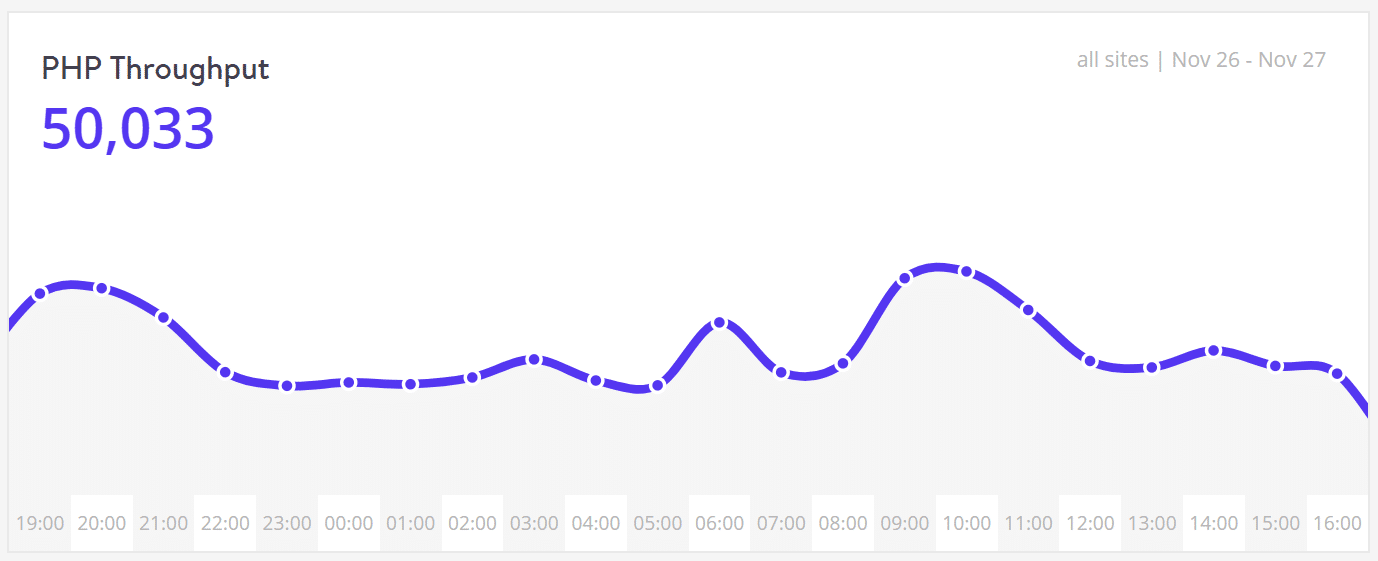
AJAX Usage
AJAX is a client-side script that communicates to and from a server/database without the need for a postback or a complete page refresh. When it comes to WordPress, a lot of you have probably seen this in your speed tests. The top two issues with AJAX include plugins causing it to spike and CPU issues on the back-end.

Make sure to check out our in-depth post on diagnosing high Admin-AJAX usage on your WordPress site.
The AJAX usage report in MyKinsta analytics can be a great way to help you troubleshoot these types of issues as you can see if you are seeing certain AJAX spikes during certain periods. This chart shows the count of the admin-ajax requests. You can then utilize some of the tips in the post we mentioned above to narrow down where they might be coming from.

Top Average PHP + MySQL Response Time
This list shows the top average response times from PHP and MySQL. These numbers can be one time peaks, so it’s suggested to compare this list with “Top Maximum Upstream Time.”

Top Maximum Upstream Time
Upstream time is the total time taken for Nginx (and upstream servers) to process a request and send a response. Time is measured in seconds, with millisecond resolution.
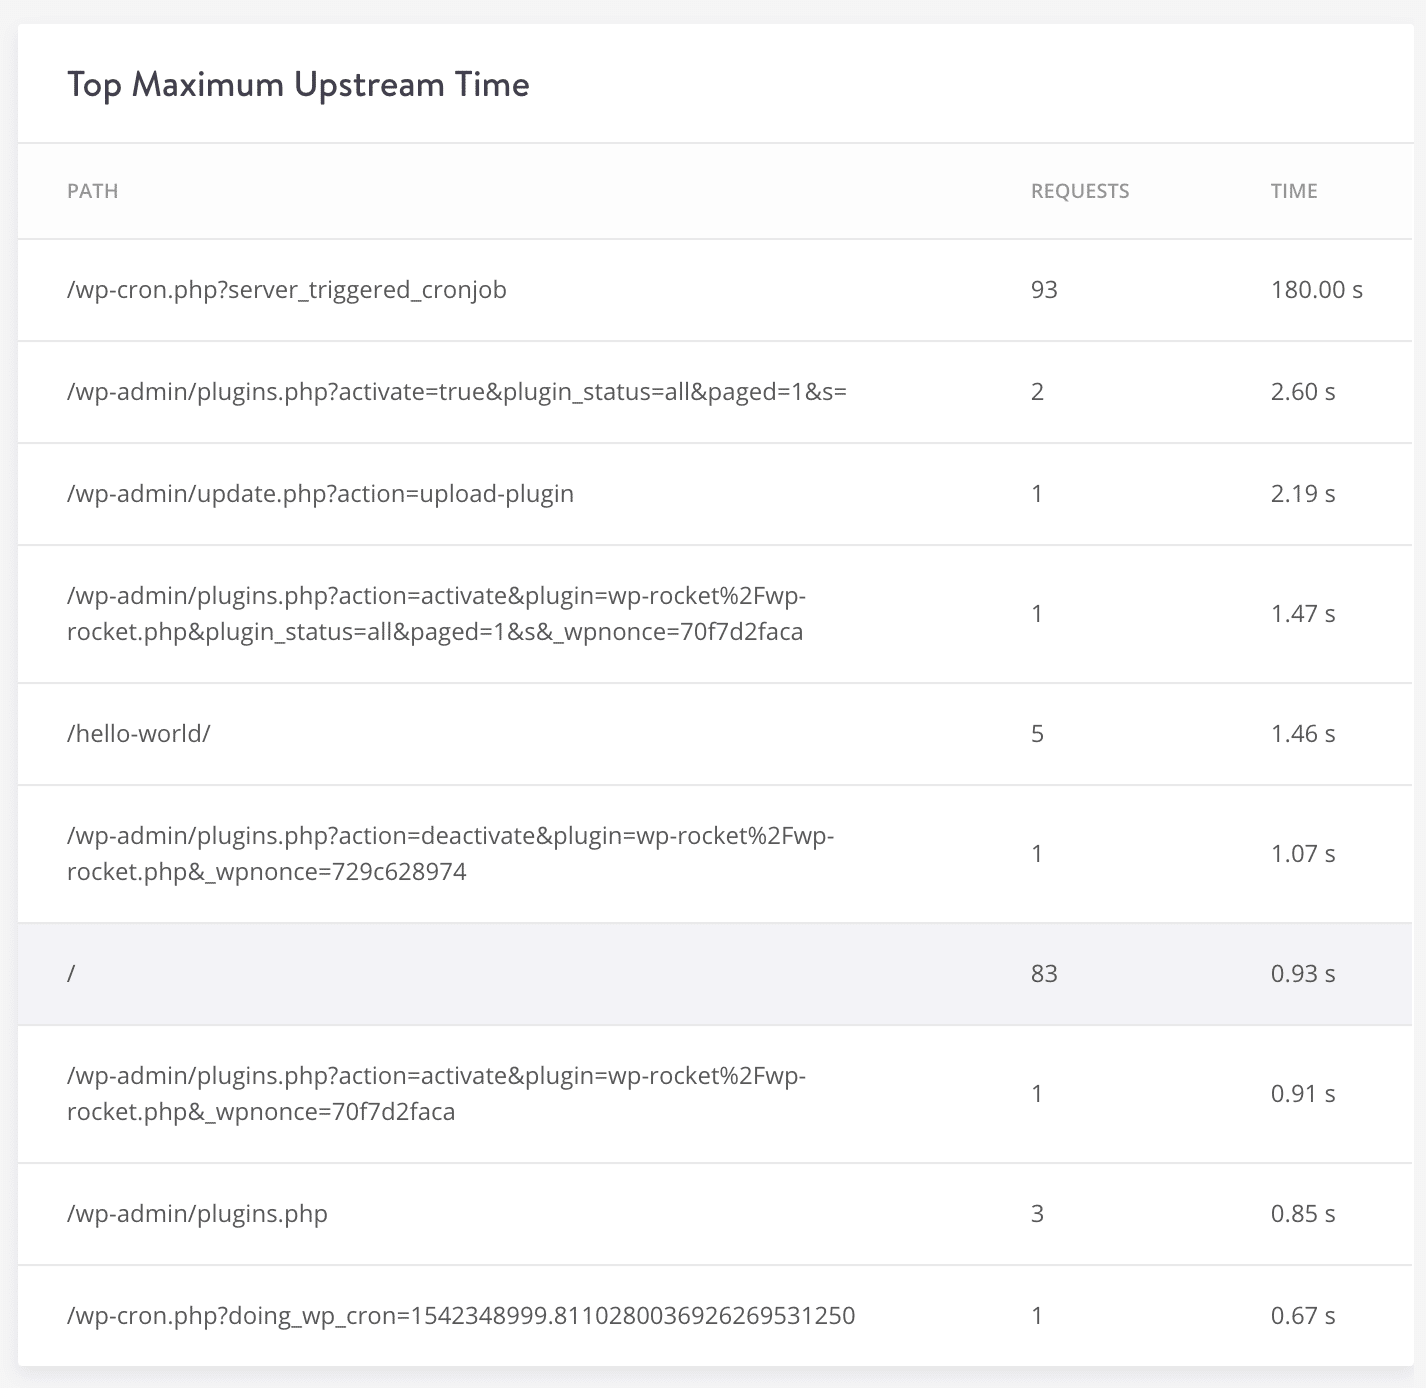
6. Check if Your Website May Have Been Hacked
If you’re having trouble tracking down a performance issue, it very well could be that your site is hacked, infected with malware, or undergoing a DDoS attack. This can impact your site’s speed and even the responsiveness of your WordPress admin dashboard. In these cases we recommend the following:
- Implement a proxy server and WAF such as Cloudflare or Sucuri.
- Block bad IP addresses using the services above or if you’re a Kinsta client you can also block IP addresses from our MyKinsta dashboard.
- You can also implement geo-blocking. Some countries are really bad when it comes to the quality of the traffic they generate. If you’re under attack, you might need to block the entire country, either temporarily or permanently.
7. Troubleshooting with Error Codes (HTTP Status Codes)
HTTP status codes are like a short note from the web server that gets tacked onto the top of a web page. It’s not part of the web page. Instead, it’s a message from the server letting you know how things went when the request to view the page was received by the server. These can be invaluable when it comes to troubleshooting!
While there are over 40 different status codes, below are the common ones we see WordPress users struggling with.
429: “Too many requests” Generated by the server when the user has sent too many requests in a given amount of time (rate limiting). This can sometimes occur from bots or scripts attempting to access your site. In this case, you might want to try changing your WordPress login URL.

500: “There was an error on the server and the request could not be completed.” A generic code that simply means “internal server error”. Something went wrong on the server, and the requested resource was not delivered. This code is typically generated by third-party plugins, faulty PHP, or even the connection to the database breaking. Check out our tutorials on how to fix the error establishing a database connection and other ways to resolve a 500 internal server error.

502: “Bad Gateway.” This error code typically means that one server has received an invalid response from another. Sometimes a query or request will take too long, and so it is canceled or killed by the server and the connection to the database breaks. Check out our in-depth tutorial on how to fix the 502 Bad Gateway error.
503: “The server is unavailable to handle this request right now.” The request cannot be completed right now. This code may be returned by an overloaded server that is unable to handle additional requests.
504: “The server, acting as a gateway, timed out waiting for another server to respond.” The code returned when there are two servers involved in processing a request, and the first server times out waiting for the second server to respond. Read more about how to fix 504 errors.
You can also dig into these HTTP response codes in our MyKinsta Analytics tool. Our response code breakdown report lets you see an overview of the distribution of HTTP status codes served for the requested resources.

The response stats report lets you see the total number of redirects happening, errors, success rate, and error ratio. Every WordPress site will typically have a small error rate ratio; this is completely normal.

There are then breakdown reports for each type of error code, such as 500 errors, 400 errors, redirects, etc.

Recommendations on Back-End Optimization
Now we’ll dive into some ways you can speed up WordPress by optimizing the back-end. Back-end typically involves anything that is handled entirely by the server, such as PHP, HTTP cache headers, GZIP compression, etc.
1. Create a Light 404 Page
We’ve seen first-hand that highly dynamic sites typically generate a lot of 404 errors. Your website might be generating more than you think! Our MyKinsta analytics tool can help you determine the exact amount (as seen below).

The reason these errors are bad is that many 404 pages are very resource intensive. For a highly dynamic WordPress site, you’ll want to avoid a heavy 404 page. Create a simple 404 template that avoids querying the database any further if possible. And of course, spend some time and fix the 404 errors as this is not only resource intensive, it’s simply bad for the user experience.
In addition to utilizing a light 404 page, we also recommend implementing a special page cache rule for 404 pages. At Kinsta, we automatically cache 404 pages for 15 minutes. If our web server detects that a new page with the same URL as a cached 404 page has been created, we’ll automatically purge the cache. If your WordPress site does not have cacheable 404 pages, we recommend working with your host to add this capability to your web server.
2. Increase PHP Threads
PHP threads might be a term you’ve never heard of, but they are how many hosts handle limiting requests (rather than limiting you by CPU or RAM, which is typically what shared hosting providers do).
PHP threads determine how many simultaneous requests your site can handle at a given time. To put it simply, each uncached request for your website is handled by a PHP Thread. For example, if you have 4 requests that come to your site at the exact same time and your site has 2 PHP threads, two of those requests will get processed while the other two will have to wait in the queue until the first two have finished processing.
Remember we discussed earlier that one of the biggest problems with WordPress membership sites is all of those uncached requests. This is why PHP threads become very important as they have to do work for each request. Therefore, these sites will typically require additional PHP threads to ensure every request is processed without delays and completed successfully.
What happens if you continuously max out your PHP threads? Basically, the queue starts to push out older requests which could result in 500 errors on your site.
3. Utilize GZIP Compression
GZIP is a file format and a software application used for file compression and decompression. GZIP compression is enabled server-side, and allows for further reduction in the size of your HTML, stylesheets, and JavaScript files.
When a web browser visits a website, it checks to see if the web server has GZIP enabled by seeing if the content-encoding: gzip HTTP header exists. If the header is detected, it serves up the compressed and smaller files. If not, it serves up the uncompressed files. If you don’t have GZIP enabled, you will most likely see warnings and errors in speed testing tools such as Google PageSpeed Insights and GTmetrix.

Enabling GZIP compression can help reduce the size of your webpage, which can significantly reduce the amount of time to download the resource, reduce data usage for the client, and improve the time to first render of your pages. This is pretty standard now across most hosting providers, but nothing surprises us at this point anymore.
4. Enable Hotlink Protection
The concept of hotlinking is pretty straightforward. You find an image on the internet somewhere and use the URL of the image directly on your site. This image will be displayed on your website but it will be served from the original location. This is very convenient for the hotlinker, but it’s actually theft as it is using the hotlinked site’s resources. It’s like if we were to get in our car and drive away with gas we siphoned off from our neighbor’s car.
Hotlinking can be a huge drain on resources for the;target server. Imagine if you are on a shared WordPress host and Huffington Post suddenly links to your images. You could go from a couple hundred queries an hour on your site to a couple hundred thousand. This could even result in a suspension of your hosting account. This is a reason to not only use a high-performance host (which can handle hiccups like this), but also to enable hotlink protection, so this doesn’t happen.
Check out our tutorial on how to prevent hotlinking.
5. Minimize Redirects and Add Them at the Server-Level
Too many redirects are always something you need to watch out for. Simple redirects like a single 301 redirect, HTTP to HTTPS, or www to non-www (vice versa) are fine. And a lot of times these are needed in certain areas of your website. However, each has a cost on your site’s performance. And if you start stacking redirects on top of each other, it’s important to realize how they impact your site. This applies to page and post redirects, image redirects, everything.
A redirect will generate a 301 or 302 on the response header status.

How much do redirects impact your site? Let’s do a little test. First, we run a speed test on our contact us page: https://perfmatters.io/contact/. As you can see below, we get a total load time of 417 ms.

We then modify the URL slightly and run another speed test to see the impact of multiple redirects. http://www.perfmatters.io/contact. As you can see, the same page now takes 695 ms to load. That’s an increase of 66%. Yikes!

Using free WordPress plugins to implement redirects can sometimes cause performance issues as most of them utilize the wp_redirect function, which requires additional code execution and resources. Some of them also add autoloaded data to your wp_options table, which increases database bloat. Adding them at the server-level is where they should be done. We allow you to do that at MyKinsta with our redirect rules tool.

You can also see a complete breakdown of how many redirects are happening on your sites in our MyKinsta analytics tool. See the total number of 301’s, 302’s, and 304’s.

Check out our in-depth post on WordPress redirects, and the best practices for faster performance.
6. Don’t Let Cron Jobs Get Out of Control
CRON jobs (WP-Cron) are used to schedule repetitive tasks for your WordPress site. However, over time, these can get out of control and cause performance issues. You can use the free WP Crontrol plugin to check and handle on all the Cron jobs happening on your site.
We have also seen performance issues with the WordPress built-in Cron handler: WP-Cron. If a site doesn’t have enough PHP threads, sometimes a request will come in, WordPress will spawn the cron, but the cron has to wait for the worker, and therefore just sits there. A better approach is to disable WP-Cron and use the system cron instead. This is even recommended in the official Plugin handbook.
To disable WP-Cron, add the following to your wp-config.php file, just before the line that says “That’s all, stop editing! Happy blogging.” Note: This disables it from running on page load, not when you call it directly via wp-cron.php.
define('DISABLE_WP_CRON', true);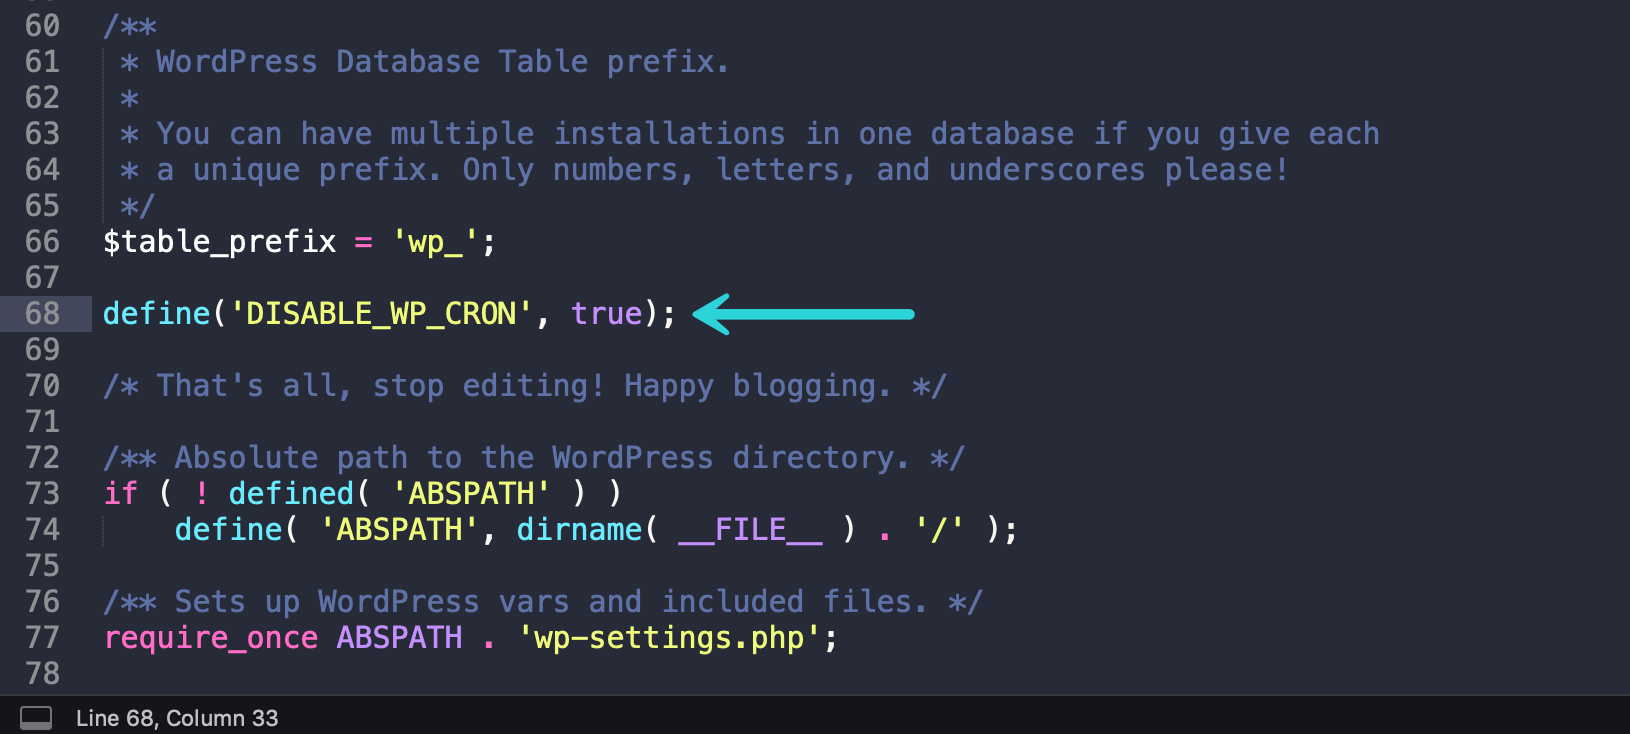
You will then need to schedule wp-cron.php from your server. If you’re a Kinsta client, systems crons are already enabled and run every 15 minutes by default. You can also have the frequency increased by reaching out to our support team. If you’re familiar with SSH, you can manage server crons from the command line.
7. Add Cache-Control and Expires Headers (Determine Cache Length)
Every script on your WordPress site needs to have an HTTP cache header attached to it (or it should). This determines when the cache on the file expires.
To fix this, ensure your WordPress host has the proper cache-control headers and expires headers setup. If you don’t, you will most likely see warnings about needing to add expires headers or leverage browser caching in speed testing tools.
While the cache-control header turns on client-side caching and sets the max-age of a resource, the expires header is used to specify a specific point in time the resource is no longer valid. While both the headers can be used together, you don’t necessarily need to add both of the headers. cache-control is newer and usually the recommended method.
Kinsta automatically adds HTTP cache headers on all server requests, and if you’re using a CDN, they will most likely add these headers for you as well.

If your server is missing these headers, you can manually add them.
Adding Cache-Control Header in Nginx
You can add cache-control headers in Nginx by adding the following to your server config’s server location or block.
location ~* \.(js|css|png|jpg|jpeg|gif|svg|ico)$ {
 expires 30d;
 add_header Cache-Control "public, no-transform";
}
Adding Expires Header in Nginx
You can add expires headers in Nginx by adding the following to your server block. In this example, you can see how to specify different expire times based on file types.
    location ~*  \.(jpg|jpeg|gif|png|svg)$ {
        expires 365d;
    }

    location ~*  \.(pdf|css|html|js|swf)$ {
        expires 2d;
    }
Adding Cache-Control Header in Apache
You can add cache-control headers in Apache by adding the following to your .htaccess file. Snippets of code can be added at the top or bottom of the file (before # BEGIN WordPress or after # END WordPress).
<filesMatch ".(ico|pdf|flv|jpg|jpeg|png|gif|svg|js|css|swf)$">
Header set Cache-Control "max-age=84600, public"
</filesMatch>
Adding Expires Header in Apache
You can add expires headers in Apache by adding the following to your .htaccess file.
## EXPIRES HEADER CACHING ##
<IfModule mod_expires.c>
ExpiresActive On
ExpiresByType image/jpg "access 1 year"
ExpiresByType image/jpeg "access 1 year"
ExpiresByType image/gif "access 1 year"
ExpiresByType image/png "access 1 year"
ExpiresByType image/svg "access 1 year"
ExpiresByType text/css "access 1 month"
ExpiresByType application/pdf "access 1 month"
ExpiresByType application/javascript "access 1 month"
ExpiresByType application/x-javascript "access 1 month"
ExpiresByType application/x-shockwave-flash "access 1 month"
ExpiresByType image/x-icon "access 1 year"
ExpiresDefault "access 2 days"
</IfModule>
## EXPIRES HEADER CACHING ##
It’s also important to note that you can only add HTTP cache headers on resources on your server. If you’re getting a warning about that perhaps you need to leverage browser caching on a third-party request, there is nothing you can do, as you don’t have request over their server. Common culprits include the Google Analytics script and marketing pixels, like Facebook and Twitter.
If you’re trying to fix this with the Google Analytics script, you can host it locally or on your CDN (although this isn’t officially supported) with a plugin like Perfmatters or WP Rocket.
8. Add Last-Modified and ETag Headers (Validate Cache)
Next, we have another two set of headers, last-modified and etag.
cache-control and expires headers help the browser determine if the file has changed since the last time it was requested (or rather, they validate the cache). The last-modified and etag headers both validate and set the length of the cache and should be included on every origin server response. If these aren’t properly set you might see a warning that you need to “Specify a cache validator.”

If the headers aren’t found, it will generate a new request for the resource every time, which increases the load on your server. Utilizing caching headers ensures that subsequent requests don’t have to be loaded from the server, thus saving bandwidth and improving performance for the user.
Kinsta automatically adds the above headers on all server requests, and if you’re using a CDN, they will most likely add these headers for you as well. Just like with cache-control and expires, you can’t manually set these HTTP headers on external resources.
Last-Modified Header
The last-modified header is generally sent automatically from the server. This is one header you generally won’t need to add manually. It is sent to see if the file in the browser’s cache has been modified since the last time it was requested. You can look at the header request in Pingdom or use Chrome DevTools to see the value of the last-modified header.
ETag Header
The ETag header is also very similar to the last-modified header. It is also used to validate the cache of a file. If you’re running Apache 2.4 or higher, the ETag header is already automatically added using the FileETag directive. And as far as Nginx goes, the ETag header has been enabled by default since 2016.
You can enable the ETag header manually in Nginx using the following code.
etag on9. Add a Vary: Accept-Encoding Header
The vary: Accept-Encoding header should be included on every origin server response, as it tells the browser whether or not the client can handle compressed versions of the content. If this isn’t properly set, you might see a warning that you need to “Specify a Vary: Accept-Encoding Header.”
For example, let’s say you have an old browser without gzip compression and a modern browser with it. If you don’t utilize the vary: Accept-Encoding header your web server or CDN could cache the uncompressed version and deliver that to the modern browser by mistake, which in turn hurts the performance of your WordPress site. By using theheader you can ensure that your web server and or CDN delivers the appropriate version.

Kinsta automatically adds the above headers on all server requests, and if you’re using a CDN, they will most likely add these headers for you as well. Just like with the other cache headers we’ve discussed above, you can’t manually set this header on external resources.
Add Vary: Accept-Encoding Header in Apache
You can add the vary: Accept-Encoding header in Apache by adding the following to your .htaccess file.
<IfModule mod_headers.c>
  <FilesMatch ".(js|css|xml|gz|html)$">
    Header append Vary: Accept-Encoding
  </FilesMatch>
</IfModule>
Add Vary: Accept-Encoding Header in Nginx
You can add the vary: Accept-Encoding header in Nginx by adding the following code to your config file. All Nginx configuration files are located in the /etc/nginx/ directory. The primary configuration file is /etc/nginx/nginx.conf.
gzip_vary on10. Changing the WordPress Memory Limit in wp-config.php
As stated in the WordPress Codex, with WordPress Version 2.5, the WP_MEMORY_LIMIT option allows you to specify the maximum amount of memory that can be consumed by PHP. This setting may be necessary in the event you receive a message such as “Allowed memory size of xxxxxx bytes exhausted”.
By default, WordPress will attempt to increase the memory allocated to PHP to 40MB for a single site and 64MB for multisite. They define the memory limits in the file ./wp-includes/default-constants.php, on lines 32 – 44 (source).
You then also have PHP memory_limit;on the server by your hosting provider. These are two different things.At Kinsta we set the default memory_limit to 256M. If you’re running into the memory size exhausted error you can try increasing the PHP memory limit in WordPress.
Add the following to your wp-config.php file, just before the line that says “That’s all, stop editing! Happy blogging.”
define( 'WP_MEMORY_LIMIT', '256M' );Jan Reilink also has a great blog post which describes the WordPress memory limit issue in more detail. He also gives a variation on the code you could use. Instead of setting the amount manually, you can set it to the PHP memory_limit value.
define( 'WP_MEMORY_LIMIT', ini_get( 'memory_limit' ) );Tips on Front-End Optimization and External Services
Now we’ll dive into some ways you can speed up WordPress by optimizing the front-end. Front-end typically involves anything that is handled entirely by the client-side browser, such as CSS, JavasScript, images, etc. This also includes analyzing external services you have loading on your site and how they’re impacting your overall load time.
Two of the most important objectives you should have when it comes to front-end optimization are:
- Reducing your overall web page size. The size of your CSS, JavaScript, images matters. A 4 MB website is typically going to load a lot slower than a 1 MB website. However, Paul Calvano has a great article on the impact of page weight on load time and how it’s important to make sure it’s not the only thing your tracking as sometimes this can be misleading.
- Reducing HTTP requests and external services. With HTTP/2 multiple requests and responses can now be sent at the same time using a single TCP connection. While this is awesome for performance, reducing HTTP requests can still help speed up your WordPress site. This also includes reducing the total number of external requests and services. Each of these adds additional delays such as DNS lookups, TLS connections, and network latency.
1. Speed Test Your WordPress Site to Get a Baseline
When it comes to optimizing the front-end of your site, it’s always good to start with a baseline. This usually means you need to run a speed test. There is a multitude of ways you can do this, check out our list of 15 awesome website speed test tools.

Check out our in-depth guides on how to use Pingdom and how to use GTmetrix. Here are a few things to keep in mind when speed testing:
Pick One Tool and Stick with It
We are big fans of Pingdom, GTmetrix, WebPageTest, PageSpeed Insights, and Chrome DevTools. However, it doesn’t matter so much which speed test tool you use, as it does that your consistent. They all have different ways of measuring and quantifying speed, so pick one tool and stick with it throughout all of your testing and optimizations. Even Google says to pick one.
Don’t Obsess Over a Perfect Score
Many of the tools such as Google PageSpeed Insights all have some type of speed or performance score. It’s important to remember that the score doesn’t always matter as much as your website’s speed and perceived performance by the user. The score is there to help gauge how well you are doing. But obsessing over a perfect 100/100 or an A score in some cases could be a waste of time. And bigger sites with lots of external scripts and advertisements will never get a perfect score, which is perfectly OK.
The Location of Your Test Matters
The location you choose when speed testing matters quite a bit. As we went discussed in an earlier section, the reason is that this is all relative to the data center location you choose. TTFB, network latency, all come into play. So test your site both from a location that is close to your data center and one that is far away. This will also help you see how much of an impact a CDN can have on your WordPress site.
Test Multiple Times Because of Caching
As we went over earlier in the section about caching, if the cache has recently been cleared or is expired on your WordPress host or CDN, it’s going to register a “MISS” on the HTTP header. This means your website or asset isn’t serving from cache.

To properly see the speed of your entire site you need to see everything load from cache, your initial page, and all assets register a “HIT.” This sometimes requires running your speed test multiple times. You can then take the average.

Now let’s move into some front-end optimizations you can make on your WordPress site.
2. Eliminate Render-Blocking JavaScript and CSS
A warning about render-blocking JavaScript and CSS might appear when you have files preventing the page from loading as fast as possible. Specific JS and CSS are sometimes conditional, meaning they aren’t required to display above-the-fold content. You can prevent them from becoming render-blocking by using async and defer attributes.

Check out this video to find out more about how to eliminate render-blocking resources:
To eliminate render-blocking JavaScript and CSS you need to do the following:
Clear JS from the Critical Rendering Path
Moving JavaScript out of the critical rendering path is typically done by adding either the defer or the async attribute to the script HTML elements that call JavaScript resources.
- The async attribute tells the browser to start downloading the resource right away without slowing down HTML parsing. Once the resource is available, HTML parsing is paused so the resource can be loaded.
- The defer attribute tells the browser to hold off on downloading the resource until HTML parsing is complete. Once the browser has finished with the HTML it will then download and render all deferred scripts in the order in which they appear in the document.
Optimize Delivery of CSS Resources
Optimizing the delivery of CSS essentially means you need to figure out how to make it non-render blocking.
- deliver those styles inline with the HTML.
- Use CSS conditionally on devices only when needed.
- Load remaining CSS asynchronously.
Doing all of the above can sometimes be a tricky process and definitely takes some tweaking based on the scripts you have loading on your site. Here are a couple of WordPress plugins that can help:
For a more detailed explanation and walk through, we recommend checking out our post on eliminating render-blocking JavaScript and CSS.
3. Combine External CSS and JavaScript in WordPress
The combine external CSS warning is typically seen when using a CDN because you are hosting your CSS files on an external domain, such as cdn.domain.com. In the past, a quick way to fix this is to concatenate your CSS files, or combine them so that they are loading in a single request.
However, if you’re running over HTTPS with a provider that supports HTTP/2, this warning is no longer as relevant as it used to be. With HTTP/2 multiple CSS files can now be loaded in parallel over a single connection. And over 86% of browsers support HTTP/2.
But that doesn’t necessarily mean this optimization is completely dead. In some instances, we have seen this still speed up WordPress sites. It depends on the size of the files and how many of them there are. Therefore, this is one optimization we recommend you still test on your site.
One of the easiest ways to combine your external CSS and JavaScript files is with the free Autoptimize plugin. After combining them, you will see a “autoptimize_xxxxx.css” or “autoptimize_xxxxx.js” file. It also supports loading them from your CDN. You can also do this with the WP Rocket plugin.

Check out our in-depth post on how to combine external CSS and JavaScript in WordPress.
4. Use Minification on HTML, CSS, and JavaScript
We can reduce the amount of data the browser has to download by minifying HTML, CSS and JavaScript resources. Minification is the process of removing unnecessary characters like comments and whitespace from the source code. These characters are extremely useful in development, but they’re useless for the browser to render the page.
Non-Minified HTML
Here is an example of non-minified HTML code.

Minified HTML
Here is an example of minified HTML code.

You can use the free Autoptimize plugin or WP Rocket to easily minify your files.
5. Use Cookie-Free Domains
Generally, when you are serving content such as images, JavaScript, CSS, there is no reason for an HTTP cookie to accompany it, as it creates additional overhead. Once the server sets a cookie for a particular domain, all subsequent HTTP requests for that domain must include the cookie. This warning is typically seen on sites with a large number of requests.
We have an in-depth post on how to deal with the serve static content from a cookieless domain warning. A lot of times you can ignore this warning as new protocols such as HTTP/2 now make this less important. The cost of a new connection is usually costlier than streaming everything over the same connection.
One easy way to fix this warning is to use a CDN provider that can ignore cookies as well as strip cookies which will completely prevent the client from receiving the Set-Cookie response header. KeyCDN is one CDN provider that does offer this feature. By default, you can see the following two options are enabled. This is an easy alternative without having to mess with moving and configuring your site to deliver static assets from a separate subdomain.

If you’re running Cloudflare, you can’t disable cookies on resources served through their network. CloudFlare includes their own security cookie in your header. Again these cookies are very small and the performance implications are extremely minimal. But if you use CloudFlare, there is no way to get around this warning.
A second way to get around this is to re-configure your WordPress site to deliver the static assets from a new domain or subdomain.
When they released WordPress 4.4, they merged the oEmbed feature into core. This allows users to embed YouTube videos, tweets and many other resources on their sites simply by pasting a URL, which WordPress automatically converts into an embed and provides a live preview in the visual editor. With the update, WordPress itself became an oEmbed provider.
This feature is useful for a lot of people, and you may want to keep it enabled. However, what this means is that it also generates an additional HTTP request on your WordPress site to load the wp-embed.min.js file. And this loads site-wide. While this file is only 1.7 KB, things like these add up over time. The request itself is sometimes a bigger deal than the content download size.

You can easily disable this file from loading. Here are three different options:
- Option 1 – Disable Embeds with Plugin
- Option 2 – Disable Embeds with Code
- Option 3 – Move the JavaScript Inline
6. Disable Emojis in WordPress
Similar to embeds, in WordPress 4.2, they added support for emojis into core for older browsers. The big issue with this is that it generates an additional HTTP request on your WordPress site to load the wp-emoji-release.min.js file. And this loads site-wide. While this file is only 10.5 KB, it’s useless if you’re not using emojis on your site.

There are a couple of different ways to disable Emojis in WordPress. You can do it with a free plugin or with code.
7. Speed Up WordPress Comments or Disable Them
A busy comment section on a site can cause a lot of performance issues. Just think about the resources that go into making comments work:
- A database is queried to pull up existing comments.
- Database entries are created for each new comment.
- Comments and comment metadata are received and processed by a visitor’s browser.
- External resources, such as Gravatars, are requested, downloaded, and loaded (requiring a separate DNS lookup).
- In many cases, large JavaScript and jQuery resources have to be downloaded and processed to make the commenting system work the way it’s supposed to.
Here are four different options you can do to speed up WordPress comments:
Option 1 – Disable Comments
If your site isn’t getting very many comments and you don’t think they are adding any value, it might be better to disable comments altogether. Remember, comments can impact your SEO as Google will typically crawl these as additional content on the page, so you should only approve high-quality comments. Check out these three easy ways to disable comments:
- Disable Comments within the WordPress Options
- Disable Comments with Plugin
- Disable Comments with Code
Option 2 – Optimize Native WordPress Comments
Your second option would be to optimize the native WordPress comment system. One way would be to reduce the number of comments loaded with the initial page load.
Go to Settings → Discussion in the WordPress admin area.
- Look for the Other comment settings section.
- Select the checkbox next to Break comments into pages with and add a value for the number of comments you want to display with the initial page load.

Another option you have is to use host Gravatars on your CDN. This is the approach we take at Kinsta.
By default, when WordPress comments are loaded, every single unique Gravatar requires an HTTP request. So if a page is loaded up with comments from 50 different commenters, 50 HTTP requests will be required to download all of those Gravatars. As you can imagine, this can impact your page speed. Not to mention the fact that we’ve seen the external DNS lookup to gravatar.com be slow sometimes and in some cases even timeout.
If you look at Gravatars on the Kinsta blog, you can see they are loading from Kinsta.com (including our CDN). Check out how to load gravatars from your CDN.

Your third option is to use a third-party comment system. If your site is hosted on a cheap, resource-starved shared server, then using a third-party commenting system may speed up pages with lots of comments. It’s the same ideas as image optimization, offload the work. However, if you’re hosted with Kinsta or another quality web host, switching to a third-party won’t do much to help your website’s load speed and may slow it down.

Always make sure to speed test the third-party comment system you’re trying. Take a look at all the separate requests Disqus generates (as shown below). While most of these requests are loading asynchronously, you’ll still notice some additional load time if you’re using Disqus.
Option 4 – Lazy Load Comments
Your fourth option is to lazy load comments so that they don’t slow down the initial page rendering. Here are a couple of plugins you might want to check out:
- Lazy Load for Comments: This plugin allows you to lazy load native WordPress comments.
- Disqus Conditional Load: If you want to use the Disqus comment system, this is a must-have plugin to lazy load comments.
8. Disable WordPress RSS Feeds
If you’re not using the blogging portion of WordPress on your site, you can disable the WordPress RSS feeds. While this won’t have a huge impact on performance, everything helps. It’s also one less thing you have to worry about.
Check out these two different ways to disable RSS feeds in WordPress:
9. Use Prefetch and Preconnect
Resource hints and directives such as prefetch and preconnect can be a great way to speed up WordPress behind the scenes. KeyCDN has an excellent article and overview of resource hints.
Prefetch
DNS prefetch allows you to resolve domain names (perform a DNS lookup in the background) before a user clicks on a link, which in turn can help improve performance. It’s done by adding a rel="dns-prefetch" tag in the header of your WordPress site.
<link rel="dns-prefetch" href="//domain.com">Some common things to use DNS prefetching for is your CDN URL, Google fonts, Google Analytics, etc
 <link rel="dns-prefetch" href="//cdn.domain.com/">
 <link rel="dns-prefetch" href="//fonts.googleapis.com/">
 <link rel="dns-prefetch" href="//www.google-analytics.com">
Prefetch is also supported by most modern browsers. Check out our tutorial on how to add code to your WordPress header.
Or you can easily implement DNS prefetch using a plugin like Perfmatters. Simply click on the “Extras” tab in the Perfmatters plugin and add domains. Format: //domain.tld (one per line)

Preconnect
Preconnect allows the browser to set up early connections before an HTTP request, eliminating round-trip latency and saving time for users.
Preconnect is an important tool in your optimization toolbox… it can eliminate many costly roundtrips from your request path – in some cases reducing the request latency by hundreds and even thousands of milliseconds. – lya Grigorik (source)
It’s done by adding a rel=”preconnect” tag in the header of your WordPress site.
<link rel="preconnect" href="//domain.com">A few examples of things you might want to utilize this for include your CDN URL or Google Fonts.
 <link rel="preconnect" href="https://cdn.domain.com">
 <link rel="preconnect" href="https://fonts.gstatic.com">
Preconnect is supported by most modern browsers, with the exception of Internet Explorer, Safari, IOS Safari, and Opera Mini. Check out our tutorial on how to add code to your WordPress header.
Or you can easily implement preconnect using a plugin like Perfmatters. Simply click on the “Extras” tab in the Perfmatters plugin and add domains. Format: scheme://domain.tld (one per line).

10. Disable Scripts on a Per Page/Post Basis
Another very powerful way to speed up WordPress is to dig through each request that is loading on your pages and posts. You’ll most likely end up finding scripts that are loading site-wide that shouldn’t be.
You can use a premium plugin like Perfmatters which has a “Script Manager” feature built-in. This allows you to disable scripts (CSS and JavaScript) on a per page/post basis, or even site-wide with a single click. Again, this plugin is developed by a team member at Kinsta.
A few examples of what this can be used for:
- The popular Contact Form 7 plugin loads itself on every page and post. You can easily disable it everywhere with one click and enable only on your contact page.
- Social media sharing plugins should only be loaded on your posts. You can easily disable it everywhere and load only on post types, or even custom post types.
- The Table of contents plugin (TOC) loads on every page and post. With the scripts manager, you can easily control where you want it loading.
Why Are Some Plugins Coded This Way?
You might be wondering why all plugin developers don’t just load their scripts only when the plugin is detected on the page? Well, it is a little more complicated than that. For example, if you have a plugin like Contact Form 7, it also has shortcodes which allow you to place it anywhere. This includes dropping it in a widget. With WordPress, it is much harder to query data from them when you dequeue scripts as opposed to querying data from the post or page metadata.
Therefore, a lot of times this is due to usability issues. The less chance they have for a plugin to break, the fewer tickets and support they will have. However, with a lot of plugins on the marketplace, there are ways to get around this and code for performance if they wanted to. Unfortunately, sometimes the sheer number of downloads and users makes coding for usability a priority.
Touring the Script Manager
We’ll give you a little tour of the Script Manager. After clicking it in your toolbar you will be presented with all the scripts loading on that current URL, both JavaScript and CSS files. You then have the following options:
- Status On (default setting)
- Status Off: Disable Everywhere (you can then choose which posts types you want it enabled on, along with the current URL)
- Status Off: Disable only on current URL (this is very useful for using on your homepage)
- Status Off: Exceptions (current URL, post type, or archive)

Everything is grouped together by the plugin or theme name. This makes it super easy to disable an entire plugin at once. Typically a WordPress plugin will have both a JavaScript and CSS file. A WordPress theme might have 10+ files.
After you select and or modify the settings, make sure to hit “Save” at the bottom. You can then test in a website speed tool to ensure the scripts are no longer loading on the page or post. Make sure to clear your cache first! And if anything goes wrong on your site visually, you can always re-enable it in the settings to return to normal.
In a speed test by woorkup, they were able to decrease the total load times by 20.2%. On their homepage alone they were able to reduce the number of HTTP requests from 46 down to 30. Their page size also shrunk from 506.3 KB to 451.6 KB.
For other ways to do disable scripts, check out our blog post on how to disable WordPress plugins from loading.
11. Analyze Third-Party Performance
Basically, anything you call externally from your site has load time consequences. What makes this problem even worse is that some of them are only slow intermittently, making identification of the issue even more difficult.
A third-party external service could be considered anything that communicates with your WordPress site from outside your own server. Here are a few common examples we encounter on a regular basis:
- Social media platforms like Twitter, Facebook, and Instagram (widgets or conversion pixels)
- 3rd-party advertising networks like Google Adsense, Media.net, BuySellAds, Amazon Associates
- Website analytics and tracking scripts like Google Analytics, Crazy Egg, Hotjar, AdRoll
- A/B testing tools such as Optimizely, VWO, Unbounce
- WordPress comment systems such as Disqus, Jetpack, Facebook comments
- Backup and security tools such as VaultPress, Sucuri, CodeGuard
- Social sharing tools such as SumoMe, HelloBar
- CDN networks like KeyCDN, Amazon CloudFront, and CDN77
How much do some of these third-party trackers impact performance? In our own case study, we saw that third-party scripts increased the page load times by 86.08%.
Ghostery also measured the top 500 US domains in Alexa, and the results were astounding, although to us, not surprising. Websites were 2x slower when no trackers were blocked at all. Which means these third-party tracking scripts are one of the primary contributors to slow page load speeds on the web.

You have to be very careful on your WordPress site. Just one bad third-party API call could timeout your entire site! Yes, it shouldn’t work that way, but in a lot of cases, it does. We’ve seen it more times than we can count.
New Relic provides an excellent and easy way to monitor your external services over time. In this example below, we can see external calls being made to twitcount.com, graph.facebook.com, and widgets.pinterest.com.

It’s important that whenever you add a new feature or plugin to your site that you investigate the external resources loading from it. The less the better!
Always Optimize with Mobile-First in Mind
Google began rolling out its mobile-first index on March 26th, 2018. Previously Google’s crawling, indexing, and ranking systems have used the desktop version of websites. Mobile-first indexing means that Googlebot will now use the mobile version of your WordPress site for indexing and ranking. This helps improve the search experience for mobile users.
When it comes to optimizing your site for mobile-first, speed is one of the most important factors to focus on. Speed plays a major role in everything from usability to bounce rates and determining whether or not potential buyers will return to your site. In fact, speed is now a landing page factor for Google Search and Ads for mobile searches.
Bad mobile experiences will lead the majority of users to never return. According to the latest Google page speed report, the average time a mobile site takes to load is 7 seconds. Can you imagine waiting that long to load a single page? Astounding.
Users demand (and deserve) better. According to the same page speed report, 53% of mobile site visitors leave pages that take longer than a measly three seconds to load.
Slow mobile experiences aren’t killing conversions. They’re preventing you from even getting a chance to convert prospects. As page load times increase by just a few seconds, the likelihood of someone bouncing climbs exponentially. Here are a few things to consider when optimizing for mobile.
1. Check Out Your Mobile Traffic
It’s always important to take a look at how much mobile traffic you’re getting, as this might shift your priorities a bit. You can see how many mobile devices are visiting your site in Google Analytics under “Reports → Tech → Tech Details.” Then select “Device category” from the dropdown. As you can see on this site, 74% of all of it is traffic from mobile. That’s a lot!

If you’re a Kinsta client, you can also check out your mobile vs. desktop traffic in MyKinsta Analytics. As you can see on this site, over 88% of the traffic is from the desktop. It’s always important to check and not just assume. Just because everyone says things are going mobile, doesn’t always mean it is for your site. Look at the data.

2. Make Sure Your Site is Responsive
Your website better be responsive! This means it utilizes media queries to scale things down automatically on mobile devices. If you still haven’t done this, you’re most likely already behind your competition. All of the WordPress themes we mentioned earlier in this post are fully responsive and look awesome on all devices.
Use Chrome Lighthouse to test and ensure that your website passes all the requirements.
3. Double Check to Make Sure srcset is Working
In the past, it was very important that you upload images to scale and not let CSS resize them. However, this is no longer as important since WordPress 4.4 now supports responsive images (not scaled down by CSS). WordPress automatically creates several sizes of each image uploaded to the media library. By including the available sizes of an image into a srcset attribute, browsers can now choose to download the most appropriate size and ignore the others. See an example of what your code looks like below.

Due to all the third-party image plugins and customizations out there, there have been a lot of times where we’ve seen this not working correctly. Therefore, it’s important to double check that your images are properly getting the srcset attribute added with different versions for different screen sizes. Image optimization is now important forever.
4. Try Google AMP
Google AMP (Accelerated Mobile Pages Project) was originally launched back in October 2015. The project relies on AMP HTML, a new open framework built entirely out of existing web technologies, which allows websites to build light-weight webpages. To put it simply, it offers a way to serve up a stripped down version of your current web page.
We have kind of a love and hate relationship with Google AMP, and so does a lot of the community. We have tested this ourselves and didn’t see good results. However, that doesn’t mean you won’t. Every website is different, and Google AMP is constantly being improved.
You can quickly get started with Google AMP on your WordPress site with one of the following plugins:
Check out our in-depth tutorial on how to get Google AMP setup. And if you need it, how to disable Google AMP. It’s not just something you can disable and you’re done.
Summary
As you can probably tell, we are obsessed with all the different ways you can speed up WordPress. Having a fast site helps boost your rankings, improves crawlability for search engines, improves conversion rates, increases time on site, and decreases your bounce rate. Not to mention the fact that everyone loves visiting a fast website!
We hope that this speed up guide was helpful and that you were able to take away a few things and apply them to your WordPress site. If so, please take a moment and share it.
Did we miss anything important? If so, we would love to hear about it. Let us know your speed up WordPress tips below in the comments.


